
Assignment
- Add a sensor to a microcontroller board that you have designed and read it.
0. Idea.
For this assignment I decided to interface Phototransistor with the microcontroller board with two LEDs and few buttons, along with this I will also interface a 4 wire resistive touch as well. This will also be the part of my final project. Phototransistor and LEDs will work for back light of the screen and few buttons will be use for control purpose. Resistive touch is also requirment of my final project.
And here the video showing results of interfacing phototransistor.
Following video is showing the result of resistive touch interfacing.
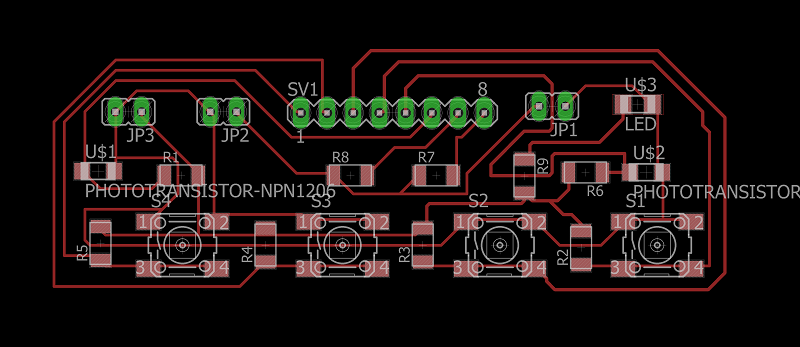
1. PCB Design.
I have designed the PCB by conserding the requirment of my final project. All the components connected will be use for my final project. Following image shows the circuit.
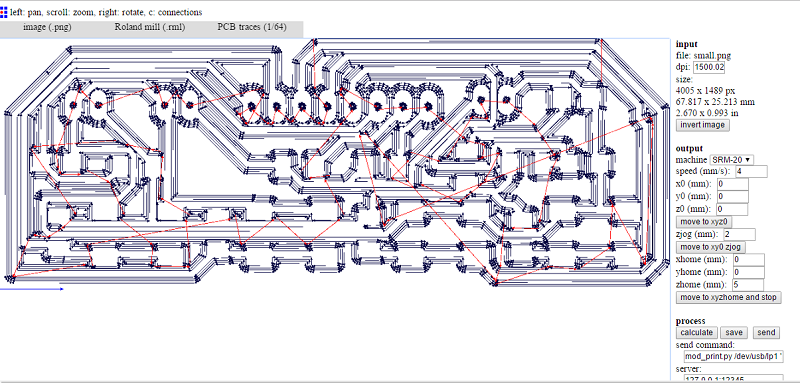
After designing the PCB, next step is to generate RML files for rolland SRM-20.
List of components used.
- R1, R2, R3, R4, R5 and R6 = 10K ohm.
- R7, R8 and R9 = 499 ohm.
- 4 x Push buttons
- 2 x Phototransistors
- 1 SMD male header 1x8
- 1 x LED
- 2 x DIP LED
- 1 SMD male header 1x2.
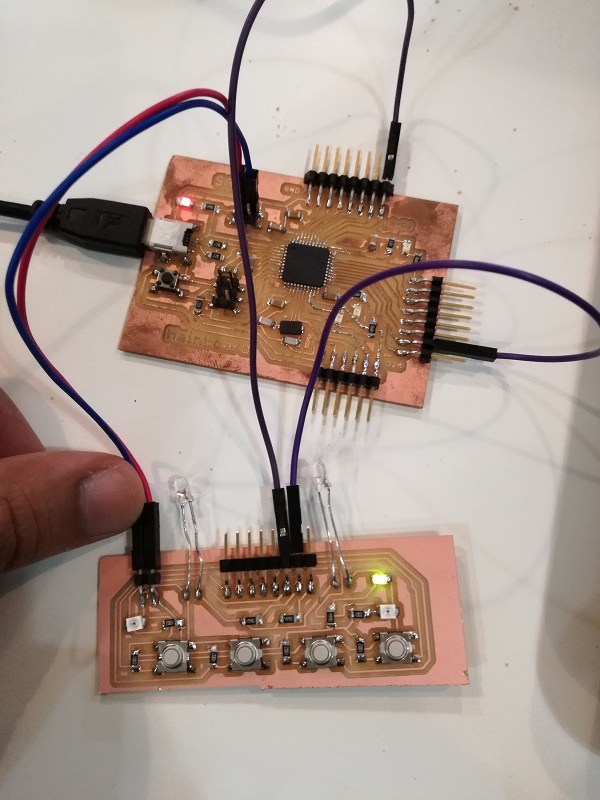
Here I am not using any microcontroller because I will use the arduino board (ATMEGA32U4) that I made in output assignment. For the details of that board please visit output assignment or my final project page.
Programming.
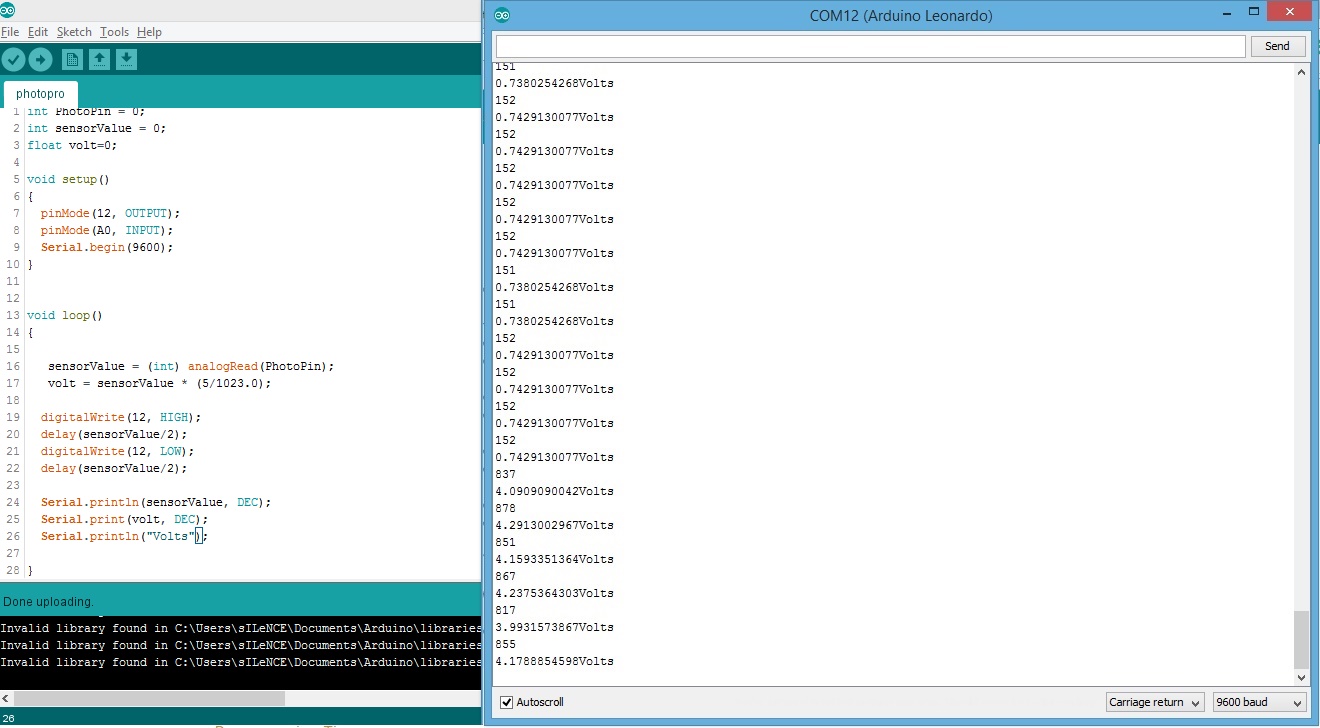
I am using Arduino IDE, for this assignment I am just using one phototransistor and reading its analog input, based on that analog input I can changing the blinking frequency of LEDs
Following image shows the program and the output.
Resistive touch interfacing.
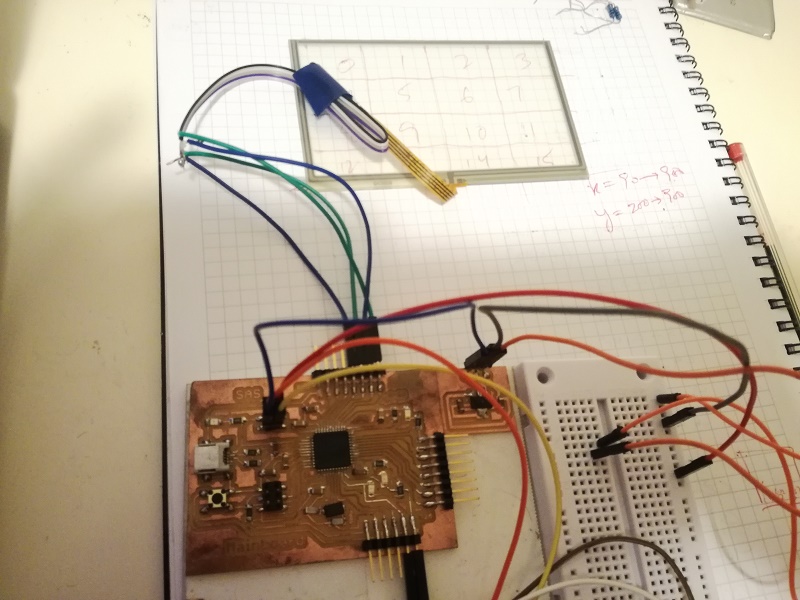
For interfacing resistive touch I am using the same microcontroller board that I have made in assignment 10.
The first thing we need to know is the pinout of touch, I found this (http://blog.circuits4you.com/2015/06/4-wire-touch-screen-interfacing-with.html) tutorial very helpfull to find the pinout.
Now the next thing is we need is a library which help us to interface it. I tried lot of library and this (https://github.com/adafruit/Touch-Screen-Library) one works, There is an example in this library which will give you the raw and rough X and Y positions and then you need to program it further for you use. I have use this library to make 16 touch points as shown in video at the top of this page and the program that I have written is attached at the end of this page.
I have connected 4 wires of touch with 4 analog inputs of microcontroller.
| Touch Pins | ATmega32u4 pins |
|---|---|
Using the program given below.
#include "TouchScreen.h"
#define YP A0
#define XM A1
#define YM A2
#define XP A3
TouchScreen ts = TouchScreen(XP, YP, XM, YM, 250);
int pxvalue = -1;
int pyvalue = -1;
void setup(void) {
Serial.begin(9600);
Serial1.begin(115200);
} void loop(void) {
TSPoint p = ts.getPoint();
if ((p.z > (ts.pressureThreshhold))) {
int xvalue = p.x/200;
int yvalue = p.y/200;
if (pyvalue != yvalue || pxvalue != xvalue)
{ pyvalue = yvalue;
pxvalue = xvalue;
switch (yvalue) {
case 1: // your hand is on the sensor
switch (xvalue) {
case 1: // your hand is on the sensor
Serial.println("0");
break;
case 2: // your hand is close to the sensor
Serial.println("1");
break;
case 3: // your hand is a few inches from the sensor
Serial.println("2");
break;
case 4: // your hand is nowhere near the sensor
Serial.println("3");
break; }
break;
case 2: // your hand is close to the sensor
switch (xvalue) {
case 1: // your hand is on the sensor
Serial.println("4");
break;
case 2: // your hand is close to the sensor
Serial.println("5");
break;
case 3: // your hand is a few inches from the sensor
Serial.println("6");
break;
case 4: // your hand is nowhere near the sensor
Serial.println("7");
break; }
break;
case 3: // your hand is a few inches from the sensor
switch (xvalue) {
case 1: // your hand is on the sensor
Serial.println("8");
break;
case 2: // your hand is close to the sensor
Serial.println("9");
break; case 3: // your hand is a few inches from the sensor
Serial.println("10");
break;
case 4: // your hand is nowhere near the sensor
Serial.println("11");
break; }
break;
case 4: // your hand is nowhere near the sensor
switch (xvalue) {
case 1: // your hand is on the sensor
Serial.println("12");
break;
case 2: // your hand is close to the sensor
Serial.println("13");
break;
case 3: // your hand is a few inches from the sensor
Serial.println("14");
break;
case 4: // your hand is nowhere near the sensor
Serial.println("15");
break; }
break;
}
}
} // touch function ends here
}
And the following video will show the complete setup and output.
Following picture is showing the setup.
Following video is showing the result of resistive touch interfacing.
Download All file of this week Here

This work is licensed under a Creative Commons Attribution-NonCommercial-ShareAlike 4.0 International License
.