ASSIGNMENT 5.
3D scanning and printing.
3D SCANNING
I had some general idea about how 3dscanners work. Some friends are using them to build interactive installations, based on processing and kinect. So i paid atention carefully to the whole session, to be aware of the rest of the systems available.
I had done some tests with de kinect, and i saw the results on the rest of the class. So at the end I decided to focus on a diferent system, the one that I consider more flexible in terms of portability. I decided to start with Autodesk Remake.
That's a very handy program, very clean interface and very easy to use, but it took three testing processes to get a nice result. Even thought, I still considere it as a realy handy tool to have a fast rough scan. For more profesional results, I would consider using at least a professional camera (I was using just the phone, pretty flexible)
I'm not sure about the cloud based software, so far. I think that's a reason to star getting to know Fusion360 and Remake. Still not very convinced.
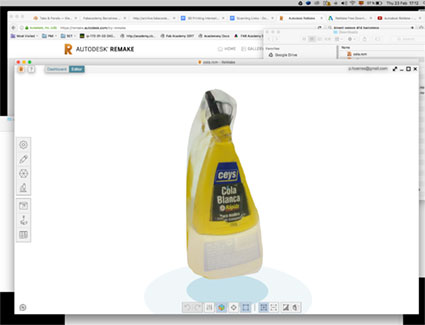
This was the first step. Getting familiar with the software to understand the workflow and how to use it for the needs of the assignment. I checked the tutorials on the Autodesk web and I took several photos, following the methods they explained on the web.
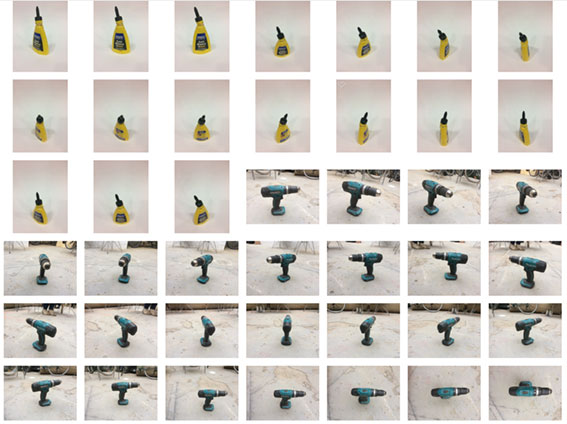
I took the first collection of photos turning the object, placed on a neutral background (yellow glue botle). Then you upload the files into the cloud and you have to wait sometime to get the 3d mesh. This first attempt didn't work out very well, probably because the lack of contrasted references for the software.
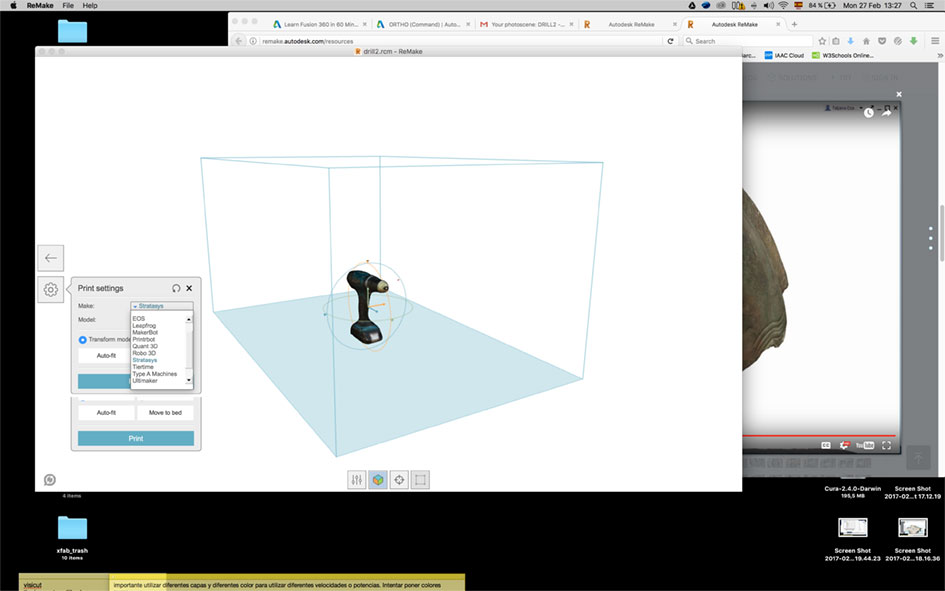
So next test was done outdoors, moving around the object, a drilling pistol, and taking photos form every angle (also from over the object)
The computer used part of the surrounding as reference for the 3dmodel, as you can see in the general mesh developed by Remake.
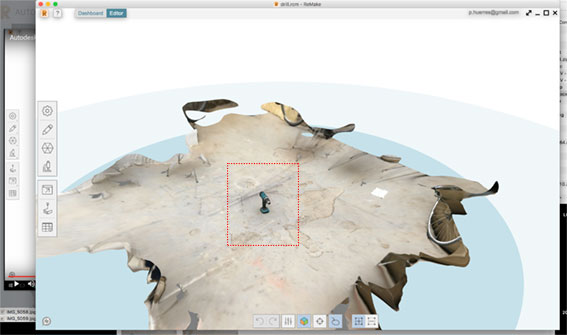
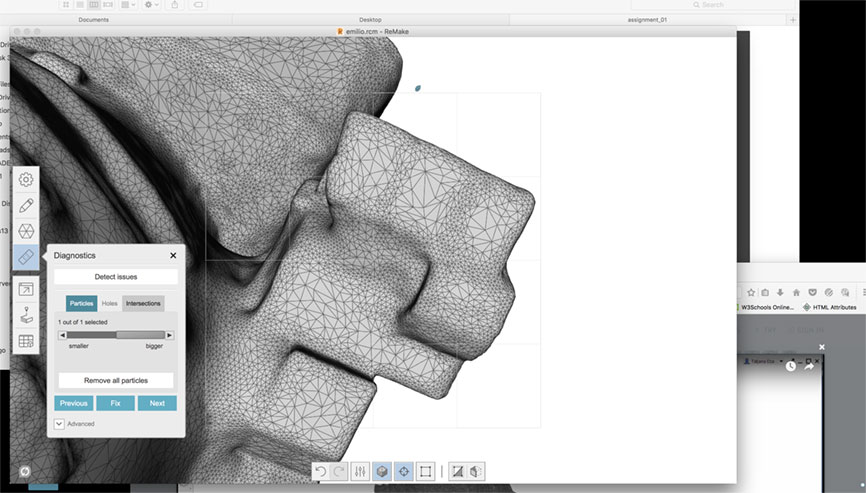
I took the drill in the middle and started to clean the mesh. The workflow is really simple, and it's an easy software to use. You just need to select the triangles you don't want an erase them.
If you are used to mores constraint or precise tools, moving around and moving the object will take some time.
Then I decided to start with another method in the same process, taking the photos indoors. Nad with more controlled light and smaller surroundings, also turning around and with teh same path for taking the images as I did with the drill. I wanted to clean this third model more extensively and export it to a diferent software to check the compatibility.
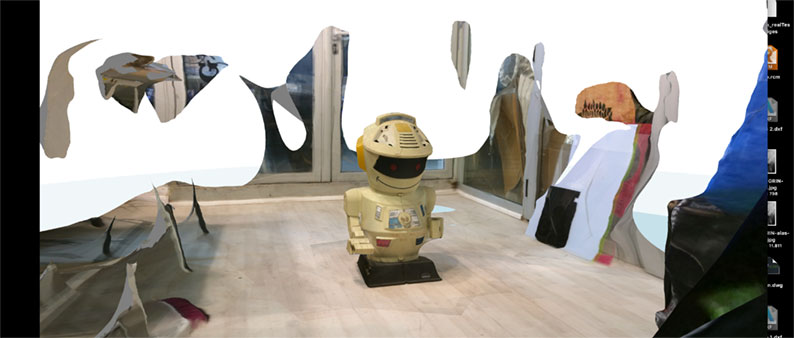
So that's the character. Let me introduce you to Emilio!
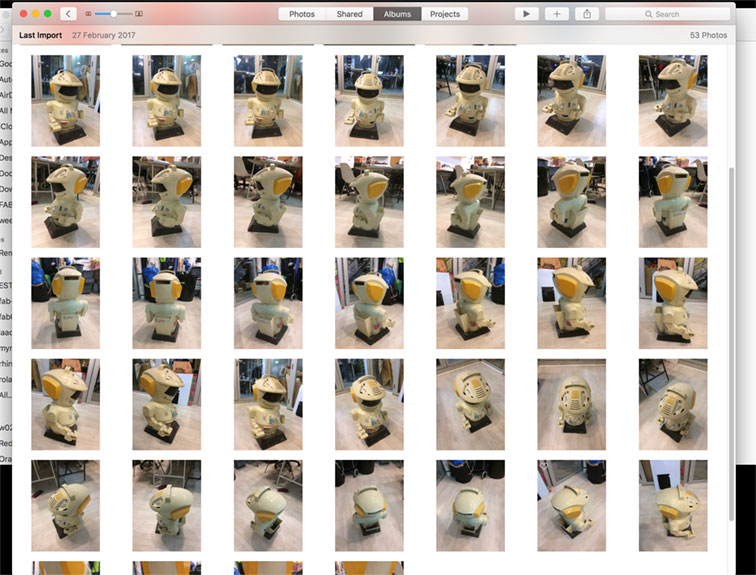
These are the fots i used to get the last mesh. It turned out to be the most controlled environment, so the result was really cool.
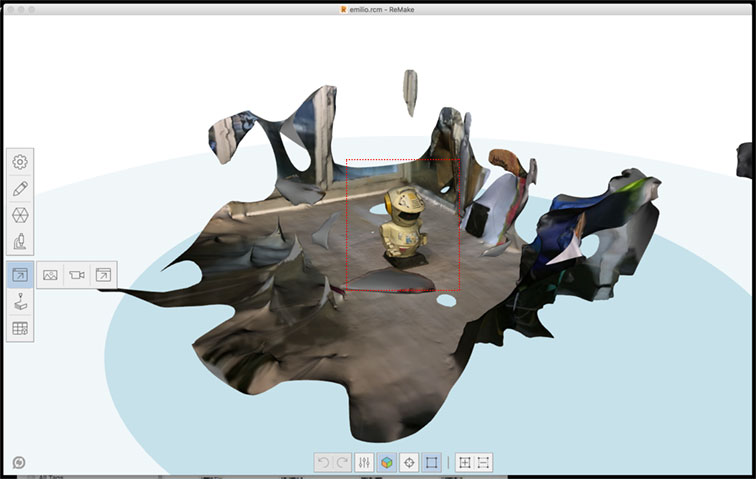
After this test I will try to scan a big wall or some environment, and check the posibilities of the software in this item, but with simple devices like my phone. It can get really interesting, I guess.
Here you can check how the software understands the motive and the environment. Pretty surreal, but kind of accurate.
Emilio in the Fabricacdemy! on Vimeo.
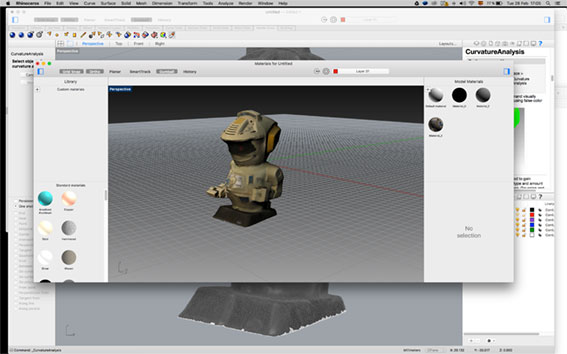
Next step was cleaning the mesh and start doing some extra adjustments. Actually was the nice excuse to know the rest of the tools. Some of them are very powerfull and VR oriented. Pity I don't have so long time to start with the printing.
I exported the toy as an .OBJ to check ohow the resonse in Rhino would be and it worked pretty well. It exports the textures and the normals, after adjusting the triangulation and smoothing a bit the edges.
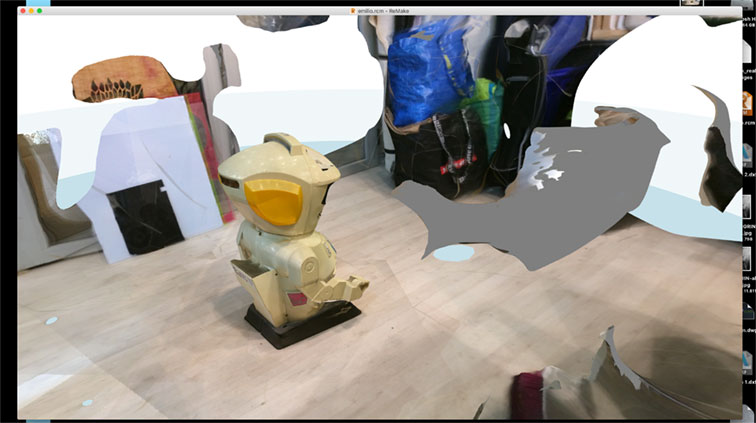
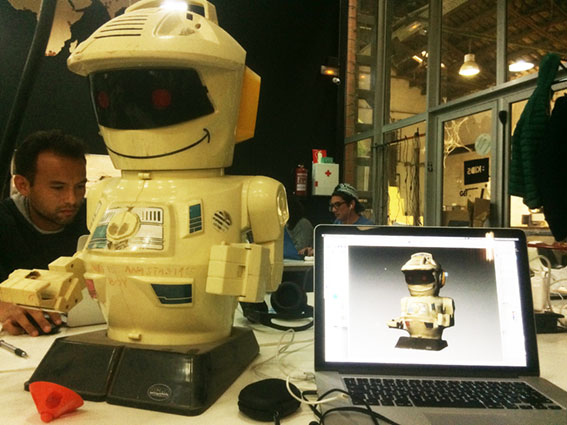
Last photos to see the result. Of course it's not perfect, but is a promising system, from my point of view, and extremely portable.

3D PRINTING
We are in a priviledged FabLab. We can use meny different models of 3d printers, and we have the excuses to test them. In the other hand, time is limited and we all need to have contact with the machines. So I decided to focused in a Prusa I3 printer.
Before that we had some tutorials about the logic of normals, poligons, and technical aspects of 3d printing. I knew some of the concepts from my previous experience with 3d modelling software. But still it was quite interesting and encoraged me to use Blender (in the future)
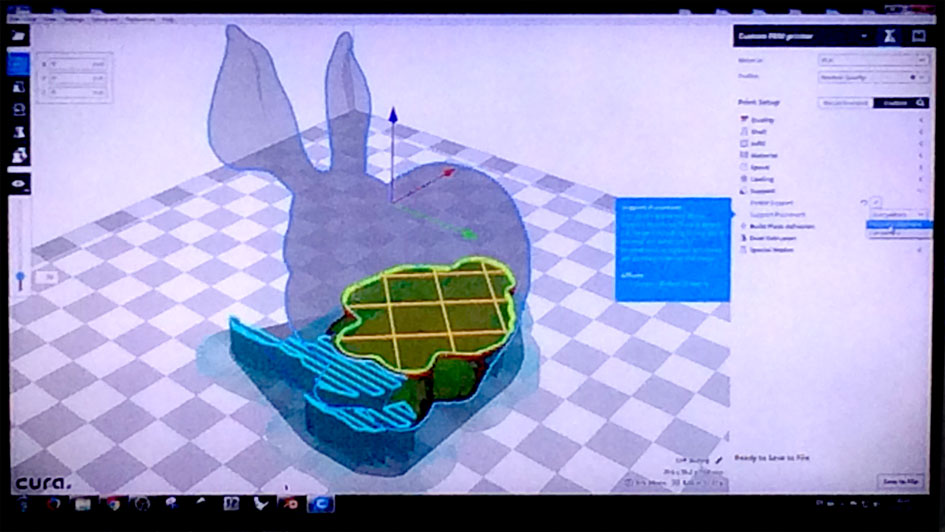
Then we moved into CURA software to understand the concepts related with the printing process itself: layers, infill, shell, support, etc.
I just include the model of the rabbit as a sintesis. All softwares will need some attention from the users, because they vary from one to another. But the image is the perfect reminder of the elements that play a part on the process.
Next thing was to see the machine itself. So I did, to understand how the nozzle and the extruder moves. And also tho check the bed, and how the heat affects to al the components involved, as a pro or as a con.
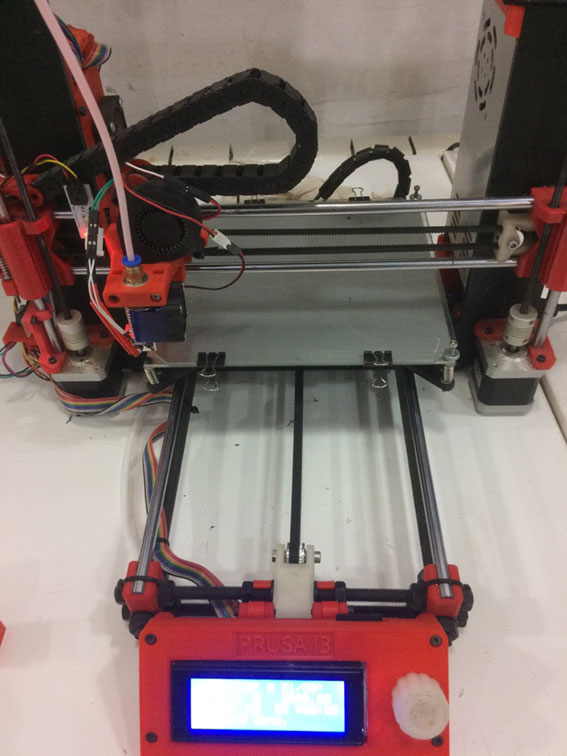
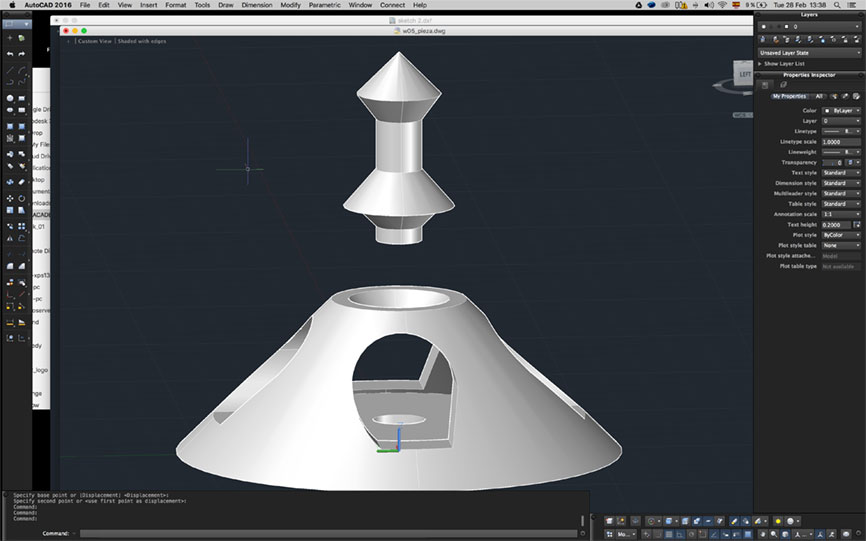
I wanted to save some time to spend in the "unknown" so I decided to use Autocad to design a small piece following the instructions on the assignment.
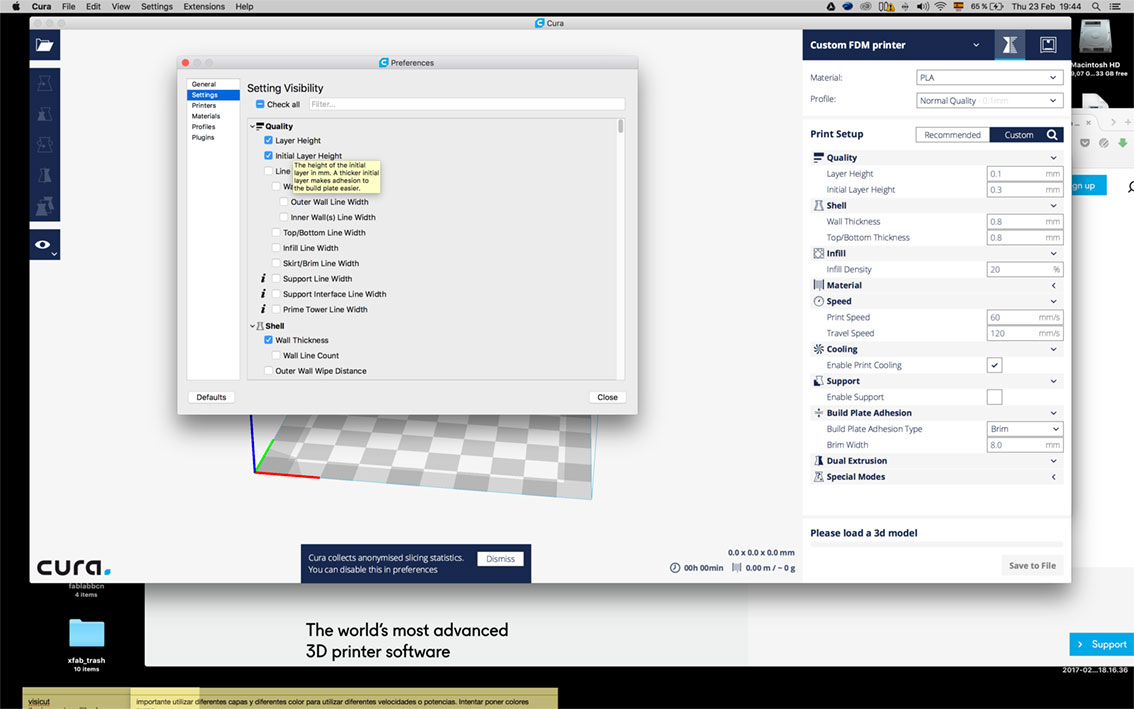
Then I checked the settings on CURA and I tried to recognize all the lines we were explained about in the first tutorials. It's quite easy to handle, you just need time to do as many tests as posible.
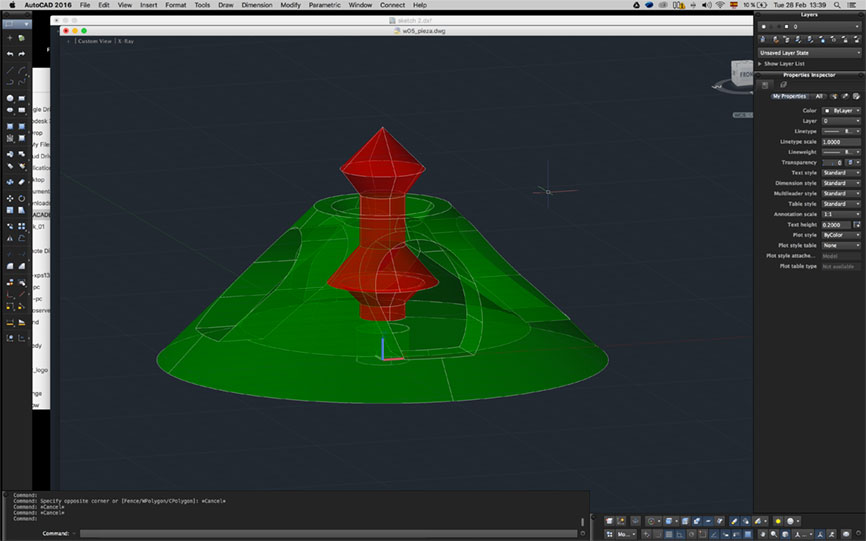
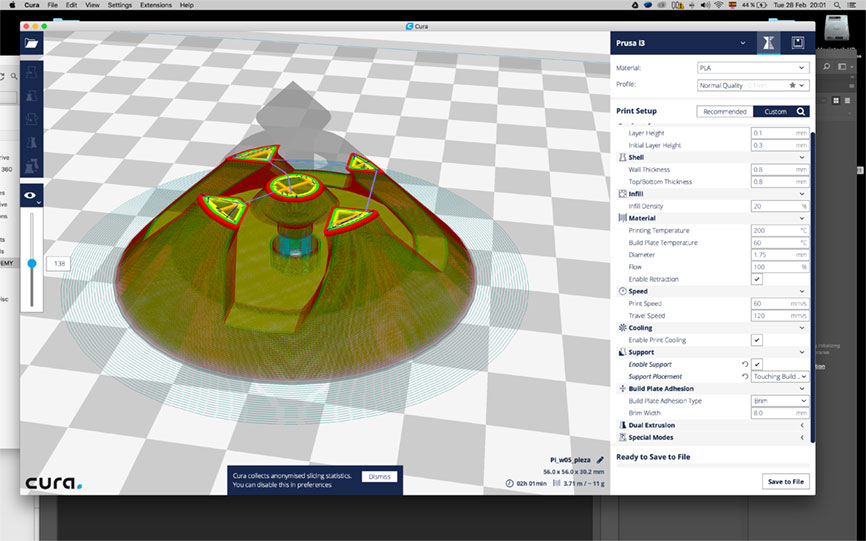
The slicer is perfect ro check how your model will evolve thru the printing. I designed the piece specially to check the capabilities of the material. Cones, with less than 45º inclination, some arcs to see how clean the supports are and things like these.

As my first approach, I wanted to be sure of success, so I decided to get ALL the supports that CURA recomended. But I'll try to do another test just with the support for the central piece, and see how PRUSA deals with the archs.
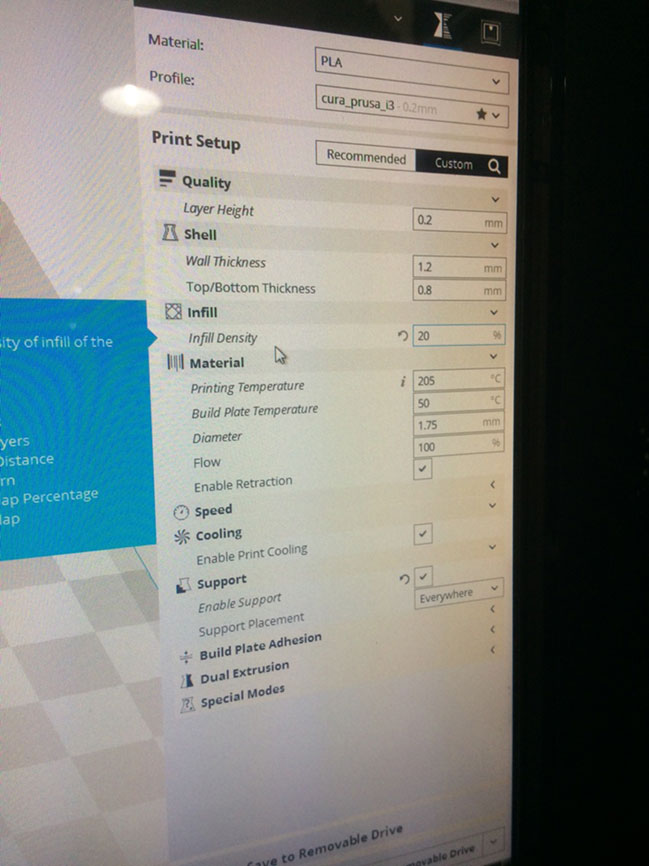
This are the settings I used to print the model in PLA. Materials need a an extension, another chapter, and I'm not ready yet to face it. I need more time to test.
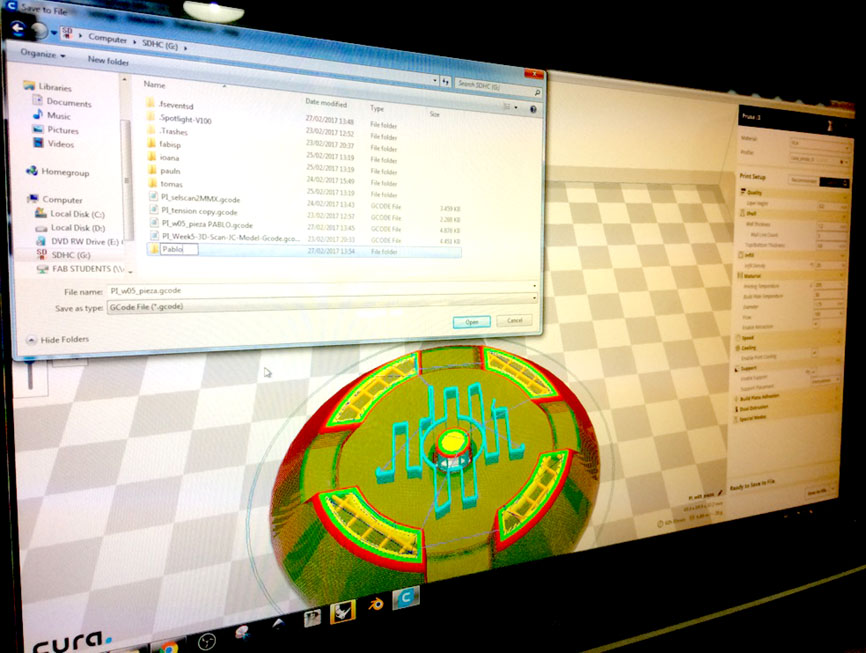
The SD card issue surprised me a bit. I have to chec¡kif there is some fully integrated system for data transmission to the printer. Still, no problems with the card. I was ready to start my piece with supports all over.
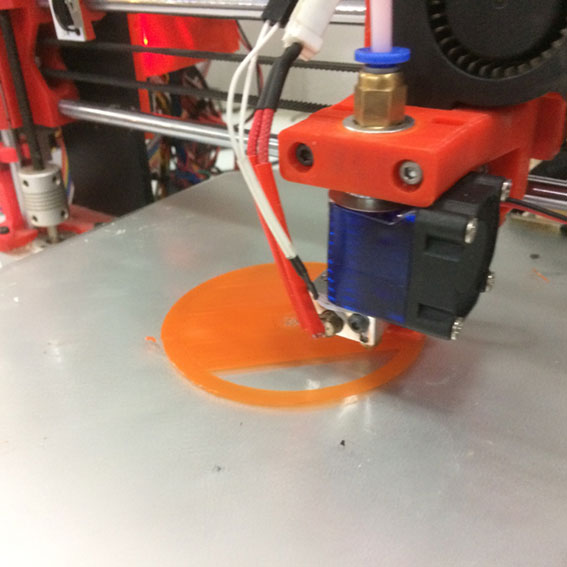
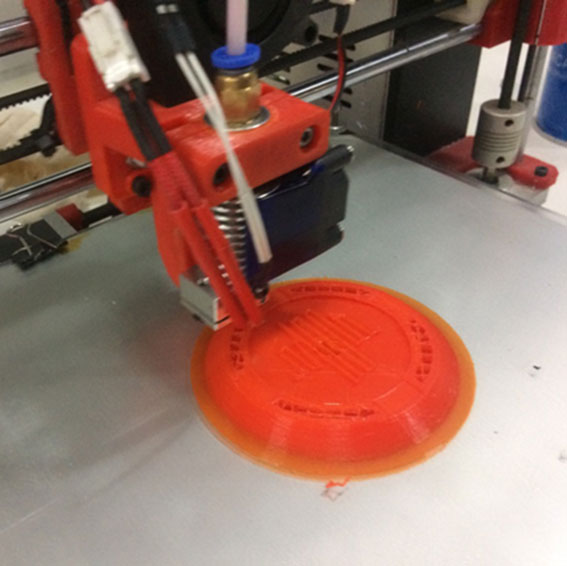
The extruder started with the brim and then the filling of the base began gently.
Support, shell and infill can be seen in this image. I think the whole process took 3 hours. I'll add the correct time and measures of the piece when I do the second test.
The piece is finished with the supports; no movement of the central part yet.
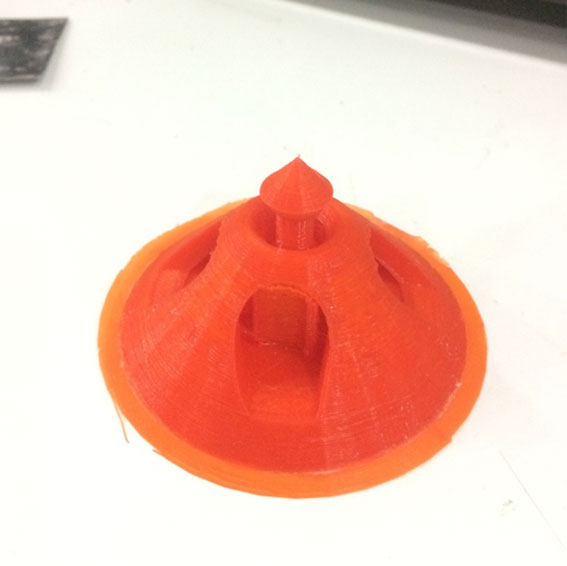
Taking off the supports with a cutter was easy thanks to the wide arcs on the sides. You have to think about that when you design the items.
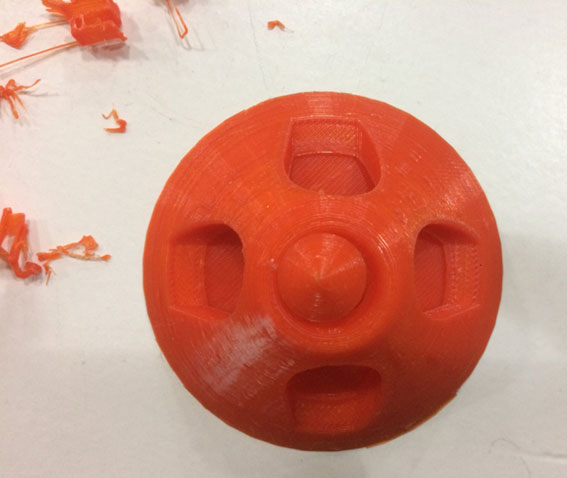
Final result, pretty neat.
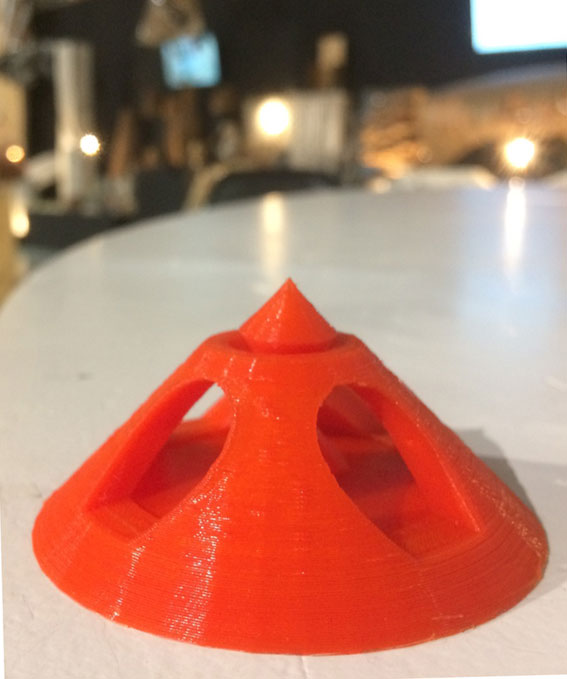

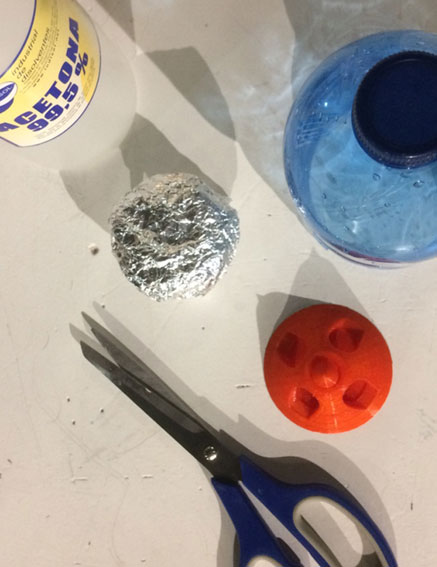
And then I tried to smooth the surface, but when I had everything ready to start, I discovered the ACETONE DOESN'T WORK WITH PLA. So the experiment was aborted until next material tests :_(
Step by Step
- Check the tools, first impression.
- Understand the logics through practice.
- Do some tests with the technics you are not used to work.
- Be patient with the tiny things.
- Analyse the workflow and try to understand the abstract part of the electronics.
- Think twice what you're doing (get some backups!).
Method
The method I used for the scanning was simple. Concentrate in one tool and do tests changing only one or two varibles. So I changed the environment and the object. I did a second test with A and B options changing the position and the number of photographs. And the third test was a change on the environmet and light.
In the printing, I just design in advance what i wanted to find in the process, to challenge a bit the machine. I checked the files onlie, but I didn't want to get it to a complicated level. The important thing was to get the transformed material in my hands so I have a reference for the next models.
First conclusions
Both are great tools to do MANY things. I was very surprised on the scanning technics. I thought only profesional tools were accurate enough to do this things.Both tools still lack of resolution and they have to be improved in terms of definition and time consuming. But they're vital for prototyping befor we get the pieces on professional or industrial fabrication facilities.