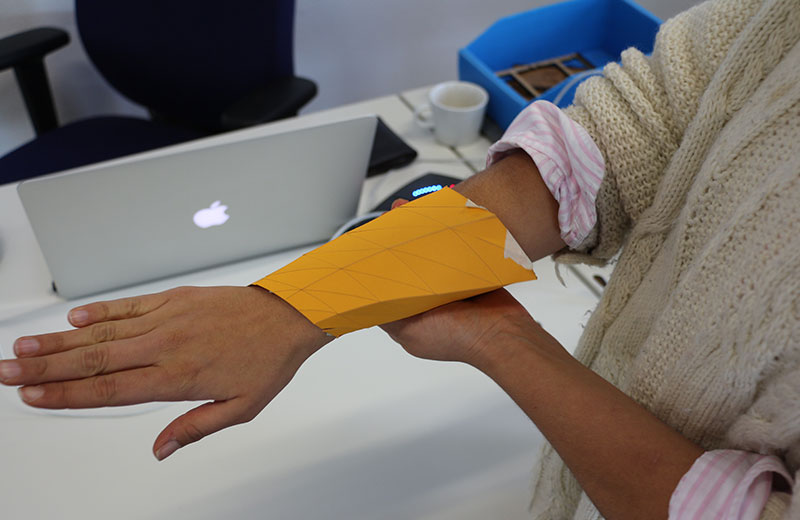
Project Development.
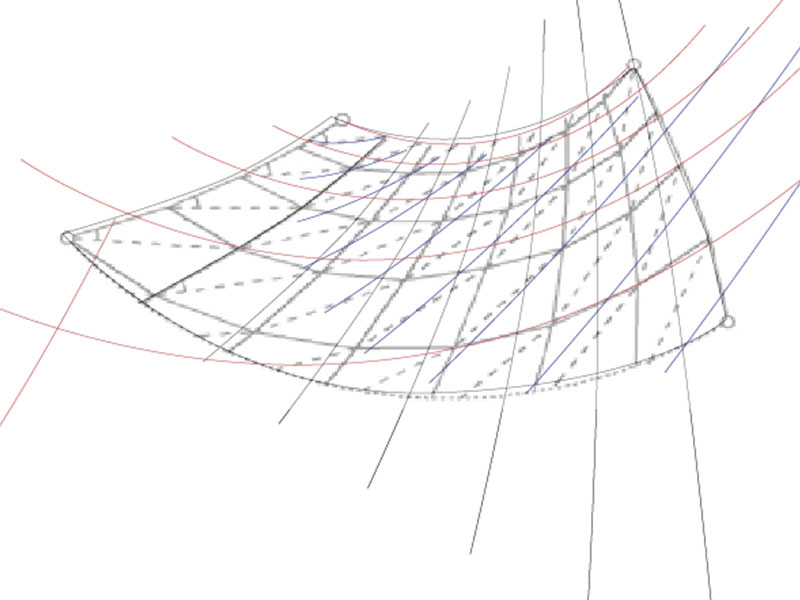
I used som modules for origami,
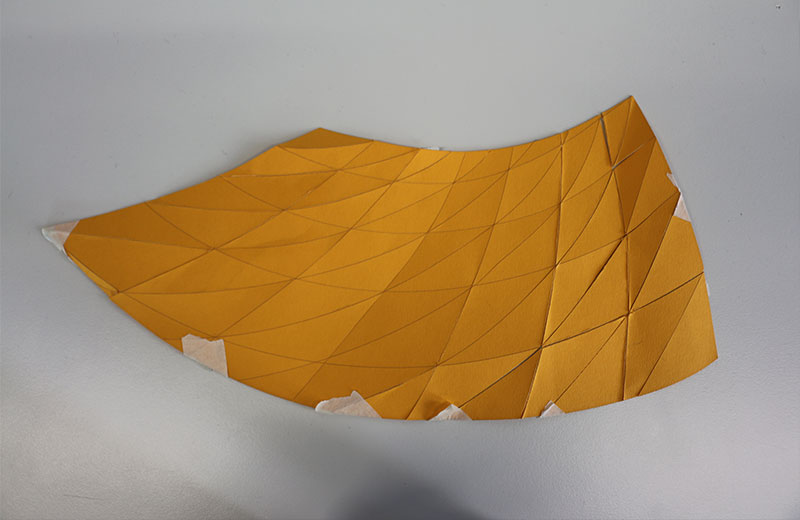
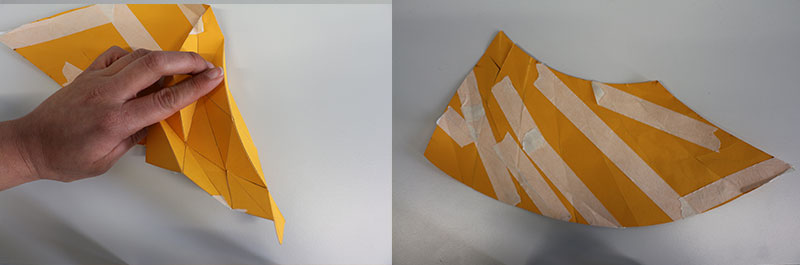
With help of Illustratohr and and a original patern of a origami i tried costruct in a parametric way the origami pater for envolbe my arm. using the Artbord functions of illustrator.
If you go to Effects Panel yu can adecuate and modify this parameters.
som other effects that you can paramatrize i n illistrator ar = offset , the patterns in Swatsche or the pattern in the brush function.
See the steps downloding the FILE ! THANKS!
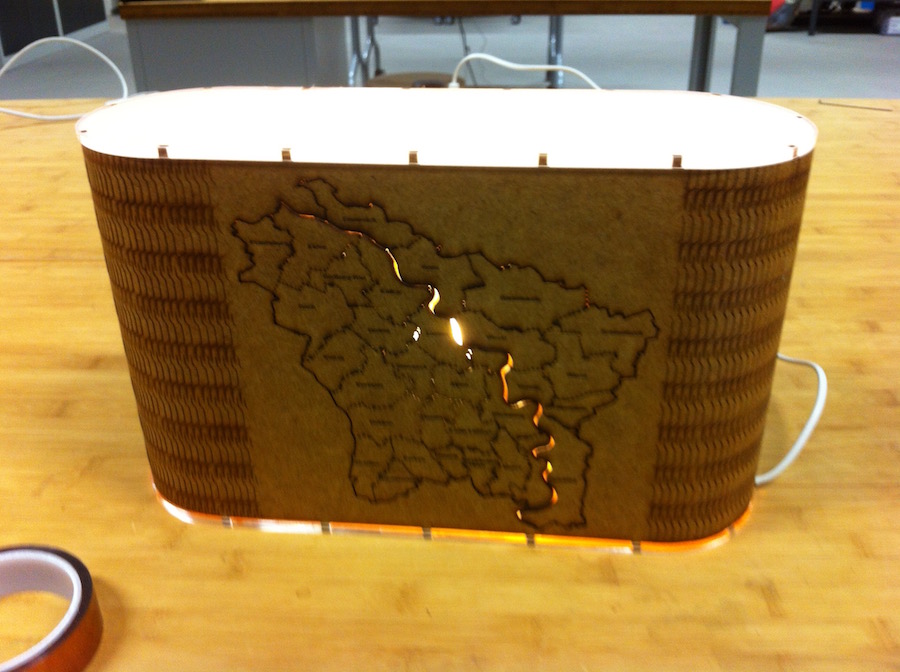
Folding Lamp
Curving pattern using the Kerf method on wood
With this model I developed another design for a lamp using this pattern for folding the wood on both sides as you can see in the following picture.
For his time, I decided to change the pattern of the joints, because the joints in the Letter “A” were not really stable.
I did a curved joint as you can see in the picture.
First, I did a small test with the tool Path> offset in Illustrator, making some tests with 0.1 and 0.2 mm offset. This function in Illustrator is parametric (Effects panel)
0.1 works really well also functions good with the curved lines.
You can change the motive of the lamp in this case I used the map ot the Rhine Region, where our Fab Lab is located, and in the front part I used the logo of the Fab Lab.
Acrylic Parts
For the bottom and top part of the lamp, I needed some joints.
Therefore I used the brush menu, when you add in the brush menu your personalized pattern you will find the following options:
Calligraphic Brush
Scatter Brush
Art Brush
Bristle Brush
Pattern Brush
You can find the spacing between the pattern, I used 1000% and fit space between the pattern.
You have to put the same distance between the pattern of the top part, and the pattern in the bottom for the hold folding piece, as you can see in the following picture.
For the top part I did a pattern to diffuse the light from outside
In order to have a nice and durable lamp I did some attachments for the lamp:
Don’t forget that you need the position of the socket of the light bulb and the cable.
I did some extra holes for the attachment of the screws.
Assembling
After cutting the wood folding part, it is important to wed the MDF,in this case 3 mm, with a little bit of water to avoid the pattern from breaking. Fold the the MDF carefully and close the structure with the joints.
You can assemble the socket of the lamp in the acrylic, and fix it with two screws. Fix the cable and make sure that it is outside of the lamp before you assemble the wood.
After that, you can carefully insert the joint of the wood into the acrylic part. Make sure that in the joint part there isn't any joint that means that can fix better with and adjust the others parts of the lamp.
Put the letters of the lab I cut it with Acrylic 5 mm in order to create a 3D effect.
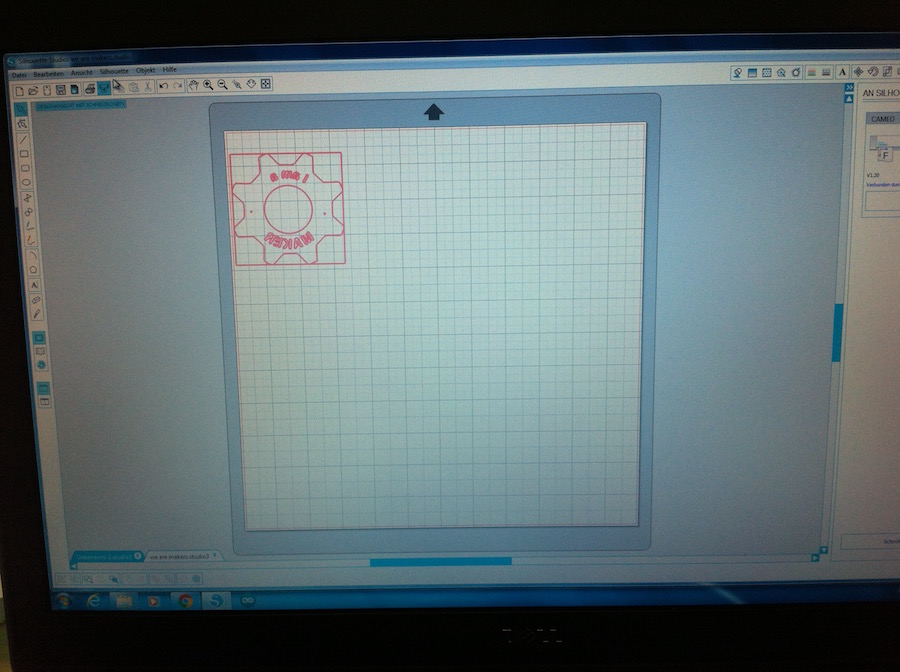
I am a Maker Cutting assigment
For this time, I used a special vinyl suitable for printing in fabrics, to make a nice design for print T-shirts for the children, that participated in the Kinder Uni event in the Hochschule Rhein-Waal Kamp Lintfort. It was an activity for parents and kids, and also for visitors and makers in our Fab Lab. Design I selected the form of a gear and the color red because it has a strong relationship with the maker movement and also the gear has a meaning of making and processing. I integrated the element in my design with the slogan “I am a Maker” and for the other side I did the logo of the Fab Lab Kamp Lintfort !
Cutting In our Fab Lab we have two machines for cutting, one for cutting in a big scale, the SUMMA Class 120 series, as you can see in the following pictures, and the smaller Silhouette Cameo which has less functions but is easier to use. For doing more than 80 logos for the kinder Uni I used the Summa ,
Important for the data is everything that is draw (in exception the pixel images) will be cutted. Also the letter you have to pay attention to release the compound paths. For example the “A” “P” or other letter that has strokes inside. Setting the machine: You have to set up the vinyl, you can use in this machine vinyl until 1200 mm width, for the fabric vinyl, it is around 50 mm width , the machine has a visual sensor which identifies the width automatically, you have to adjust the vinyl holders. In this case the holders will take a little bit of the width space of the vinyl , that means that the final are for cutting is of the 43 mm width. You can open you illustrator data directly in the summa software. After setting the paper you can look the origina size that you can cut using the option cutting size area, and adjust repeat and make the mirror of the design.
IMPORTANT : for the fabric vinyl you have to do the mirror, in order to print the design in the right way in the T-shirt. Wenn the your design is ready and adjustable of the cutting are you can send it to the summa. ! The machine is super quick !
Silhouette: In this machine you can not use the original Illustrator data, but you can export the data in DXF And open the data in the Silhouette software and you will have the vector lines to cat , a nice feature is that you have the measurements of the design directly , For this machi you dont have a holder , but also a hollding matte which has a grid to orient beter in the design distribution, The other advantage of this machine is that you can cat different materials, and you can adjust the knife, and load material for example 400 grams thick. For this application I use the 0 level. Setting the machine: Connect the came to your computer with the USB cable 1. paste the material on the matte 2. Load the mate in the silhouette cameo. 3. Send from your computer the cut command . ! When the machine is finished. Press the function unload the matte of the machine. 5 you can take your vinyl and and also prepare it for printing in T-shirt. Cutting This Vinyl has a holding folie, which is spacial for support high temperatures , and you can use to protect the vinyl between the iron and the tschir. If this foil is not included you able to use a butter paper for printing you t-shirt. You can place the logo on the T-shirt and iron bout . CAUTION: For this vinyl we use 150 C degrees during 15 sec. The Maker T- Shirt is ready ! For more information you can see the introduction only in german.
Silhouette: In this machine you can not use the original Illustrator data, but you can export the data in DXF And open the data in the Silhouette software and you will have the vector lines to cat , a nice feature is that you have the measurements of the design directly , For this machi you dont have a holder , but also a hollding matte which has a grid to orient beter in the design distribution
CONCLUSIONS
The laser and Vinyl cutter ar ones of the most used machines in our Fab Lab , for different application , to look inside of the application gei us a better understanding supporting more ideas . Also making a better use of new features like the color mapping , Having a mor safe place taking more preventive measurements . Well it is a feeling a work without end