Week 4 - Electronics production
Assignment
Make an in-circuit programmer by milling the PCB, then optionally trying other processes.
Introduction

The FabISP is an in-system programmer for AVR microcontrollers, designed for production within a FabLab. That allows you to program the microcontrollers on other boards you make, using a USB cable and 6-pin IDC to 6-pin IDC cable. It's based on the USBtiny and V-USB firmwares, which allow the ATtiny44 to perform USB communication in. software. To produce our own Fab ISP boards, we needed to first mill then board, solder the necessary components and then finally program it.
PCB Milling
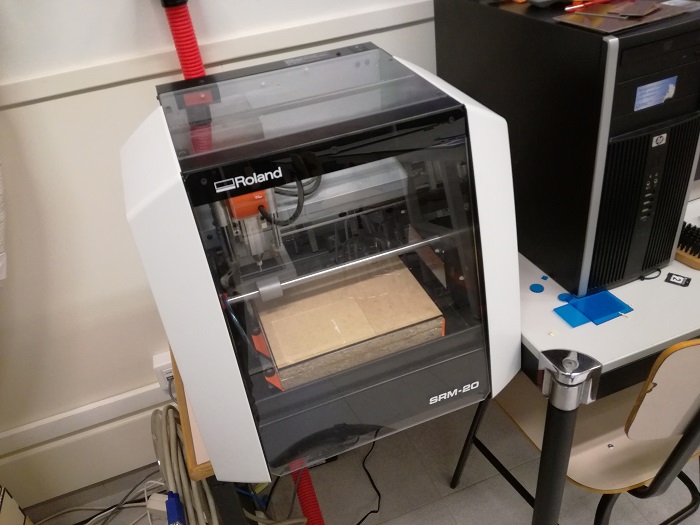
For this part of the assigment we will be use the Roland SRM-20 desktop milling machine, it will remove the copper from the PCB board to leave only what is necessary according to the pre-set design.
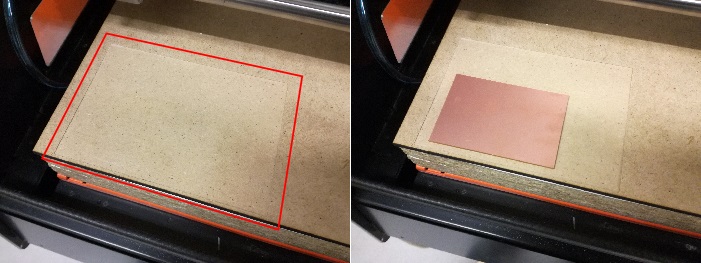
The first step is to prepare a surface to ensure a homegeneous height, as well as adding a platform to ensure that the tool reaches the material to be milled
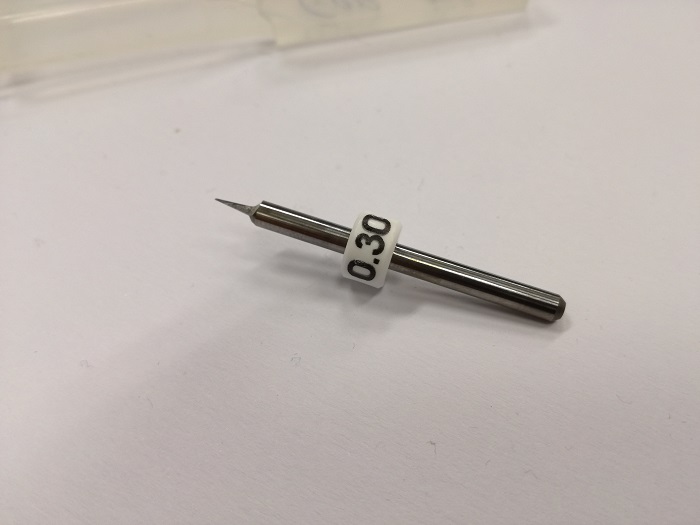
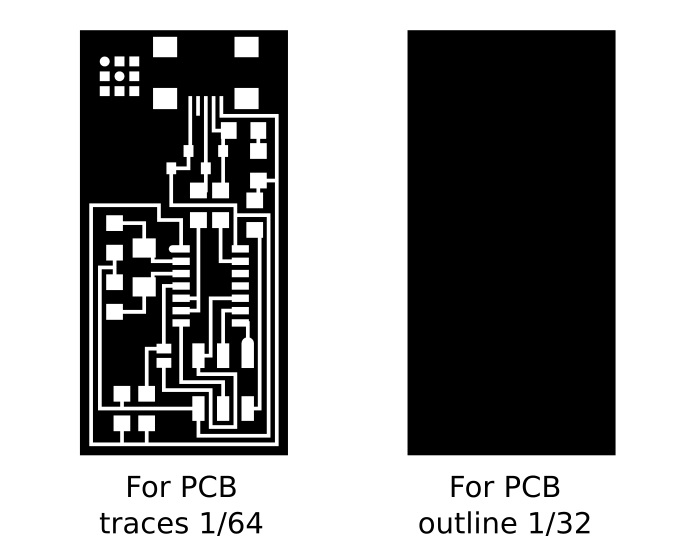
For the first milling process (traces) we need a tool of 1/64 of an inch and for the second process (outline) we need a tool of 1/32 of an inch. Are two processes
OOOPS! We are in Europe and we work with metric units. The tool I was able to get is 0.3 millimeters (I'm working on my Lab). It will have to work for both processes.
I made a small modification of the FabISP thinking that with the tool of 0.3 millimeters and 15º could engrave more than I want. Raise the contour slightly to keep it out of the outer traces.
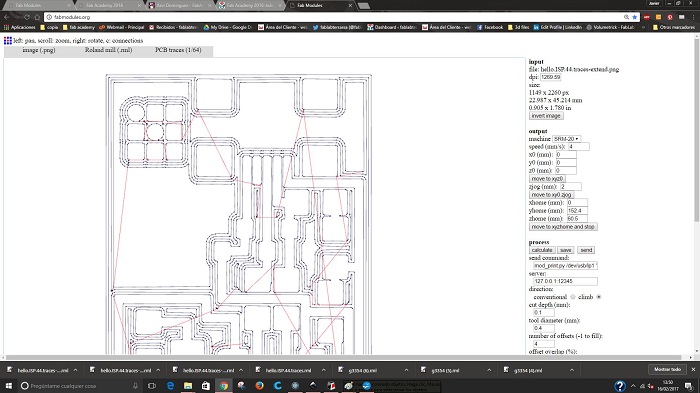
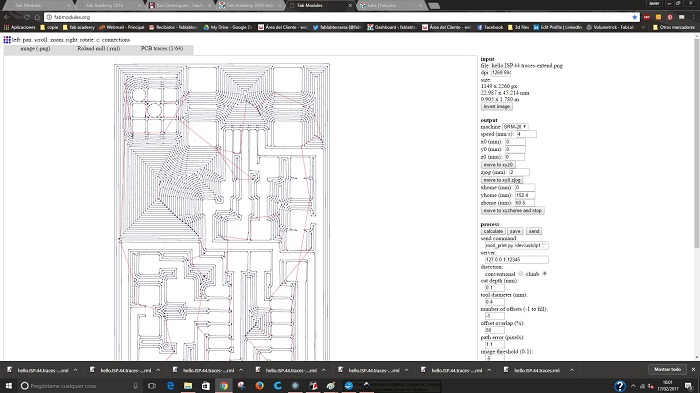
For this work we are going to use Fab Modules , a set of software tools for personal fabrication, intended for use with machines common to fab labs. By using PNG files Fab Modules converts the .png into paths that the Roland SRM-20 can read.
1. Go to fabmodules.org
2. Inpunt filte to read: .png and select hello.ISP.44.png
3. Output format: Roland mill (.rml)
4. PCB traces: 1/64. For the engraving process I use the 0,3 milimeters tool to mill. I set this in de “tool diameter” box
5. Right menu: output machine (SRM-20), cut depth 0 mm, number of offsets: 1
6. Process: CALCULATE
7. Process: SAVE -> .rml file
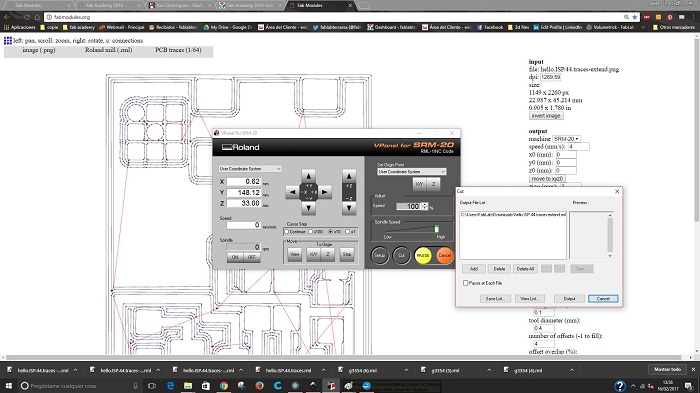
8. Check 1/64 mill is placed on then machine.
9. Open VPanel, the Roland software to manipulate the machine.
10. Move machine tool to your "origin point" using the -X, +X,+Y and -Y buttons. Click on X/Y button.
11. Finally, move the tool down using the arrows.When the tool is almost touching the copper surface, open the machine and with your hands and the allen key move the tool until it touches the copper. Click on Z button.
12. Click "Cut" and select the .rml file.
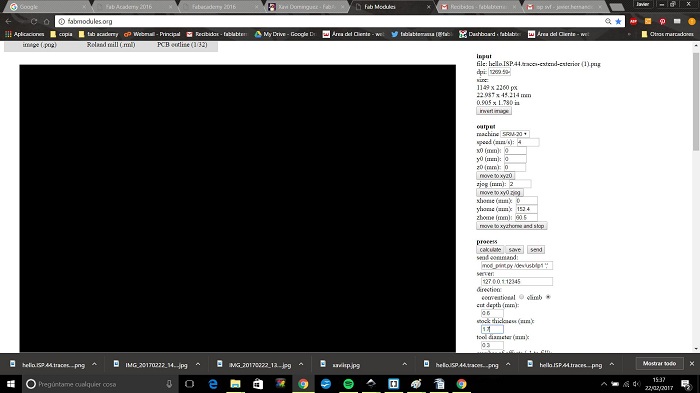
For the outline process is almost the same, just change the step number 4. and select "PCB Outline", set the tool diameter and the number of offsets.
For the first test I set the number of offsets by 1.
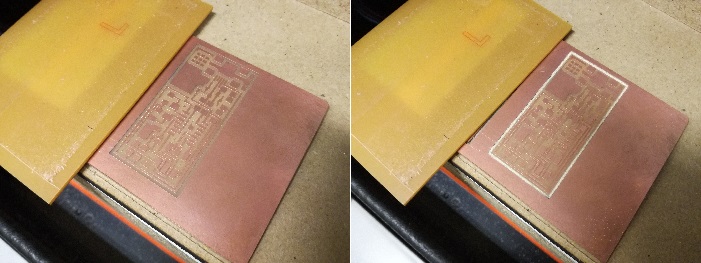
Correct result, I think
Second test, and I hope the final one. In this case I set the number of offset by -1
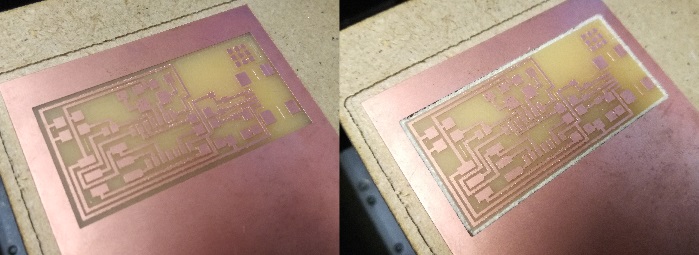
Finally! I will work with this one
Soldering
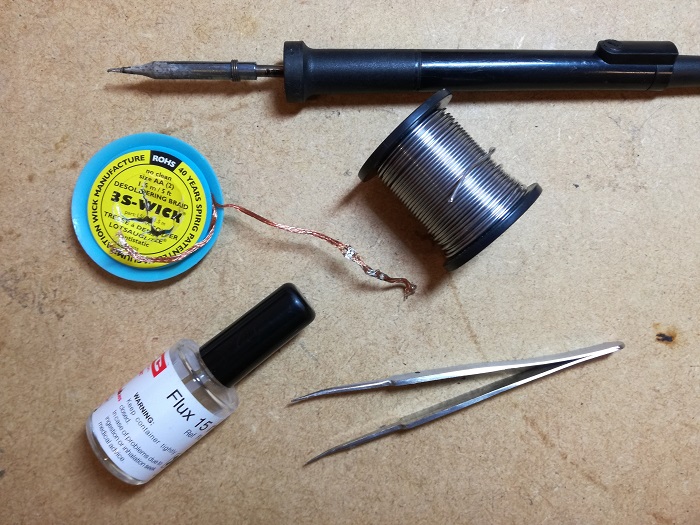
Soldering iron, Tweezers, wire for soldering, soldering remover and Flux. All we need to start soldering!
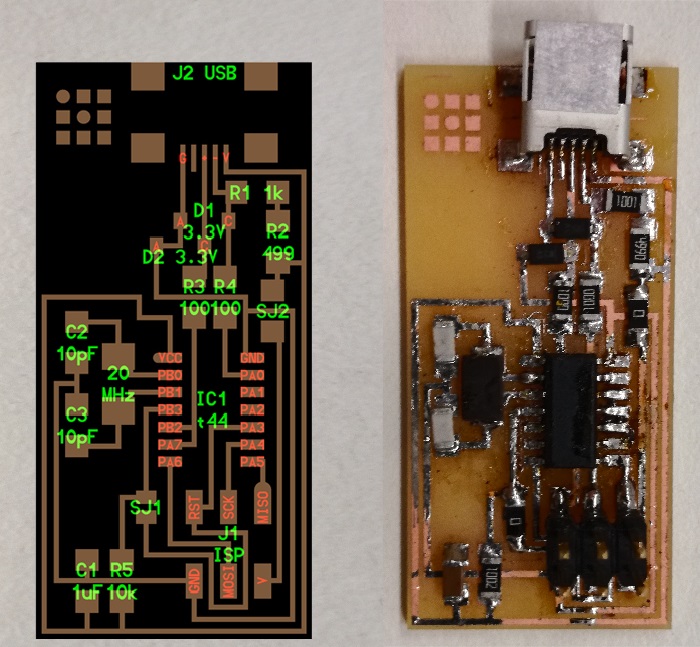
This is the list of components for the FabISP.
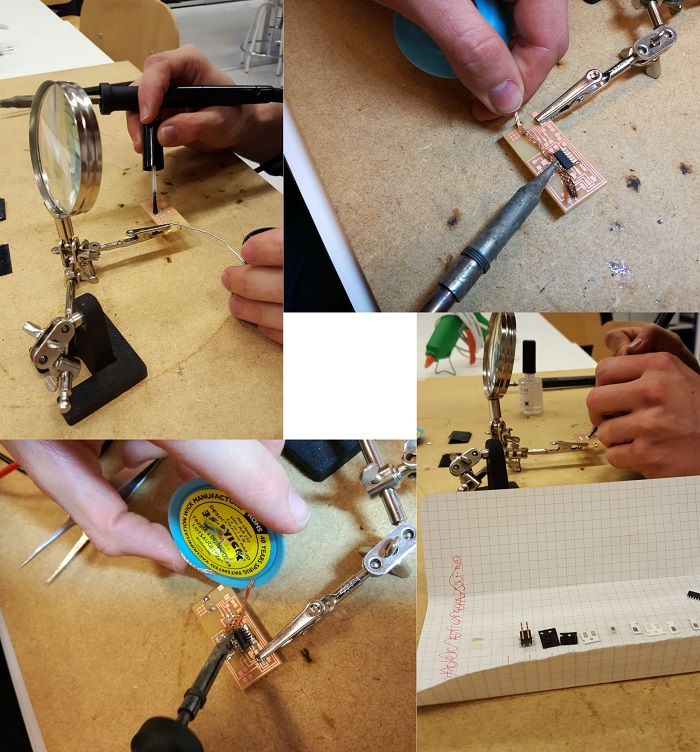
Without the tools and materials mentioned above we can not work, but the most important thing is to have an orderly work area, patience and STEADY HANDS
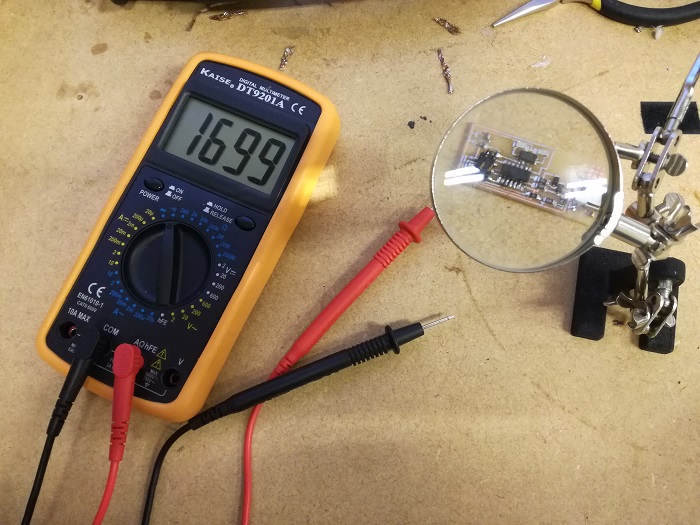
Before connecting the board to the computer, it's important to check the connectivity of the components. I used the multimeter and the schematic image as reference. Connectivity can be checked before soldering each component
Final result, its time for programming
Programming
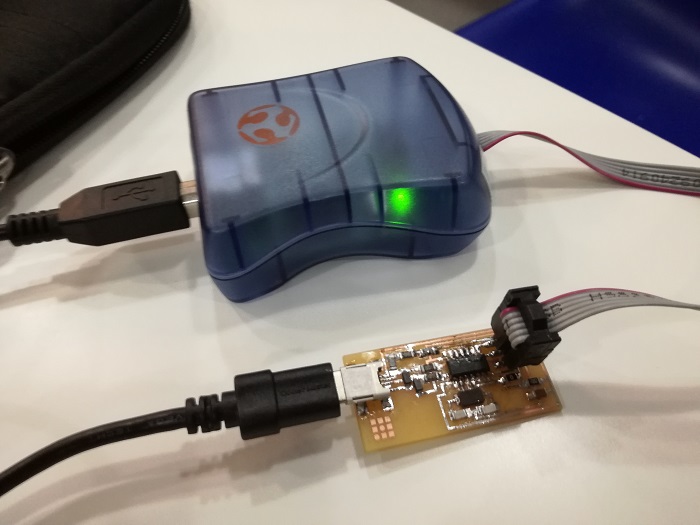
First to do is to Power the FabISP Board and connect it to a AVRISP MKII programmer to check the board is ok. If the programmer led is green we are ready to start with the programming procedure.
Some tuto work before starting
Back to my lab i'm going to try the programming using a Arduino UNO because I don't have a AVRISP. I will folow the instruuctions of an 2016 fabAcademy student

The 10 uF capacitor must be connected between RESET and GND
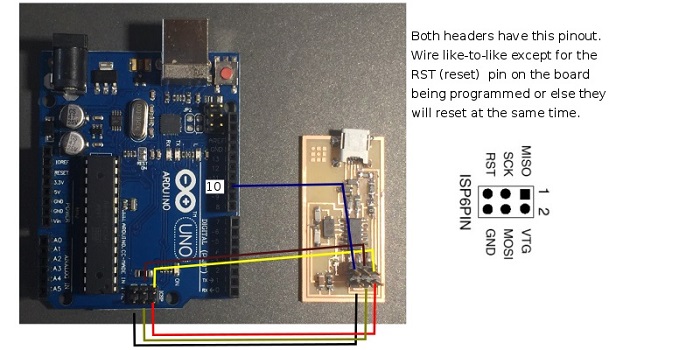
Connect your FabISP to the Arduino.

I made a backup of the Path enviroment, it seems the AVRdude installer sometimes overwrites instead of updating it. We can do it using “ Windows key + "Regedit” clicking right button to modify and coping the path line.
There is a warning about the winAVR and it makes me think that i will have problems, will see.

Download the latest version. 2010, negative sign!
Download the FabISP firmware. We will use this to build a program that we will run on our FabISP.
We can use a text editor like Bracket or Notepad++

Now we need to write into it which COM-port your Arduino connects to your PC. Connect the Arduino and open the Arduino software.

Replace this line AVRDUDE = avrdude -c avrisp2 -P usb -p $(DEVICE) # edit this line for your programmer with this line AVRDUDE = avrdude -c stk500v1 -b19200 -P COM5 -p $(DEVICE) And edit the COM5 so that it matches the number on your COM port

Problems, after several attemps it wont work, it seems there is a problem with the administator permissions, i tried to solve it whith the help of my guru and it was impossible. PLAN B
I going to programm the FabISP in other computer, a mac from my guro and the AVRISP MKII programmer from Fab Lab Barcelona. The mac computer has already installed the software needed.
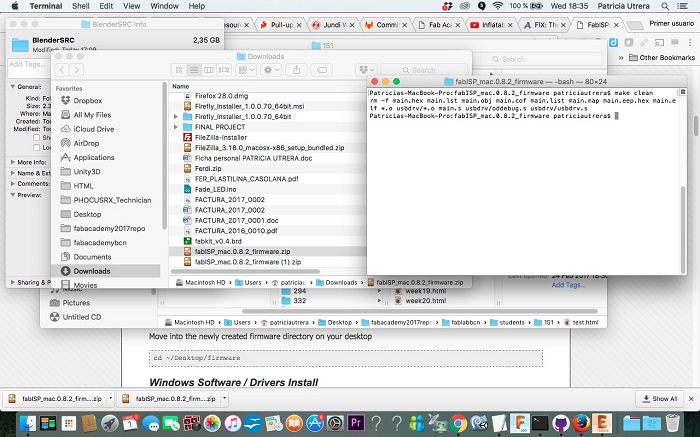
Again, downloading the FabISP firmware
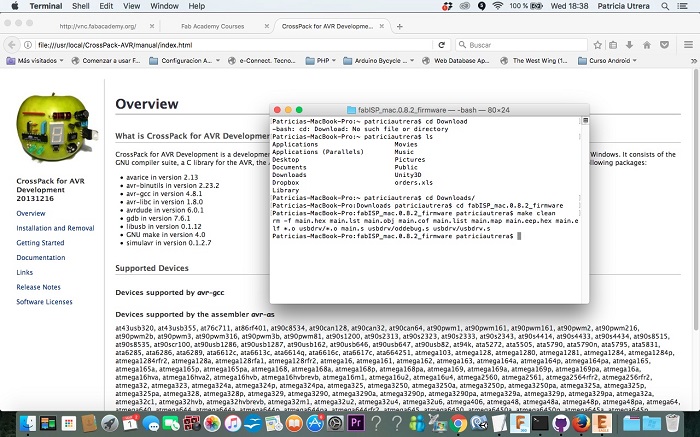
MAKE CLEAN
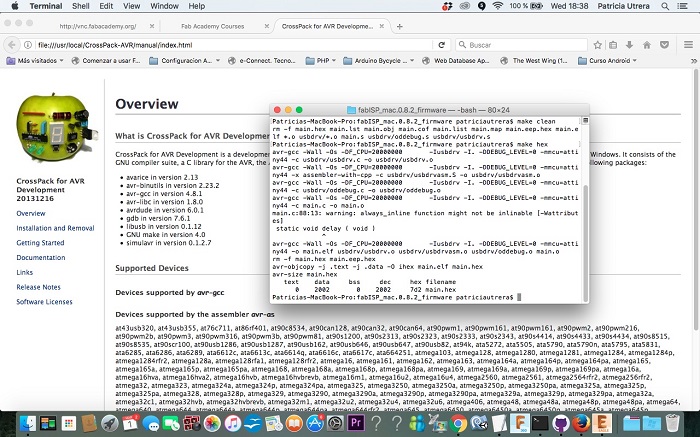
MAKE HEX
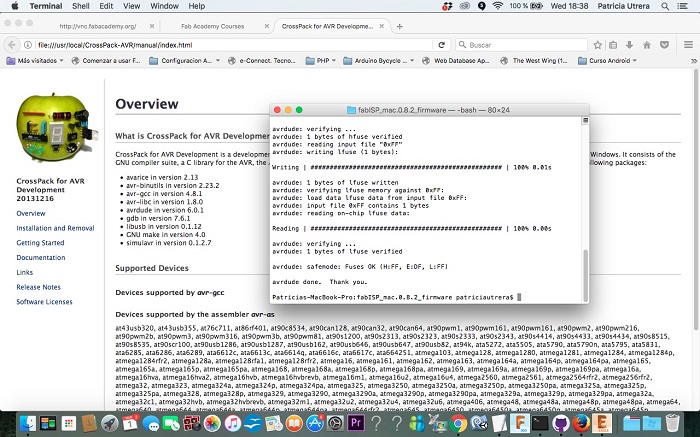
MAKE FUSE

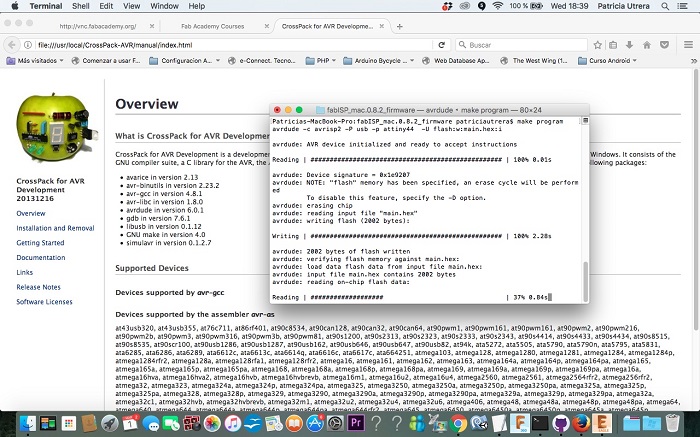
MAKE PROGRAM

Done! The board in programmed. t
Final Step is to check if the board is recognized by the computer
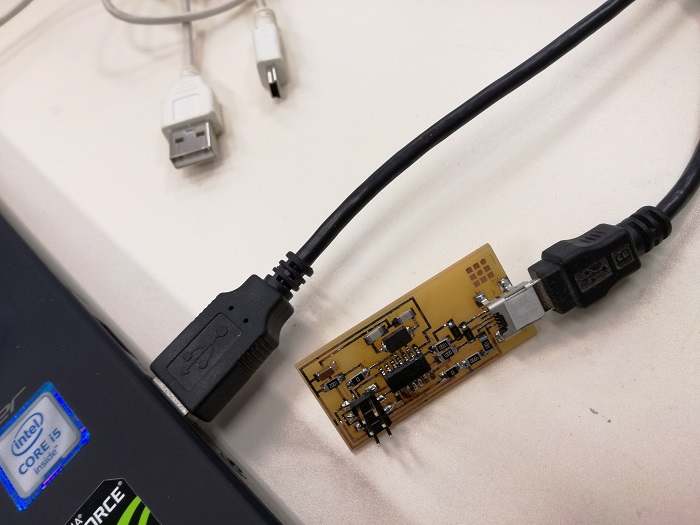
There is somethin wrong! Ggrrrr. The computer don't recognize the board. No explanation, everything is well connected, the cable is ok(i tried whit two diferent cables)Not even an unknown port notification. I'm going to repeat the hole assigment until it works, but time is running and I'll leave it to do it later.