WEEK|03
Computer Controlled Cutting
For this week's assignments, we had to design a press-fit object to be cutted on a laser cutter.
I also used the vinyl cutter to make a sticker for my final project.
Which softwares ?
I used a few software for this weeks assigment :
- FreeCAD
- Inkscape
- SVGNest (online tool)
- 123D Make
FreeCAD and inkscape Source files
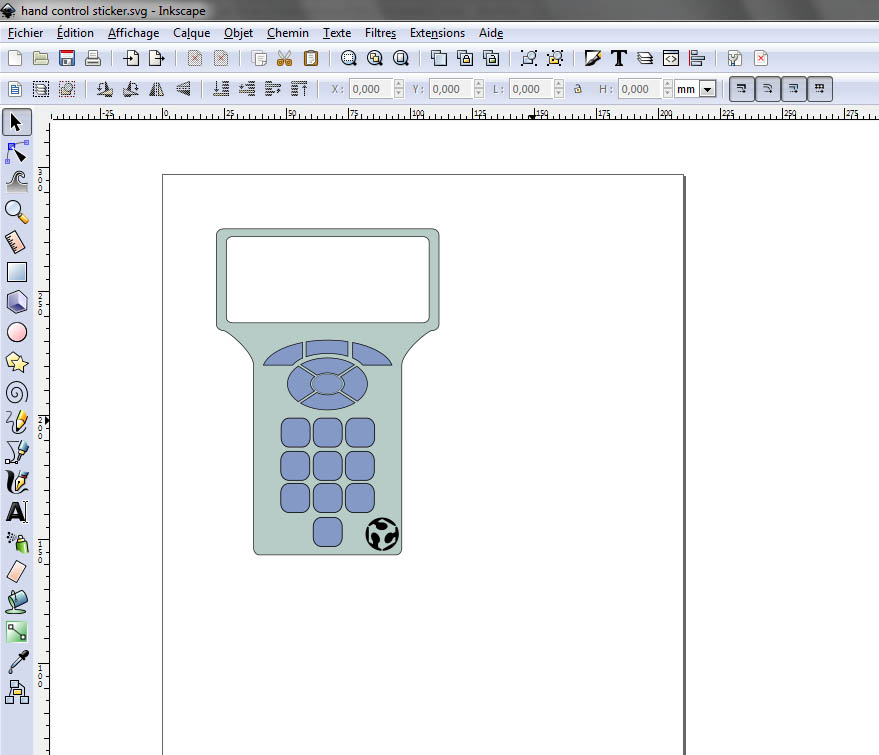
For now, I used inkscape to make the sticker wich will be pasted on the hand controller, based on commercial ones. This is obviously a Work In Progress, as I still don't exactly know the size the controller will have.
Did I do that elsewhere ?
Here is the assignements where I had to use these skills :
My work
With FreeCAD
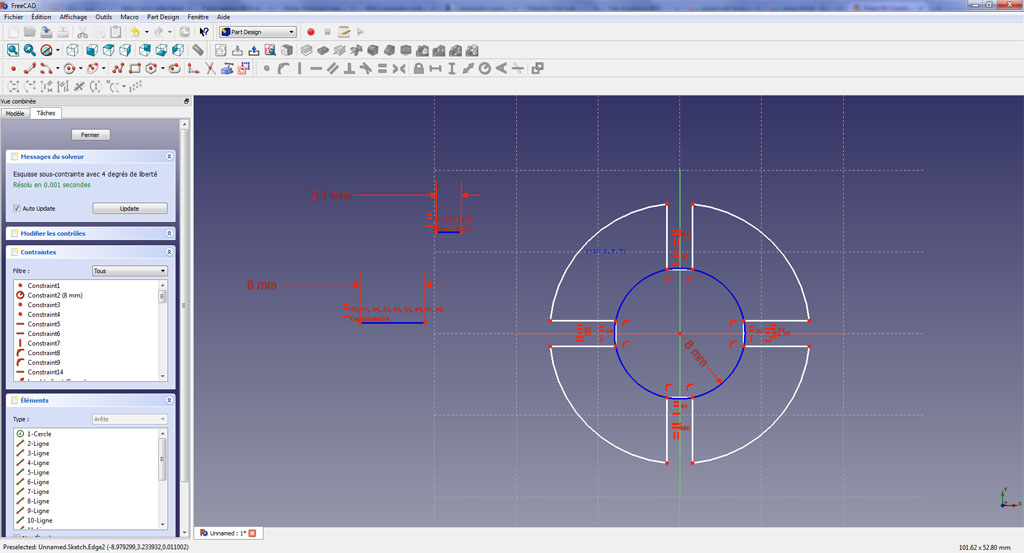 I used FreeCAD to make a 3D model of the press-fit kit, for two reasons :
- It is simple to use
- I can use contrains to define material thickness and cutout lenght (see screenshot)
This worked like a charm, but problems occured when I exported those parts in SVG format. But it seems that FreeCAD's "Flattened SVG" export function didn't generate the actual shape using lines, instead, he decomposes the shape with as many rectangles as needed, making the resulting file difficult to use with a cutter.
With Inkscape
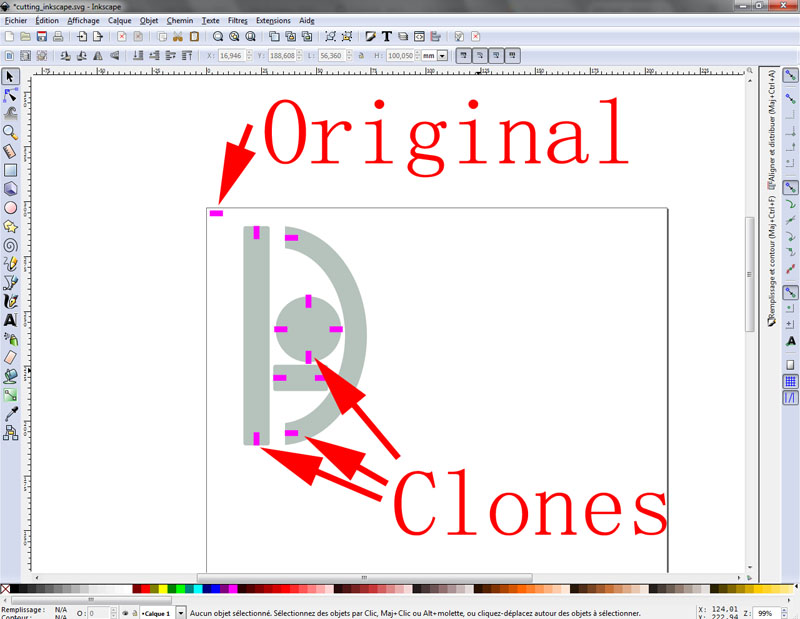
 So, I switched to inkscape to make the same press-fit, and it was at the same time easier and trickier.
Easier, because the cloning method is almost the same as the reference line I used in FreeCAD.
The only thing to take into account is the "descendance" of clones.
On my first trys, I used the second case (frenetically typing "ALT+D"), cloning the clone of another clone, etC... This makes the clone-chain behave eratically.
 I used basic shapes and clones to make my pressfit construction kit. However, I didn't take a great care on the conception itself, so, even if the parts are correctly sized, there isn't a very high number of possibilities.
Anyway, this can be done later, when avaible time won't be a problem :-)
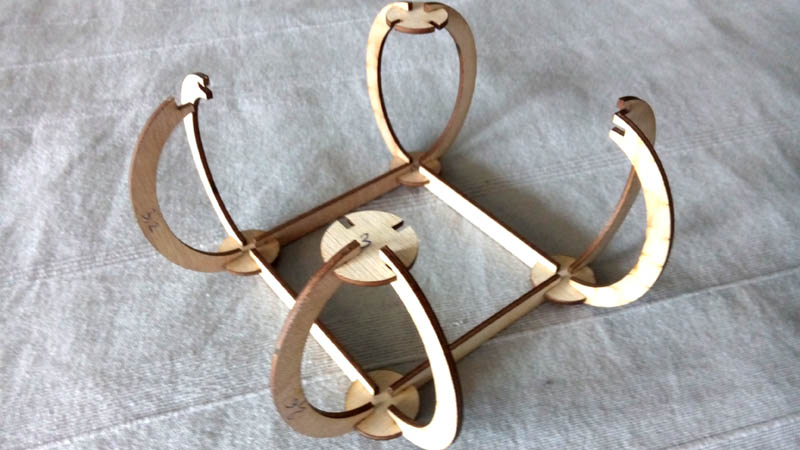 Here is the final result of my press-fit construction kit. As we can see, there isn't a lot of pieces, but some cool stuff can be made with it.
It's not obvious on the picture, but I used all of the parts I have made, even the ones with bad measurements (some of the slot-size are marked on the pieces).
Here is the final result of my press-fit construction kit. As we can see, there isn't a lot of pieces, but some cool stuff can be made with it.
It's not obvious on the picture, but I used all of the parts I have made, even the ones with bad measurements (some of the slot-size are marked on the pieces).
The slot sizes was a bit of a problem, because the plywood available in the fablab was of a poor quality. It was intended to be 3mm thick, but in fact, the thickness wasn't regular at all...
I had made four tries, with slot sizes varying from 3.2 to 2.6mm, and the last one was the good one, a bit too little, but still working.
For testing SVGNest, I changed the slot size to 2.65mm and this was perfect.
Testing SVGNest
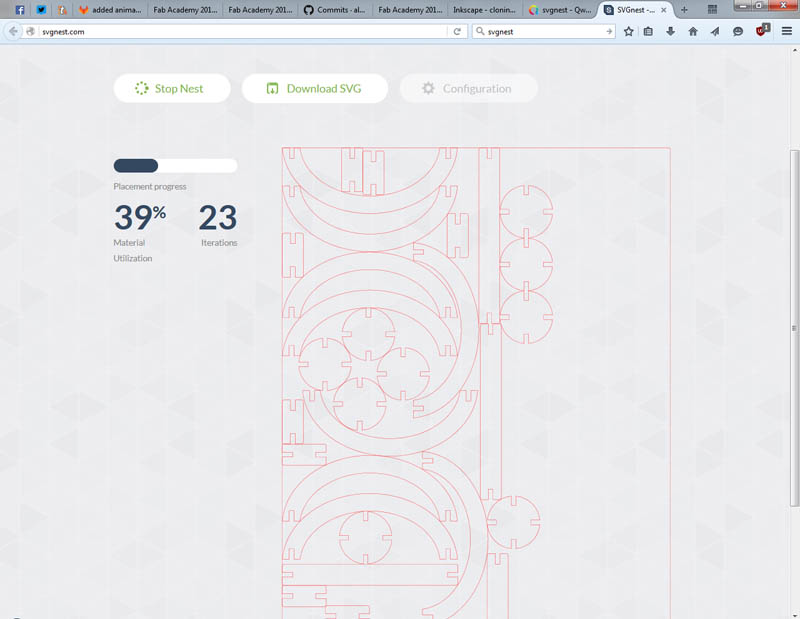 To make a high number of part, I decided to try SVGNest, a new open source tool, which takes a SVG as input (including a container box), and nest all the parts in the most compact way possible.
Even if the tool is very simple to use, it takes a lot of time on my netbook (Intel celeron single core) to compute the final result (almost half an hour for the first iteration with default settings).
Right now, I'm testing it on my desktop PC (i5 dual core) and it is at the 23rd iteration in less than 5 minutes. In this case, even if I let him run for few hundred iterations, I think the most compact nest I could obtain should be 39% of the container box I choosed.
The settings could dramatically increase the compute time. For exemple, I tried checking the "Explore concave" option, and each iteration ran in 1 or 2 minutes instead of a few seconds. Doing so, the parts a more intrically nested, but the material utilization is still at 39%, so there is no real gain in this case.
Note : As the fablab 3mm plywood stock was almost empty and they needed it for another workshop, I only cut three sets of pieces instead of the full plate.
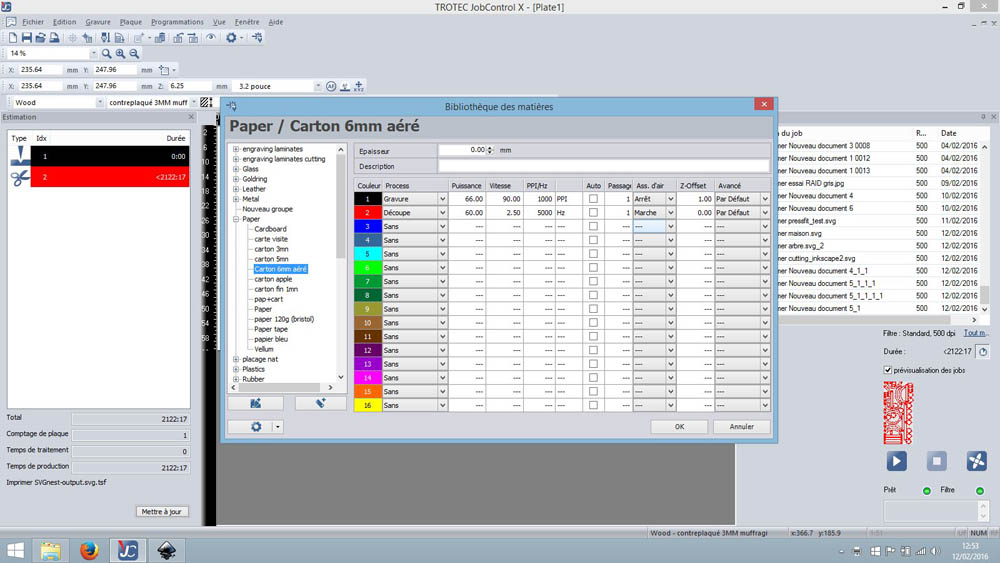
Here are the settings mostly used for the cutting.
For the plywood :
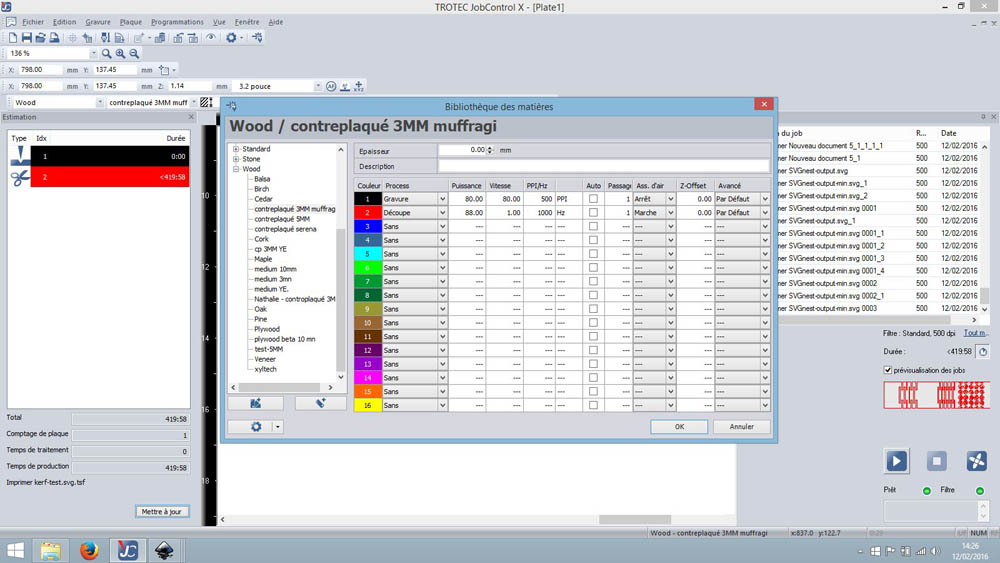 For the cardboard :
And here, the movie done when cutting in cardboard : And on the plywood :
One more thing
In addition, I wanted to make some test with kerf-cutting. The idea was to make a heart-shaped box for my girlfriend, for valentines day.
 I made three kerf at different sizes and shapes on a piece of junk plywood of 3mm, but the only good was the first one. The second was too thin and broked on the first bend, and the third... well, witch third ?
After this test, I wanted to try to make the heartbox.
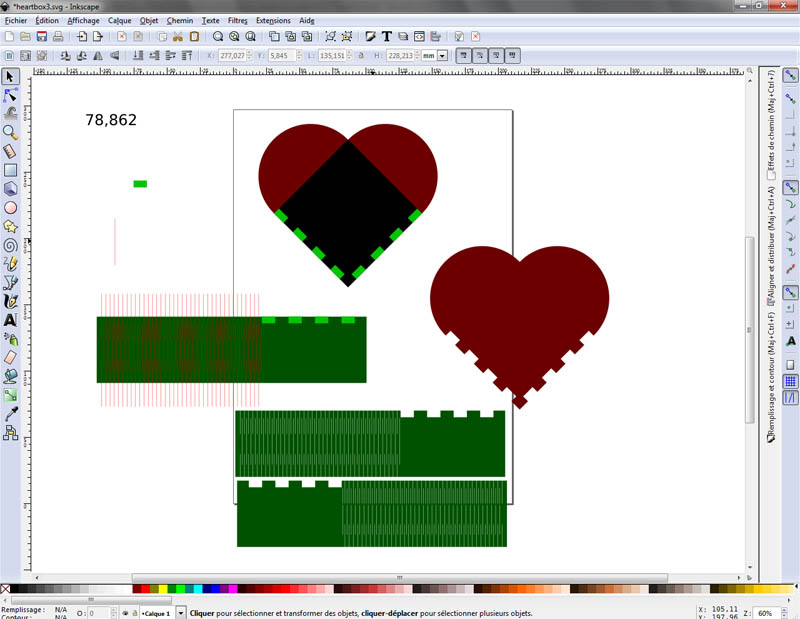
The heart shape was done with two interlacing circles and a rotated box, then united with the boolean "union".
I used the "Transform" tool to place the slots in a regular spacing along the straight edges of the heart and the sides
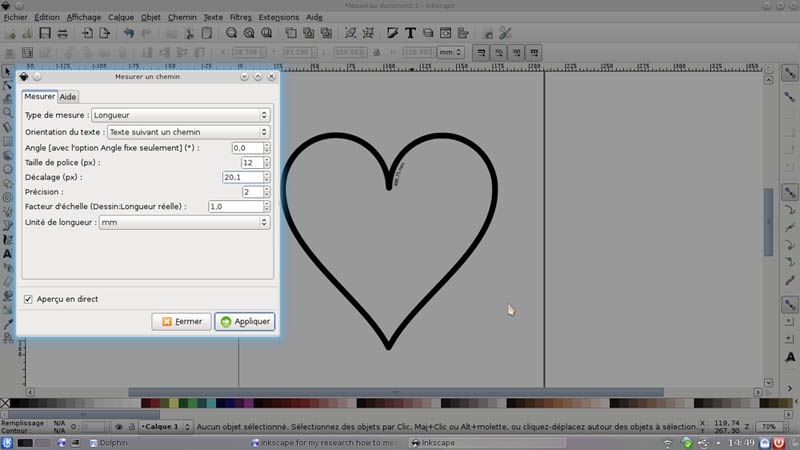
A cool tool in inkscape is the "Extension -> Visualize path -> Path lenght", witch gives the lenght of the perimeter of any shape. Dividing this lenght by two, and I get the lenght of the two sides witch would be joined.
 Once the shapes, slots and kerf properly placed, I copy/pasted the parts and joined/cutted them using boolean function.
I also mirrored one side.
Unfortunately, the cut failed. And I think I know exactly why :
- Plywood a bit too thick (5mm instead of 3)
- Kerf lines too narrow
3 x 2 = 6 passes on the almost same spot in a short lap of time, burning the wood away and so, making funny flames into the laser cutter.
I filmed this, but stopped a bit earlier the big mess came live :
Still with inkscape
While I was in the Fablab, and even if this is not a press-fit kit, I drawed a sticker to be placed on the hand controler for my final project. As stated above, I still don't know the right measures, so I just made a first version, which will be corrected later.
This allow me to have a design near enough to the final one.
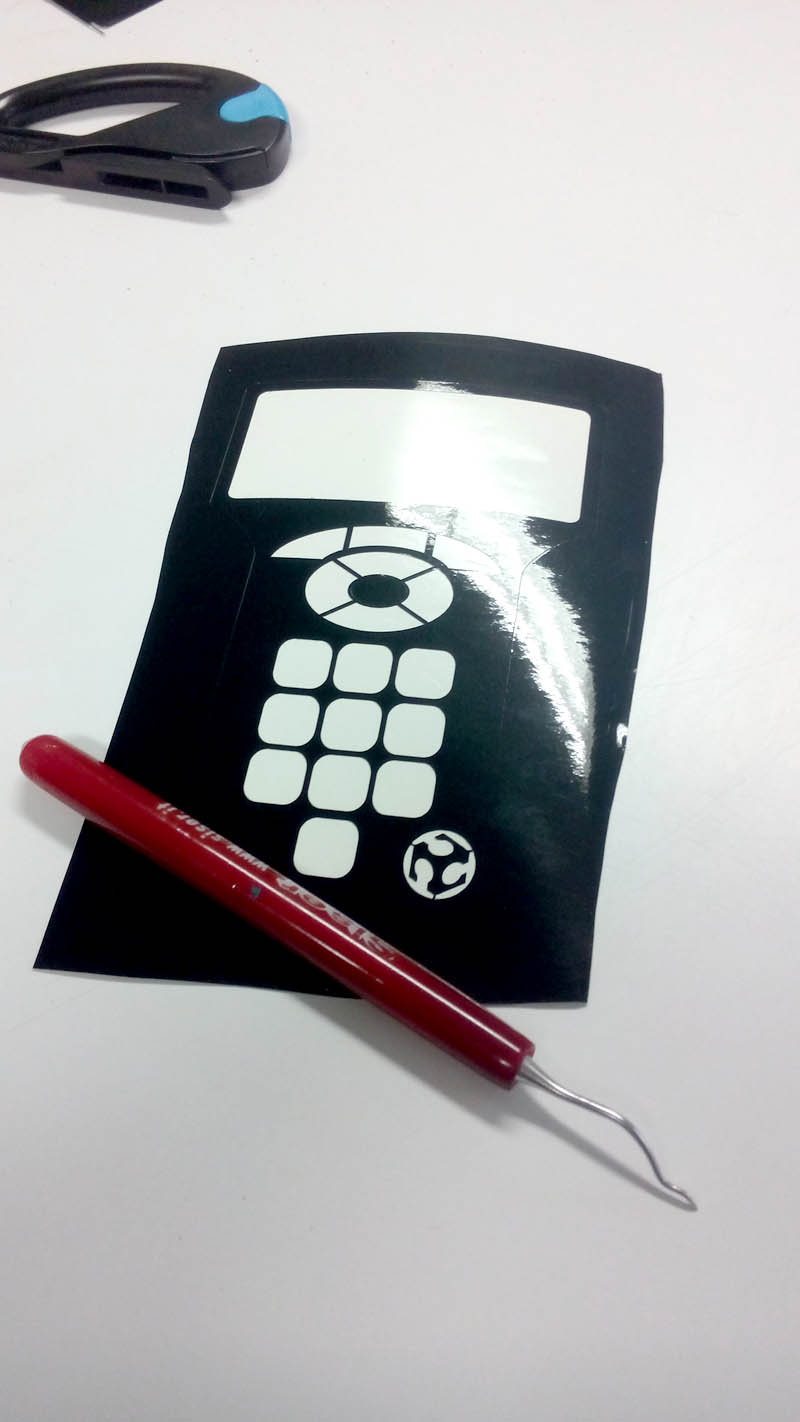
Once the sketch is done, I cutted it with the plotter on a black vinyl sheet
I'm naturally a distracted person, that's why we can see two overlaped cuts on the sheet :
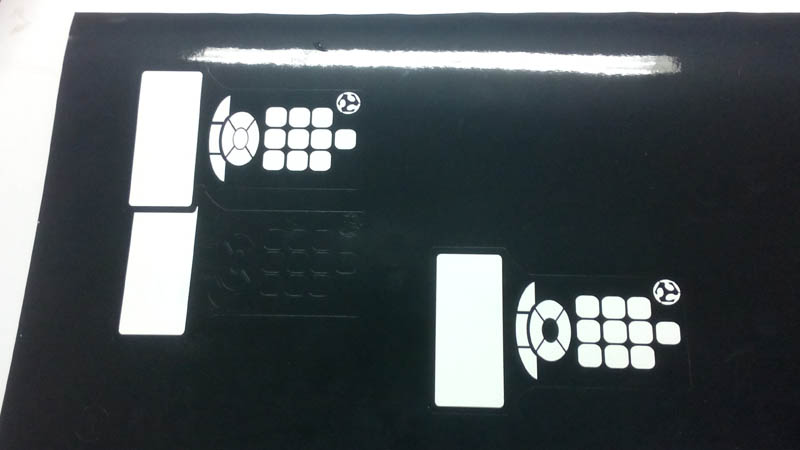
I don't know if this is due to inkscape, if it's a problem of the driver or if it is normal,
but if we cut a sketch which have both border and infill, the plotter will make two passes on the same exact path.
Depending on the force choosen and/or the support we are cutting, this could lead to some bad results. Fortunatly,
for this case, all went good.
I forgotted to film the plotter while he was cutting the sheet, I'll do that later
With 123D Make
Until this week, I have never used 123D Make, so this was a discover.
The idea was to use a MiniCut2D a polystyrène cutter to make a little desk (about 30cm long) with multiples compartiments.
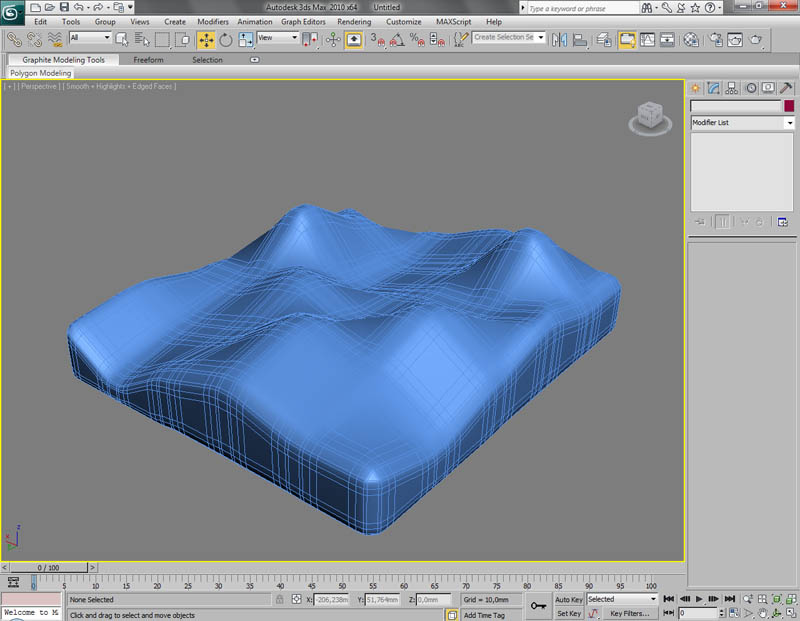
I have quickly made a model of some little desk using 3DSMax (but any other 3D tools will be OK). I know, this isn't really original, but the goal is to learn 123DMake, so I focused on that instead of the creativity.
I made a simple box at the right size (the MiniCut2D cutter can only handle sheets of 260x300mm max).
Then, I used the "Edit mesh" modifier to pull and push some vertex, trying to get a pleasant shape, before applying the "Meshsmooth" modifier, which will..... smooth the mesh, ahem!
Once the model was OK, I exported it as a STL file.
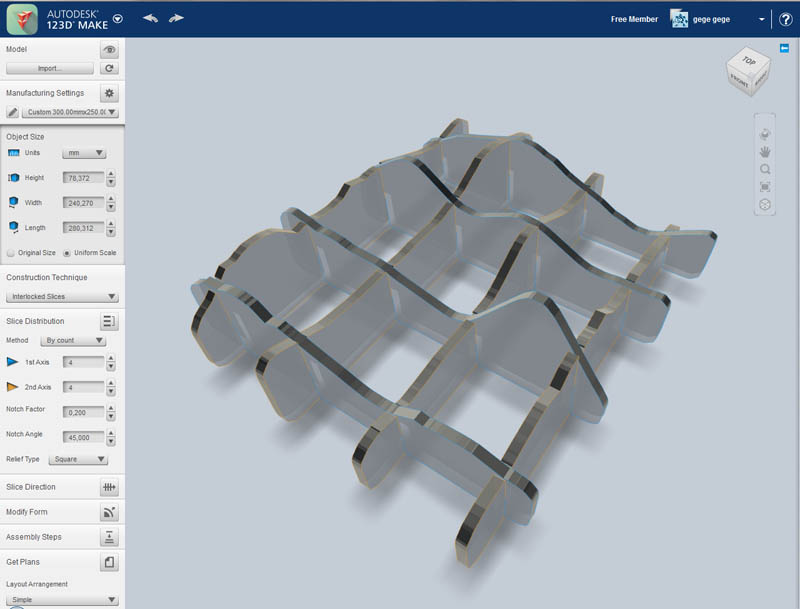
I fired up 123D Make and imported the STL, sets some parameters to fit my needs (customized sheet size and a 6mm thickness). As the MiniCut2D software already have an option to take in account the "tool" size, I didn't set it in 123D Make.
I choosed "Interlocked slices" as this was the more convenient way to make the desk. As this desk would be tiny, I've only added 4 slices on each axis, wich will make compartiments of about 36mm², barely enough for small figurines.
I also used a 0.2mm for notch factor, to make the assembly easier with Depron (extruded polystyrène).
I tried different random settings, to see their effect on the result, but nothing very interesting
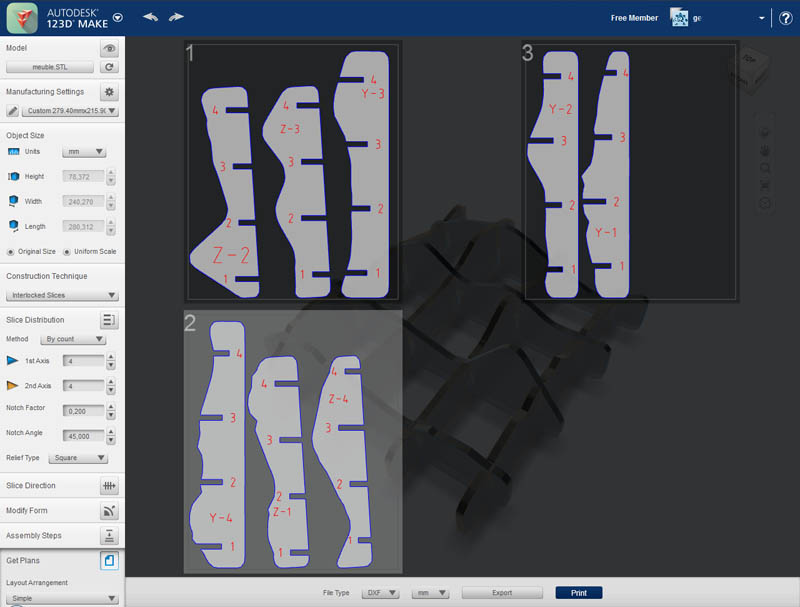
In fine, I exported the differents sheet as DXF file, witch you can find on the link below.
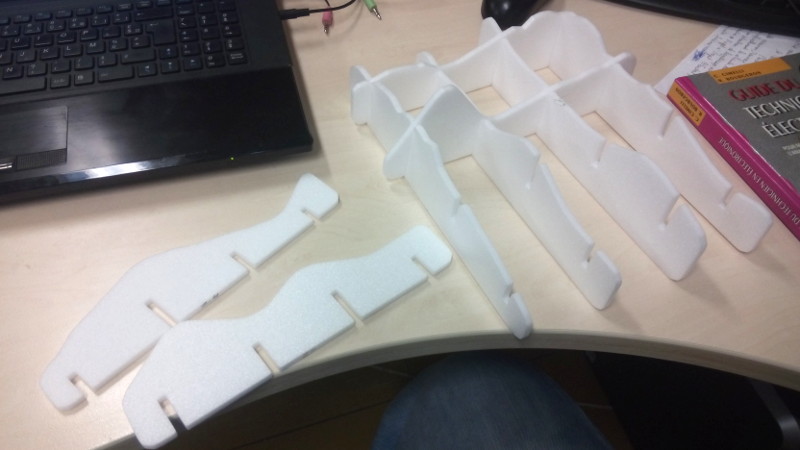
Here is the desk while cutting with the MiniCut2D :
Here's, the work in progress :
And finally :
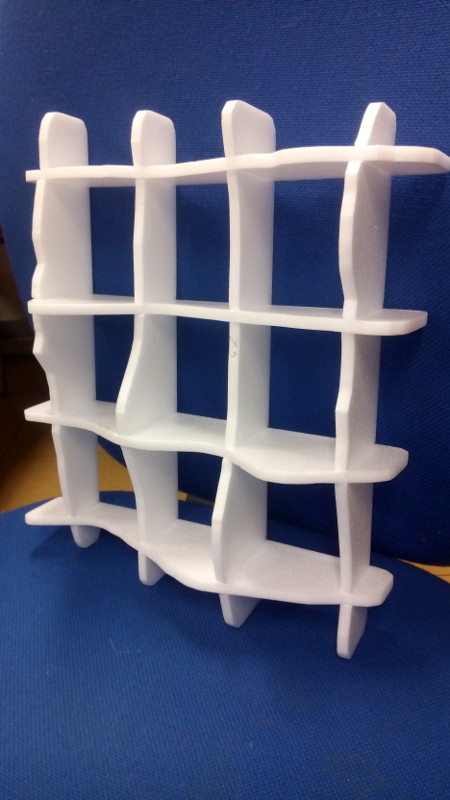
Slot size was perfect, the joins are very good, no jiggle
Of course, this was more of a proof of concept, as this is not very usable "as is".
This allowed me to try 123DMake, witch I already heard about, but never give a try. It's a very good piece of software, simple to use and with a pretty good ergonomy.
My goal, right now, is to find an open source alternative :-)
In the past
A few months ago, when I have been teached about how to operate the laser cutter when he was shipped, I tried to engrave my Fairphone back cover with some Gallifreyan words.
The results was exactly what I wanted
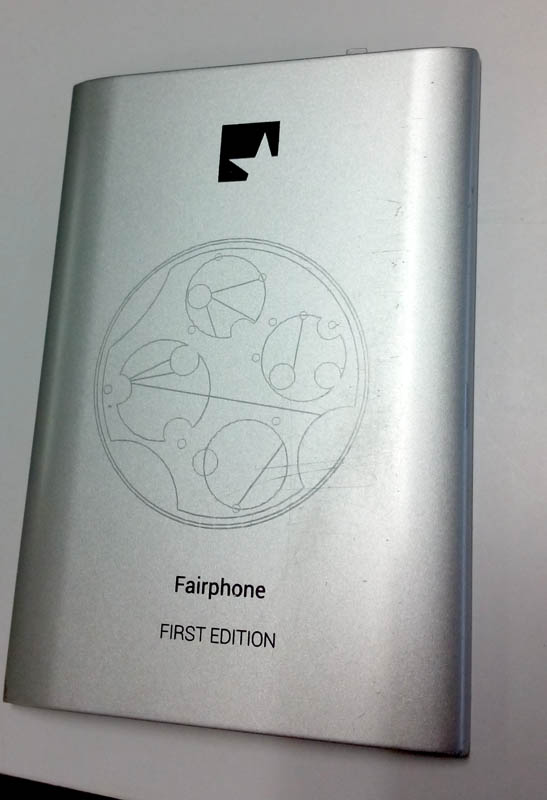
This wasn't done with a raster engraving, but with vector engraving.
The idea is to draw like if we want to cut the part (usually with pure red borders). Once in the laser cutter controller, modify the cut settings to be less powerful : less power for the laser and more speed. Vector engraving can save a lot of time.
Troubles
As always, I faced some problems, fortunatly, this wasn't very blocking ones
First, FreeCAD SVG's export isn't really convenient, as all the lines of the sketch are exported as closed shapes, placed head-to-head, making more time-consuming further processing...
I'm still looking how to workaround this.
The clone tool in inkscape is great, but has some weird behaviours we need to understand or to deal with (like the chain-cloning)
With the vinyl cutter, the orientation of the cut is important. We need to check the "Rotate 90°" in the print setting, if we don't want the vinyl cutter to unroll a lot of material before begining the cut.
The problem with the laser-cutter when attempting to cut the heart-shaped box is something relatively trivial, I just need more time to do more tests
In fact, the more problematic thing is the theory of relativity. It's totally true that Time seems to go faster as we do something we love !
Ressources
Here are the website I've used when needed :
- For the inkscape clone tool
- FabAcademy archives to get some inspiration
- Fablab of Carrefour² Numérique of Paris to get some infos on FreeCAD's SVG export