WEEK|07
Computer-Controlled Machining
For this week's assignment, we had to "make something bigger" using Computer controlled machine.
Software used
- PolyBoard , a desk-making software (free version, no export available...)
- 3DSMax
- Inkscape
- vCarve Pro
Source
Zip fileMy idea
My idea for this week was to make a desk, intended to be placed under my already existing computer desk. The goal is to add some more storage space for all my stuff to be hidden to.
Unfortunatly, due to a very busy week at work, I got almost no time to work on a design, and no time at all to go to the Fablab. I will be late to finish this assignement.
My workflow
For this week, I wanted to test a software designed to make desks, PolyBoard. This is apparently a great software, I just have to enter the desk type and dimensions, and continue with the remaining boxes, doors and so.
I left this software when I realized that the free version doesn't allow to export the design file (through saving the project in their proprietary format is allowed).
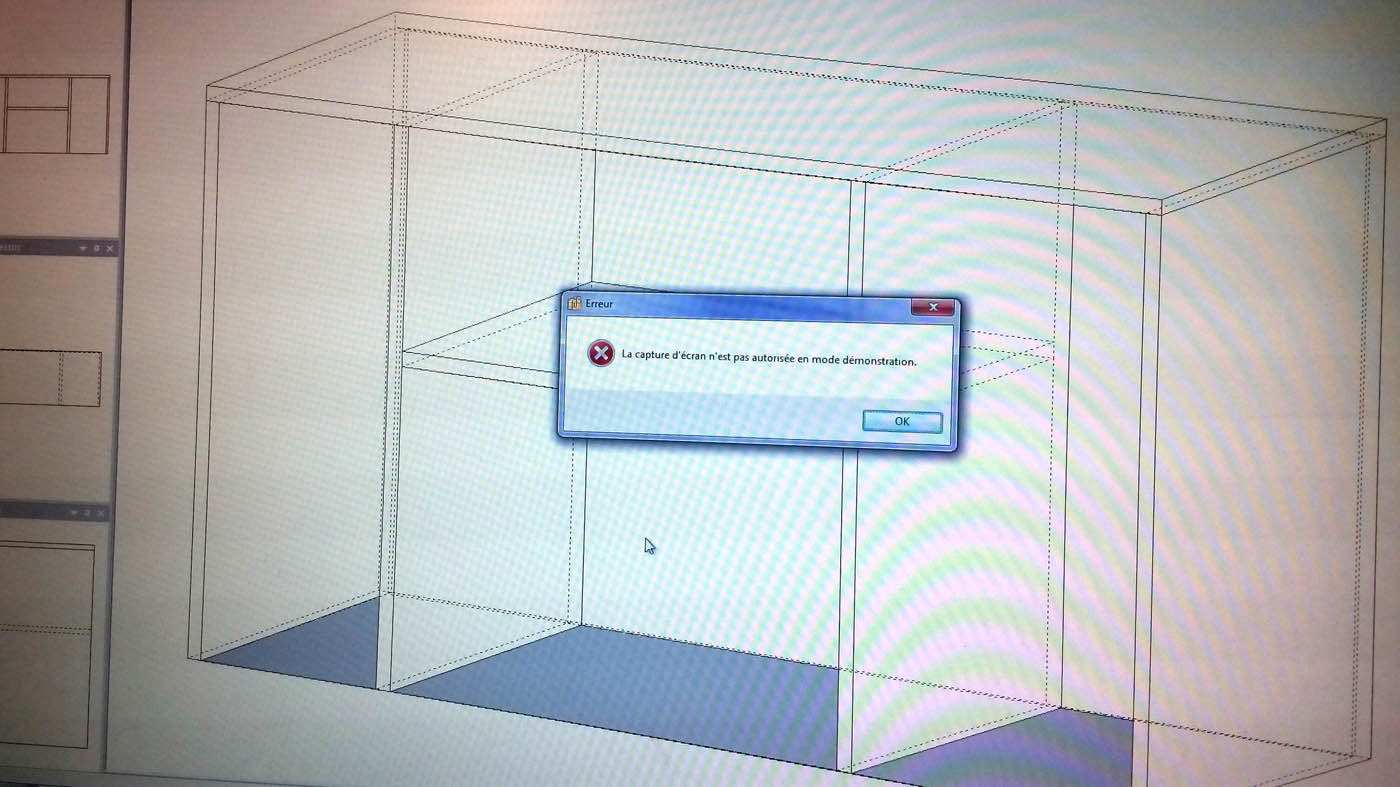
To be totally honest, I removed this program from my PC when I realized a few days later that the free version was also blocking the print-screen function (even if he wasn't the active window).
I really hate this king of behaviour in a software.
So, I goes back to two of my favorites tools, 3DSMax and Inkscape.
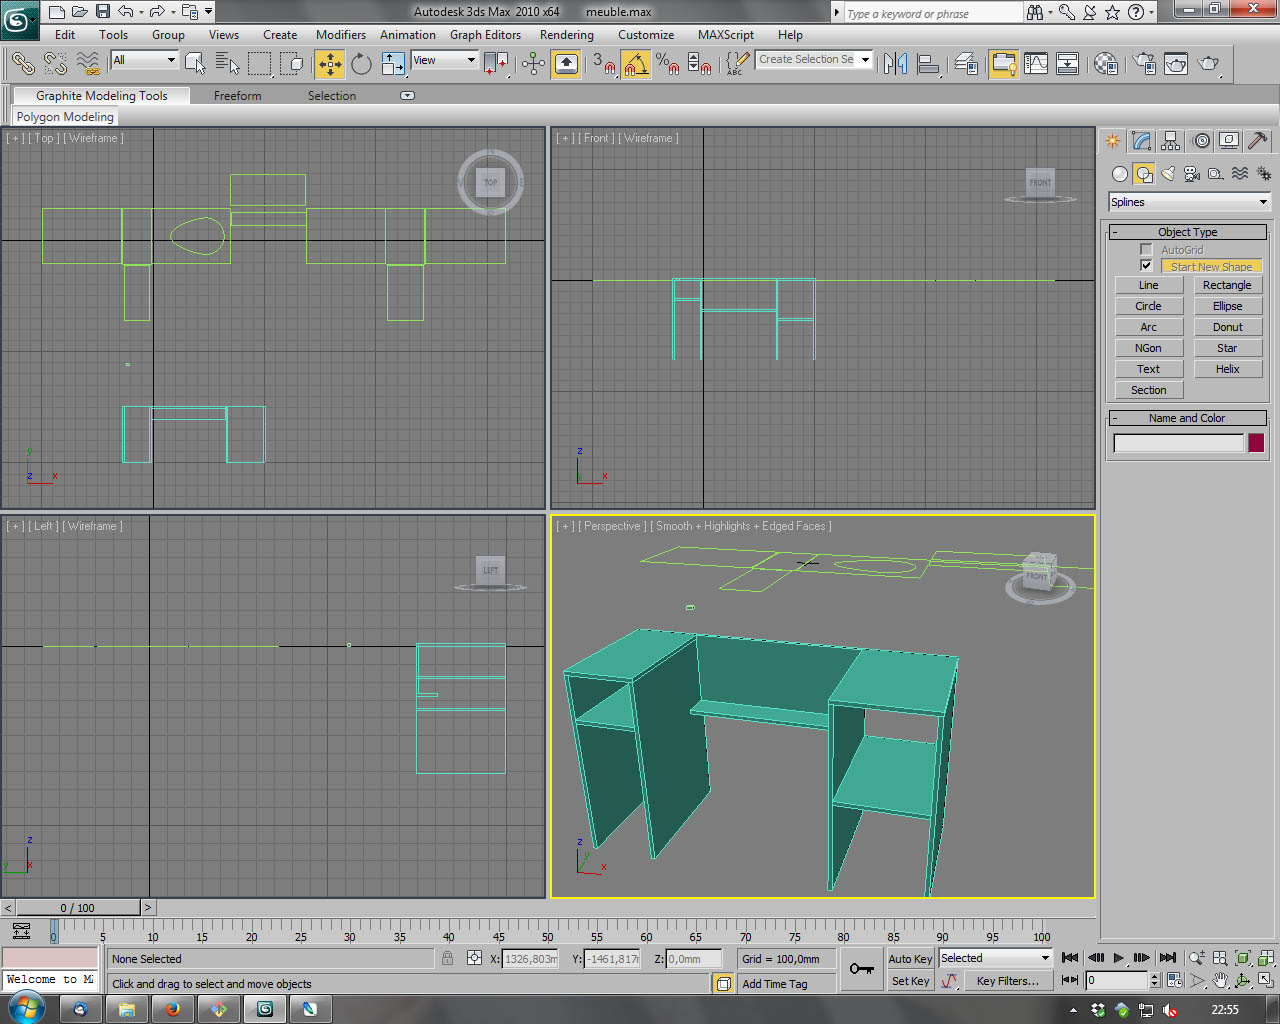
I used 3DSMax to make a 3D model of the desk, this wasn't strictly necessary but this helped me to better visualize the result and more conveniently check for errors.
I used 2D primitives (mainly rectangles), laying down all plates for all part of the desk. I had measured my desk before, and I added an inner offset of 1cm, so the bounding box of my under-desk would be about 128 x 71 x 50 cm
The first box is where my computer tower will be, the second box is where my stuff will be, and the thing between the two box is where my other stuff will be stored. I have a lot of stuff
I also have some long legs, so the middle-part is not too deep, so I will not hurt my knees on it every time
After all the plates was created, I extruded all them with 15mm height (the thickness of my plywood) and began to place them together to form my final under-desk.
For this task, I'd used the "align" tool heavily.
As soon as the design seemed OK for me, I switched to inkscape to add some joins. I could have done this with 3DSMax, but it was a bit tricky, and I didn't really need the 3rd dimension.
Unfortunatly, exporting in DXF or AI from 3DSMax didn't give any good results (inkscape import hungs everytime), So I had to redraw all the plates in inkscape. Not really a problem but a little loss of my precious time.
I did the same work as in the week 3 : using clone and boolean operations to make all the plates, with tabs and holes.
<img src="img/week07-inkscape.jpg" class="img" alt="">Testing the design
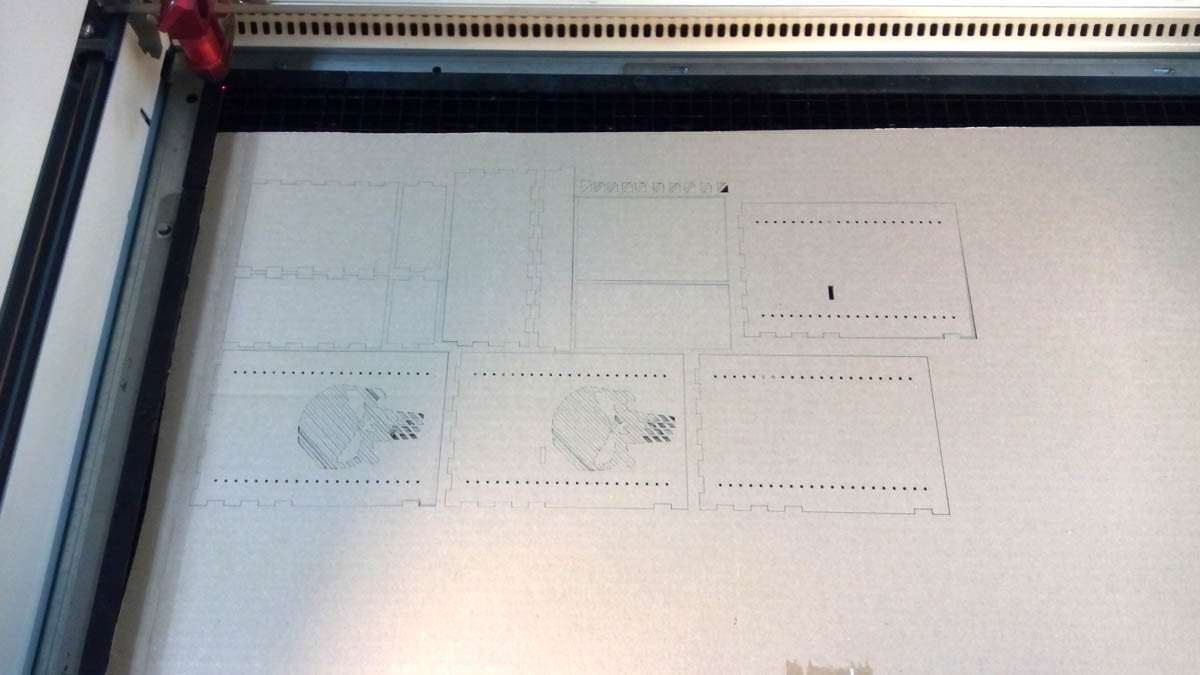
To avoid wasting a full wood plate, I cutted this desk in a 3mm thick cardboard with the laser cutter. Reducing the design by 50% did the trick, as it was aimed for a 15mm thick plywood.
Unfortunatly, I forgot to take pictures of the whole assembly (I had the hand full of glue at this time)
Anyway, this allowed me to spot a misplacement of one hole, witch was 5cm too far so the corresponding tab would not insert. Good catch.
Unfortunatly, there was another error witch I didn't spot... More on that later.
So, I goes back in Inkscape, corrected the mistake, exported again and I was ready to play with the shopbot !
vCarve
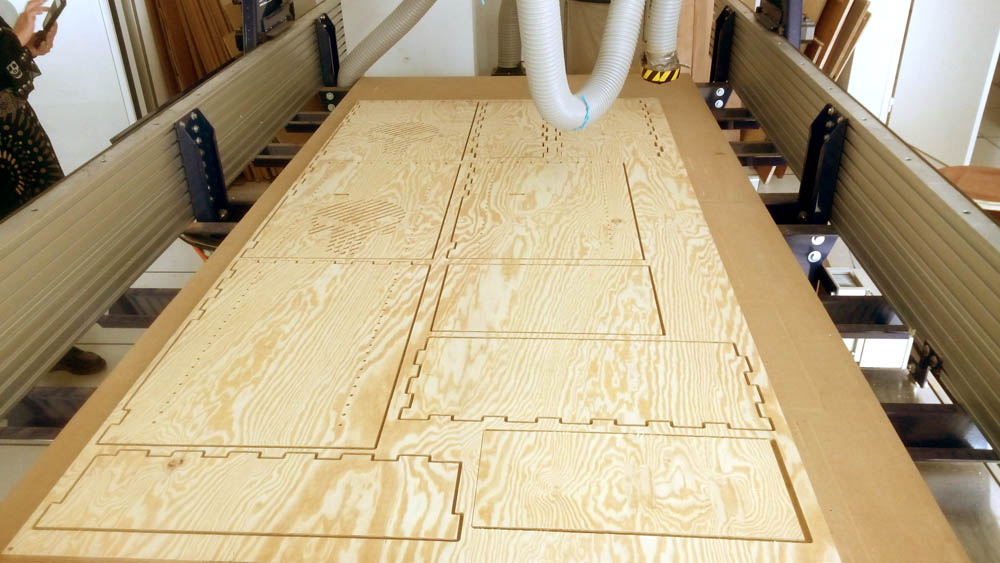
Using vCarve, I first entered the size of the plywood sheet : 2250 x 1250 x 15mm and imported the design
vCarve didn't support the SVG, the DXF was a bit crappy (some lines was considered as full box), so I ended up exporting my design in PDF and then, import went fine.
And then, I did some placement test on the sheet of wood, trying to be not too close of the corners because the plywood was fastened with screws.
Once the placement was OK, I selected all the holes and cuts in my design, clicked "Create cut" and entered all the needed informations :
- Cut depth (With a bit of overhead : 15.1mm)
- Tool
- Number of passes (4 for this case, maybe 3 was OK too)
- Cut vectors and direction
- No tabs
- 1/4" Down-cut (57-910) cutting tool
- Spindle speed set at 11000 r/min
- Feedrate : 10mm/s
Then, I selected only the edges, and again, creating cuts but this time, with tabs added all around the cut (3mm thick, 10mm long, one tab every 600mm)
There is some triangles in my design, witch would be used as joins for some parts. To save some time, I created another edge cut with exactly the same settings, but only with thoses pieces. Because at this time, I still didn't know if I would use them.
In fact, I didn't cut them, so it saves a few tenth of minutes.
Cut'em all !
Once the work in vCarve Pro was done, I saved it and goes to the control software of the Shopbot to do all the preparation (Zero-Z on the base, Zero-XY, etc...).
Next time, I'll do this first, so as soon as I finished in vCarve, I could just run the job.
So, when the preparation was OK, I exported the toolpath from vCarve using the "Save and send to machine" button (don't know exactly the name in english).
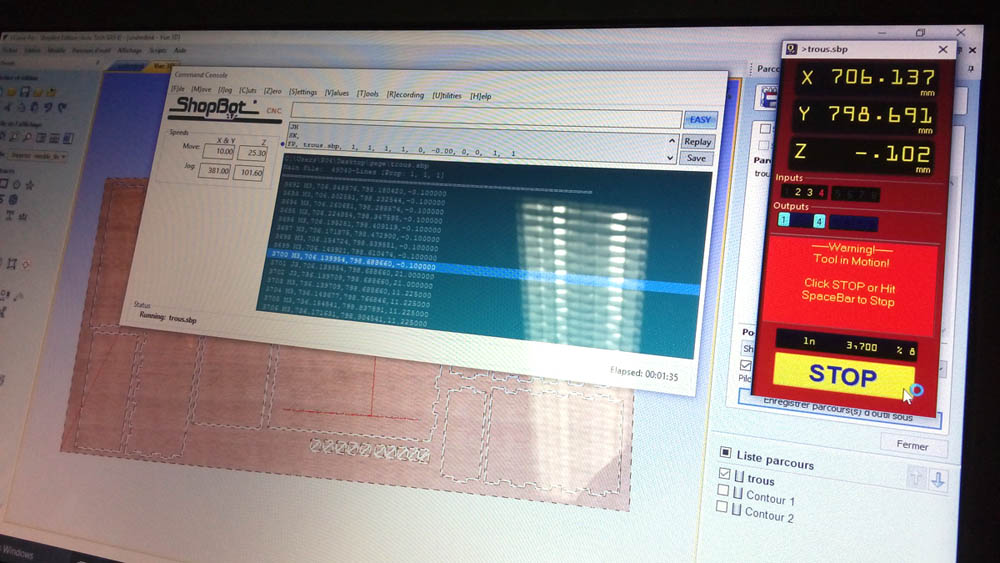
For safety sake, I always do a "dry run" test first with "3D-Offset", so the head will follow the path on X/Y but Z will be constant, far enough from the base. This allow me to see if all is coherent and if the endmill won't hit a screw...
As soon as I'm sure that all is OK, I restart the job (the "holes" job first), this time with no offset.
The job finished almost two hours later, at ~7.00pm.
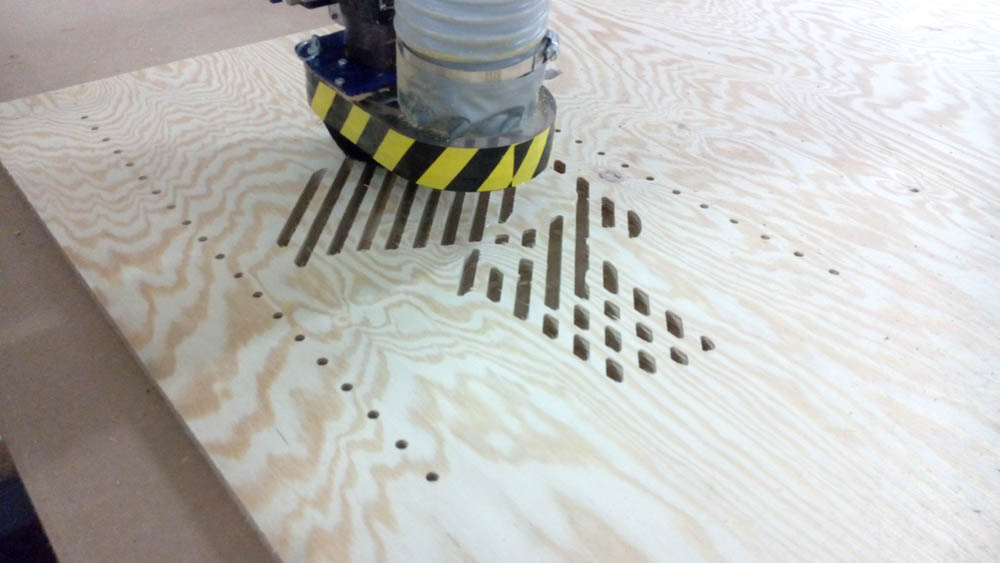
During this job, I realized that 0.1mm of added depth in vCarve wasn't enough, and the bottom layer of plywood wasn't always cleanly cutted (the sheet was a bit bend).
A nice functionality on the ShopBot's control software is the "nudging" capability. If we stop the job, the software shows a dialog where we can choose what we wish to do :
- Stop the job
- Resume the job
- "Nudge"
- I don't remember
Then, I launched the edge cut job (again, with 3D-Offset first to do a check). Well, running a long job at 7pm is not a great idea... More on that later.
Cleaning the mess
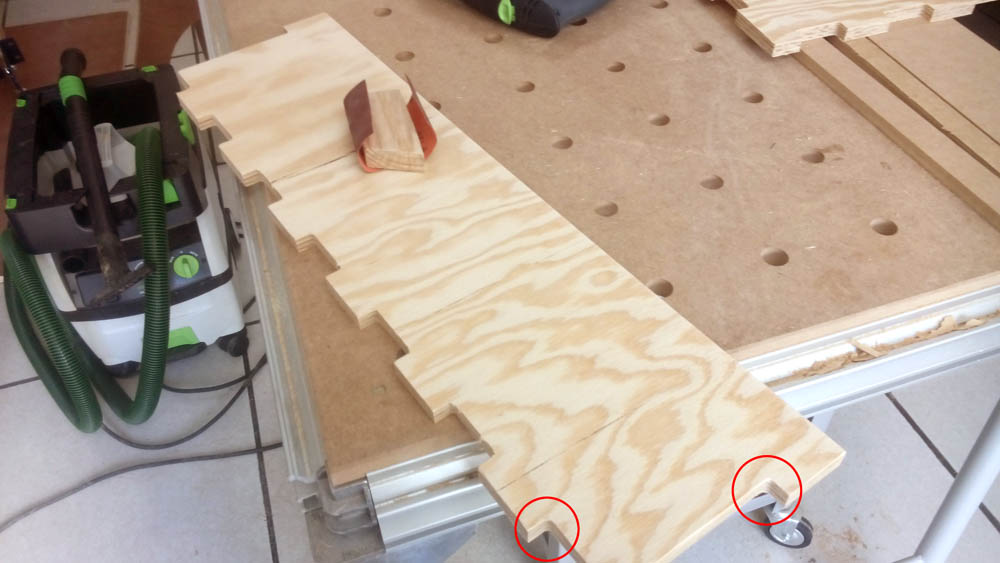
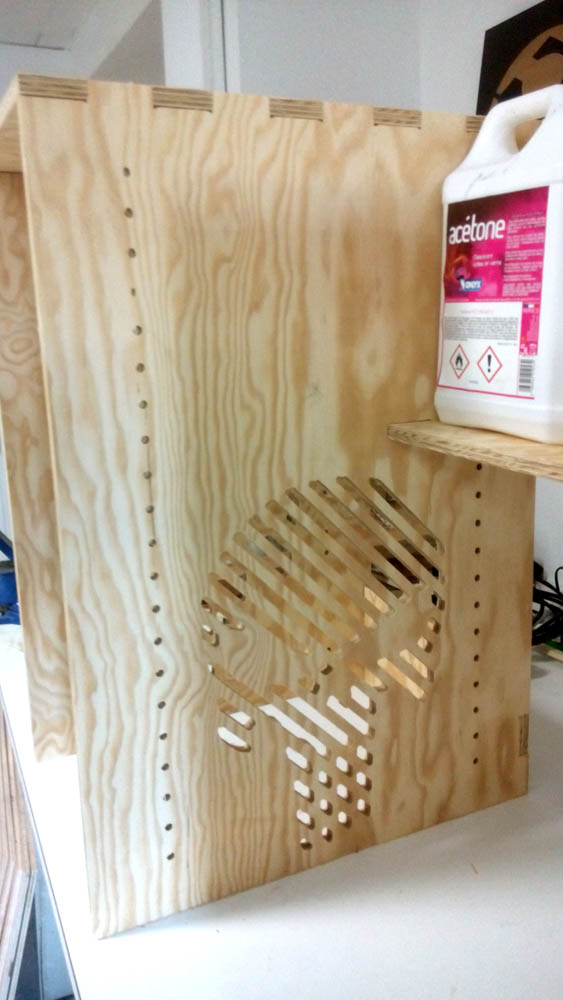
Once the job done, all the part was good, but with a lot of little chunks of wood all around the cuts.
 So, this is where the longest part of this week's assignment began :-)
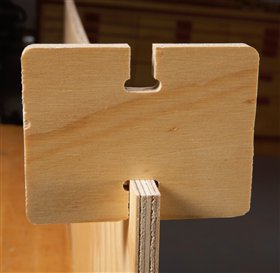
I took all parts one by one, sanded the edges with fine sandpaper to take off all the chunks, and used the jigsaw to straightening the rounded corners the shopbot has made.
This takes me almost three hours to clean and straighten all of this. Next time, I will certainly use another join type witch needs less post-processing, like T-Bone notch.
Once this process is done, I assembled the desk "as is" to see if all was OK, and it was !
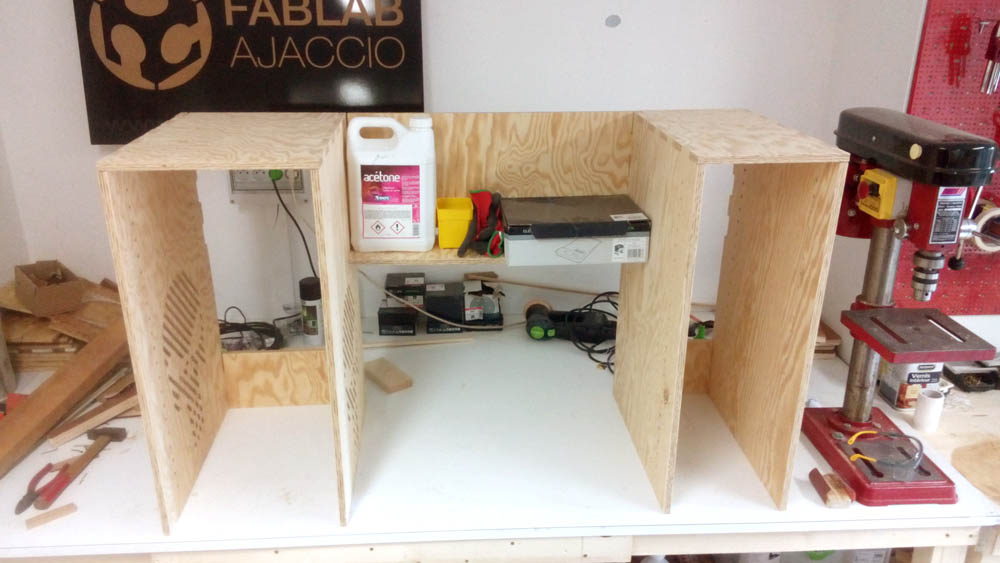
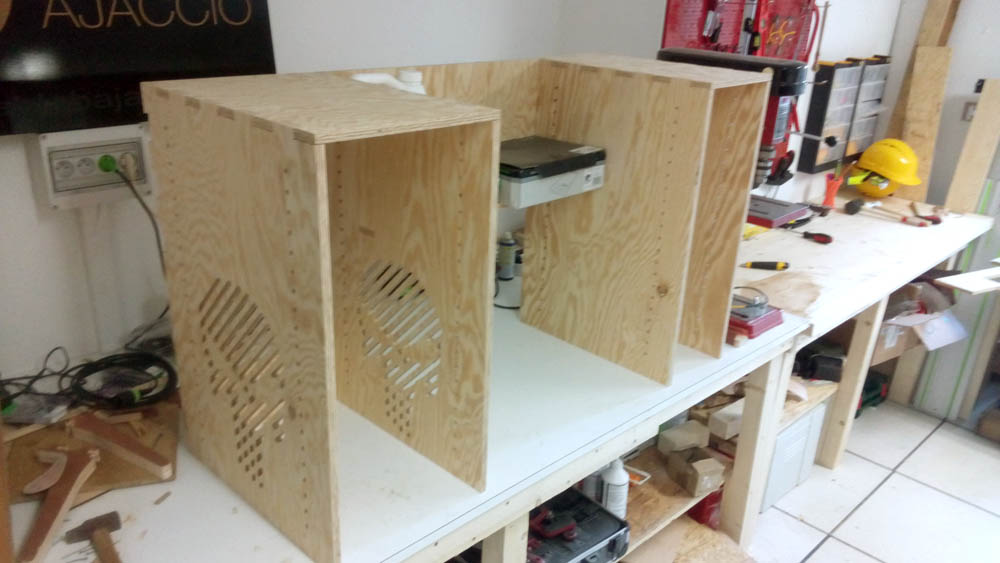
Of course, this still needs to be fastened. I will do this in the future, but not on my "lab time", because once assembled, the desk won't enter in my car to take it to my house. I don't know when I will have the time to do the final assembly, so we can consider those last pictures as the "hero shots" of this desk
My mistakes
Like in all assignement, I learn from my mistakes, and this week, I made two of them.
Size error
As stated above, I made a part size smaller than wanted (about 15mm shorter). Unfortunately, because of the scale of the cardboard test and the irregularity of the sheet, I didn't see this until the "pre-final" assembly.
I have two way of fixing this :
- Lengthen the piece of about 15mm
- Move 15mm up two joints holes of the adjacent piece
- Add some piece of wood to hide the mess
The second way would use more wood, and force me to clean again two of the most annoying pieces, and the last one will be a ugly hack.
Timing error
I did the first part (inner cuts) in the end of the afternoon, at ~4pm. The job finished around the 7pm.
At this time, I ran the second job (edge cuts), thinking that it will be faster because of simpler shape. Que nenni.
At 8:45pm, the job wasn't at 50%, and would finish at ~11pm.
One thing to know is that the Fablab is located in an unused room of a bank, and security level is very hight. One thing I didn't know is that the alarm is automatically turned on at 9pm (even if there is still someone inside), and the fabmanager needs to call the security center every 5 minutes to disengage the alarm. Pretty annoying, huh ?
So, we had two choices :
- Leaving the shopbot (and his vacuum) running until the end, and then all night long
- Pausing the job, turn off the vacuum, and hope that the job would resume without problem the next morning.
Fortunatly, the next morning, the job was resumed without problem.