Composites
Tasks:
Read the material safety data sheet (MSDS) and technical data sheet (TDS) for the resins that you're using
Design and make a 3D mould (~ft2 /30x30cm), and produce a fibre composite part in it
To be honest, this week assigment was something really new for me. I am not sure if I knew what a composite is :D
It was not new in terms of skills, but in term of idea, in terms of posibilities.
I was not quite sure what I wanted to do, and I came up with the idea to do something which would be hard or inefficient to do using other techniques. I decided to make a waterproof container!
I am planing to use this container for the Final Project, at least as a prototype
The design tool that I will be using for this assigment is  , as always, my lovely CAD!
I started the design by drawing a block, with the dimensions of the future container, and also the fog maker, which I was planning to place inside the container

Next, I extruded the inside of the container, and left offsets of 4mm, which will be the wall thicknes. Using the align tool, I placed the fogger inside the container

With the press/pull command, I placed the fogger inside the bottom of the container in a way that the water will always be on top of the fogger. I did that because the water should always be above the fogger in order to produce mist, so all the water below the fogger was not used, basically wasted. If I level the fogger with the bottom of the container, I make the water usage more efficient

And thats it! Very simple design, simple shapes, lets see how the mill will go!
I wanted to use the CAM processor of the Fusion 360, for that I had to install a cloud Post Processor suitable for the CNC available in our FabLab
How to install the Cloud Post Processor is explained in details HERE
Fusion 360 EasyWorker post processor: HERE
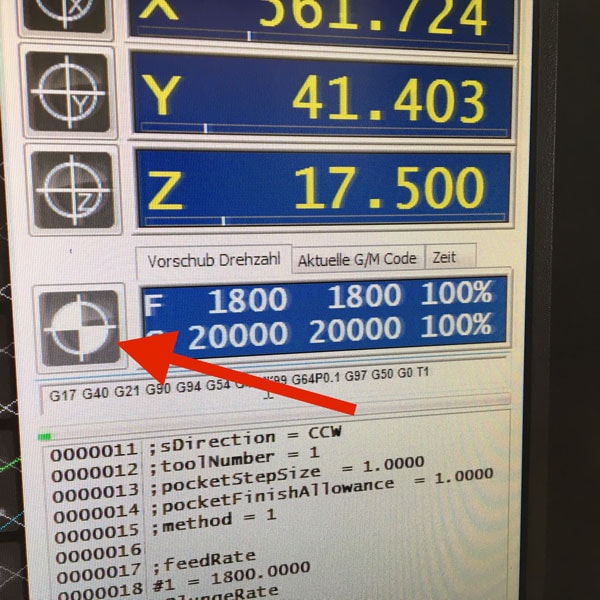
In the CAM process, first thing which I do is make a new Setup and choose the directions of the X, Y, and Z axis

And also set up the parameters of the stock box

Next I make an Adaptive clearing, which is the rough cut, and here I have to introduce in the library a new tool. After I measured the tool parameters of the CNC machine, I introduced them in the library:

A very important parameter is the Holder. In the Moulding & Casting week, I used Roland machine, which did not have any specific holder, the dimensions of that one can be neglegible
Here is another story. After I measure the dimensions of the holder, I add a new holder, and place it in the library

These are the dimensions of the EasyWorker holders:

Another important parameter is the Tool Number. In the post process of the tool, I have to select the tool number corresponding to the tool number of the machine. In my case, it is 1

Here are the parameters which I used:


In the Post Process I have to specify the CNC machine which I am using, in my case I upload the downloaded folder with the cloud post processor. Choose the right settings, and generate the .GCode

Here we go! THE BEAST. This is the machine which I am going to use for the milling process e(sign: Easy Worker MasterPro 2513.

It’s working area is 2600 x 1400 x 300mm and it comes with a vacuum table. We primarily use it for wood milling but with its HSD Spindel (3.9KW; 24.000U/min) it is also capable to mill metals easily.
The material which I will be using is Foam
At first, I place the foam on a wood sheet, and then on the CNC bed, and after I aligned it, switch on the vacuum to fix the piece
To set the X,Y and Z Zero Positions, I home the machine by pressing the home button in the software (or on the remote control).

After the milling is done, this is how the container looks:

As you can notice, the container does not have the hole in the middle. I had to stop the job at this stage because the depth of the container was more than the tool length. If I continued the job, a collision would happen. I decided to leave it as it is
Now, it's time for the sticky part!
The resin which I am using is this one (DataSheet)

As a composite material I used Glass Fiber
First, I used a thin layer of plastic membrane in order to remove my mould after the resin gets hard. After I mixed the resin with the hardener, I started applying the mixture on the glass fiber which I placed on the mold using a brush
After I put about 3 layers, this is how it looks:

I left it for about 18h, and after I came overnight, it was already dry and hard as F*CK :D
When I removed the mould, I got a beautiful waterproof container

Because I am not satisfied with the result, I decided to try a different approach! I will try to do the positive mould, basically the opposite of what I have done.
I designed a new sketch in 2D, I used  to edit the design before importing it into the machine CAM software.

The idea is to cut several pieces of10mm wood, I cut 7 pieces, and glue them together to get a 3D shape at the end!
I cut 7 identical pieces, and aligned them using the reference holes! I also cut a big hole in the middle of 5 bottom pieces, in order to place the air pump inside, and easily remove the cast later.

After I glued all the pieces together, and fixed them, this is how it looks:

While waiting for the glue to dry out, I prepared a little plastic "thing" (do not know how to call it :D) for the pump. The idea is to be able to screw it on my mould, and remove it whenever I want!

When the pieces are glued together, this is how it looks:


And the final mould with the screwed plasting thing on top!

Let's start with the dirty part!)
First, I prepare the environment, and place all the tools which I need next to me. Safety first!!!

Next, I use plastic foil to cover my mould, and spray it with silicon, in order to remove later the composite part easier

I prepared a container for the resin in advance! It is just a cut piece of plastic bottle, but it works :))) I tare the container on the weighting scale, and following the ratio of 100 : 30 described in the datasheet, I place 100g of resin

And then I place 30g of Hardener and mix everything together

As the main composite materials I am using Paper & Jute (natural cloth) . I used two layers of each!

The process is pretty easy! I place one layer of material, and fill it with resin on top, and then another layer, and resin again, and so on... The material should be completely wet, filled with resin.
When I am done with that, I have to keep track of the time because after I mixed the resin with the hardener, I have about 40min until it gets hard! So I place all this business into the vacuum machine!

This looks so impressing :D I like this smashed thing!!!
I keep it under pressure for about one hour or more, after that the resing gets hard and I can remove the piece!

And here it is! The result is far form ideal to be honest, but this is something I was expecting. There is a slight fillet between the main container and the hole for the pump, but I think its an initial design issue.

Now, when its hard and strong, this piece is very workable. I cut all the unnecessary parts, and give it a better look!

Here is the Waterproof Test:
Since I am already wearing my dirty clothes :D and there is still some resin left, I decided to play a bit more with it!
The idea is to make two composite pieces, with different layer numbers, and different sequence, and try to lasercut it.
I got two scrap pieces of wood, and decided to use them in the following way:
- First: I will place the piece of wood, and then composite layers on top
- Second: I will wrap the wood piece inside the composite layers (this means that I have double composite layers comparing to the first one)
The rest of the procedure is the same. I place layer by layer, and make sure that the resin goes inside the material


Here there are! both pieces: left one is wrapped, and the right one is layer by layer

And now its time to place both pieces under the vacuum!

After one hour under the vacuum pressure, I removed the pieces, cut the unnecessary parts, and smoothened the edges.

The difference in layers:

And now Let's Laser Cut this!!!
I designed a fast 2D sketch in Rhino, the FabLab Logo, as well as writings. The idea is to test both settings for vector cutting and the raster engraving

The thing is that it is not so easy to find the right settings, because composite material differ from piece to piece, and there are no general settings which I could use. After some time of testing, I came up with my final settings.

You can see the settings for Raster engraving, as well as for Vector cutting
And here it is, my final piece:

Download Files: