Week 01 - Principles and Practices, Project Management
Menu
About documentation
In order to make sure that things worth memorizing are kept, all results are documented for you and others to learn from, including findings, problems, software tools, machine descriptions or settings.

We will start with basic html-programming. As an editor, I decided for Brackets which is open source and easy to use.

For the set up of this website the FabAcademy template by Massimo Menichinelli was used. You can find the link in footer. It already comes with Bootstrap, a popular HTML, CSS and JavaScript framework which helps in developing responsive (device respecting) designs.
About web design
At w3schools.com you can find a link of many html-tags, offering a large variety of styles. "Style" brings me a general statement concept. It is common in website design to separate content and form. Therefore, html content is store in html-files, while the form is defined by the so-called "style sheet". Theses cascading style sheet (CSS) contains additional information on how to interpret the code given. For instance, IDs of the a tag can add the font size, the font weight, the font color etc.
To include images for instance, the style sheet defines the border, margin and padding of the embedded element. Additionally, I added a link to every image, so one you click on it, it appears in the original size.In order to control the site's performance, images should not be displayed in the highest resolution in the first place.
 Further tags, I used involve embedding of YouTube videos and Sketchfab models. This could be done by simply copying the code snippet displayed when clicking embed on YouTube underneath the video you would like to embed.
CSS modifications
First of all, I wanted to customize the design of FabAcademy Template by adding borders around each element on the index page. As changes to design can be made easiest in the stylesheet called fabacademy.css, I added some new classes to the sheet. It is pretty easy to also use pre-made classes to e. g. add images. The class img-responsive scales the images according to the screen size. I will say some more words about responsive design in a minute.
Images
You can set it up with:
     <a href="media/images/FabLab_symbol.JPG">
           <img class="img-thumbnail img-responsive" src="media/images/FabLab_symbol.jpg">
     </a>
     <legend>Here's the legend of the picture.</legend>
Result:

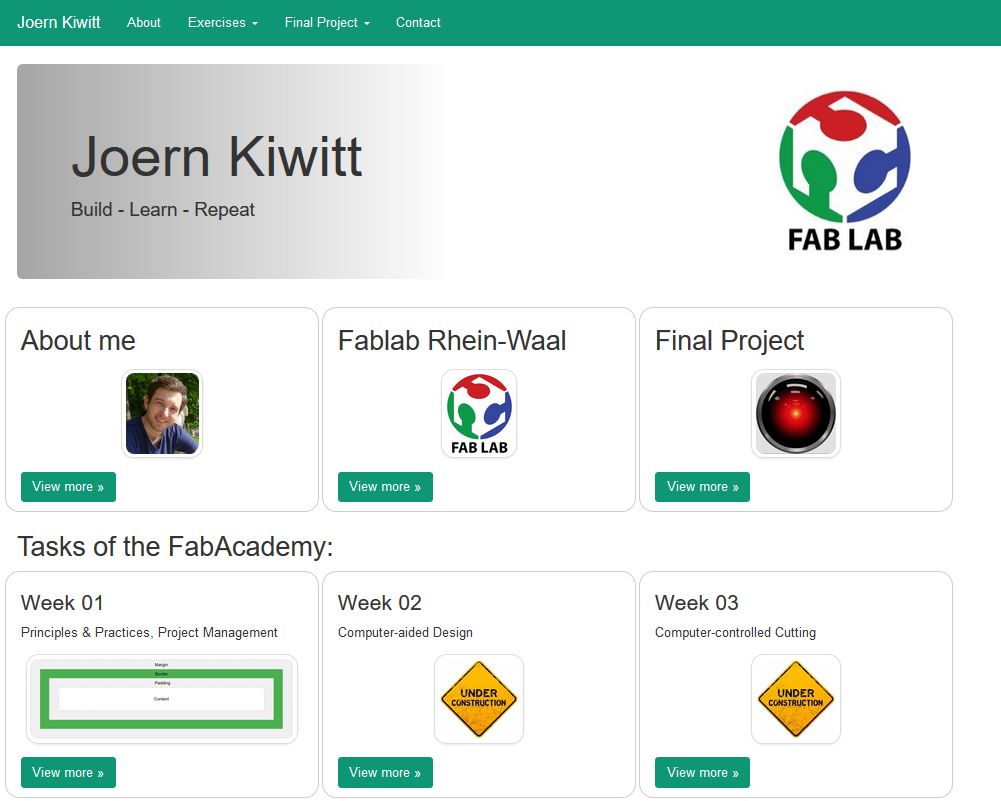
Adapt scheme of index page
I had some problems to set the border lines in bootstrap, as there was no margin between the fields. I added a margin of 2 px left, right, bottom, top. I introduced a new class which I added to all container objects on the index page. I also recommend to do the tutorial on w3school for Bootstrap.
In the style sheet:
     <style>
     /* JK custom styles */
     .containerBorder {
        width: 30%;
        height: 200px;
        overflow: auto;
        padding: 0.01em 16px;
        border: 1px solid #ccc !important;
        border-radius: 16px !important;
        margin: 3px 3px 3px 3px;
     }
     </style>
And in the html file:
     <div class="col-lg-4 containerBorder">
          <h3> Week 01 </h3>
            <p> Principles & Practices, Project Management </p>
            <p> <img src="media/images/1_HTML_style.JPG"  alt="image 1_HTML_style" height="100" > </p>
            <p> <a class="btn btn-primary" href="exercise01.html" role="button"> View more » </a> </p>
     </div>
Result:

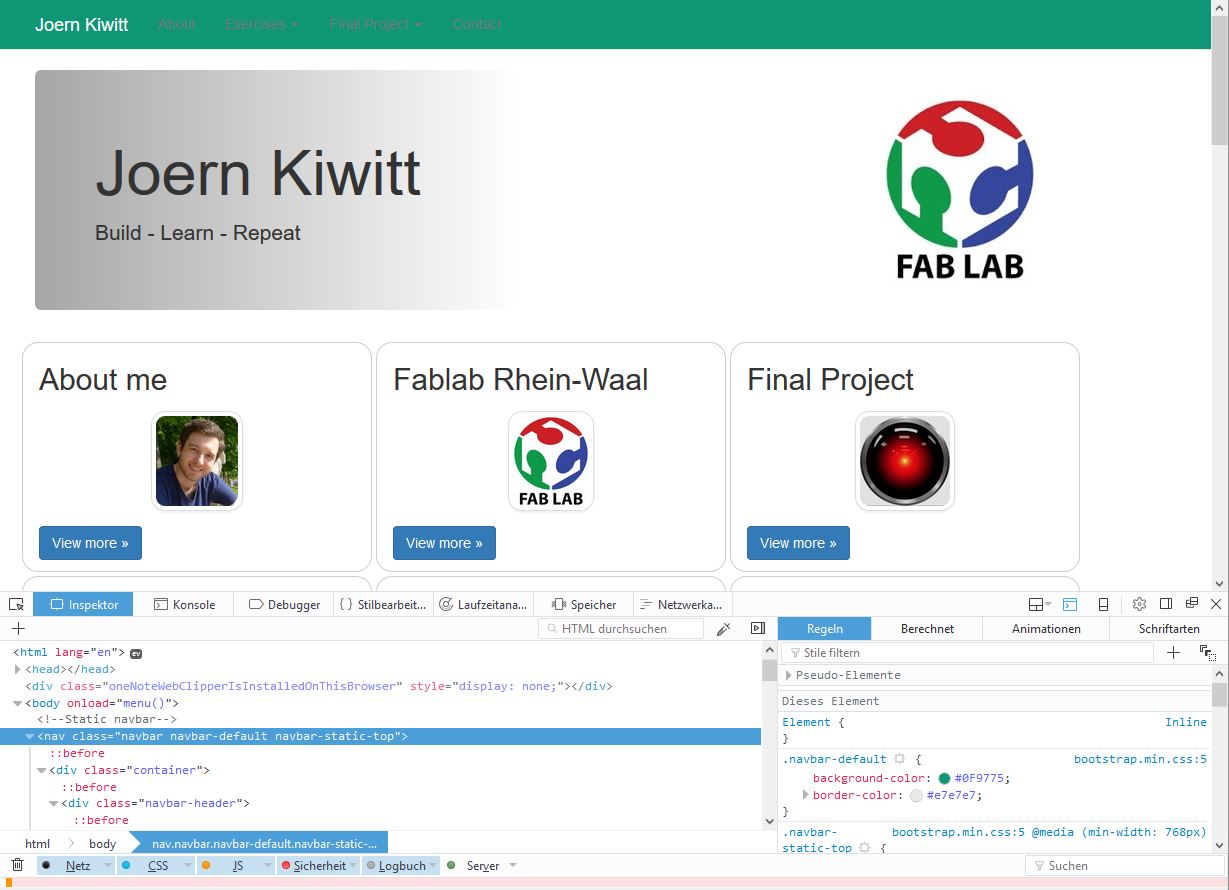
Change color scheme
Change the color of the menu to make the website more appealing. I chose a color with the HTML Color Picker. I modified this code in the bootstrap.min.css file to change the navbar background color as well as the font color.
     <style>
     /* custom styles */
          .navbar-default{
            background-color: #0F9775;
            border-color:     #e7e7e7;

          .navbar-nav>li>
            a{color:#FFFFFF}
     }
Result:
Add hover over function
Furthermore, I added a hover-function for containerBorder-class. The border will change its color on hovering over it.
     .containerBorder:hover
     {
        border: 1px solid #0F9775;
     }
Result:
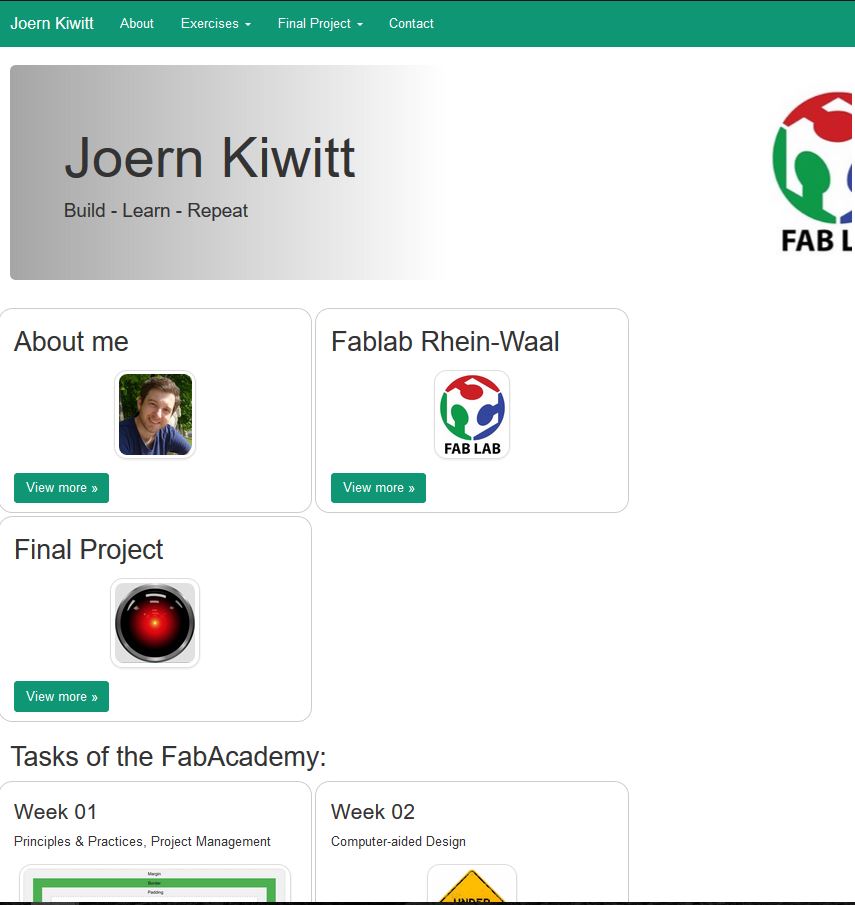
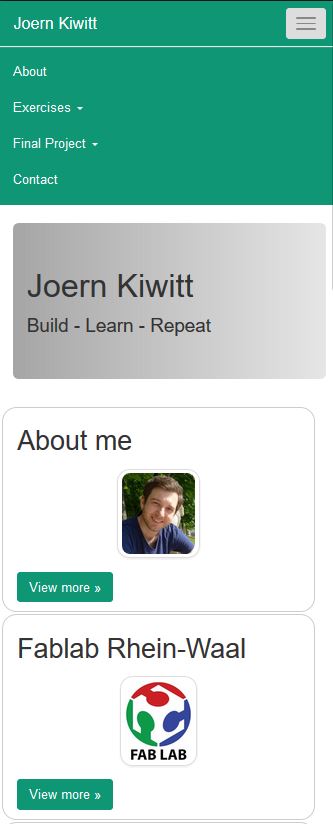
Bootstrap Responsive design
To make design fit to all screen sizes ("responsive web design") for desktop, tablets, I used the grid system of Bootstrap.
- xs (for phones)
- sm (for tablets)
- md (for desktops)
- lg (for larger desktops)
The class in the template had to be changed in order to meet all sizes from lg to sm. These codes refer to the basic grid classes.
     <div class="row">
     <div class="col-lg-4 containerBorder">
To:
     <div class="row">
     <div class="col-sm-4 containerBorder">
Result:
Git Tutorial
According to wikipedia Git was developed by Linus Torvalds, who also developed Linux (he said, he named all his products after himself). To be able to store code and continuously improve it, Git is used as a repository. It stores information on your machine as well as on a server and enables subversions. On my Windows machines, I will use Git for Windows to upload our code to the Gitlab instance of. GitHub is an web-based repository which enables to collaboratively develop code. GitLab is a self-hosted version of GitHub, if you want your code to be in a private environment, this is probably the prefered option.

Setting up Git
Initially, you will have to create a user profile (which you create on git.fabacademy.org). Open Git Bash from the folder in Windows where you would your repository to be located. Type the following commands into the bash:
- User name:
git config --global user.name "Your user name" - Your email:
git config --global user.email "Your email address" - Generate the ssh key using the command:
ssh-keygen -t rsa -C "your_email" - Copy the ssh key shown by the command:
cat ~/.ssh/id_rsa.pub - Paste the ssh key to gitlab website
Finally, copy the link to your repository and clone it:
 Type "git clone git@..." to copy the files from the repository into your filesystem.
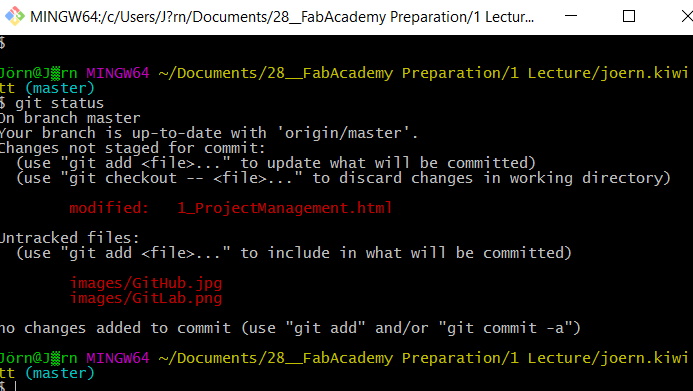
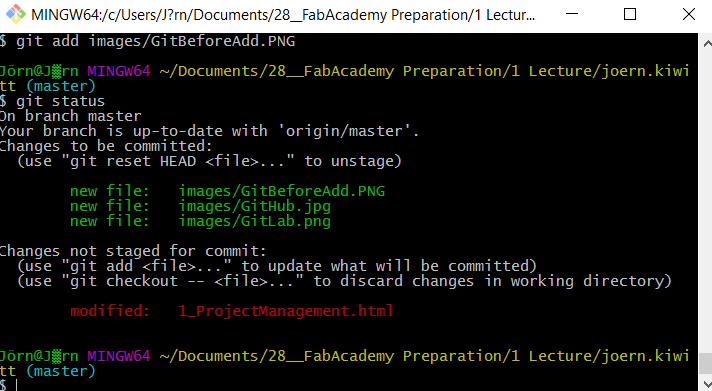
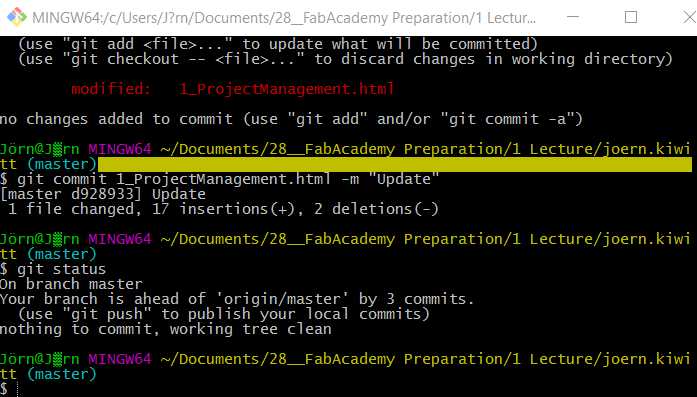
Using Git
In a nutshell, the Git workflow for the local respository looks like this: Commands:
- Use "git add -a" to register all new files in the index repository
- Use "git commit -m "message" to hand over files to your local repository
- Use "git push origin master" to hand over files to your server repository