14 - Composites
Assignment:
A_ design and fabricate a 3D mold
B_ produce a fiber composite part in it
A_ Design and fabricate a 3D mold.
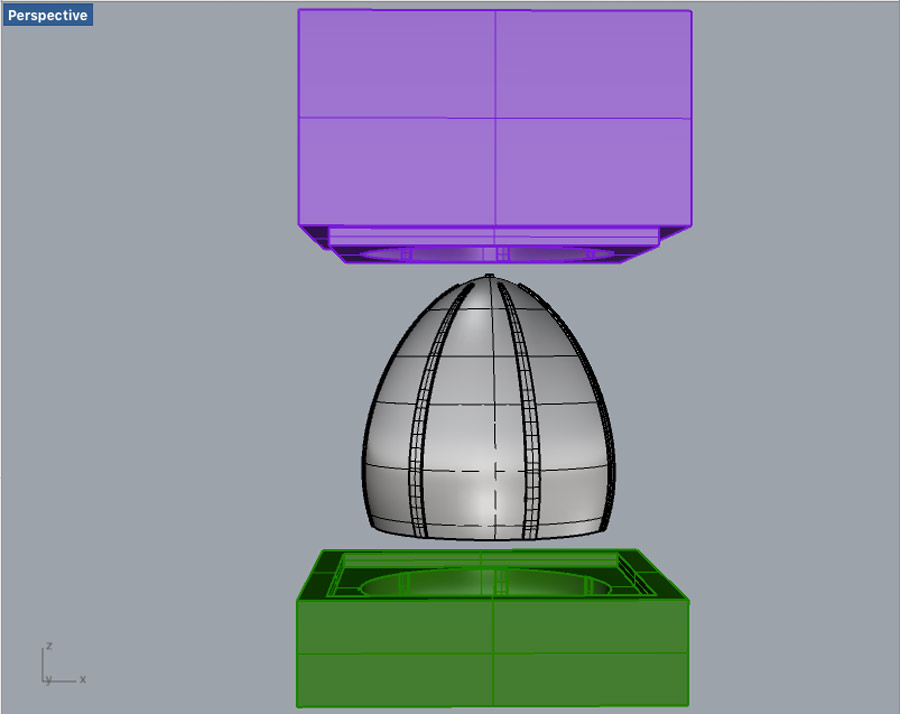
For this week assignment I want to do a lamp shade using the mold that I produced druing the molding and casting assignment. As I had done quite a few exercises of molding already I decided to concentrate on the molding of the composite.
My objective is to make the composite layer as thin and transparent as possible and make it rigid but with some flexibility at the same time. And if possible with natural component. I did research on the possibilities:
-estireno for transparency
-ecoplastic
-pine resin
-entropy resin
-acrilic for transparency
-carnauba for strenght
During a lab workshop on natural components the instructor presented a series of components and he introduced a composite made with potassium silicate and japanese paper. That pulled my attention so I decided to experiment with it even though I am conscious I will never get much transparency - natural component do not allow transparency and probably neither much rigidity. But I'll try it out.
Notes on the workshop:
I learned that there are 3 main families of natural components
1º-Silicates (low PH)
2º- Fat Acids (high PH)
3º- Sinthetics based/petroleum (high PH)
Silicates and Fat acids are not compatible so they don't mix well. A combination therefore is useful to isolate the 2 mold and the composite - using one to create the mold and the other as a release agent.
A_ Preparing the mold.
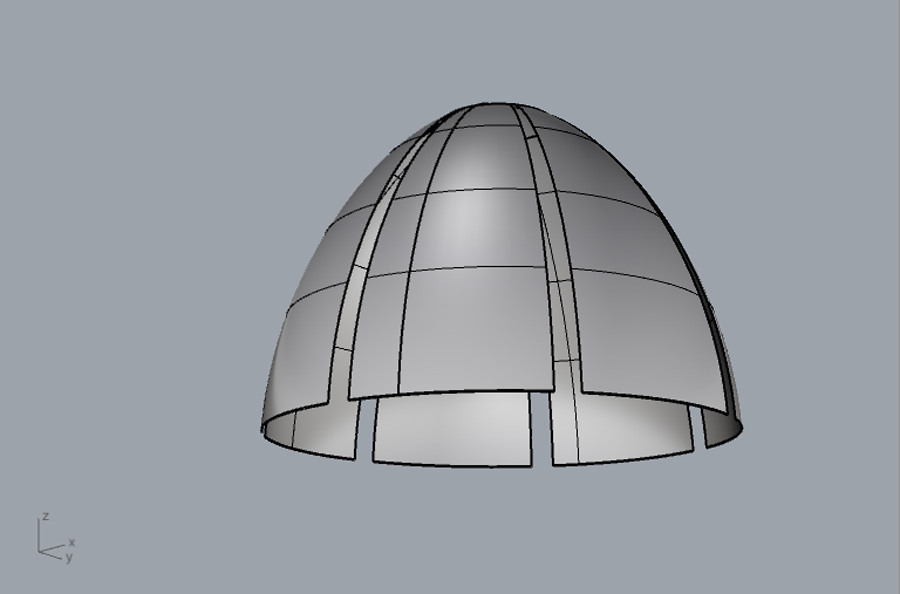
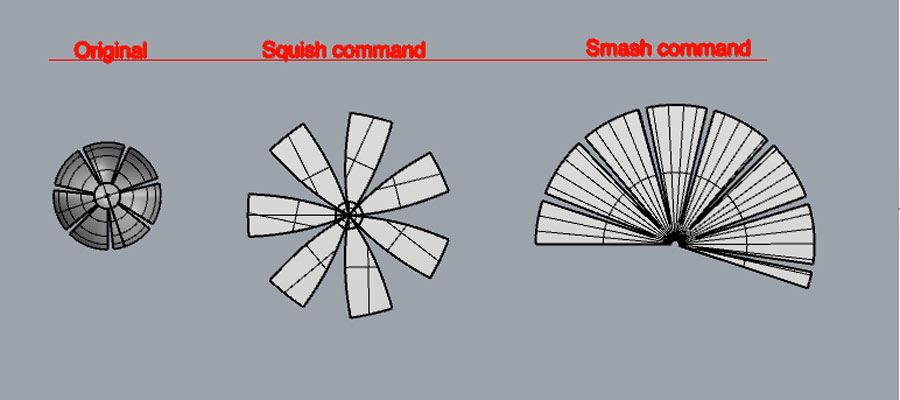
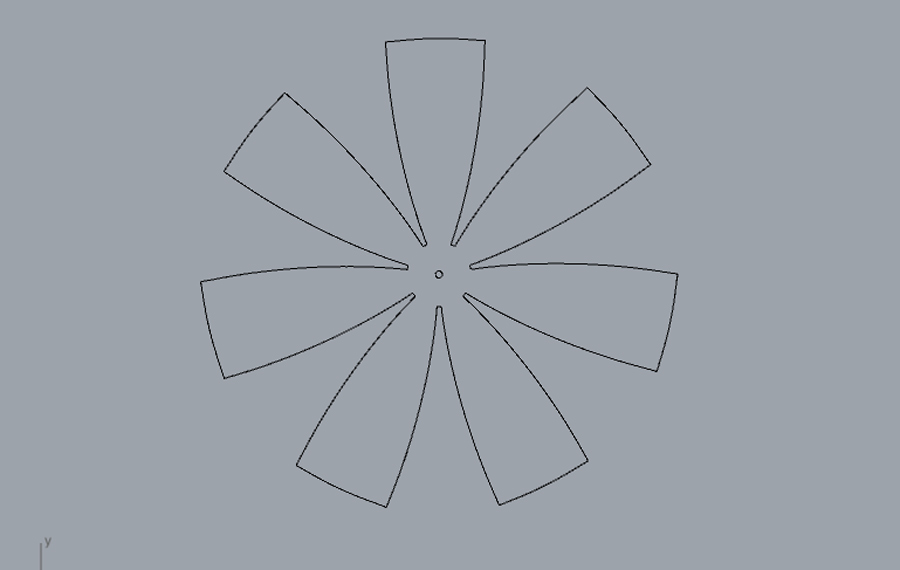
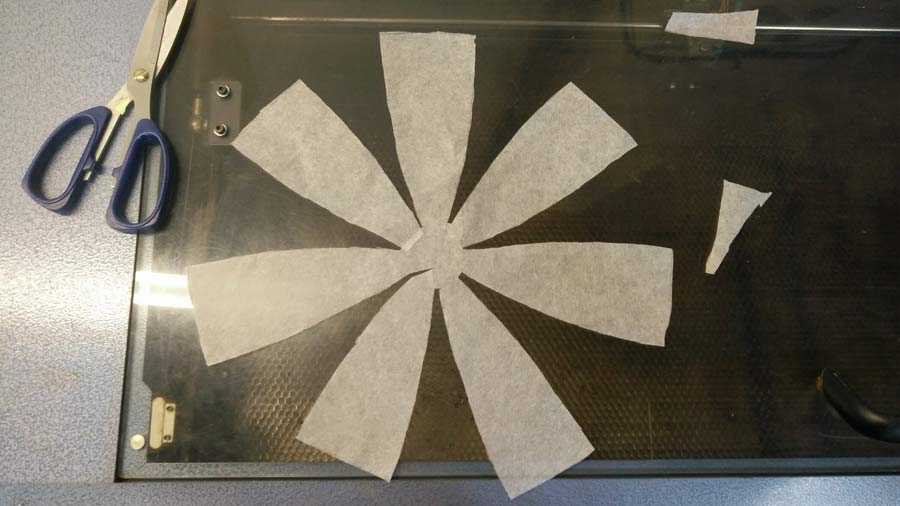
I went back to the Rino file I used to create the egg shape in concrete. And I tried to extract the shape and project it on a flat surface so I can later cut it in thin layer of paper while avoiding seams. It is a very complex operation because the mold contains double curvature. I investigated and consulted with colleages experts in Rhino and was advised to use "smash" and "squish" command. I struggled a lot but never could extract an accurate flat surface that would marry perfectly with the 3D mold. My conclusion is that it is not possible to generate the flat surface without seams - at least not in Rhino.
Nevertheless and knowing it was not accurate I carried on and printed the shape on a normal piece of paper and cut manually with scissors various layers of Japanese paper. In spite of the non-accuracy of this technique I will at least get to experiement with the material and challenge my concept - the idea to material application. The gap is always huge.
I bought Japanese paper in 3 different weight and made test.
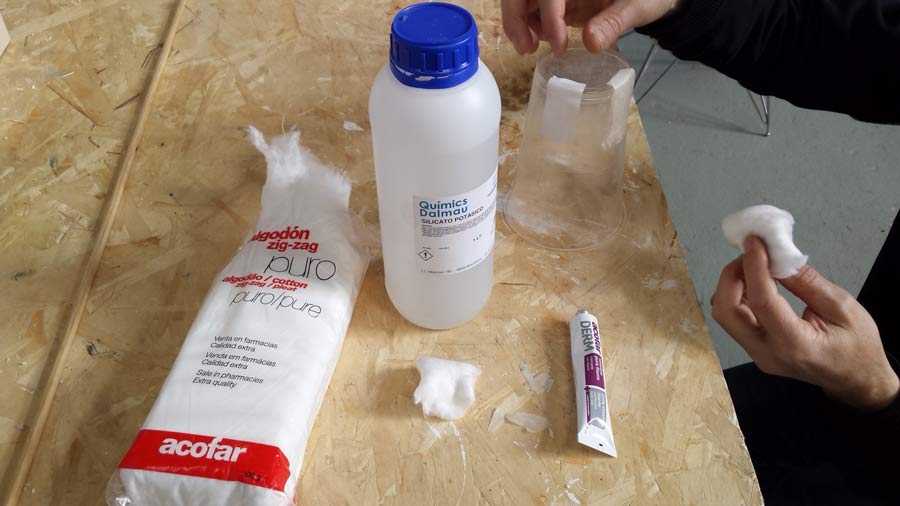
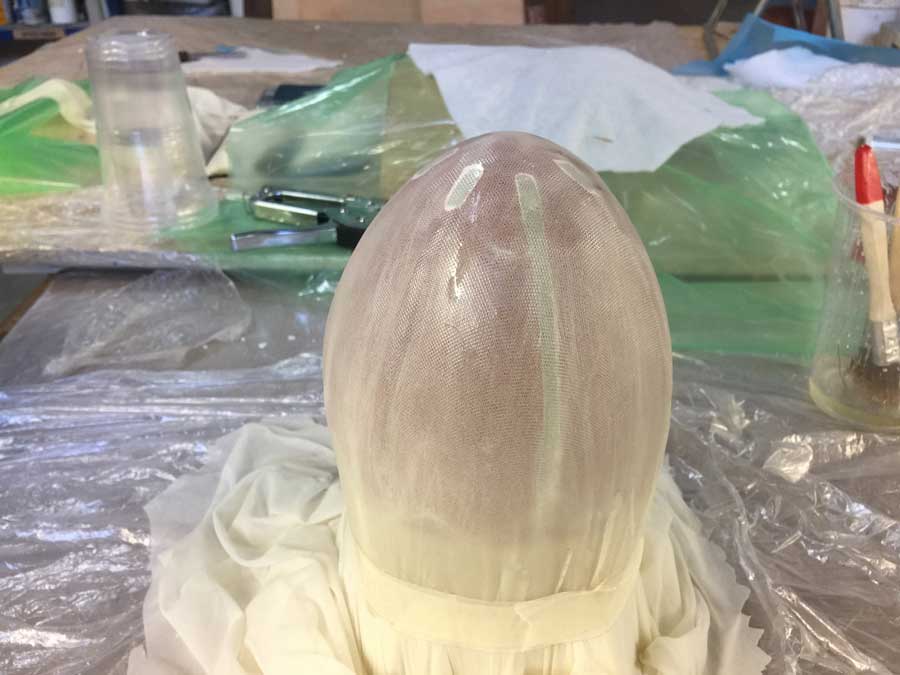
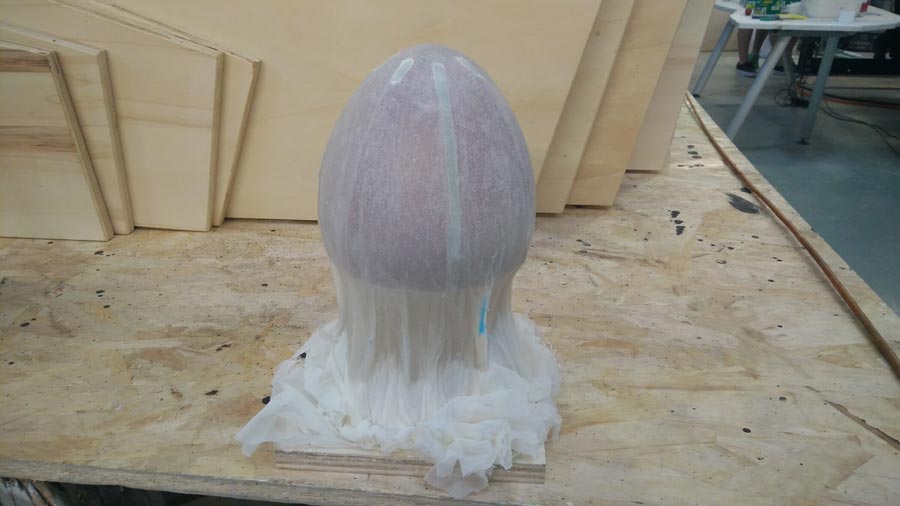
The Japanese binder I am using is silicate so I got Vaseline to apply on the mold so the composite materials will not adhere.
The thinest paper seemed more efficient as it absorbs better the liquid and it remains relatively translucid. But with 3 layers I got almost no rigidity - still very wabbly.
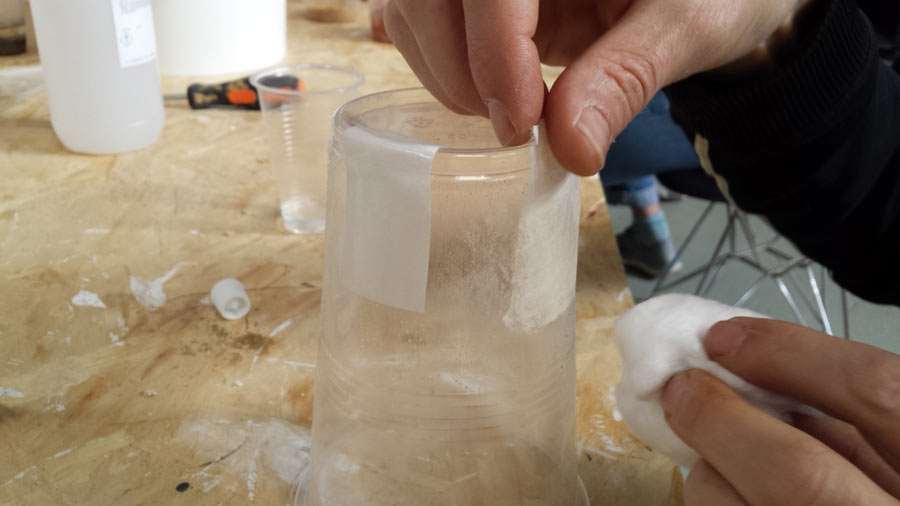
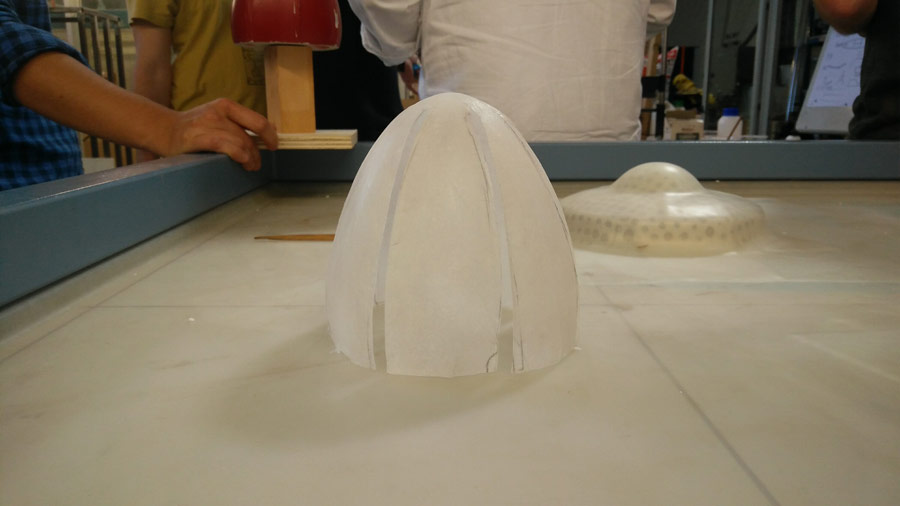
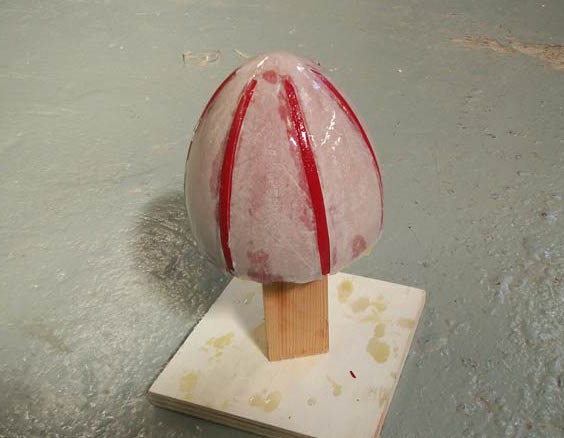
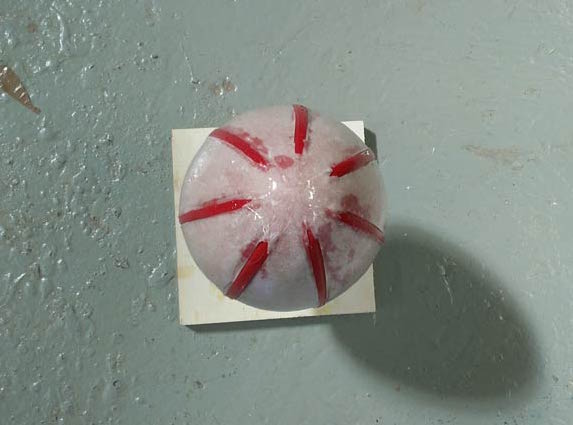
I had lacquered the mold to fill the pores of the its surface so I spread vaseline on the mold and placed the 5 layers of Japanese paper cut outs on the mold, layer by layer and applying potassium silicate on each of them until the paper is soaked. Even though it is practically impoosible to avoid folds in the paper in the areas of sharp curvature, to get the best result it is important to start from the middle of the object and push the paper towards the edge - in this case of each section. This way the excedent of paper is located on the extrusion which I plan to cut afterwards.
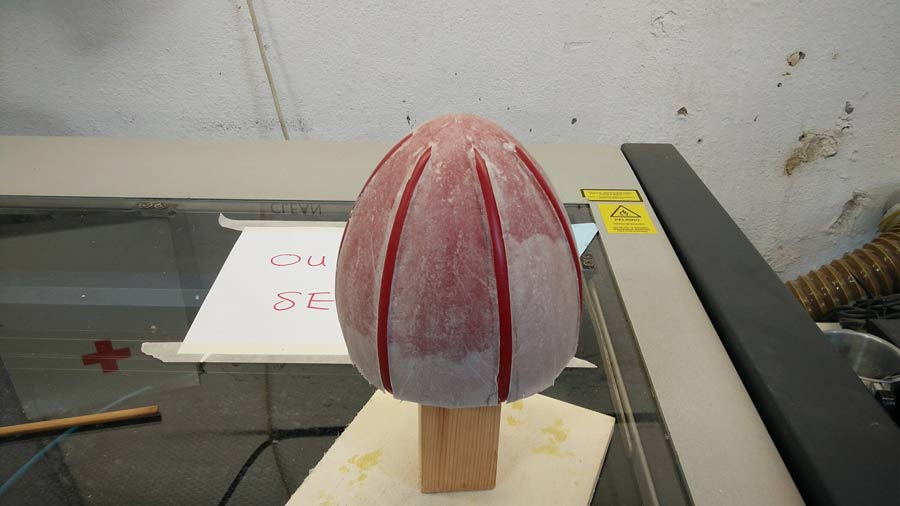
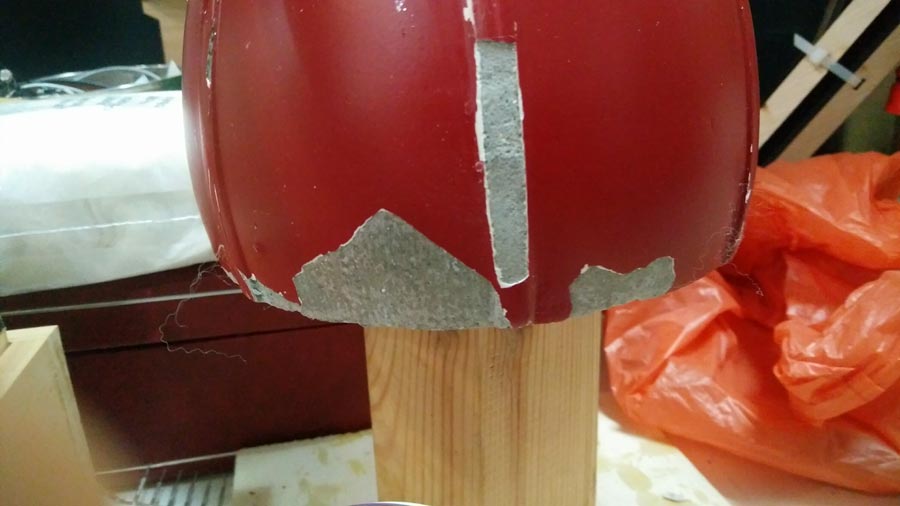
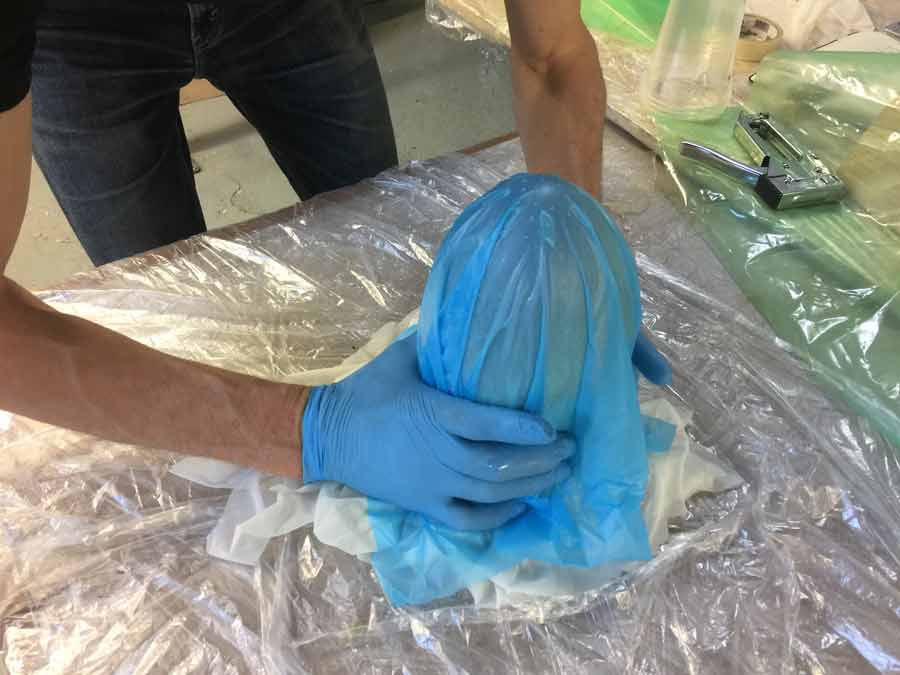
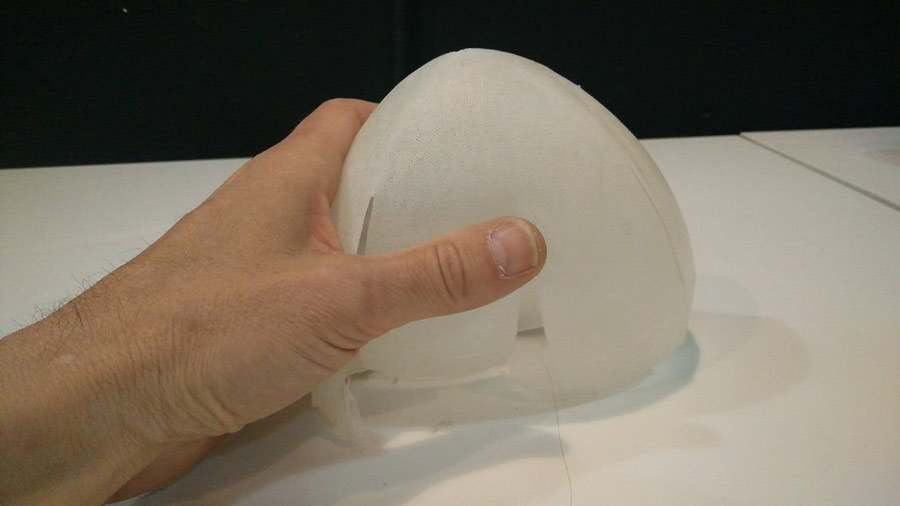
After 1 hour in the oven at 40º the mold was dry and I could release the composite skin from the mold. I machined the end of a chinese stick so one of its end be thin and can be slipped between the composite skin and the mold. It came out pretty easily. But it was very wabbly and had no strenght. I would need 20 layers to get some rigidity.
I applied a coat of epoxy resin (quimical components - what a contradiction!) onto the surface of the composite to get rigidity but it did not help much.
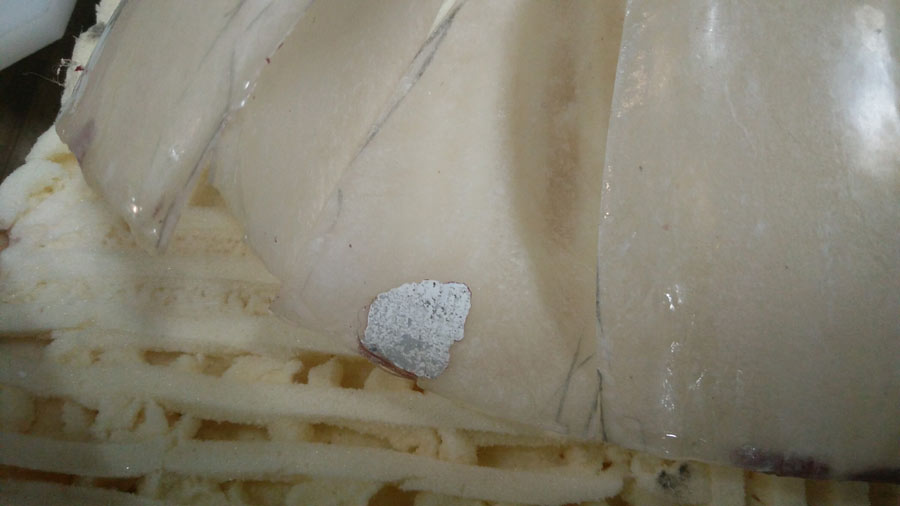
I let it sit for the night and demolded it after approximately 10 hours. The result was pretty desastrous as the epoy stock to the mold and when I demolded it peeled the laquered layers of the mold. The structure was still super wabbly, and with an ugly glossy texture and feel to it.
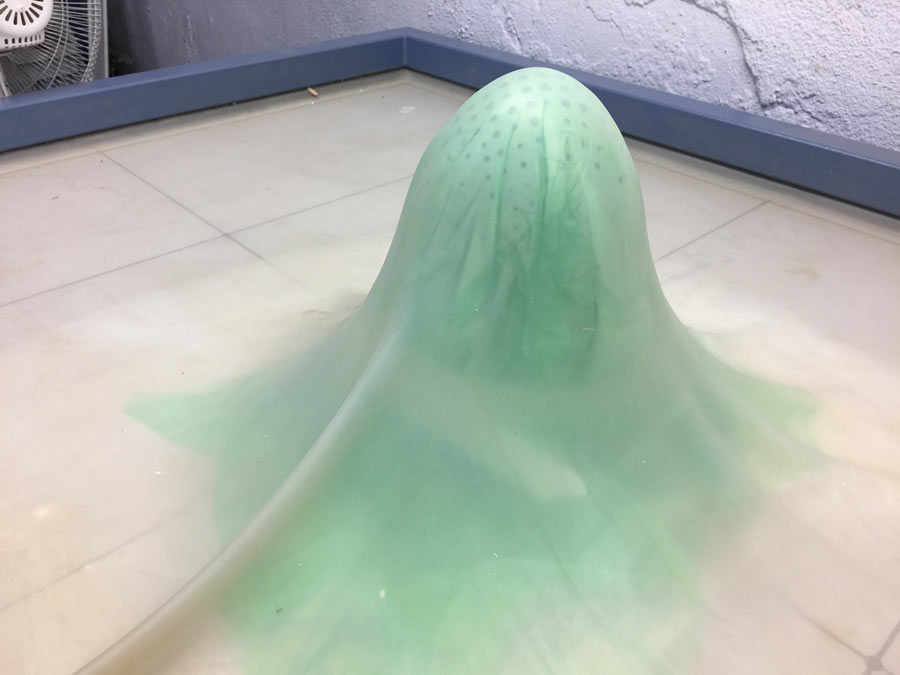
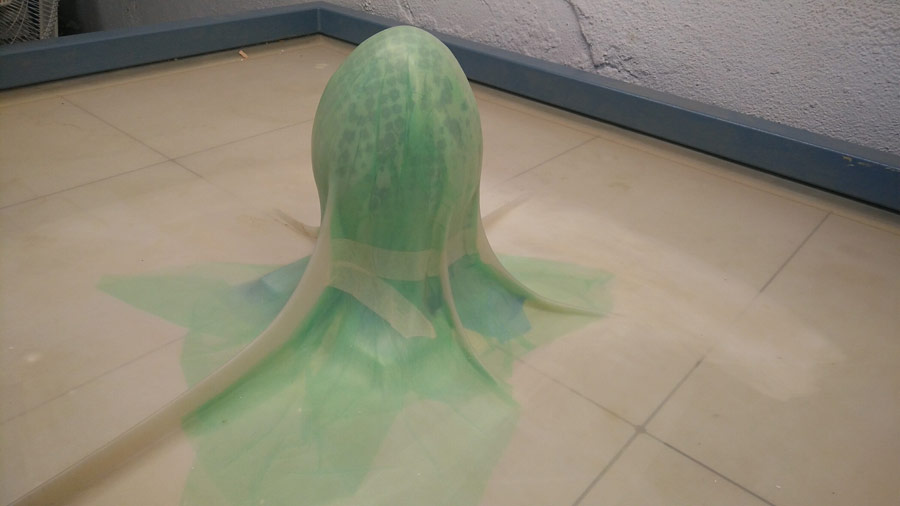
I would have needed either to put a bunch of layers or add some layers of fabrics to get some rigidity. The very design is challenging as there is a lot of strees in the part where there is almost no material ( where the petals split)creating weak point in spot that support most of the structure. Even if I could get these part to be rigid they will always remain very fragile. But this weakness might be the very quality of the design - giving it fragility. I will experiemnt further.
Alltogether the result can be consider a total disaster. Miles away from what I intended: to create a lamp shade that can be reproduced in diffent colors, so once stacked onto one another and rotated an interesting effect of color shades and transparency could be created. Instead most of the challenges involved remain unresolved - that is: how to extract the flat surface from the 3D model and accurately apply the surface on the mold so it sits in a precise position and making the object rigid enough so it can keep its shape once out of the mold but flexible enough to be demolded without destroying the mold.
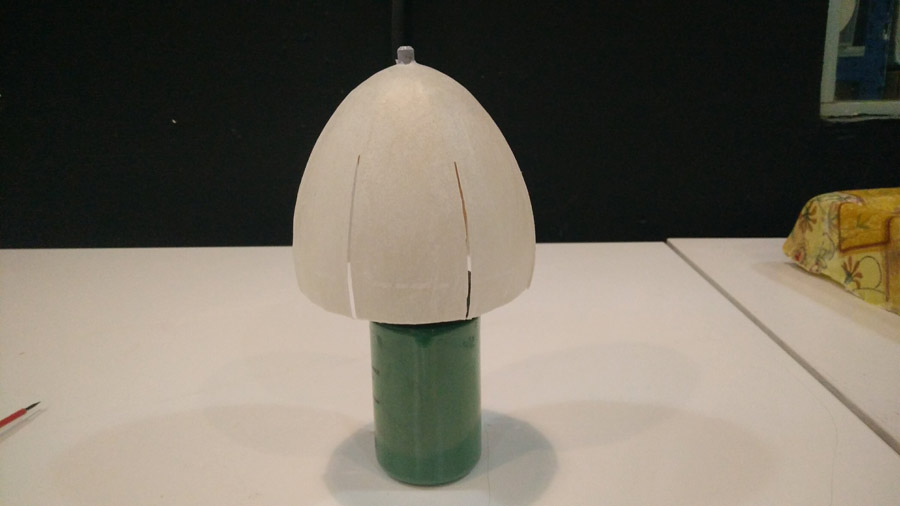
Anyhow with the experience now I decided to repeat the molding using licra (thin clot) and epoxy resin seeking more rigidity and a similar level of transluscence (use of colorlees resin would get even better result but there is none available in the lab and it is quite pricy.).
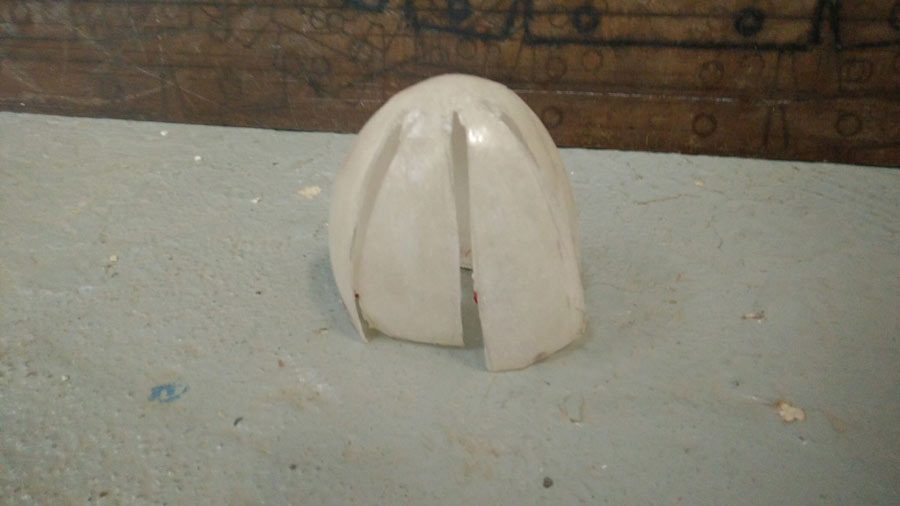
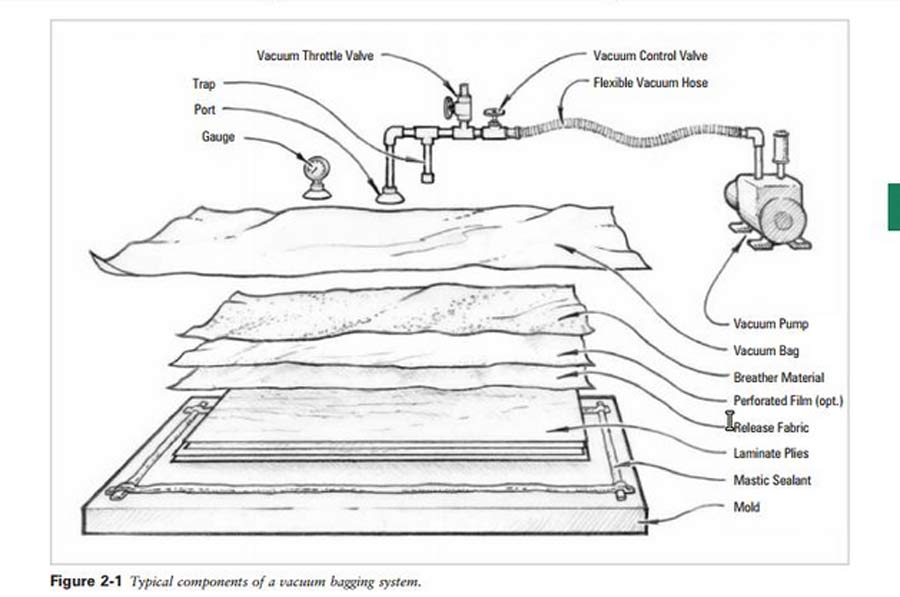
epoxy resin + licra composite
I used the folowing graphic as a reference for the layer sequence to applyt in resin composite.
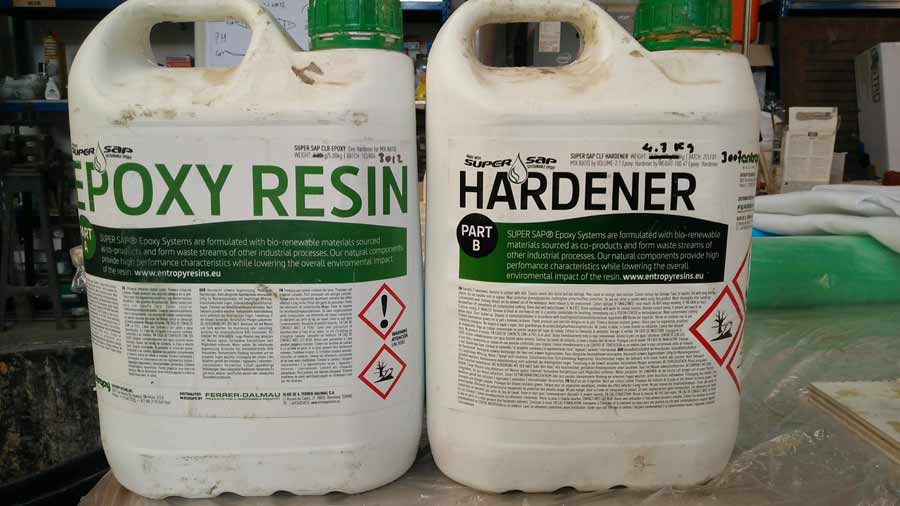
Note: I am using the same epoxy I used earlier in this assignment. Mix consists of 2 parts of PART A for 1 part of Hardener (partB).
I am using the same egg mold and will try to get more strenght while keeping as much transparency as possible.
I followed the instruction on the schema above, laying a thin layer of plastic film on the mold, than I applied 5 layers of white licra cloth spreading epoxy resin on each layer. Than I covered it with another thin layer of plastic film, a perforated film, a layer of absorbing material (white) that can absorb the excedent of epoxy and finally covered the whole thing with a layer of thick plastic sheet (to protect the membrane of the vaccum machine).
I placed another piece of thick plastic on the vaccum bed to protect it and placed the mold on it and waited 12 hours.
NOTE: I create a stand with a central axis so the mold is detached from the machine bed. This way the vacuum silicon mambrane can also shape the bottom part of the mold.
Demolding was pretty simple. Because the bottom diameter is smaller than the middle part I had to make little slot (with a thin disk on a dremmel) to be able to retreive the casted part from the mold. That was part of the plan and of the design.
I managed to get more rigidity and about the same transparency as with the Japanese paper and potassium silicate (actually more regular transluscence) but the result is far from satisfying. Nevertheless the experience made me learn a lot and most importantly grasp the proces of composite.
-hafting pine resin
- hafting pine resin
Lesson for this week is frustration. Make something basic to test the margins of the technique and material. Trying to do something complex at first, something special implies very high risk of make something useless. Rather go simple and work the complexity in while spiraling up with the porcess.
Download the files here