#week 12
Moulding & casting
This weeks assignment
Design a 3D mould, machine it, and cast parts from it.
designing a 3D mold for casting
Designing in Fusion 360
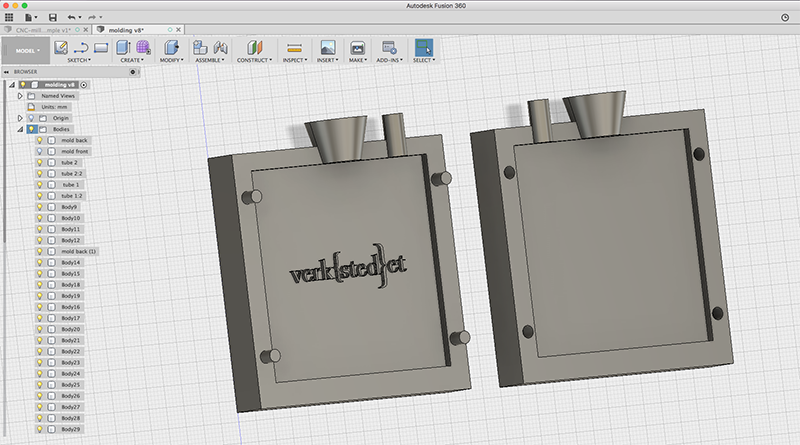
The molds for the casting was designed in Fusion360. Our instructor had pre-made an "instruction file" that was a great help when it came to visualizing the workflow and the "pos vs. neg" challenge that always arises with casting molds.
This time around it seems like Fusion is starting to sink in, and the modelling was not too hard this time. In hensight, I wish I had gone for a bit more complex figure - but I think the most important thing this week was to learn the workflow, techniques and materials.
Design workflow
Designing the molds can be quite a mental test, trying to figuring out whats needed to get the final result right.
Later on, I found out that I had maybe skipped a few steps, that would have made it a bit easier - but I came out right in the end.
1. step
Model what you want to re-produce with the casting. (I skipped this part, without knowing it - and instead more or less designing the model inside the mold).
2. step
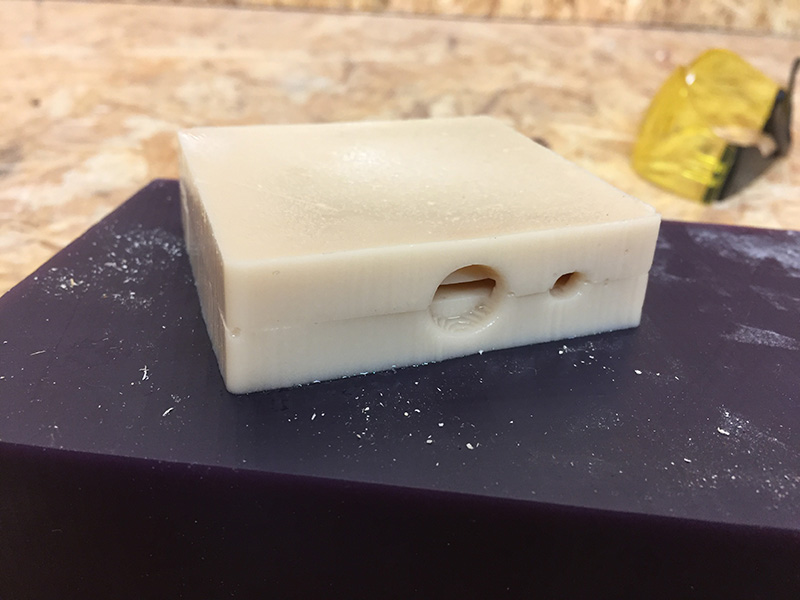
Design the moulds, including the opening for pouring the materials and air vent. Also add a few markers that will align and keep the mould in place.
3. step
Place the object into the moulding bloks
4. step
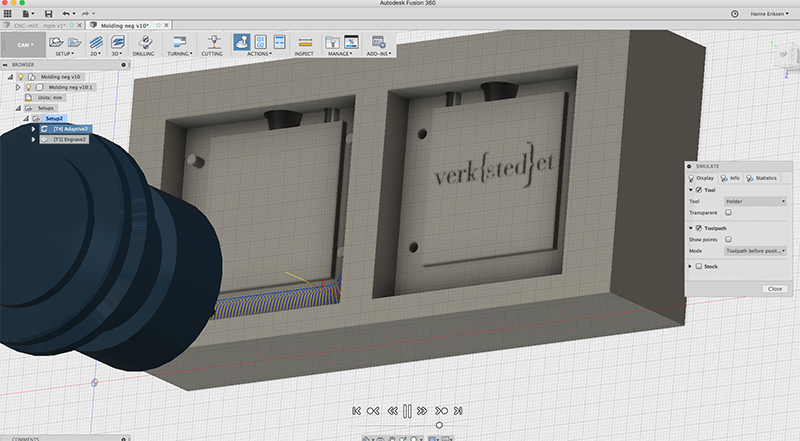
Add the blocks onto the block of materials that you want to mill the mould with.
5. step
Create the millingpaths, making sure to run the simulation before posting the g-code to check that everything looks correct.
I used the CAM module in Fusion360 for generating the gcode - and then I imported the gcode into MACH3 for the milling job. You can see information about MACH3 and the CNC here

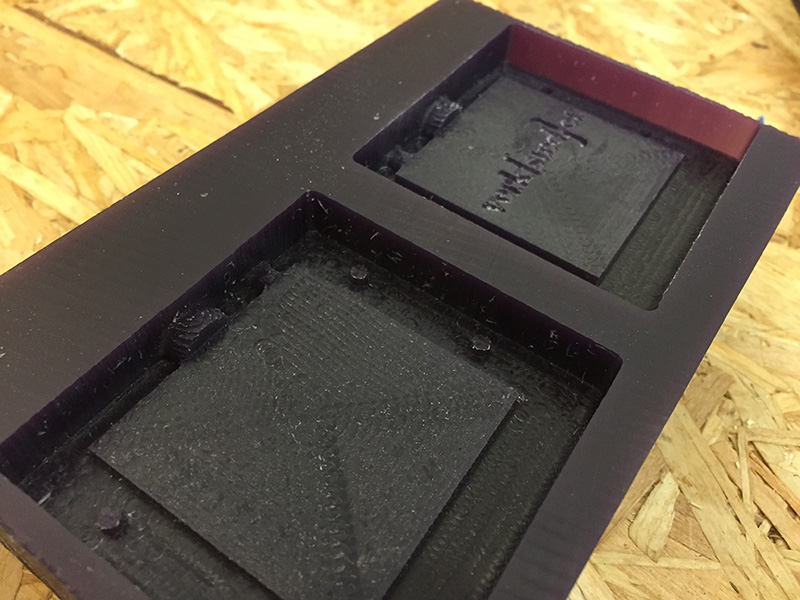
Milling the moulds
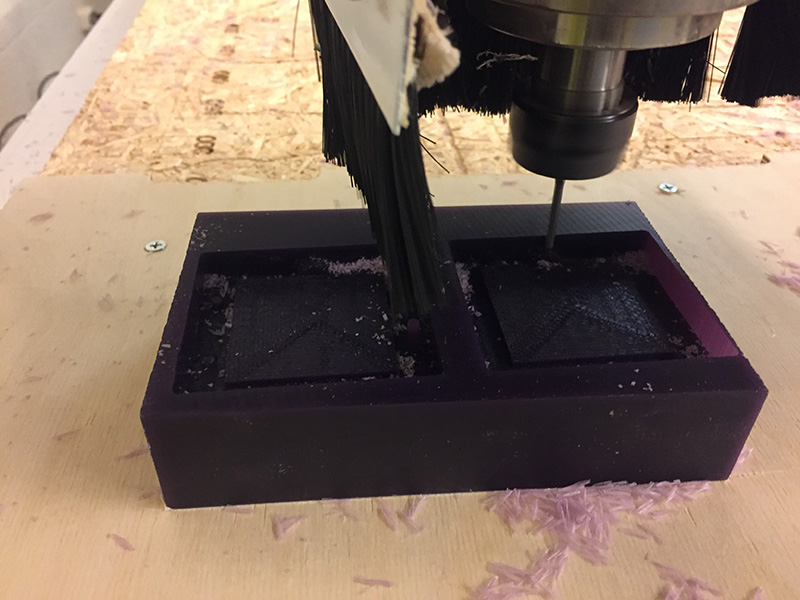
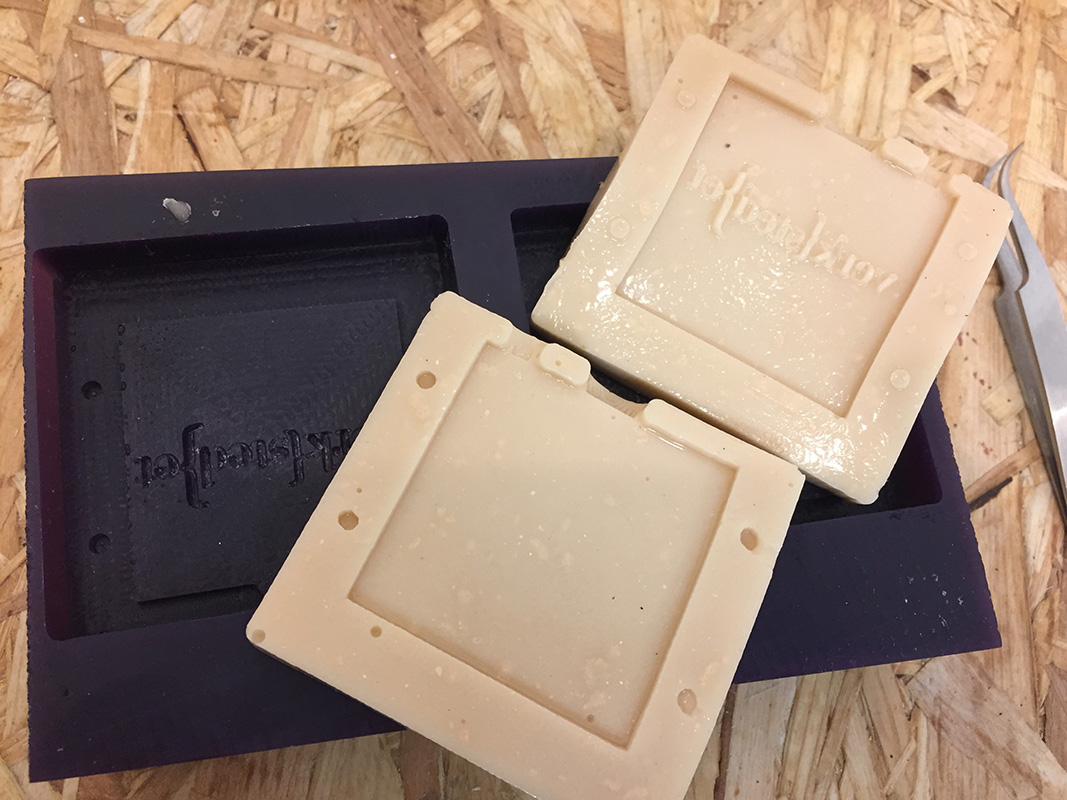
The mould was milled in machineable wax, and using a 3mm endmill and 3 mm engraving. The milling was done in 2 operations with one tool shift.
The end result came out fine, except from maybe a bit too rough. This is can be polished off after with sandpaper.
I could also have done the milling with a smaller stepover, and done a finishing job on it at the end.
Casting the moulds
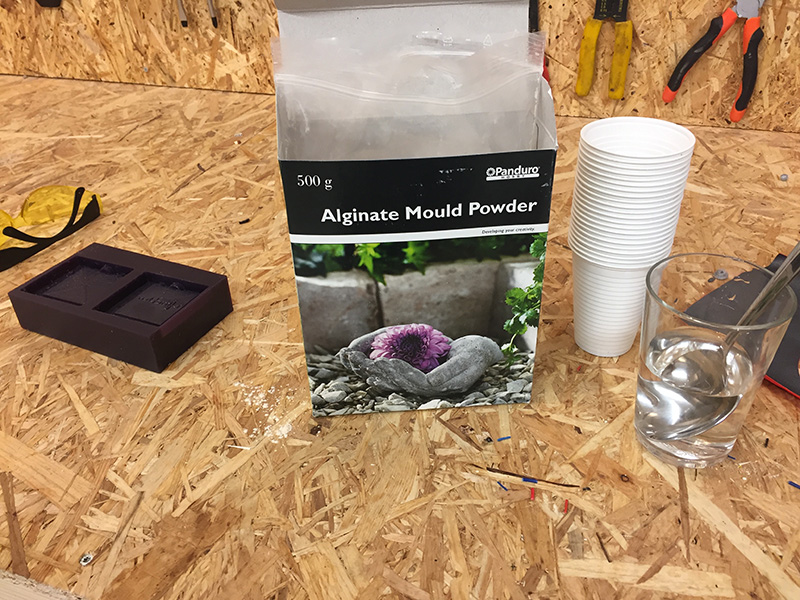
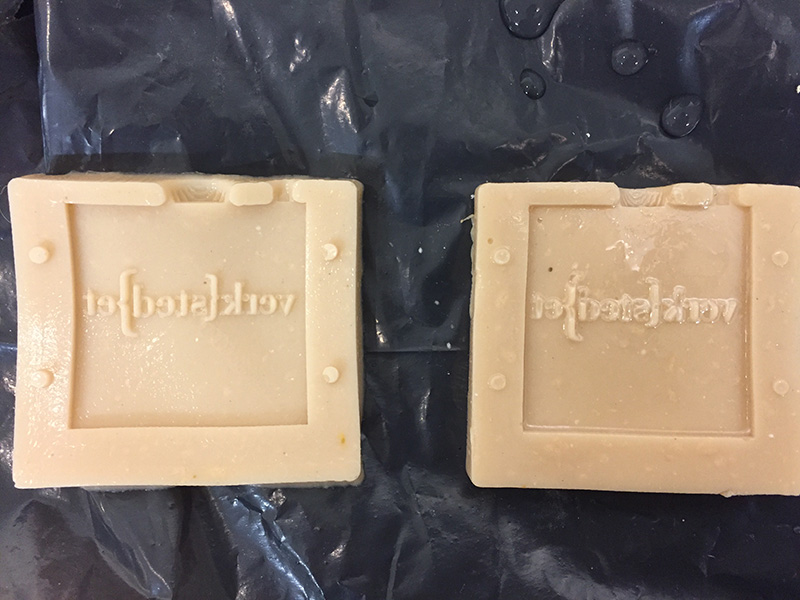
Casting the moulds was definately the most, and unpredictable part. I had not been able to get a hold of the right silikon for casting, we had to improvise for the casting part. Jakob got the more expensive and reliable silikon paste, whereas I did my casting with Alginate Mould Powder.
Alginate Mould Powder is an interesting product. The texture of the material after it had become solid - was all wobly and wet. After 24 hours, it had still not dried up. This type of material will probably be perfect for type of casting with foods or other "soft" materials.
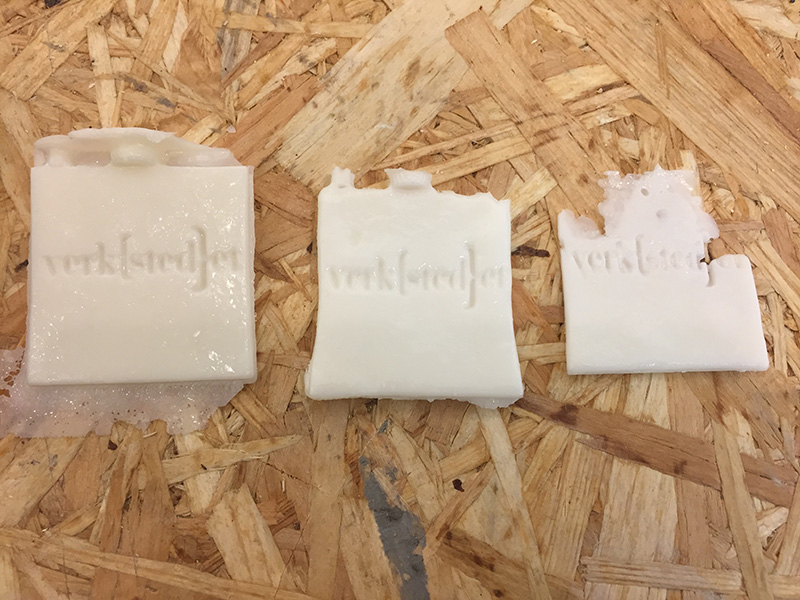
I made two rounds of casting, since the first one came out with "bubble" inside the text - making it difficult to read.
On the second round, I used the pencil trick - where I "painted" the Alginate over the mould in a thin layer, making sure it went all the way down into the text shapes. After, I poured the bottom mould half way up. I then placed the other half on top of it, and tightened it with a rubber band, before I poured the rest of the materials into the mould. This came out a lot better.
I also realised that I had made a mistake with the modelling in 3D. The design half way closes the opening where you pour the material. This made it a bit of a challenge making the material go all the way down and not creating air bubbles inside it.
When thinking about the airhole and sprue, and the placement of it - I think I just placed it there since I was following a ready made example of modelling a mould. But I don't know if the placement would be better somewhere else. At least not with this material. I think it would be more difficult to get all the airbubbles out if placed differently.
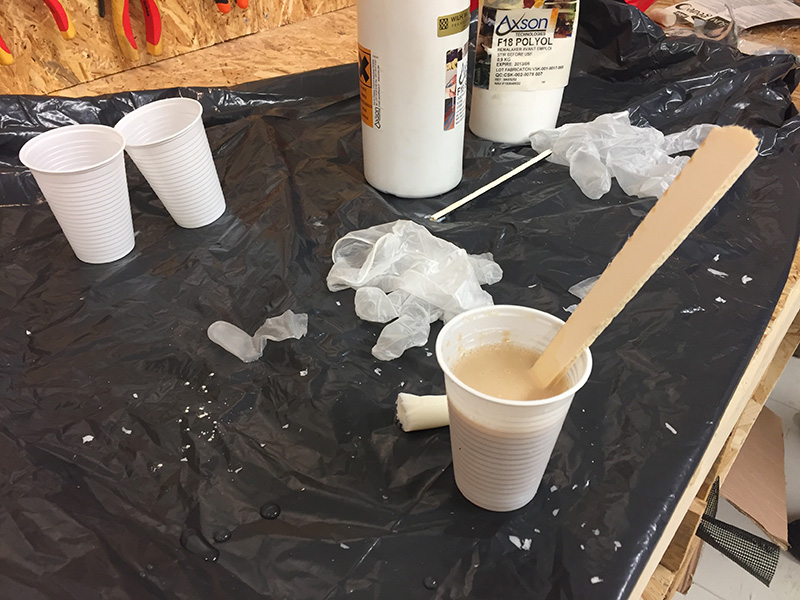
Casting the final product
For the last round, we did the casting with the resins epoxy and hard polyuretan.
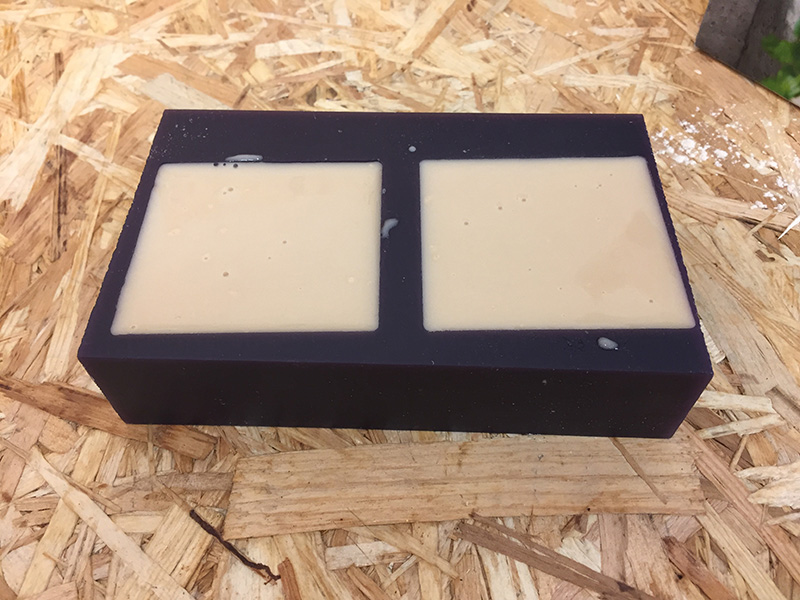
What I learned from this, is that the Alginate probably works best as a one sided mould. Or at least, not as a "two part stick together" mould. Since the Alginate is very slippery and wet (still is after 24 hours drying) - it was an interesting experience casting a licquid inside a very "licquidy" shape.
BUT - after 3 tries, the final cast came out not too bad! You can read what it says, and the shape is correct.
The material logistics broke down a bit for this week, which was the reason for the choice of casting materials. The polyurethane was leftovers from Fellesverkstedet that out instructor brought with him, and the Alginate was bought in a local store.
The polyurethane expired 5 years ago, but it actually set just fine!
Learning outcome
The learning outcome this week is that 3D modelling a mould is not as easy as first thought. Imagining the right proportions with the final product can be a tricky bit. Here it would be beneficial to maybe 3D print the shape before milling it. I also regret not making a more advanced shape, but that is more of a personal thought. The idea was to cast the final product in chokolate and use it as a giveaway.