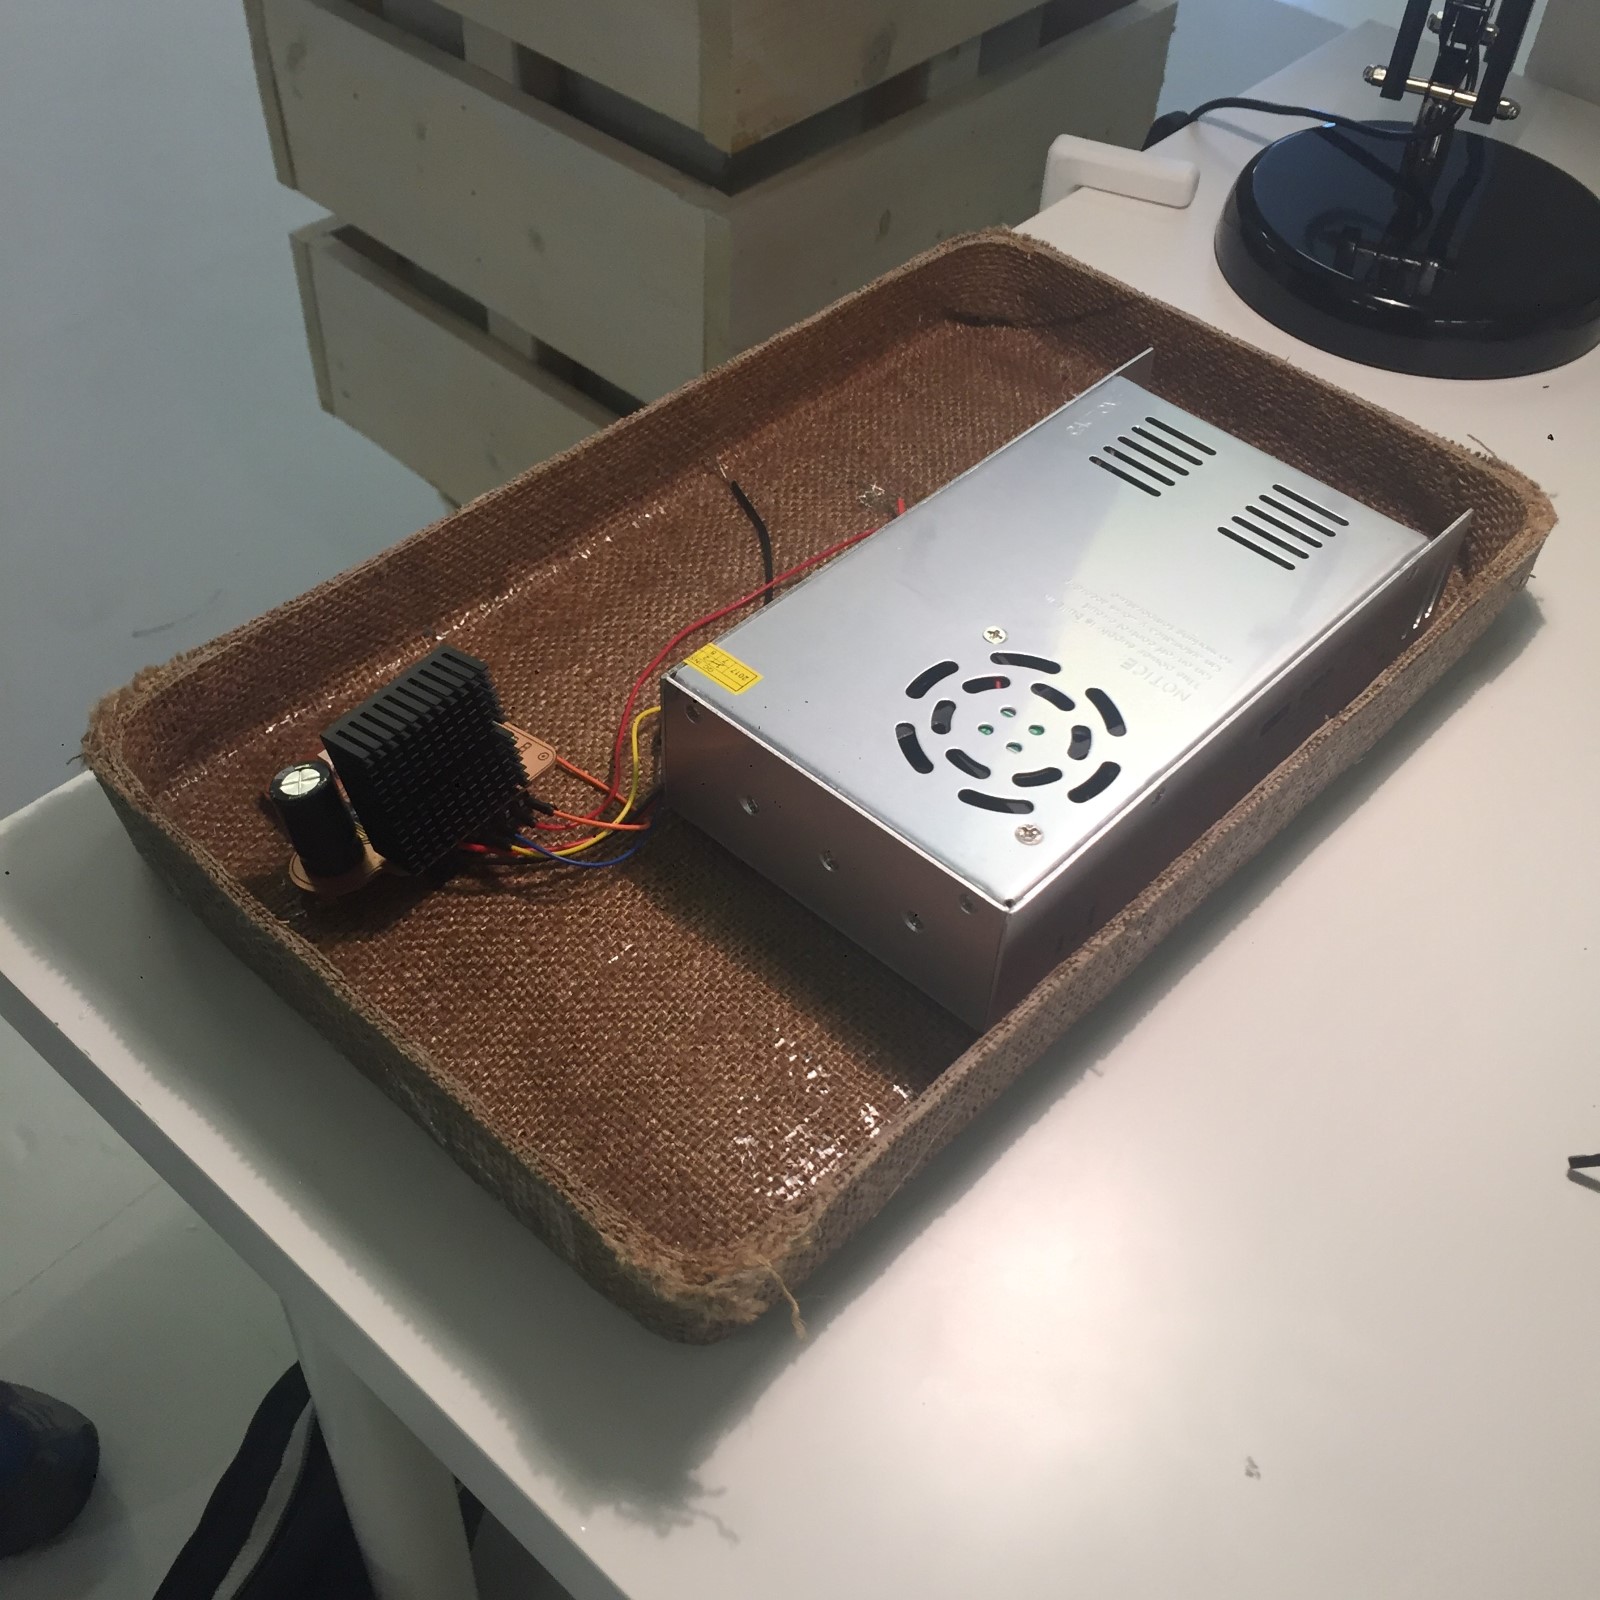
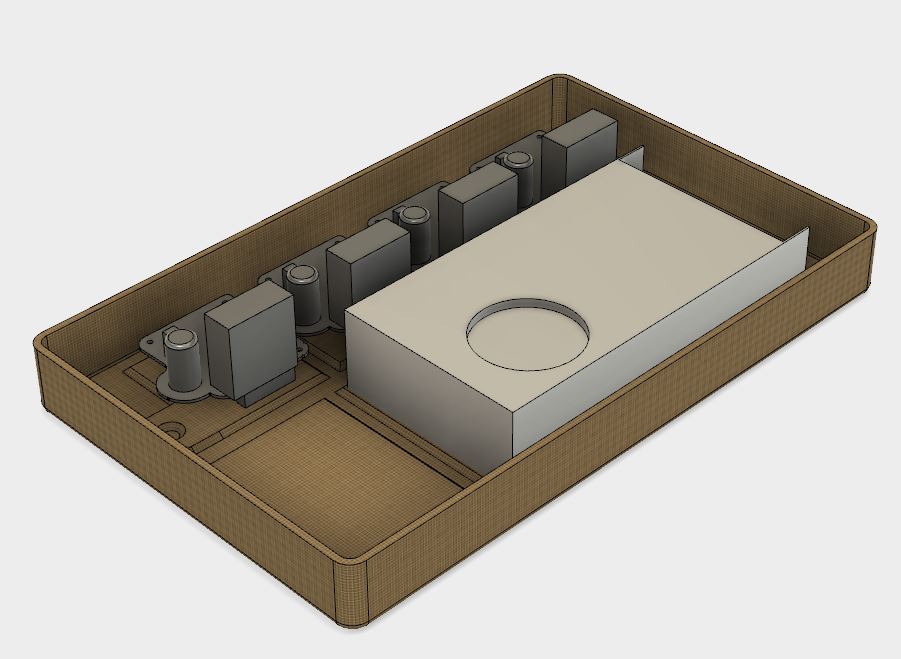
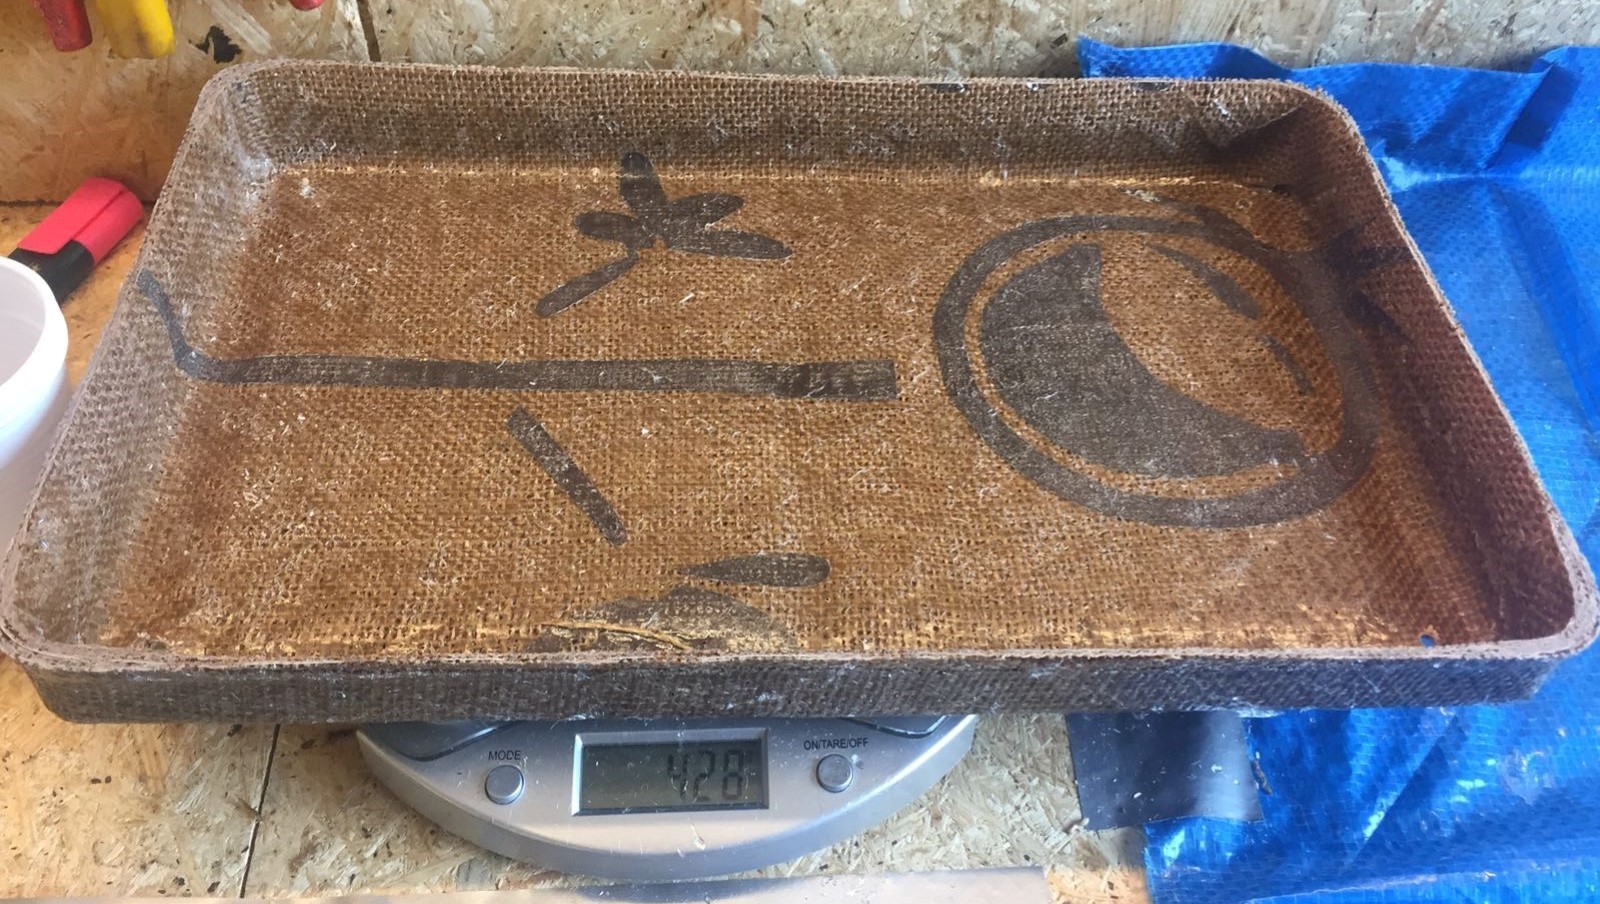
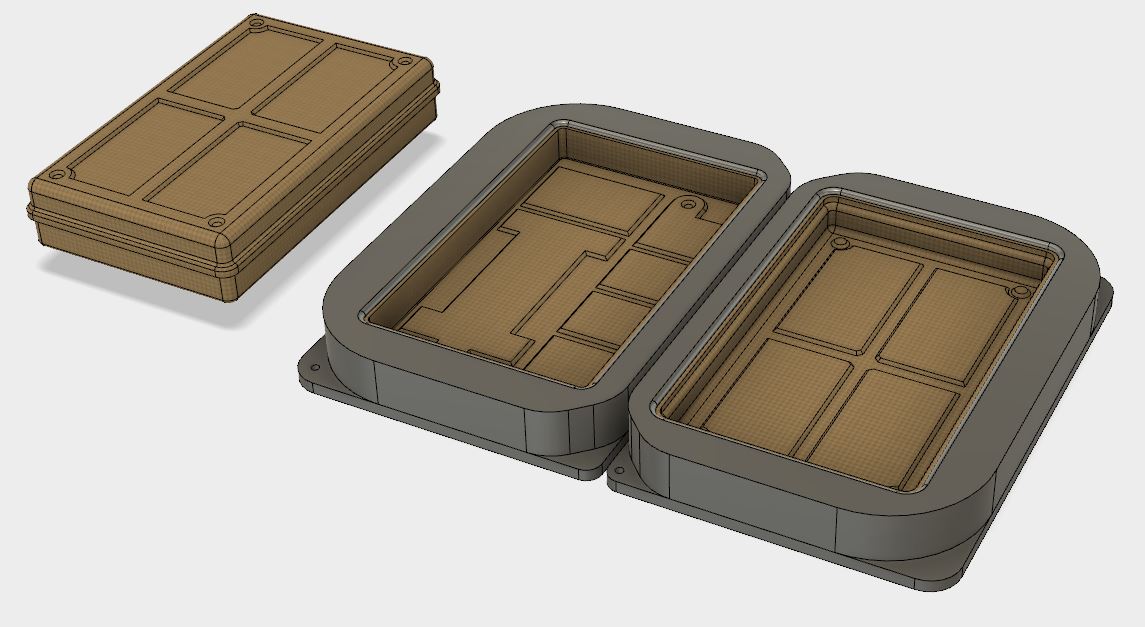
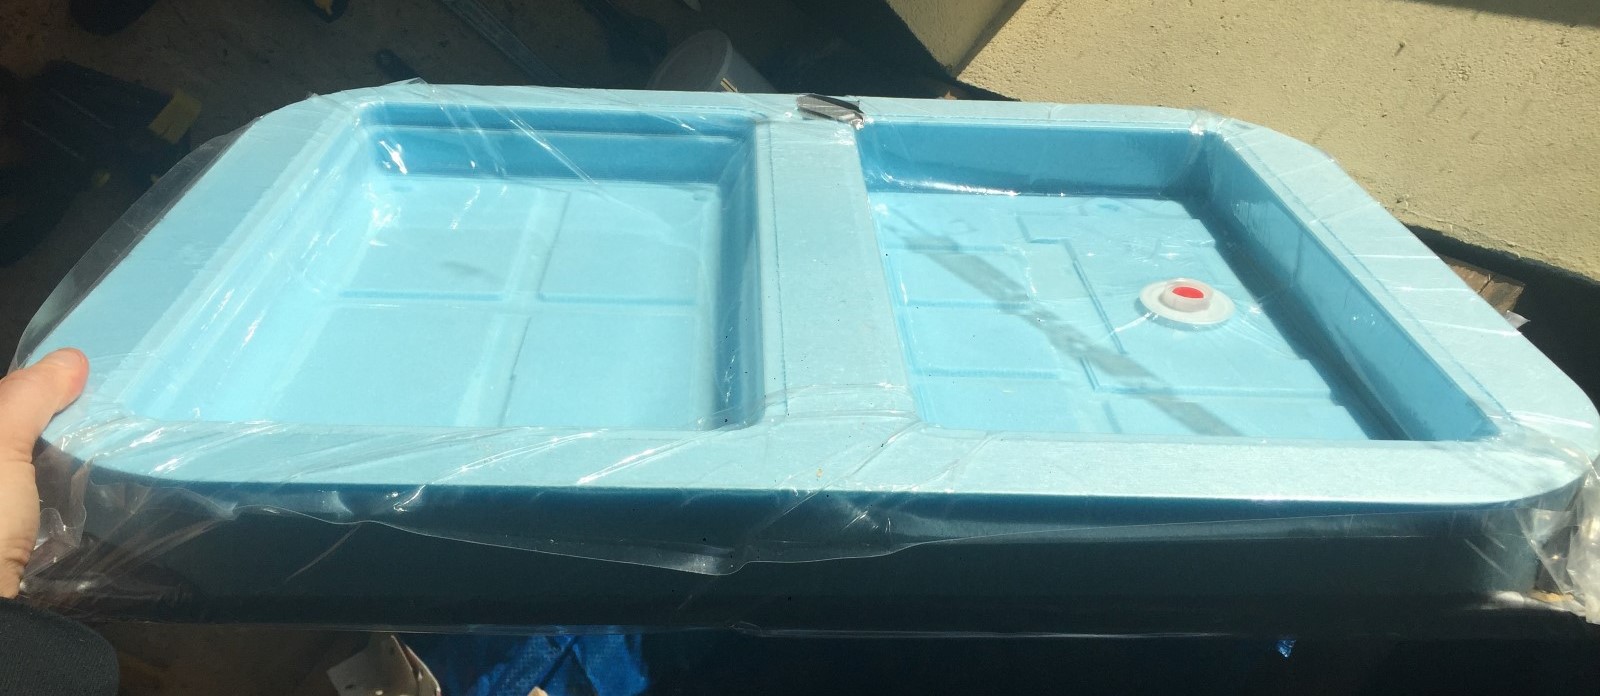
The lower half, or "tray" of my electronics enclosure for my CNC.
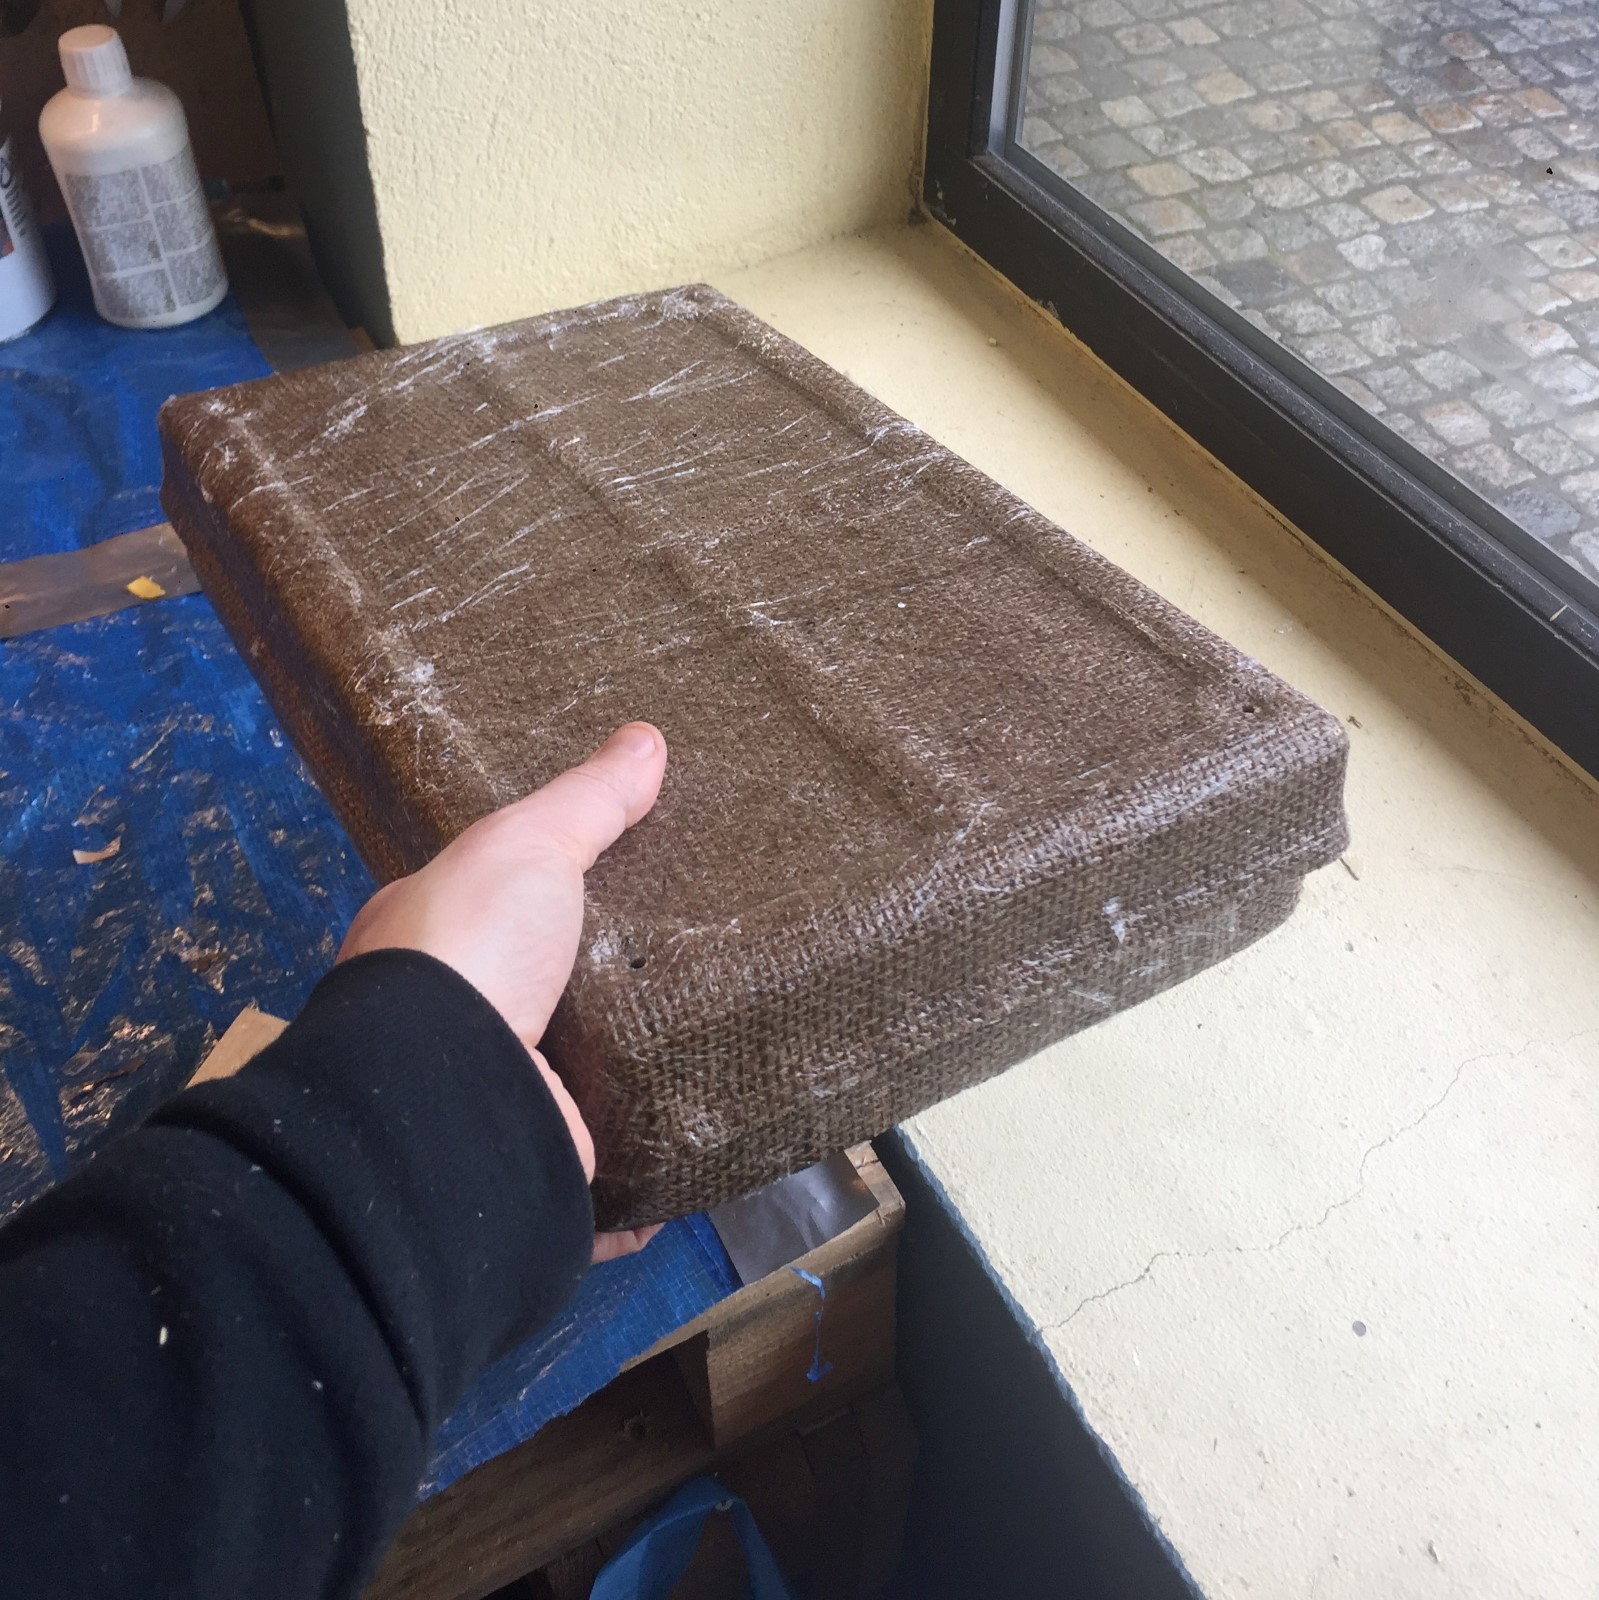
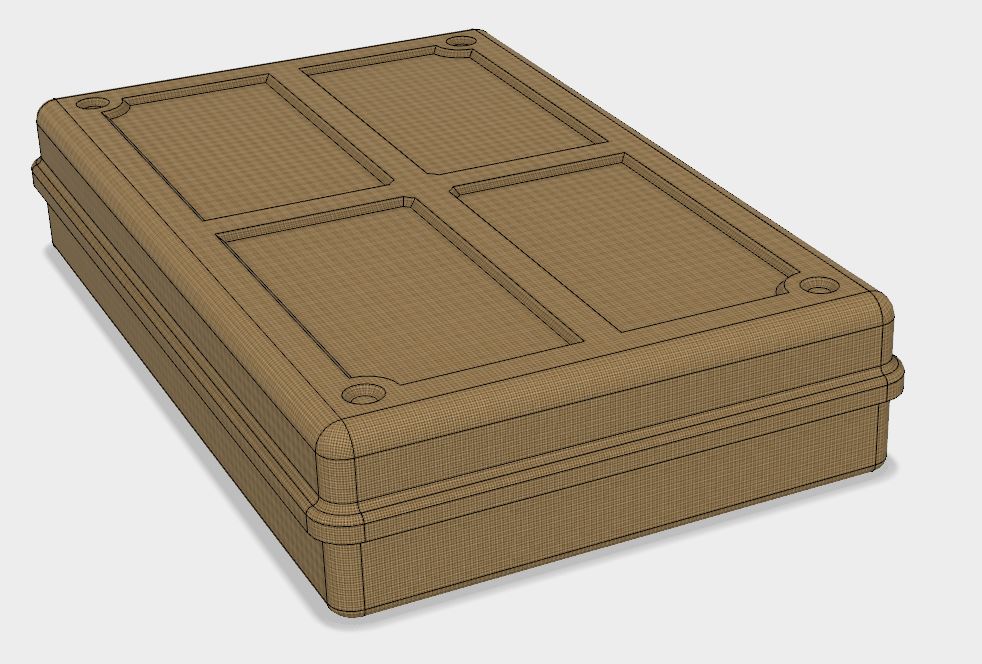
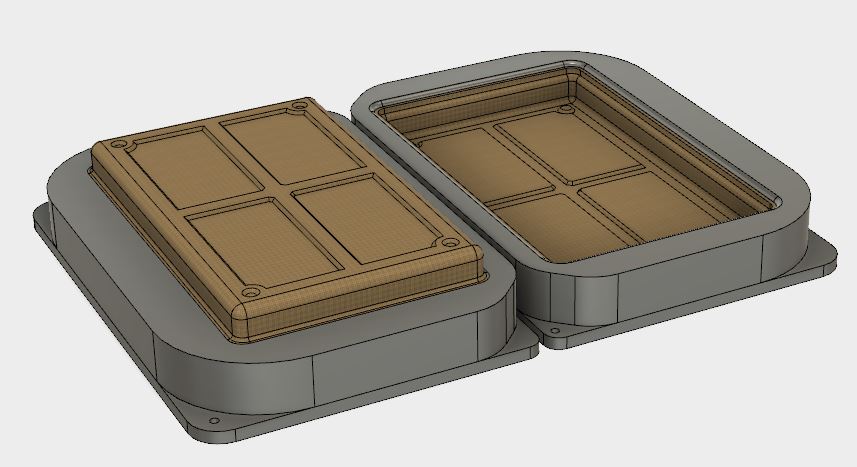
The "lid", and it actually fits!
I'll try to find a brush and see if it can be used to remove the cling film remains.
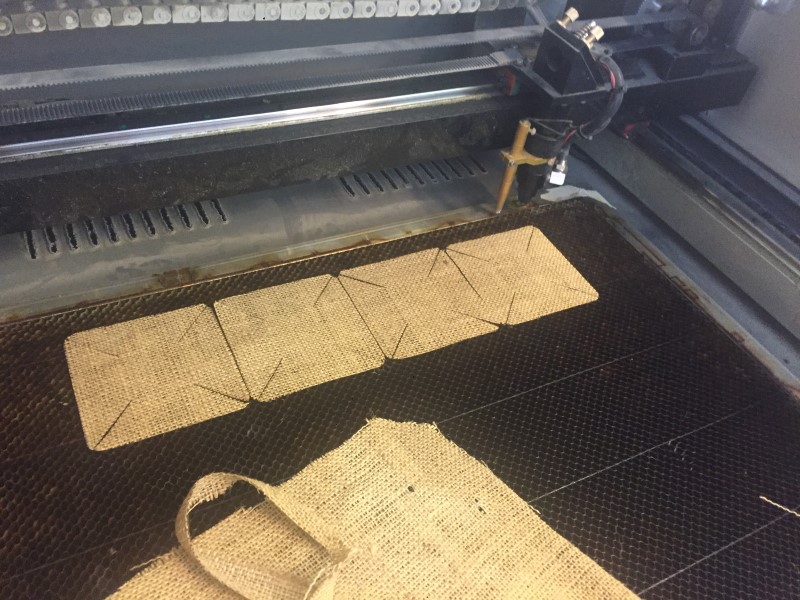
I used recycled burlap from an old sign for a kindergarden, it had graphics glued onto it which I incorporated into my design.
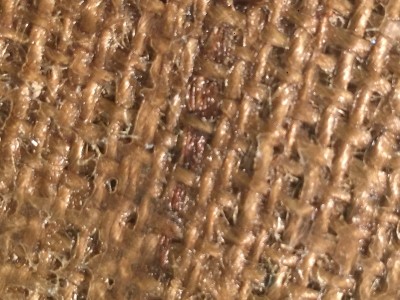
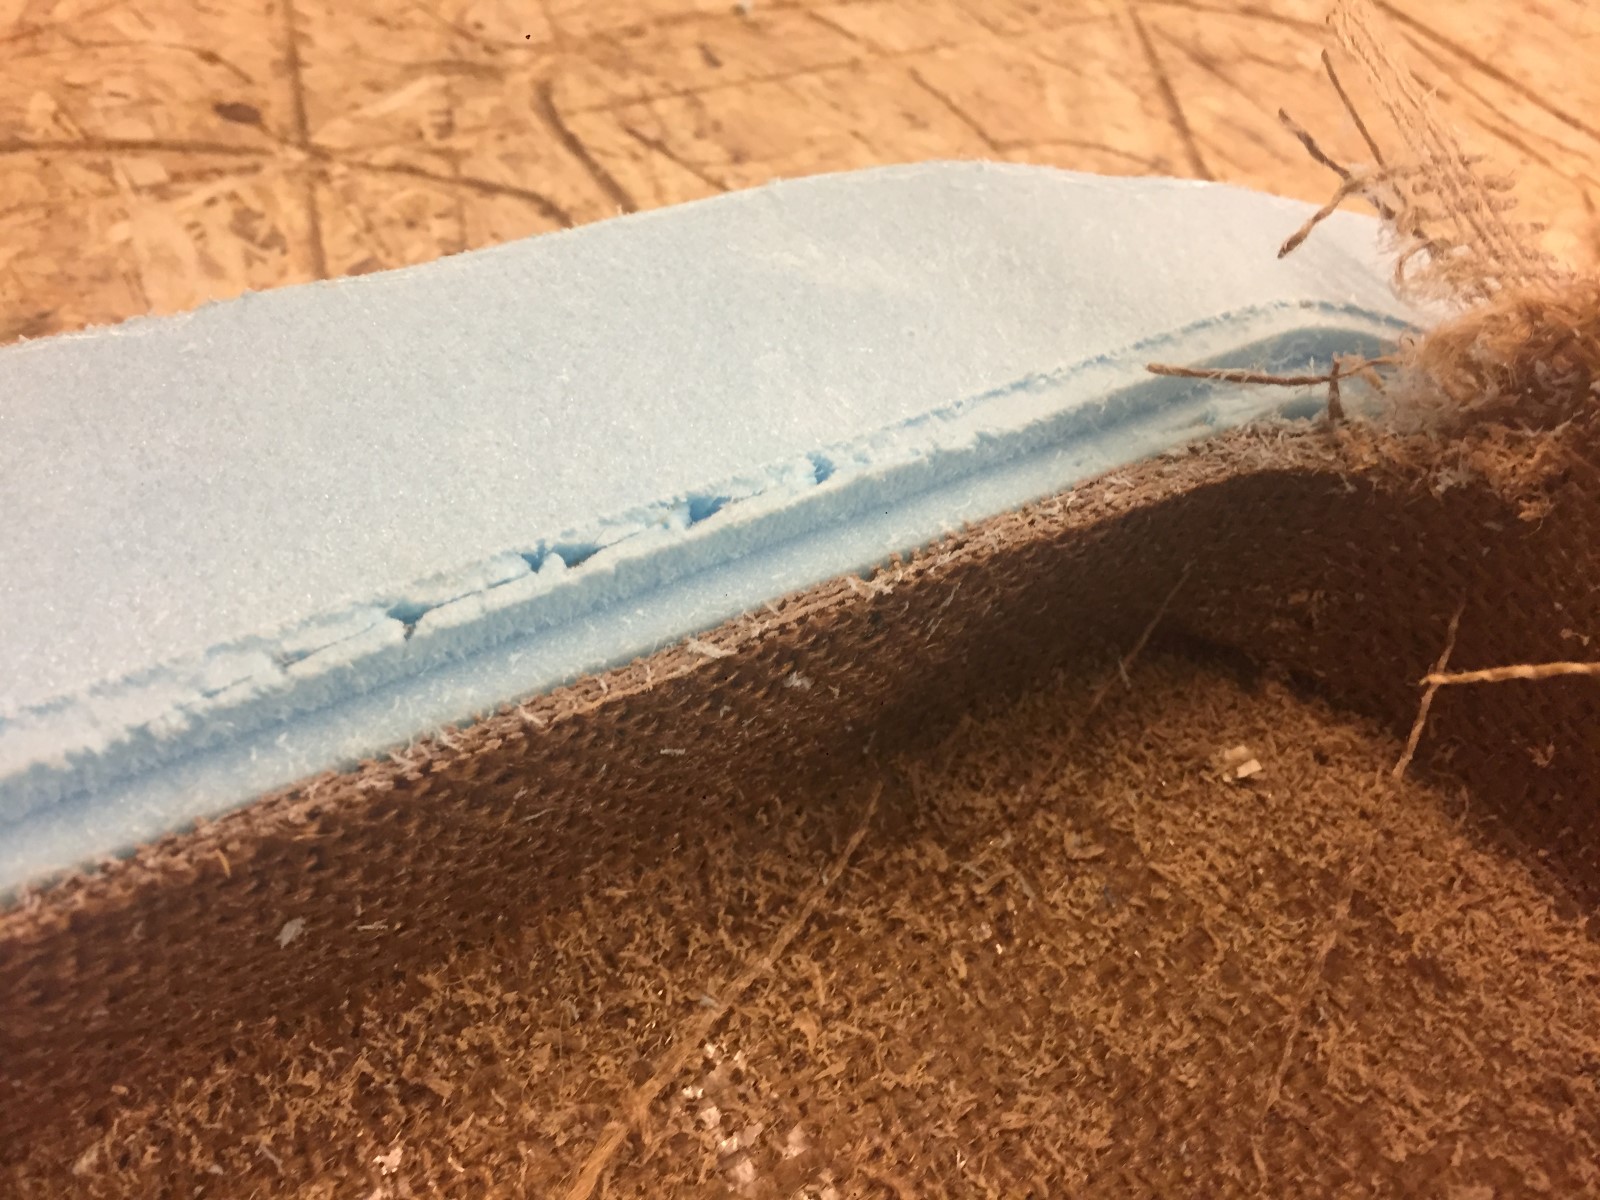
Imperfections
The resulting parts have a few deficiencies.
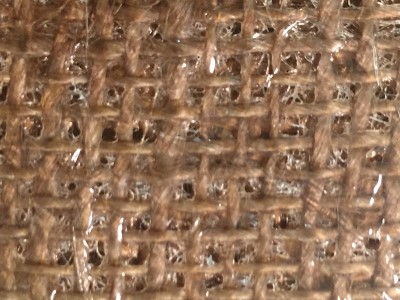
The plys are not filled with expoy, there is frequent "holes" between the strands of jute fibers, some goes all the way through the part, "pinholes". Perhaps I didn't use enough epoxy? I increased the amount when making the lid and the resulting part is 20% heavier and indeed, it has less "starved" areas. Another theory is that I used a too thich absorbtion material since lots of my epoxy ended up in that.
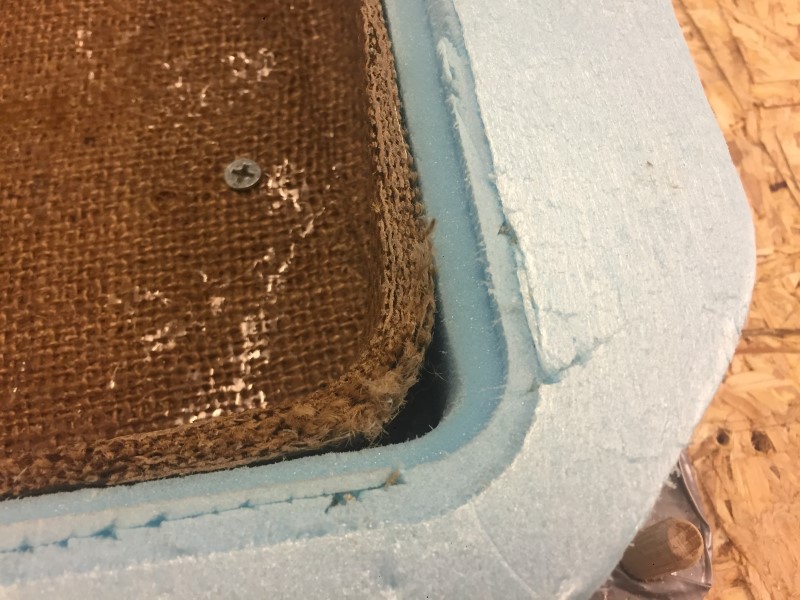
Dry and delaminating walls on the tray part. I did not saturate them with epoxy. I assumed the epoxy would be sucked up through the edges as it did in my test. It didn't. Did better in attempt nr 2. where I first wetted the plys before putting them in the mould.
Bridgeing in the corners. Can probably be mitigated by reducing excess ply overhang (like Niel told us). Did that and tried to make sure to push them into the corners when in the vaccum bag. This improved the lid over the tray but it wasn't 100% good, perhaps my vertical corners are too sharp?
TODO:
I still need to arrange something on the inside so that I can screw down the lid properly and of course cut holes for vents, cables, connections etc.
And I plan to mix some epoxy to wet the dry corners of the "tray" so that they will keep from fraying.
Tray part. Top face to the left, bottom to the right. I used a concave mould.
Bridging error in the tray to the left. This was probably partially casued by the excess length of the plys forming ridge during vaccum curing, shown on the right.
BOM
"Jute"-fiber or "burlap"-bags, one new and one recycled. The recycled one has served time as a signpost for a kindergarden and has some plastic print on it.
Vaccum bags intended for clothing compression. (Did not hold vaccum, possibly due to punctures)
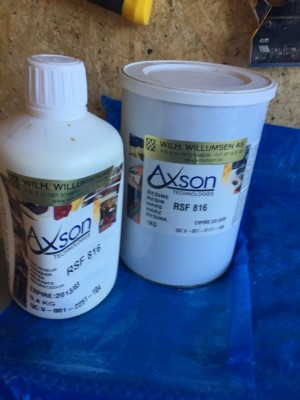
Epoxy and hardener, type RSF 816 Axson. Shoudl 16h before demoulding.
Shop vaccum cleaner.
Plastic disposable cups and cutlery to mix expoy in.
cling film as mould release
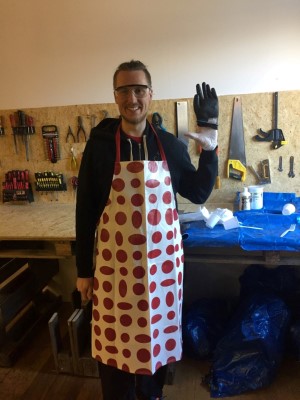
Protective clothing.
XPS building insulation blocks, 49 mm thick
Oriented strand board, to mount and reinforce the foam. (not critical.)
"FRAKTA" IKEA Shopping bags, used as working surface when wetting the plys and as (laser) perforated release film.
Some white fluff made from synthetic fibers. Used as breather and absorbtion layer. Ca 10 mm thick uncompressed, was probably too thick.
SaleCNC milling machine. To machine the moulds. (2100mm/s full cut depth, 45 mm.)
Lasercutter to preforate the release film (dot mode, 0,05s per dot, 20%) and cut the plys (50mm/s at 70% strength).
Respiratory protection: Not necessary if room is well-ventilated
Tightly sealed goggles
Protective work clothing
Protective gloves: Synthetic rubber gloves
Hardener:
Ensure good ventilation/exhaustion at the workplace.
Tightly sealed goggles
Protective work clothing
Protective gloves: PVC gloves
I used polyurethane synthetic rubber gloves AND PVC gloves on the inside of them. As well as long sleeves and wrap around goggles.
The work area is in an big room next to a drafty wall sized door.
Mixing ratio from the data sheet: 100 Resin, 40 hardener.
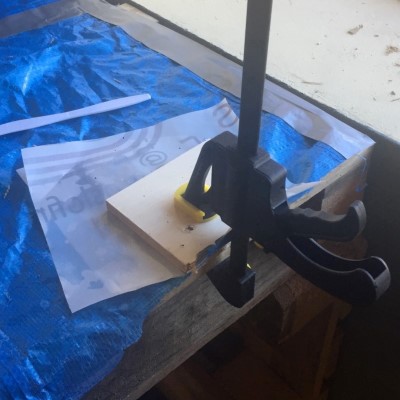
For the first test I mixed up half a disposable cup of expoy and made a cuopon of four layers. I compressed it with a speedclamp.
I mixed it outside the door to the workshop to avoid generating fumes inside.
Minimum pot life before gelling is 28 min in 25C if you do 500g. Since the test area is fairly cold and I made a much smaller batch I expected it to go much slower.
After one hour the mixture was still very liquid. After two hours the mixture was much stickier.
From the data sheet: Demolding time @ 23°C on laminate (5 plies / glass fabric 290 g/m2) 16 hours
We shall see!
Success!
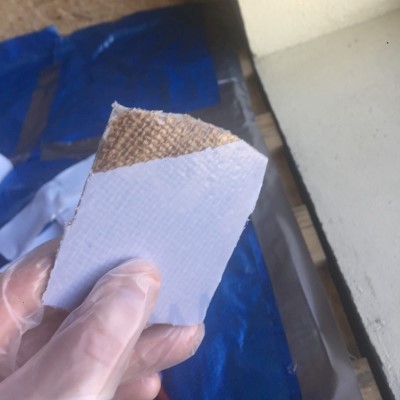
First coupon worked fine. I demolded it after 24h hours of clamping between plastic sheets and wood for reinforcement
Issues and observations:
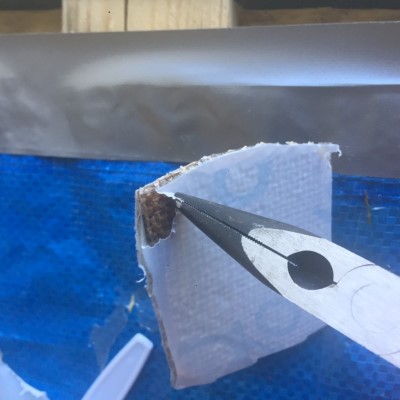
The plastic that I was hoping to perforate and use as relese film binds to the epoxy. I don't know the plastic mix of the foil I used but I thought epoxy would not bind to plastic films at all?
After asking around I learned that recycled plastic can stick to expoy due to it having contaminants in it. I'll make more tests with different plastics as release film!
New test - make shapes
New test!
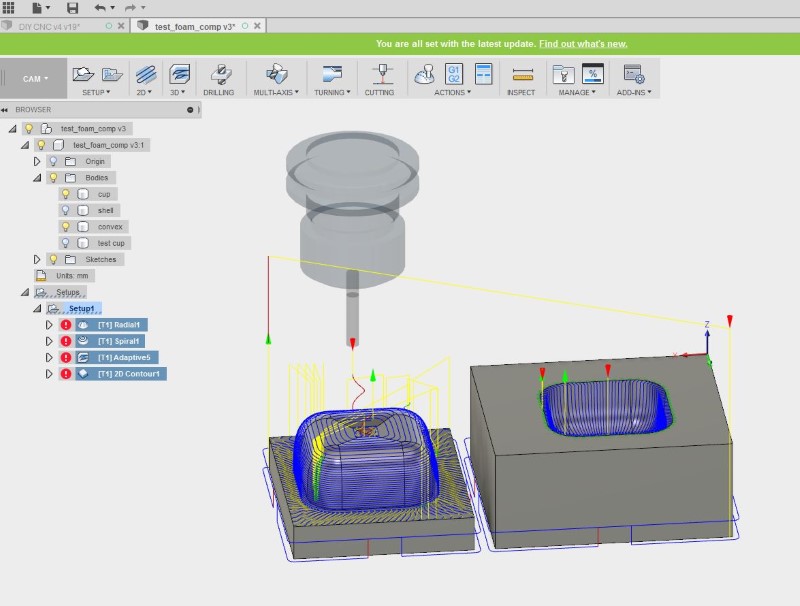
For my second test I choose to try out both convex and concave surfaces. I used fusion360 to design and CAM a simple test form.
It also gave me an opportunity to test out different machining strategies.
CAM strategy
I ended up favouring "morphed sprial" for its bulk material removal with constant tool engagement (adaptive clearing does one depth at a time.) I then used "pencil" to quickly clean up edges and adaptive clearing with 1 mm layers to do the radiuses in all corners.
I used the lasercutter to cut the plys to shape (I first tested the shape for hand with siccors). The diagonal cuts are called "darts", they are critcal to be able to get them into the corners without creasing the burlap.
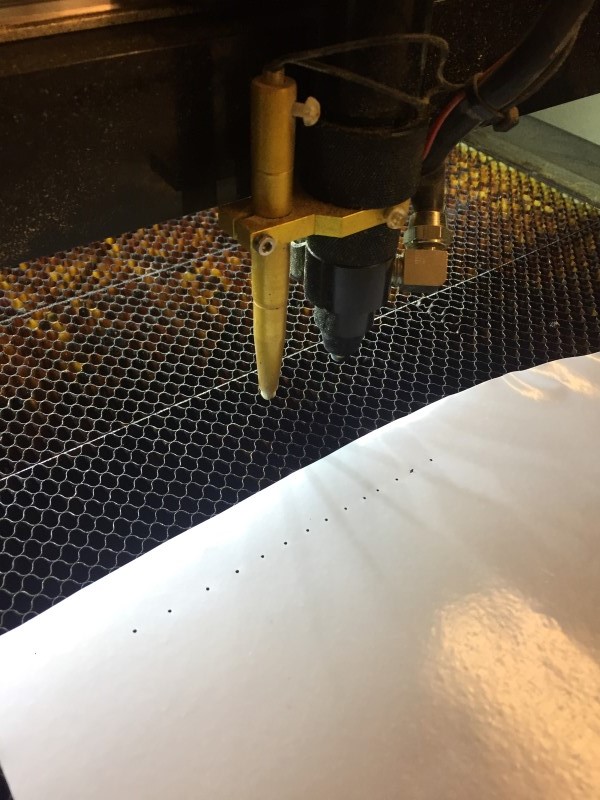
I also use the lasercutter to perforate plastic to use as a permiable layer so that excess expoxy can bleed through. The lasercutter in the lab has a specific "dot"-mode which made this very easy.
Layers, starting from the bottom.
XPS-foam milled into my mould shapes, convex and concave.
Cling film as mould release
4 layers of burlap saturated with epoxy
Perforated zip-lock food bag. Laser perforated, 3 mm spacing between holes to let excess epoxy through.
Synthetic white fluffy material, ca 10-15 mm thick. To absorb excess epoxy and lead air to the vaccum port.
Vaccum bag for compaction.
I let it sit like this for 40 min under vaccum. As soon as I turned of the vaccum air leaked into the bag. I think splinters probably pierced it, even if I couldn't find the leakage points.
According to what I have read I would have liked to keep the vaccum pressure until the part has cured. Since my epoxy takes 16h to cure enough for demoulding this wasn't practically possible, attempting that would probably have burnt out the vaccum cleaner.
Issues and observations:
Molten mould The left cup was made in a concave mould and got so hot during curing that it partially melted the skin of mould, that is the residue on the surface.
Vaccum spreading resin When I applied the vaccum I could see the epoxy being pressed/sucked into the excess fibers on top of my mold, they were not staturated before.
Too late demould I let it cure over the weekend before attempting to demould them and by then the excess epoxy on the inside of the concave cup was too hard to be removed. The data sheet specifies 16h before demoulding, I'll stick to that in the future.
Sticky relase film On the right cup the flower pattern on my release film got transfered to the cup and could not be removed, the paint probably bonded with the expoy. I'll try another plastic when making my box.
Application side The concave cup mould was MUCH easier to apply the plys into compared to try to wrap them onto the convex cup mould. I will make my next mould concave.
IKEA plastic as release film candidate I notice that the resin does not stick at all to my workbench, which is covered in plastic from old "FRAKTA" IKEA bags. It is also muchg stronger than the films I have tried so far. I'll try that next.
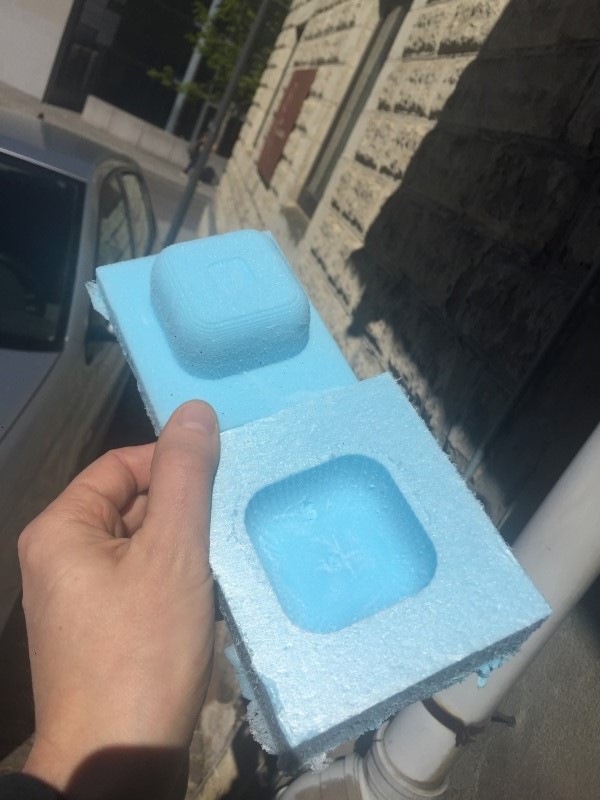
Mould side after demoulding
Top side after demoulding
Make the product
Armed with the observations I had made from my tests I decided to use the following for my box:
I used Fusion360 to desing the box and mold halves. I suspected that the bottoms would bend in under vaccum so I added 12mm of Oriented Strand Board (OSB) to the bottoms. This also made it easy to make indexing holes and areas to screw the moulds to the milling table. I taped the XPS to the OSB with double stick tape.
CAM strategy
I ended up favouring "morphed sprial" for its bulk material removal with constant tool engagement (adaptive clearing does one depth at a time.) I then used "pencil" to quickly clean up edges and adaptive clearing with 1 mm layers to do the radiuses in all corners.
Too big mould!
I first planned to stick both halves into one vaccum bag but when I test fitted them I realiced the bag would not be big enough to "reach in" and give adequate pressure, so I had to split the moulds from each other. My indexing pins came in very handy!
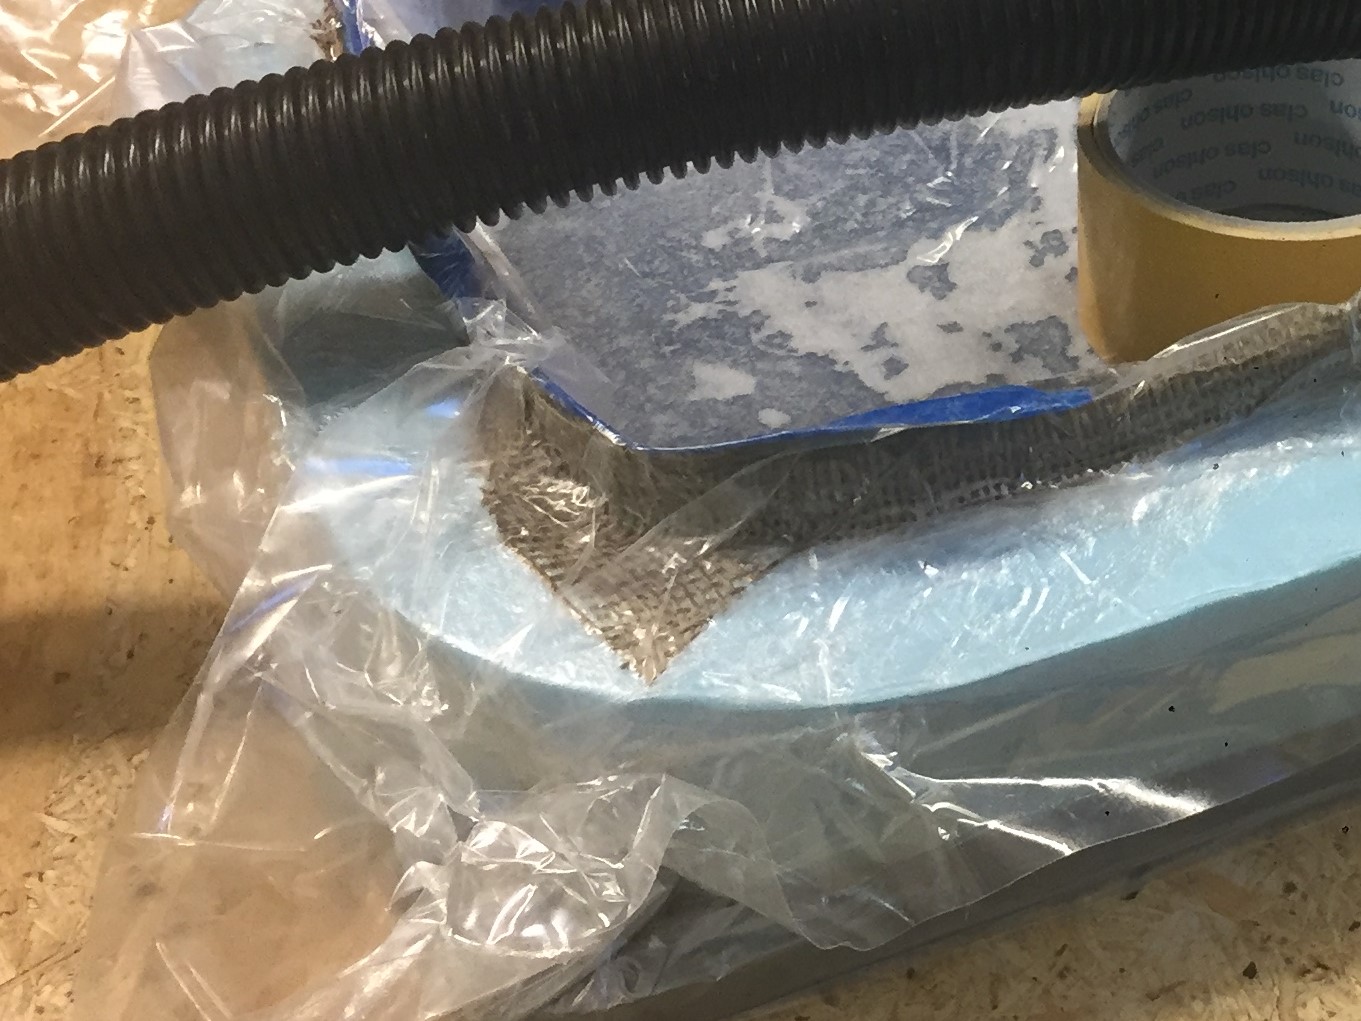
Burlap compisites using vaccum bagging
Layers, starting from the bottom.
XPS-foam milled into my mould shape.
Cling film as mould release. TIP! Attach it to the bottom of the mould with vaseline to stop it sliding.
4 layers of burlap saturated with epoxy
"FRAKTA" IKEA bags Laser perforated, 3 mm (tray) and 6mm (lid) spacing between holes to let excess epoxy through.
Synthetic white fluffy material, ca 10-15 mm thick. To absorb excess epoxy and lead air to the vaccum port. (Probably too thick, use a thinner material!)
Vaccum bag for compaction.
I let it sit like this for 40 min under vaccum. As soon as I turned of the vaccum air leaked into the bag. I think splinters probably pierced it, even if I couldn't find the leakage points.
According to what I have read I would have liked to keep the vaccum pressure until the part has cured. Since my epoxy takes 16h to cure enough for demoulding this wasn't practically possible, attempting that would probably have burnt out the vaccum cleaner.
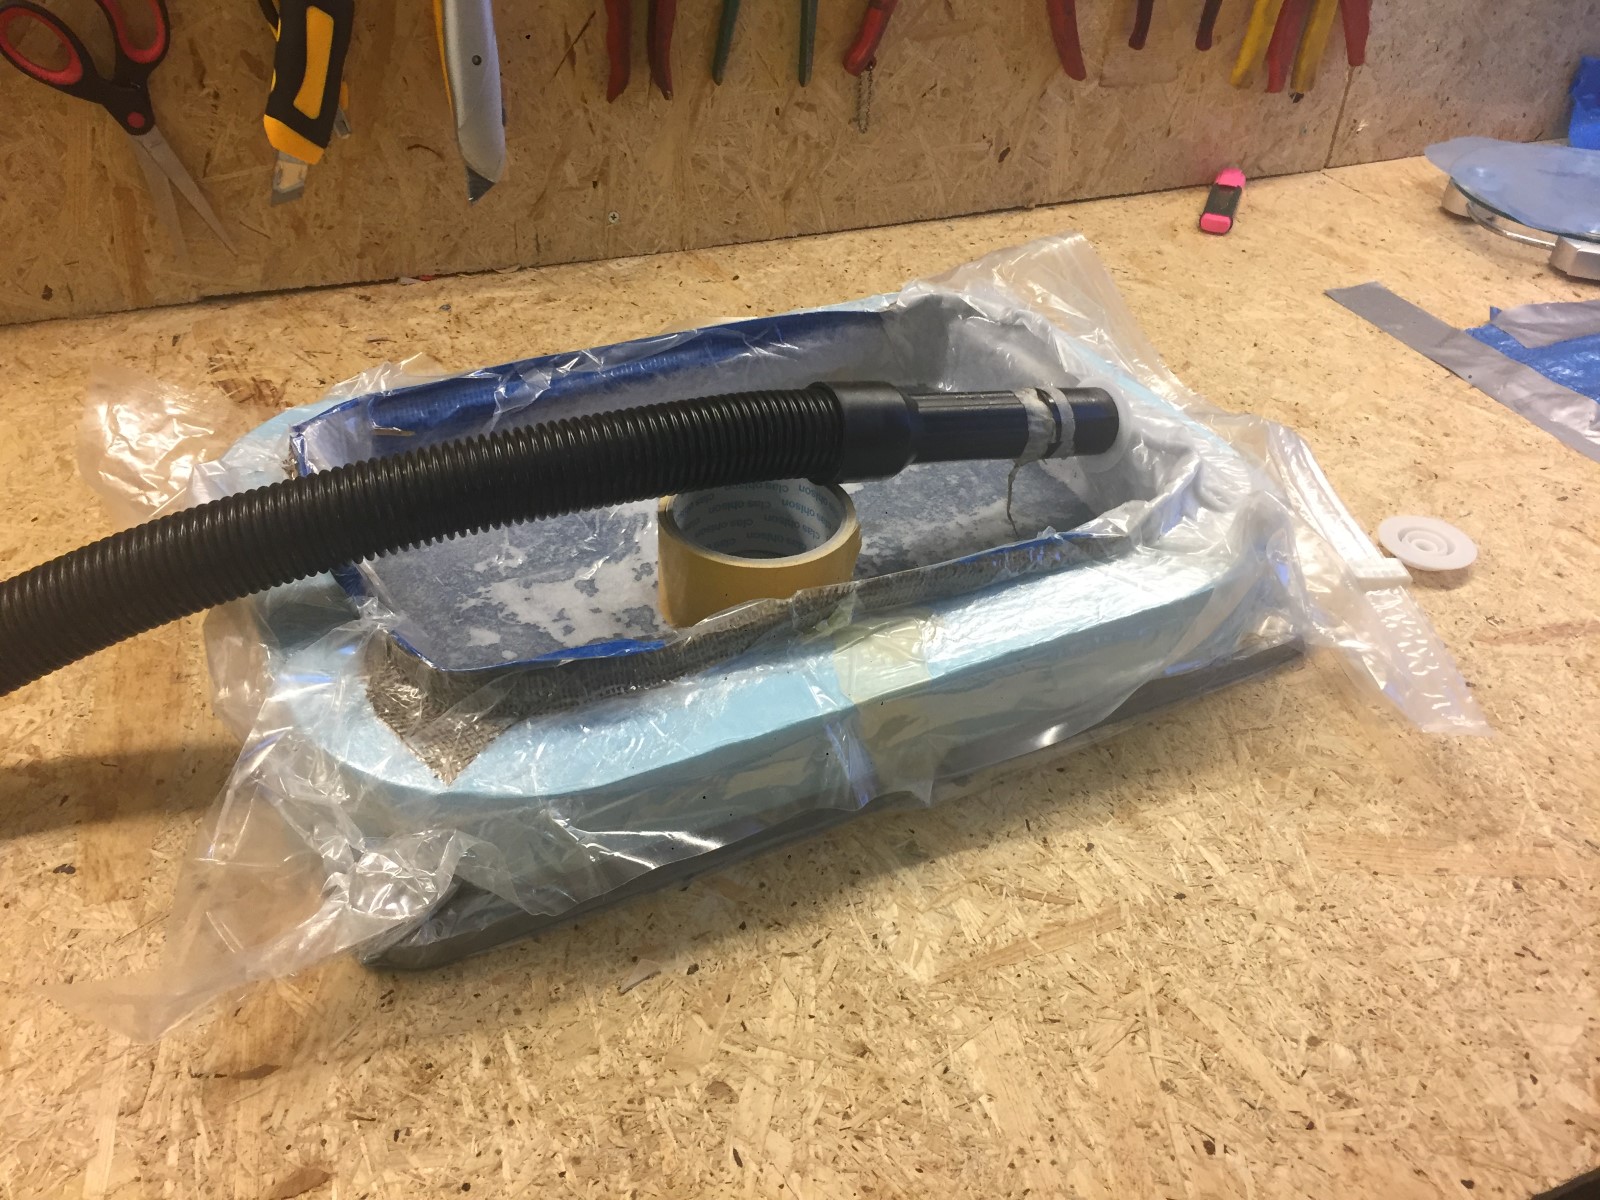
My vaccum setup, I let it sit like this for 40 min under vaccum. As soon as I turned of the vaccum air leaked into the bag
Trim the product
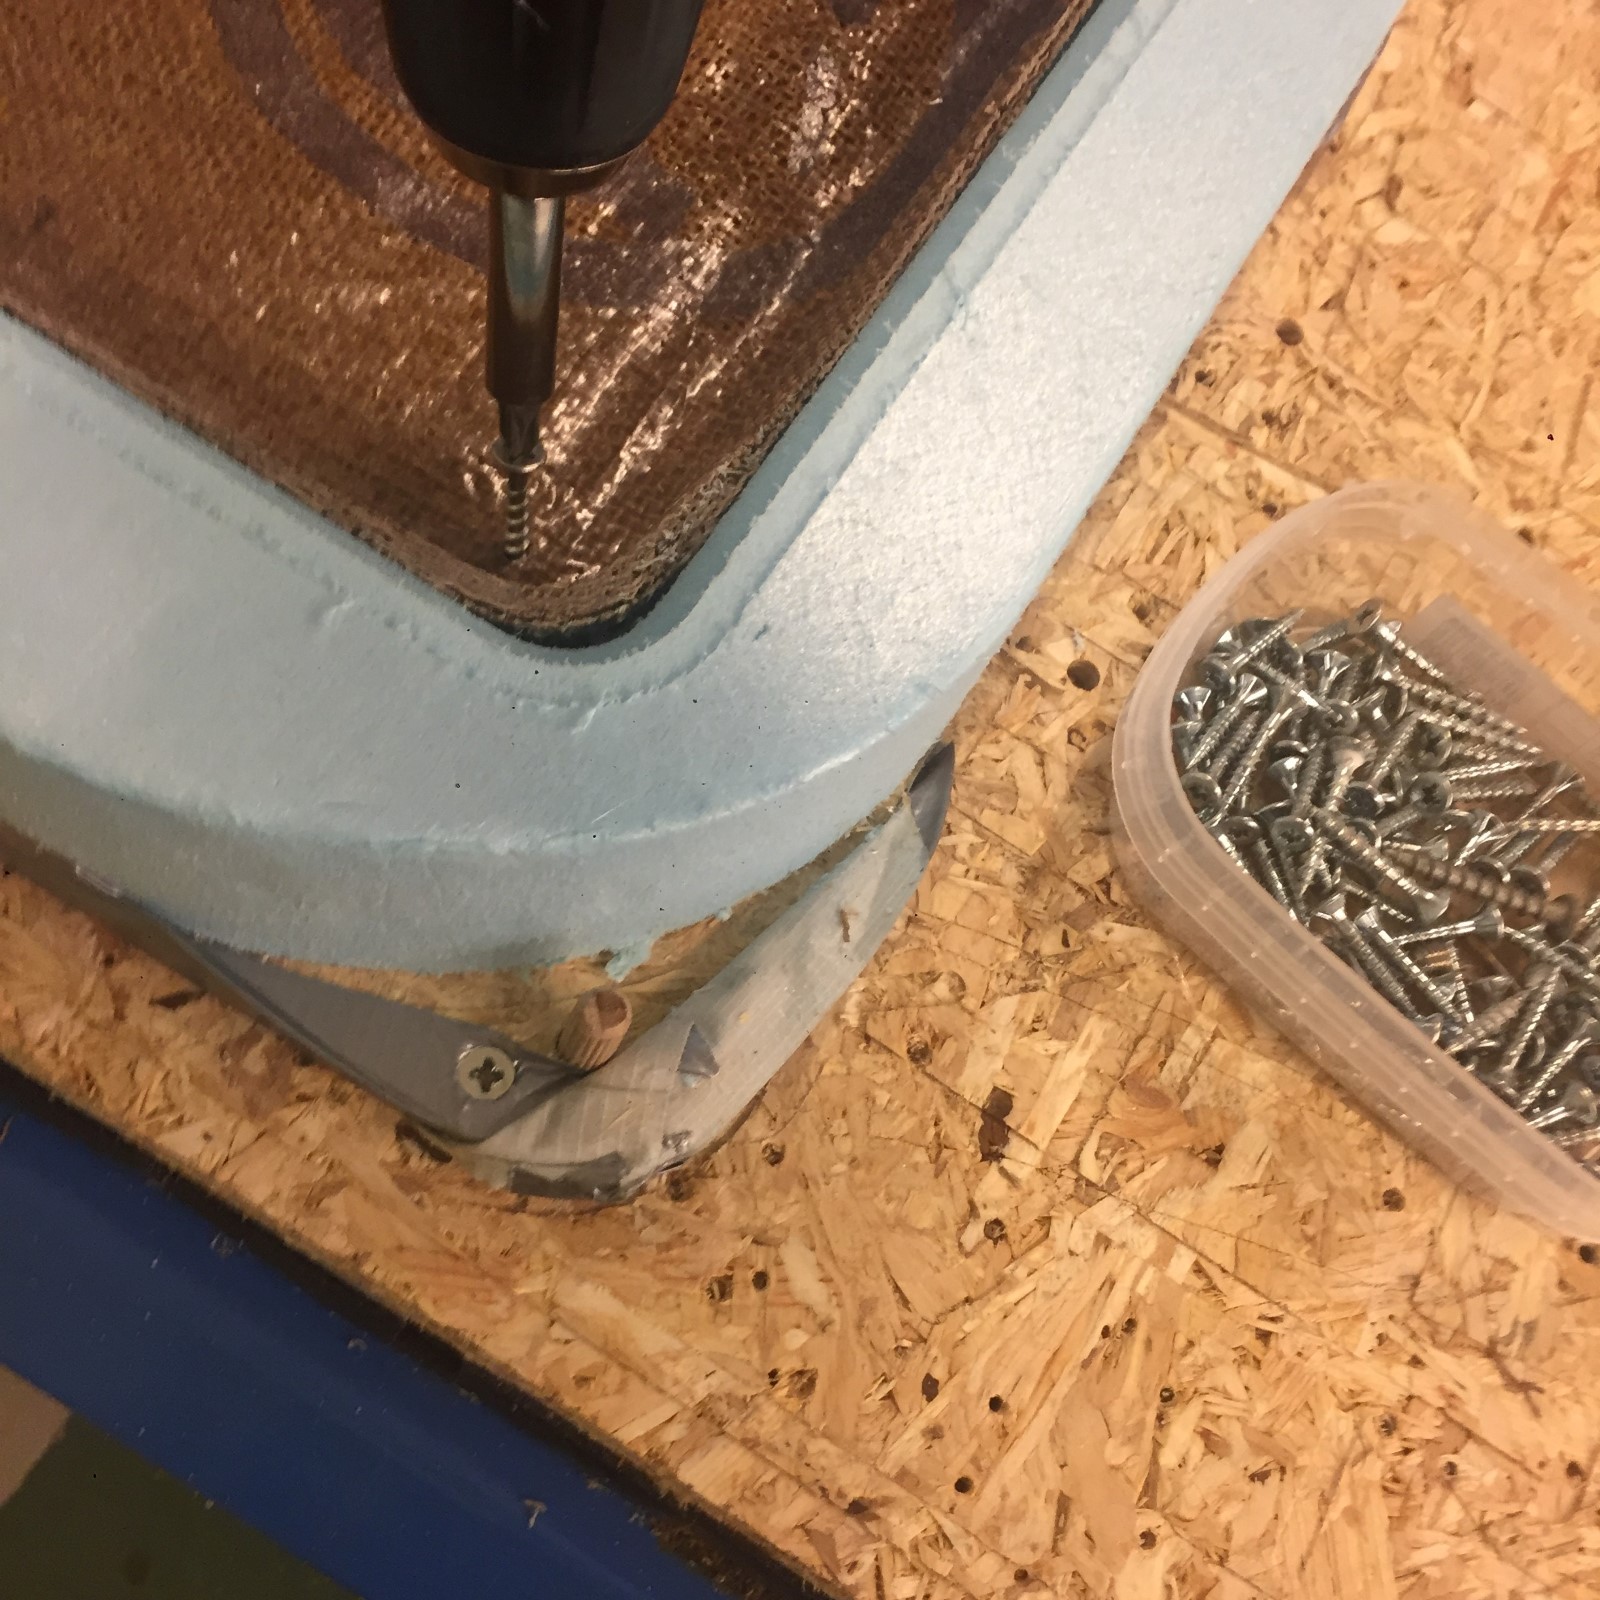
The corners of my mould base plates has indexing holes where I put wood plugs that go into matching milled holes into the sacrificial layer on the mill. This allows easy positioning back into the mill.
I also drilled holes and screwed the composite down as well to prevent it moving.
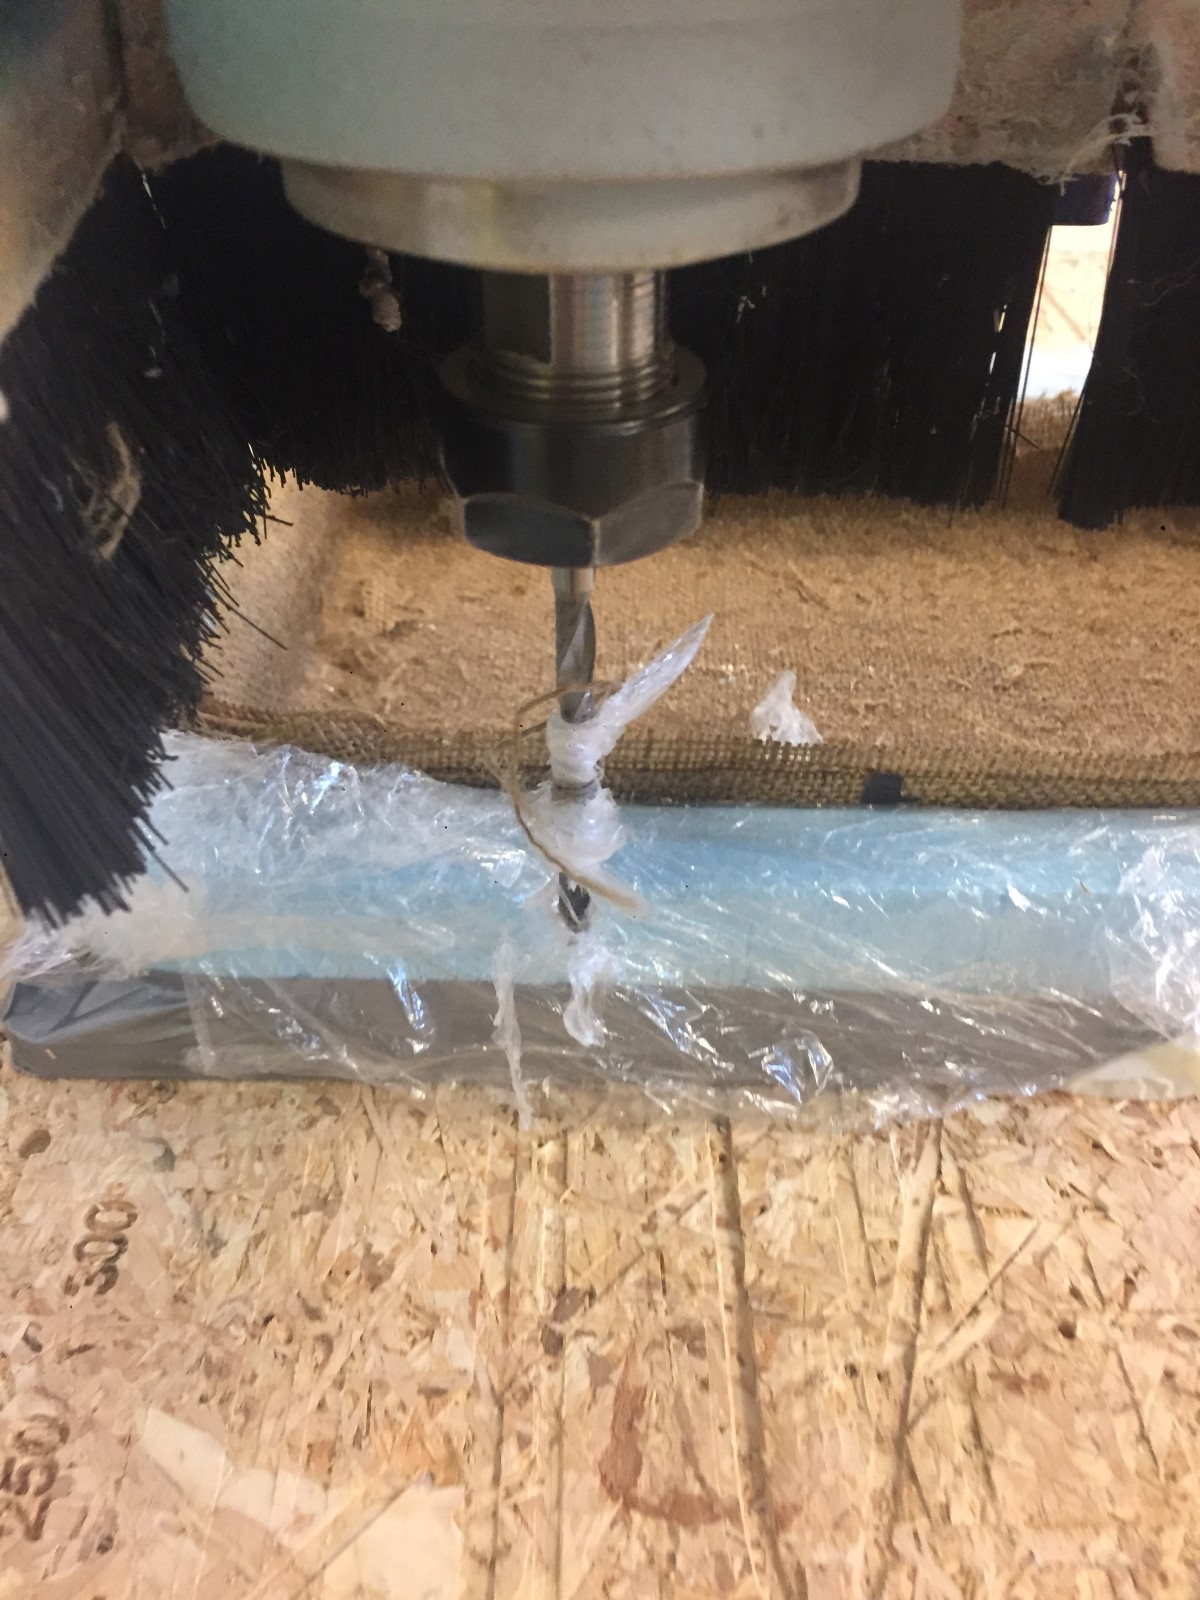
This allowed me I used the CNC mill to easily trim the excess from the edges.
I first tried milling with the cling film still hanging loose over the sides of the mould, turns out that was a bad idea.
Varning! Do not do this if you are using fibreglass or carbon fiber it would release dangerous micro fibrers into the air and your dust collection bag would become hazardous material.