Computer-Aided Design.
Assignment:
*- Model (raster, vector, 2D, 3D, render, animate, simulate, ...) a possible final project, and post it on your class page.
*- Model (raster, vector, 2D, 3D, render, animate, simulate, ...) a possible final project, and post it on your class page.
week 2
Guillermo Jaramillo :: Fab Academy 2017
Fab Academy 2017

For the 3D design, I try a lot of different tools, some installed on PC, such as SketchUp or Blender and others on line like Onshape, TinkerCad or FreeCad.
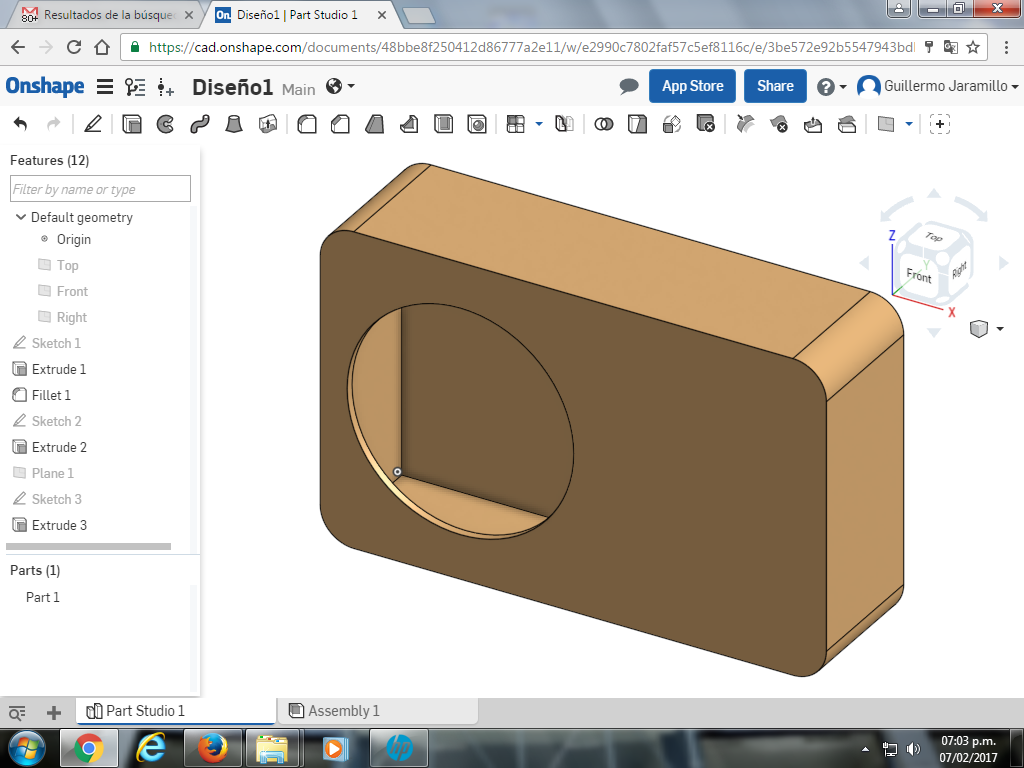
Lets start with a tool called Onshape, available here: https://www.onshape.com/ . In this tool i design some ideas of the case trying all possibilities, the result is here:
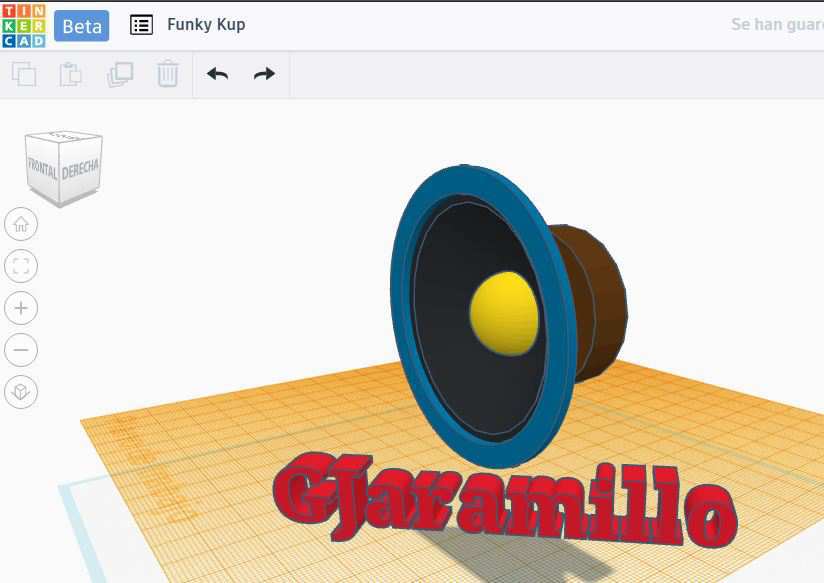
Now another excelent tool for 3D design is TinkerCad, is available here: https://www.tinkercad.com/ . I try to design a speaker, but this tool lets you to learn another ways to think, because there is not available 3D operations like revolution, but a lot of this primitives you must resolve with addictive geometry. Here the result:
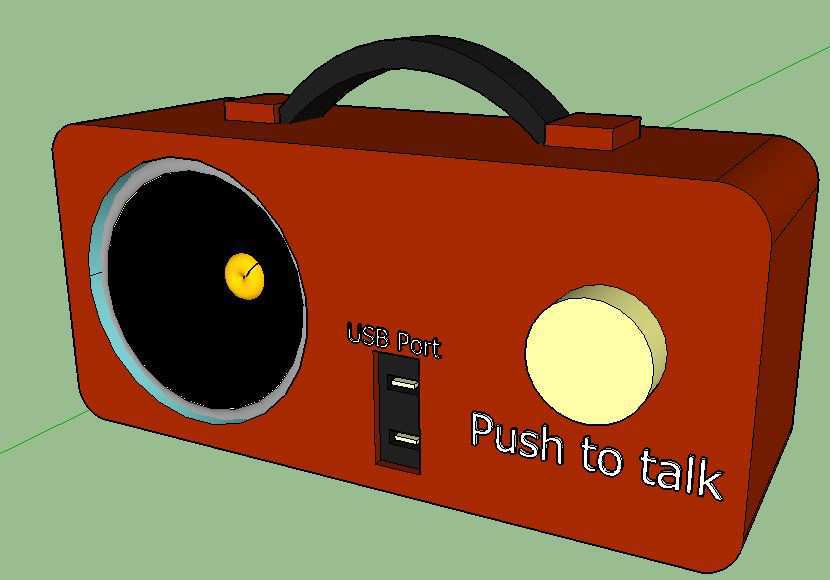
So i tried SketchUp (http://www.sketchup.com/download), the final results are shown, with another dozens of cups of coffee i finish a preview from the project. Lets see.
Now i finished the render of this work, its uploaded to my youtube channel:
(https://www.youtube.com/channel/UCMN4AH-jr21Idn_2t9fzHlg)
This is the video showing the preview in render mode.
(https://www.youtube.com/channel/UCMN4AH-jr21Idn_2t9fzHlg)
This is the video showing the preview in render mode.
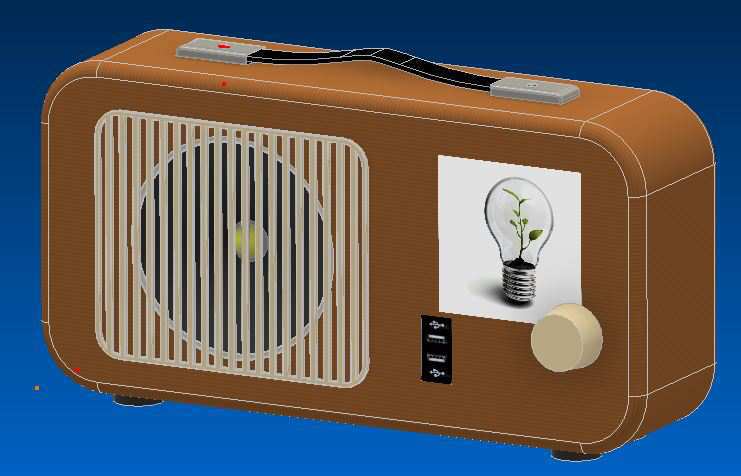
And finally, I used Autodesk Inventor to create a model of my project. This a very professional tool, with 2D and 3D primitives to design almost everything.
This is the result.
This is the result.
And the render of the construction of this preview is uploaded to my youtube channel. I show in the video all operations and multiple views.
This is the video showing the preview in render mode.
This is the video showing the preview in render mode.
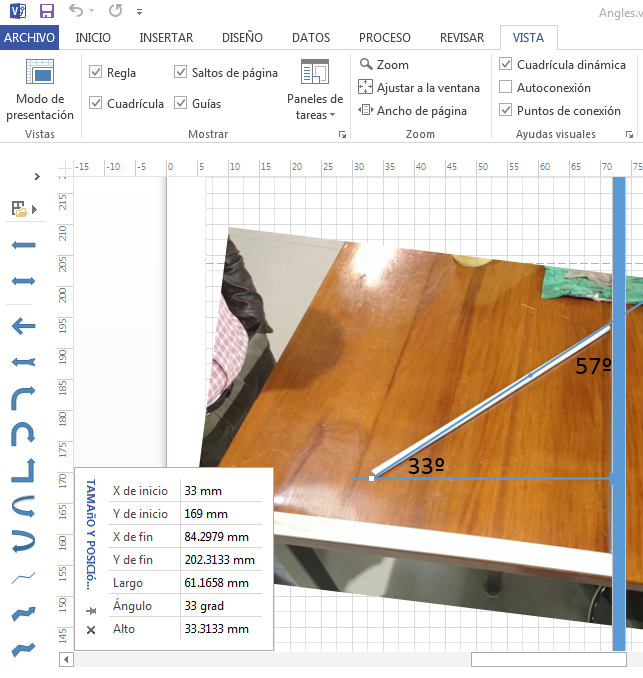
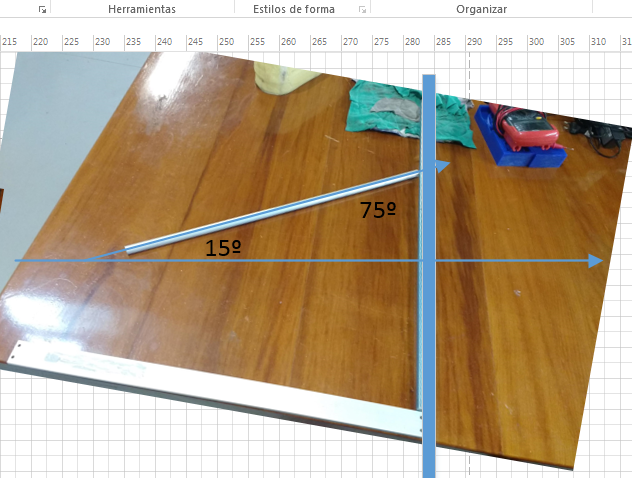
Lets work with MS Visio to use the 2D for calculate the different angles between lines. So, thats meaning that there is a simple method to calculate angle degrees of inclination using simple procedures and photos. I used this to calculate the three positions of the cane in my final project.
Lets see first a set of photos, next the process in 2D program and finally the measure of the real angle.
Lets see first a set of photos, next the process in 2D program and finally the measure of the real angle.
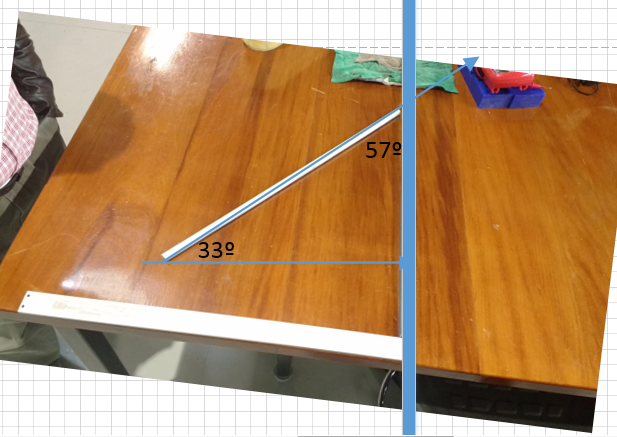
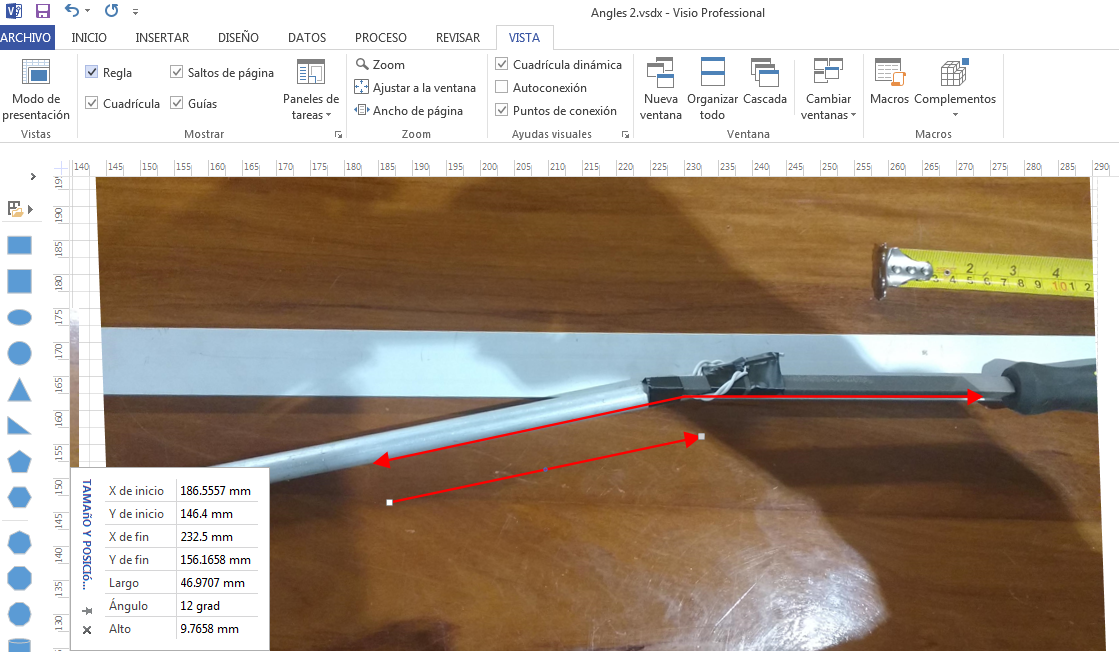
Finally the calculus of the right angle is measuring the angle of the line as showed in the picture, in this case the angle found is 33º, and for a simple calculus the complementary angle and the needed angle is 90º- 33º = 57º. As the same calculus in the right photo the angle measured is -168º. The method is measure the angle in this case is 12º. Next, the right angle is 90º-12º= 78º.
Finally the rigt angle between the cane and the handler is 90º+78º = 168º.
Finally the rigt angle between the cane and the handler is 90º+78º = 168º.
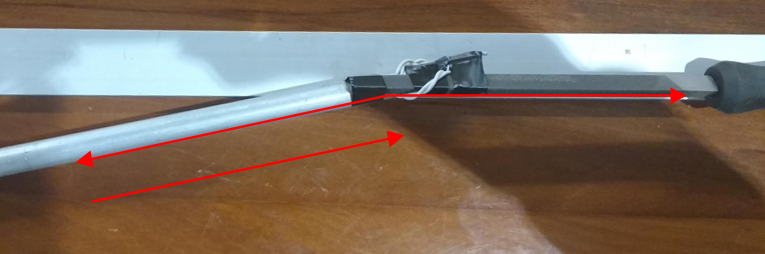
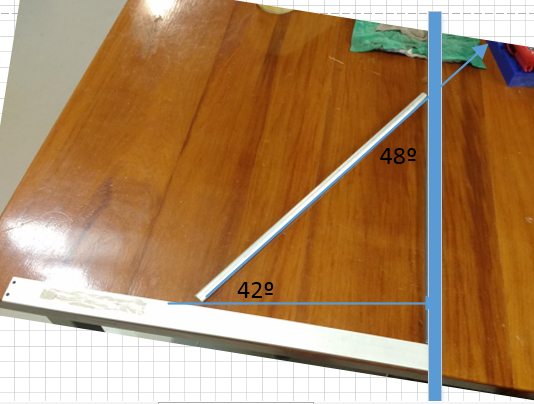
Here i have a set of photos in that there are the different positions of the cane and the problem is calculate th right real angle. For this i do a simlple geometric procedure.
First i add a photo into the 2D program called MS Visio. So i add a lines with a flat angle like 0º, and now put a rectangle in square with the first line and add a third object like a line and measure the angle between this doing a triangle.
First i add a photo into the 2D program called MS Visio. So i add a lines with a flat angle like 0º, and now put a rectangle in square with the first line and add a third object like a line and measure the angle between this doing a triangle.