Composite
Goals
- Read the material safety data sheet (MSDS) and technical data sheet (TDS) for the resins that you're using
- Design and make a 3D mould (~ft2 /30x30cm), and produce a fibre composite part in it
Making the mold: 3D model and milling
For this week I decided to build a simple bowl using the jute fabric we have laying around in the lab, which has been neglected by everyone in favour of the linen. My not-so-secret plan is to fill the aferementioned bowl with potpourri to perfume our lab (the temperatures are rising, the fear is beginning to settle in and some joker keeps cutting that smelly MDF).
I started modelling a very basic shape in Onshape for my mold:
I then exported the .stl and moved to the pc equipped with Cut3D in order to create the toolpaths for the actual milling. I already illustrated the process two weeks ago (molding and casting), but this time there are 2 significant differences: the slicing of the model and the mill end settings for the polystyrene. Since my model height was greater than our polystyrene sheets height I had to slice it, obtaining two .stl to be milled separatedly. Cut3D makes this operation a breeze: as soon as you reach step n2 during Cut3D workflow, after setting material height, cut plane and so forth click "slice model" and set the slices height according to your material, and Cut3D will generate as many slices as required to safely mill your project.
As soon as you have all your slices you can start generating the toolpaths as they were original files; for this kind of work I used a 1/4 end mill for the roughing path and a 1/8 bn end mill for the finiscing. The settings, tested and found true by my colleagues are as follows:
- 1/4 flat
- feed rate: 220 mm/s
- rpm: 18000
- plunge rate: 30 mm/s
- 1/8 bn:
- feed rate: 220mm/s
- rpm: 18000
- plunge rate: 30mm/s
You may have noticed how the feed rate is quite high, but this pose not a problem, for polystyrene is a very soft material and makes very little resistance.
As soon as I had my toolpath files I fixed a sheet to the ShopBot with a couple of screws and started milling.
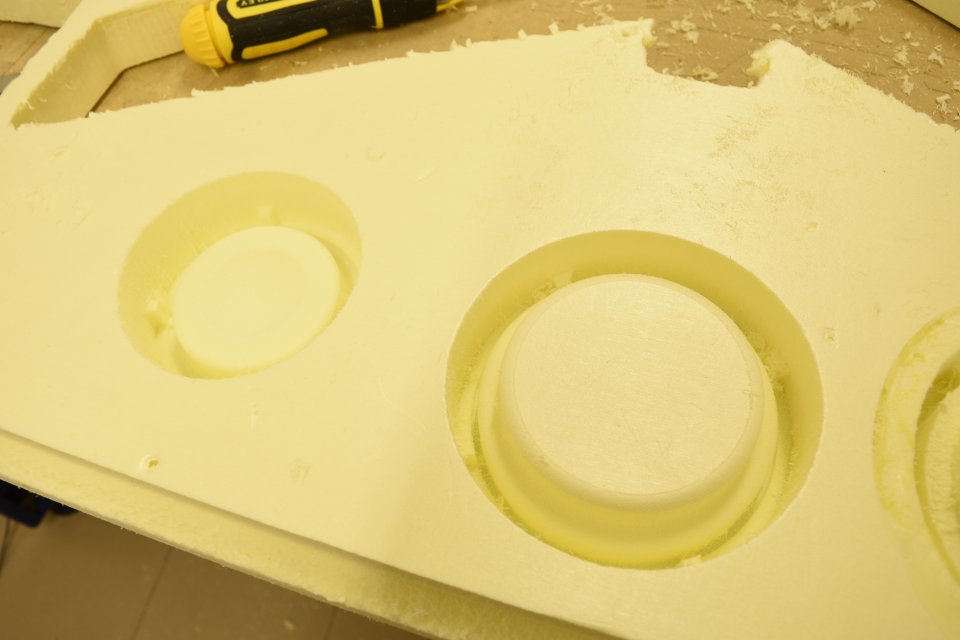
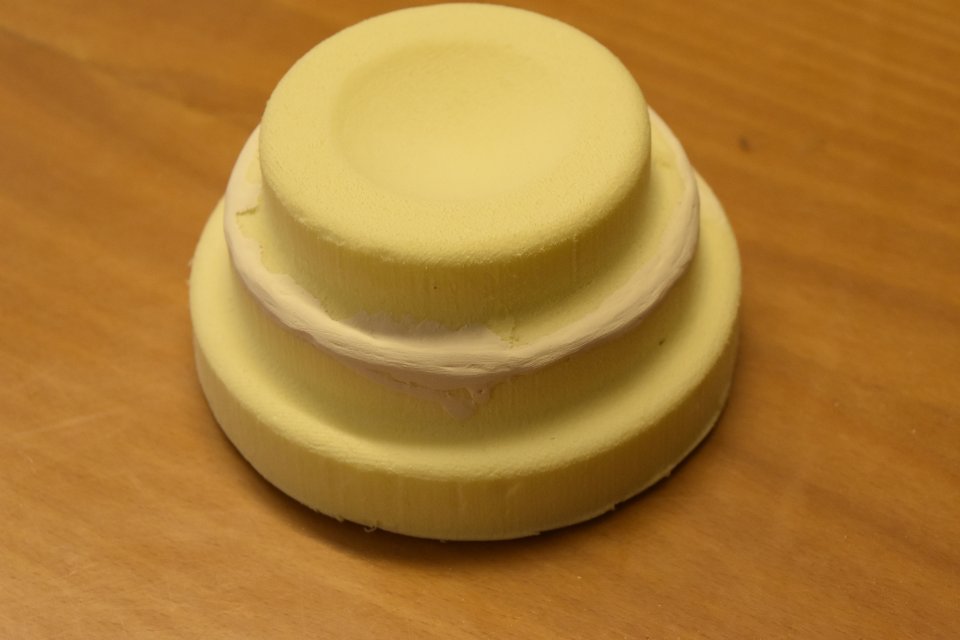
I then glued the two pieces together with some polyvinyl acetate and smoothed the joint with some cement plaster.
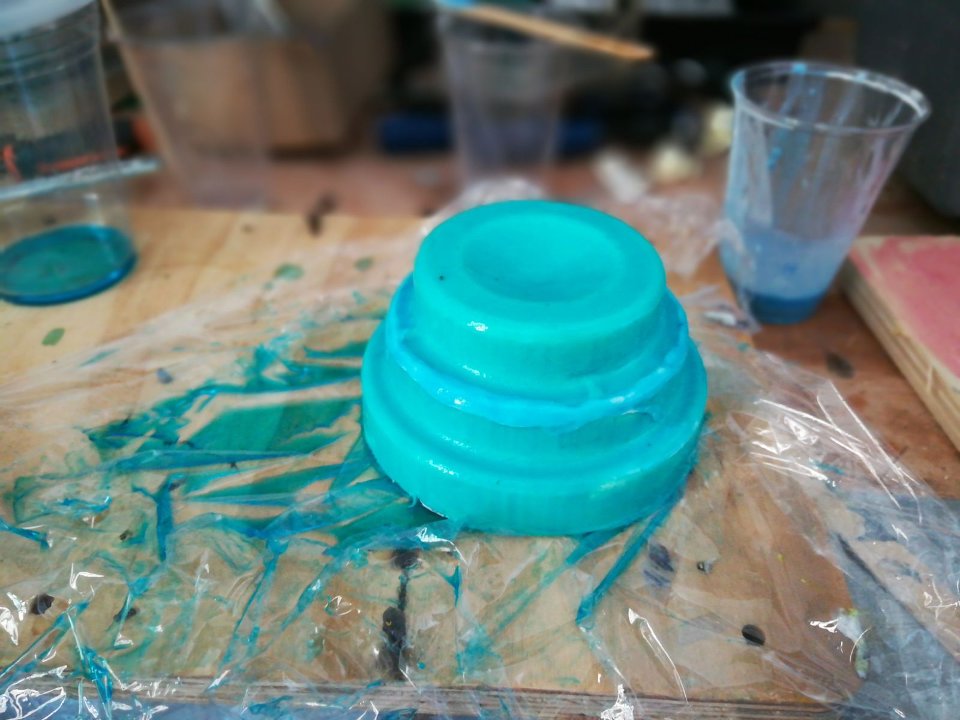
I started coating my mold with polyvinyl alcohol as a form release agent (epoxy should not stick to it): each coat took nearly 2 hours to dry, I made 13 passes; here is the final product:
I proceeded to gather all the needed materials for the following step: I cut the jute in thin stripes and circles for the bottom of my bowl (I used the laser cutter for this last part), took out of my secret stash the last tiny square of release fabric (this has been the biggest disadvantage of doing an assignment a week later the rest of the class: they consume anything, like a biblical swarm of locusts), cut some perforated plastic sheet and some breather material.
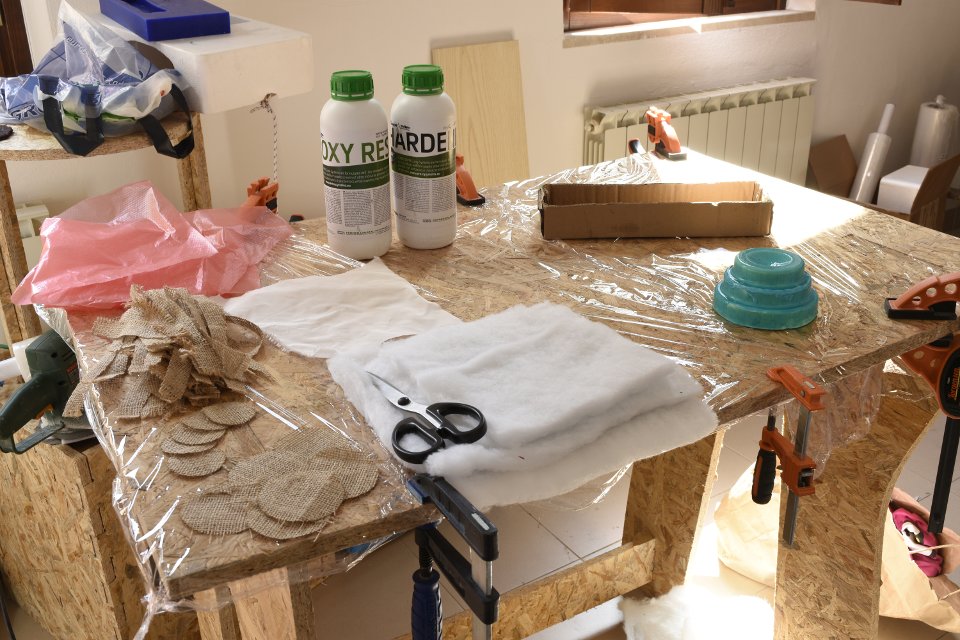
I laid everything on a table, ready to assemble my work according to the following scheme:
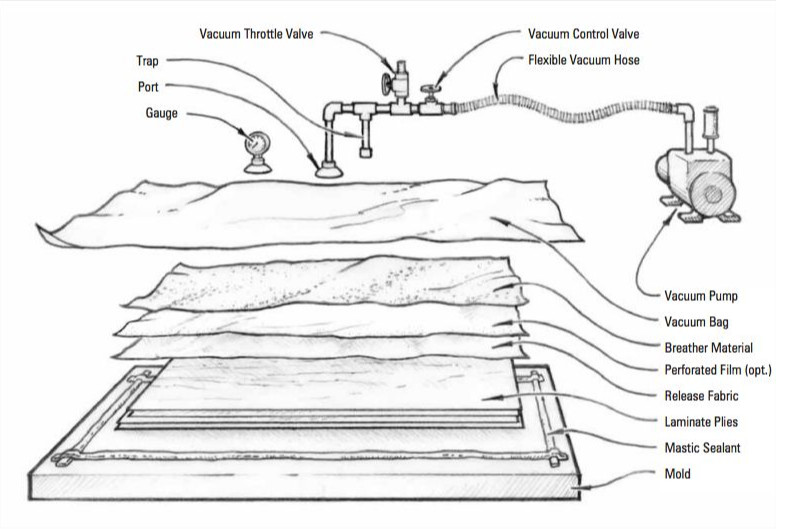
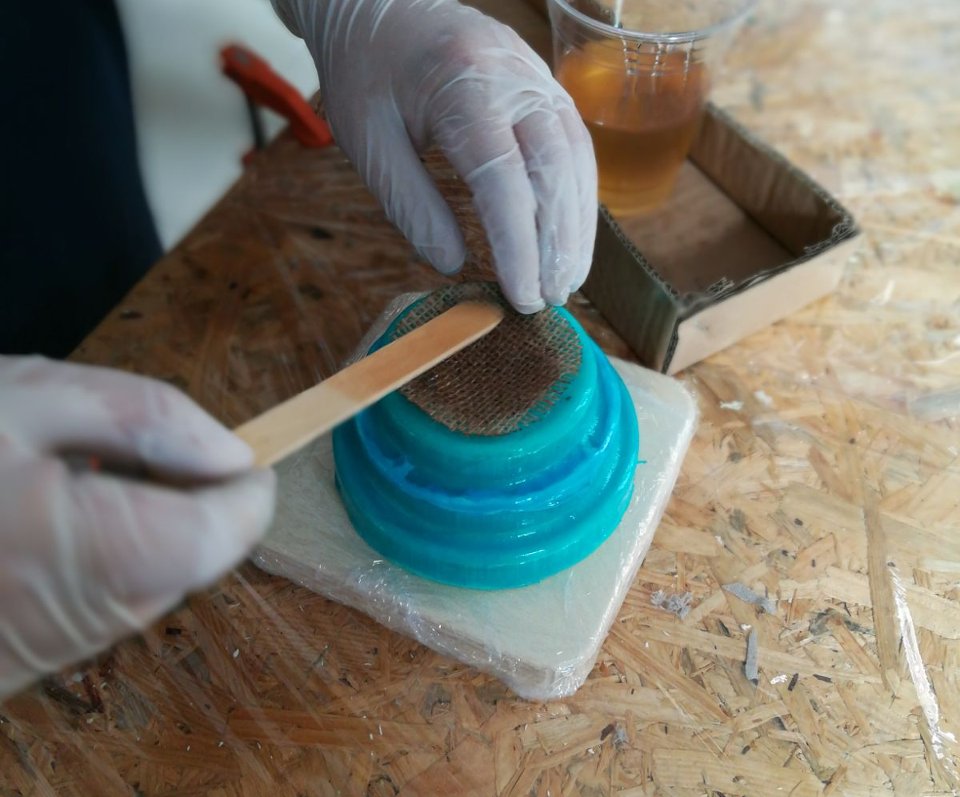
With everything ready I mixed the epoxy resin with the hardener in a 2:1 ratio, as stated on the box and started covering my mold with the jute stripes soaked with epoxy.
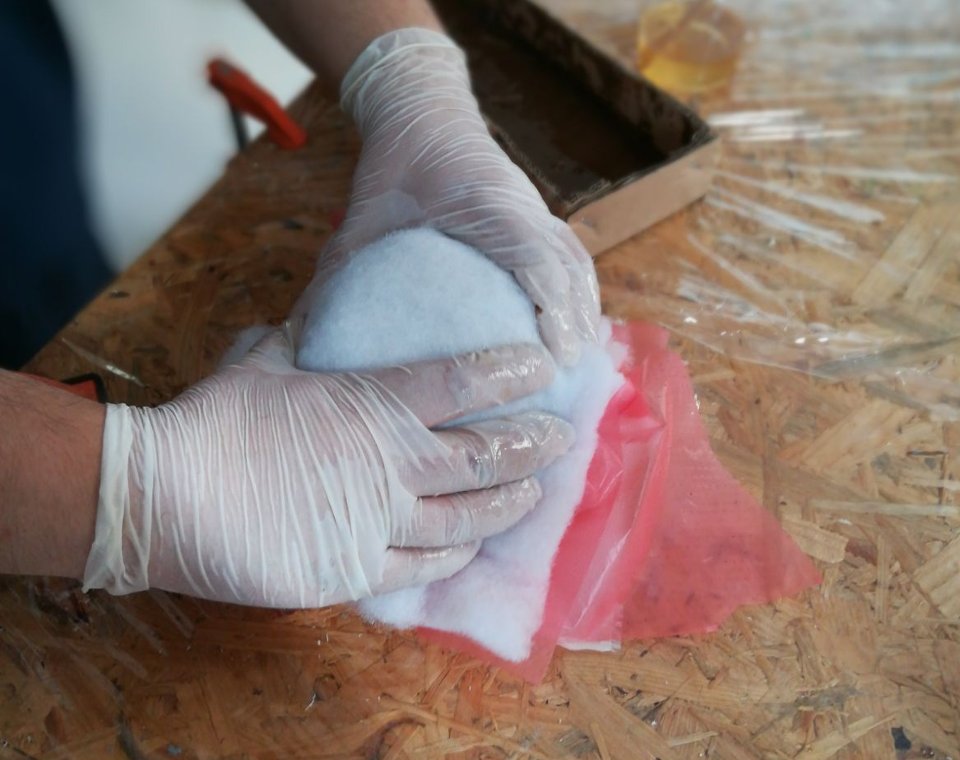
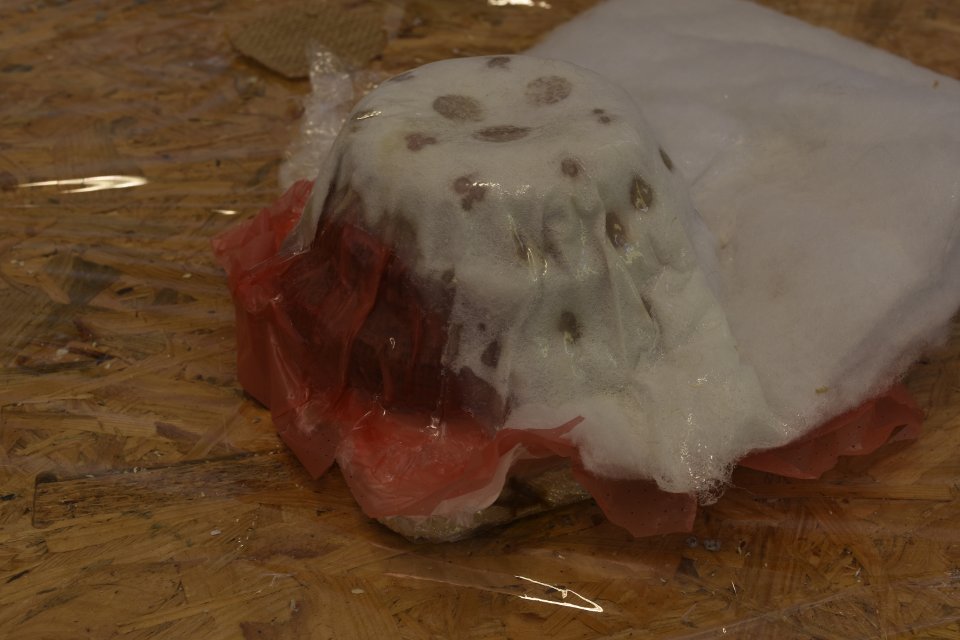
It has been a laborious and messy job, I really understimated how little pliable this thick jute is. After a bit of struggling I finally succeded in applying 3 layers of epoxy-soaked jute stripes on top of my mold and proceeded to put everything inside a vacuum sack. There I left my creation to dry for about 5 hours. Let me thank Chiara and Pietro for lending me 2 extra sets of hands during all this.
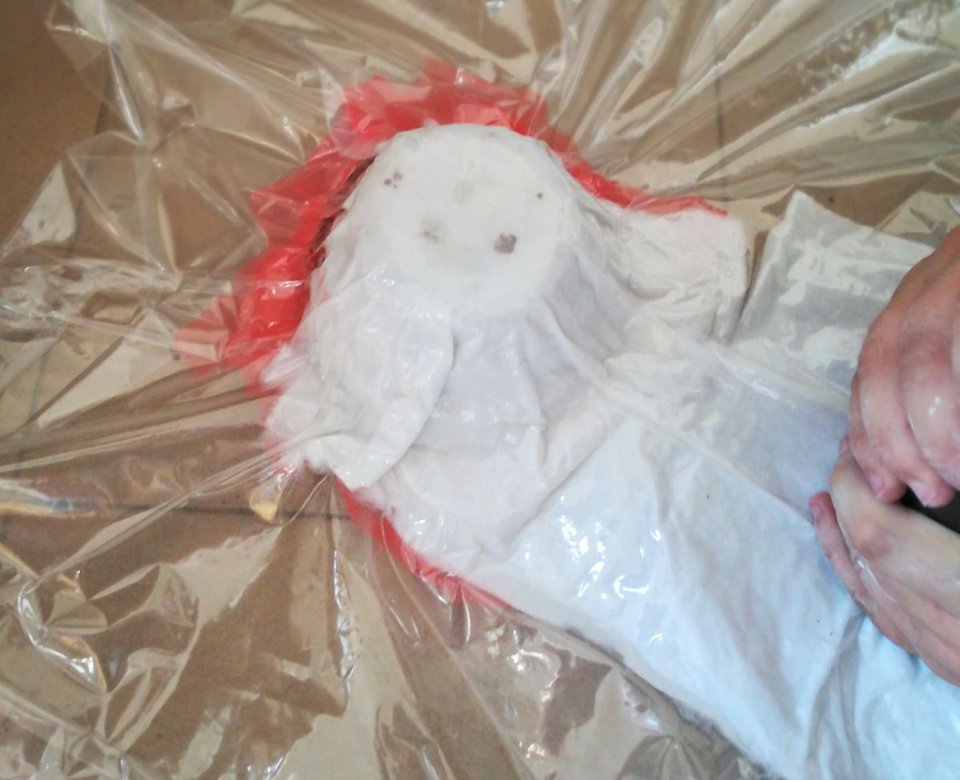
As you can see in this last image, the release fabric on top of my mold shifted position while I put the ensemble inside the vacuum sack. When I noticed it, almost an hour later during a routine check of my work, it was already too late, thus I decided to let it dry and examine the outcome.
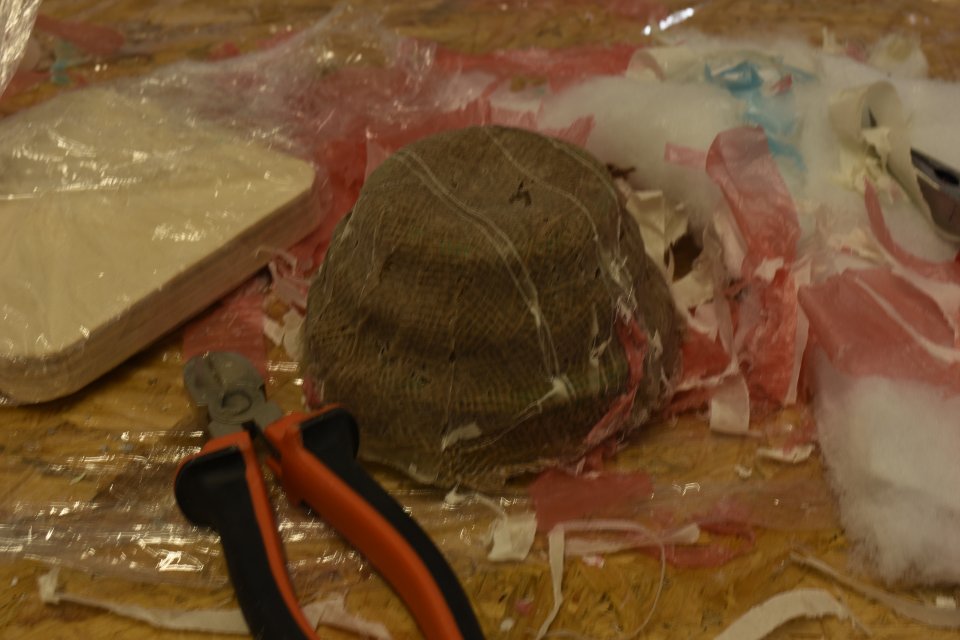
As expected the outcome was far from ideal, with lot of material firmly glued to the surface. Equipped with a nipper and an unwavering patience I started removing as much material as possible; interestingly enough the release film has been the one that gave me the biggest problems: I probably used too much epoxy.
As far as the interior goes, it seems that the polyvinyl alcohol did his job only in part: using a cutter as an exploring probe I noticed that the mold isn't completely glued to the fabric as I feared at the first moment. Anyway, even using some hot water to dissolve the alcohol I hadn't been able to extract my mold yet.

Conclusions
This week proved, once again, that I lack any manual ability whatsoever and that no amount of careful preparation can prevent such fiascos to took place. For my next attempt I plan to try several things:
- Use linen instead of jute: here my hubris didn't pay off (did it ever?), my colleagues have been right in using the linen fabric, easier to work with thanks to its flexibility
- Use less epoxy
- Use wax instead of polyvinyl alcohol as a release agent
Update
It turned out that I have been a little too hasty in throwing the towel: after some more soaking with hot water (ok, _a lot_ more) my mold detached from the composite material, keeping its integrity in the process (the cement plaster dissolved for the most part, but that was to be expected).

Files and links
- tar.gz - archive containing all the files (stl model, Cut3D vorking files, toolpaths)
- Epoxy resin safety data sheet
- Epoxy hardener safety data sheet
- Onshape model