Moulding and Casting
Goals
- Design appropriate objects within the limitations of 3 axis machining
- Demonstrate workflows used in mould design, construction and casting
Keycap making
This week I tried to cast keycaps for my pet project: a DIY ergonomic keyboard. Seems to me that keycaps are especially suited to this kind of production process, since 3d printing them takes too long and the finished product is not polished enough.
First of all I found a Cherry MX datasheet as a reference and started to work on my model. I chose the DSA profile for my keycaps on order to have only one model for all my 1u keys, instead of having a profile for each row (as in the DCS or SA profiles; more about this topic here).
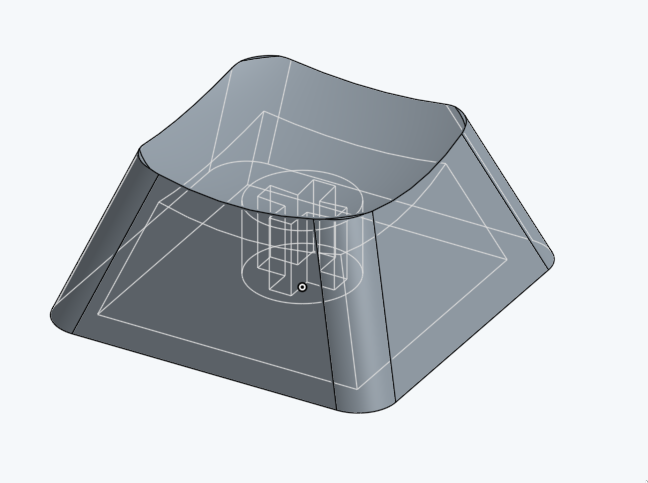
Once my model was finished I cloned it in order to make the two pieces to drill into the wax, with the registration keys:

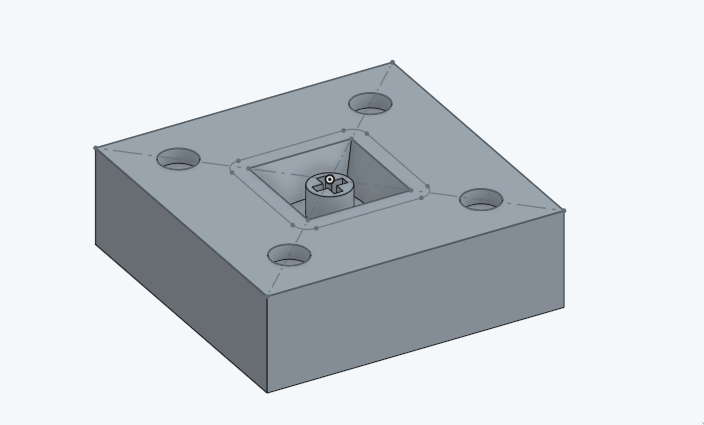
Before starting to make the toolpaths for drilling I made sure the two halves fit together nicely, using the "section view" tool on the assembly
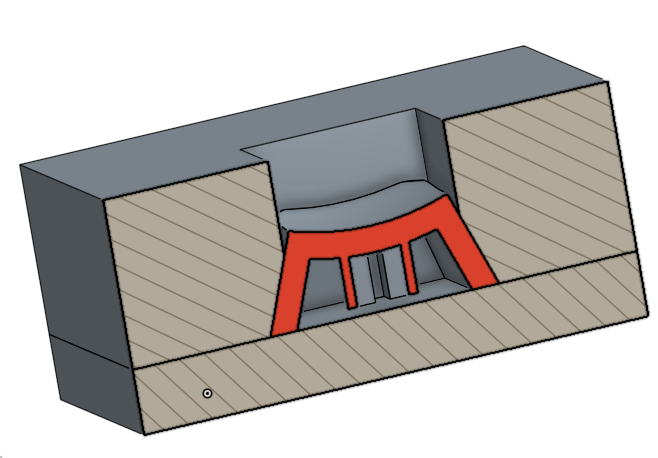
I then exported the models as .stl and opened them in 3D Cut, in order to make the toolpaths for the milling machine. I choose a 1/8 end mill for the rough cut and a 1/32 end mill for the finishing cut, since my model had several small parts
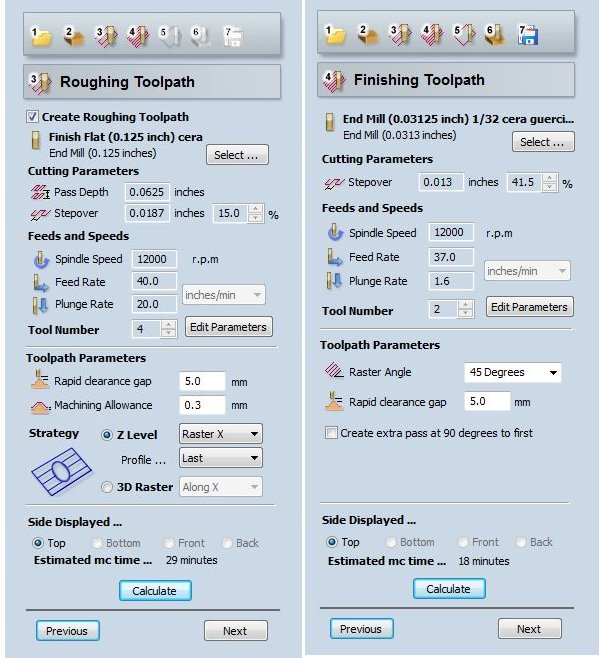
These are the end mill settings:
- 1/8
- Feed rate: 40 in/min
- Stepover: 15%
- Plunge rate: 20 in/min
- Spindle speed: 12000 rpm
- Max pass depth: 0.0625"
- Tools n: 4
- 1/32
- Feed rate: 37 in/min
- Stepover: 40%
- Plunge rate: 1.6 in/min
- Spindle speed: 12000 rpm
- Max pass depth: 0.016"
- Tools n: 2
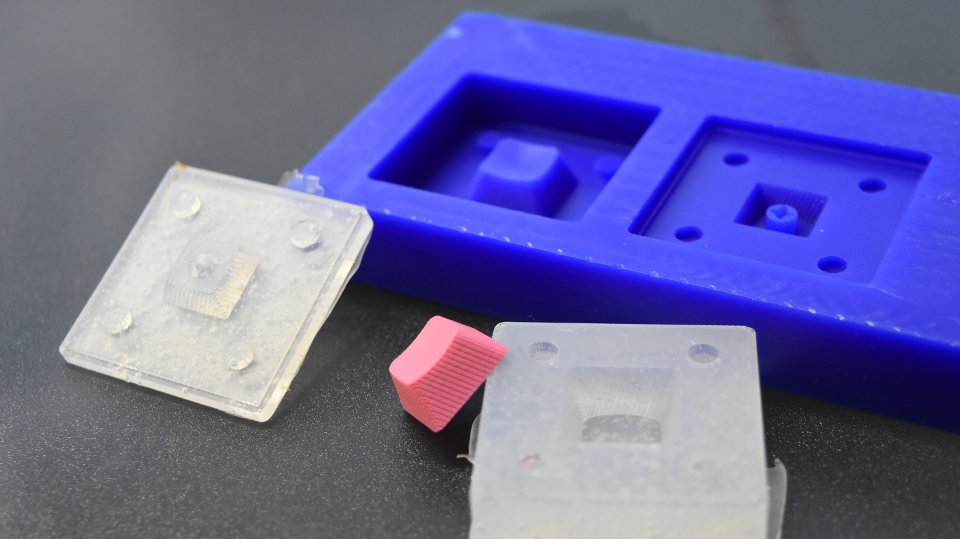
Once my wax block was drilled (I had to relaunch the finishing cut several times to get a good finish) I used some SORTA-Clear 37 silicone rubber to make my negative mould. There were lots of air bubbles in the silicone so I tried to remove them using a makeshift vacuum chamber (a simple tupperware container and a tube vacuum cleaner), but to no avail.
The mould came out good enough, even if there were some imperfectionr on the stem cross due to a nasty air bubble. I tried to cast some Smooth-Cast 305 into it anyway, just to have a finished sample.
I'm quite happy of the result, the keycap being solid and pleasing to the touch; as expected the stem cross is subpar, making this particular piece unusable, but I'm redoing the silicon mould as I write.
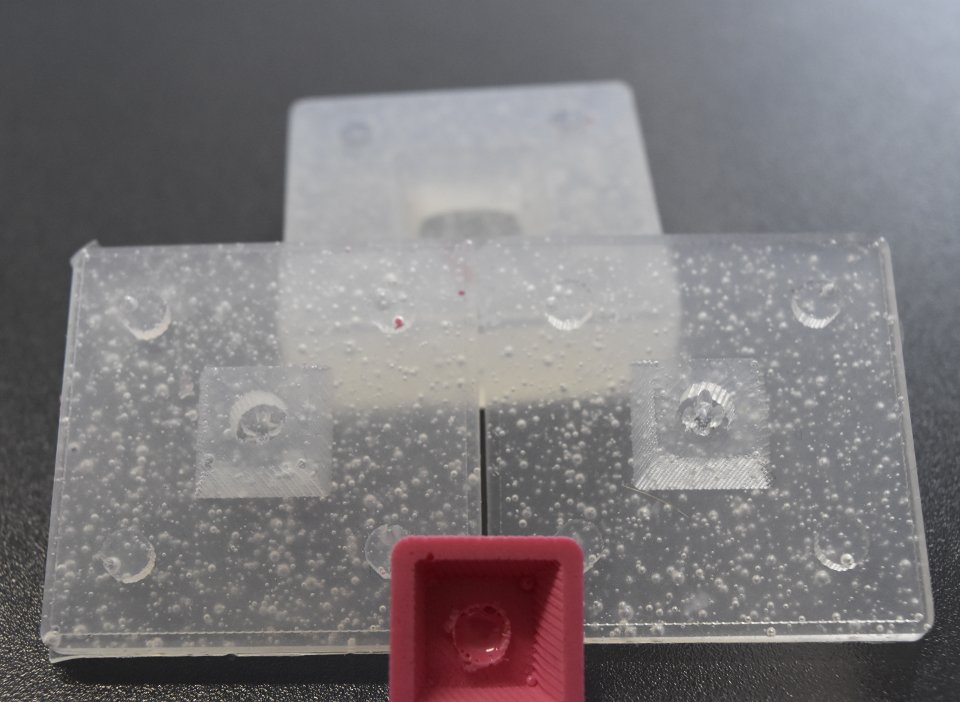
Here is the second take on the bottom mold: as you can see the stem is still mangled, mold-wise. The final part is even worse, since I closed the two halves in a too sudden a move, preventing the air from escaping, explaining the air bubble in place of the stem.
Update 29/04
Our local guru provided us with a new brand of silicone rubber and I gave it a try; It took the mold 48+ hours to solidify, but the result was worth the wait, in my opinion:
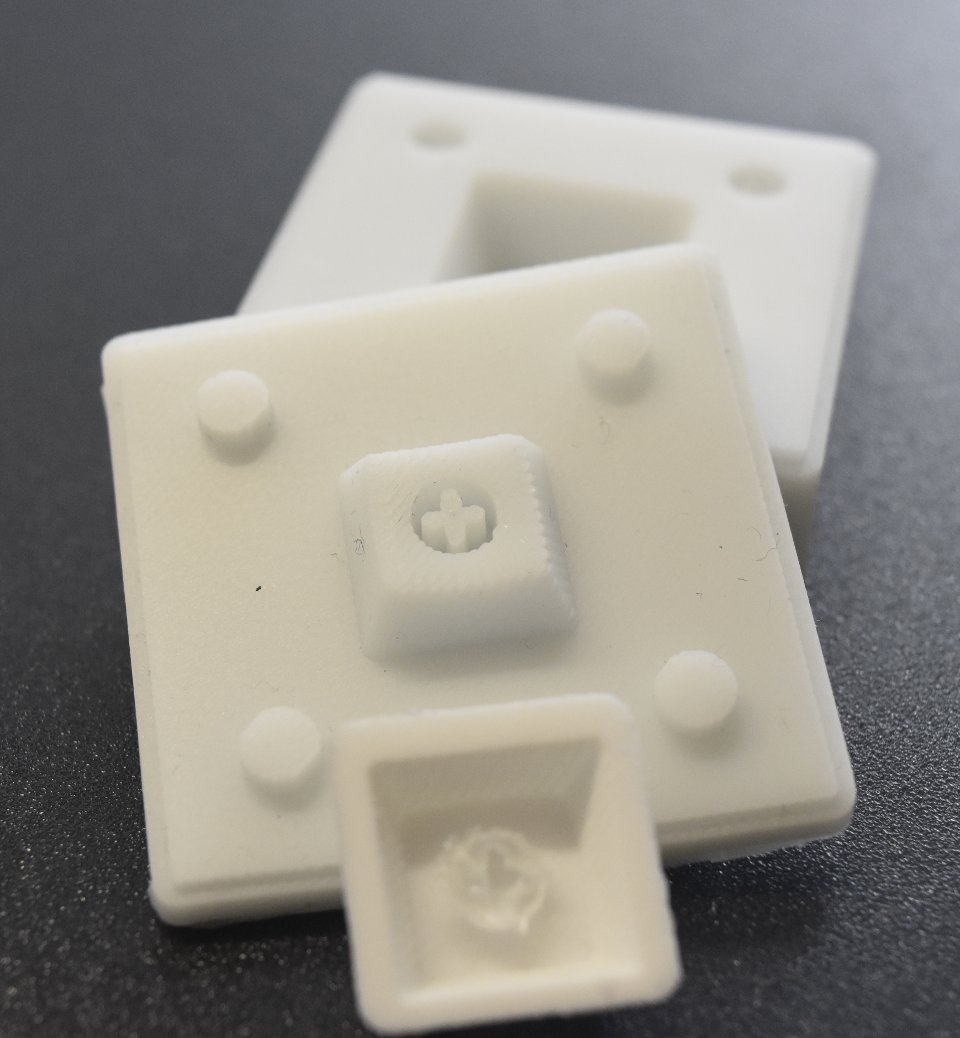
The stem is still far from being satisfying, next time i'll try to begin pouring a little resin inside the cross and joining the two halves only after that.
Links
- w12-files.tar.gz - archive containing all the working files (stl model of the keycap, stl model of the mold, roughing and finishing toolpaths)
- Mold model - OnShape working file
- Keycaps families description