


Design something big
Manufacture something big
Configure Shopbot parameters
Assembly something big
1. Find the object on internet and get the measurements
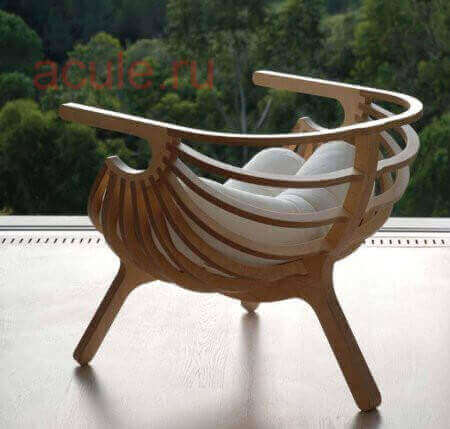
2. Choose the material: MDF
A Medium Density board or DM board is a fibreboard made of wood fibers (previously lined and stripped of the lignin they had) agglomerated with synthetic resin by dry pressure force and heat until the average density is reached.
Also called DM (medium density) or MDF (Medium Density Fibreboard)
It has a uniform and homogeneous structure and a fine texture that allows its faces and songs to have a perfect finish. It works practically the same as solid wood, being able to mill and carve in its entirety. The dimensional stability, unlike solid wood, is optimum, but its weight is very high. It is an excellent base for veneers. It is perfect for varnishing or painting. It can also be varnished (although due to its characteristics it is not necessary). It glues (with white glue) easily and without problems. It is usually medium brown and is a cheap low-cost board in the current market.

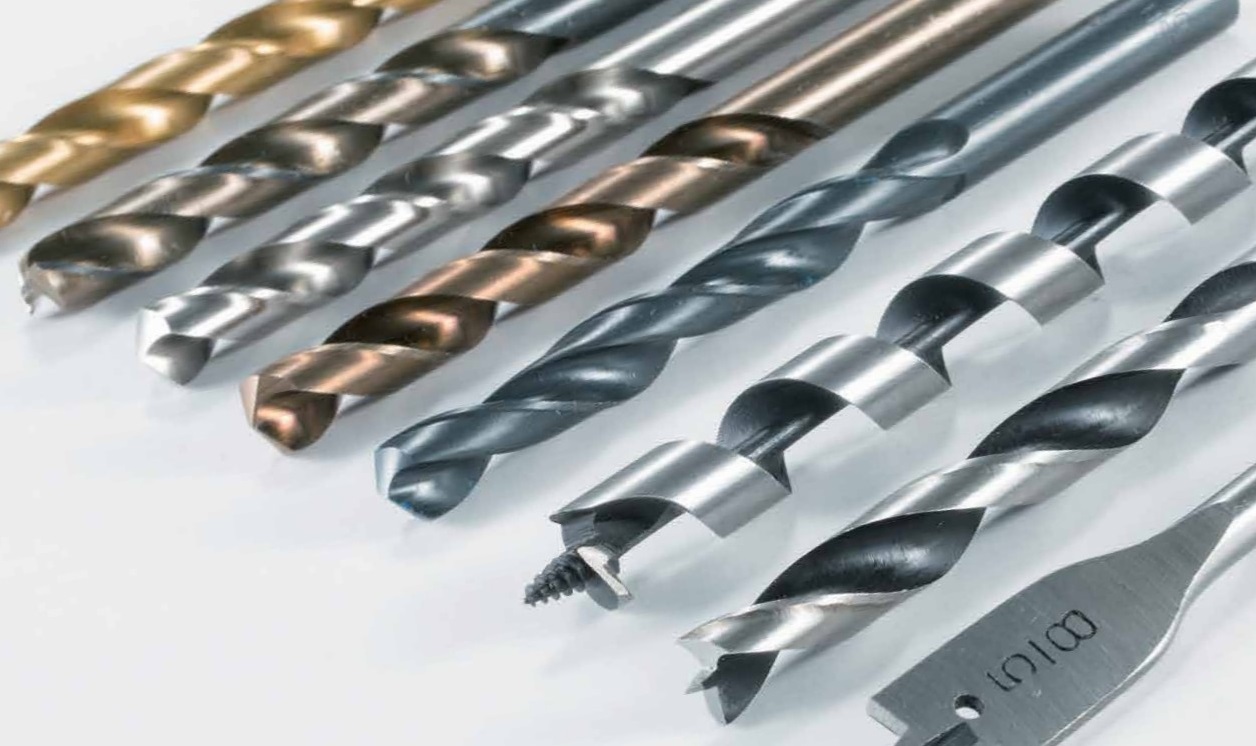
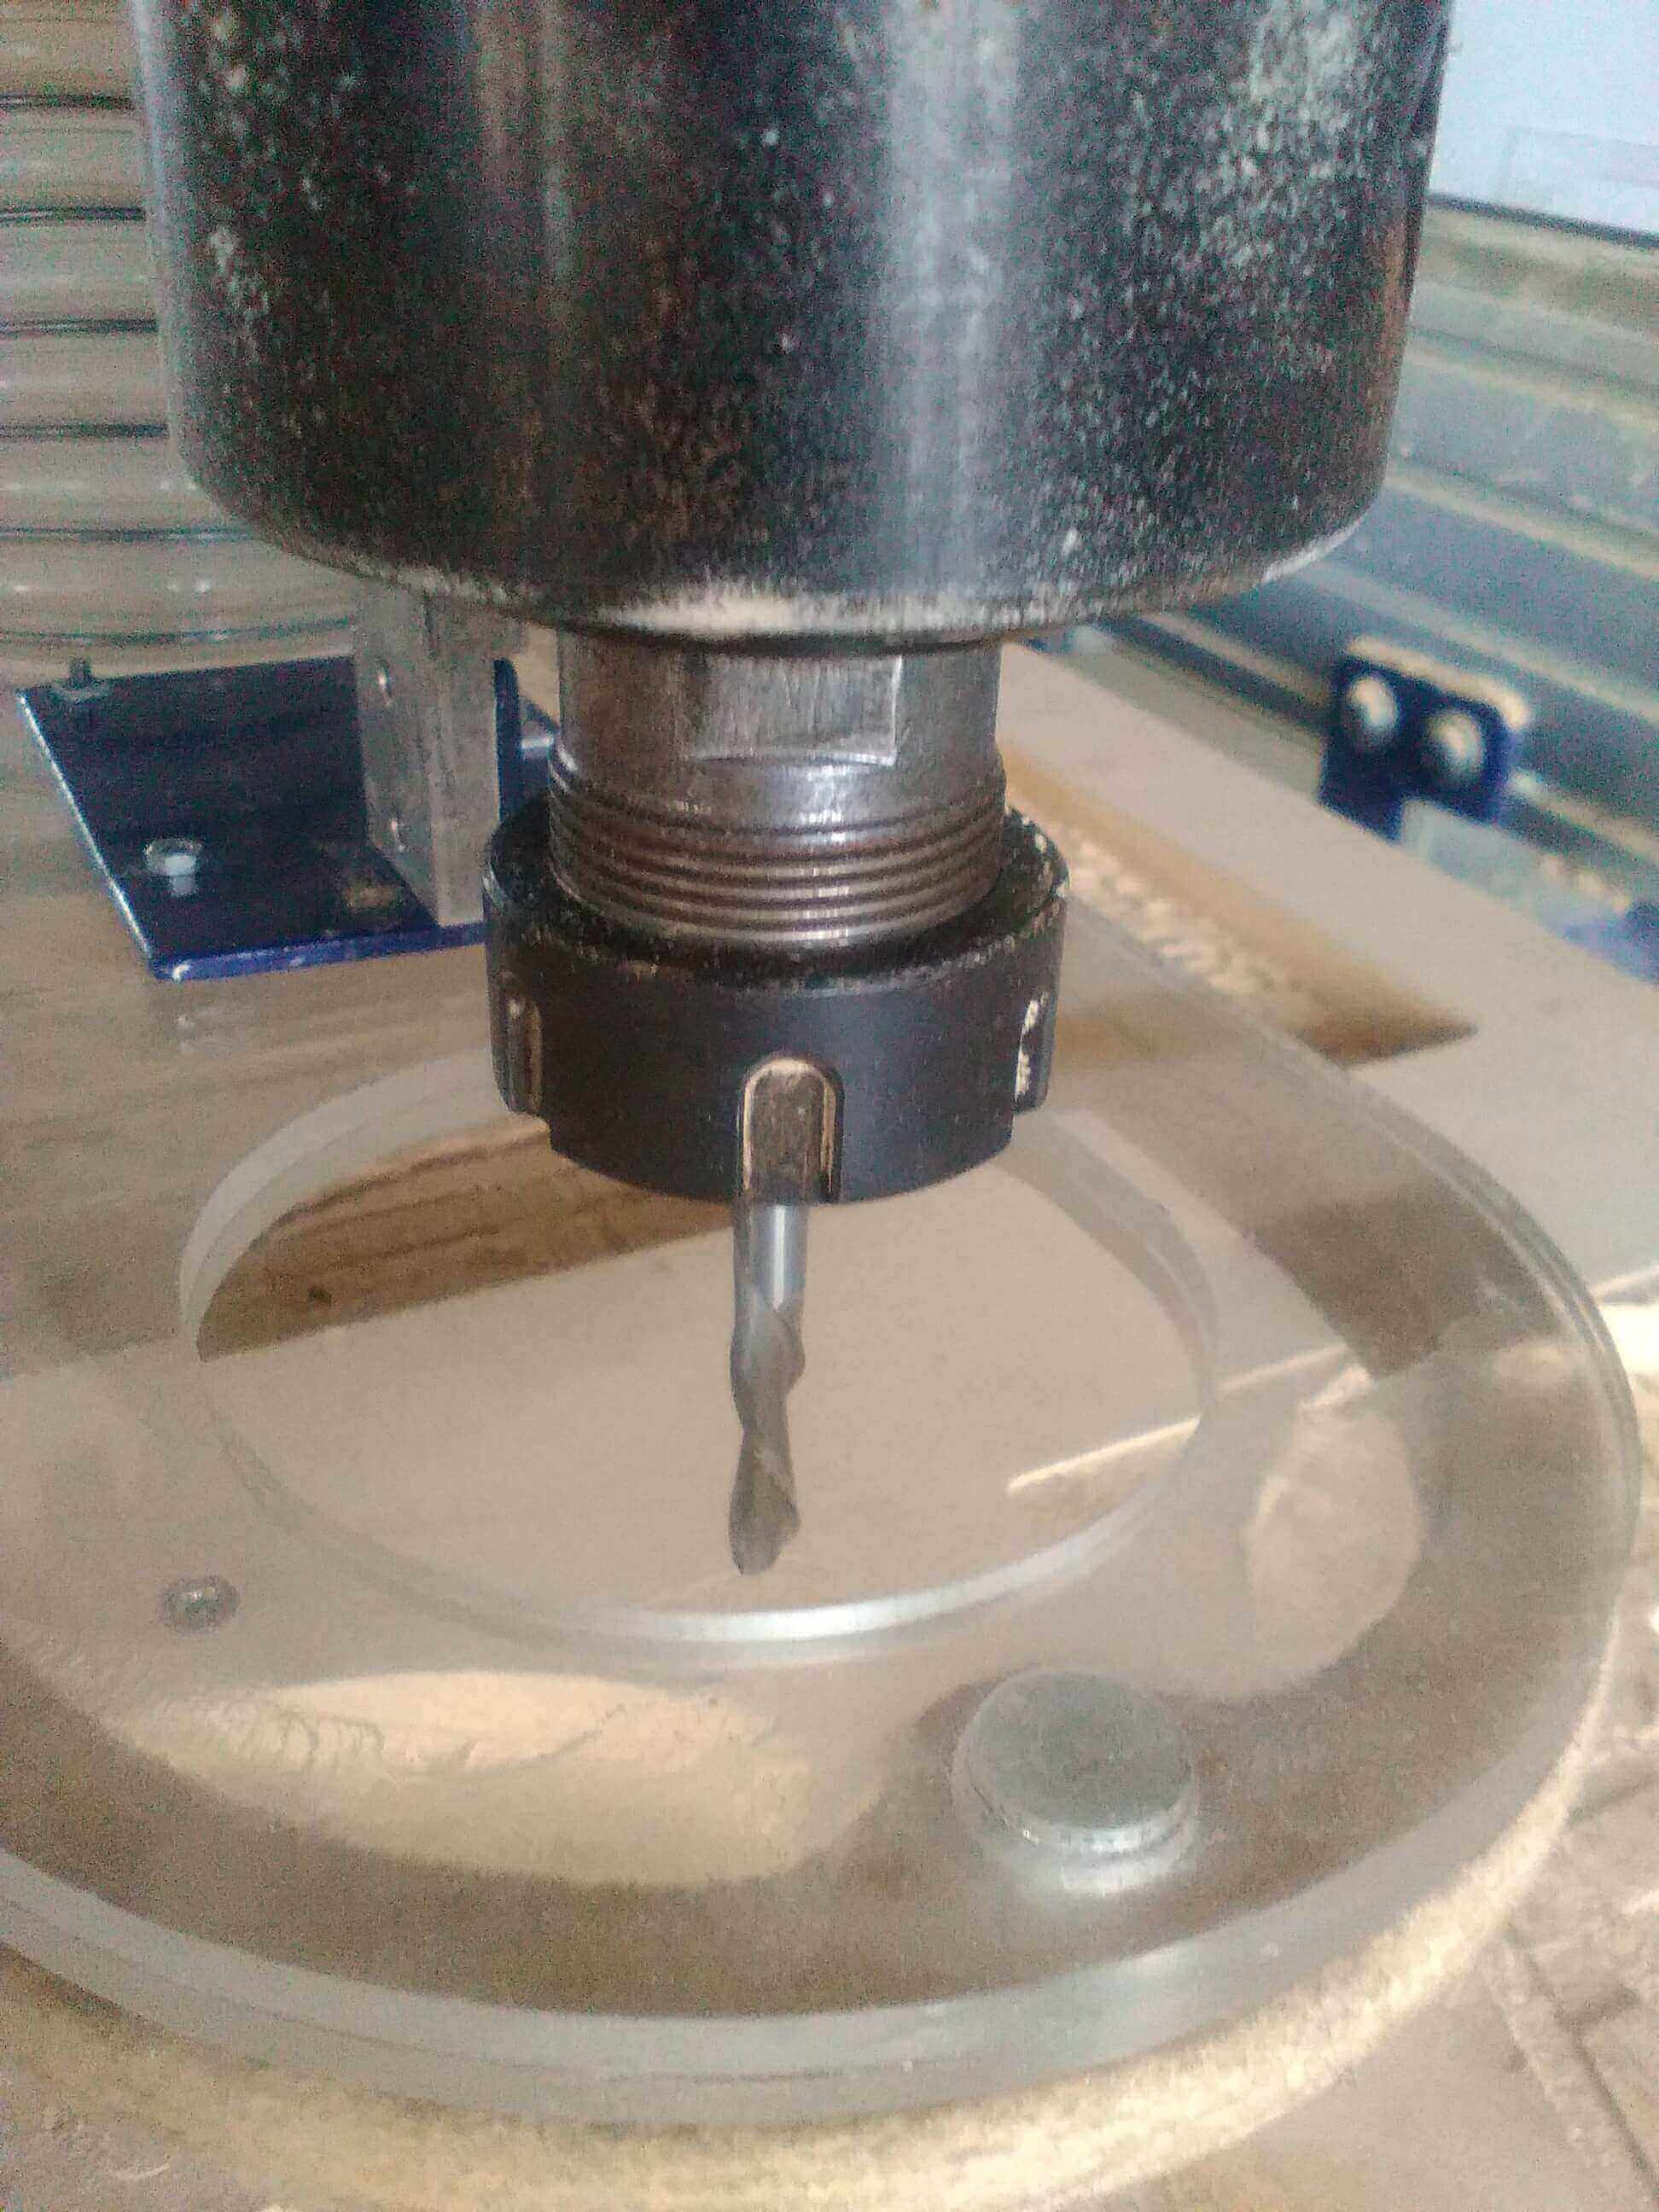
Two-edged straight-tooth milling cutters are the most common cutters, used mostly to make straight cut-type grooves or die or empty the area of a box. End mill with straight edges to fix the rod is usually used clamps. In my case, use a 1/8 "diameter end mill turning at 12000 rpm, with a feed rate of 120 mm / sec. In my case, use a 1/4 "diameter tip cutter turning at 10000 rpm, with a feed rate of 130 mm / sec
The helicoidal cutter, also are more common since its design allows the cut as the evacuation of the leftovers that it leaves. The straight milling tool comes in a variety of cutting diameters, often in the range of 1/8 "to 1-1 / 2" Milling tests give the following conditions as a result: In my case, use a 1/8 "diameter end mill turning at 8000 rpm, with a feed rate of 100 mm / sec. In my case, use a 1/4 "diameter tip cutter turning at 10000 rpm, with a feed rate of 100 mm / sec.
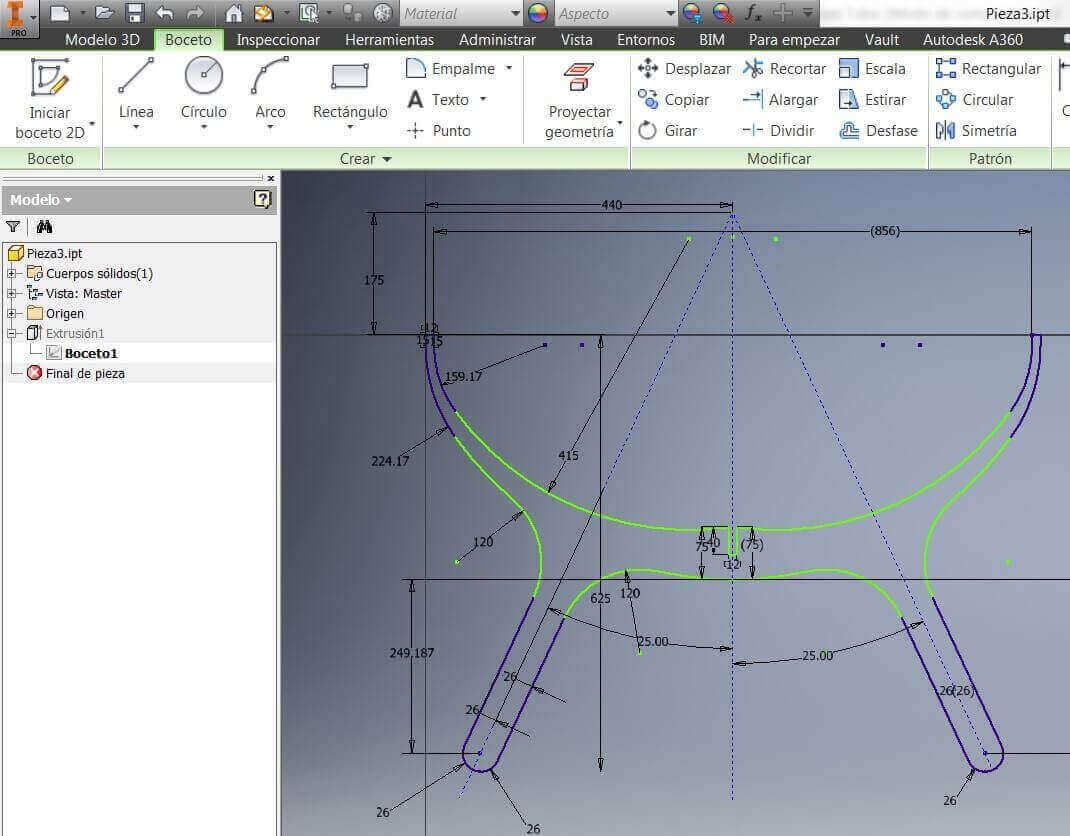
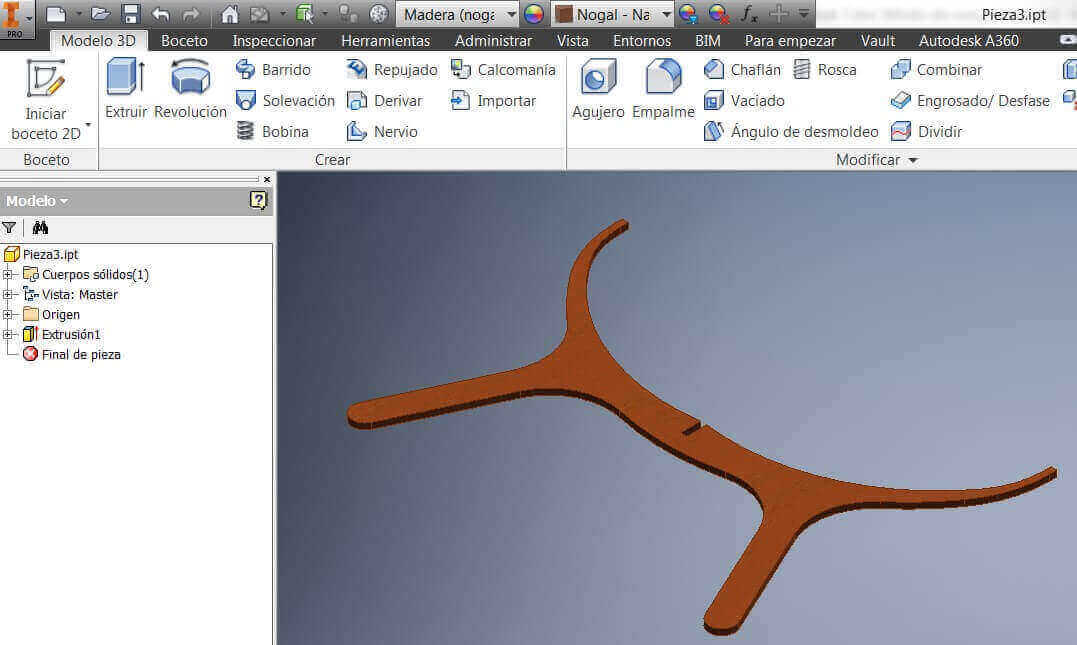
3 With the help of the Inventor software I began to make the sketch and the drawings, taking as a reference the sequence made in week 2.
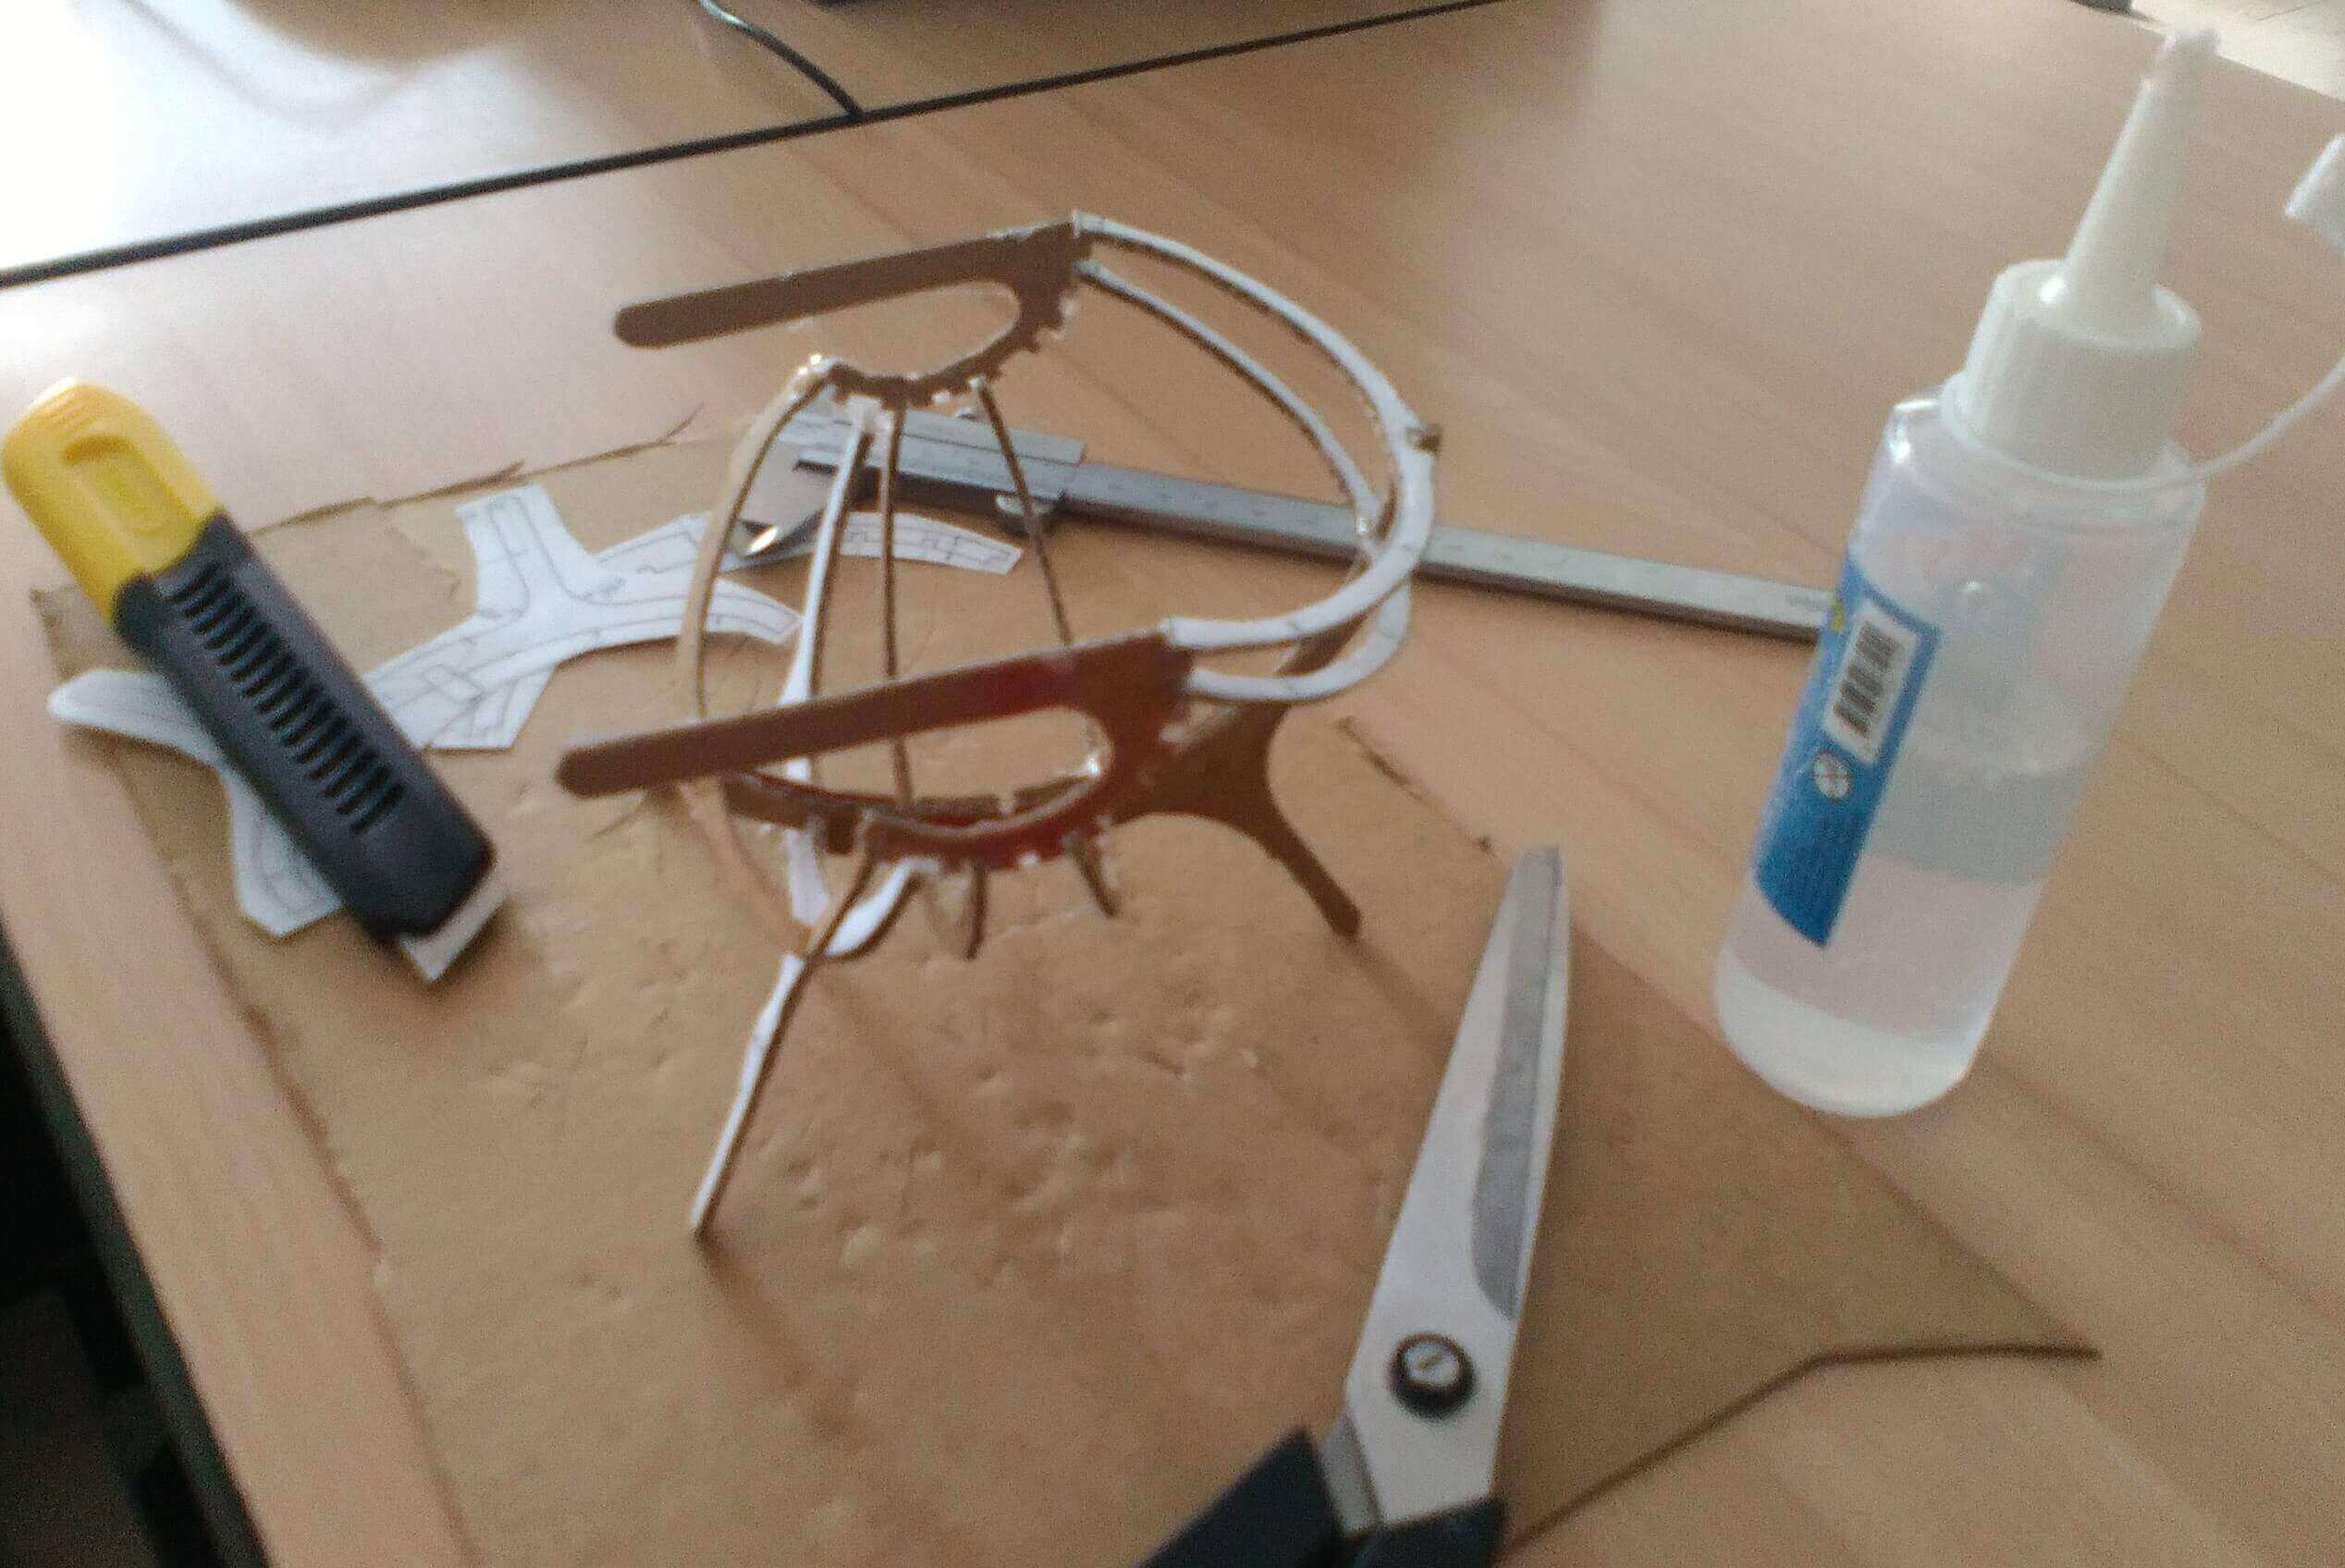
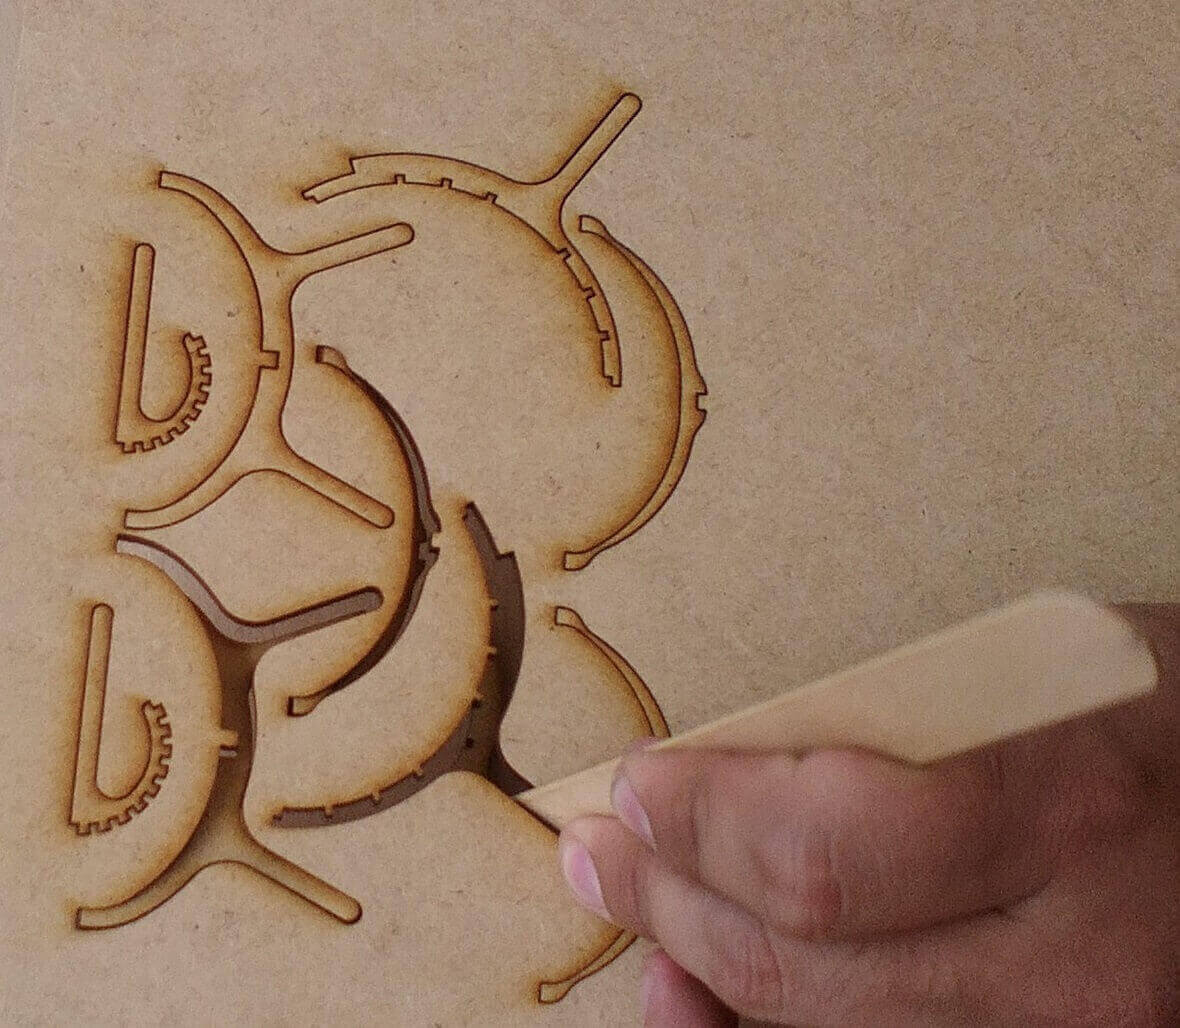
4 I then made a first model on cardboard to observe the balance and fixation of its parts.
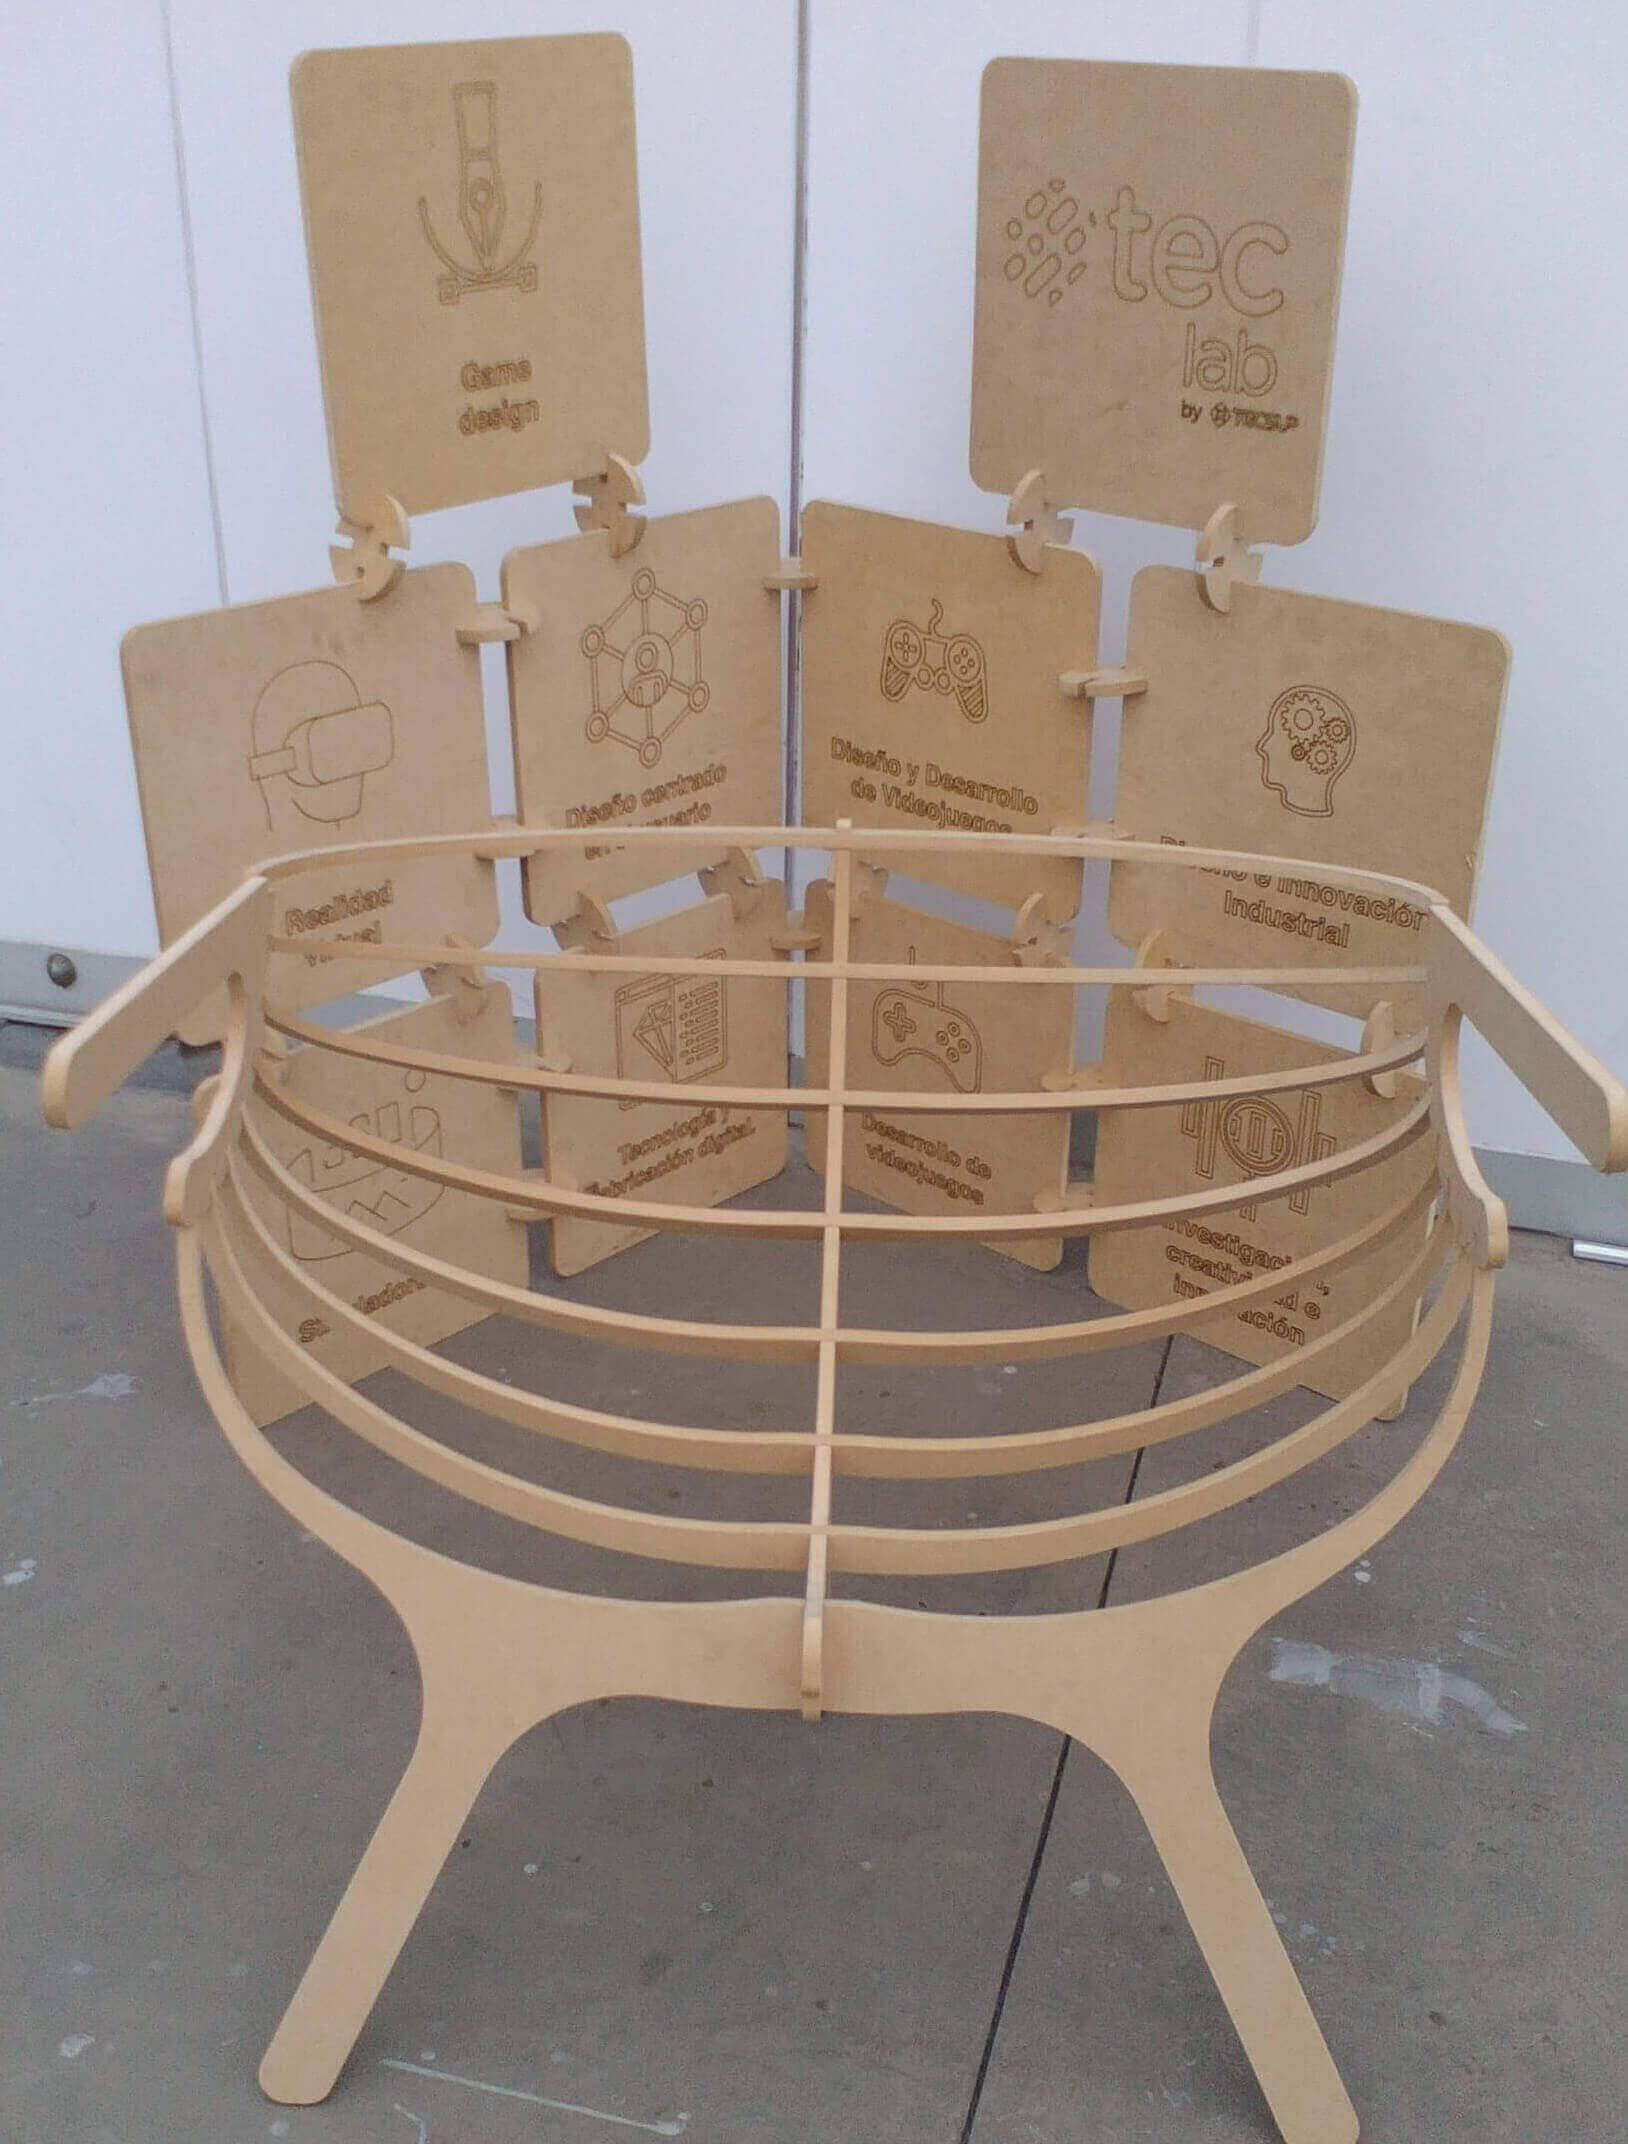
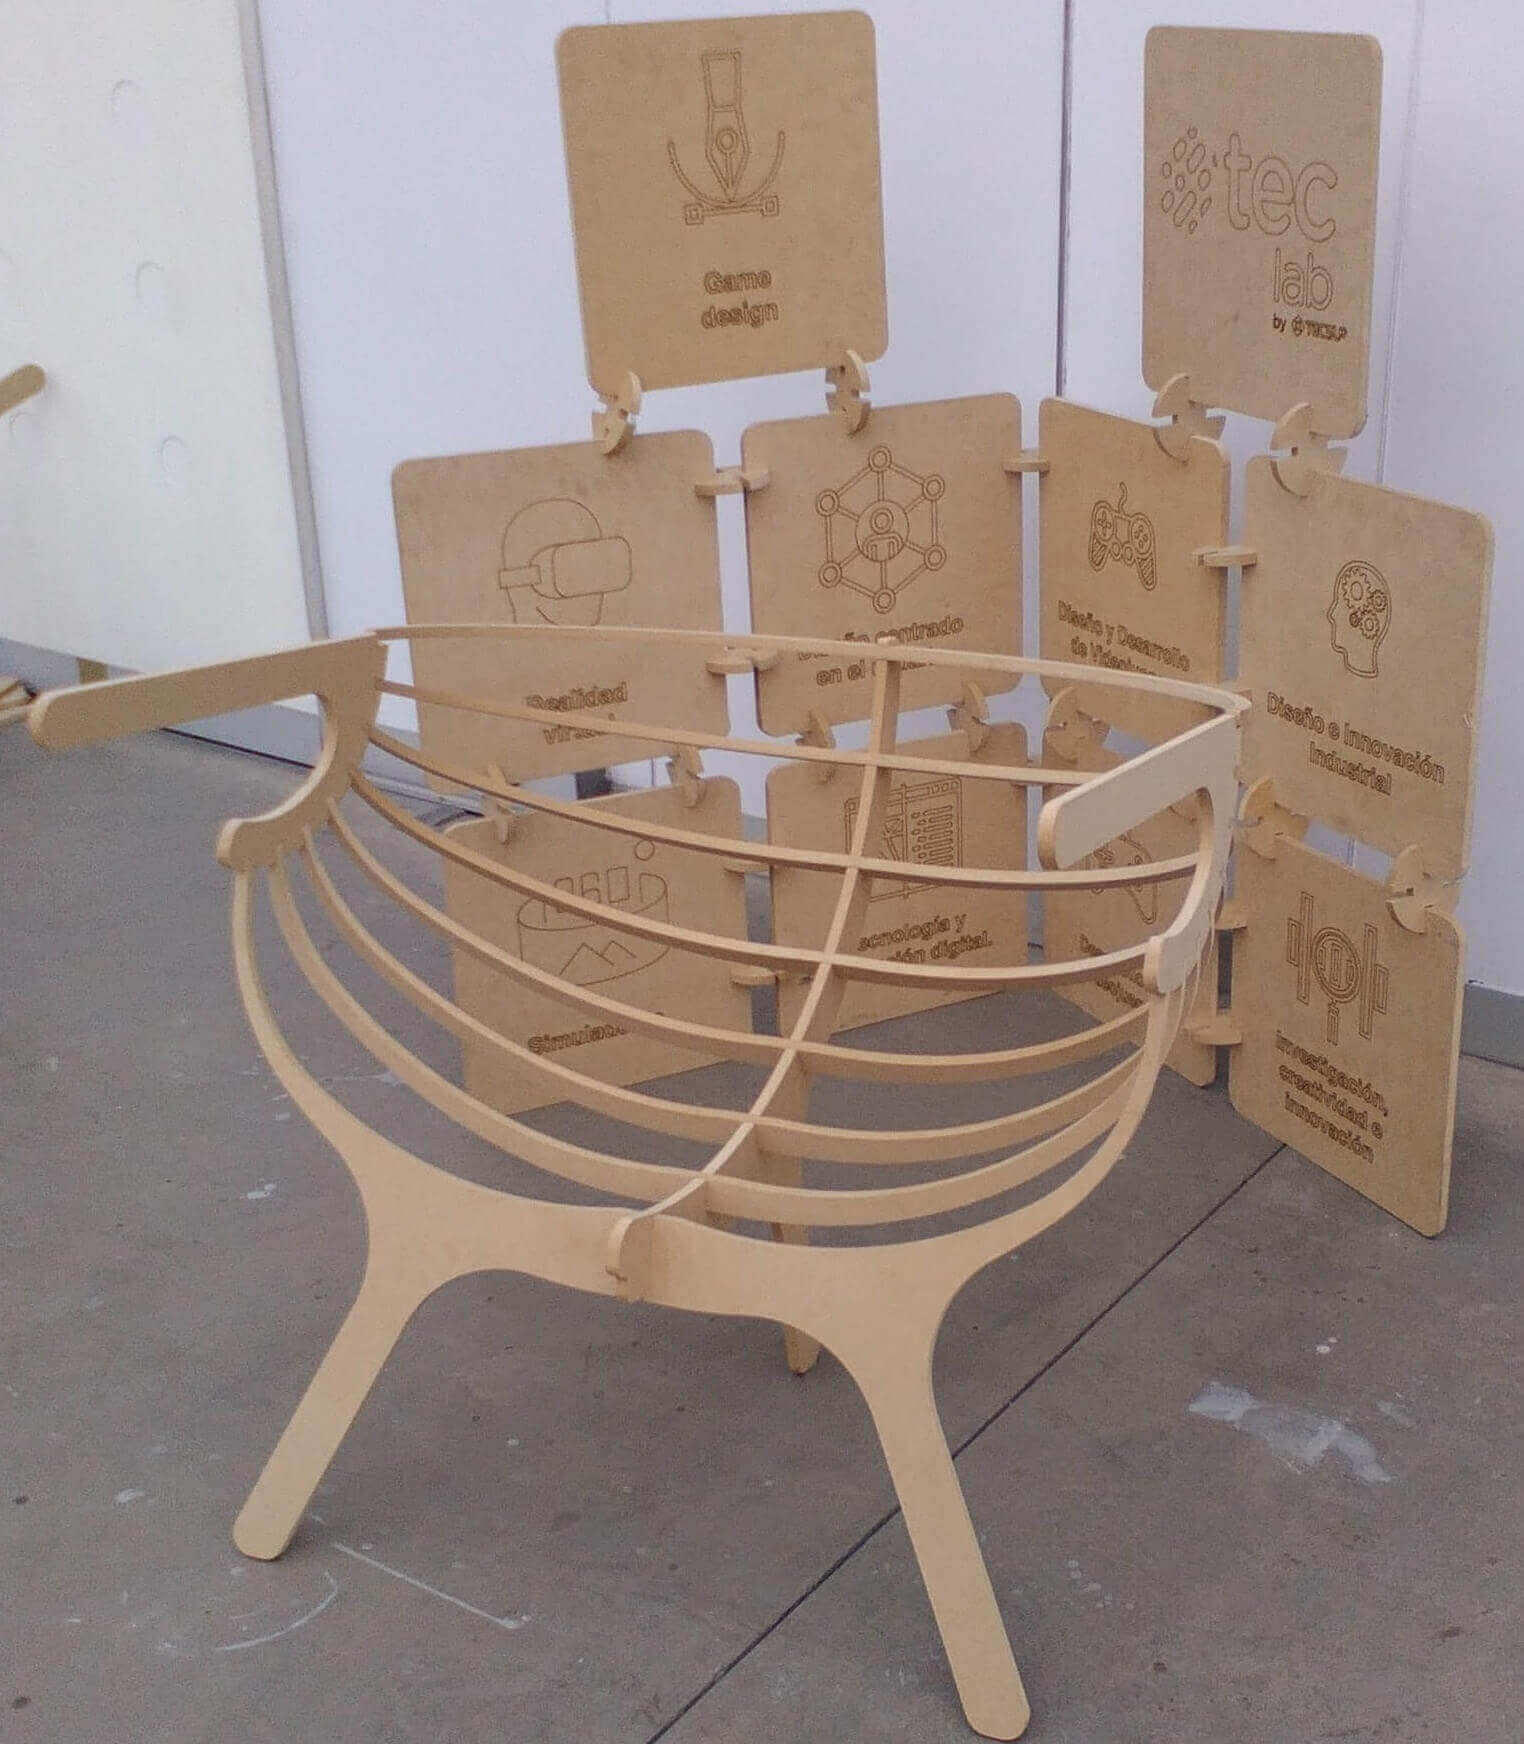
5 Then I made another model in MDF using the laser cutter
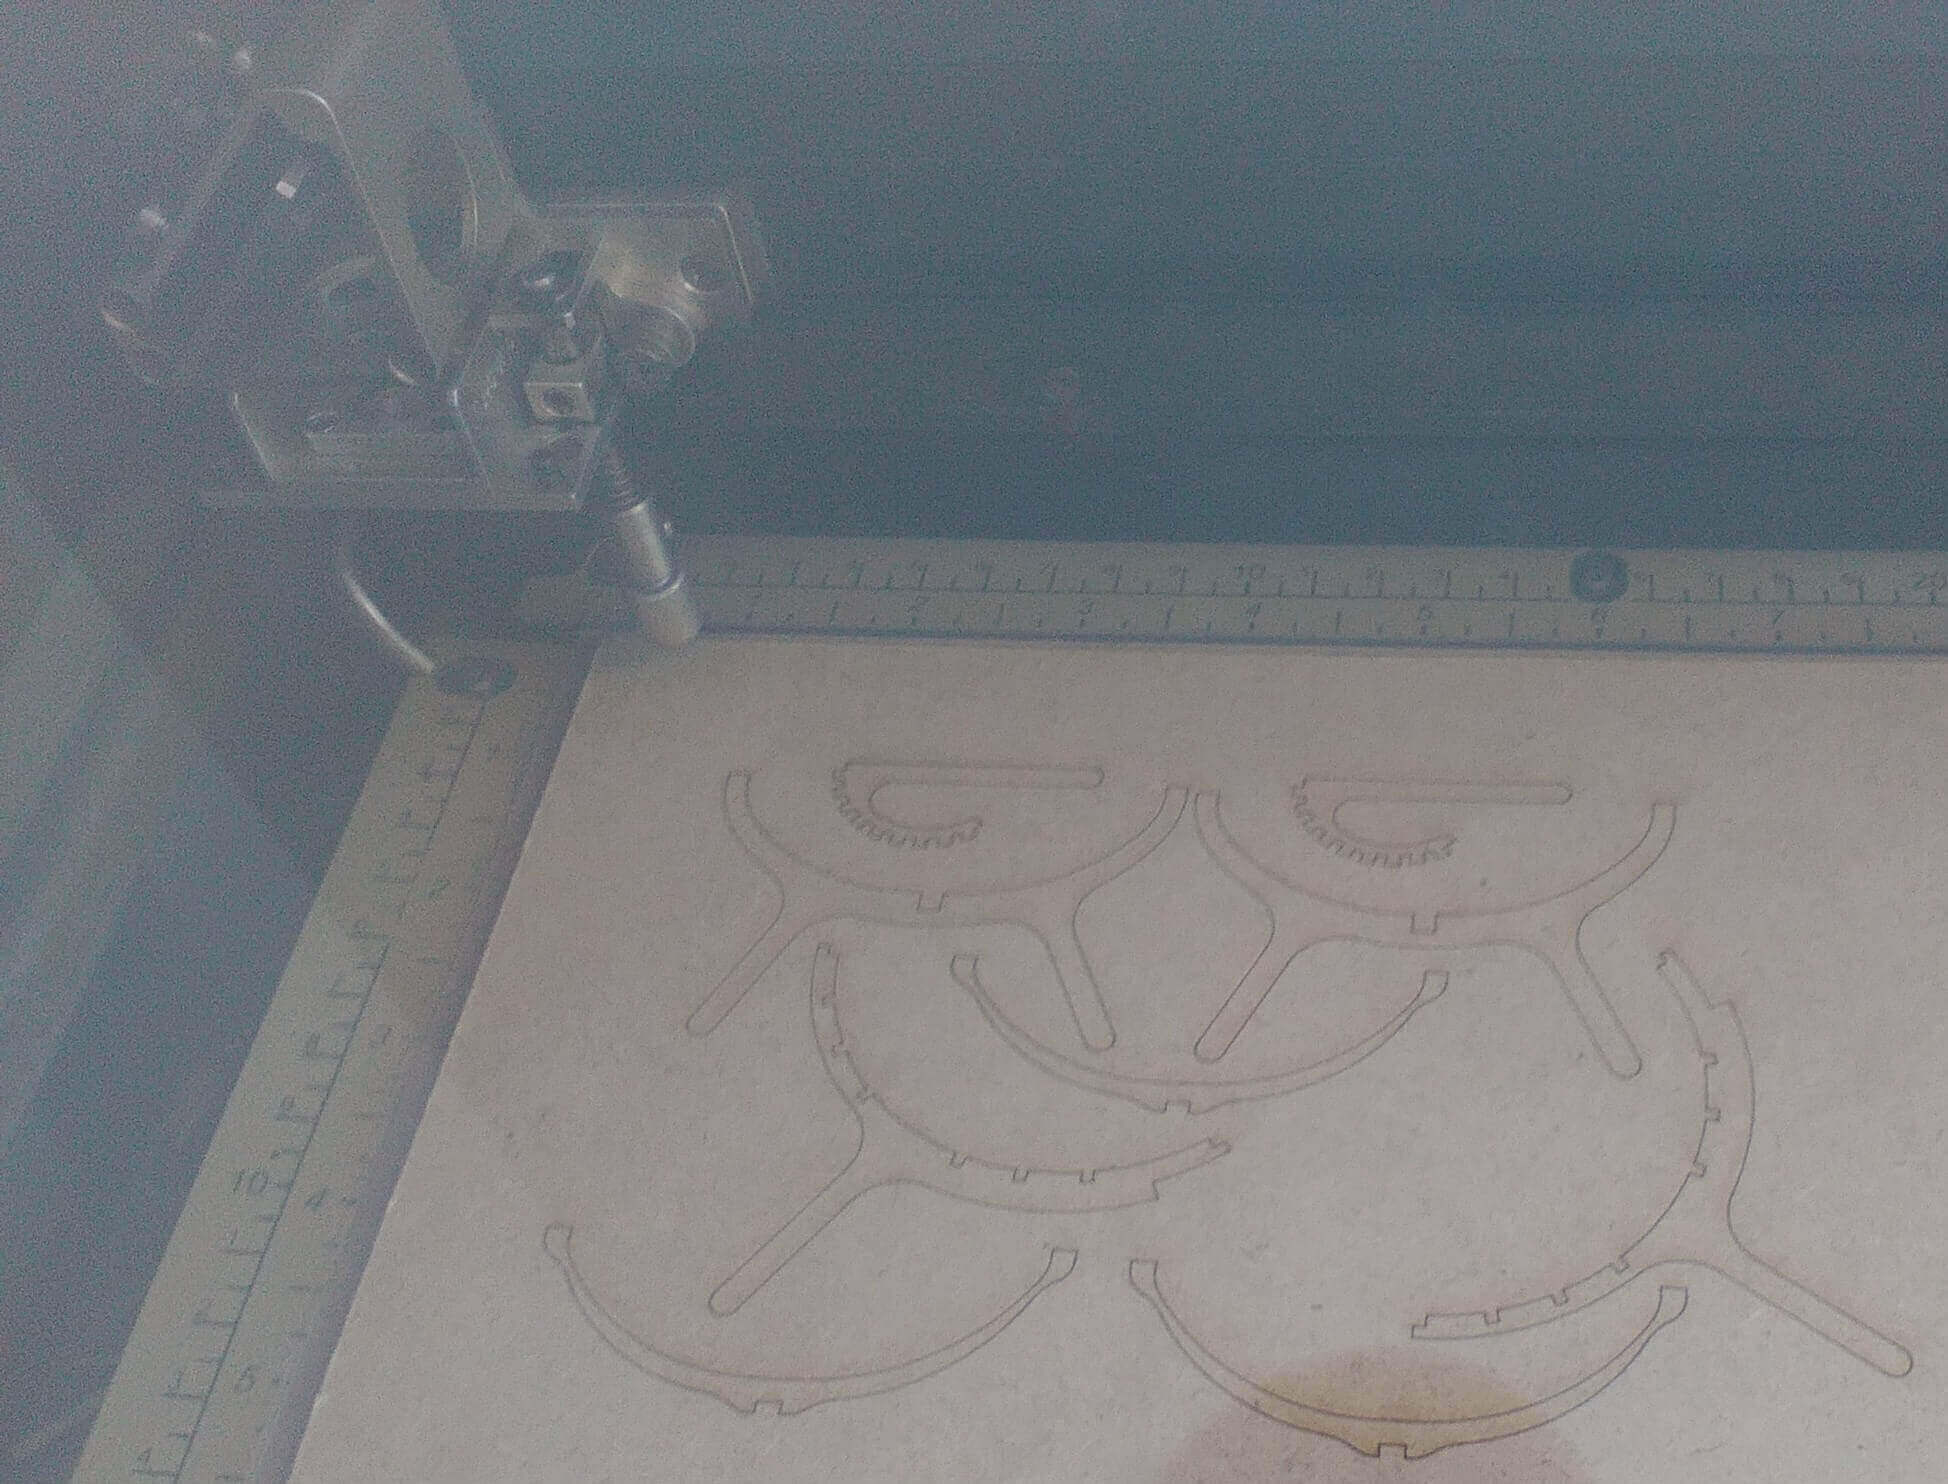
Then generate the parts with their MDF material thickness 12 mm, generating their respective planes.
Then perform the assembly using the constraints of the chair components.
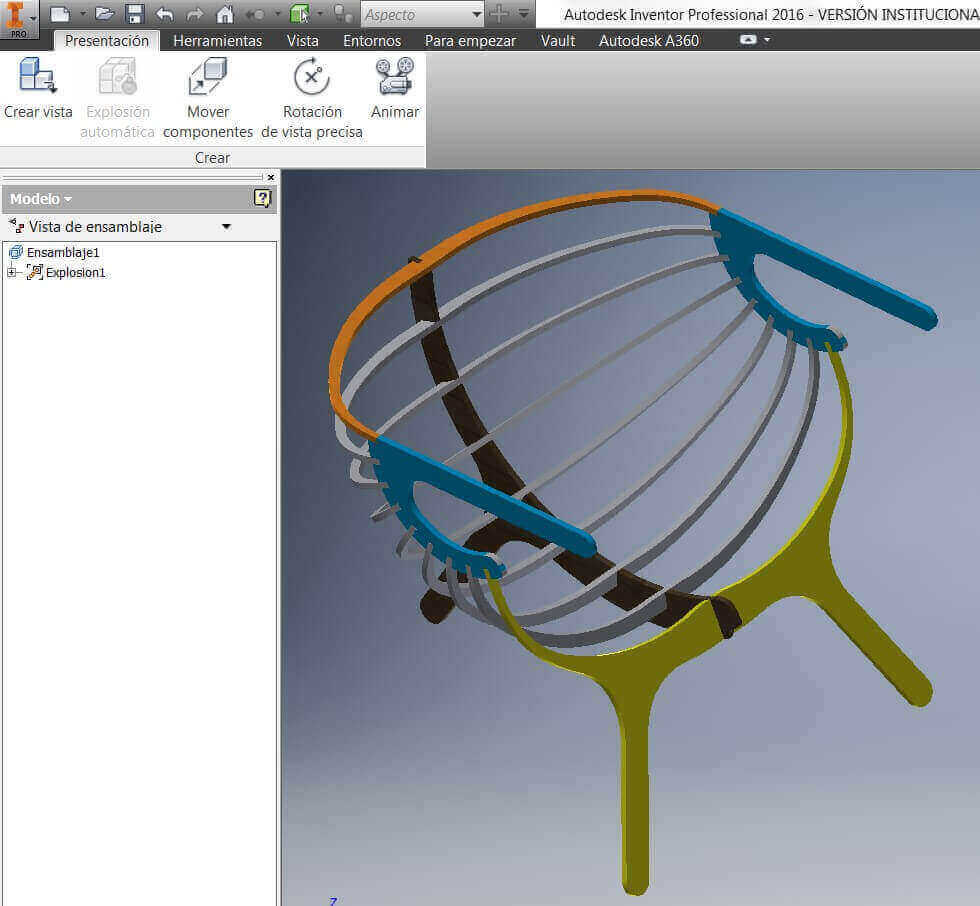
7 Then perform the simulation with the inventor software for assembling and disassembling the chair. Also, with the inventor software, sequence the armchair assembly.
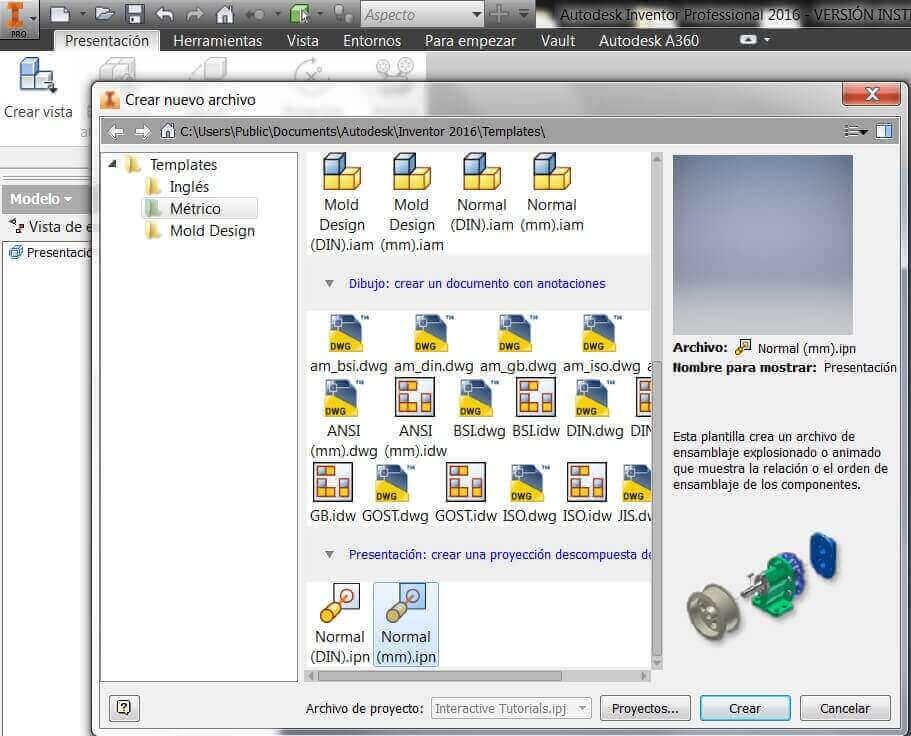
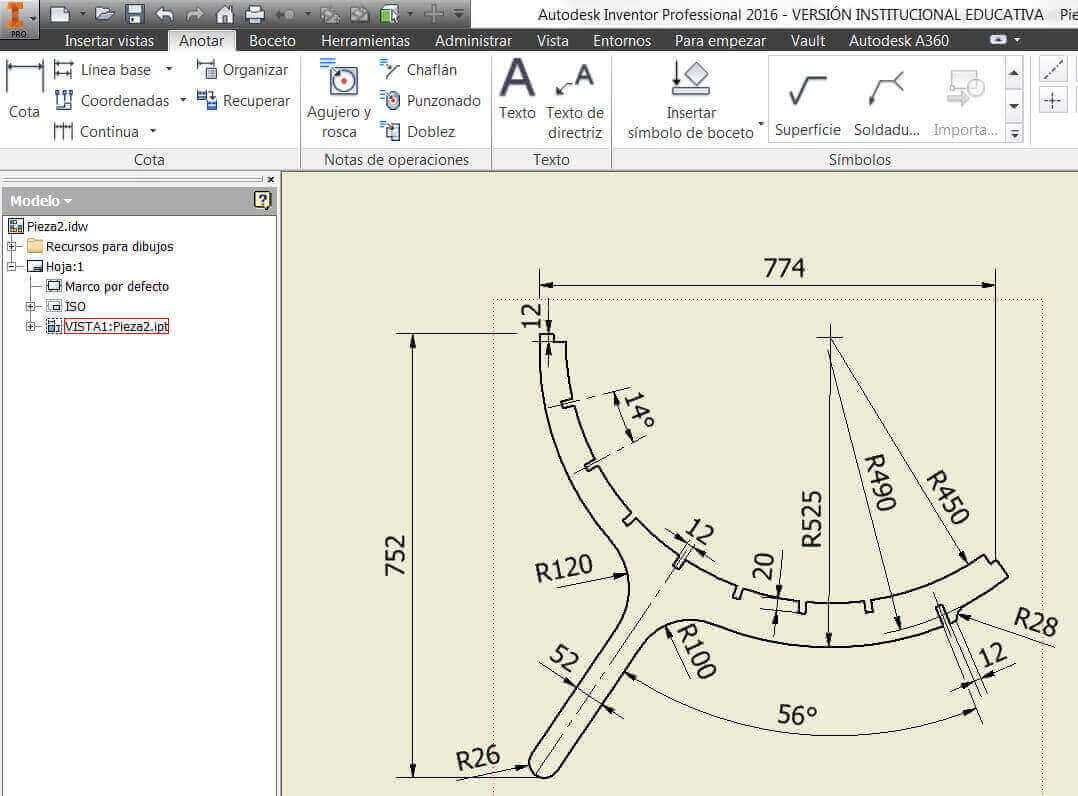
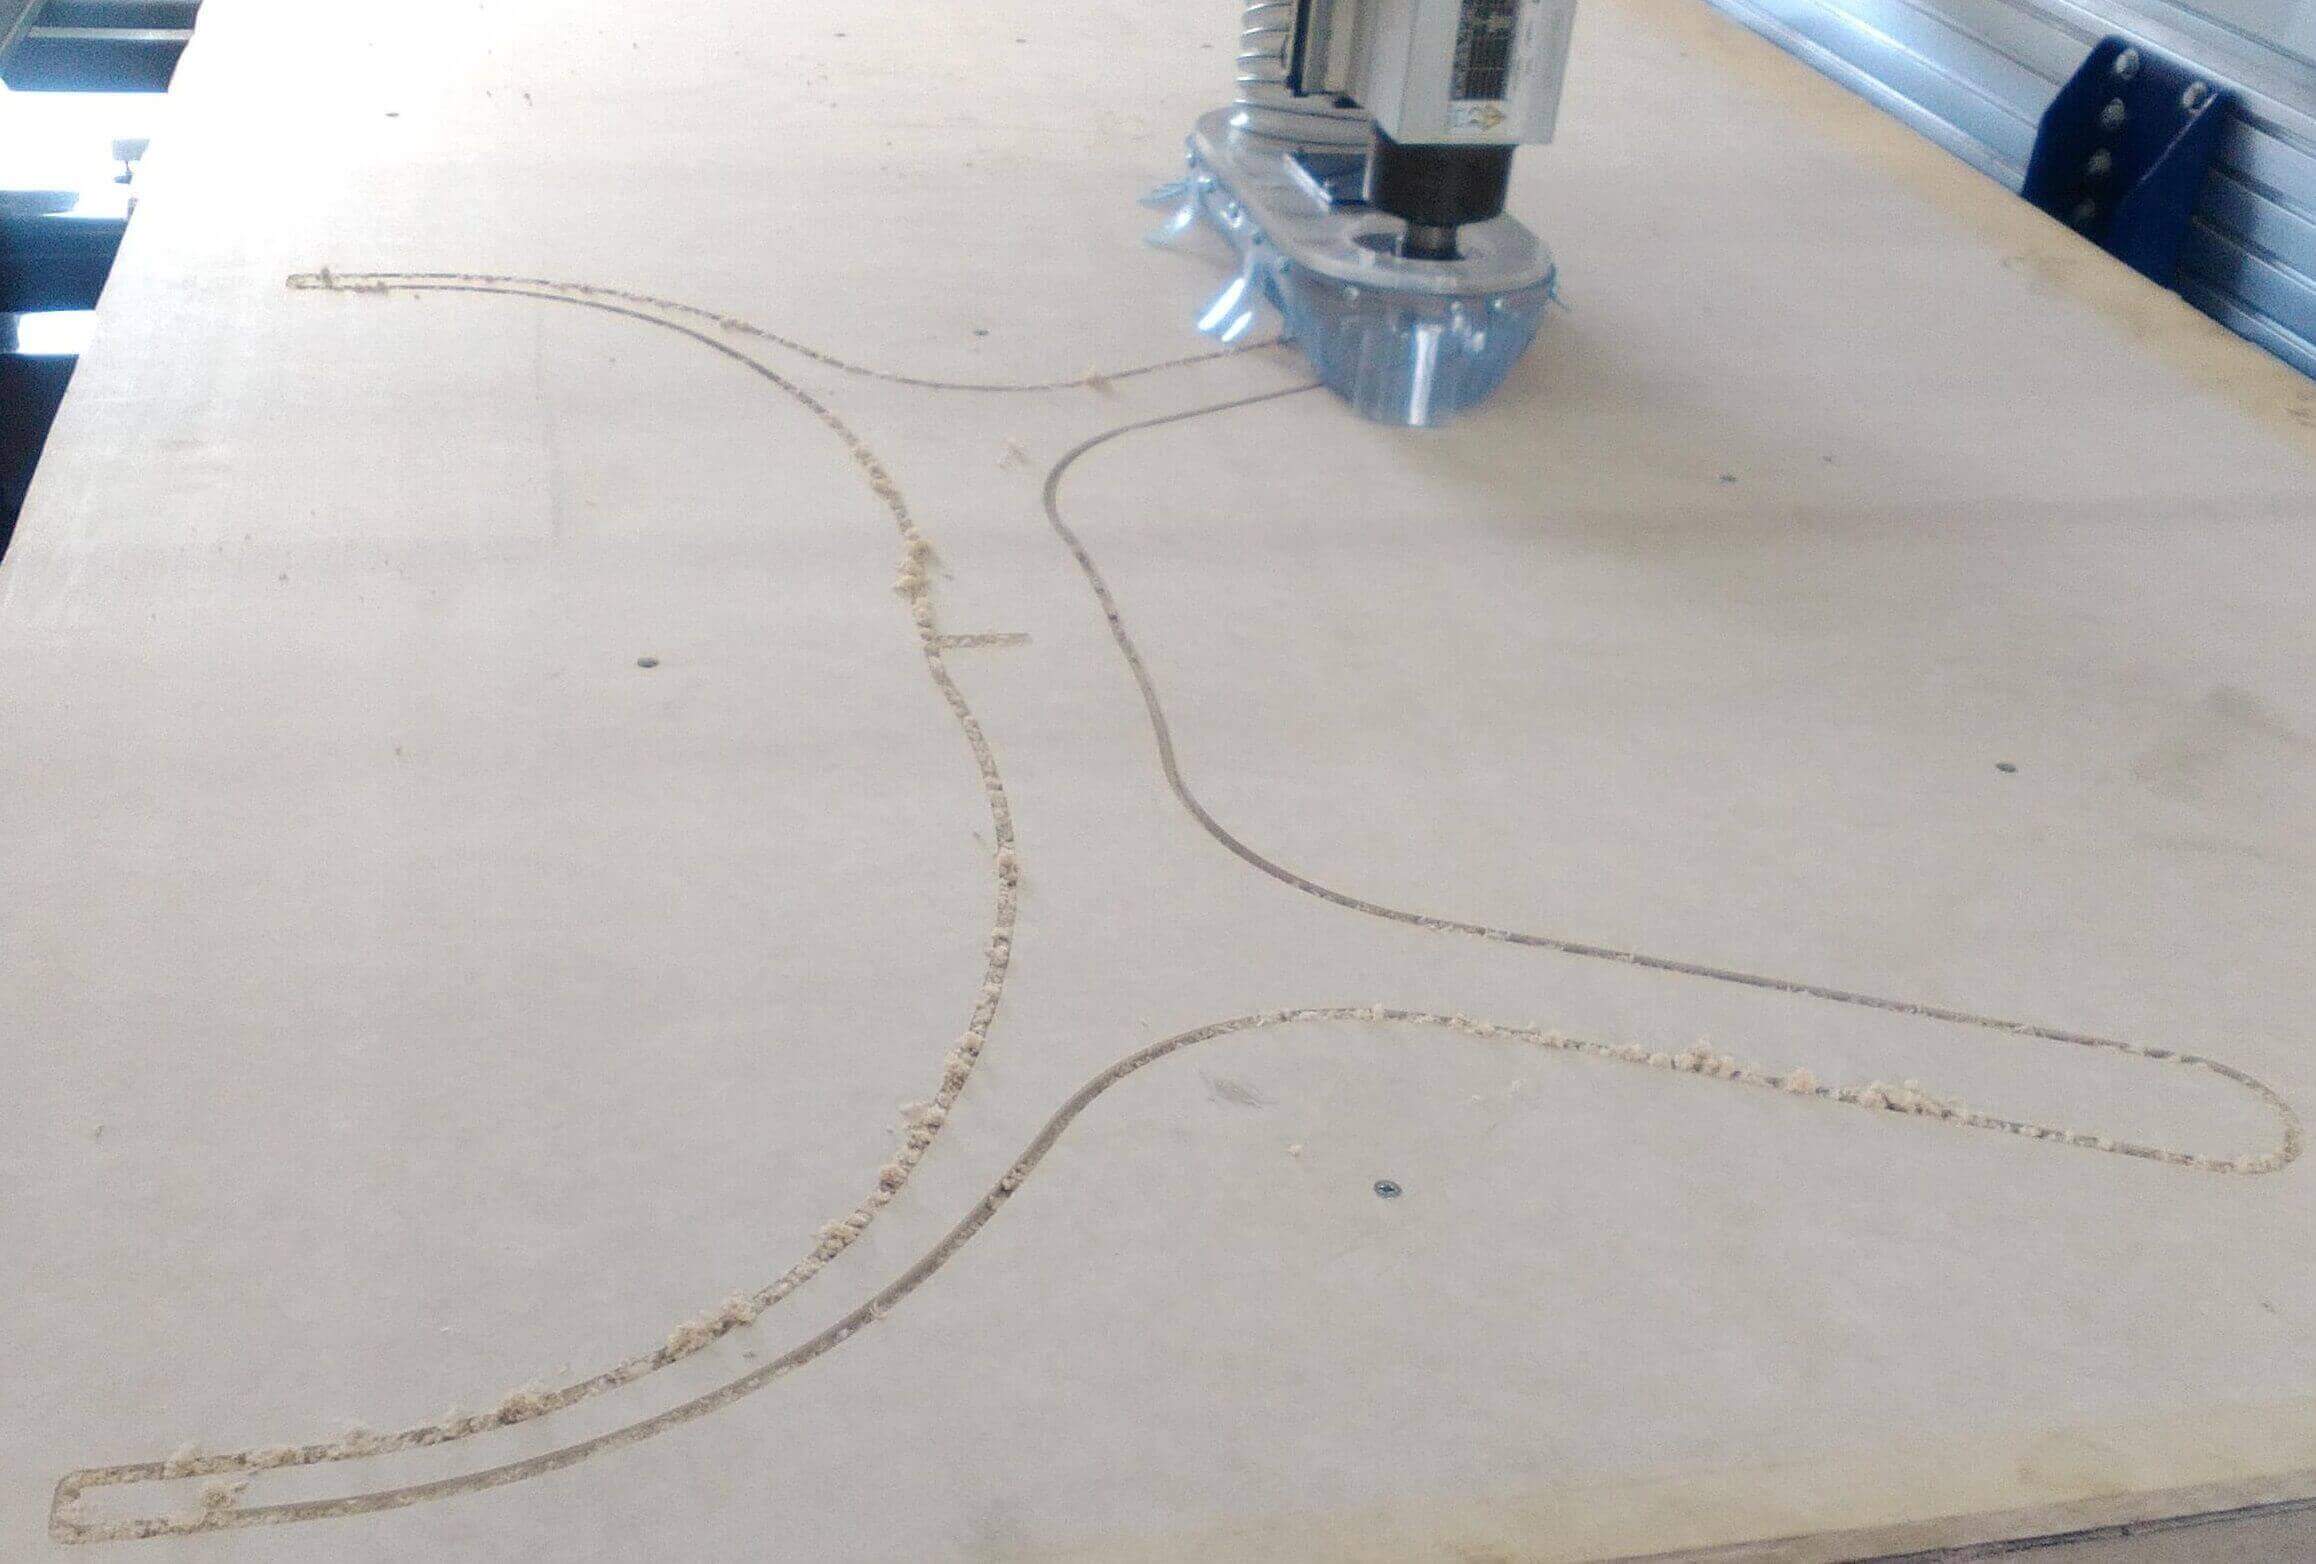
8 Then with the inventor software generate the plane to optimize the material for CNC milling.
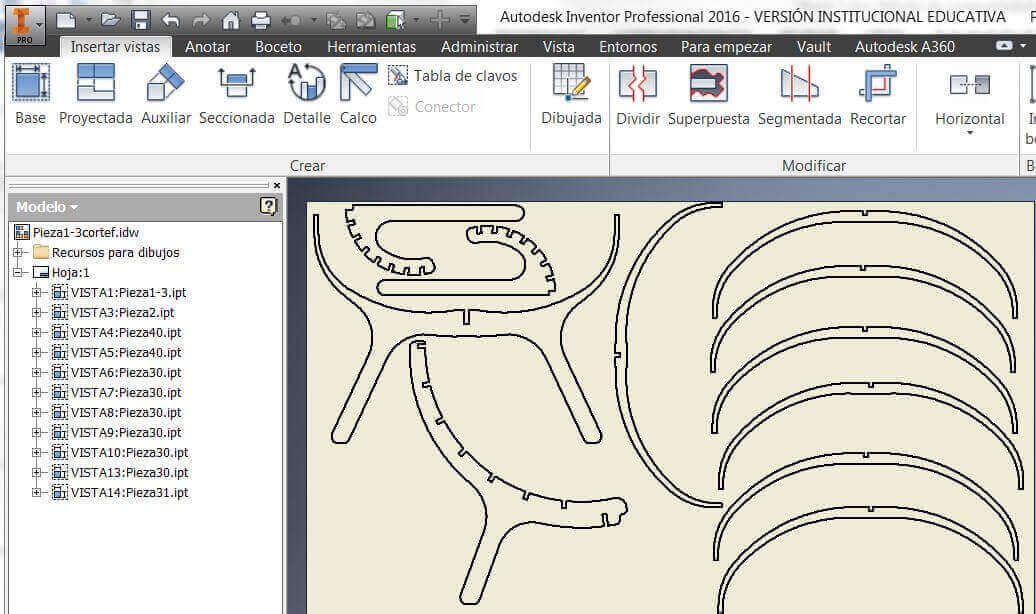
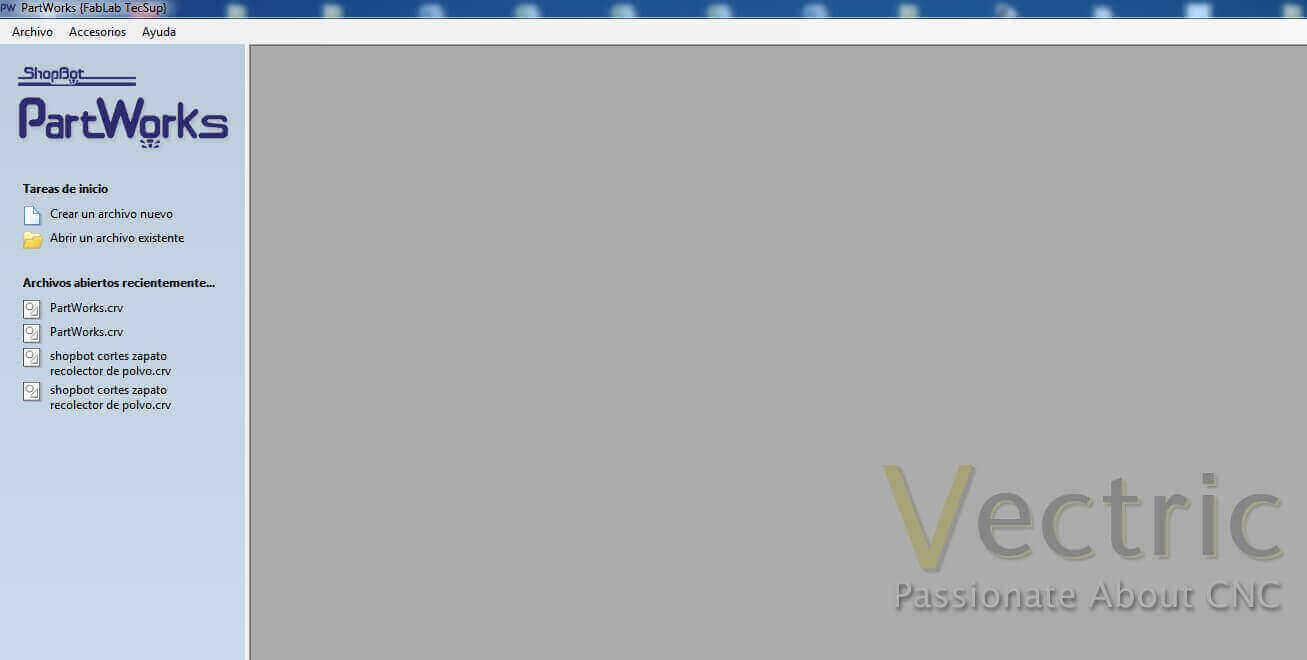
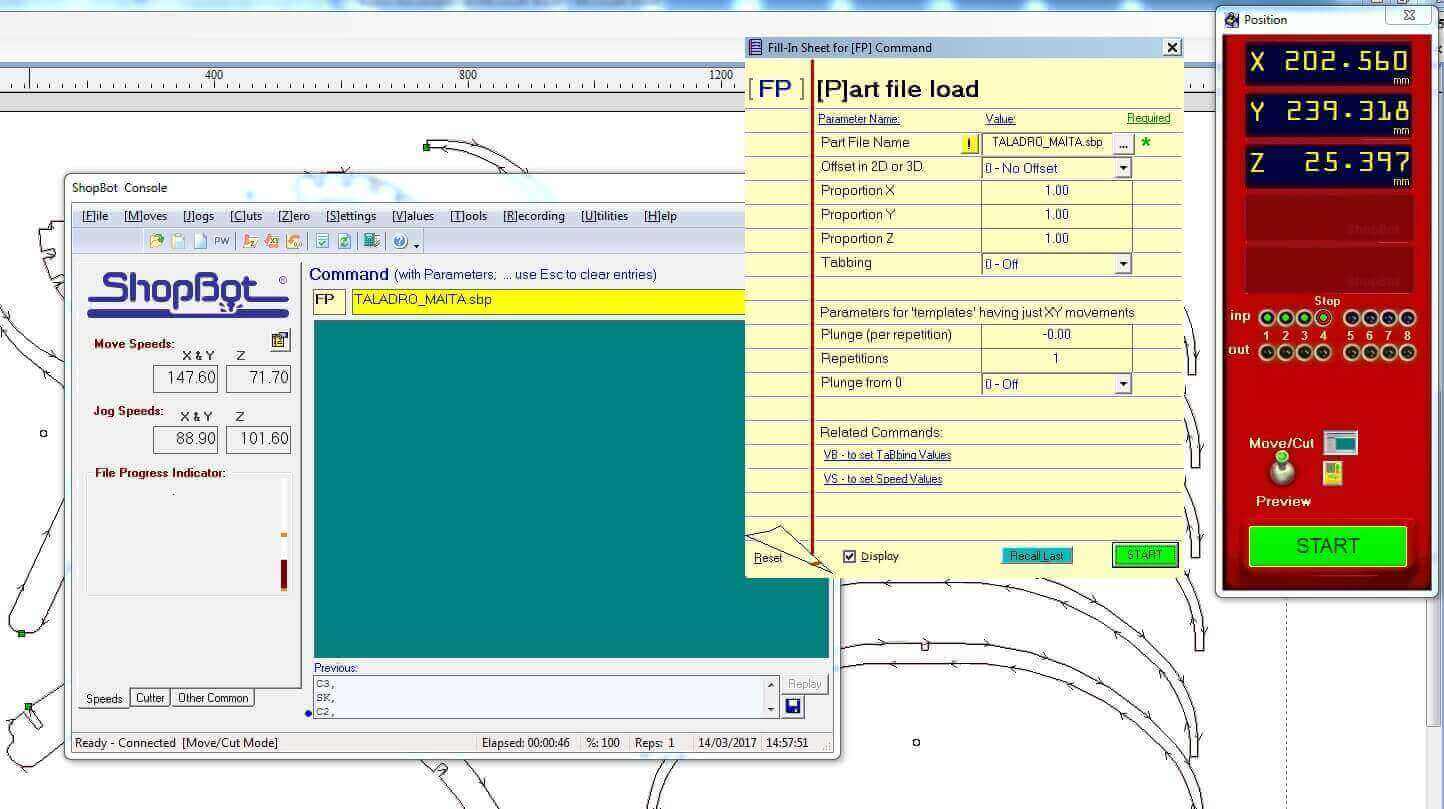
9 Save the plane with the extension .dxf and send it to the shopbot milling machine for its respective machining
Machine: Shopbot router
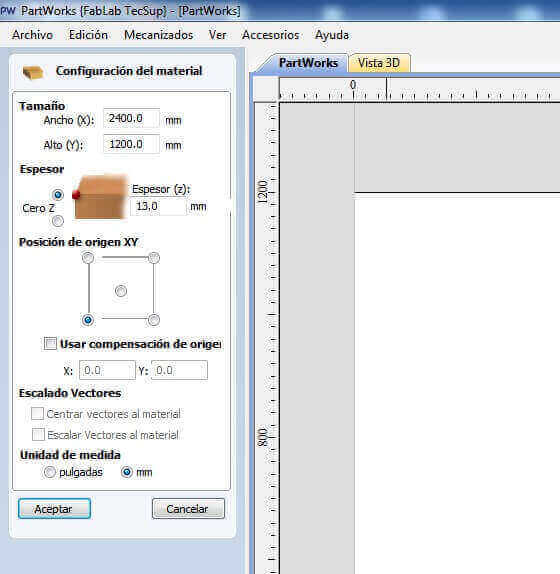
Table: 2400 x 1200 mm.
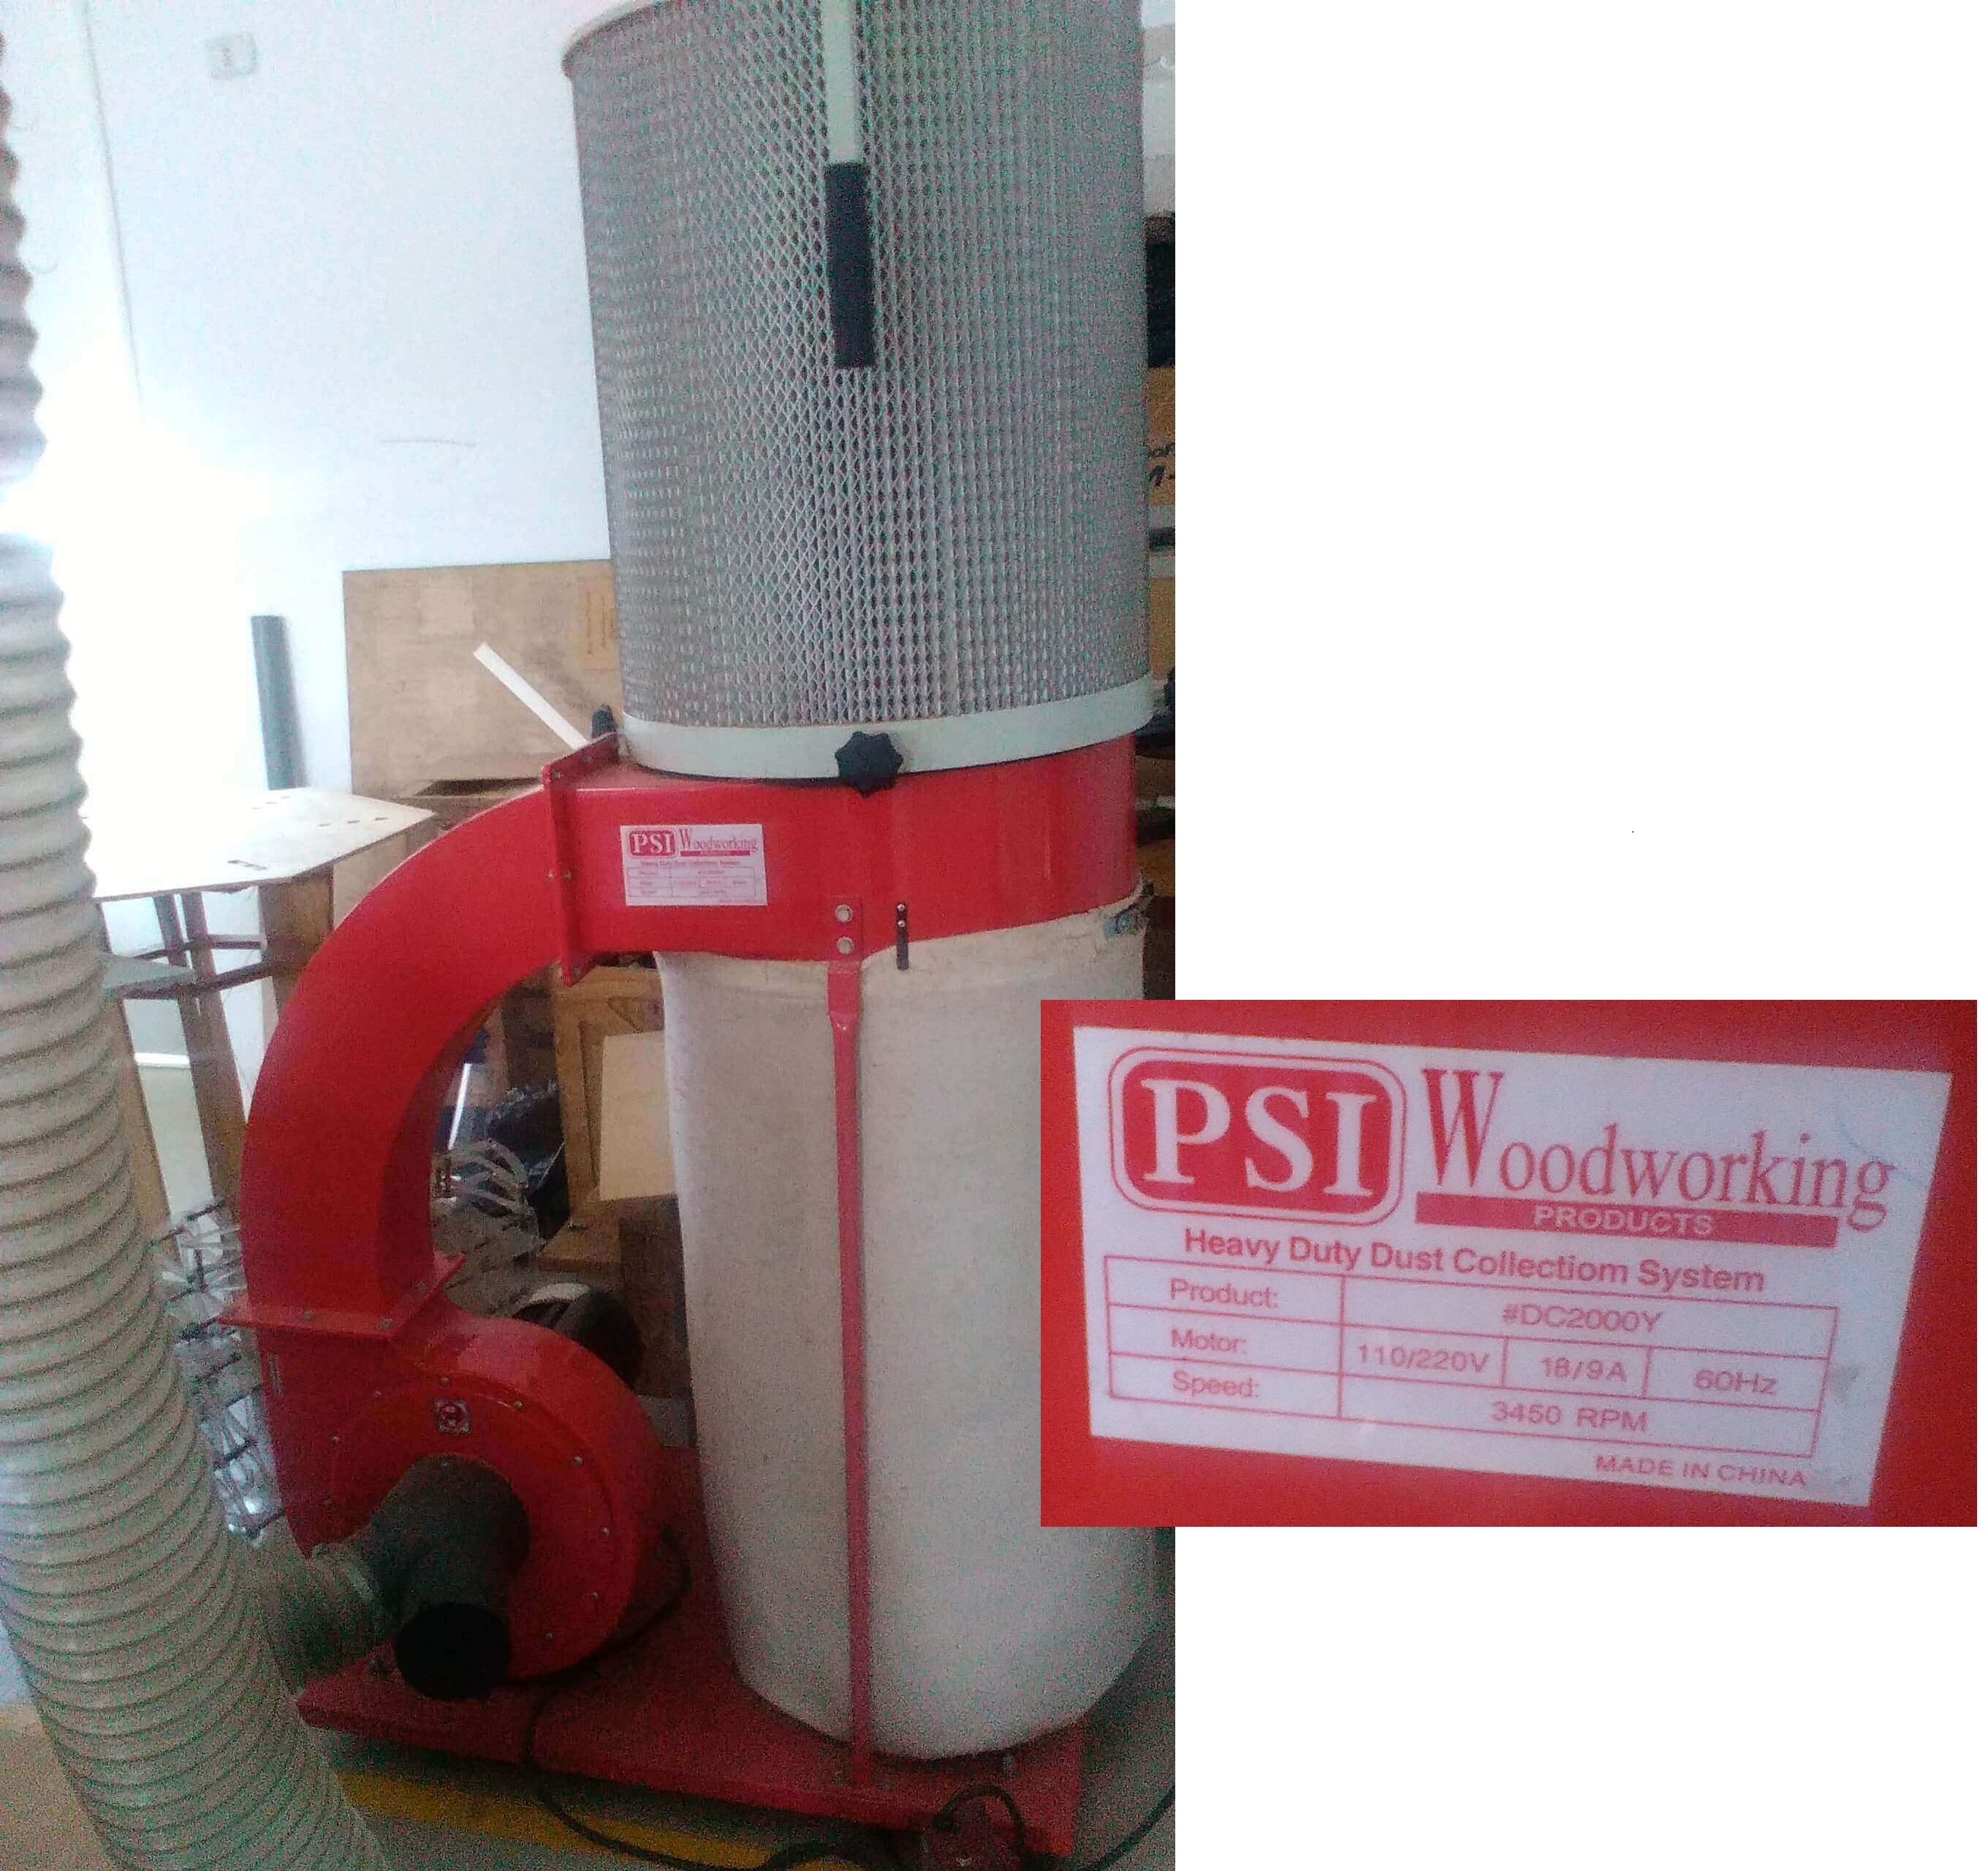
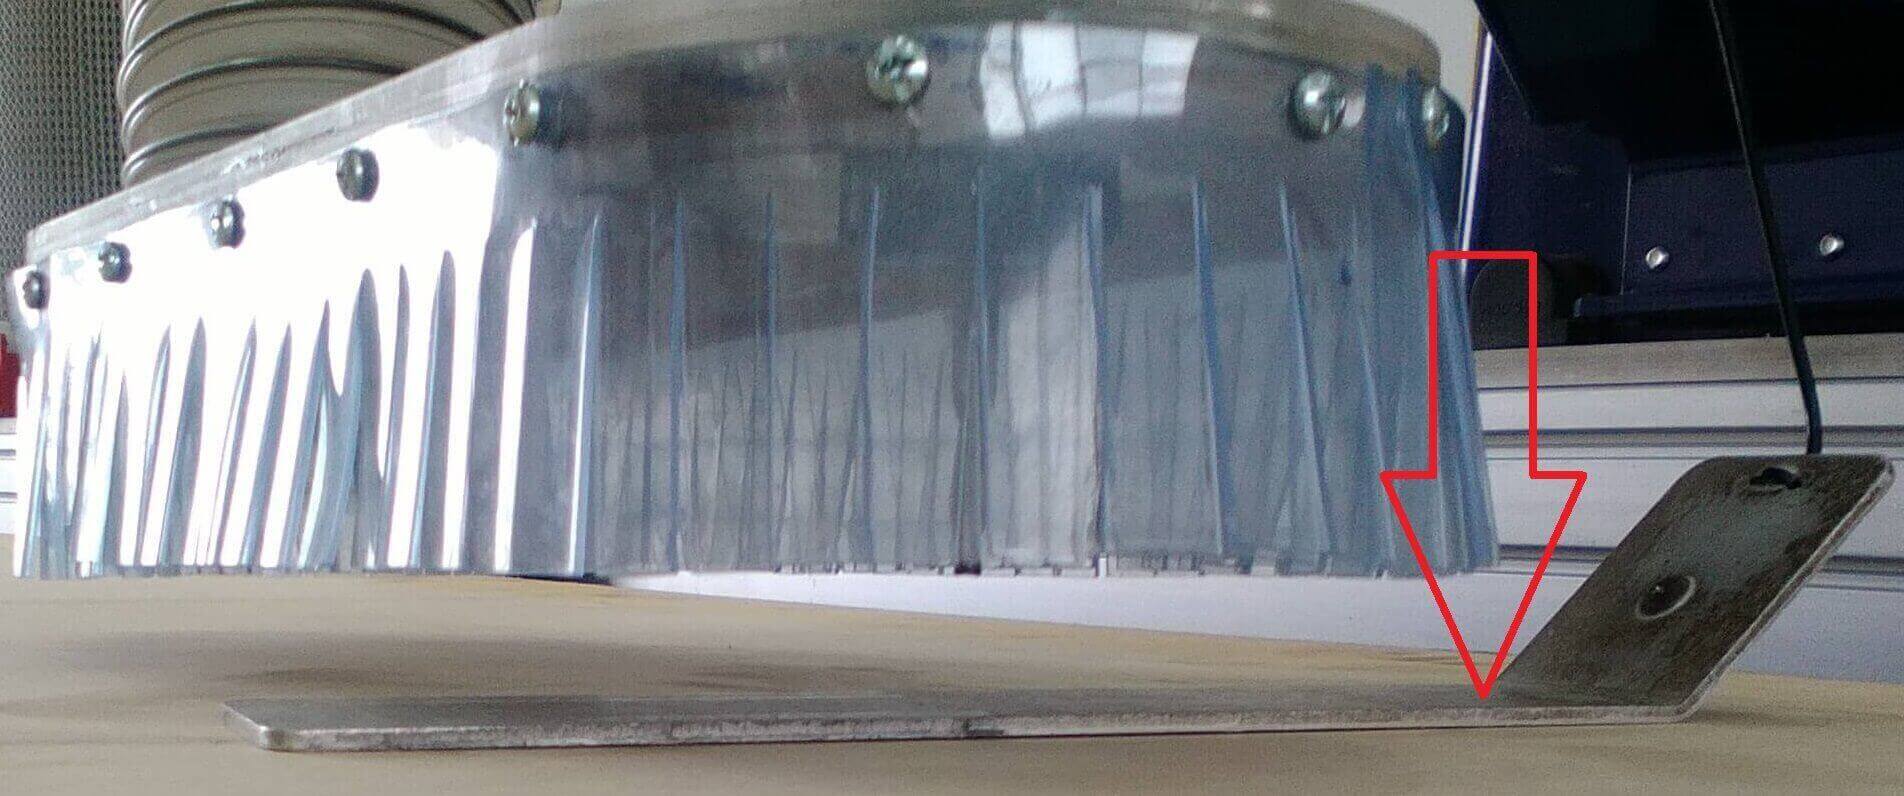
Accessory: Vacuum cleaner
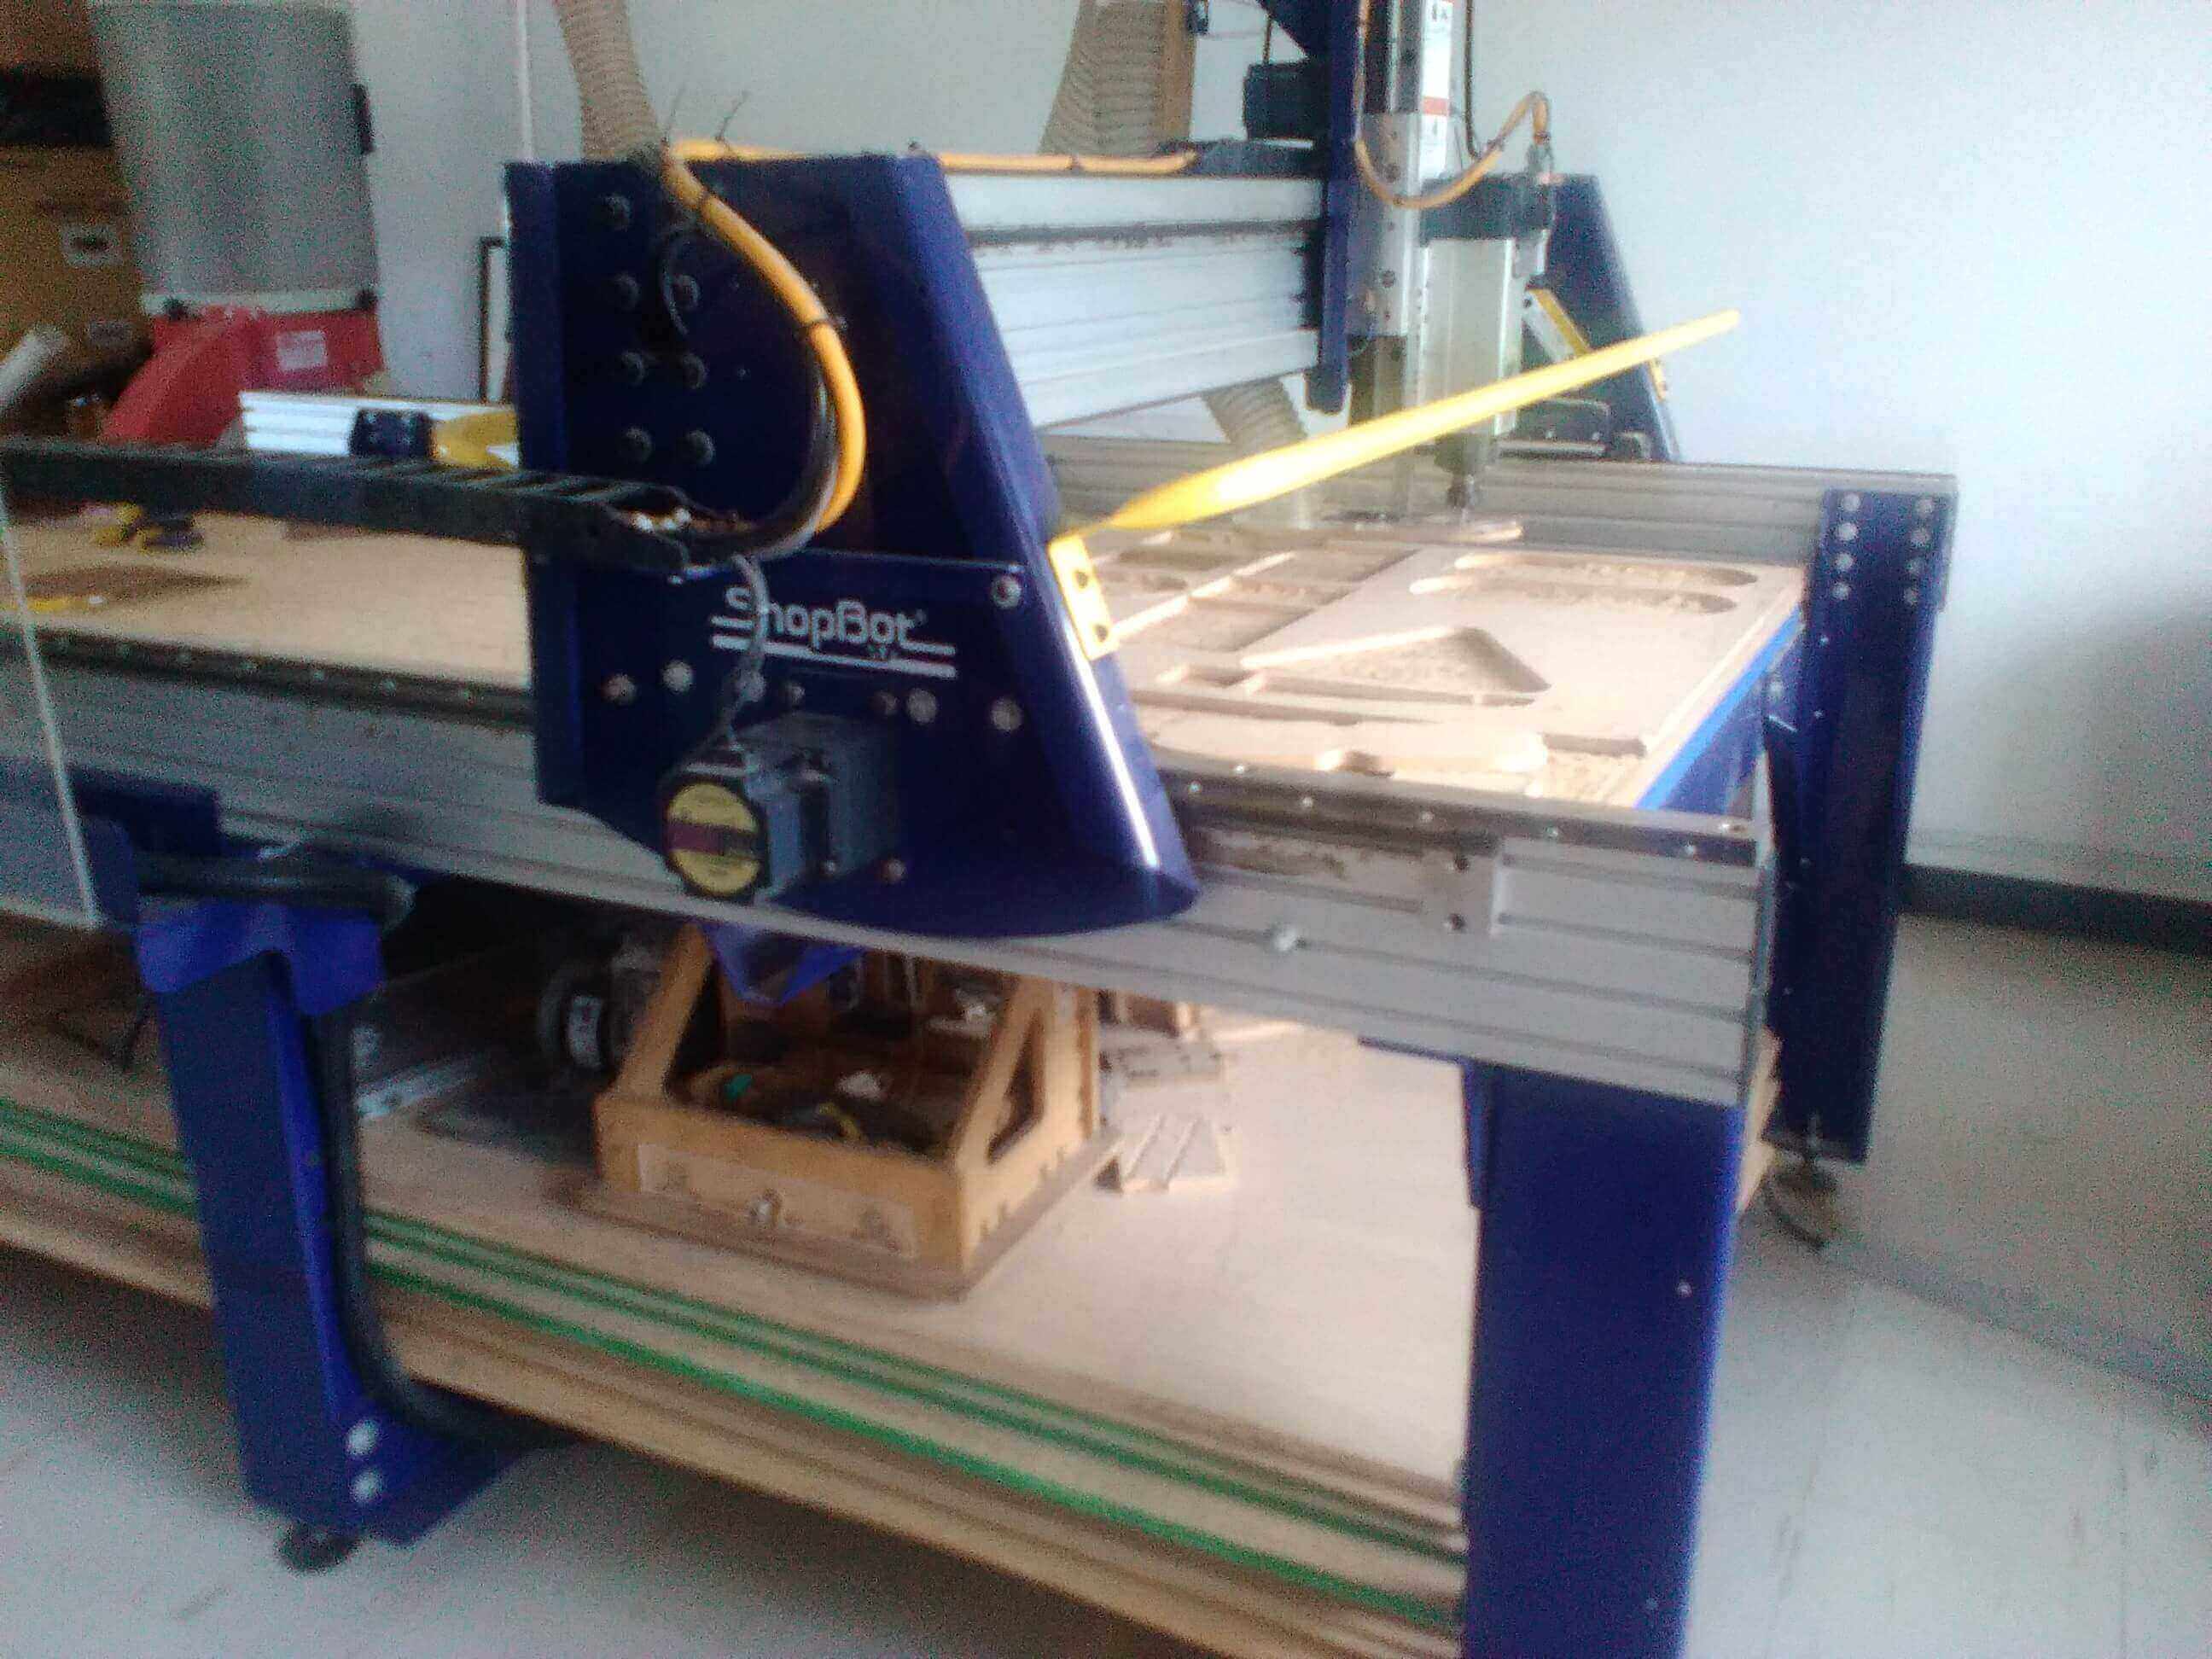
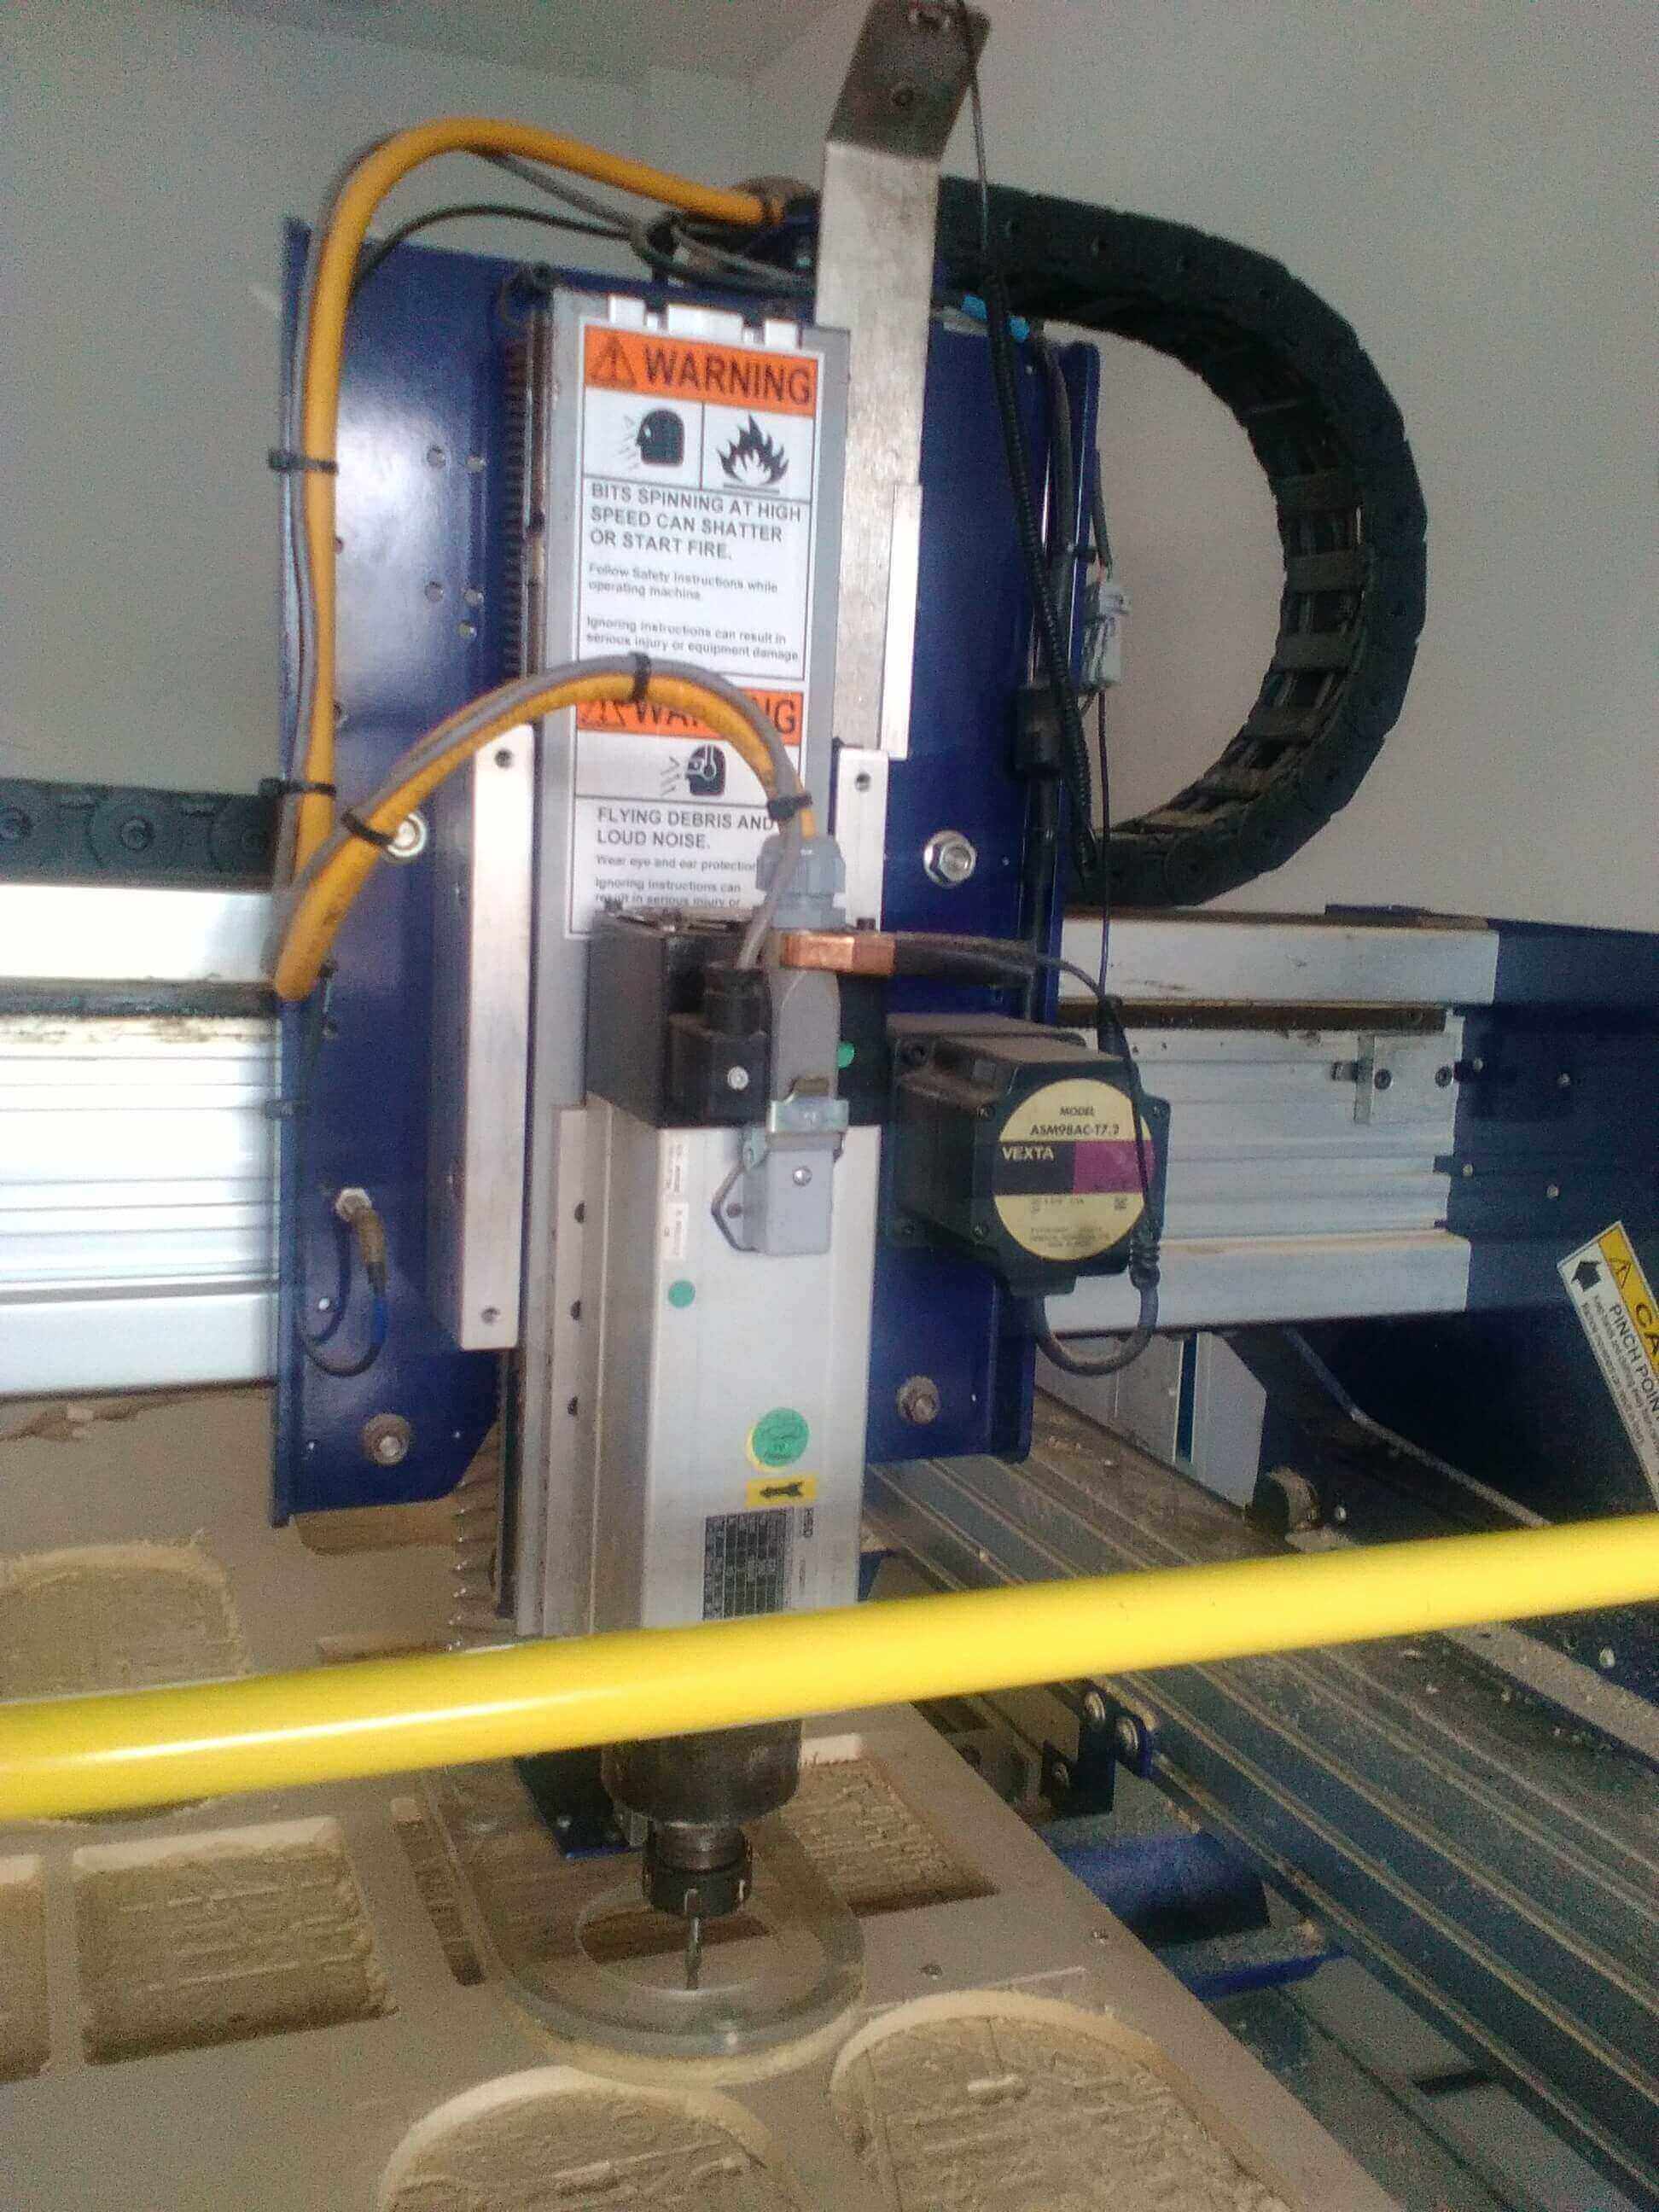
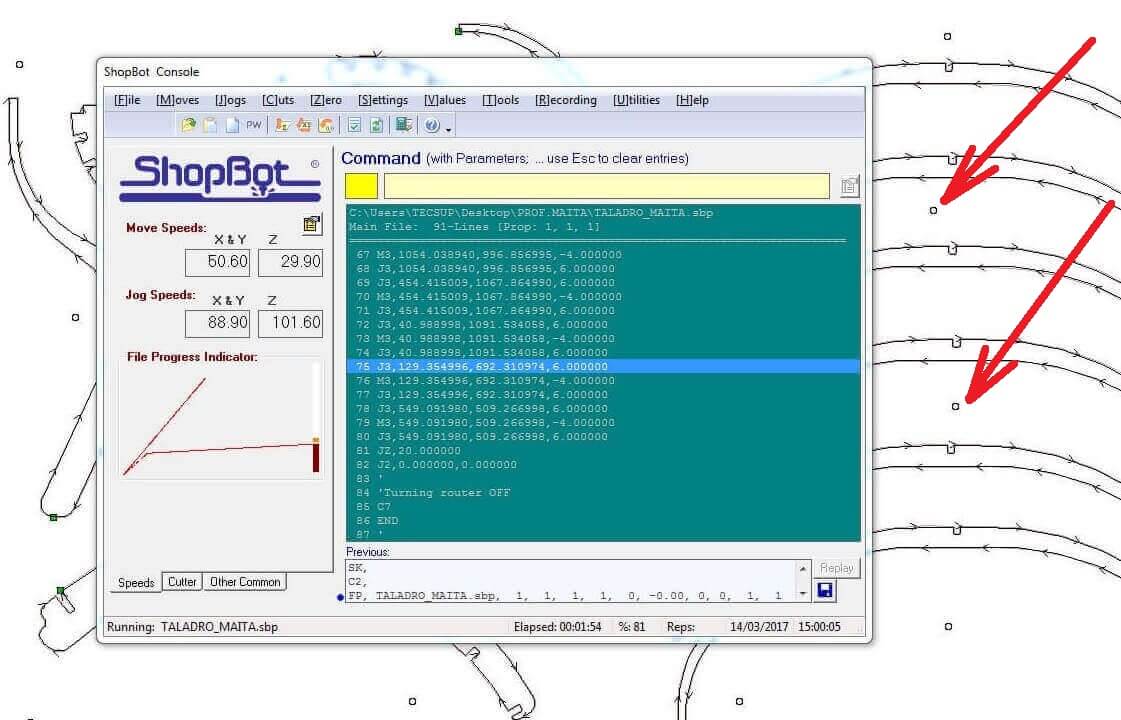
10 Use the software of the shopbot machine. The size of the work material (2400 x 1200 mm)
11 Then set the coordinates (X, Y) the machine zero point
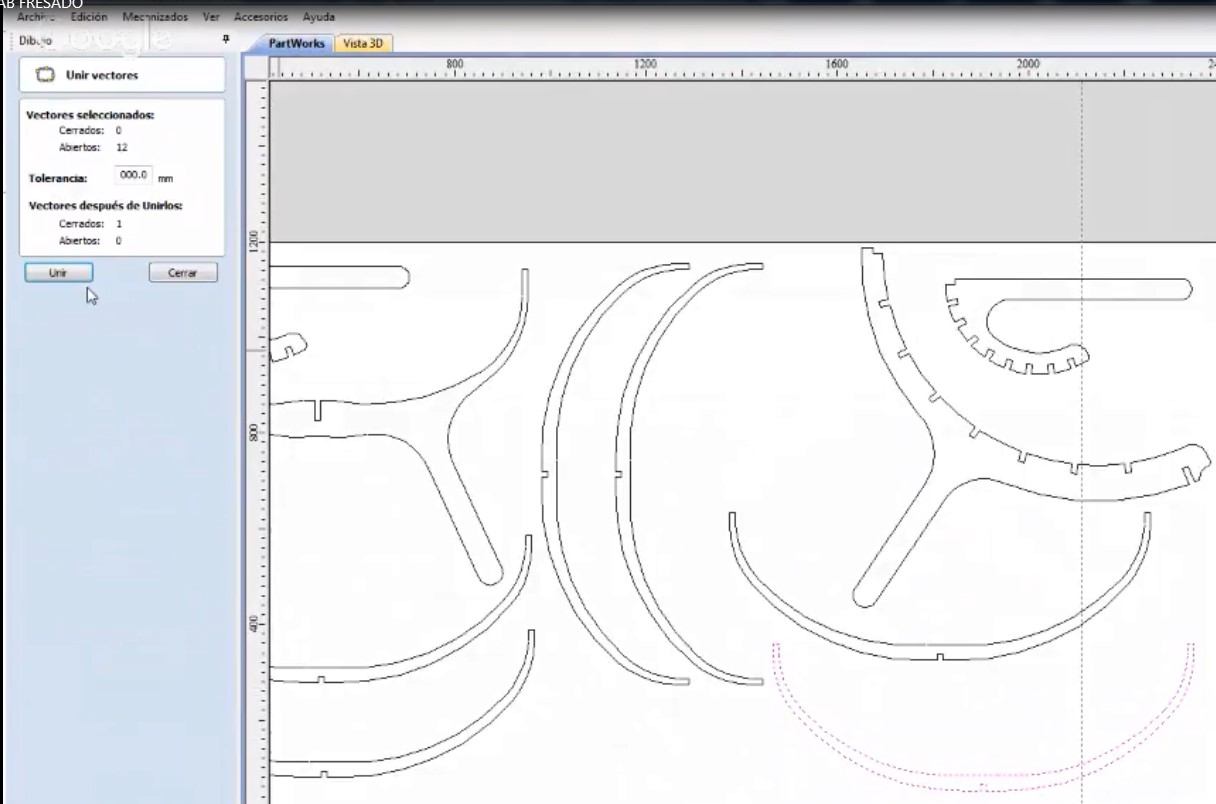
12 Then check the vectors of the components to be machined their lines are not separated.
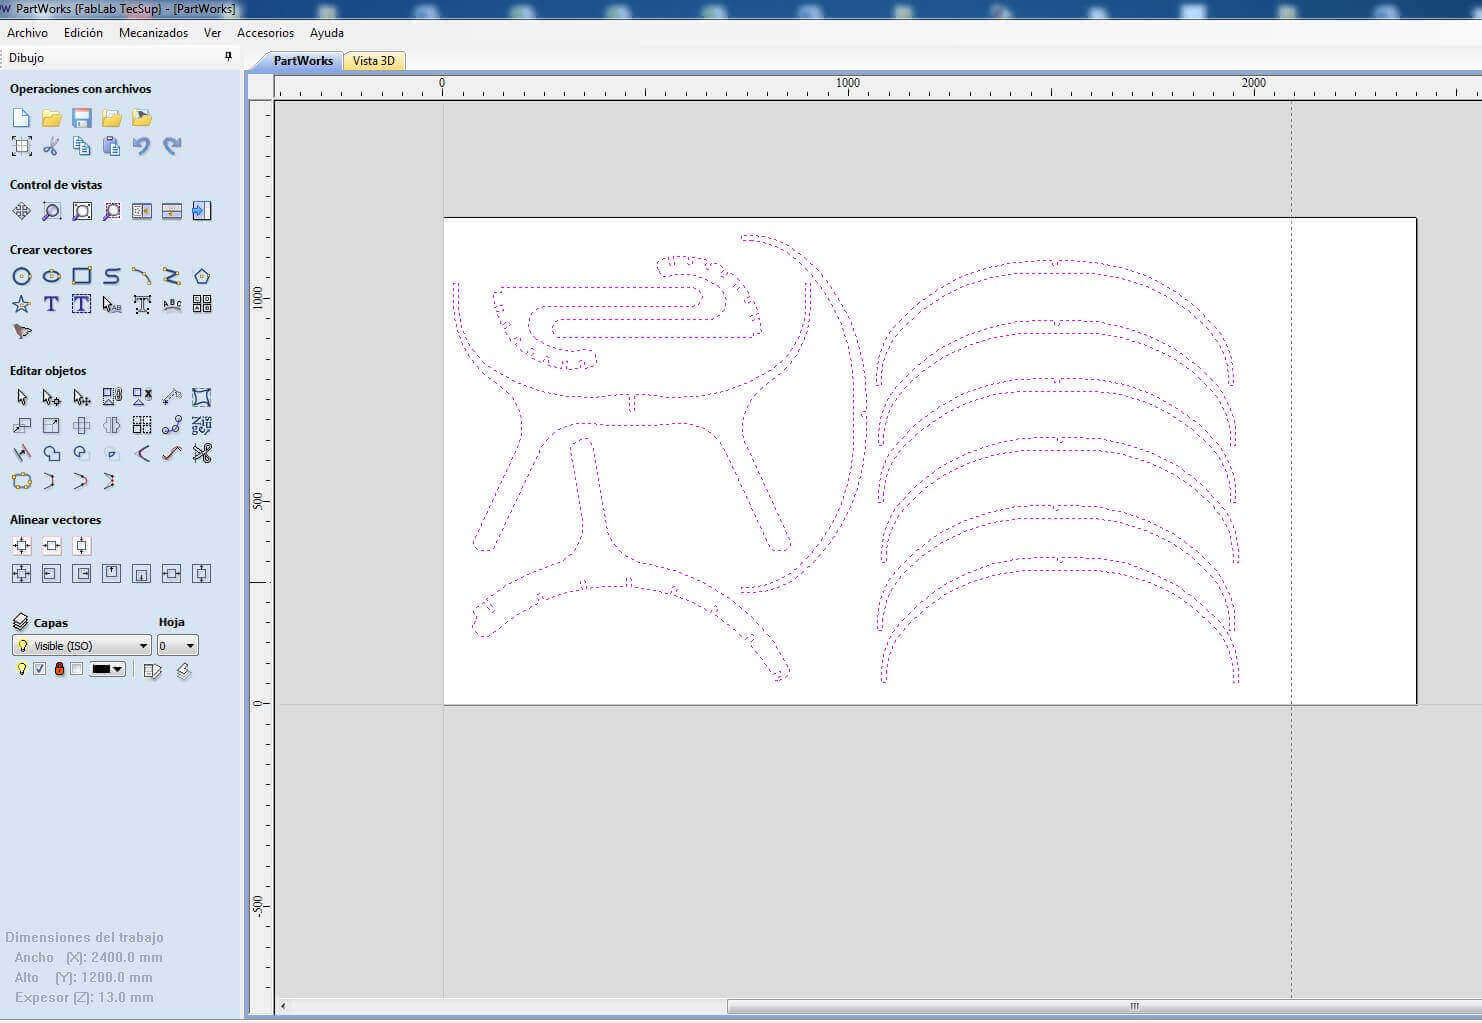
13 Again check that the vectors of the components must be grouped
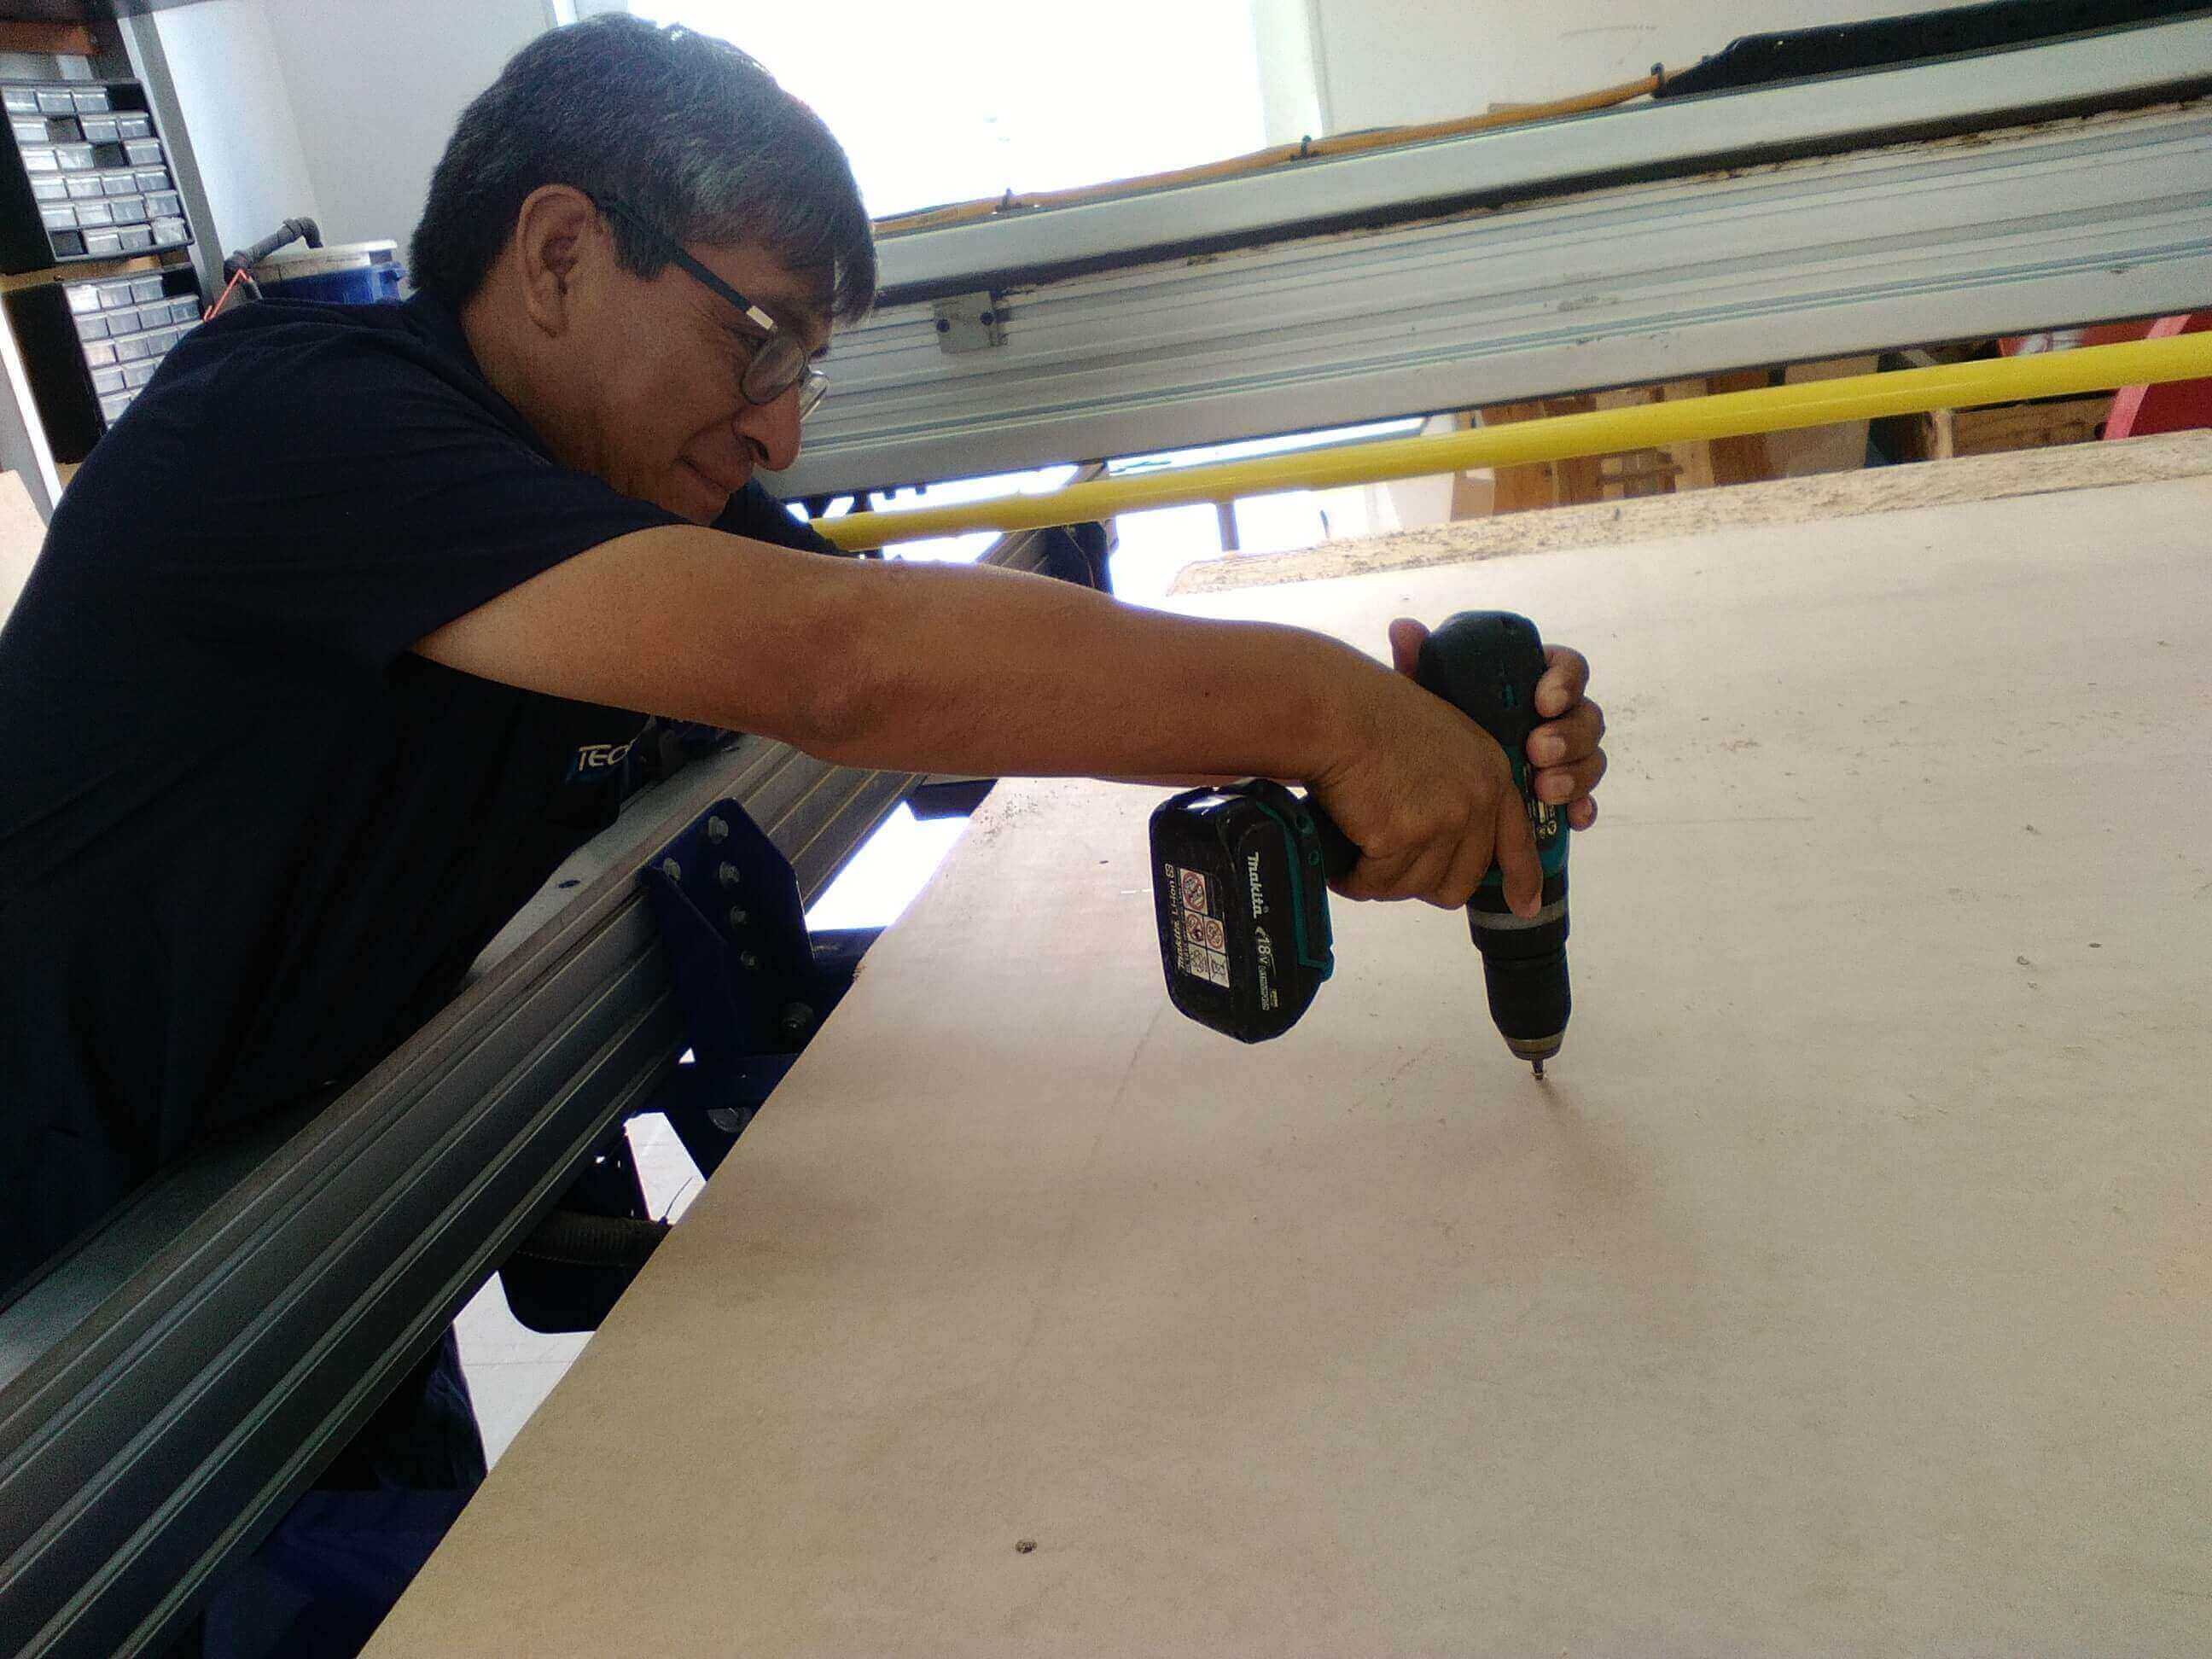
14 Select the guide points where the stove bolts were located to attach to the work table.
15 After choosing the points the milling machine, I could place a previous machining on the material to work. Then fix the stove bolts using a portable screwdriver.
16 Then perform Z-axis zero calibration, the cutting tool
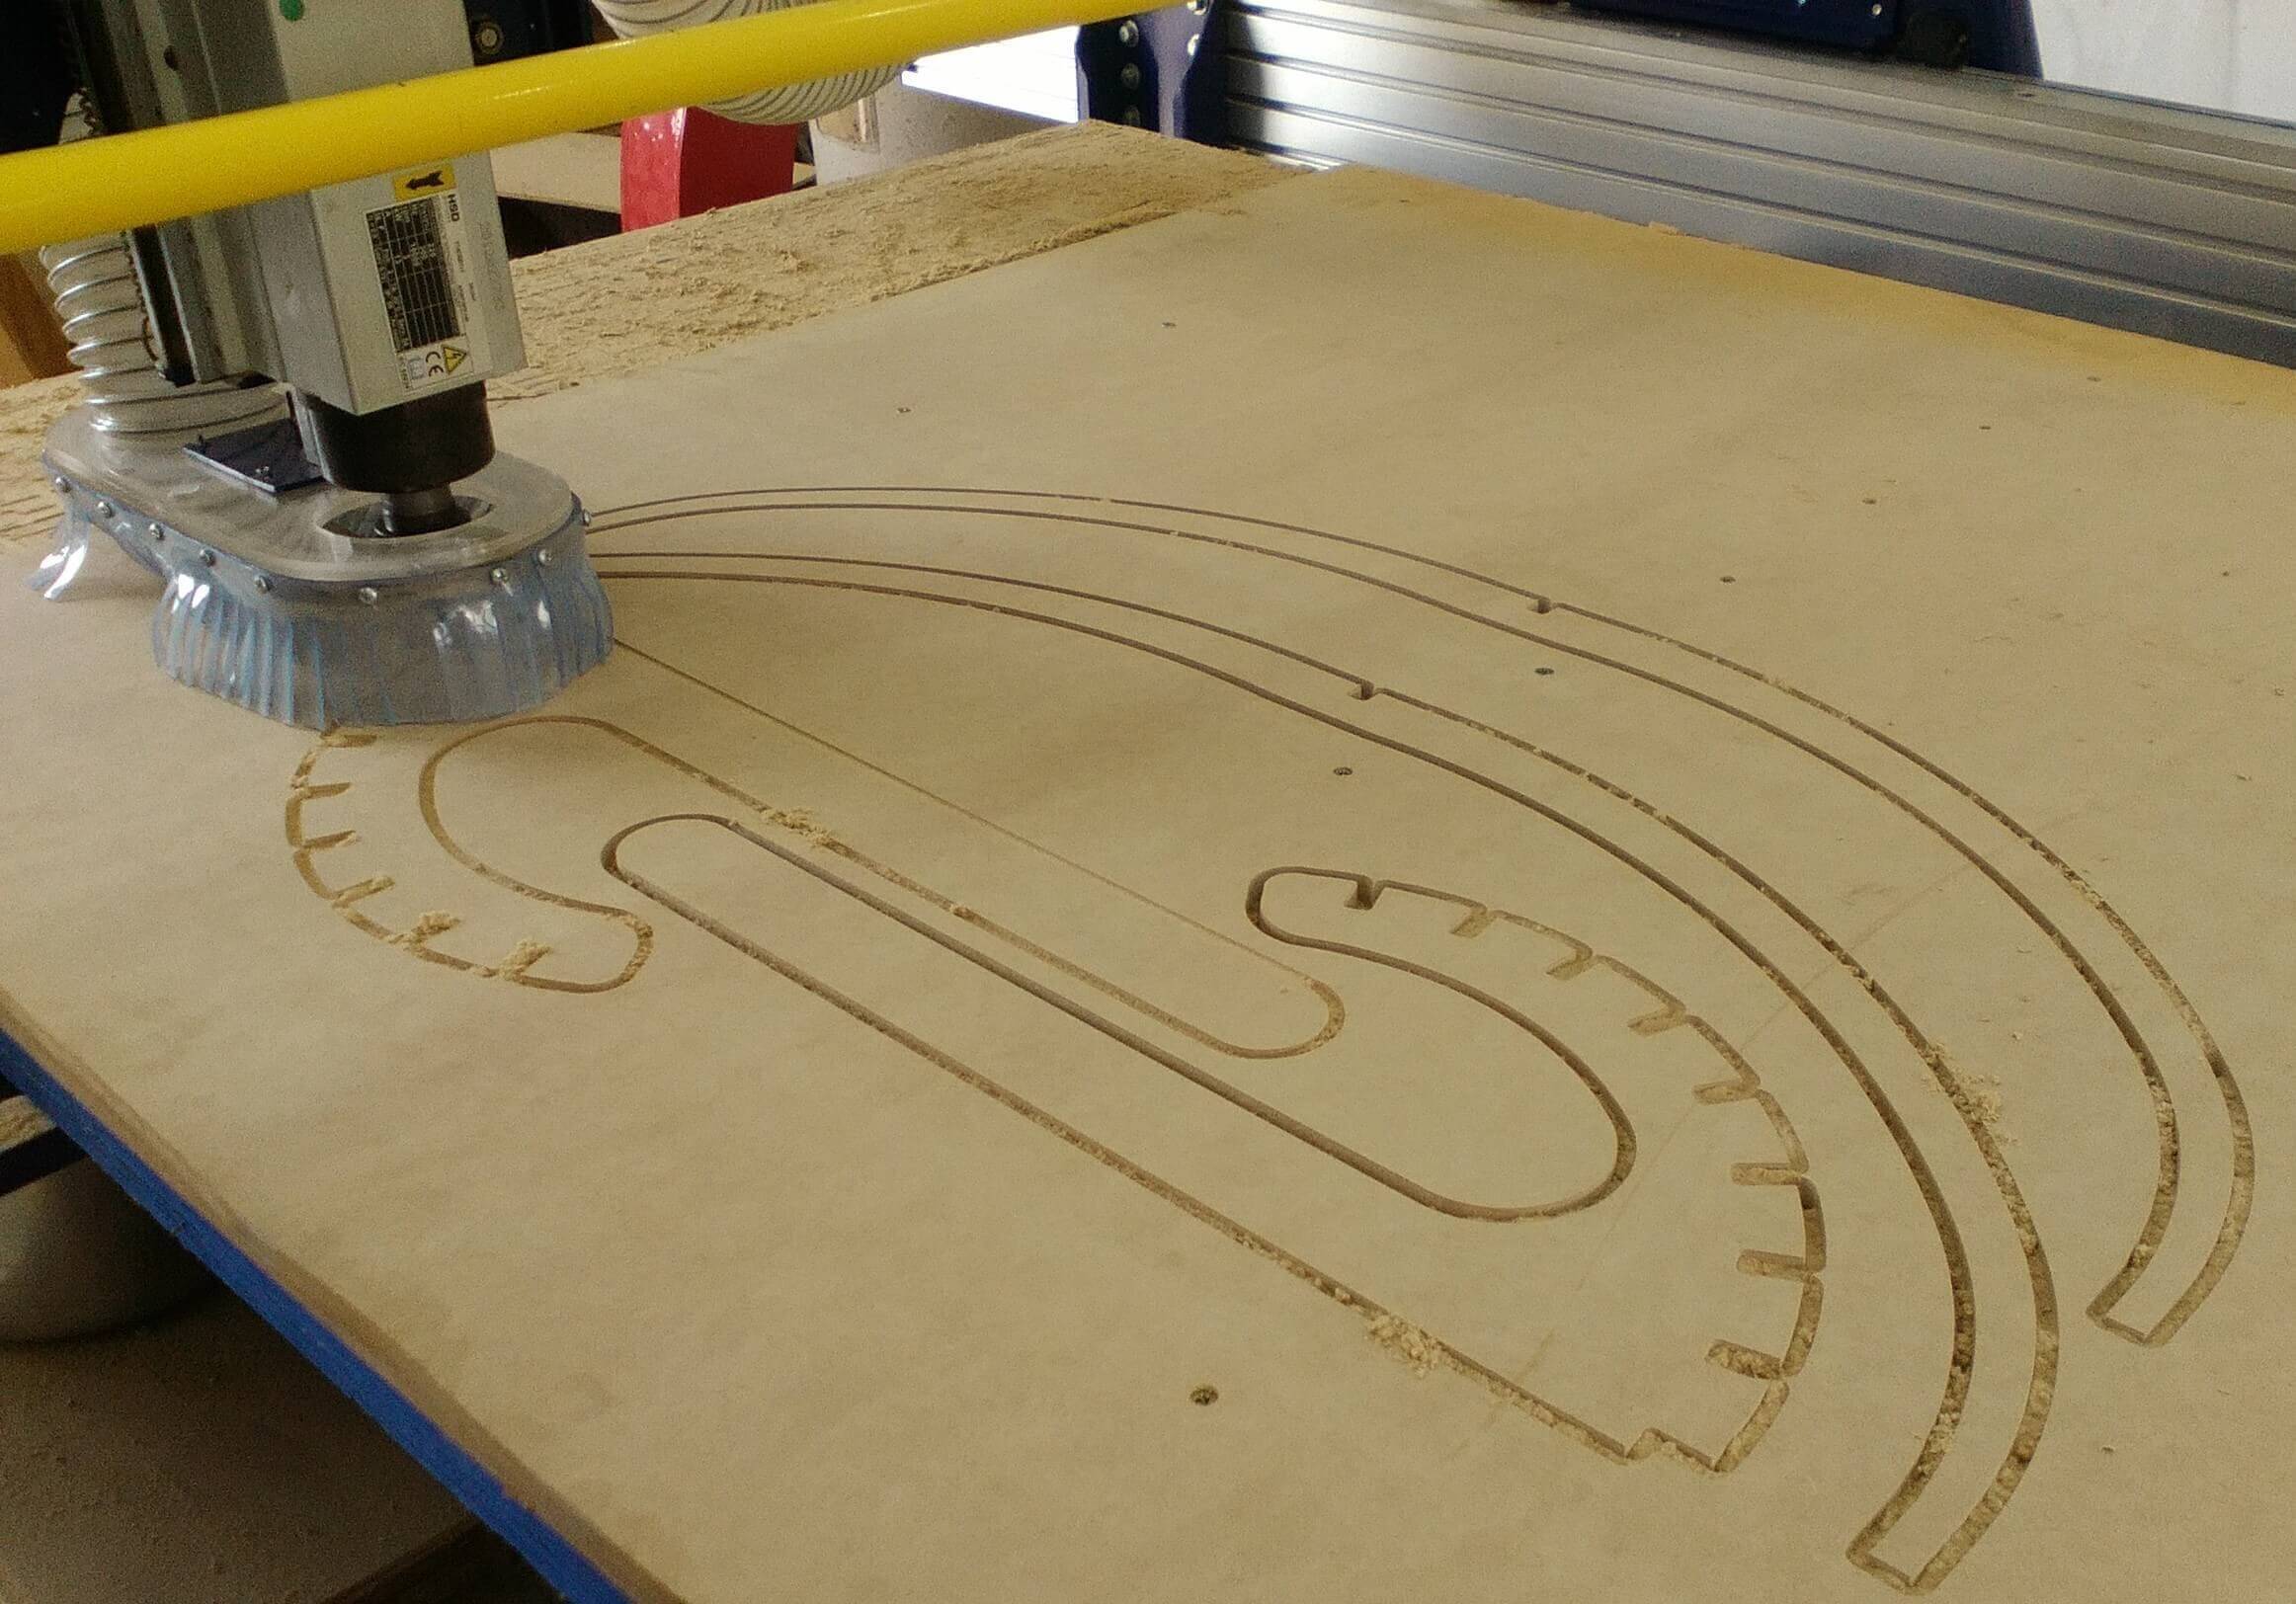
17 Then the 12 mm thick MDF began to be machined with a 2-mm helicoidal tip mill with the diameter 1/4 "mm. The feed rate was selected 100 m / sec at a speed of 8000 rpm. I immediately turned on the vacuum cleaner.
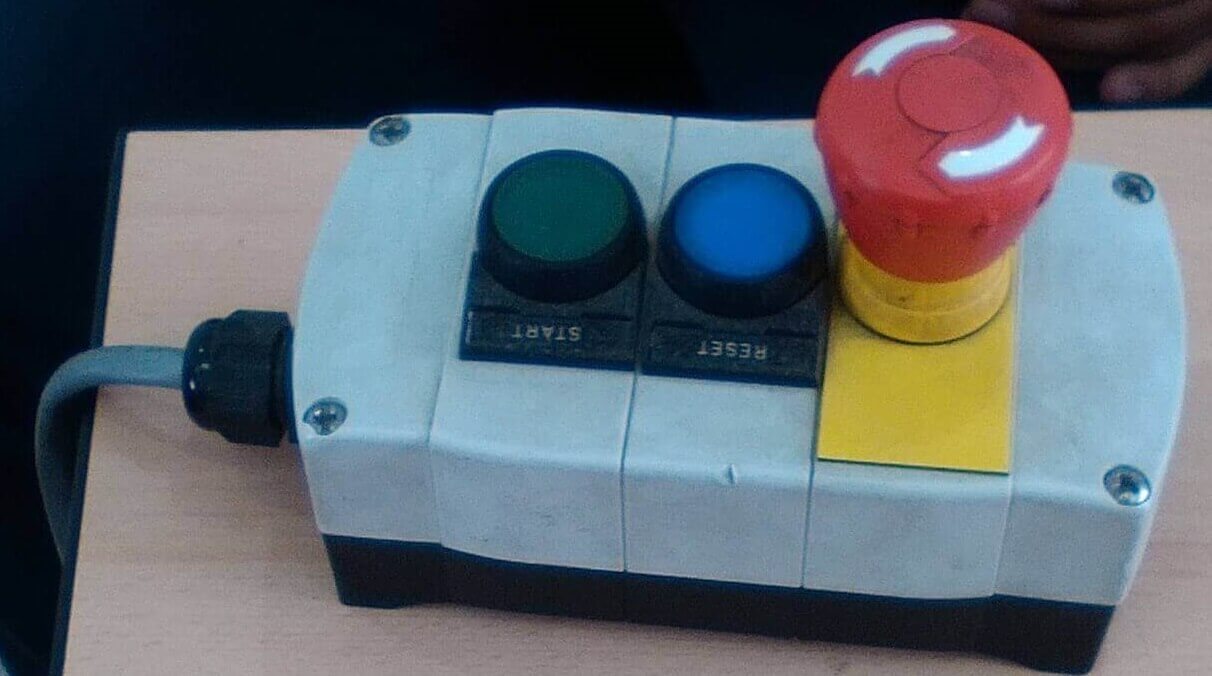
18 One should be aware of being close to the safety pushbuttons for any emergencies.
When trying to mechanize fast it happens to have selected the excessively speed of 14000 rpm and to give the depth of pass plus 1.5 mm, with its advance of 100mm / sec. Solution: Re-start now if the recommended parameters are set at 100 mm / sec at a speed of 8000 rpm, with a depth of 0.5 mm per pass.
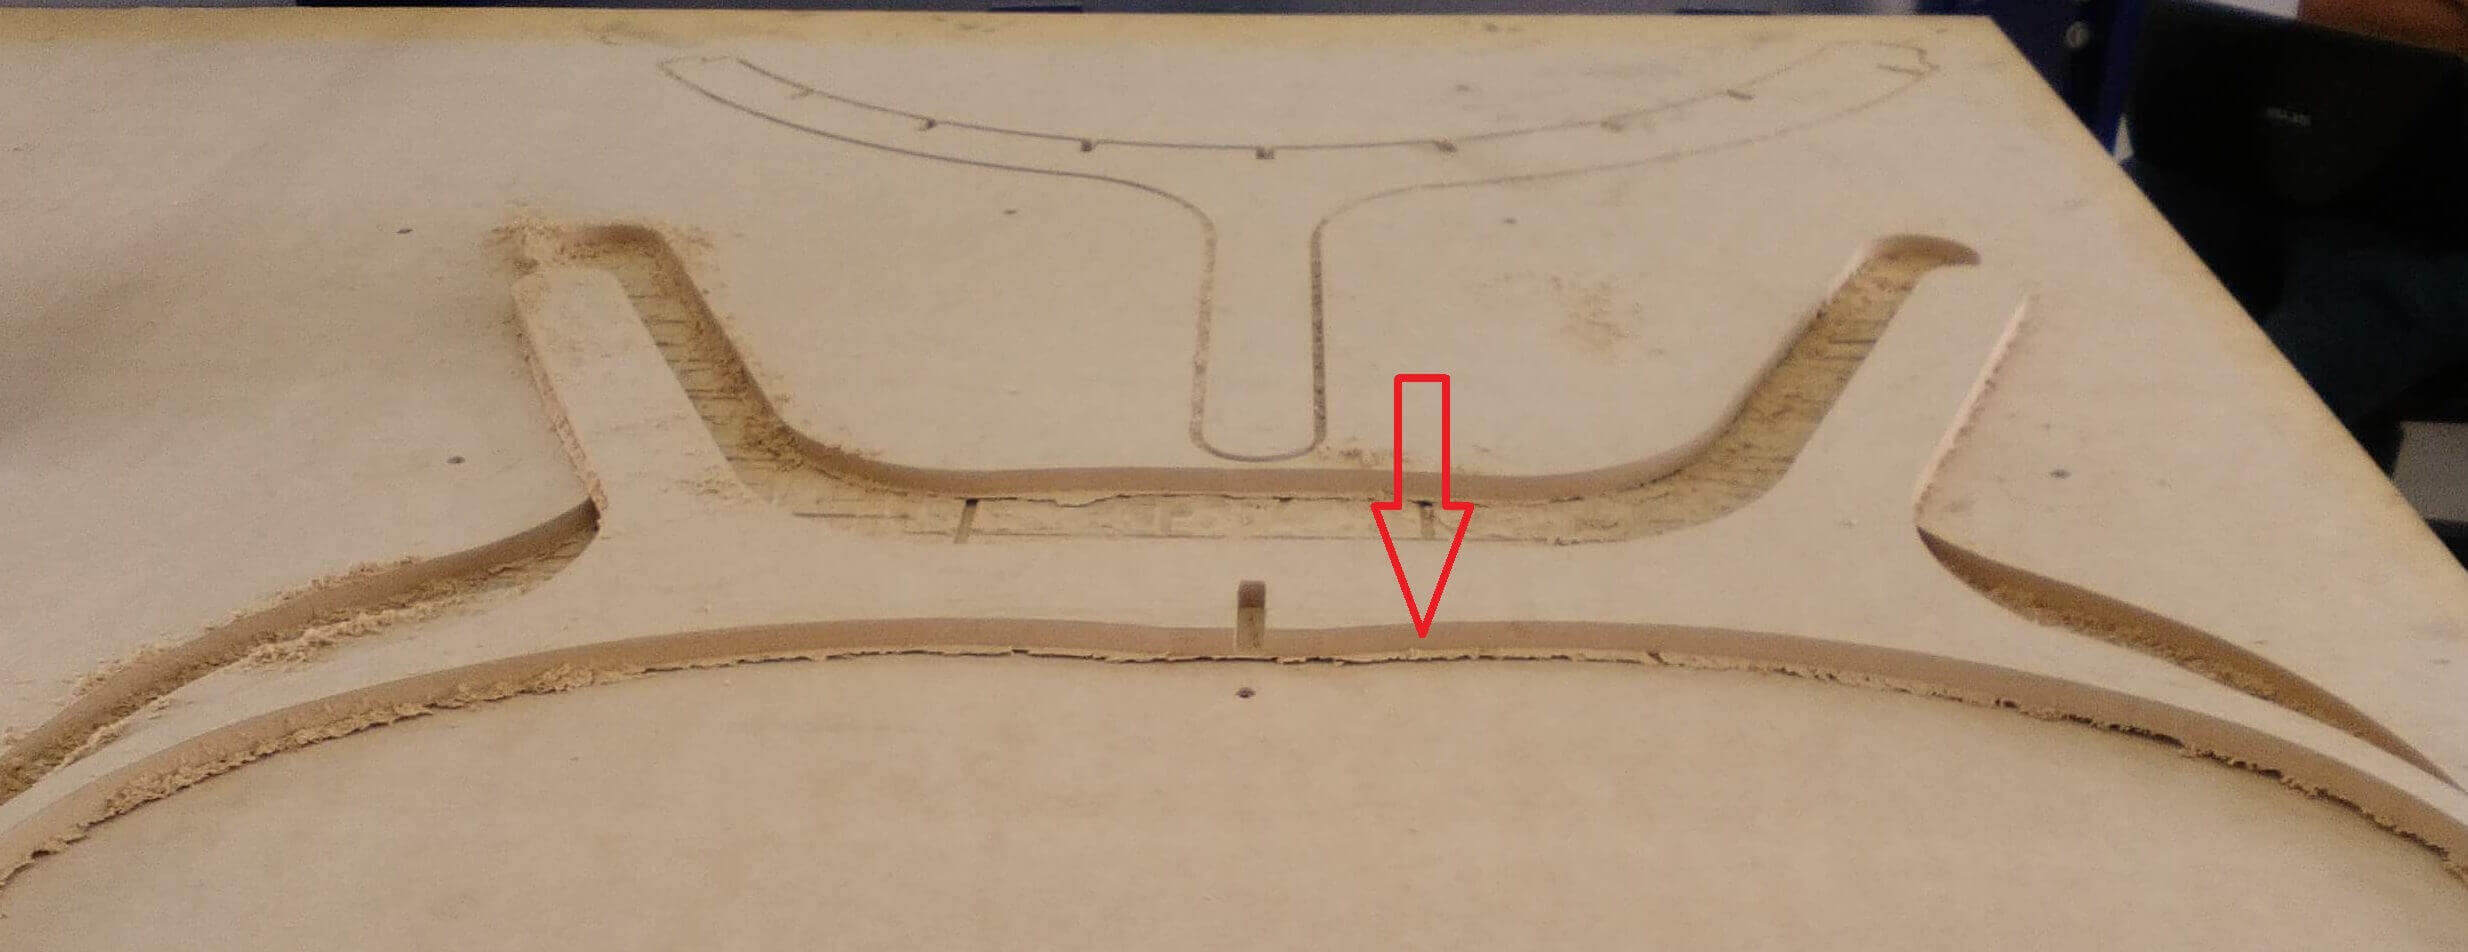
At the time of machining chips were still left in the grooves the vacuum was not enough. It became necessary to use a portable vacuum cleaner to help remove the chip accumulated in the cutting slots
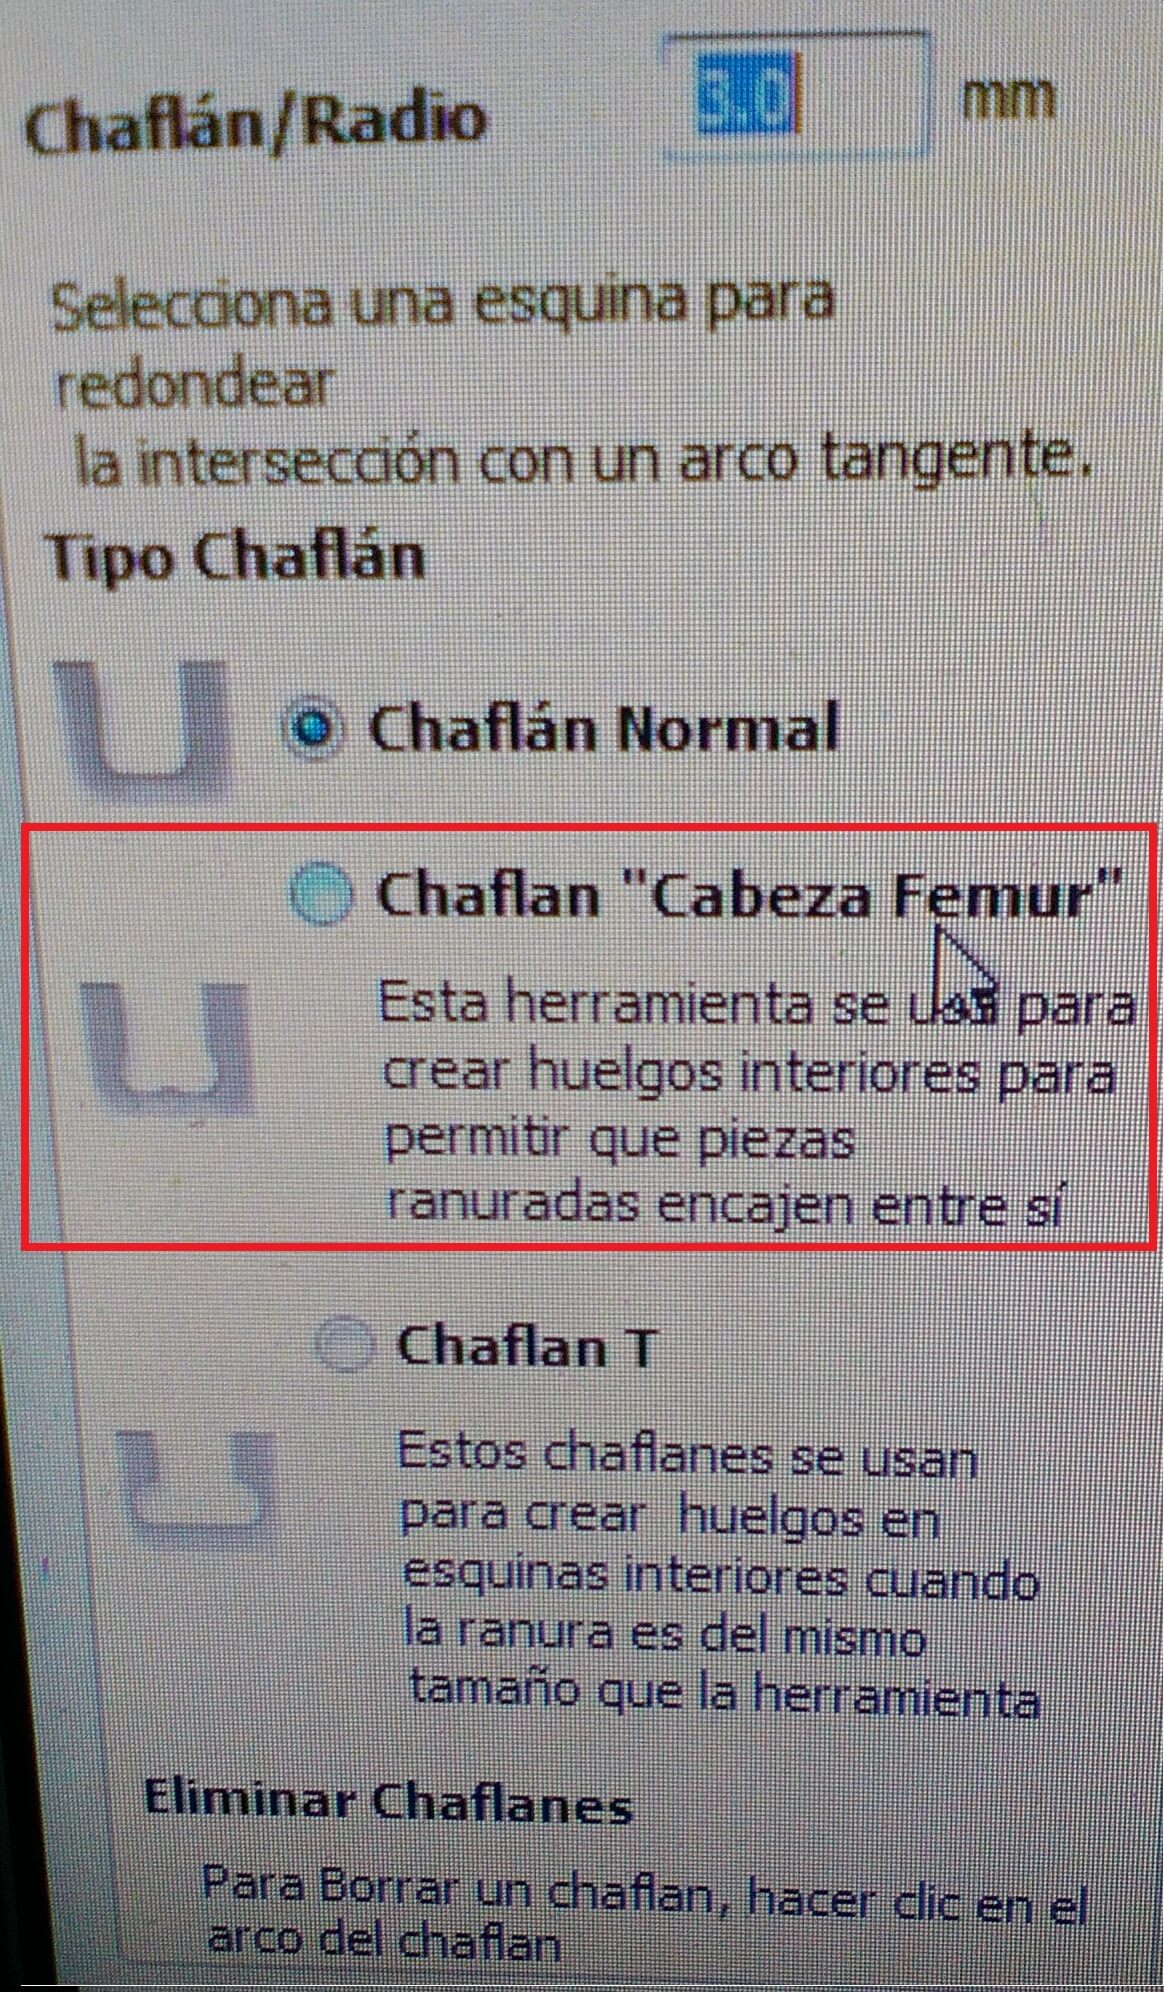
Due to the shape of the milling tool, the slots had a little curve.
Solution: use the Femur head chamfer
At the moment of checking the chair with load, from a person seated the front legs suffered a buckling.
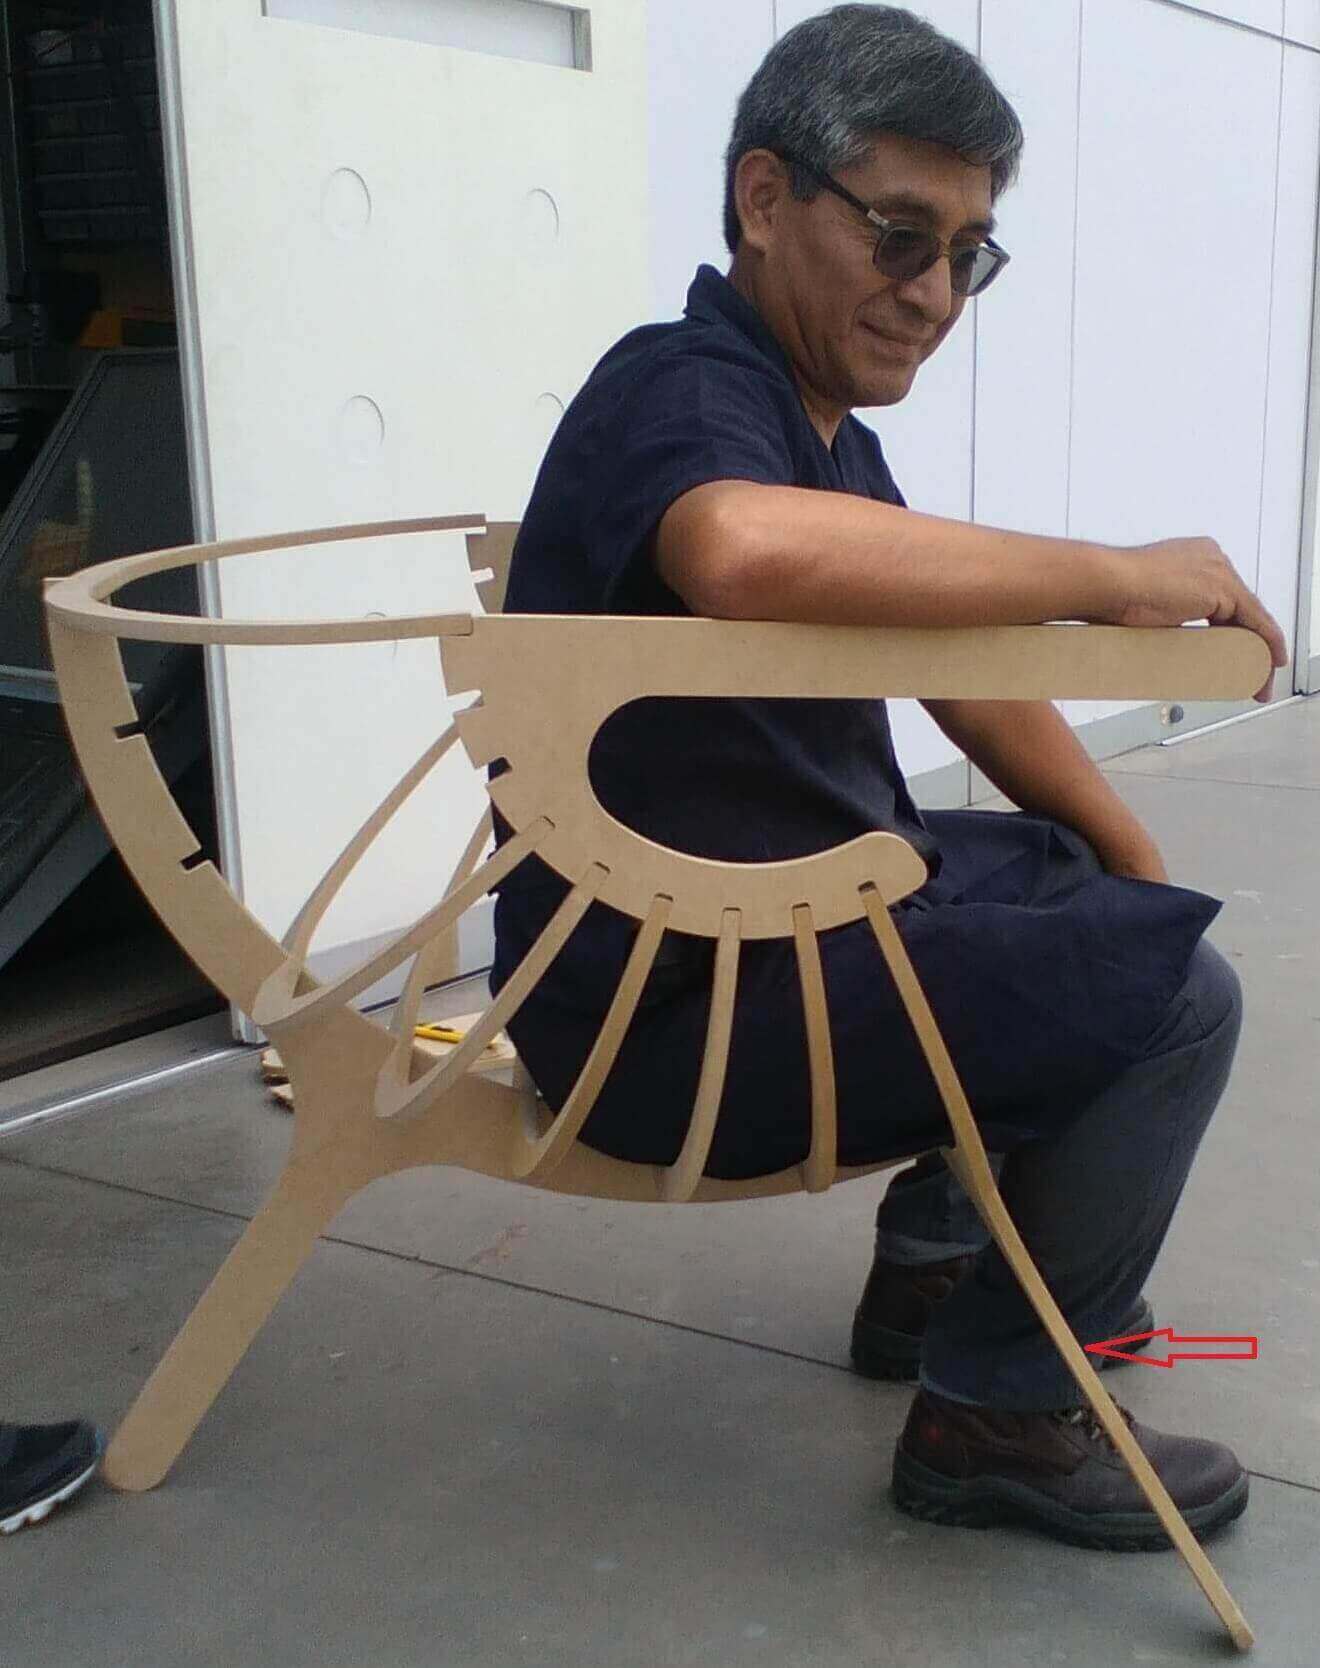
Solution: Again redesigned to change the angle of the front legs
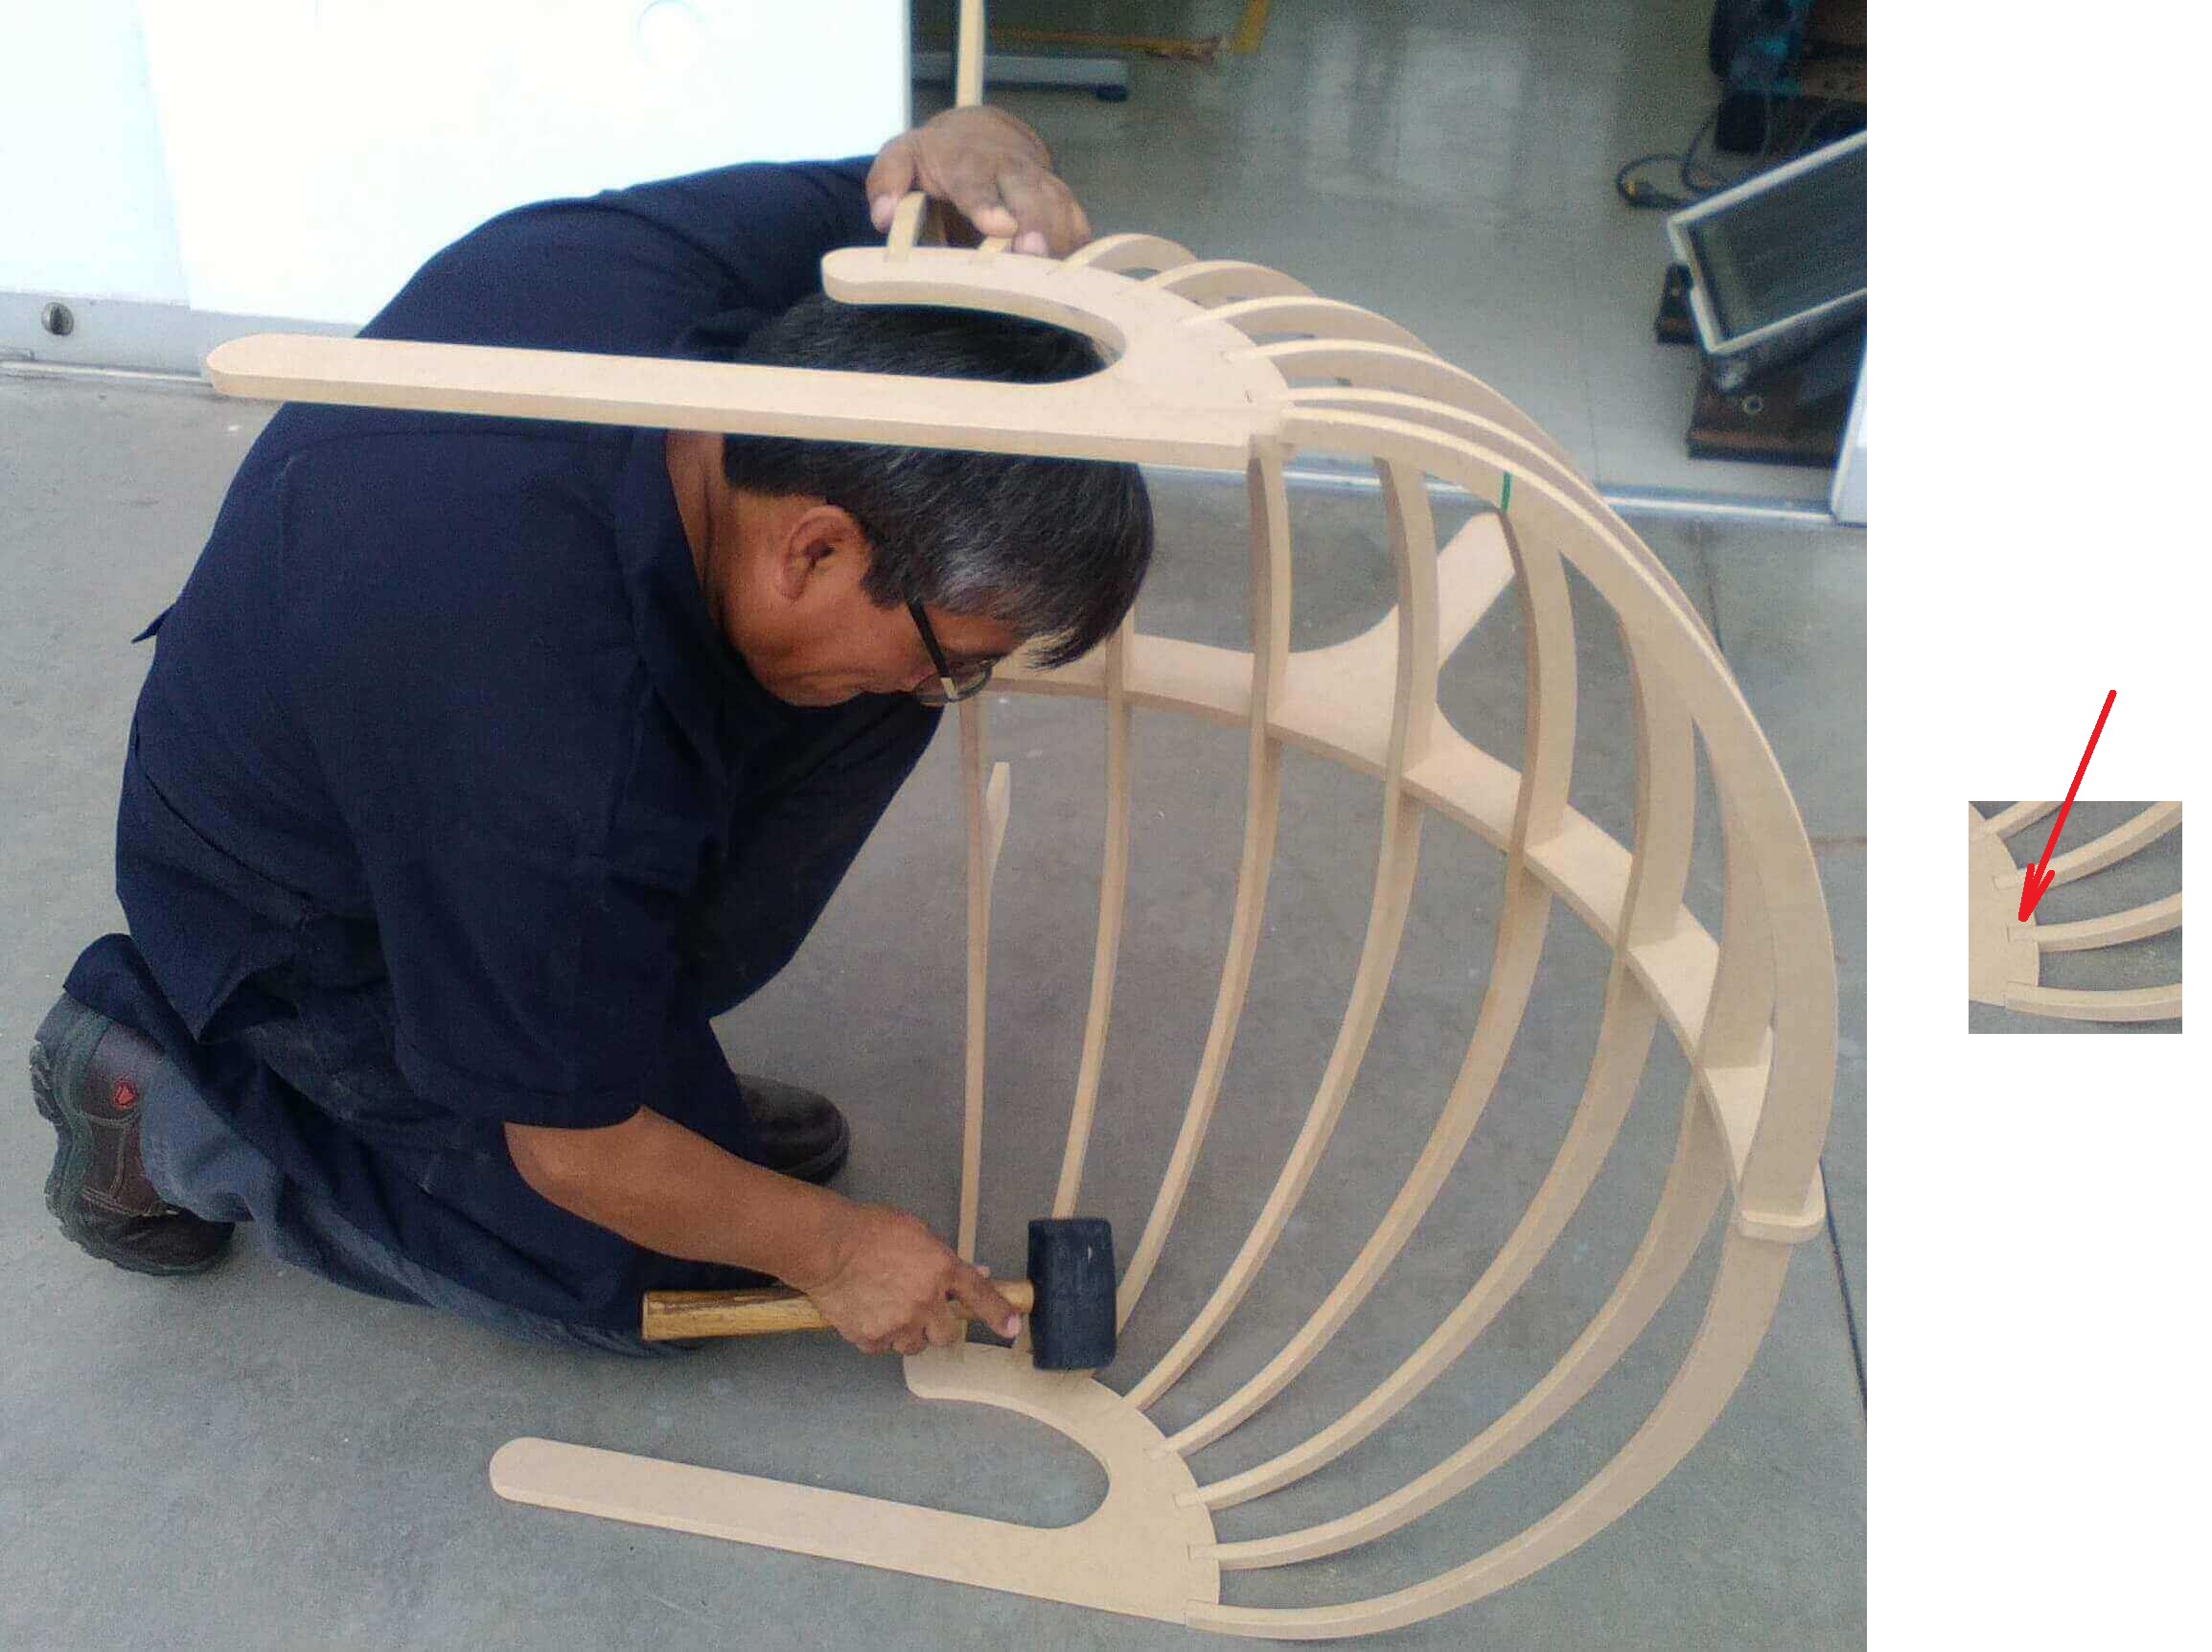
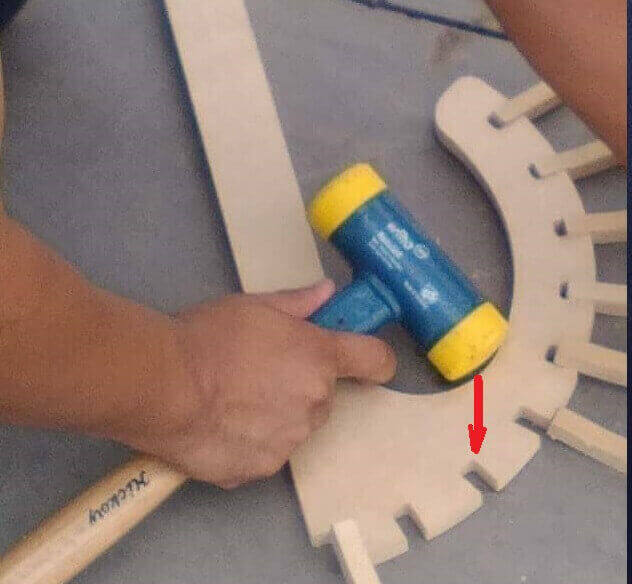
19 After correcting the errors presented, I reassembled the assembly with basic carpentry tools.
20 Then the test is carried out with an approximate weight of 90 kilos.
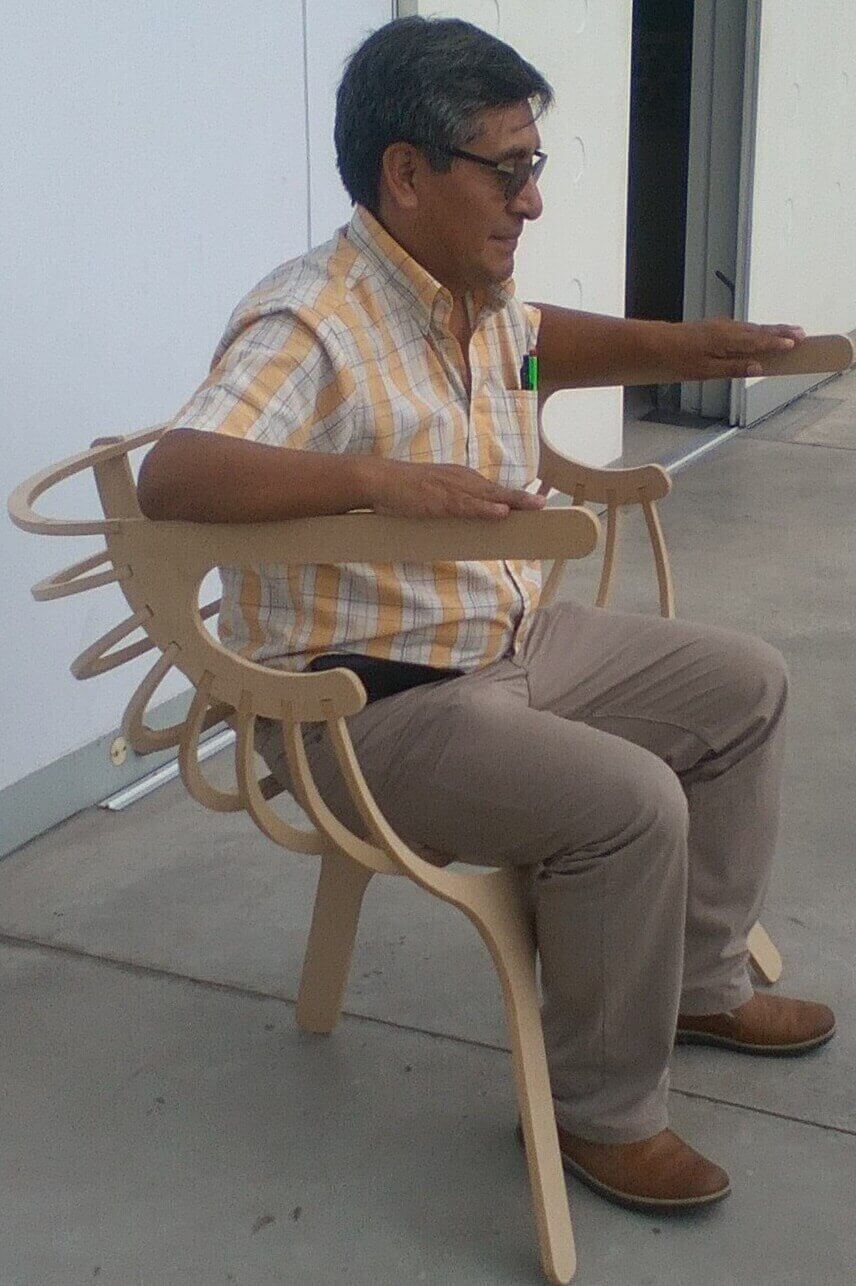

21 Assembling and final presentation
-Learn the parameters of MDF on Shopbot
-Design joints considering the assembly
-The armchair should handle 90kg, and to consider the 20kg extra factor, as security