
Assignment objectives:
* Group project: test the design rules for your printer.
* Design and 3D print an object (small, few cm) that could not be made subtractively
* 3D scan an object (and optionally print it)
Neil's class Summary
3D printing: testing capacities
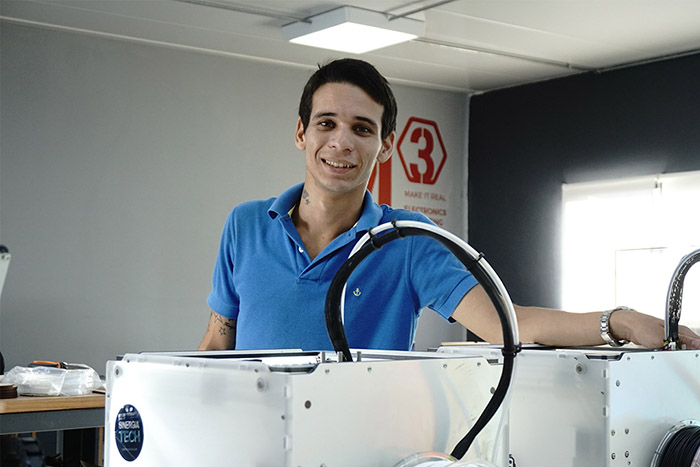
Alejandro Ferreira, our local 3D Printing & Scanning master at
Sinergia Tech
gave us a complete class about 3d printing: we went from fabrication types, to the outstanding events in printing history, materials, quality, available software and printers, and lastly handling, funcionality and maintenance of machines. What a good journey, thanks Ale!
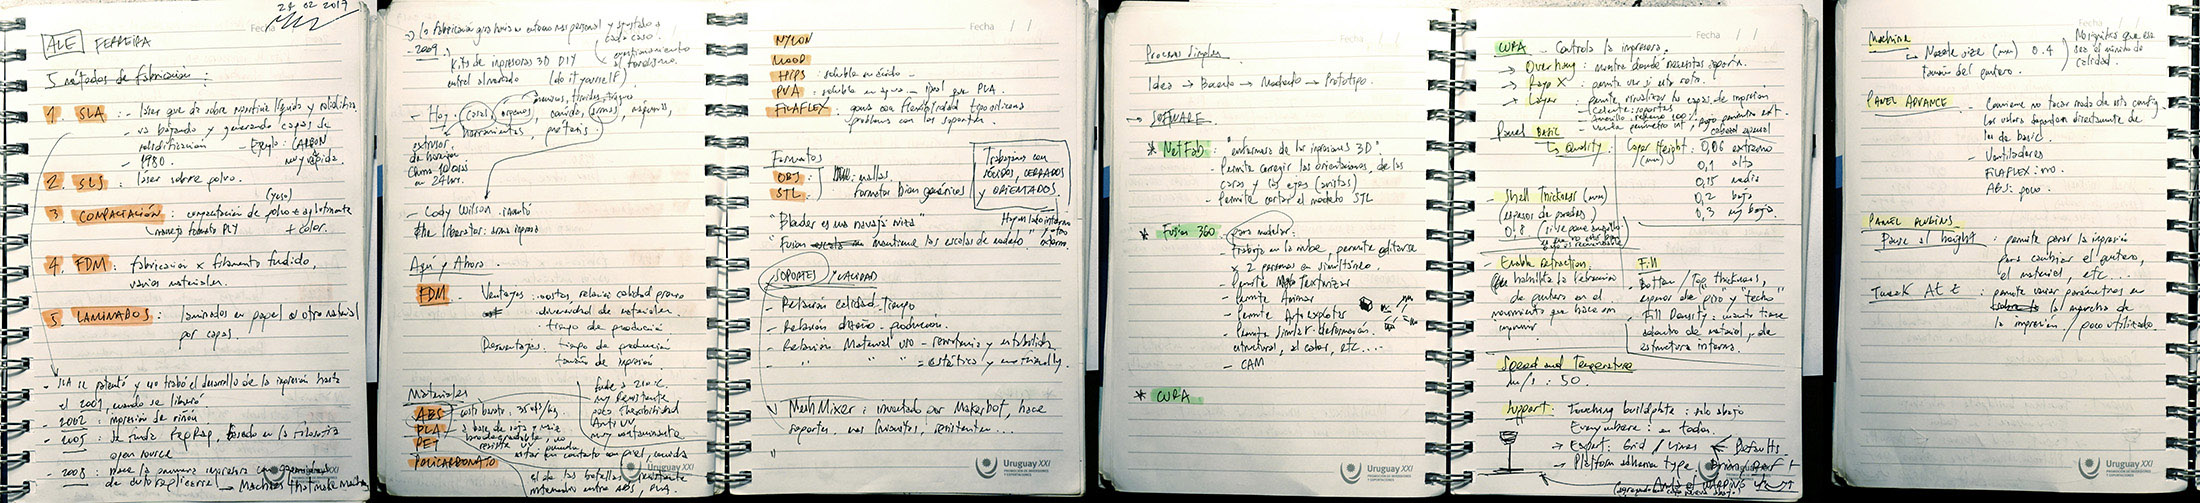
 Here are a few notes i took (only in spanish, sorry .. )
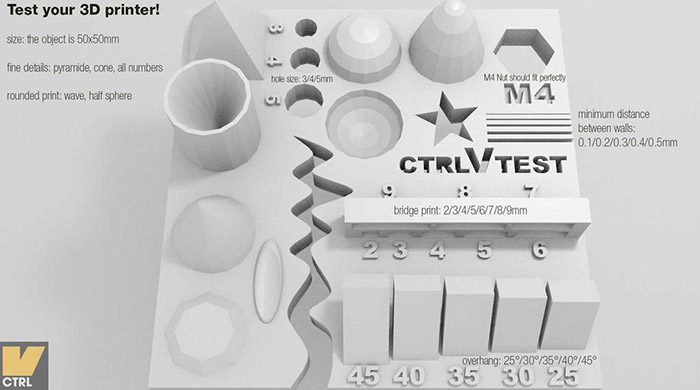
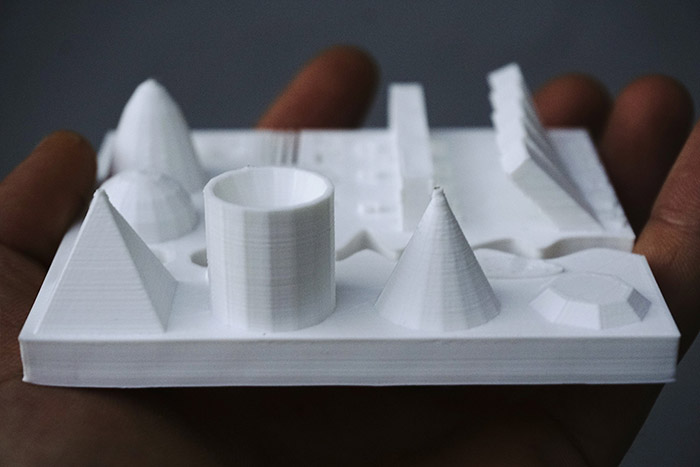
 In order to test our FabLab best 3d Printer, the
Ultimaker 2+
,
Mercedes
downloaded a very demanding "torture" test from
Thingiverse
.
In order to test our FabLab best 3d Printer, the
Ultimaker 2+
,
Mercedes
downloaded a very demanding "torture" test from
Thingiverse
.
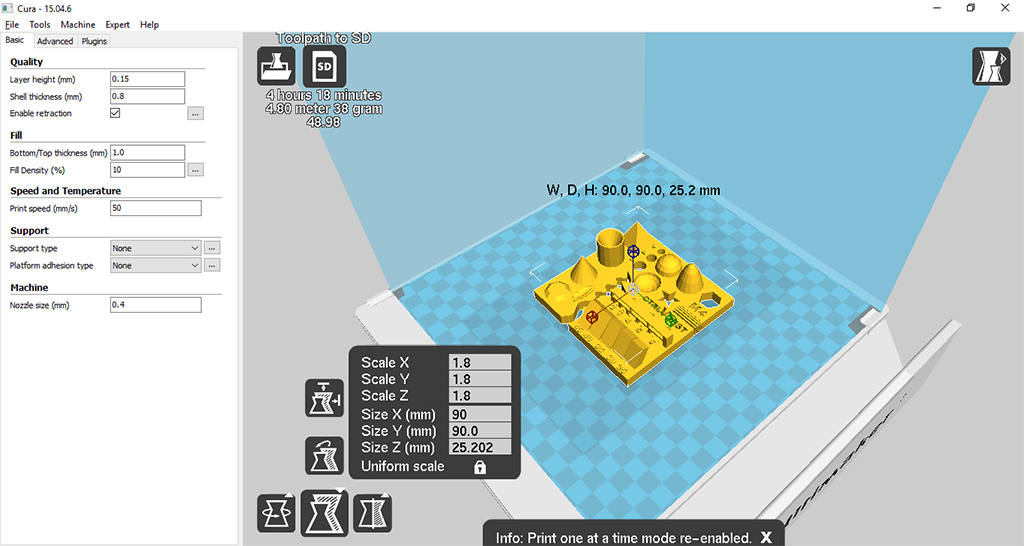
 Once in
Cura
we made some configuration tests varying quality, fill and size settings in order to estimate an appropriate duration of the printing process. We arrive to a final solution ponderating quality and time, here are the parameters.
Once in
Cura
we made some configuration tests varying quality, fill and size settings in order to estimate an appropriate duration of the printing process. We arrive to a final solution ponderating quality and time, here are the parameters.
 Before beginning the print process we must clean the glass bed of the printer and then add some hairspray to improve the adherence of the PLA to the printer bed.
Now we're done, let´s print!
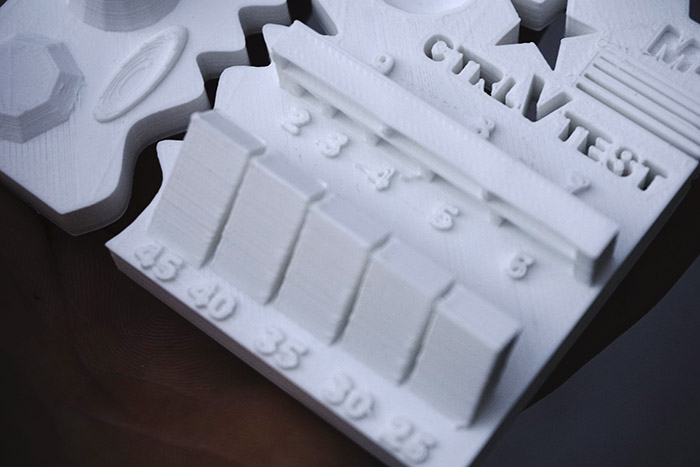
The printed test seems to be in good condition. We get almost all the details in the 3D model, except the top vertex of the pyramid and the cone. It was very useful to perform the 3d printing test to verify the printing with 45 degree tilt and relief areas to be used in the final part design.
Before beginning the print process we must clean the glass bed of the printer and then add some hairspray to improve the adherence of the PLA to the printer bed.
Now we're done, let´s print!
The printed test seems to be in good condition. We get almost all the details in the 3D model, except the top vertex of the pyramid and the cone. It was very useful to perform the 3d printing test to verify the printing with 45 degree tilt and relief areas to be used in the final part design.
 You can also check
this document
for better understanding on 3d-printing design rules.
You can also check
this document
for better understanding on 3d-printing design rules.
3D printing: design & print
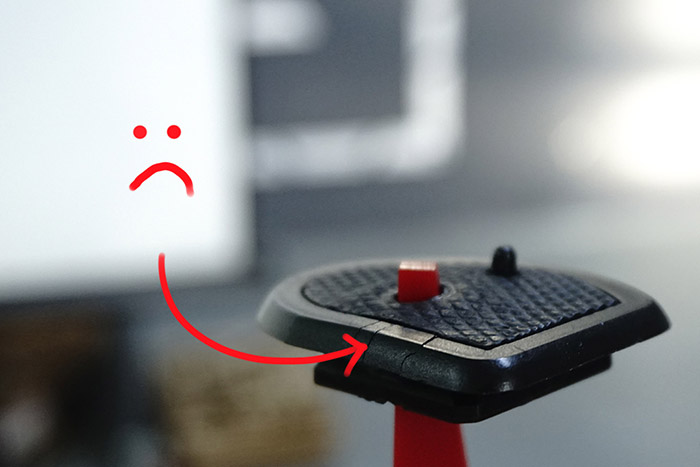
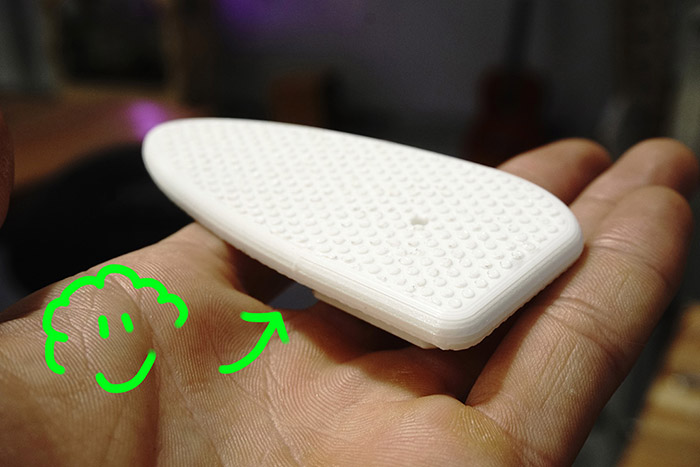
A few days ago, during my usual photo documentation at FabLab, the quick release plate which is attached to the camera tripod broke. So i decided to desig and 3d print a new plate to replace the broken one.
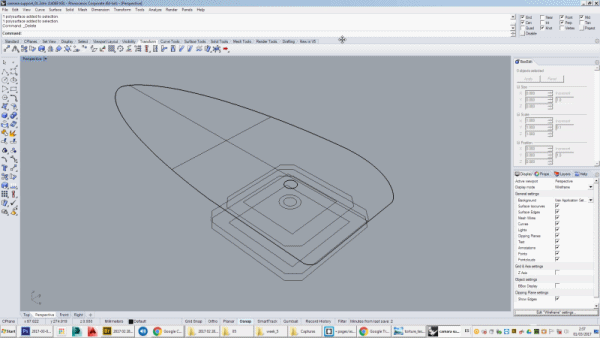
 After doing some sketches based on the original plate (i improved its capacity by making it longer and resistant), i made the 3d model with Rhinoceros and exported to STL.
Download the RHINO file.
 Once in Cura i did some quality-time estimations, added support for the hanging parts, checked the print process -under Layer View Mode- and saved in removable drive for direct printing in Ultimaker.
Let´s print!
Once in Cura i did some quality-time estimations, added support for the hanging parts, checked the print process -under Layer View Mode- and saved in removable drive for direct printing in Ultimaker.
Let´s print!
3D Scanning
Unfortunately, our local 3D scanner is not calibrated, so our instructor advised us to try
photogrammetry
techniques.
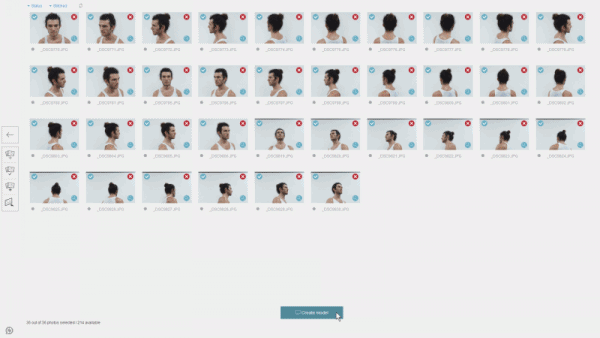
At the beginning of the assignment I was undecided about which software to use:
Autodesk ReMake
(with a Student Licence),
Agisoft Photoscan
(30-day trial version) or
Visual SFM
(free) , so I decided to give all of them a try.
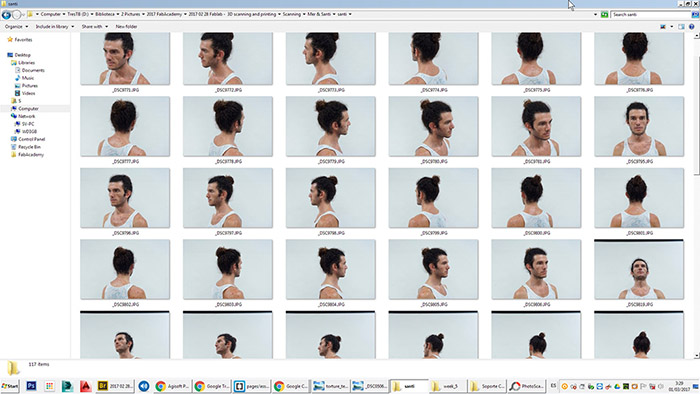
In the first set of images i took a total of 36 pictures (12 pictures at 3 different levels, 30º of horizontal and vertical angle between them) by fixing the camera's position on space and rotating the model (my head) in front of the lens.
 Autodesk Remake seems to work very slow on my pc, even the time that takes to initialization is too much, i suspect some display driver problem might be causing the problem. fter 15 minutes of rendering i got a dirty primitive 3d model. The application automatically runs and generates a 3d model. It seems not to work in the dark areas of the picture. I got a damaged 3d model.
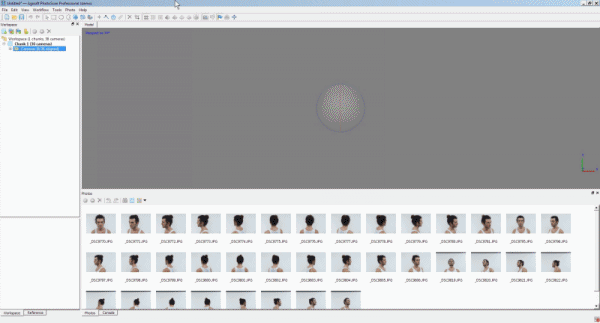
 Photoscan works by spliting the process in different phases: align photos, build dense cloud, build mesh and build texture. The results look more close to Frankestein than me.
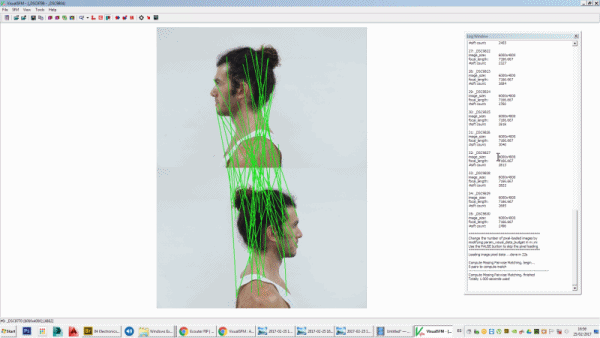
 Visual SFM is really a well visuals application, but i couldn't get a complete model from it. It allows to visualize the similar points in the images by tracing lines between them (View/Feature Matches) and also the object's normals (View/Single Image, View/More options/Show Features)
After testing several instances 3d reconstruction the app only gets to build fragments of the head, everytime different from each others, and does not allow to show them together, even the complete set of original pictures dissapear from the image thumbnails view option. Another issue i found is that i can't visualize the dense 3D model, the screen just goes white. I couldn't find the solution for that yet.
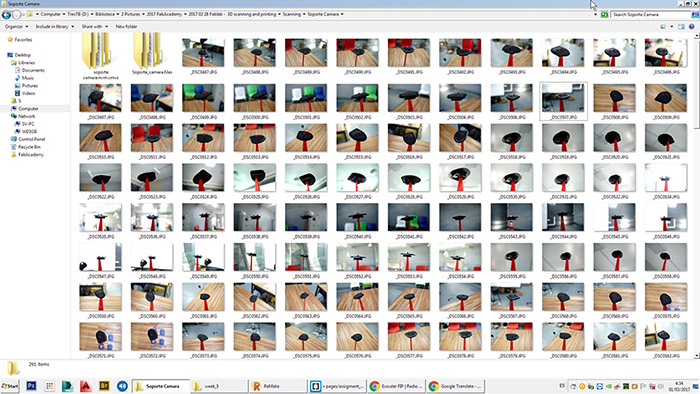
 In the second set of images i took a total of 94 pictures randomly horizontal and vertical rotating the camera and fixing the position of the object. Theoretically it is helpful for computing the model to have reference points in the space where the object is situated (background) as well. In this case i decided to test with a smaller object: the broken camera quick release plate.
 The results were frustrating as well: neither of the three applications could build up a decent 3d model. I think I was wrong to choose a black object.
In the last set of images i took a total of 393 pictures, again, randomly horizontal and vertical rotating and approaching the camera to the object's fixed position in the space in order to get more detail and eliminate the "blank" areas.
 The result is a huge quantity of Mb that neither of the three apps can handle. I will have to back to this sometime.