*FIFTH*WEEK: 3D scaning and printing
Assignment
1. Group assignment:
- Make 3D printing test parts with diferents forms and settings
2. Individual assignment:
- Shown how you designed and made your object and explaned why it could not be made substractely.
- Scanned an object.
- Outlined pronblems and how you fixed them.
- Included your design files and 'hero shot' photos of the scan and the final object.
Group Assignment
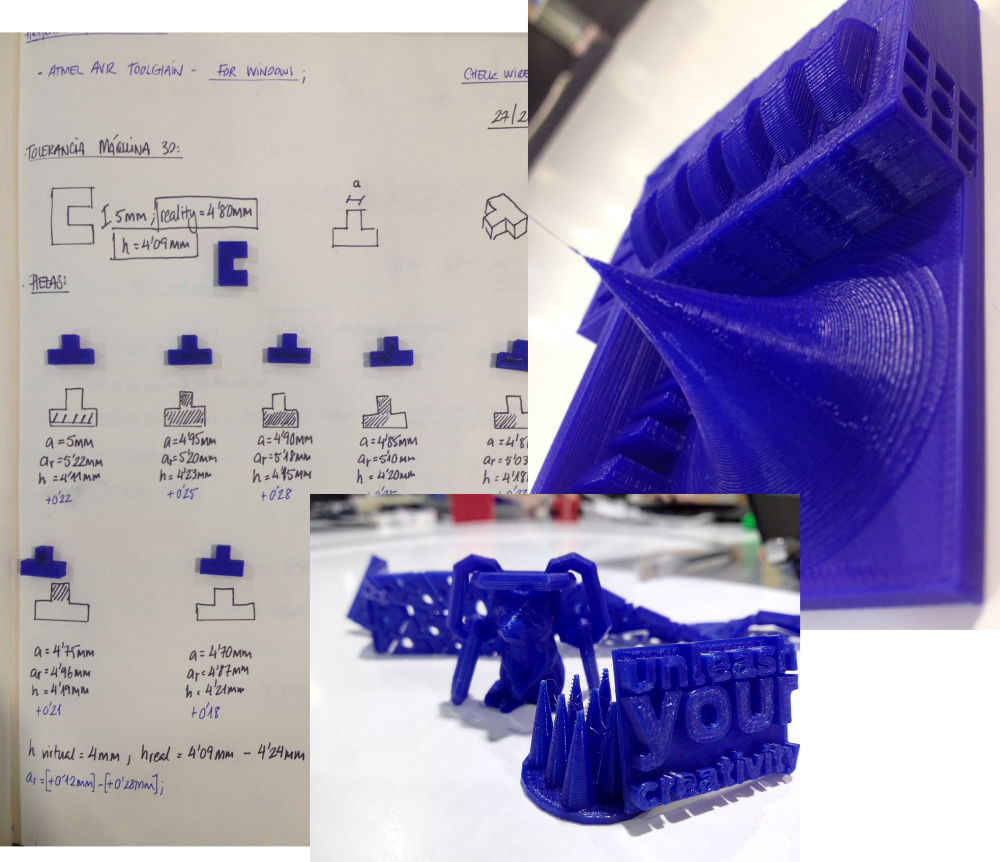
3D PRINTING TEST PARTS: This week we had to do group assignment where we printed objects with different positions and settings for calculate
-Fidelity of the pieces with respect to the virtual model
-Know the angle from which the stairs are formed and the piece ceases to be flat
-Quality of the pieces according to the extrusion temperature
-Minimum wall thickness
We had diferents mistakes like bad positions or supports.
You can see the group assignment HERE
Individual assignment
3D DESIGN:
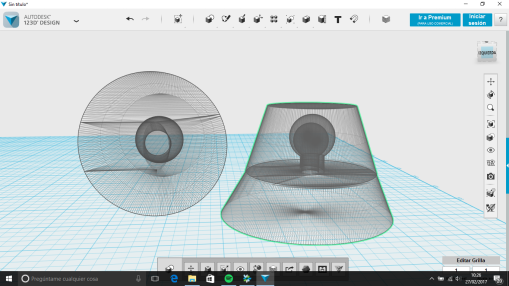
I used 123D design for design in 3D a object that can only be done by printing in 3D. First I did a design that not work, this object had two parts with conical shape, and the union was a sphere on top of a cylinder. it didn't work as I wanted, this object just rotate and didn't move like a tail. I Finally printed it in a bad postion and It broke.
 On the next try I changed the shape of the object and I made rounded edges in a prism. Also I used the same piece to create the object but these had diferents size.
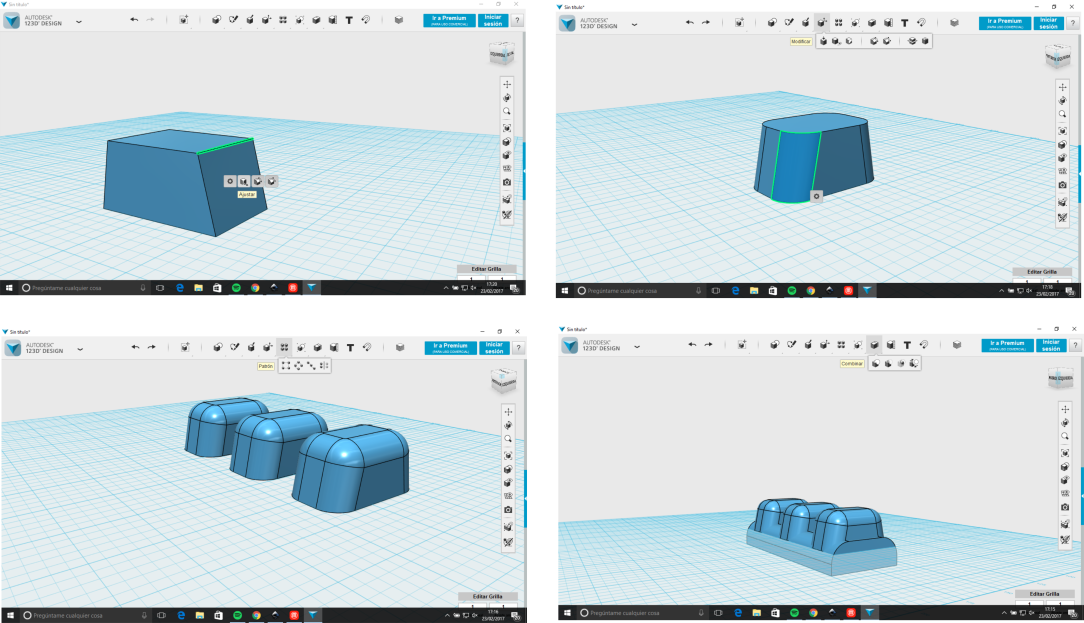 The elements of union were a sphere on top of a cylinder which I fused in the top part of the piece, And a sphere on top of a prism which I subtacted in the botton part of the piece. The tolerance between the spheres were 0.8 mm and the tolerance between the cylinder and prism were 0.4 mm.
 It could not be made substractely because the interior sphere is bigger than exterior prism.
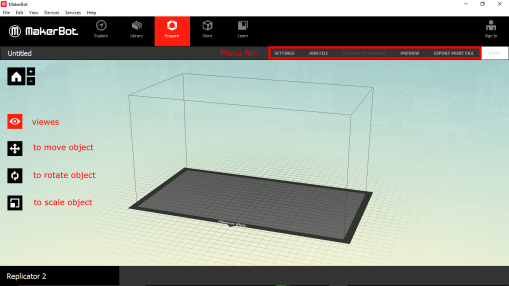
3D PRINTING: We used makerbot Replicator 2 to print in 3D, with PLA filament 1,75 mm. The program to prepare the X3G file was Makerbot desktop. This 3D print use a SD card for upload the files.
 Although I had used differents 3D printers as prusa i3, makerbot mini and makerbot R2 in my job, never I designed and printed a object like this. I prepared it in Makerbot desktop with my supports because this object can't be print with default supports. I hadn't any problems, I used this parametres:
- layer height: 0,2 mm
- with raft
- without supports
- infill: 20%
- number of shells: 2
- extruder temperature: 215ºC
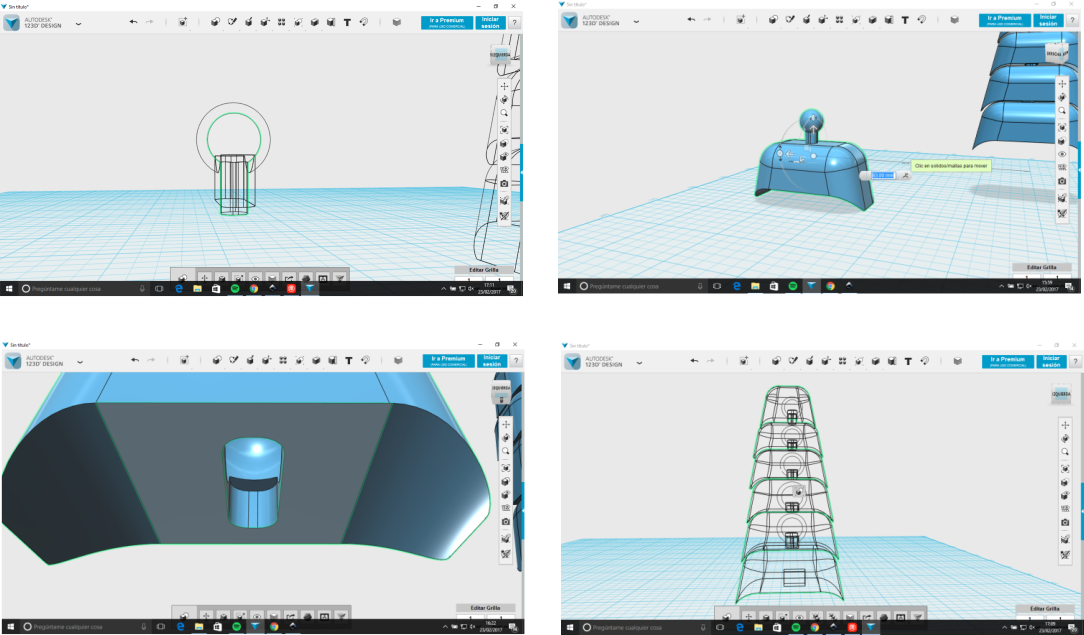
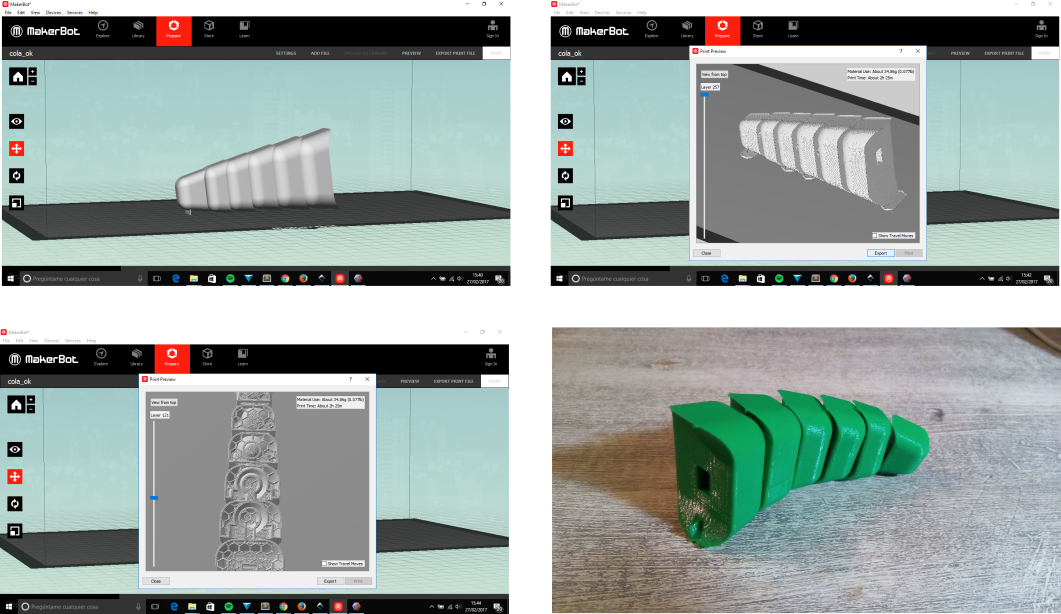 This piece can't be created otherwise because it's a piece constituted by different structures embedded with each other, so that the 3D printing when creating layer by layer can realize, without the necessity of some supports, one structure inside another. This is the case of joints, where a sphere is created within a larger sphere. You can see in the picture above how this happens.
3D SCANING:
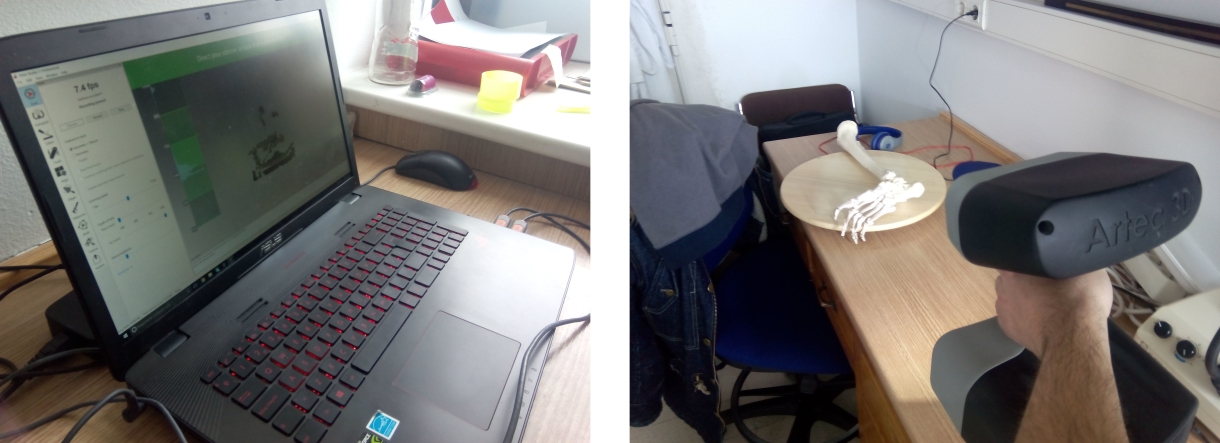
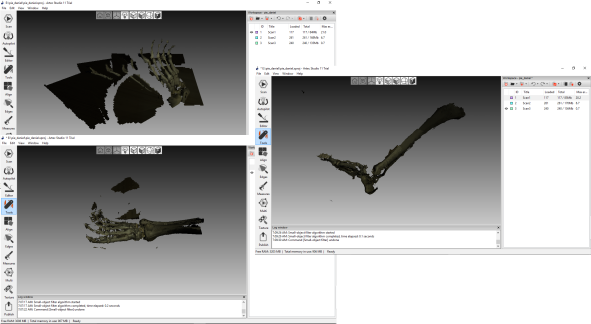
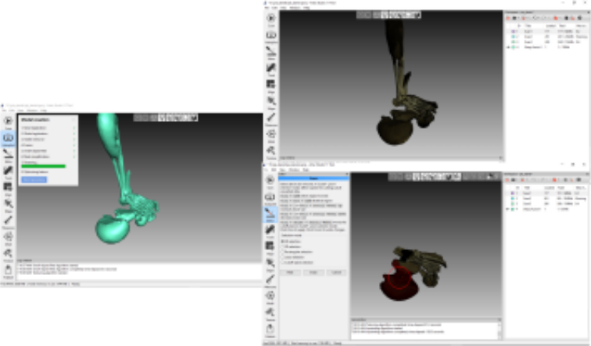
I used the escanner of my work, MHT artec and its software, artec studio 11, to scann a foot squeleton. I did 3 scanns, and I dreated automatic reconstruction, but the fingers were dificults, because they have space between bones and lost the position.
 I also used the 3D sense scanner to scan my colleague, we had some problems with the hair but we finally got it, We create a virtual bust.

Files
- 3D tail object
- x3g tail object
- Scan 3D