Fabacademy 2017
Twelveth Week. Molding and casting
Index
Twelveth task
design a 3D mold, machine it, and use it to cast parts
Mold design
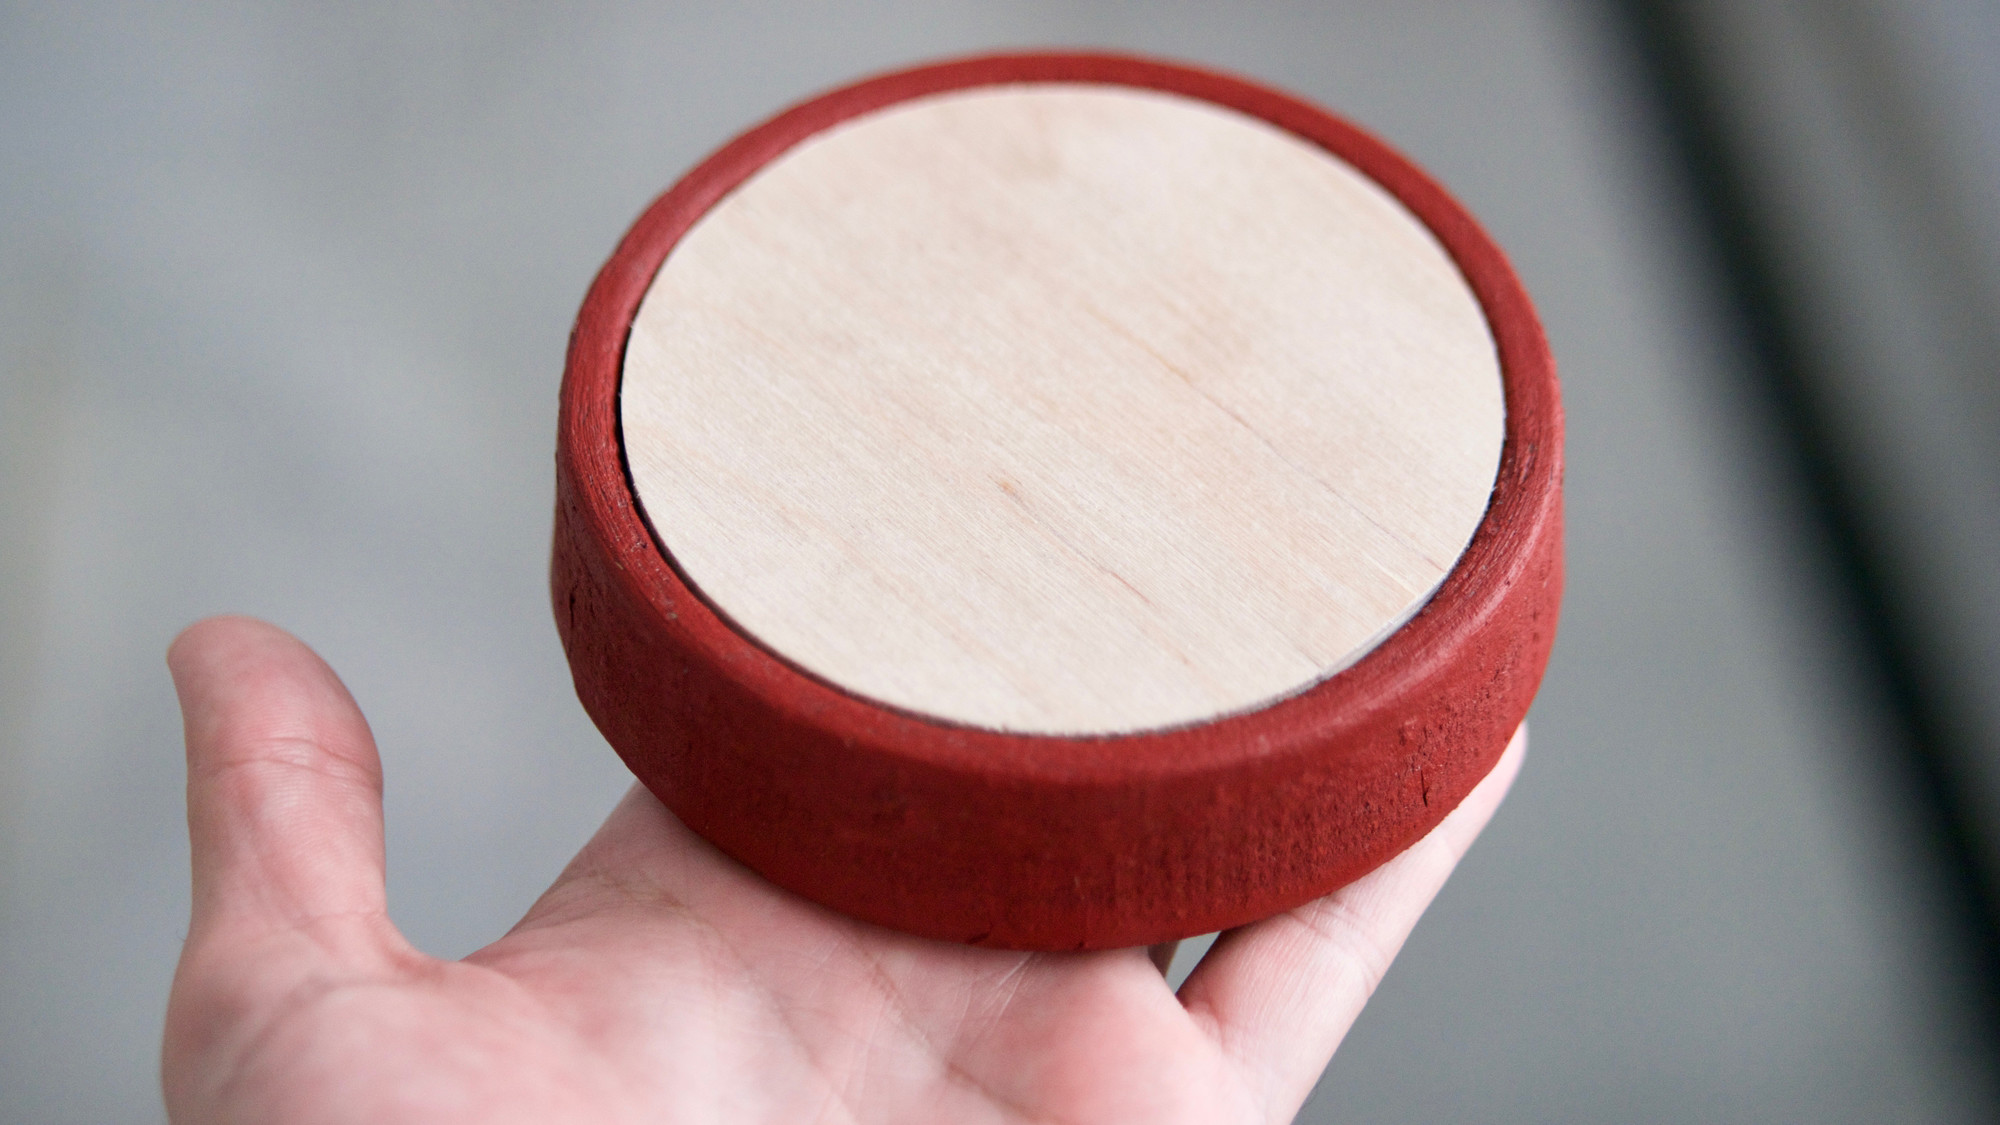
For this week task I decided to make the rubber tires for the baby walker done in Week 7. I initially had planed to use toroidal rubber gaskets but a custom fitting tire would be a great addition to the design. The tire shape is designed using OnShape as a simple revolved profile with an internal spine to keep the tire in place. The modela and our stock milling wax is not big enough to fit the entire mold. Also, this week I will have limited access to the Modela so I decided to make a modular mold which requires a single milling job and casting four copies it can make the negative mold for the final piece. The air vent and the pouring hole will be made by removing material in one of the copies.
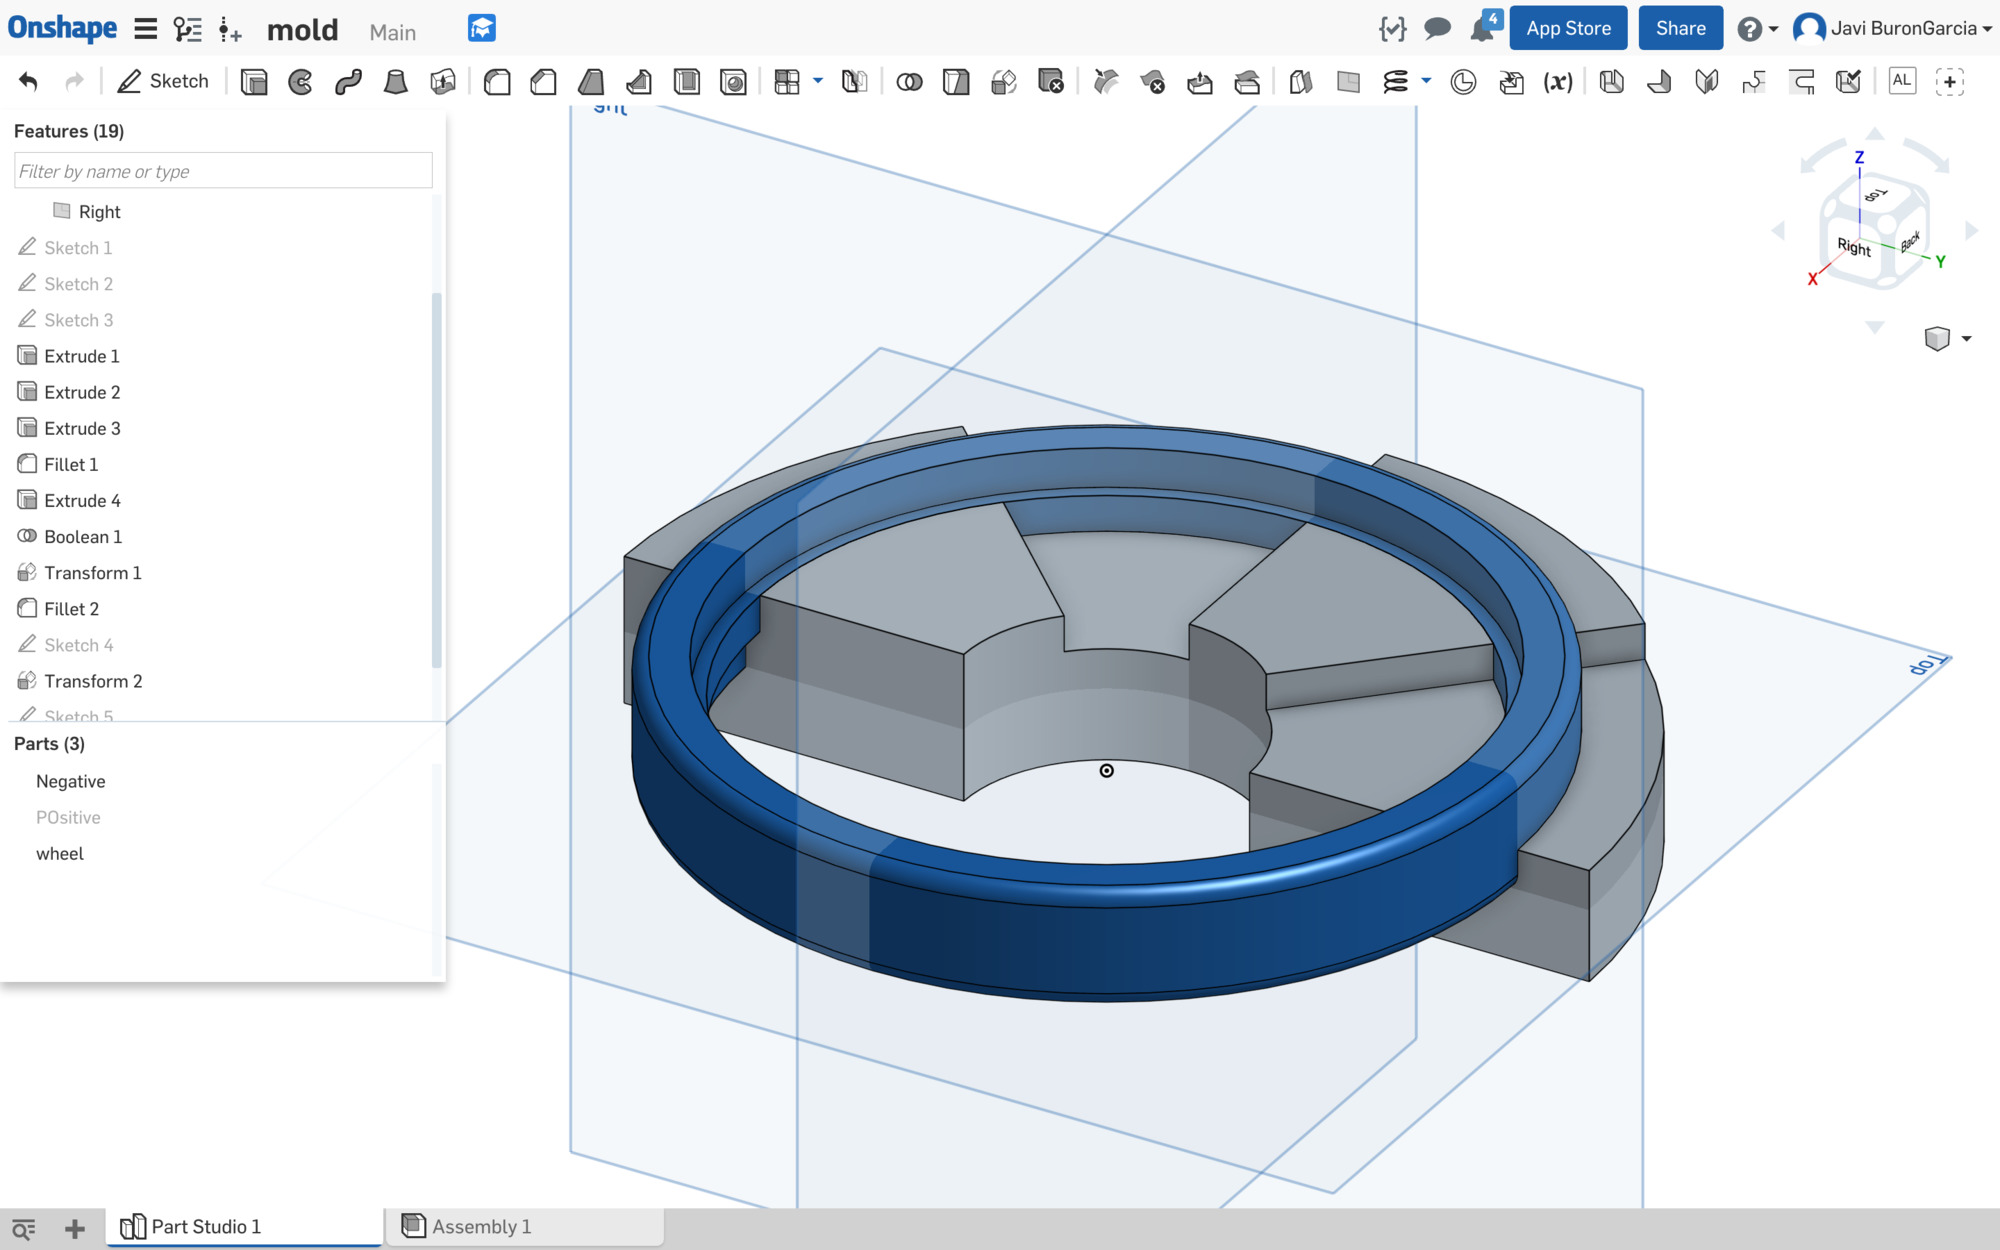
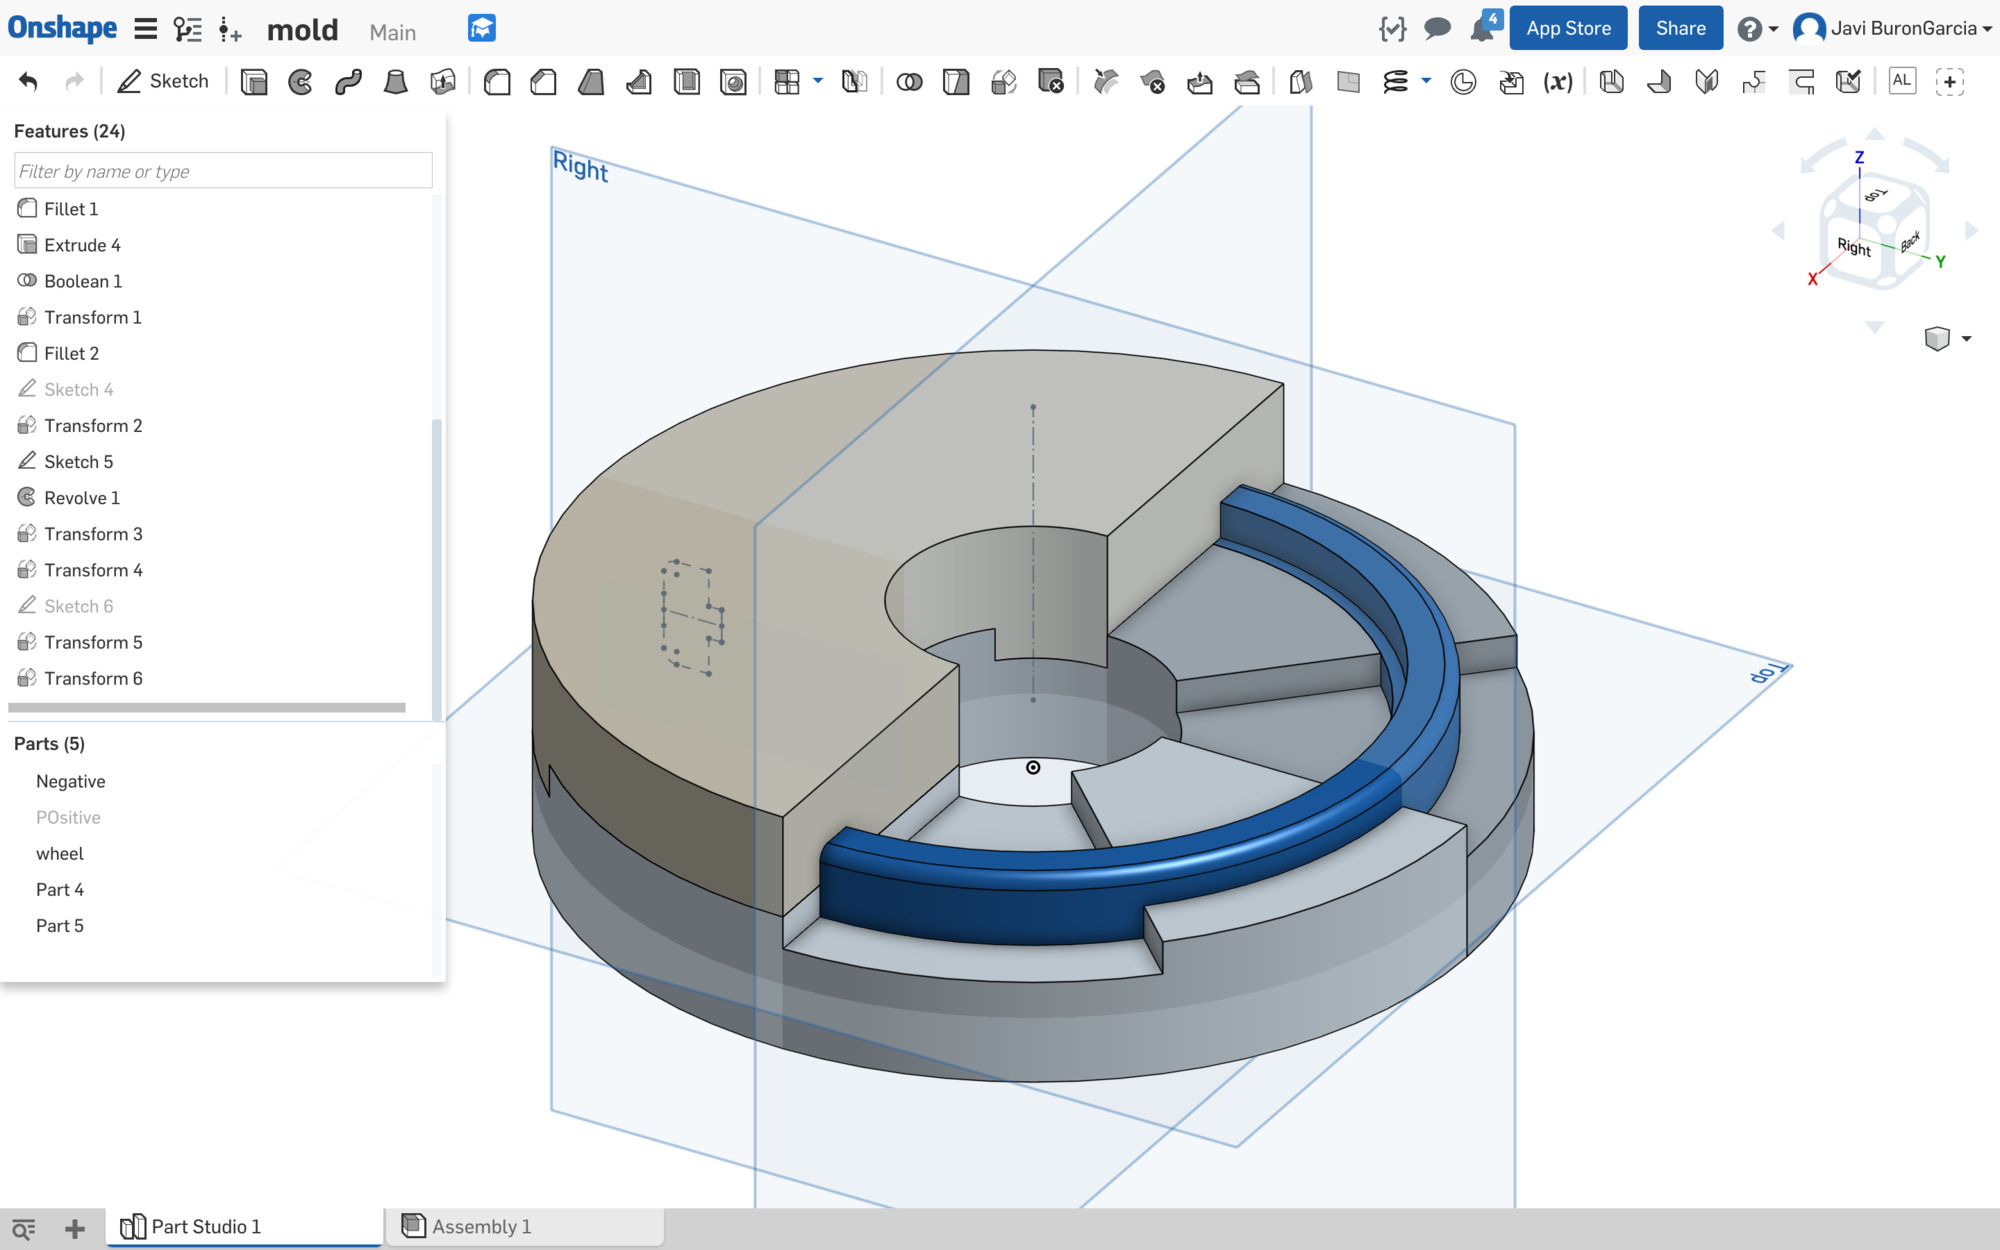
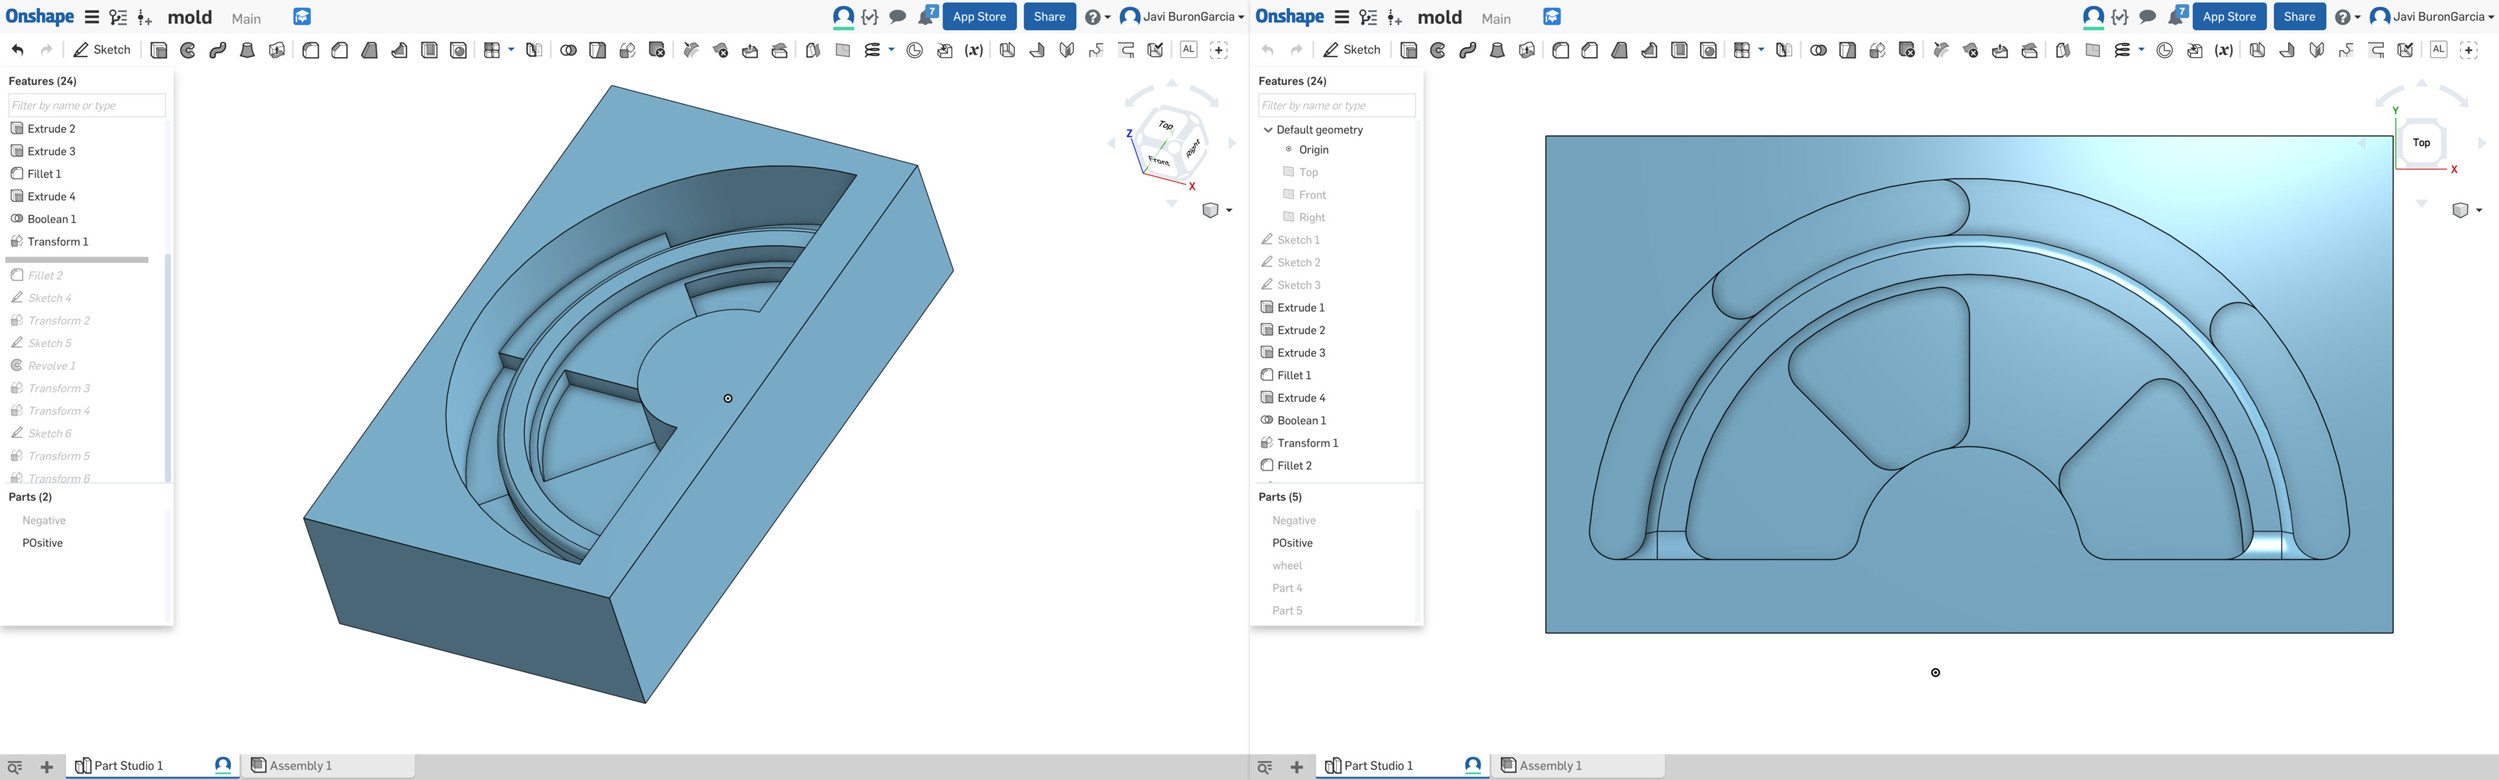
Now it is time for the positive mold for milling the wax. Onshape has great boolean features. Next step would be to optimize the design for milling so inner corners would fit the bit diameter. To minimize milling time I decided to use a 6mm bit for the rough and finish passes so 6mm diameter fillets are applied to all the inner corners of the mold. Bit diameter will create some unwanted burrs in certain areas of the tire which would be avoidable with a single full size design for the mold. I will probably try that in the following iteration.
Milling
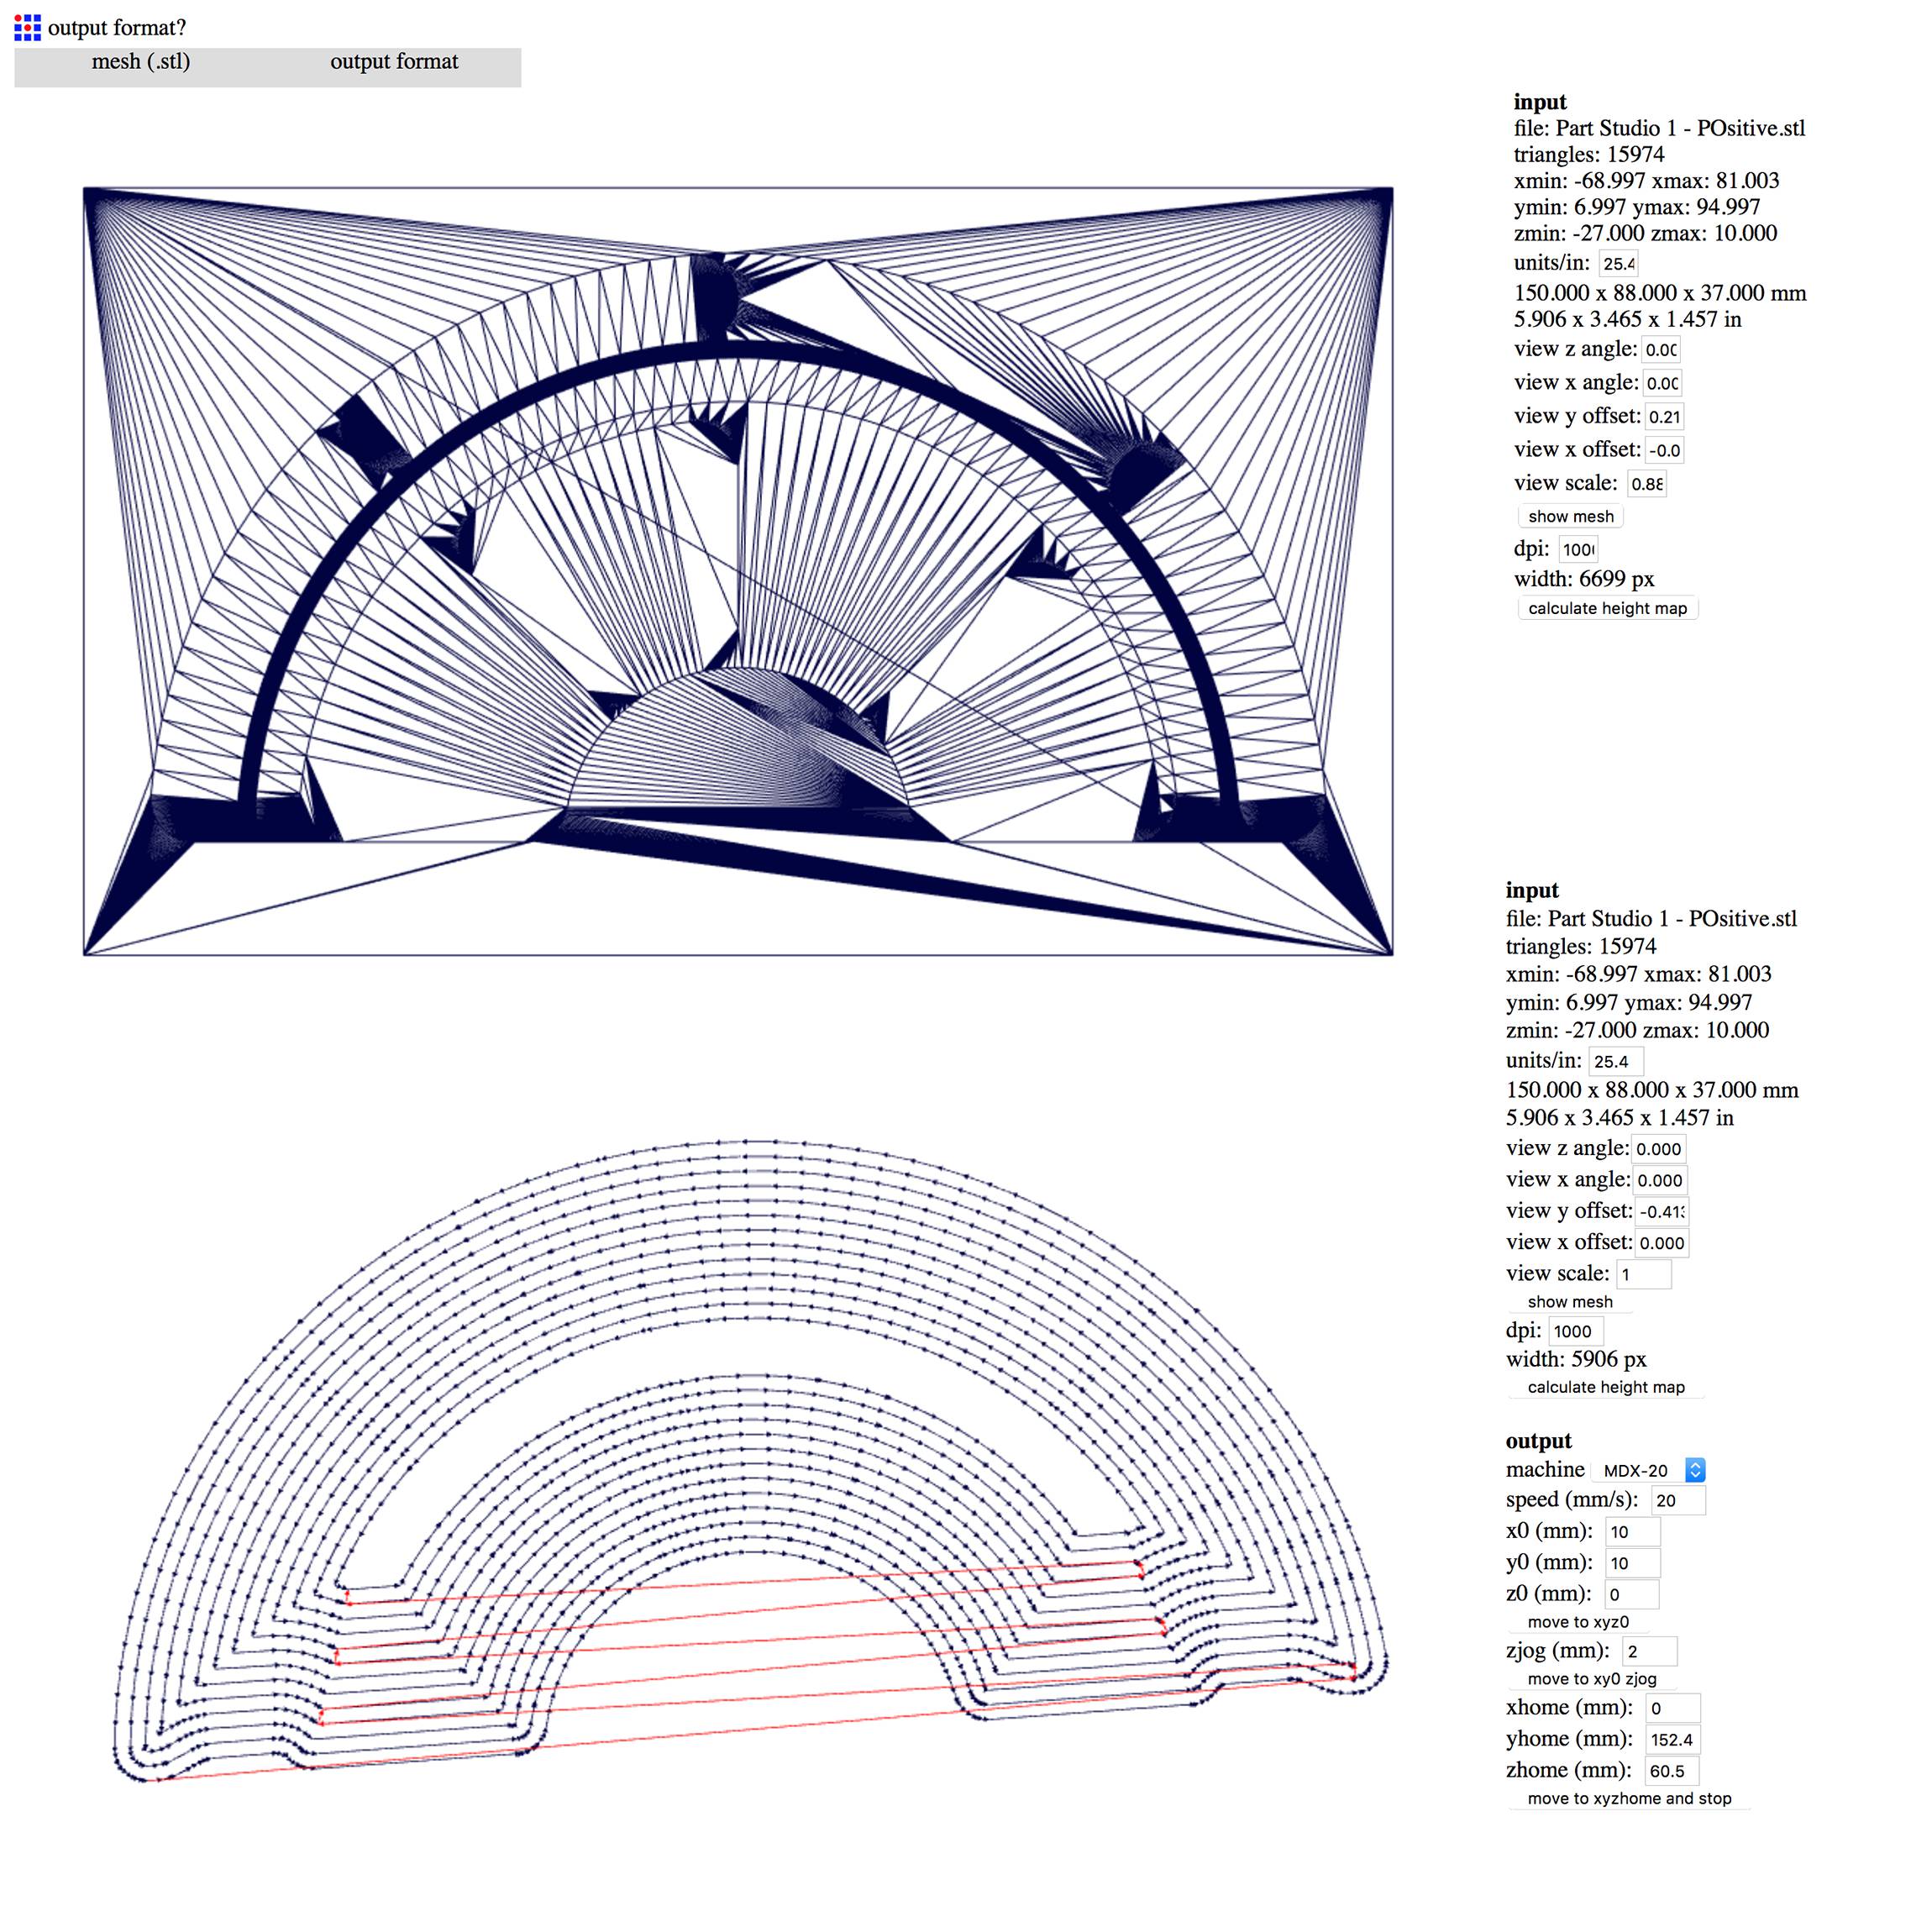
Once the mold design is ready, I export the file as STL making sure that it is exported as a binary file which are the ones that can be imported into fabmodules. Next step would be to get the Modela setup correctly:
- Fix milling wax block into the Modela based, we were advised to use double side tape and hot glue along the edges to prevent any movement during the milling
- Turn on the Modela and exit the view mode
- Measure the X and Y distance from the absolute 0 of the Modela and the X and Y zero of the wax stock
- Insert the milling bit
- Zero the Z axis by pressing the Up and Down physical buttons of the Modela
- The 6mm bit is much less fragile than 1/64 bits so no worries
Process in fabmodules is similar than when used the Modela for milling PBCs:
- Select mesh .stl as imput file
- If you are working in mm make sure that the units/in field is 25.4 and press "calculate height map"
- Select Roland mill .rml in output format
- Select the desired process, wax rough cut or wax finish cut
- Select The modela model that you will be using, in my case MDX-20
- Adjust tool diameter accordingly, in my case 6mm
- Adjust cut depth, in my case 1mm
- Updates the x and y fields for the origin of the stock material
- Press calculate and wait (go and grab a coffee, it really takes time!), once the paths are calculated press "send"
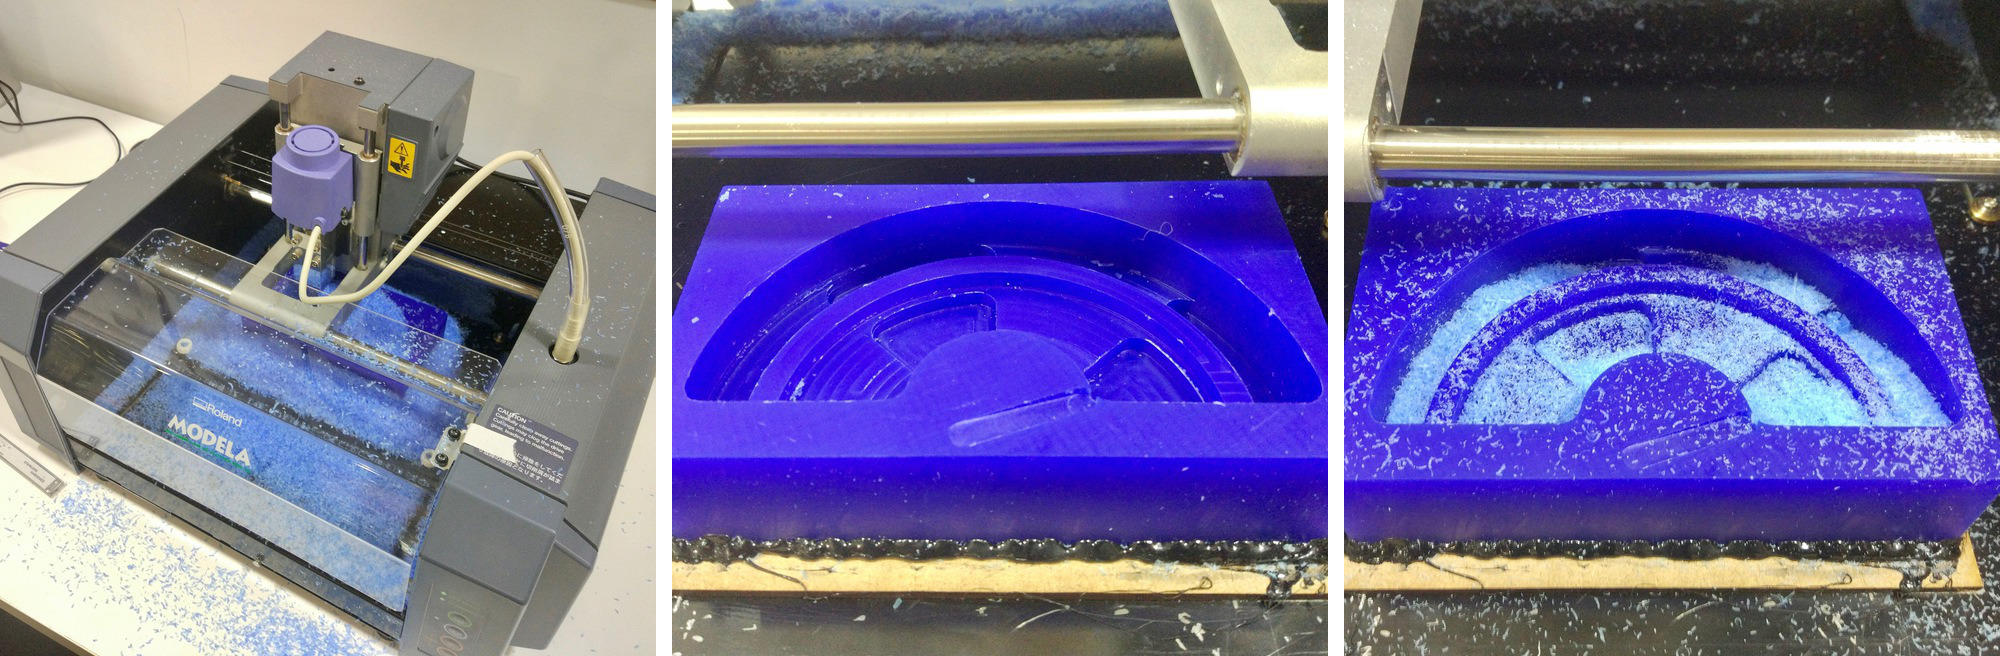
The milling process was more difficult than expected, at some point during the milling process the Modela stopped and I have to send the job 3 times in order to finish the rough pass. Similar problems happened with the finishing pass. We checked connections, software and hardware but we could not figure out what was the problem. It was suggested that the spindle had not enough power to mill through the wax so we reduced the cutting depth to 0.5mm without any improvement.
Casting
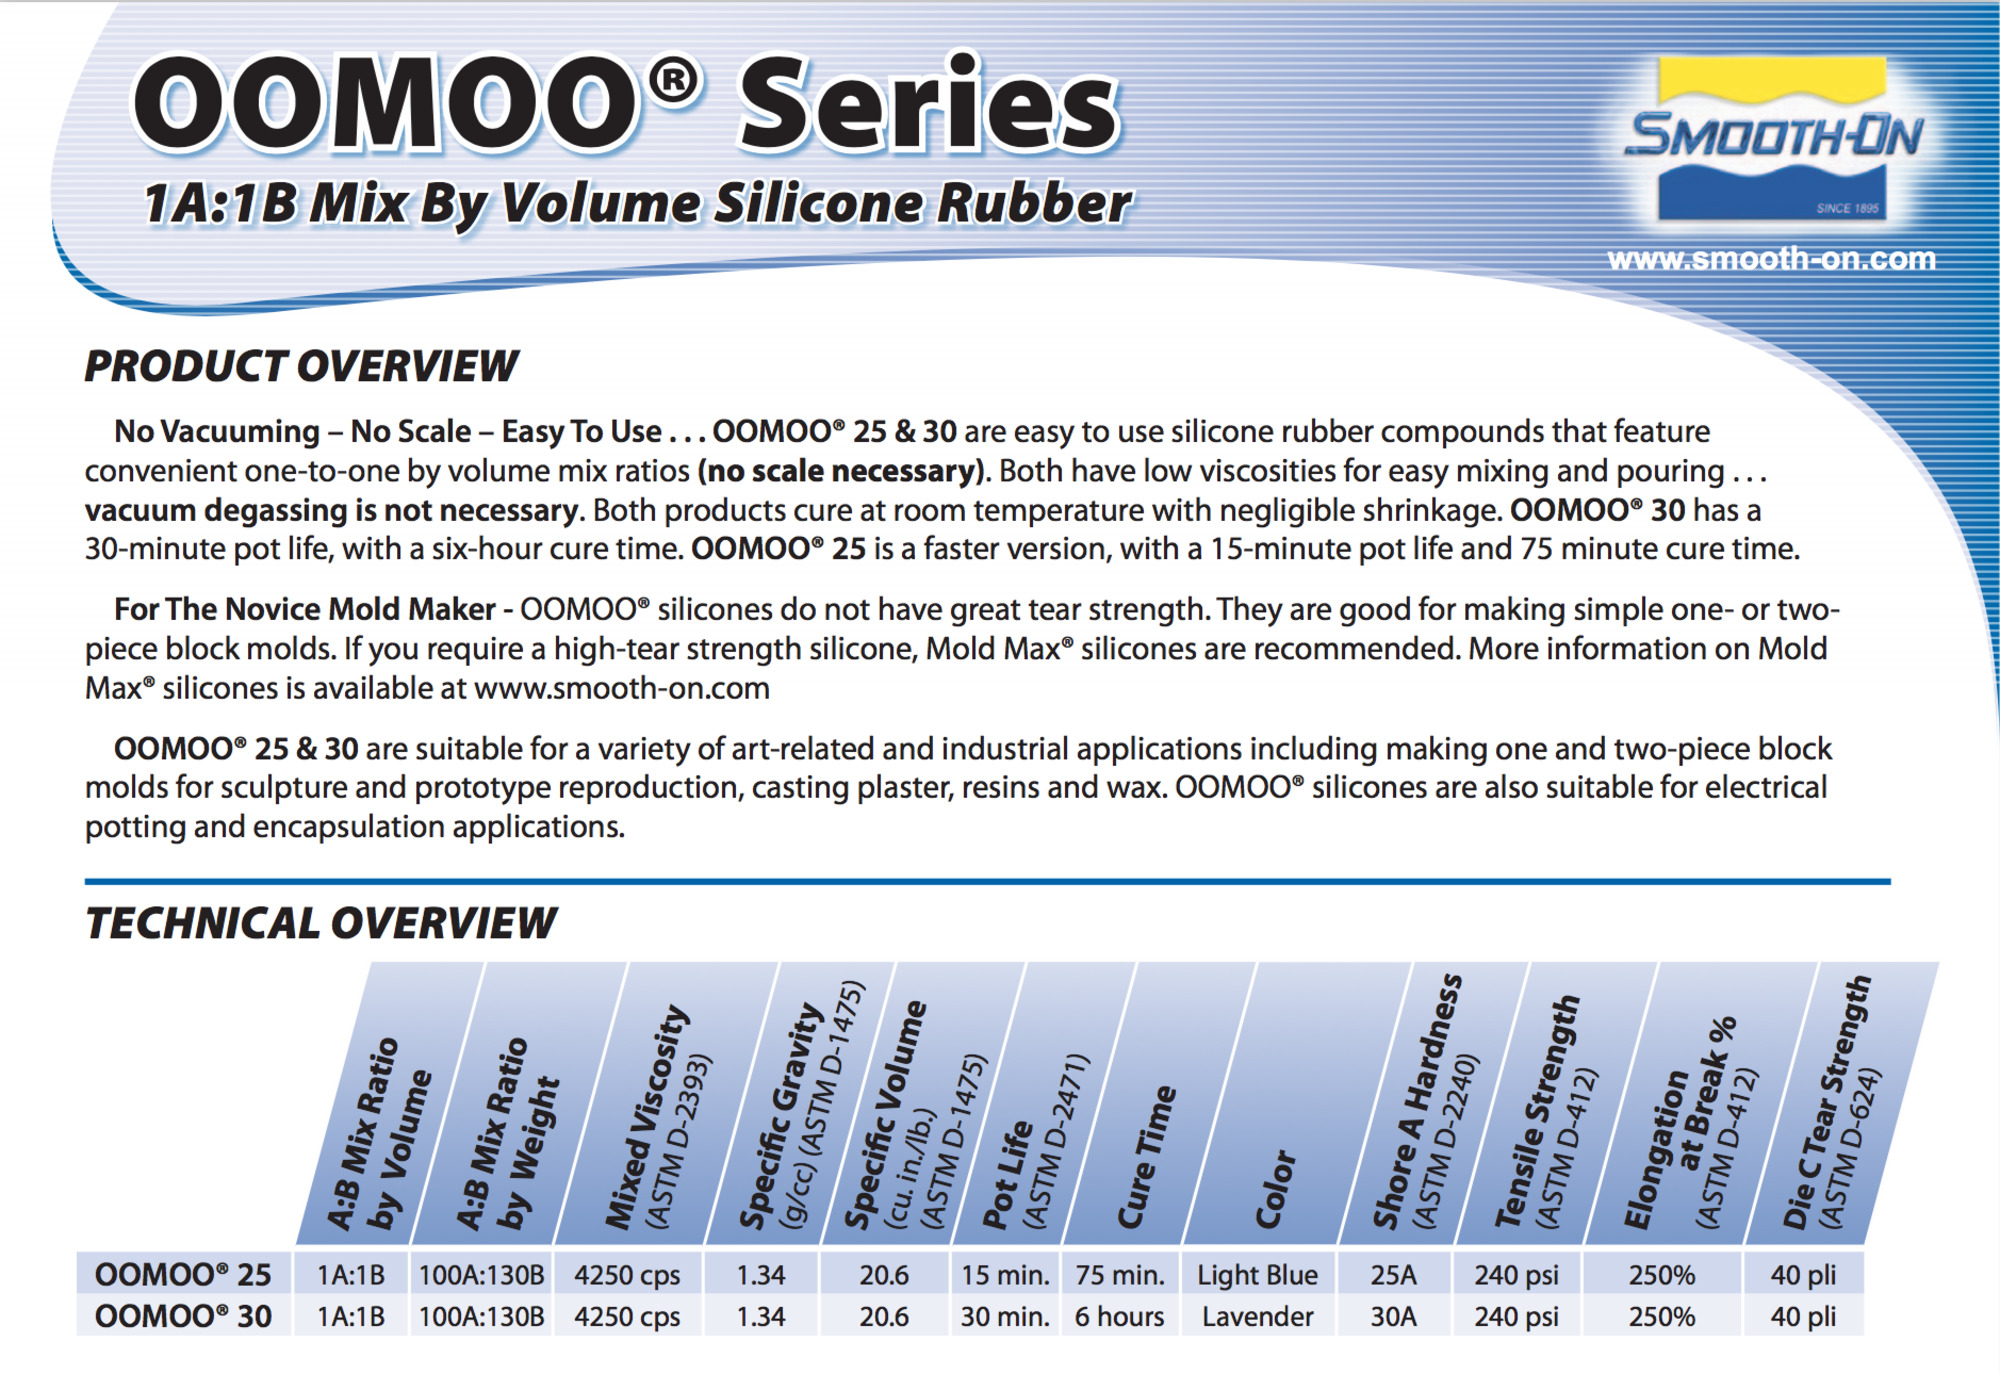
First, I needed to decide which silicone rubber will be used. Tires need to be flexible so I could use a harder rubber for the mold and a more flexible one for the tire. After reading the datasheets and considering the curing time of the harder rubbers I decided to go for the Oomoo series silicone rubber, specifically for the Oomoo 25 which had a curing time of just 75min and a pot life of 15min. Its Shore Hardness is just 25 which is lower than normally the ones used for car tires (50 and upwards) but I decided that it was a decent compromise between curing time and hardness. Oomoo 25 datasheet and safety data sheet.
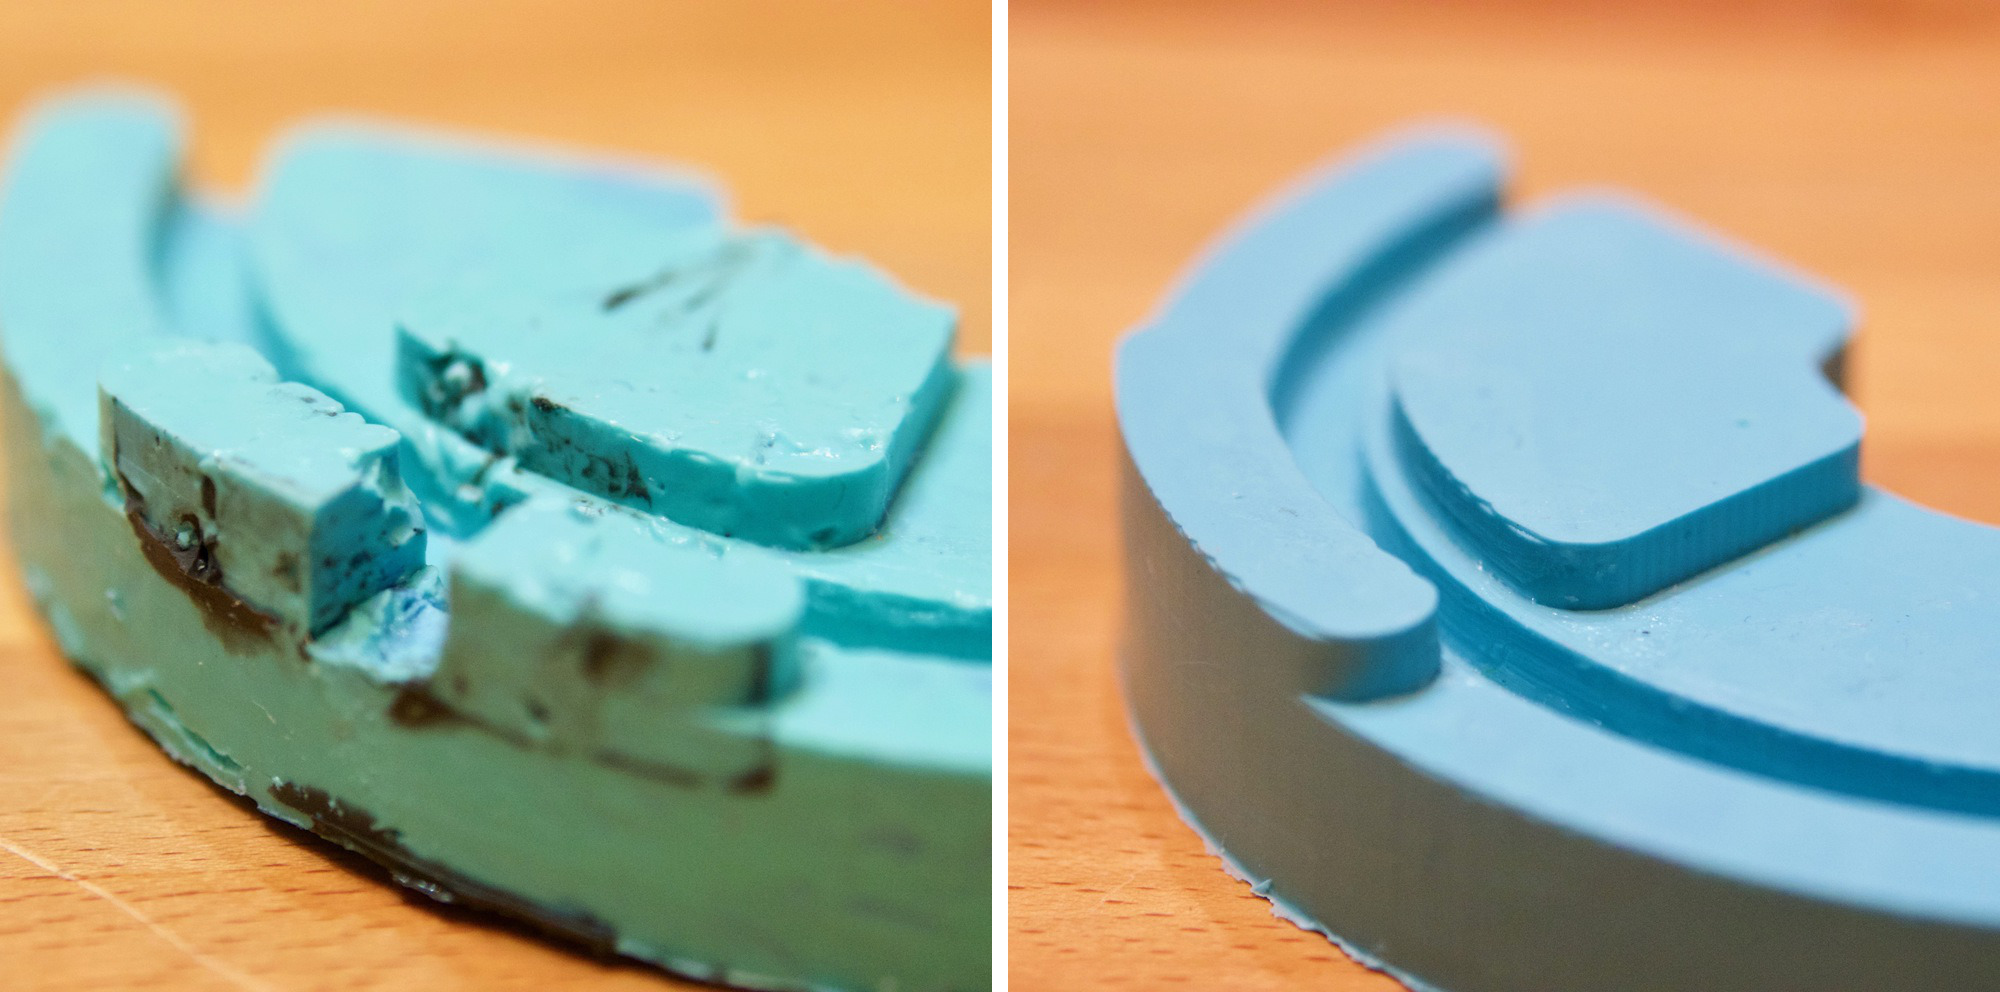
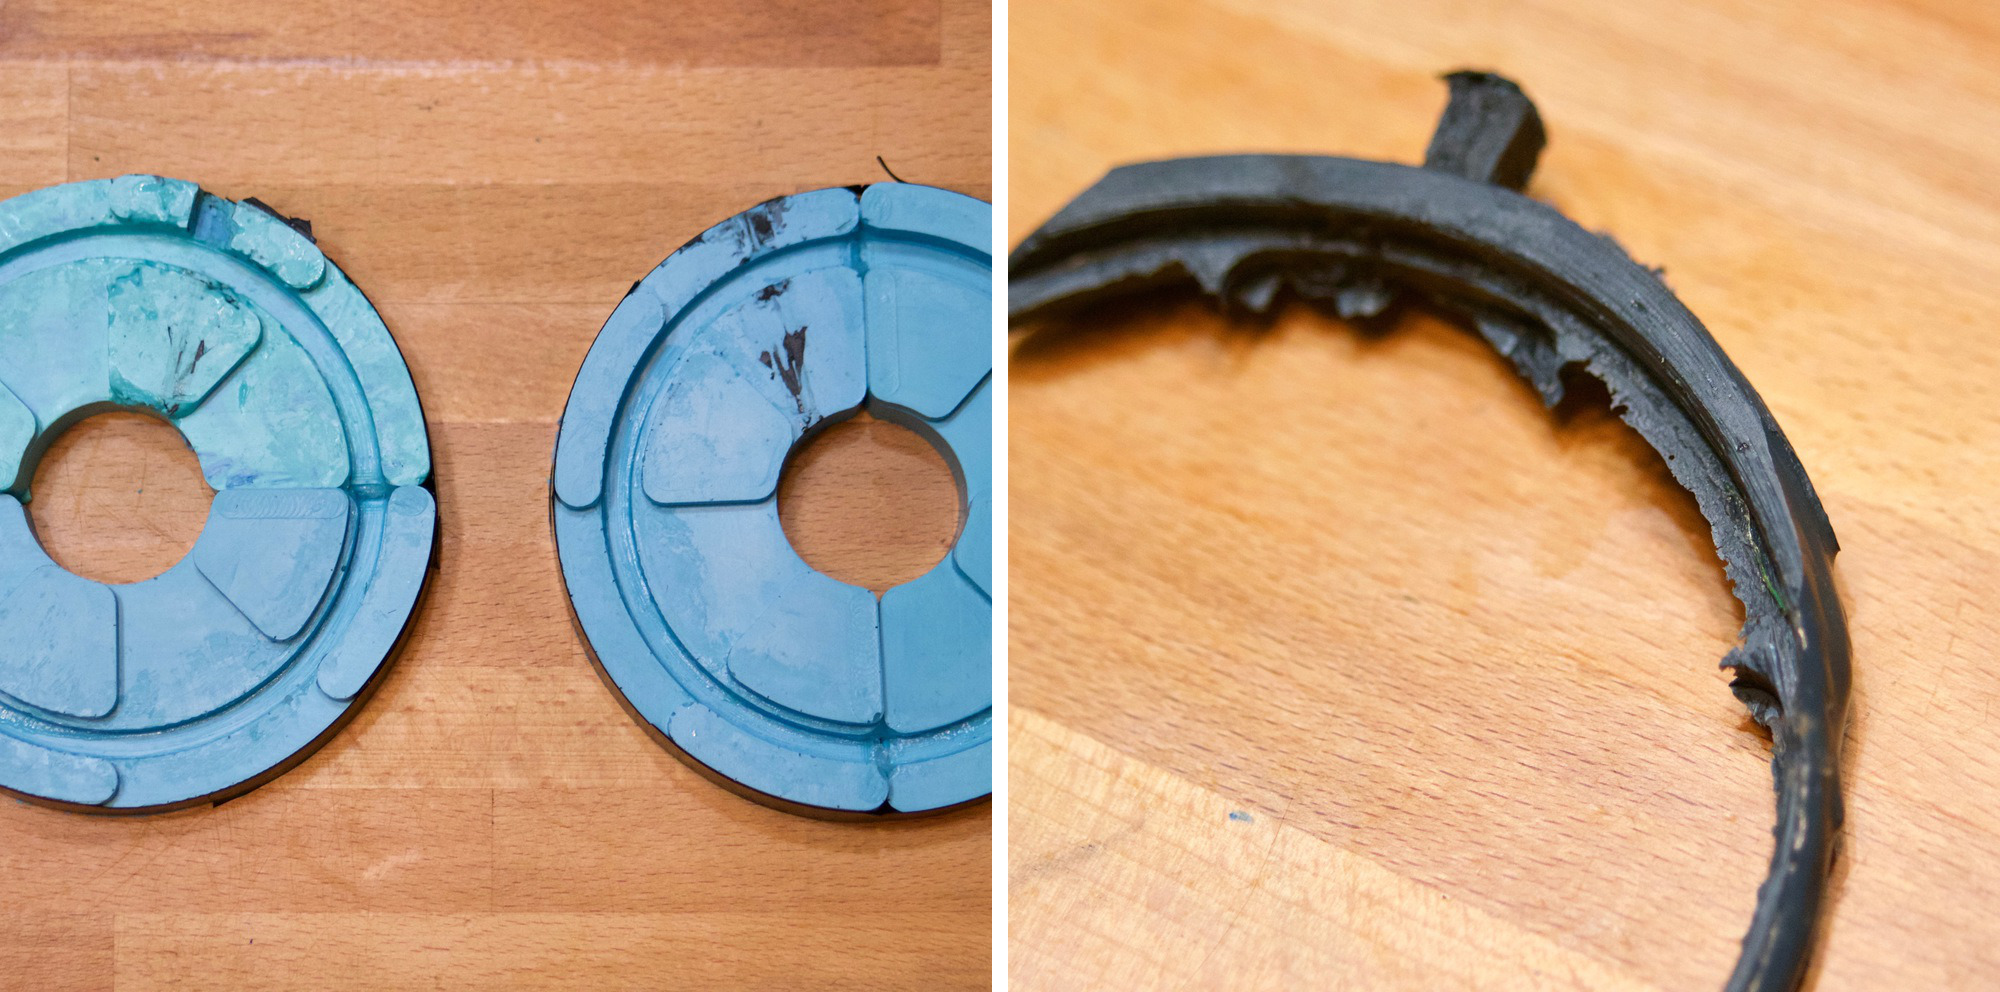
I needed to produce four mold casts in oder to cast the wheel itself. At the end it was a good thing as I could test 4 times the mixing and pouring process. Above you can check the great improvements between the first and last casting. First one is obiously not properly mixed and also full of bubbles and holes. In the last one I perfected the mixing and pouring technique getting almost no bubbles, sharp edges and full resolution details.
While I was casting the molds I realized about the mold design mistakes, I did not expect that the pouring mix was that dense so it will be quite hard to bring all the mix evenly distributed inside the mold. My first attempt confirmed this, the mix did not circulate inside the mold and the final piece was less than a fifth of the whole volume.
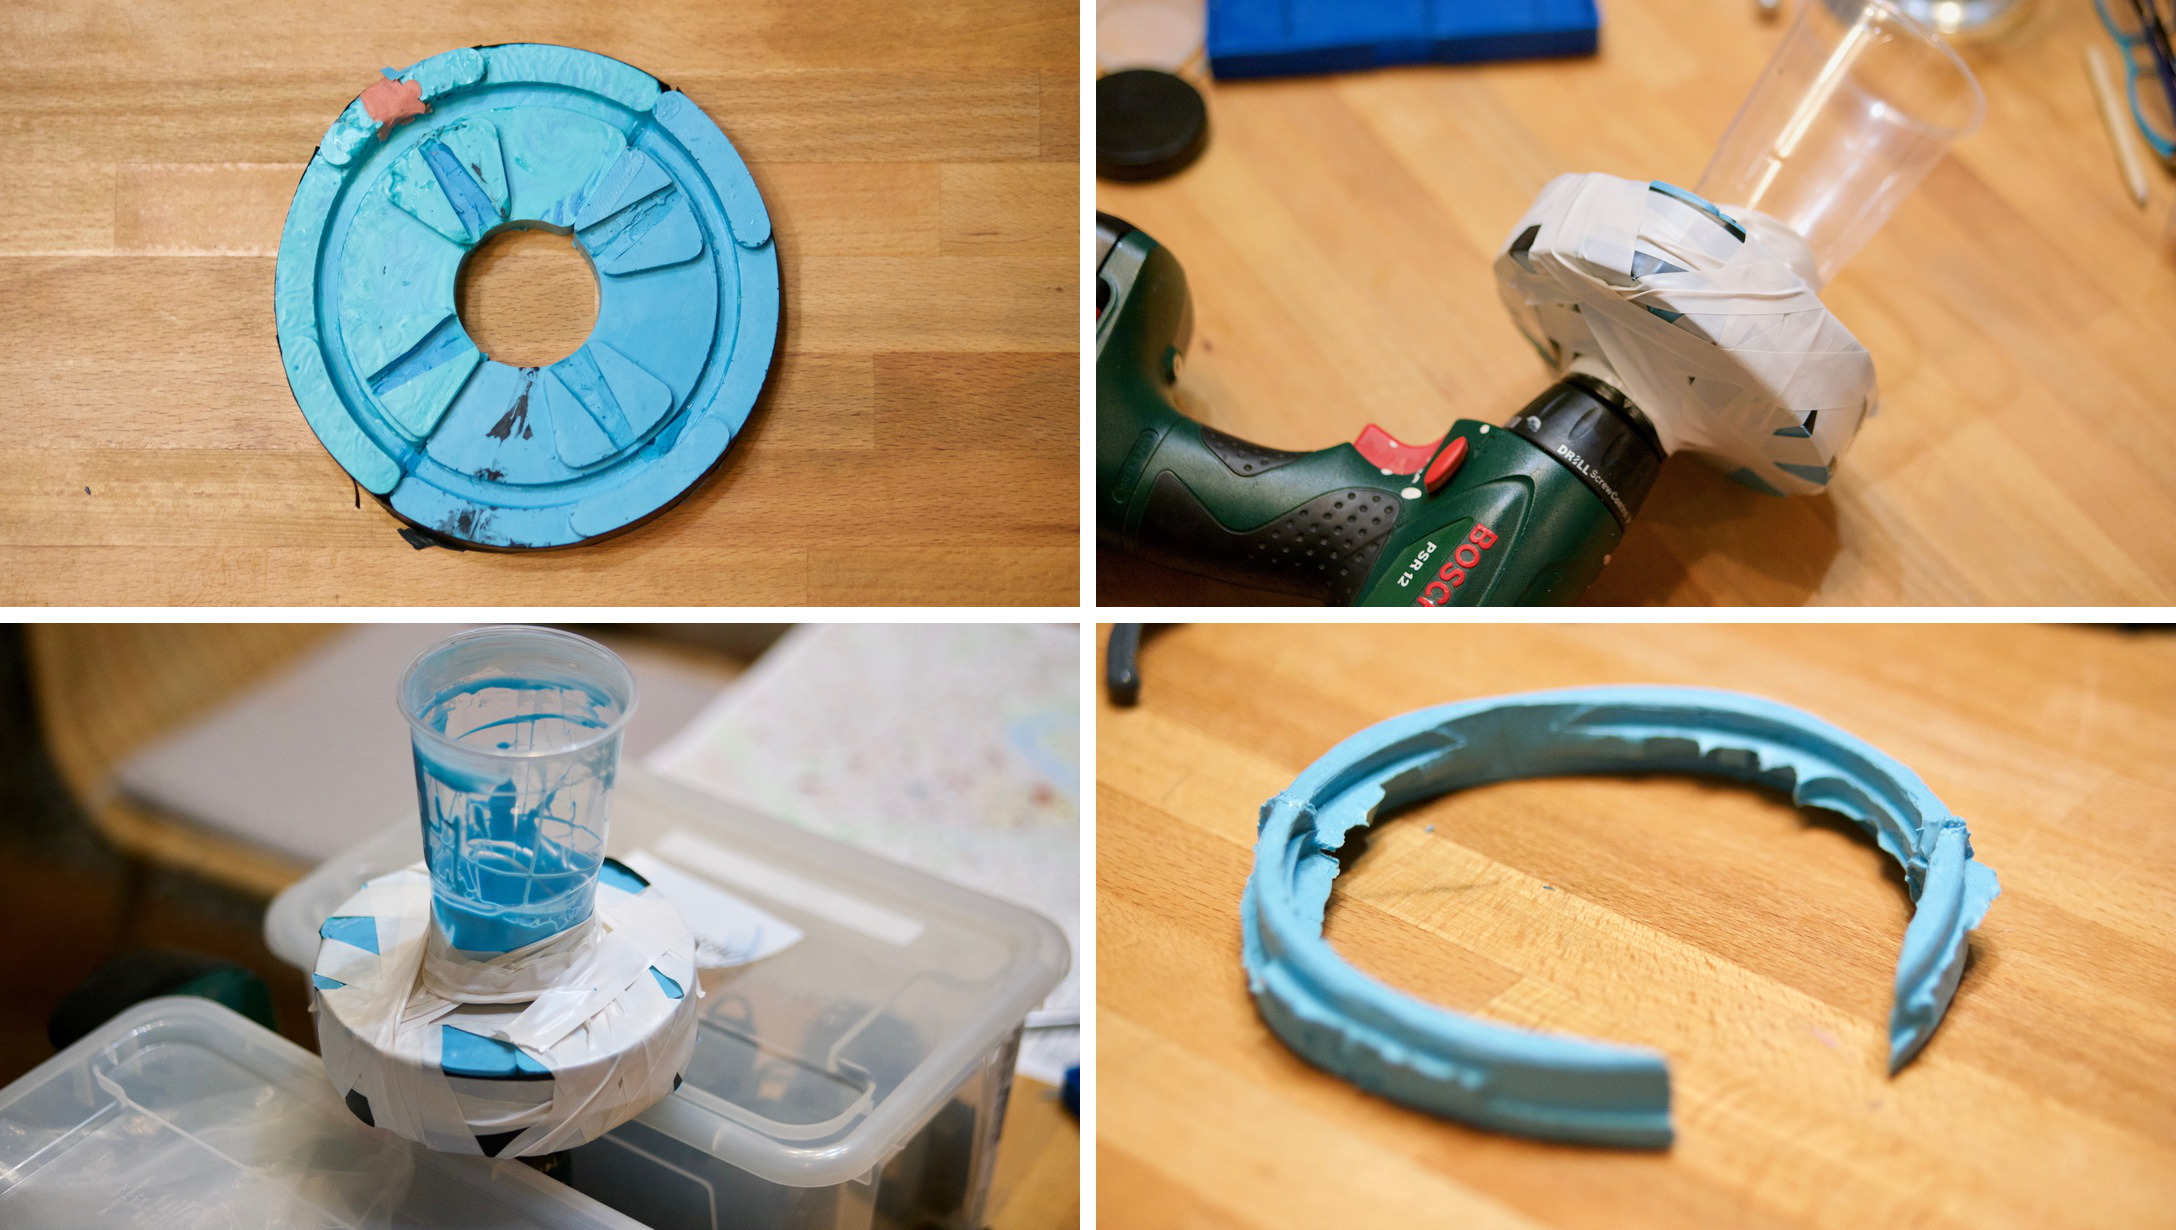
For my second attempt I tried to use centrifugal forces to bring the dense mix inside the mold, I hacked the existing mold creating radial pouring channels and I taped the whole mold to a screwdriver and put a plastic cup with a hole in the bottom to prevent silicone flying around when the mold was being centrifuged. Results were much better although several improvements were needed:
- More radial pouring channels are needed, I made four but next iteration would have at least six.
- A rigid mold would work much better, although my two step process was not neccesary, it helped me to understand better the mixing and pouring process. I think I will use a MDF mold on the next iteration
- Less flexible rubber is needed for the tires. At the end 25 shore hardness was not enough for a tire will try oomoo 30 for the next iteration.
UPDATE Second iteration mold design
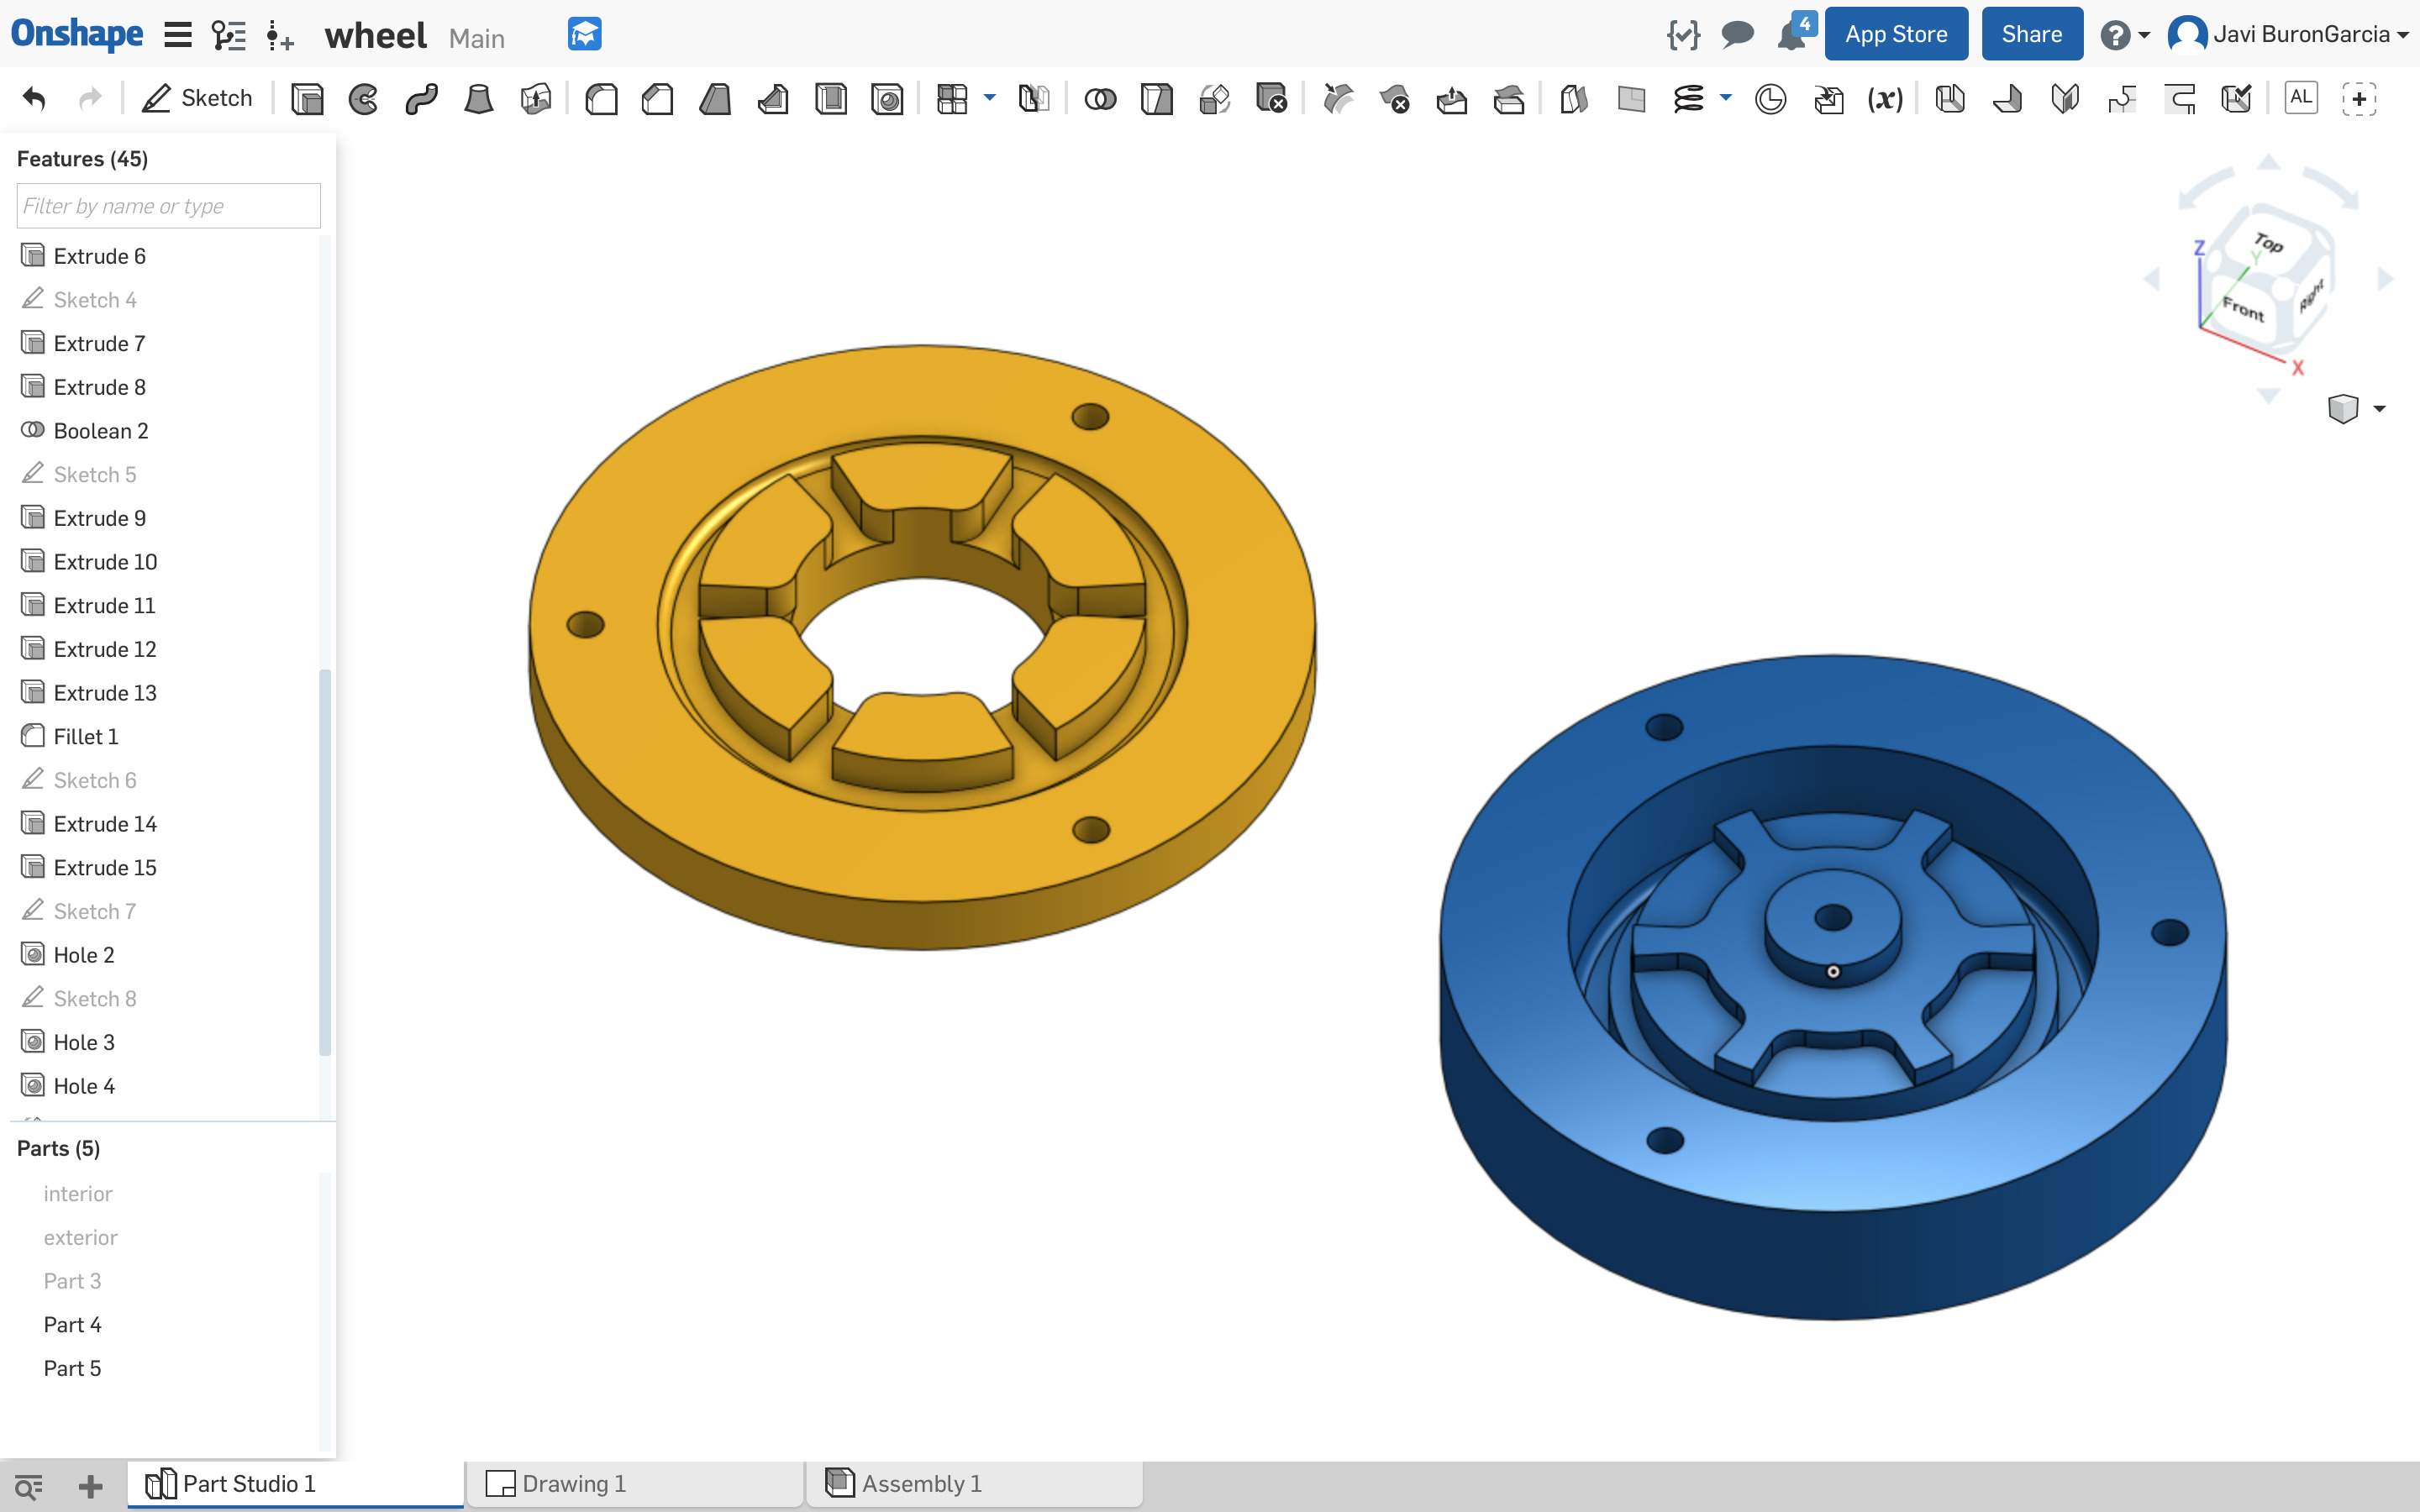
Based on my learning from the first mold I designed a second version using Onshape again. I included six radial channels so the rubber mix is evenly distributed inside the mold, this radial channels are aligned with the upper surface of the wheel so gravity and centrifugal force will ensure that the mold is filled by the mix. Also, I design the mold to be milled in MDF, adding through holes to bolt the upper side and botton side together and a center axis hole to simplify the centrifugation process. Finally to improve the hardness of the final piece I decided to use Mold Max 60, a Shore 60A silicone rubber which was avaiable at our Fab Lab. Material data Sheet and Safety Data Sheet. Pot life is 40min and curing time is 24 hours.
Mold was bigger than the maximum milling volume of the Roland MDX-20 so I choose to use the Shopbot instead. I exported the 3D file to STL and imported in VCarve Pro. I used three different opperations –rough pass, finishing pass and profile cut– and two different router bits using the following settings.
| Flutes | RPM | Feed Rate | Plunge Rate | |
|---|---|---|---|---|
| 1/4” Downcut End Mill | 2 | 14,000 | 3 ips | 1 ips |
| 1/8” Tapered Upcut Ball End Mill | 2 | 12,000 | 2.5 ips | 1 ips |

The casting process was simpler to set up for a tigth fit and a simple centrifugation process, as pot life was longer it was easier to pour it in small batches in between centrifugation pulses done with an electric drill. The mold sit for overnight and the next day I removed the top part for a shorter curing time as described in the datasheet. Centrifugation seemed to work perfectly as the whole mold was filled with silicone rubber. Demolding the bottom part was a bit more complicated than expected. Some small vertical channels would be desirable.

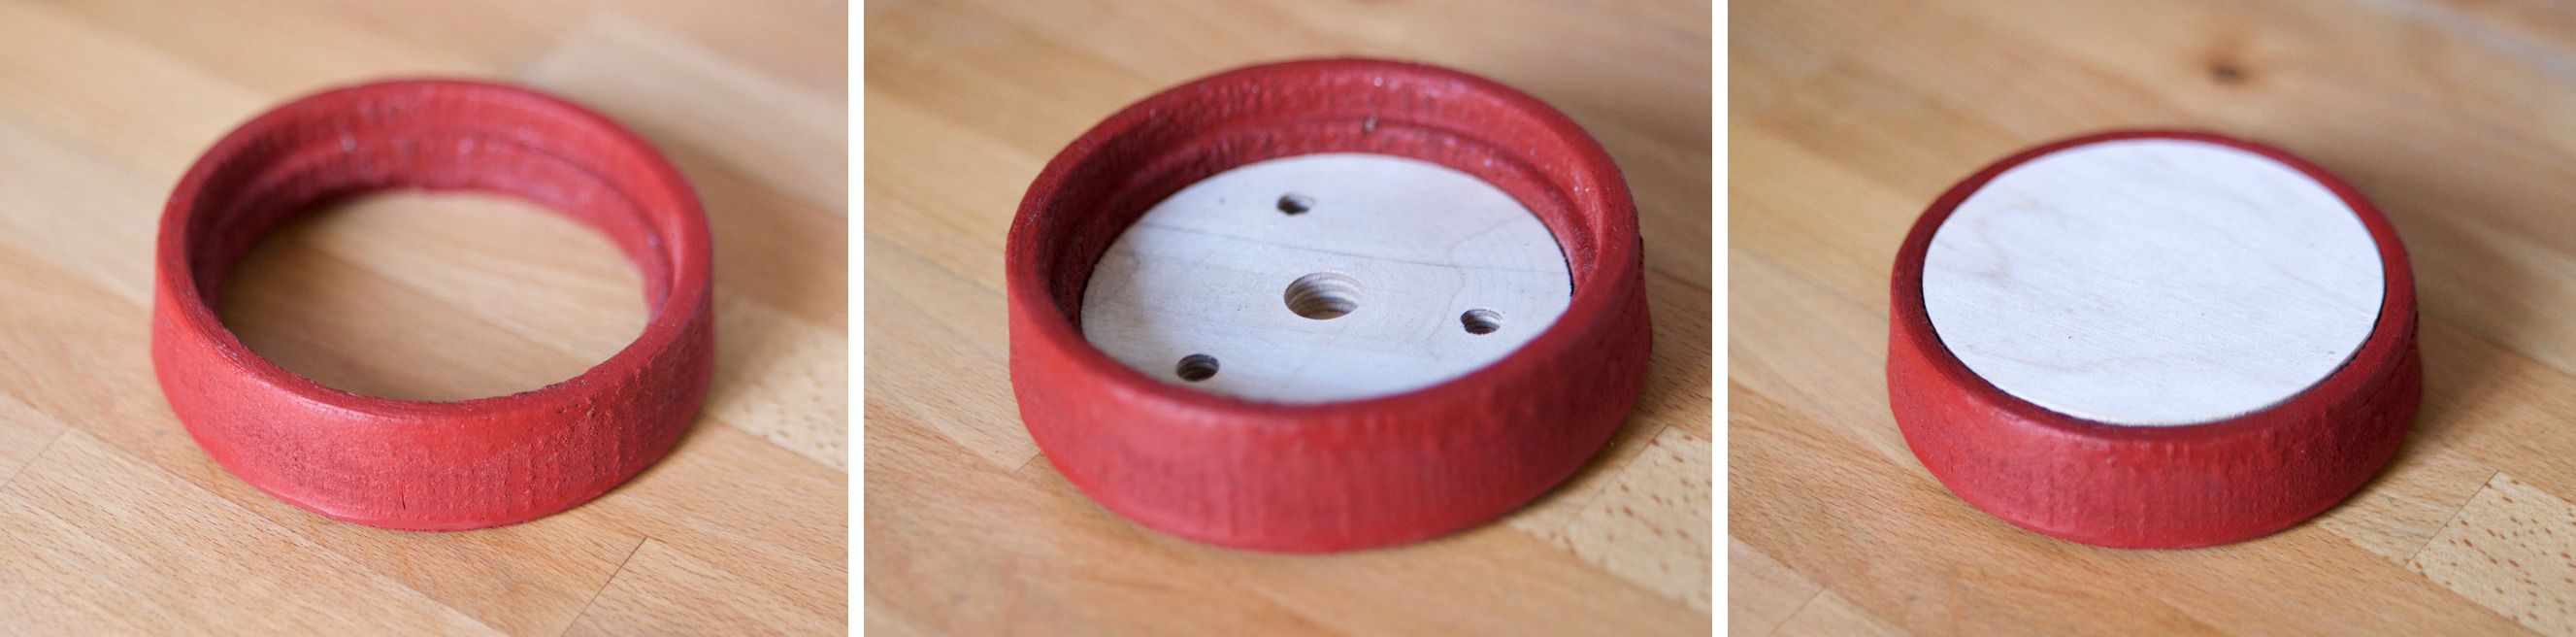
I removed the excess rubber from the radial channels and the parting line with a blade and assembled the wheel, tolerances are good and the ply parts fit perfectly. I am quite satisfied with the results but some further improvements could be done:
- Mold surface could be smoother specially at the sides. I will apply a primer and smooth the surface with fine sandpaper
- A laser cut pattern in plastic could be attached to the mold so I could get nice tire marks