3D Scanning and Printing
3D Printing
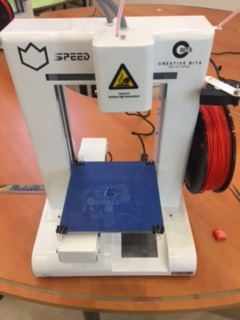
Before I explain My design on Onsahpe i will explain the 3D Printer I am using. In the Lap we are using Wistek 2805 Printer with the application REALvision.
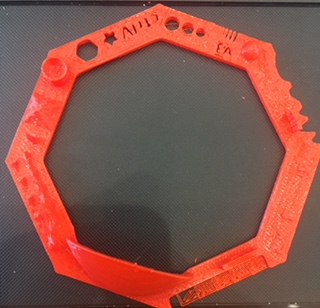
In order to test the accuricy of the printer we printed as a group the shown above design in order to identify the percision of the 3D printer. As we see, we should avoid desining small edge cuts or letters. The following is the reference for the test sample.
Z-Height Check
Warp Check
Spike
Hole in wall
Raft Test
more Overhang Steps 50° - 70° (needs special care, like cooling)
2 different extrusion widths: 0.48mm & 0.4mm
This is a hard to print testfile!
often you don't know if your printer is ready for complex files. with this file you have an easy option to check problematic printing/slicing stuff.
these test are included in this very tiny file:
01 Nut, Size M4 Nut should fit perfectly
02 Wave, rounded print
03 Star, Sharp Edges
04 Name, Complex Shapes
05 Holes, Size 3, 4, 5 mm
06 minimal Distance: 0.1, 0.2, 0.3, 0.4, 0.5, 0.6, 0.7 mm
07 Z height: 0.1, 0.2, 0.3, 0.4, 0.5, 0.6, 0.7, 0.8, 0.9, 1.0, 1.1 mm
08 Wall Thickness: 0.1, 0.2, 0.3, 0.4, 0.5, 0.6, 0.7 mm
09 Bridge Print: 2, 4, 8, 16 mm
10 Sphere, Rounded Print 4.8mm height
11 Sphere Mix, 7 mm height
12 Pyramide, 7 mm height
13 Overhang: 25, 30, 35, 40, 45, 50, 55, 60, 65, 70°
14 Warp, does it bend?
15 3D Print Font, optimized for 3D printing
16 Surface, Flatness
17 Size, 100 x 100mm x 23.83 (10mm width)
18 Spike, minimum Layer Time, 21 mm height from Bottom (include Baseplate)
19 Hole in Wall, 4 mm diameter, check for proper print
20 Raft Test, raft should be just under the model
21 Retract Travel, check retract settings for longer travel
"
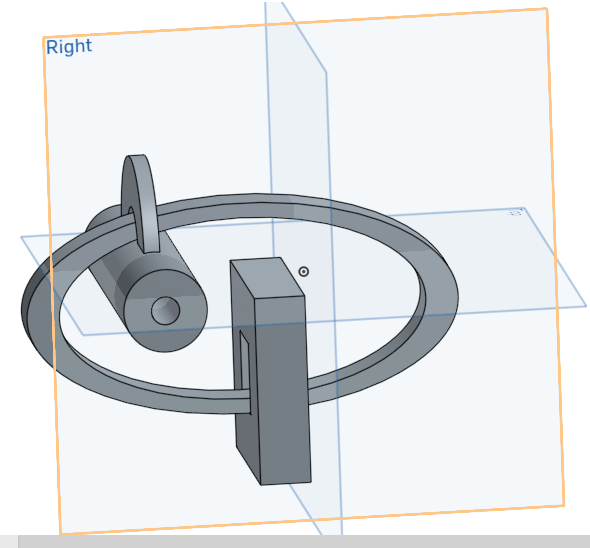
Preparing the Design
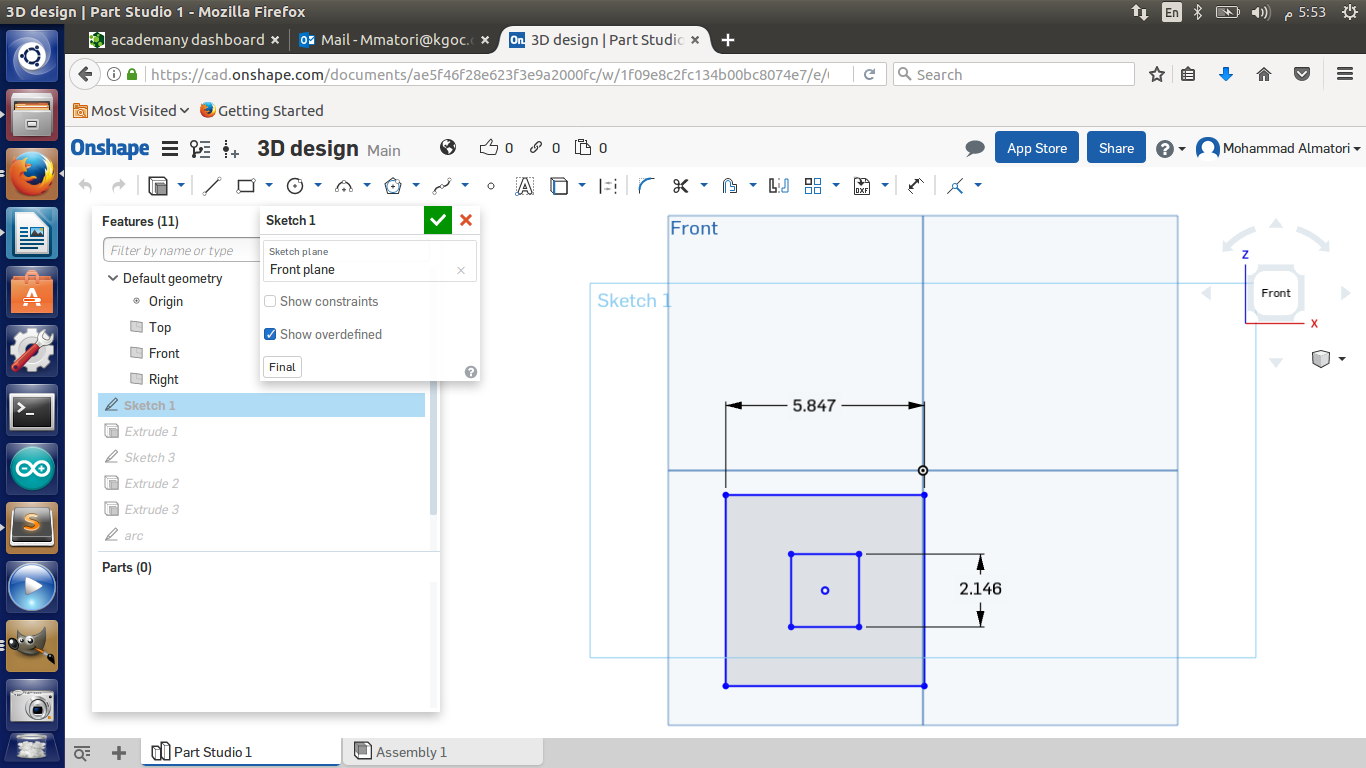
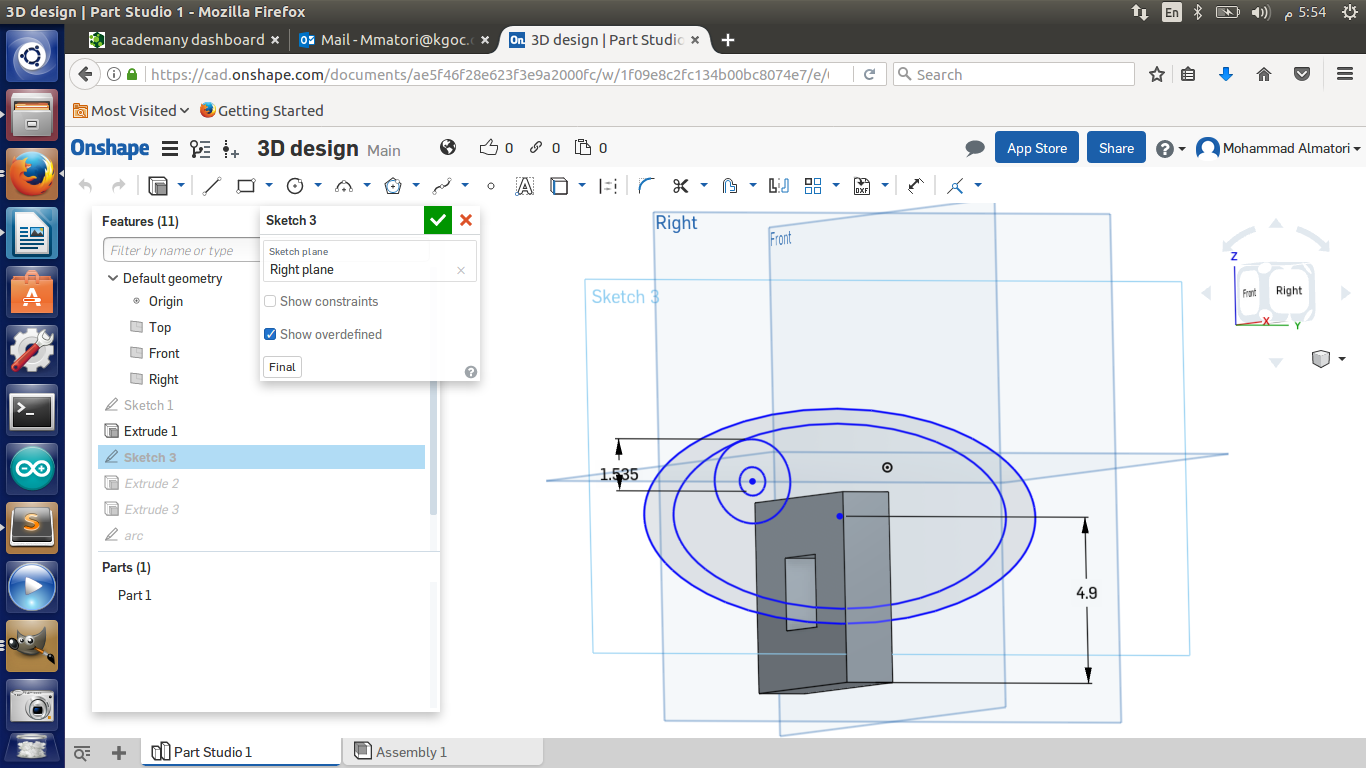
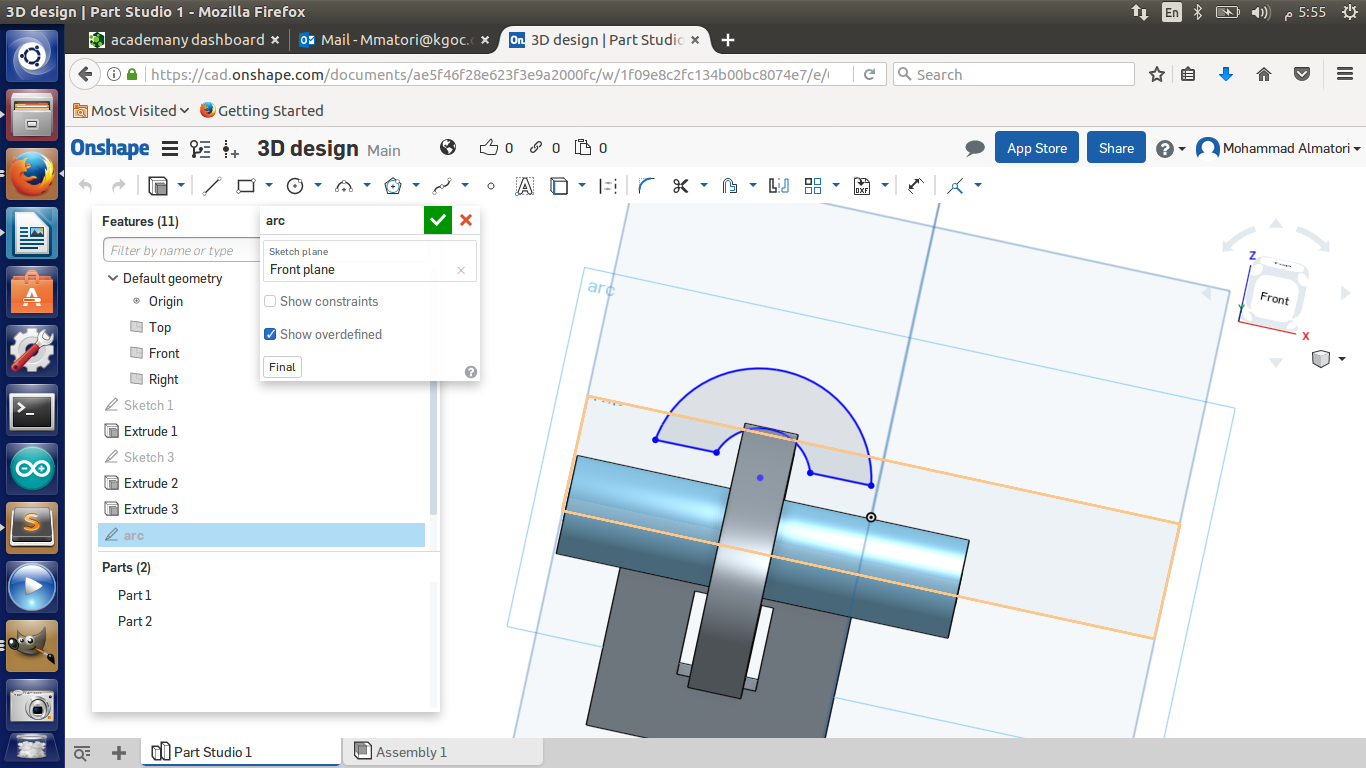
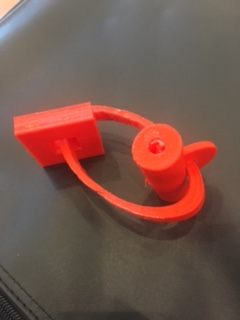
I have used Onshape to prepare my Design. I have created what is called an impossible design, which is three pieces connected together. The three pieces can not be printed separatly as there will be no way to join them together later. Below is the Design:
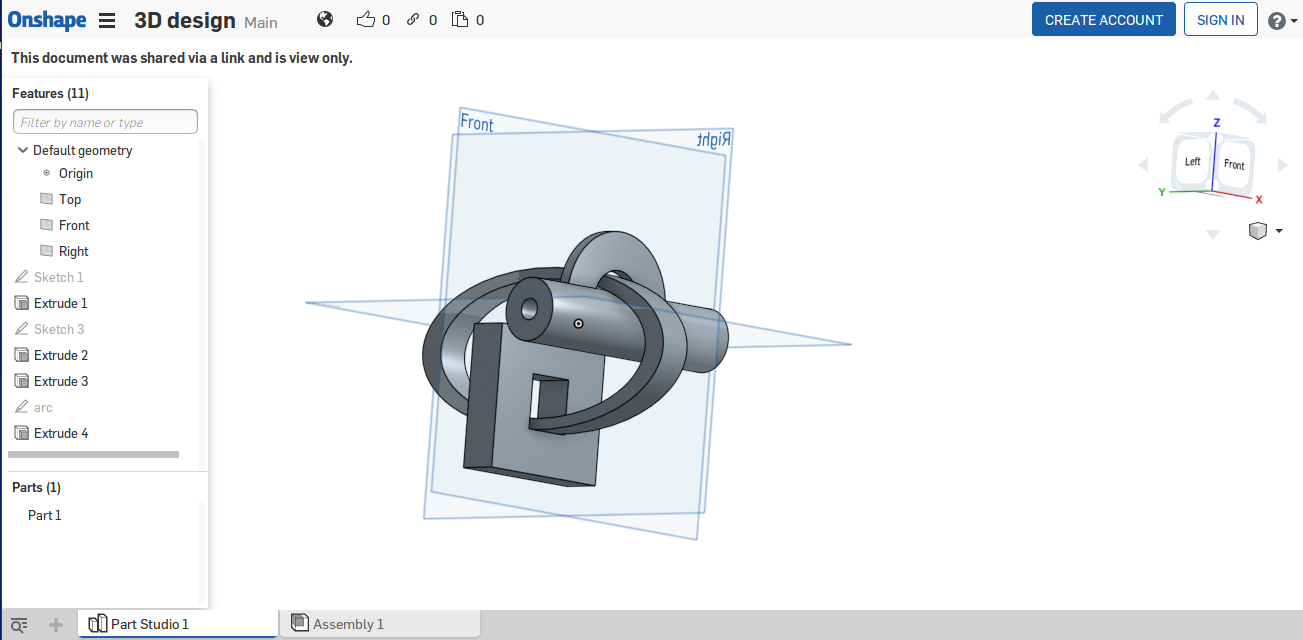
I have used new features to make this design. I have made each shape seperatly, then i extruded each shape. the first extrude is set to a new extrude. the rest extrudes are added to the first one.
for the 3D printer to print the final shape, all pieces should be connected together, otherwise the printer will print on air. Therefore, on Onshape, i moved all the shapes and made each touch at least onther object.
Preparing the Design File
After preparing the design on Onshape, I download the design as .STL and open the file in an application RealVision. Realvision allow the user to applay certain works on the design such as re-scale, rotate, flip ...etc. and saves it as .Fcode. Later on, we open the Fcode file in the 3D printer and run the print.
Blow a description of how to use RealVision:
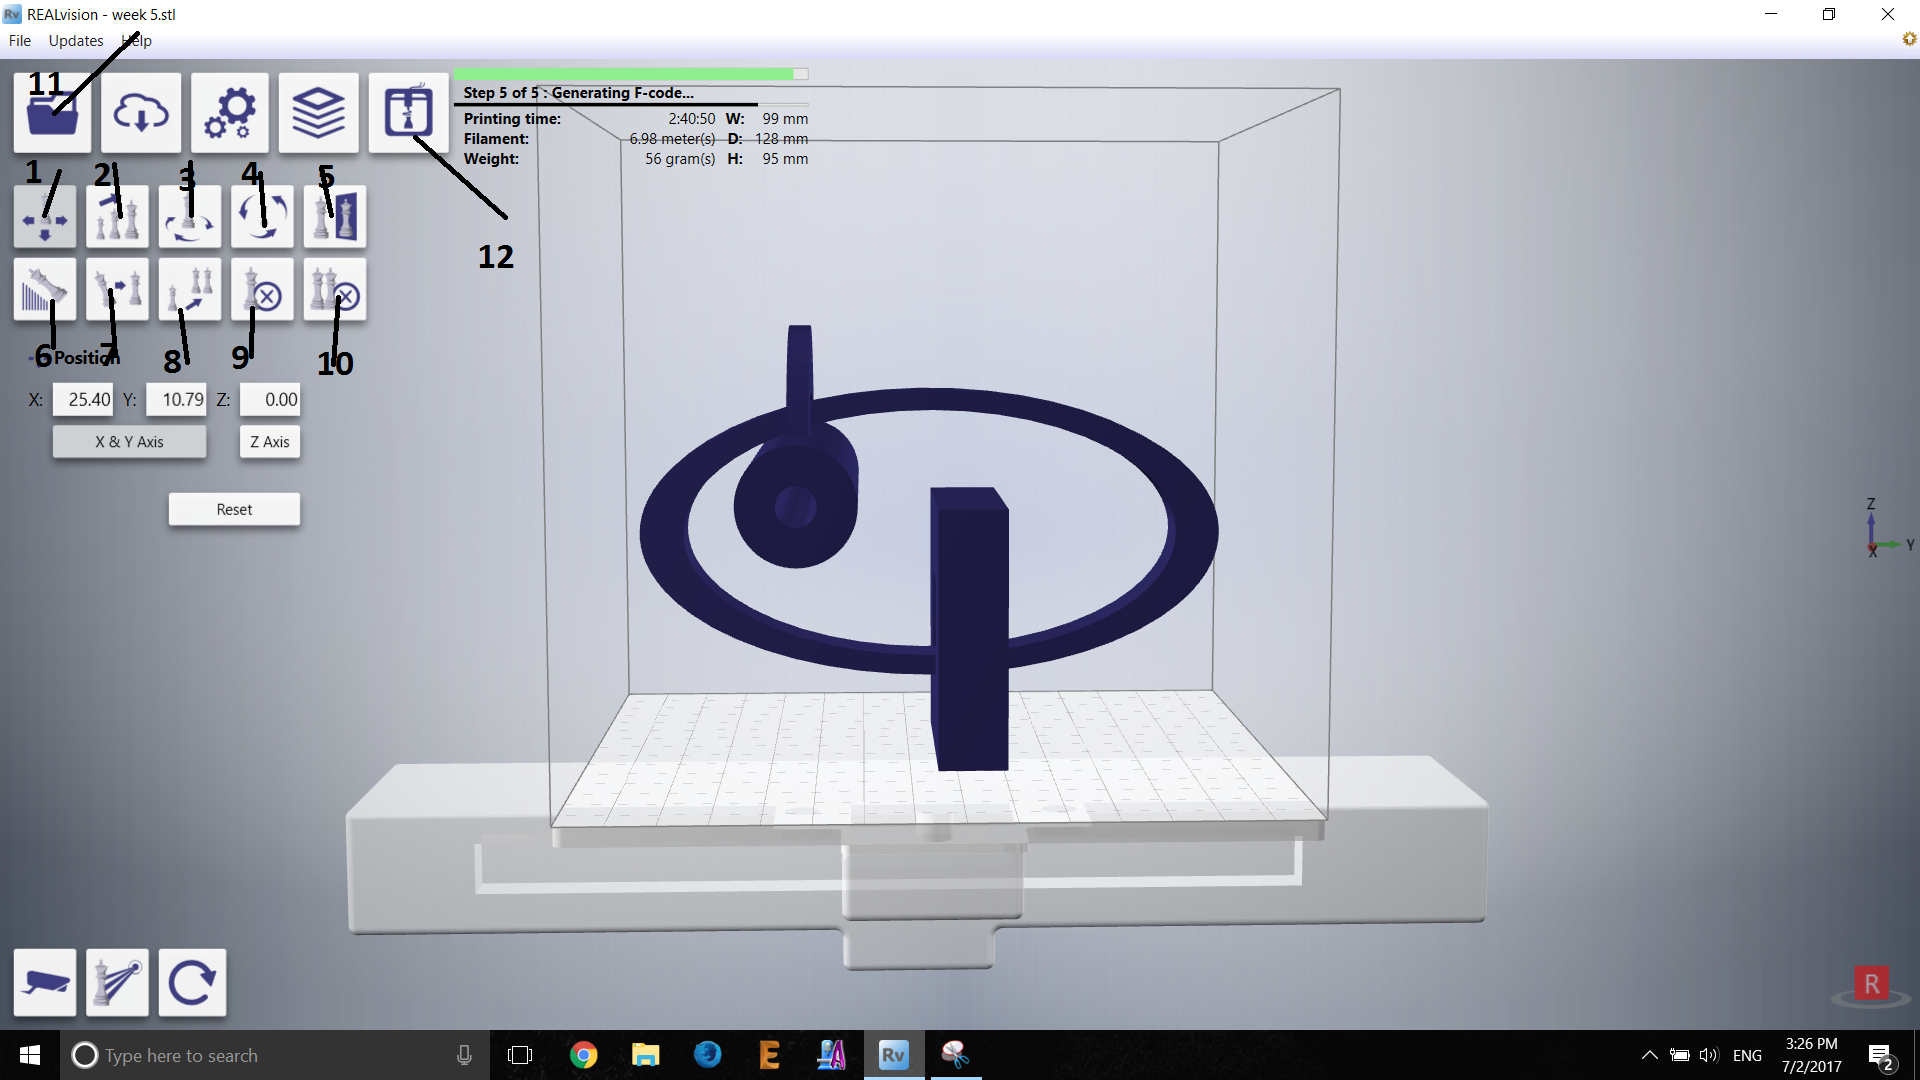
1- Move the entire object on the plane.
2- Re-scale the whole object.
3- Rotate on Z axis.
4- Rotate on X and Y axis.
5- Flip the object.
6- Add support.
7- Put on plane.
8- Duplicate the object.
9- Delete selected object.
10- Delete all objects.
11- Open a desgin file.
12- Save the .Fcode into your location drive.
Printing the Design
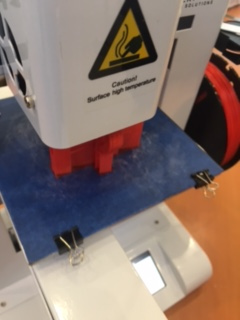
I created the design using Onshape, I faced an issue at that time which is I had multible parts. Multible parts make the 3D printer Prints on Air. therefore, I Connected all items together and made as one part. I saved the file as .STL -> opened it with REALvision -> adjusted the dimension & scale, Add support to prevent the shape to fall while printing and saved it as .Fcode.
On the printer side I adjusted the heat to melt the material wire. put some glue on the surface of the printing area. and let the prininting start. after 2 hours it finshed the printing.
After the printout is finished. I took of the floor panel and poured hot water on top of it to remove the design from the plate. the started cutting off the supported materials.
The support Parts where easy to remove on the big open spaces, but extremly annoying for the small parts so i used small heated cutter to cutoff the joined parts.
In the end there was movement limitation due to the unforseen size chnge of the eclipce shape, whitch prevent the movement of cylendrical part throw the whole eclipce shape.
What i Have Learned from the 3D Printing
3D printing is a very usefull tool. I had already used it to replace broken joint in my showerbox. after more reading about it. I know they are using it to replace some human joints such as knee. 3D only draw back might be the material that is being used for printing, but i am sure new stuff will be invented.
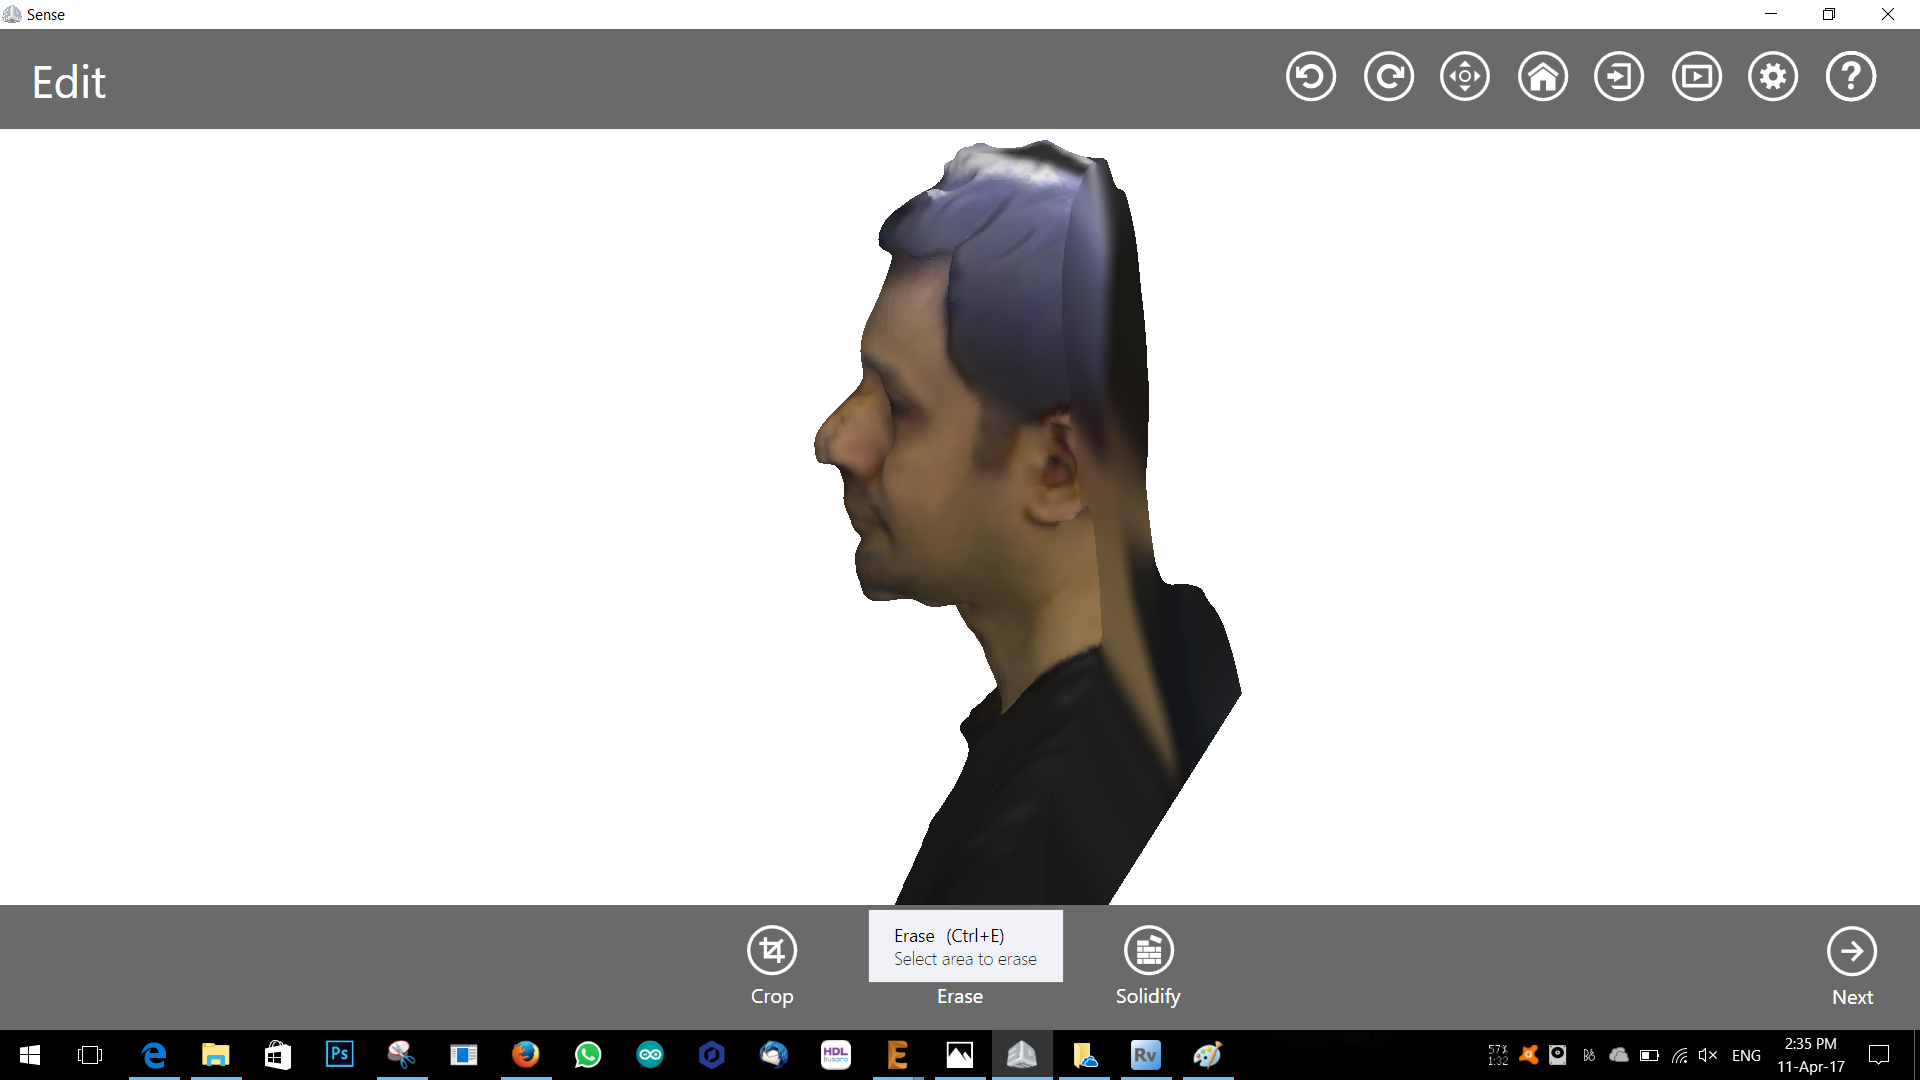
3D Scaning
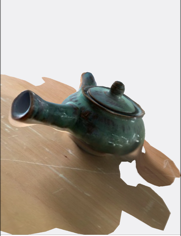
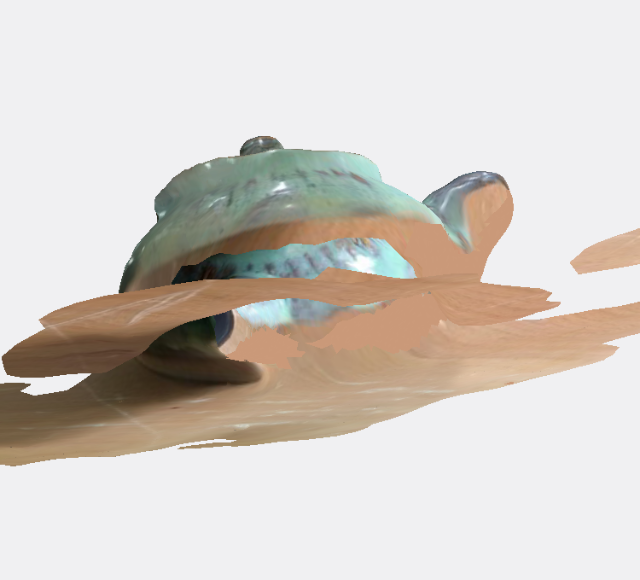
First Test: Due to the delay in delevering the 3D scanner. I looked for a Mobile app to do 3D scanning. I downloaded "TRNIO". The way the application works is that you choose an object and the it take multiple pictures in a spherical fasion with a minimum 30 picture the it display the 3D scanned object as shown below. I apoligize i didnot get the source file for the scanned object.

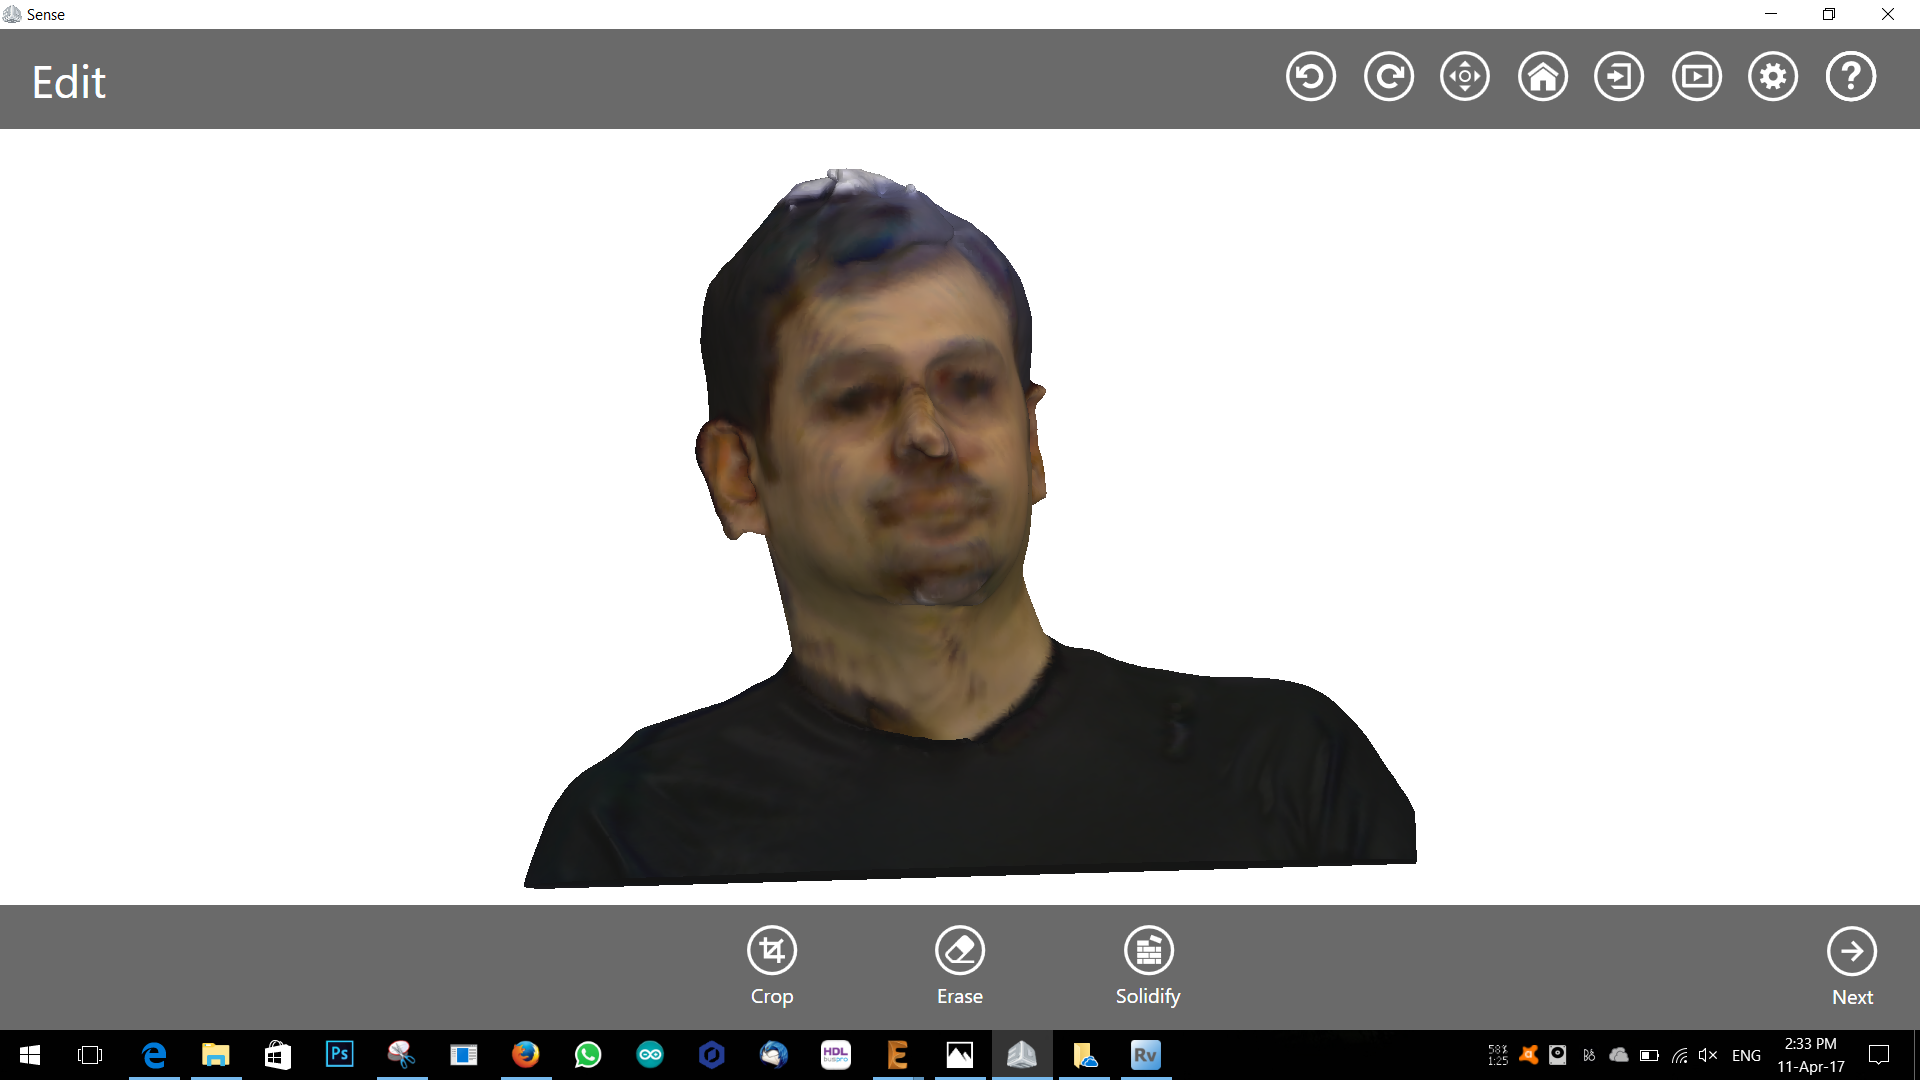
Second Test: After Receiving the Scanner "3D Sense", I did scan myself and conclude this week task.


Download Files
Test your 3D printer!
3D Design for printer.
My Face Scan .STL
My Face Scan Skechtfab h