Vinyl Cutting
The first task in this week is to design a sticker utilizing the Vinyl cutting printer. I downloaded for this task InkScape. I truly liked this application, user friendly and simply get the job done. Initially to get familiar with Inkscape I draw a “Do Not Stand” zone sticker which is related to my final project. The printer that we are using is Silhouette CAMEO 2. The process involved in printing the stickers involves designing a 2D shape -> import the design to Silhouette software -> prepare the file -> print on sticker paper -> use certain technique to remove and stick the stickes.

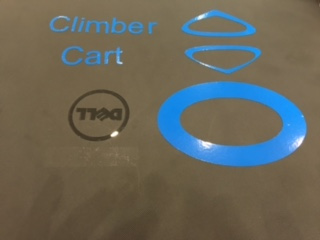
after getting familiar with Inkscape, in every worksheet I set up the document size and grid units from Document properties/ page & /Grids. Utilize zooming features for fast viewing my work. Utilize the drawing tools to draw my sticker and make sure to use the option of Fill and Stroke. Fill and Stroke option is extremely important as the Vinyl cutting printer I identify the cutting boundaries from the stroke of the design. I did face an issue while setting the fill and stroke which is I could not get the exact fill color and it was always faint. After more familiarization with this feature I noticed that by increasing the Opacity to 100% you can get the full choosing color. In line of whats said, I designed the final project name in addition to some stickers as shown below.
In regards printing the design, we have used in the lap the application “Silhouette Studio”. The steps as follows, open my file → adjust the size and the printout location on the worksheet → click on Object Tap then Trace → Select Trace Area and highlight my hole image → adjust the filter in away to print out the whole design → keep only the traced area and discard the origin file → send the job to the printer and print the stickers.
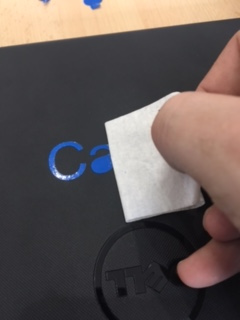
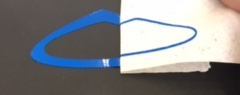
Removing & Sticking the Printed Letters
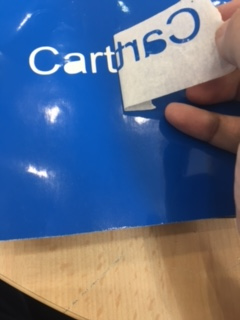
In regards of removing the printed letters, removing letter by letter is not the correct way. The correct way is to use sticker to remove a whole wards and sentences. Then stick it on a surface, remove again the sticker without the letters.
Below is sample pictures:

Settings for Vinyl Cutting
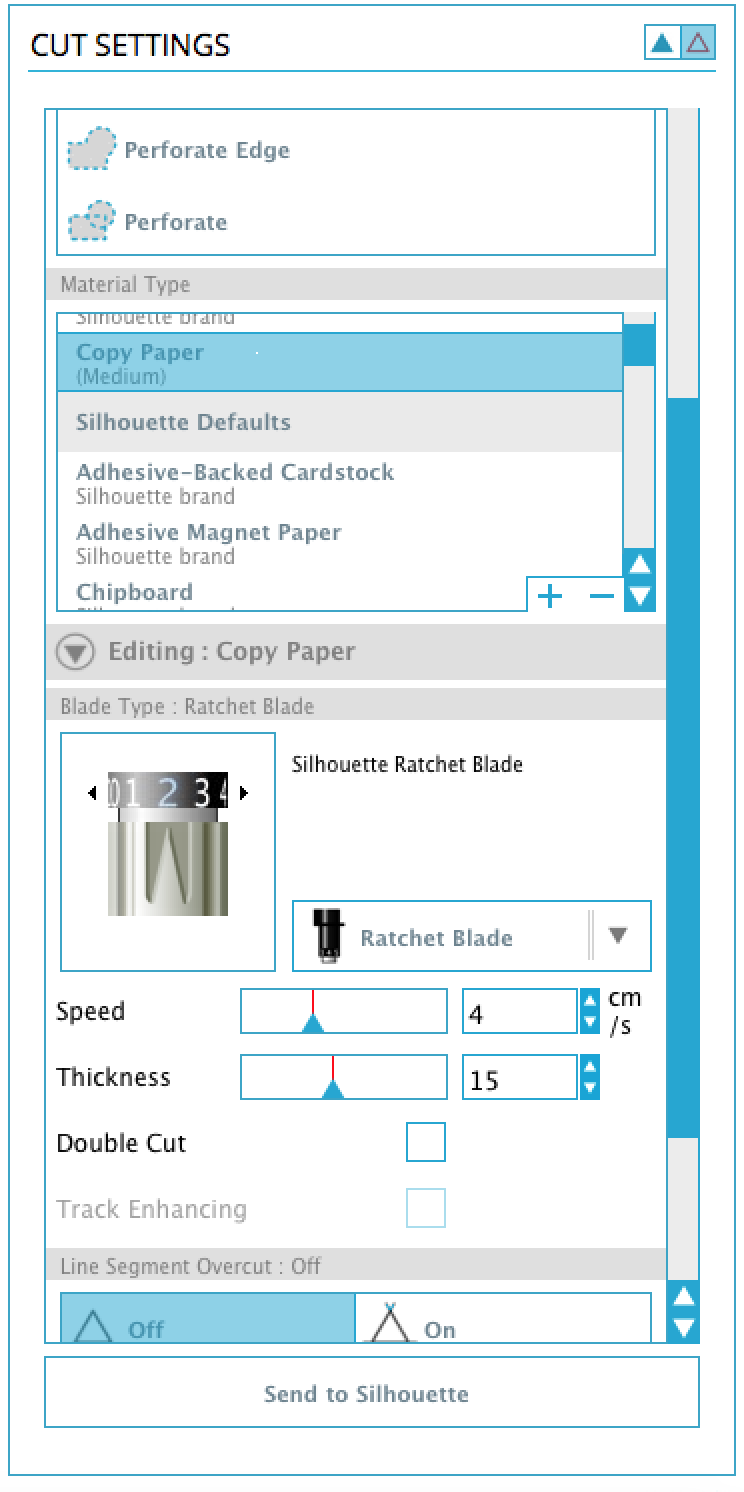
In the settings, you choose the material type required for the papers. I chose Copy Paper as it is the most close option to the sticker paper.
Blade Type, Speed and Thickness are all related to each other. you have to get the correct combination to cut certain elements. for further details please refer to the following link:
Silhouette Settings
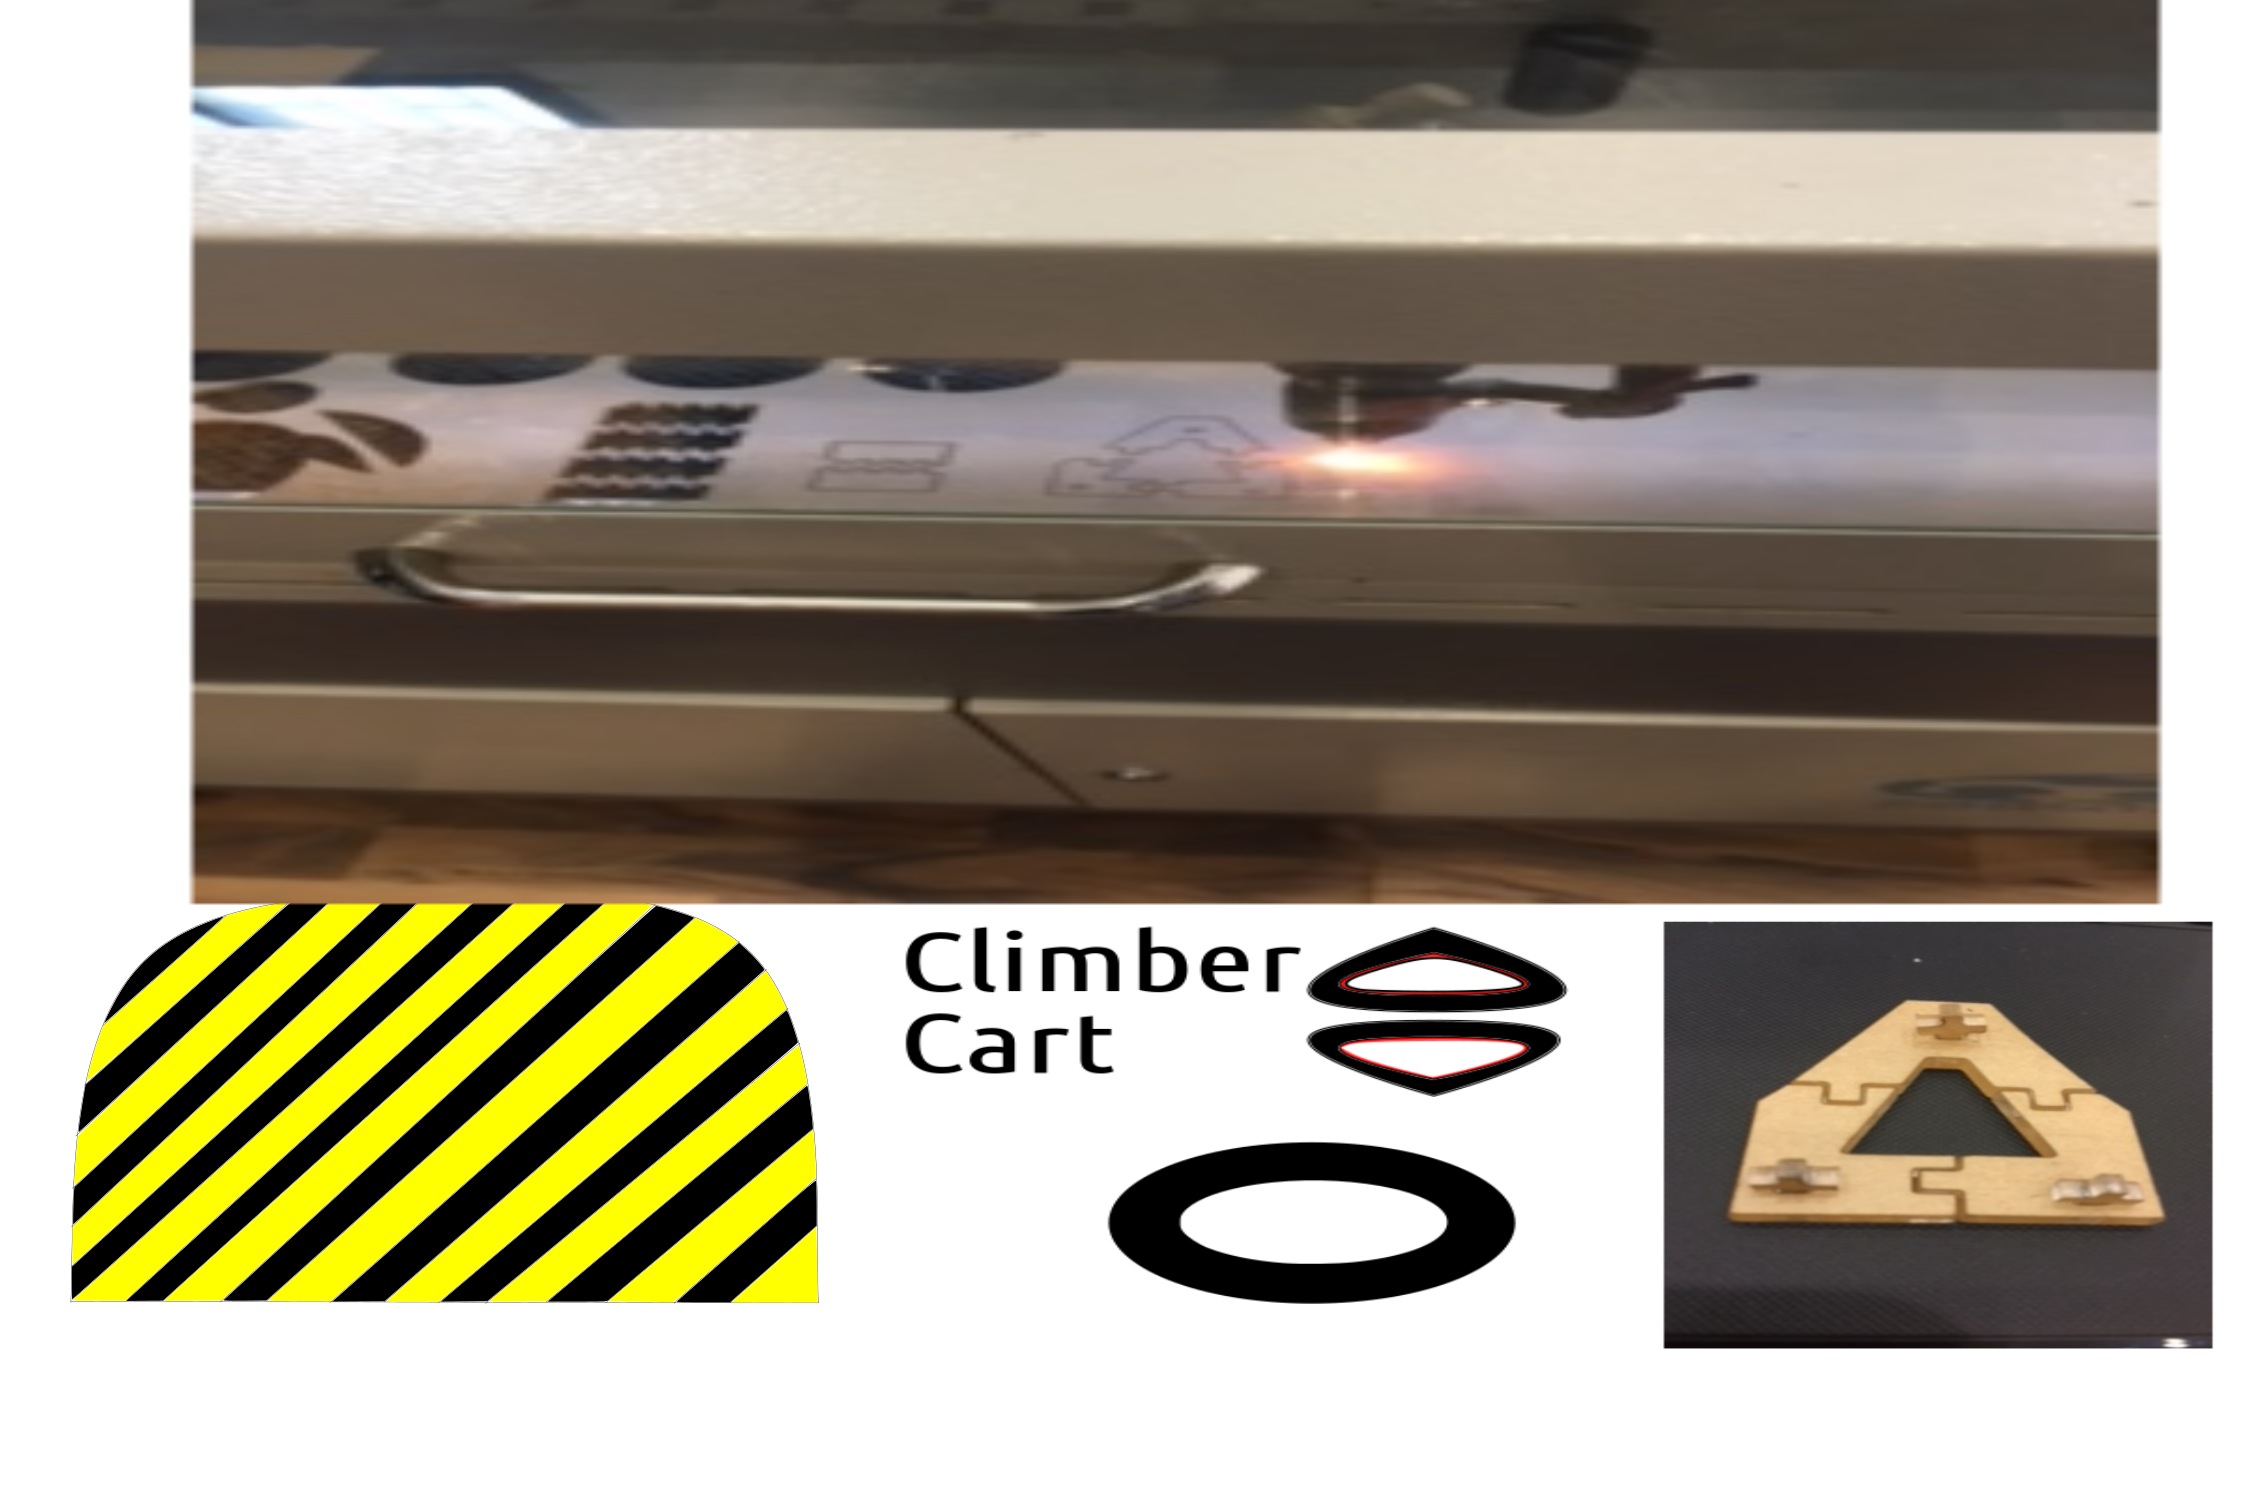
Laser Cutting
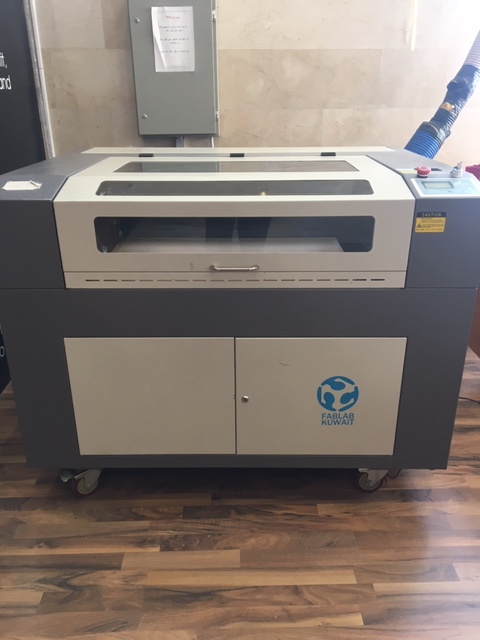
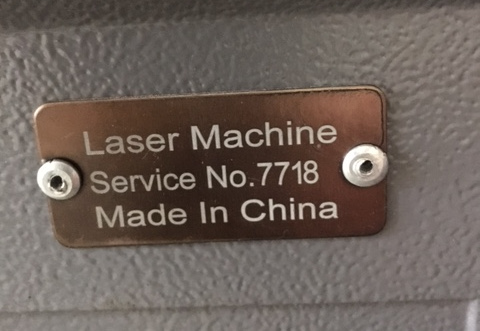
About the Machine
In regards Laser Cutting, the machine we are using is Made in chine with no brand name mentioned.:
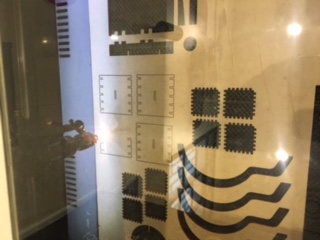
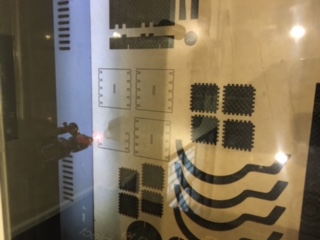
Designing Using Inkscape And Cutting
I have worked in doing the design in inkscape the design is as follows.
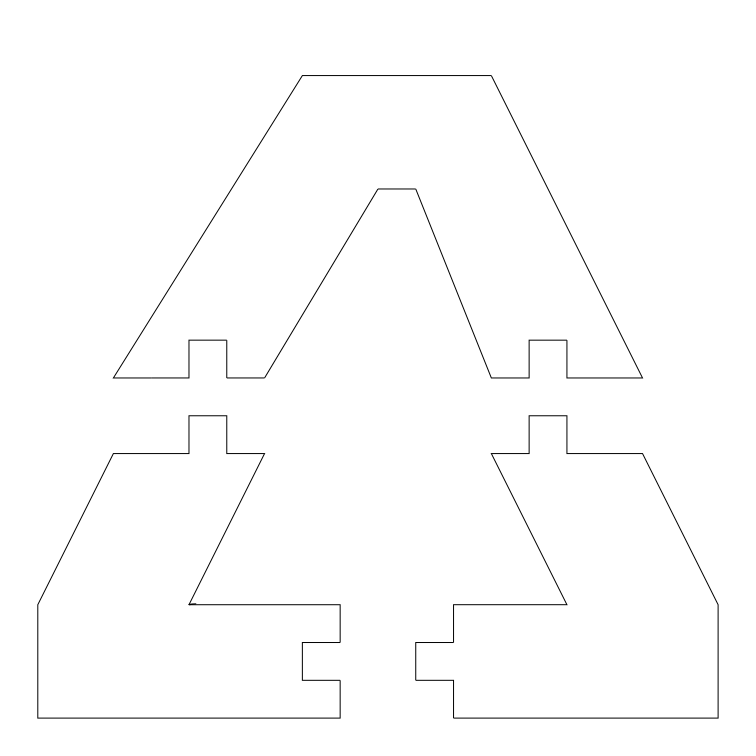
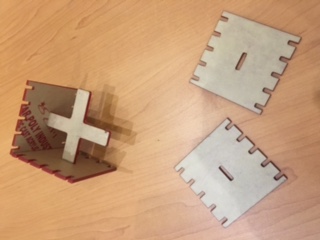
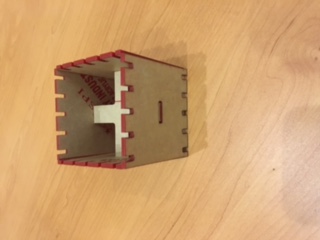
the material used is acrylic 3mm. In the begging the space for the whole and filling part is 3mm. After cutting the object the fitting became loose with some measurements errors.
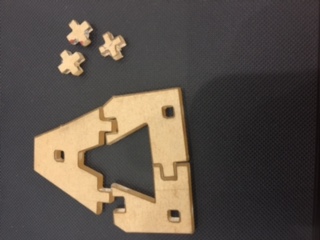
Therefore, I reduced the size of the holes by 0.13mm from each side and re-cut the design.
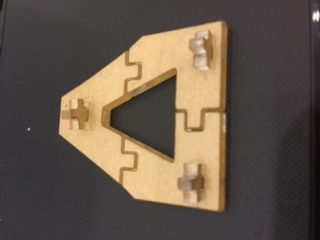
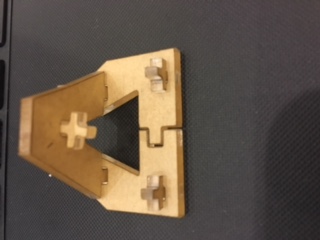
I noticed that handling acrylic 3mm is not flexible with the measurements which means you have to be really accurate with the measurements. In addition, the small parts did break during removal.
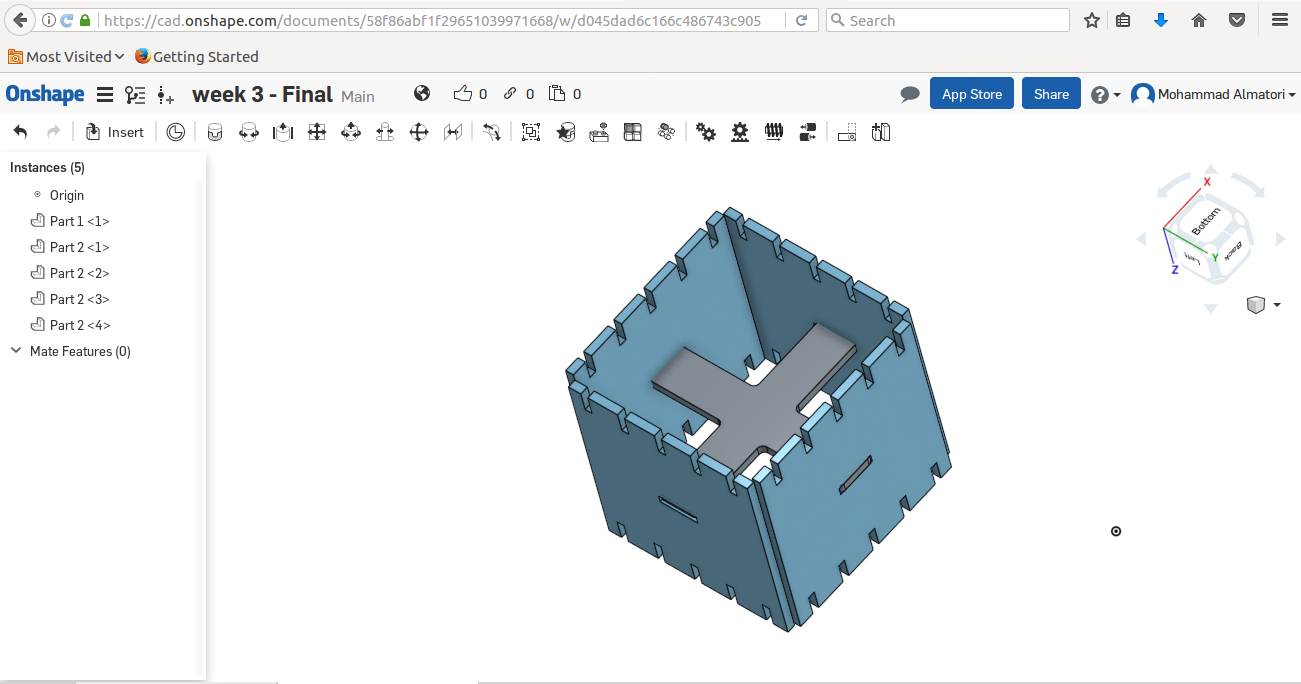
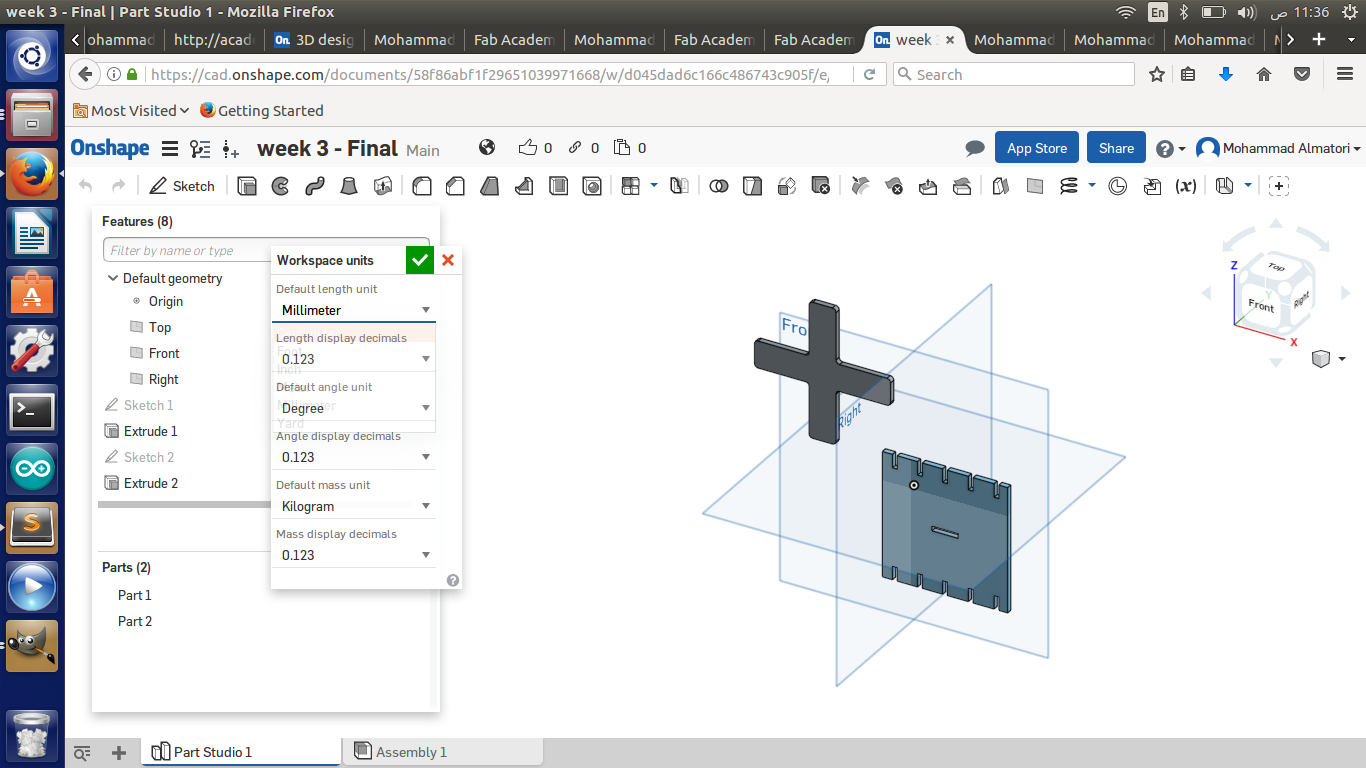
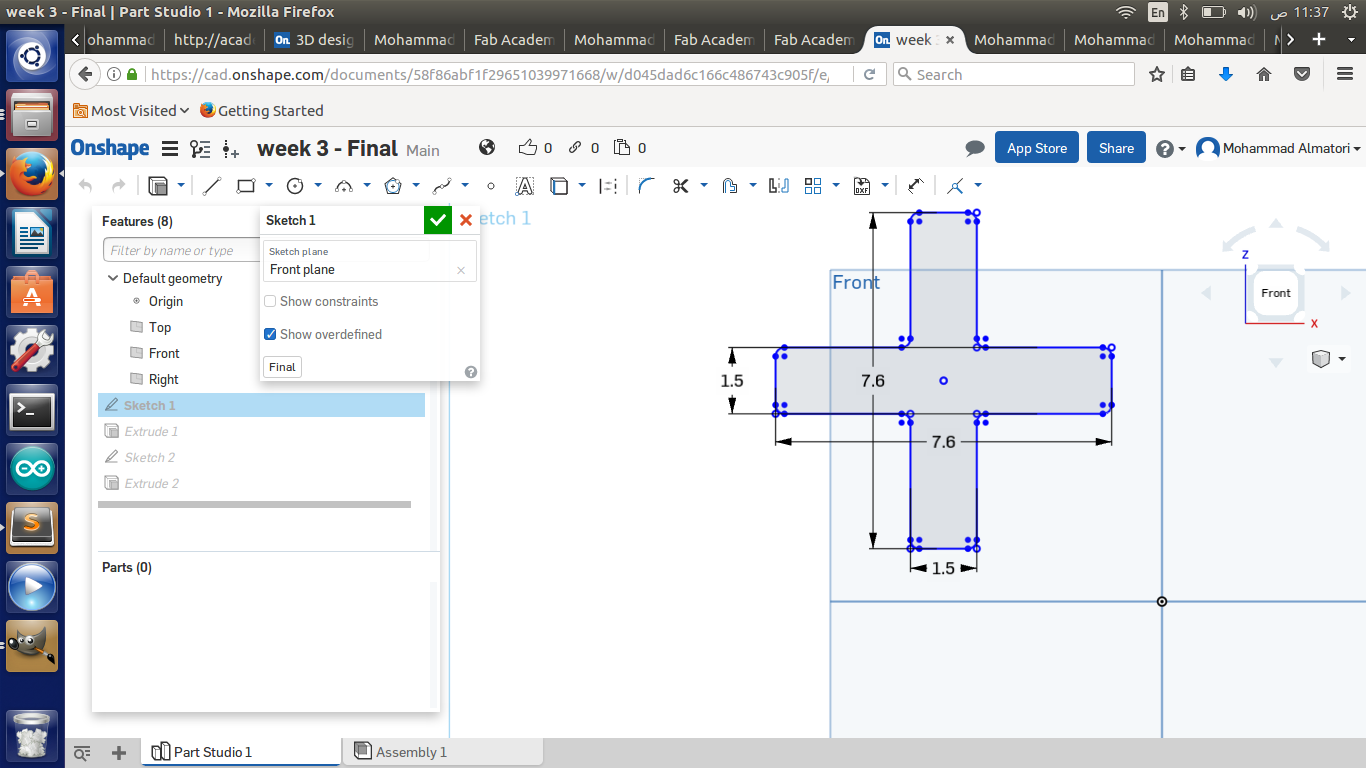
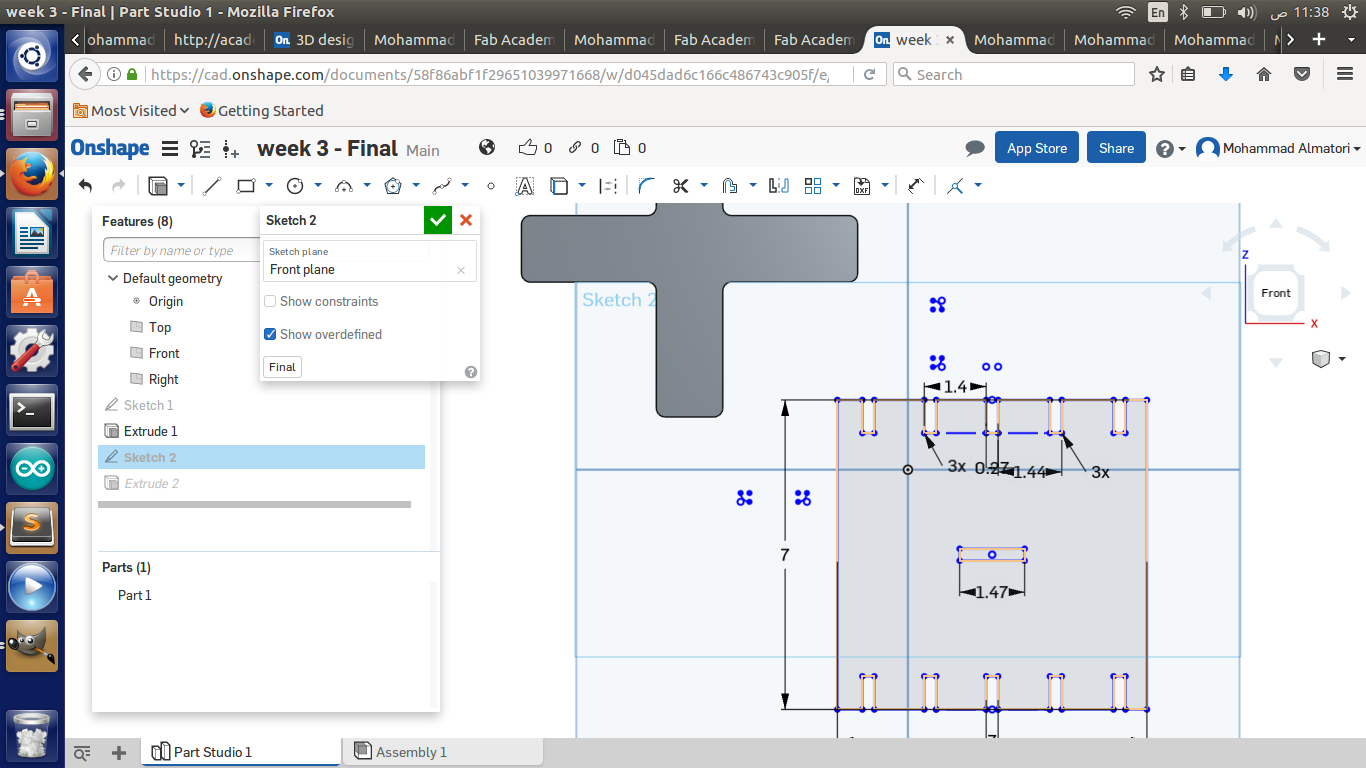
Designing Using Onshape
I have also used Onshape application to design for the laser cutting with different shape. designing with Onshape had a main advantage such as it was easier to duplicate/add edges designs more over it is better for the final check as it is shown in 3D.
How to Parametrically Design
Onshape allows the user to Parametrically Desing a shape. Below is step by step, How to set your parameters.
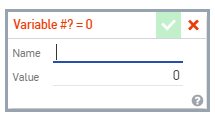
How to use Variables:
One more option in Onshape is using Variables do dynamically control the parameters. The way in using the parameters is as follows:
First click on the (x) icon shown below:

In the dialog, select individual features, then Enter a name and a numeric value “Noting the variable name is case sensitive”. Then click √.
Create a dimension, in the dimension field enter # and the variable name. Save the dimension; the variable is replaced with the value and the expression. When you double-click the dimension for editing, the variable is displayed.
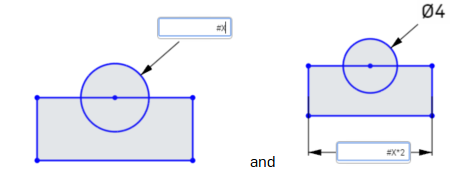
you can use variables anywhere you use expressions in a Part Studio. For example, in an extrude or revolve operation. Start the operation as usual (in this case, Revolve), in the numeric value field, enter # and the variable name.
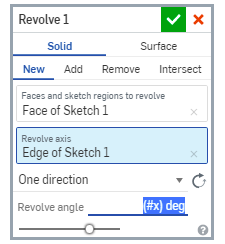
Accept the feature. When you edit the feature, the solution is displayed in the numeric value field.
How to use Laser Cutter Software
The following are the steps required to laser cut your design using the software:
1- Lunch the software.
2- Import your design file.
3- Arrange your files locations as per the acrylic sheet.
4- Dowload your design.
5- Run from the machine.
For more details of how to use the software. please refer to my following tutorial:
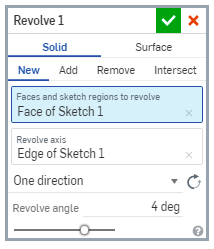
As shown in the picture, from the application we can set the speed and the power of the laser and process. the speed effects the cutting through the acrylic based on its thickess. based on the tests I did on the machine. setting the speed to 40% cuts though 3 mm acrylic, while 20% cuts through 6 mm acrylic. Moreover, Controlling the power allows you to either do cutting or engraving to the used acrylic.
Cutting and Assembling the OnShape Design.
Download Files
Square_Box.
Ground_Warning_Sign.
Final_Project_on_Device_Stickers.
Traingle_A.