WEEK-2: Computer-Aided Design
The 2nd assignmenet in the Fab Lab was to do the following and report every step taken during the process.
Learing outcome
1) Evaluate and select 2D and 3D software
2) Demonstrate and describe processes used in modelling with 2D and 3D software
Have you:
1) Modelled experimental objects/part of a possible project in 2D and 3D software
2) Shown how you did it with words/images/screen shots
3) Included your original design files
2D Design
Rasters and vectors defined
Vector images are the type of images with mathematical base or formula that shows how the image is shaped, colored and boarded. These images retains the apearance whether we increase the size of the image or not due to the math base ofthe image that will automaticaly calculate the image size.
On the other hand, Raster images are made of pixels simply to display the images. for instance, raster images size when it gets increased it gets blurry since it does not retain the size and the apearnce.
2D Youidraw
YouiDraw was a software suggested by the local instructor that I found very user friendly to my project needs. It has the option of all objects available. And to be more precise, I have used an insert picture option that I couldn't find in the previous softwares. So what I did was to mix an insert a picture with a hand drawn objects of a mobile phone and a Chip that will be installed inside the ball. The brush option was very creative in this software and it gives a touch to the end product to be drawn in a nicer way.
My evaluation for this 2D software is that it is a very user friendly and its administration set up was very easy to do. No Sign up needed. Sign in with your Google account. YouiDraw works on also on Google drive. All the information I provided are secured by Google such as the designs, and data are protected as well. It is available through the net to be used instantly regardless of the operation system installed within your laptop.
I highly recommend this software and I will definitely use it to carry on with my 2D designs once needed for my project. In comparison with the GIMP software for 2D design, I will be using YouiDraw software for my project due to the previous reasons mentioned above.

2D GIMP
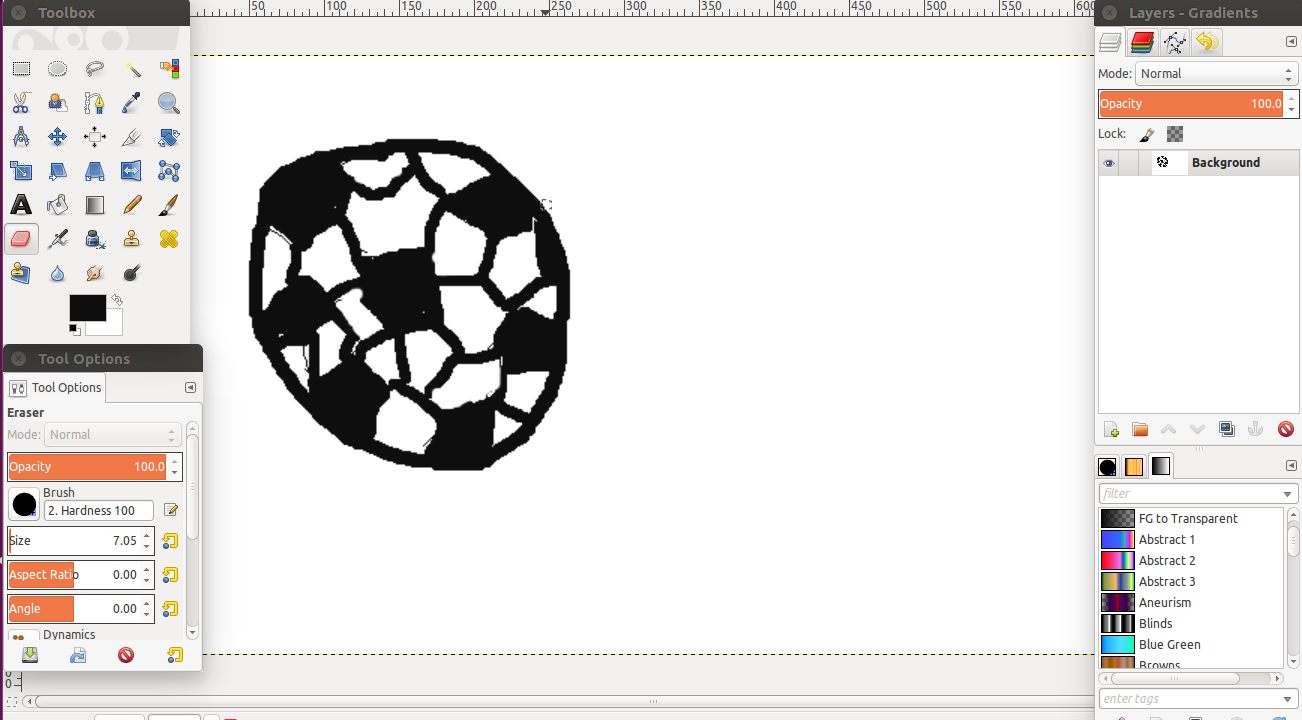
I have decided to selected the GIMP software to draw a soccer ball by the mouse cursor. I didn't want to use the existing circles to start drawing in 2D. I wanted to use the by-hand option to draw a ball in order to asses the flexibility of the software in case I need to use that option in the future.
My evaluation for this software is below average. There are lots of simple icons that requires lots of hassling and hunting in order to find them such as the crop option or even the draw option itself. I can also say that GIMP lacks the Adjustment Layers. You can make a new layer, apply a Filter, and then tweak the opacity or blend mode, but it is a full image layer. At this point I knew I have been exposed to other softwares that is more flexible and user friendly especially at the 2D level. The options available are very limited.
3D Design Software Used
3D Onshape
I found the website at first very complicate and very tough to use. A tutorial of the software was sent to us and then i started to pickup the software a little bit. The videos we have seen showed that onshape is a full cloud professional 3D CAD system that lets design teams work together on any device at any location in the world just like the D tinkercad – with no hassles. It also provides instant access to any design you have worked on through the system.
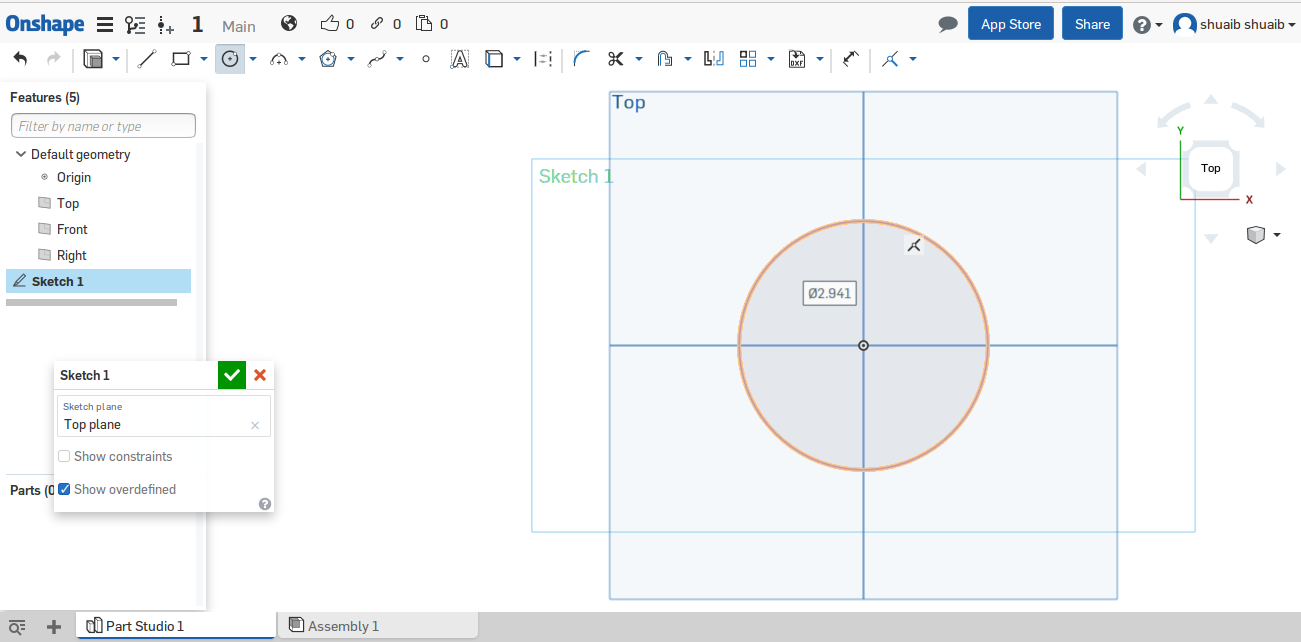
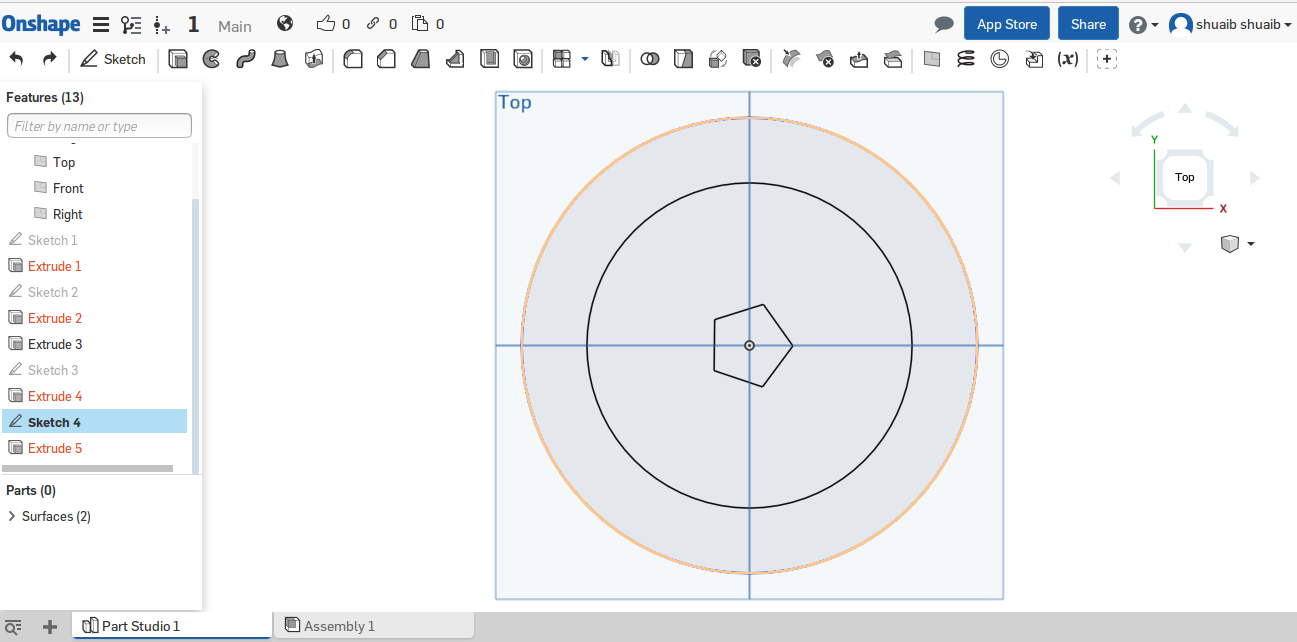
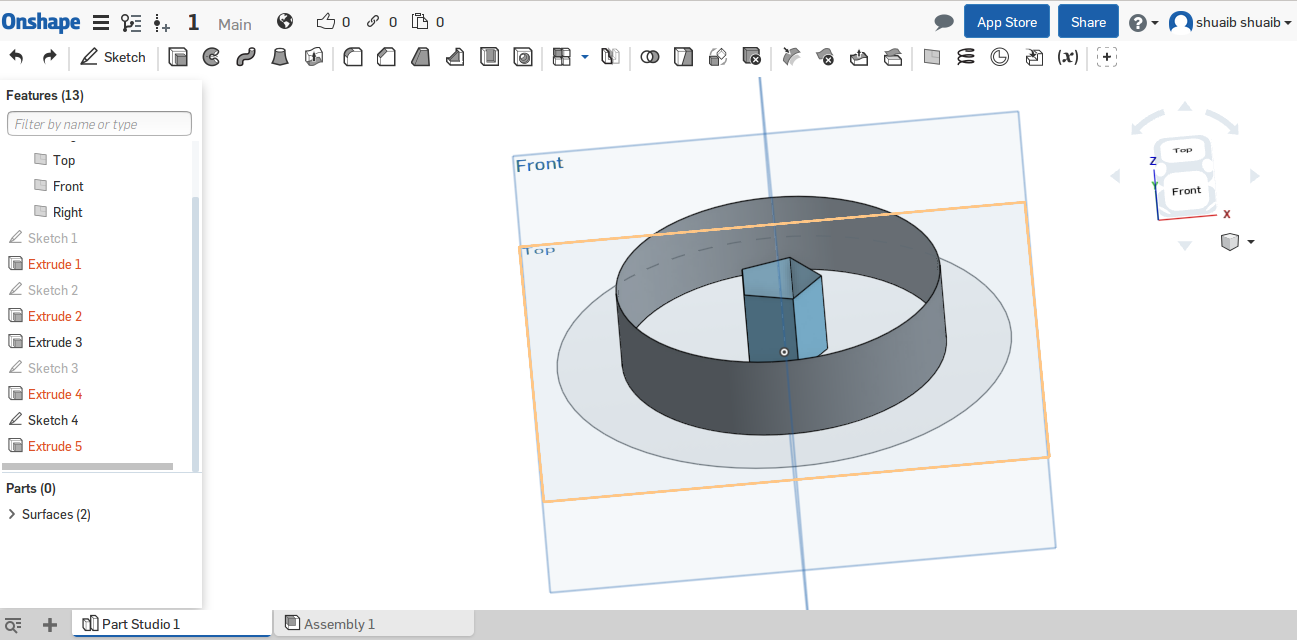
When I started using the software I used the same approach for any other software used in this week which is to draw something similar to my one of my original ideas and make sure it is user friendly and related t my end result. So when I started, I designed the shape of the ball print and the circle around it on a 2D platform as shown below in the pictures. The I chose another 2 other objects to be placed on top of the existing circle to represent a whole within the ball itself and could also relate to my project. Then I used the option “extrude” to show the objects I draw in 3D. Here are the files used and snap shots of each of the pieces designed.
Piece-1 ... Piece-2 ... Piece-3 ...
here is a link for the onshape public linkof the files above. Click HERE.
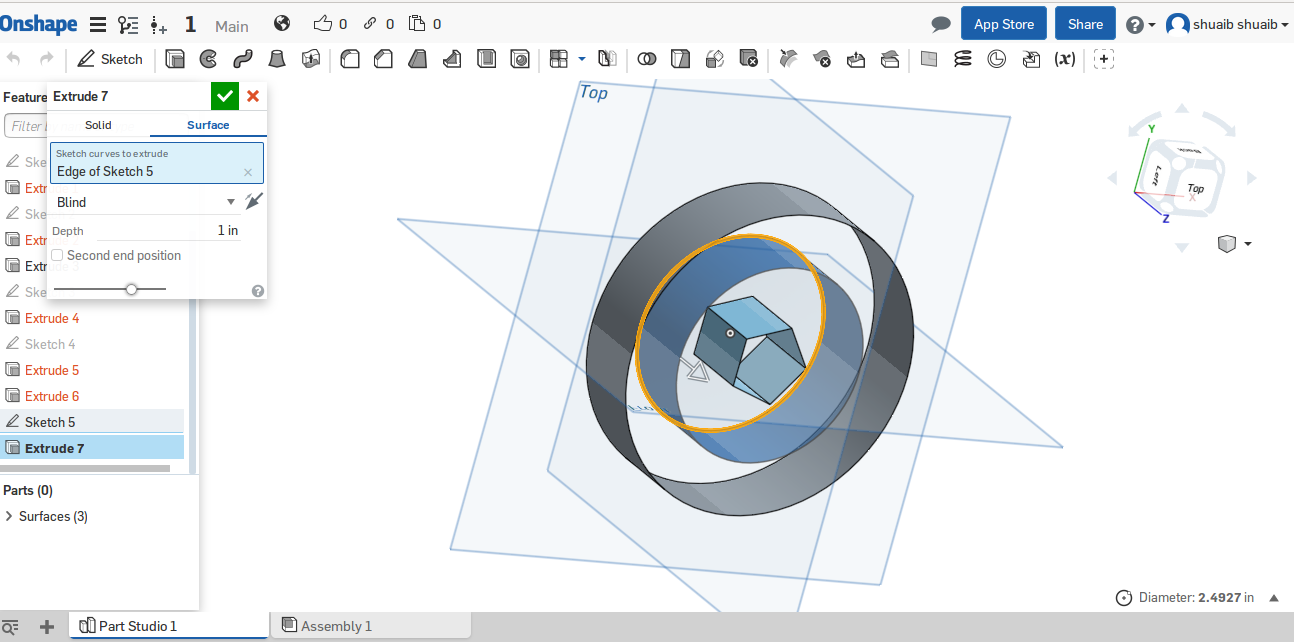
My evaluation for this software compared to tinkercad is that Onshape is more complicated and less flexible for me to utilize especially toward my final project. Since I am not a very familiar with 3D and 2D designs, I was not comfortable using Onshape for my final project even though the recommendation has been very high from the fablabers around me. I disliked the software also when I miss multi perspective views in one environment. Here are 5 useful toturial videos done by our local instructors bu in ARABIC thogh:
Series of Onshape Toturial Video (5 Useful Videos)
Here is a small comparison I have done to further evaluate both software fairly:
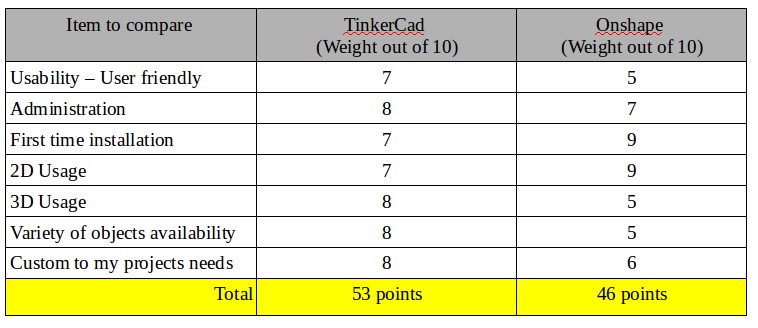
With the evaluation criteria I created above, it helped me select the best software to move forward with in my project and the following week assignment. I will definitely chose TinkerCad over Onshape
3D Tinkercad
I started off by learning how to 3D design in signing up in the www.tinkercad.com software . The first assignment was to create a kids toy out of the 3D. I read about the software first and found uut that tinkercad is a web based architecture software that enables designers to collaborate on designs from across the world at no cost. 3D design files are stored on the a server which are very easy to access from multiple locations or computers.
In the beginning, the tinkercad software was hard to use. I started off by playing with shapes, locating the shapes and squares on the 3D platform, then moving into merging 2 different shapes int each other. I tried the grouping option then hollow one shape into another one. My assessment for the software is that it is very flexible and user friendly (with the mouse and NOT on the laptop pad).
Finally the toy task was assigned to us by the local instructor where we had to merge more than one object. So I started with the the sphere shape and the circle shape. I merged them together and added 3 thin squares and grouped them into the circle and the sphere. I kept the object solid and grouped them to come up wit the final figure in the picture below.
The development of this object will help me in my own project by working on the round ball itself and sliding the control chip that will be placed inside the ball.
Here is the file where you can view the toy design I developed.
CLICK HERE
here is the prcess that was done in the task assigned:
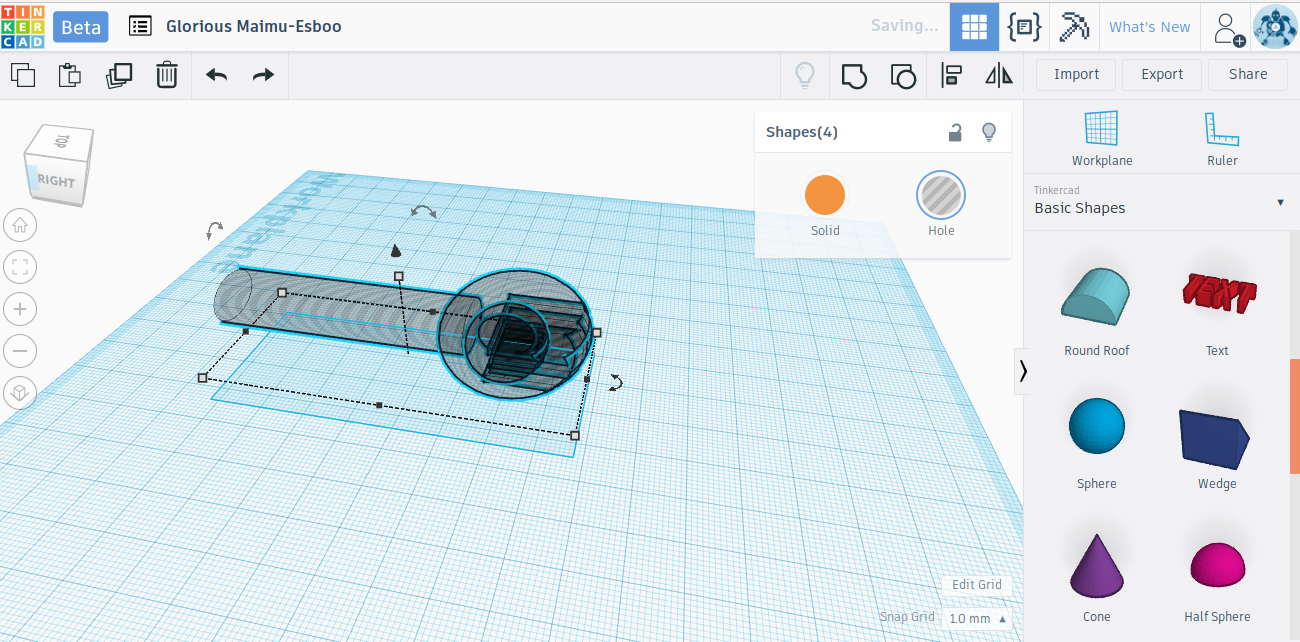
in the picture above, i have used tinkercad to define the pieces and put them together for a profile view to see how the pieces are connected to each other.
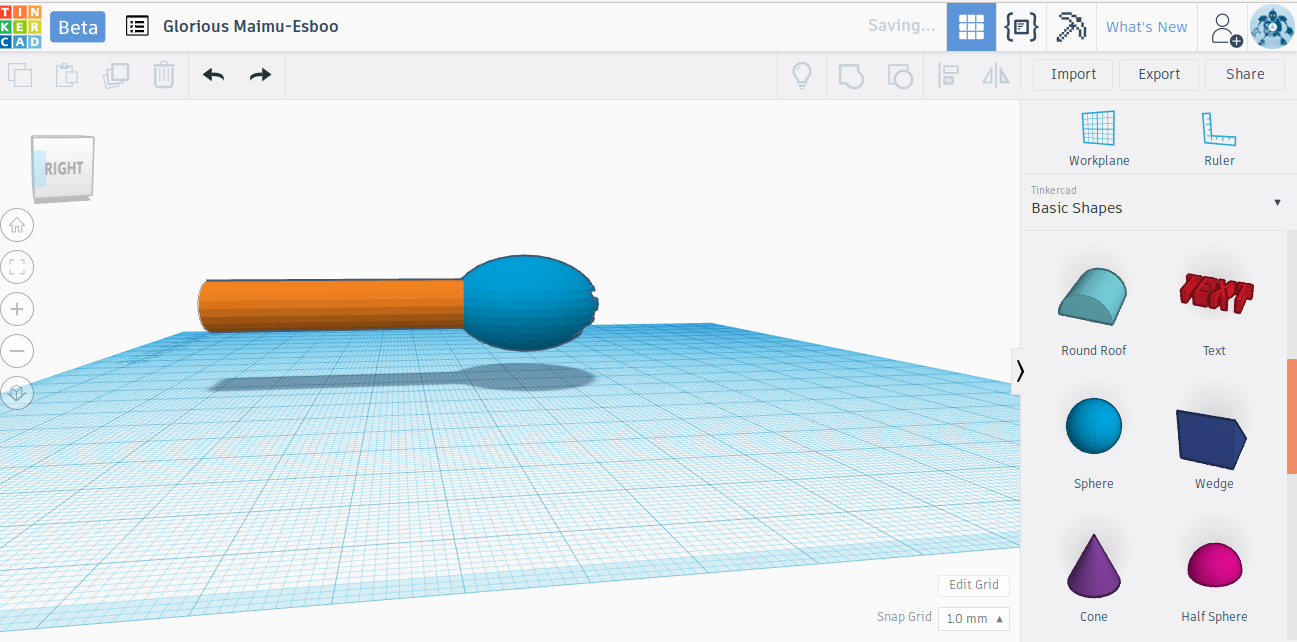
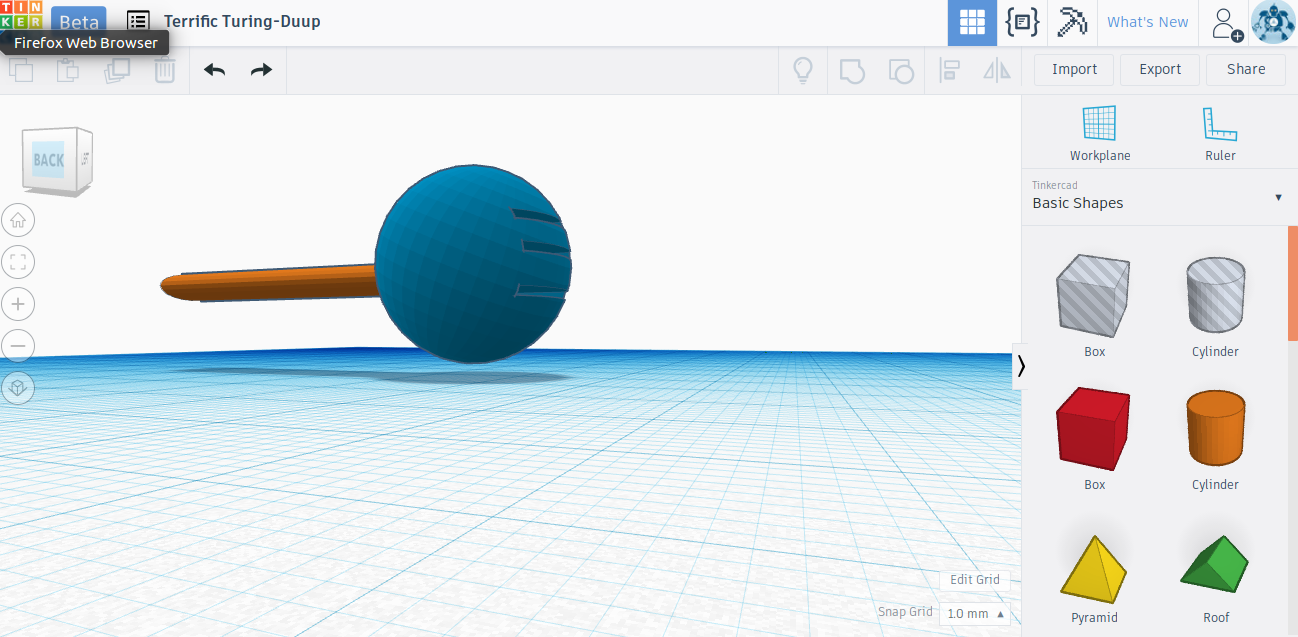
in the 2 pictures abve, the final design was prepared in 2 diffrent views.