Week 09
Mechanical Design

The ninth lecture on Wednesday March 22nd was about Mechanical Design: principles, materials, fasteners, framing, drive, guide, couples, bearing, rotary, liquids, mechanism. Assignment given by Neil for this ninth week was:
- Design a machine (mechanism and automation) including the end effector
- Build the passive parts and operate it manually
- Document the group project and your individual contribution
I knew that machine-building assignment would be maybe the hardest one to me, and now I was facing "the beast": this is intended as a group assignment but I follow Fab Academy as a remote student from the place where I live in Venice Metropolitan Area, my Fab Academy node (Fablab Cagliari) is about 1000 kilometers away and I didn't feel very comfortable and confident to carry on a group project through remote collaboration methods and tools, and without "touching the atoms".
I discussed this situation during previous week regional review and I followed weekly global review prep meeting where Neil at first said "an individual can be a group" but then also said that this assignment is about "collaboration"; as a conclusion, regional guru Fiore said it would be OK for me to study the different mechanical design techniques (basically how axis are made, and how to make them move) and try to build a machine as a little experiment and a parallel project.
Parallel Project: Drawing-Board Machine
An architect friend of mine recently moved to a smaller studio and decided to discard the old drawing board he had been using when student and his the very first years as a professional; since CAD software and plotter machines, it become useless: in fact, despite the fact that in origin this was a quite expensive tool, nowadays boards like this can be found on auction websites or local second-hand announces websites for a very low price or even for free as you provide transportation, as it happened in my case some months ago.
The idea behind this it was to give a new life to this drawing-board, transforming it in a "magic-self-drawing-board" capable of producing drawing through colored markers or, to say it better, in a computer-controlled-drawing-board 2 axis machine: now with Fab Academy Machine Building Assignments, I thought the right time had finally come to bring this idea to life! :)
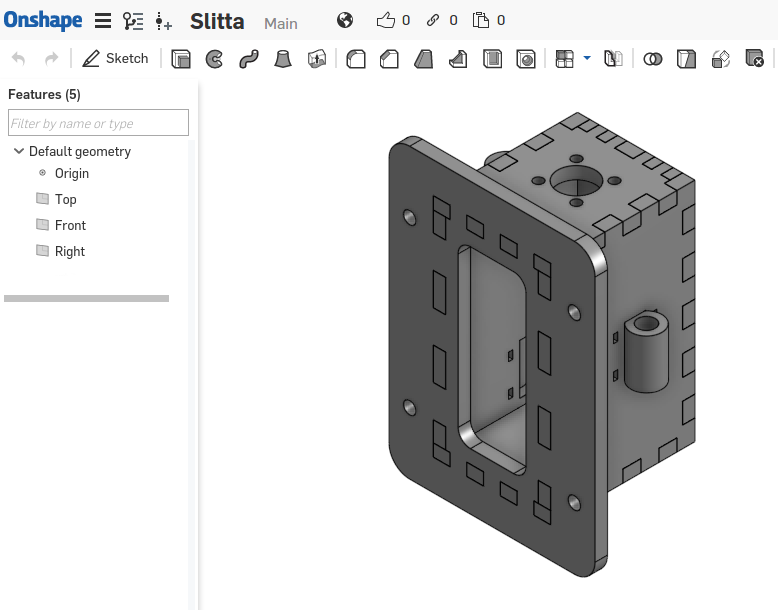
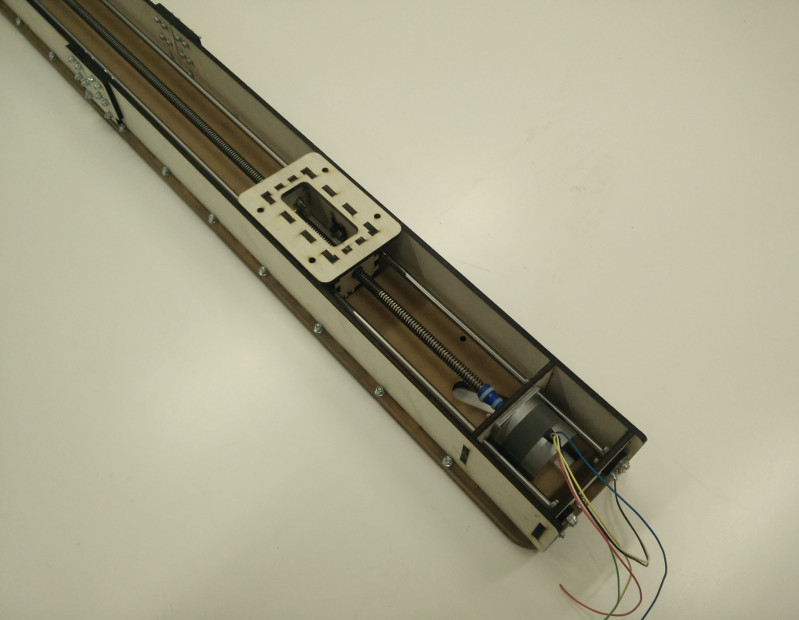
(...designing Y-axis) /1 -sled
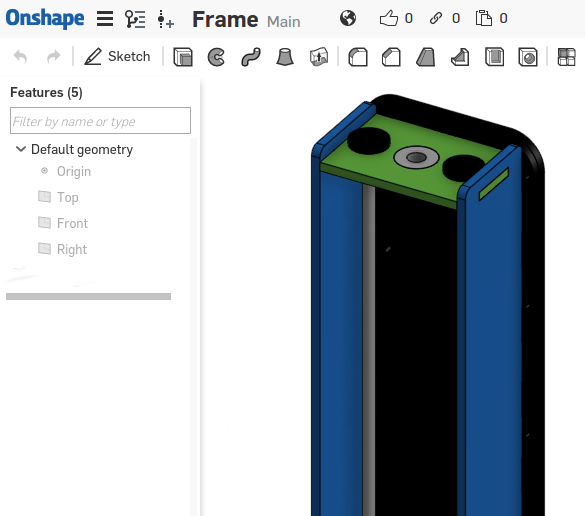
(...designing Y-axis) /2 -frame (upper end)
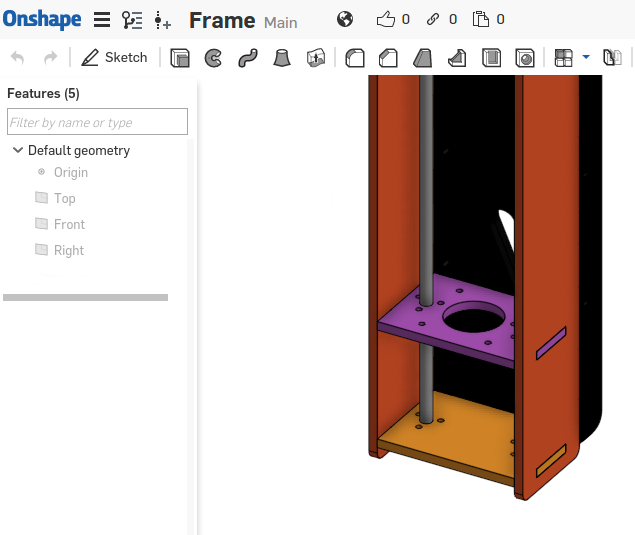
(...designing Y-axis) /3 -frame (lower end)
Assembling and manual testing Y-axis
and here's a small "Hero Video"
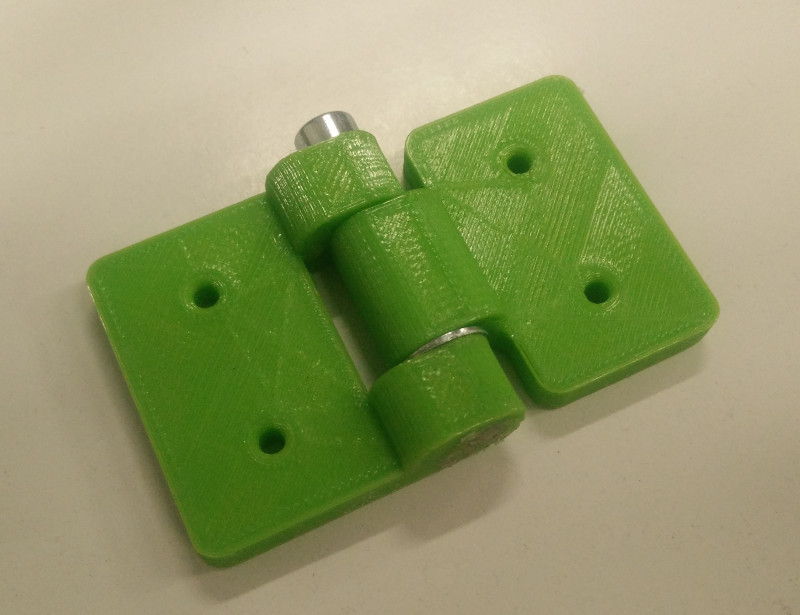
Bonus Project: MailPlus Door Hinges
Recently I was thinking about my MailPlus Final Project and figuring out about the ways the main and upper doors are going to move; then during this week's lecture I heard about mechanical principles and though about how to produce my own hinges; that is basically a problem about mechanical design (although at a very beginner-level): 3Dprinting two parts that are complementary between them and with some metalware fasteners (screws, nuts&bolts)
Designing the hinges

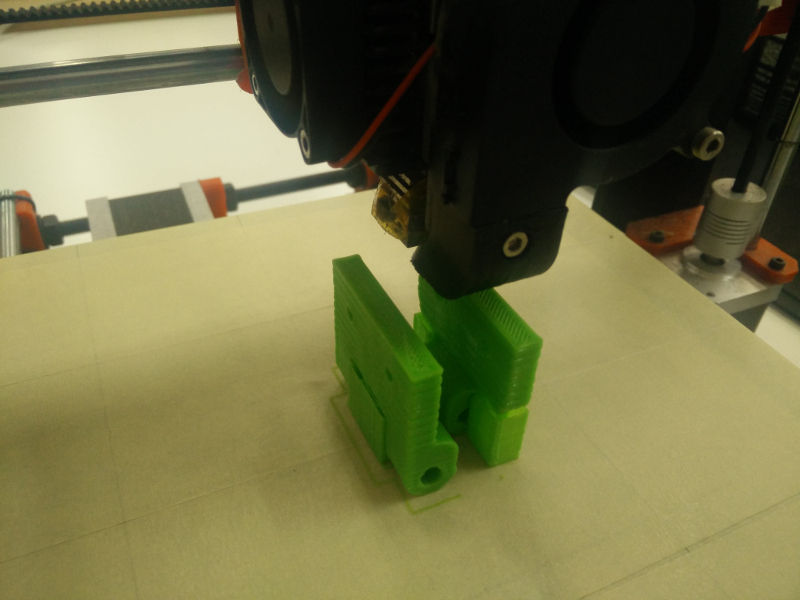
3D Printing
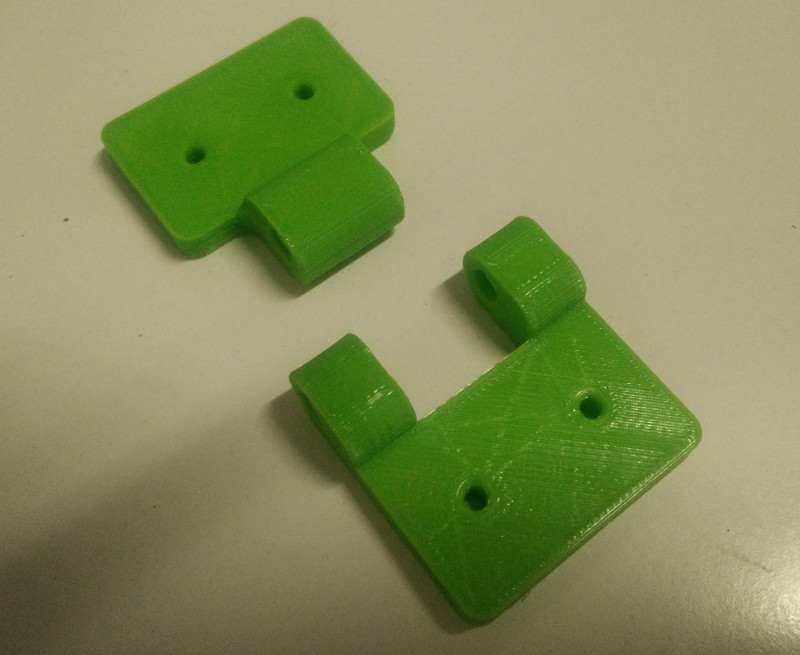
3D Printed Parts
Putting everything together
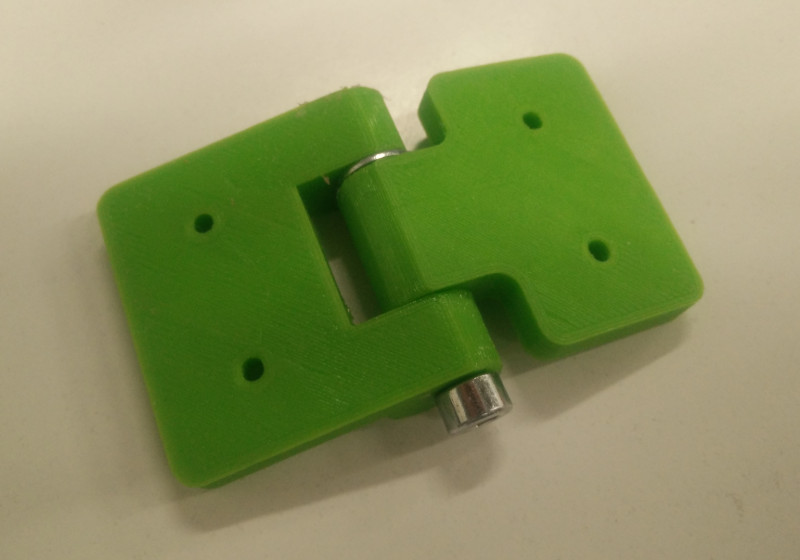
...working fine!
Source files
- slitta.sldprt -Onshape output SLDPRT File
- frame.sldprt -Onshape output SLDPRT File
- hinge.sldprt -Onshape output SLDPRT File
- hinge-A.stl -Onshape output STL File
- hinge-B.sldprt -Onshape output SLDPRT File
- hinge-B.stl -Onshape output STL File