Week 01
Principles & Practices + Project Management

"Hello, world!" My name is Sebastiano and I'm a continuing student from Fab Academy 2016: you can find more details about me on the About Page. I was looking forward the Fab Academy lectures and recitations new beginning! I enjoyed the first lesson on Wednesday January 25th, and the final assignments given by Neil for this first week were:
- Plan and sketch a potential Final Project
- Work through a git tutorial
- Build a personal site in the class archive describing you and your final project
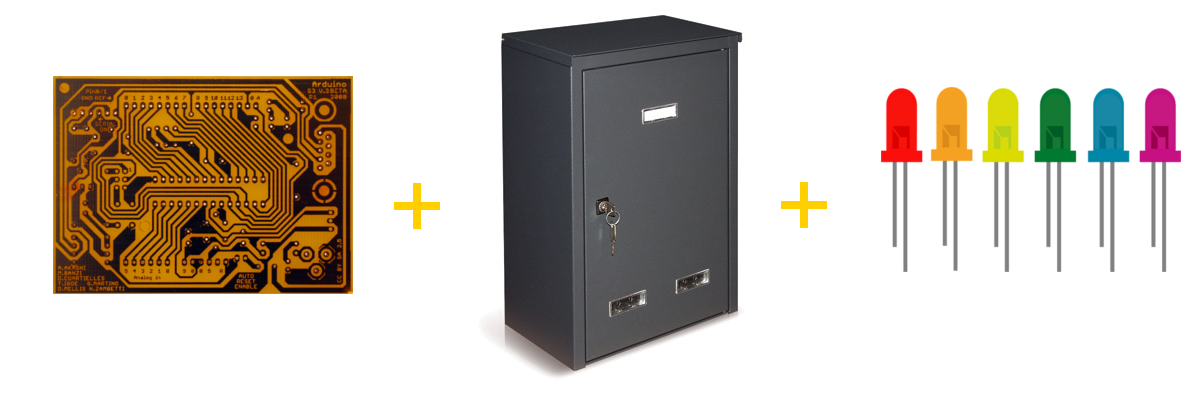
Potential Final Project: "MailPlus Reloaded"
First of all, the potential Final Project. As explained by Neil, a "Final Project" has to be the result of the Fab Academy learning semester; therefore, it has to include and combine different fabrication techniques; about my Final Project I decided to work on the very same idea I had at the very beginning of Fab Academy 2016. Being sometimes an absent-minded person, some years ago my physical mailbox got full and some important mail went lost; since then, I was unsuccessfully looking for a "smart" mailbox, able to interact with me and give some advice about its state; being then a Fab Academy student, the first idea that came to my mind while thinking about the "Final-Project", was to build such a mailbox, and I named this project "MailPlus".
Along with Fab Academy 2017 I decided to keep this idea since it's still in my head and in my needs and, as far as I know, nobody yet has put on the market or even fabbed such an object. Furthermore, this potential project was already discussed with the group of students and instructors during Fab Academy 2016 Regional Review (Italy Area) and everybody, including regional gurus Fiore Basile and Enrico Bassi, found it interesting and with a good potential; so here we go with "MailPlus Reloaded" (Yes, I'm a big fan of The Matrix Trilogy!). You can see the MailPlus concept image on the top of this page; for documentation about the process and the download of .xcf editable file ("eXperimental Computing Facility, native image format of the GIMP) please refer to Week 02 assignment :)
Working through a git tutorial
git is a free and open source distributed VCS designed to handle everything from small to very large projects and originally created by Linus Torvalds in 2005 for the development of Linux kernel; understanding git usage and leaning git basics are essential elements for Fab Academy students, since every student is required to contribute to the web documentation archive, uploading and keeping up-to-date his/her very own website, with the work he/her has done during Fab Academy semester.
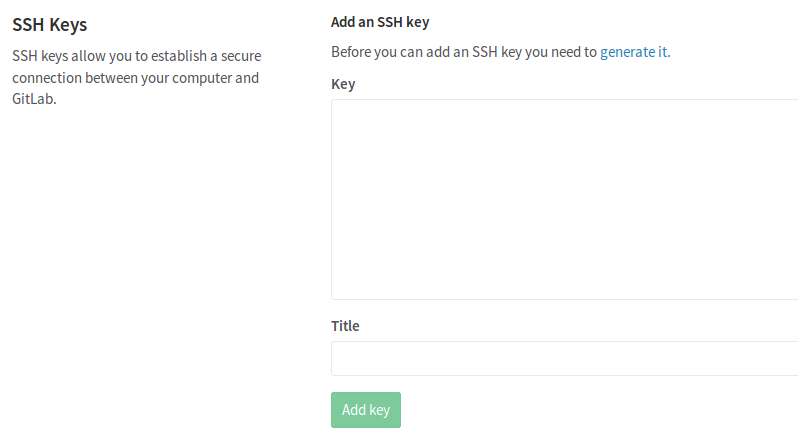
Fab Academy archive indeed consists in two systems: a machine running the Gitlab software where files are uploaded while tracking file versions, and a machine running the Nginx webserver where all uploaded content is published; in order to upload content to the archive, I needed to setup a Gitlab account on the first machine and then upload to it my SSH key.
First problem: since I don't have a SSH key, how can I generate one? Little premise: as far as I can, I prefer using a GNU/Linux system; to create a new SSH key I used ssh-keygen on terminal
~ $ ssh-keygen -t rsa -b 4096 -f ~/.ssh/faba -C "foo@bar.me"
where "foo@bar.me" stands for the e-mail I used for my account on Gitlab system; then copied SSH key with xclip, a very useful tool that reads from standard in, or from one or more files, and makes the data available as an X selection for pasting into X applications
~ $ xclip -sel clip < ~/.ssh/faba.pub
and back to the web browser pasted the SSH key inside the Gitlab system after being signed in ( => Profile Settings => SSH keys)
Done! Going ahead through the git tutorial.
It's possibile to find a plenty of git tutorials over the Internet. A good starting point is the Pro Git Book by Scott Chacon and Ben Straub, which is released under a Creative Commons BY-NC-SA license and can be found directly inside the official website; I also found useful the 30 minutes video Git Tutorial for Beginners by Corey Schafer.
First thing I did to getting started with git was of course installing git software; this is very simple on a GNU/Linux system, like Debian or derivatives (e.g. popular Ubuntu and Mint distributions), as opening a shell terminal and using apt-get package manager
~ $ apt-get install git
After having git correctly installed, I configured git identity
~ $ git config --global user.name "sebafru"
~ $ git config --global user.email "foo@bar.me"
by the way, it's always possible to check config settings (including identity settings) through the command
~ $ git config --list
I also configured SSH identity inserting in file ~/.ssh/identity
#Gitlab
Host git.fabacademy.org
  HostName git.fabacademy.org
  IdentityFile ~/.ssh/faba.pub
At this point I created a folder for Fab Academy 2017 and moved inside it
~ $ mkdir FA17
~ $ cd FA17
initialized a repository in this folder, to start tracking an existing project (this creates .git subfolder with all necessary repository files, a "git repository skeleton")
~ $ git init
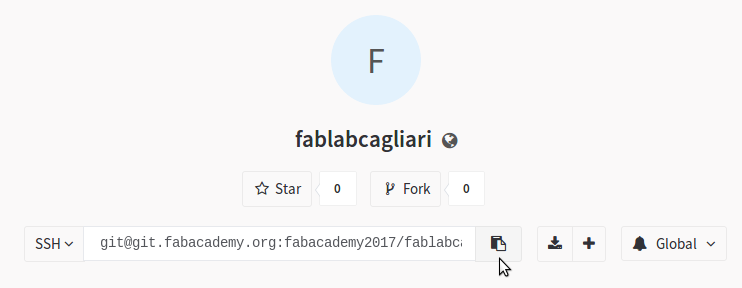
and cloned fablabcagliari repository
~ $ git clone git@git.fabacademy.org:fabacademy2017/fablabcagliari.git
whose "coordinates", going back to web browser, are reported inside the Gitlab system (and first icon button is like "copy to clipboard": wonderful!)
It's possible to track the changes status in local file repository (e.g. changes to be committed, changes not staged for commit, untracked files) with command
~ $ git status
or the same command with short status flag to see changes in a more compact way and more simplified output
~ $ git status -s
Now it's time for the "golden routine": "pull-add-commit-push" :) I used "pull" to fetch and merge changes from the remote repository master branch into the current local repository master branch
~ $ git pull
I used "add" to add files to the index and stage files for commit (-A option is used to stage ALL files)
~ $ git add -A
I used "commit" to record staged files, alongside with identity details (e.g. name and e-mail address, as provided earlier through "git config" command) and commit message (-m option is used to provide commit message, this will appear on remote repository log and therefore on the Gitlab system) to local repository
~ $ git commit -m "commit message"
and finally I used "push" to update remote references and upload committed files to remote repository:
~ $ git push
It's possible to show commit history with command
~ $ git log
A quick online reference for git command is given by Git Reference, a website put together by the GitHub team.
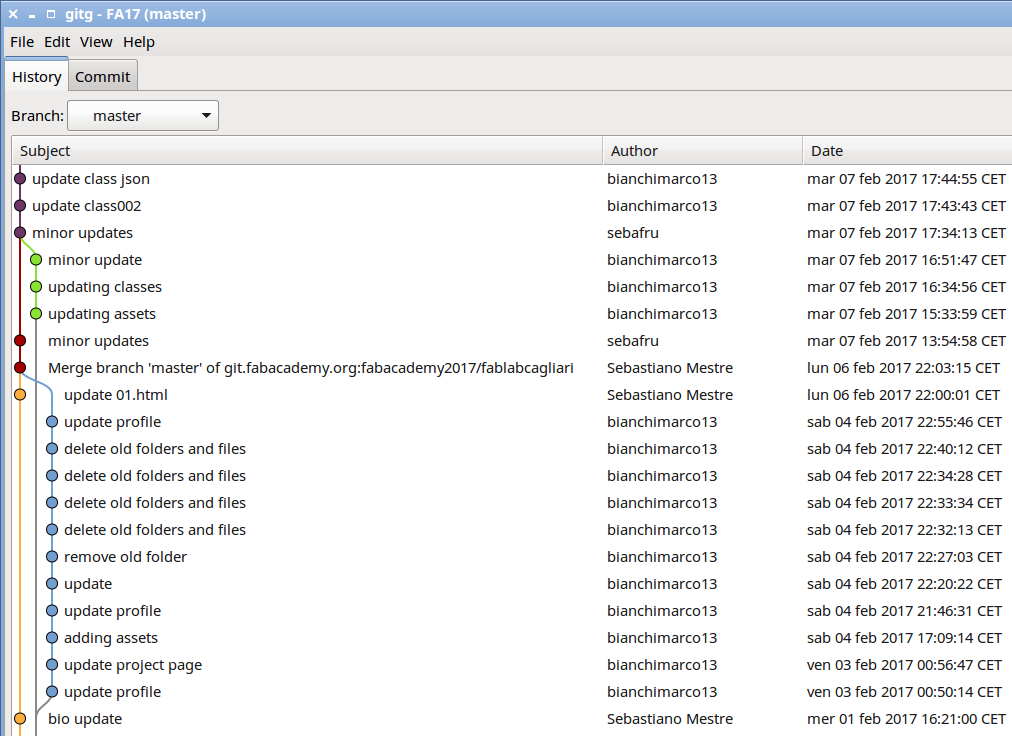
A final note about git: last year I was the only student at fablabcagliari but this year there are two students working on the same repository, so I found interesting viewing branches history: under my GNU/Linux system I used gitg, the GNOME desktop environment graphical git repository viewer; installing gitg software is very simple on a GNU/Linux system, like Debian or derivatives, as opening a shell terminal and using apt-get package manager
~ $ apt-get install gitg
and here here's a screenshot about branches crossings! :)
Building a Personal Website
Before starting to build a Personal Website, is important to understand what a web server is: a computer system (hardware and software) that processes requests via HTTP, the basic network protocol used to distribute information on the World Wide Web; his primary function is to store, process and deliver web pages to clients ("browsers") such as Chrome (the one that Neil mostly uses during his Fab Academy lectures) or Firefox (the one that I mostly use on my GNU/Linux system). Some widely adopted webserver software is released under the terms of a Free Software License, such as Apache (running over the majority of active webservers around the world) or nginx (actually running over a Ubuntu Linux in order to deliver this year's Fab Academy students' Personal Websites). Once a webserver is up and running it is possible to build a website inserting in the default student homepage directory a bunch of files, crafted following some standards.
Standard markup language for creating web pages and web applications is called HTML ("Hypertext Markup Language") and it is often used along with other standards/languages such as for instance CSS ("Cascading Style Sheets") or JavaScript to describe the structure of a web page semantically and originally include cues for the appearance of the document. HTML was originally introduced in 1980 as an Internet based Hypertext system by english physicist and computer scientist Tim Berners Lee while working as a contractor at CERN, giving then birth in 1989 to the World Wide Web; since 1996 HTML specifications are maintained by W3C ("World Wide Web Consortium") and currently HTML is at his fifth version, also known as HTML5.
HTML documents are made of a structure of nested HTML elements. These are indicated in the document by HTML tags, enclosed in angle brackets; an element is in general identified by a pair of tags: a "start tag" and an "end tag"; the text content of the element, if any, is placed between these tags; e.g. to indicate a paragraph the following syntax can be used
<p>Text of the Paragraph</p>
HTML tags may also enclose further tag markup between the start and end, and throug this nesting it's possible to combine different styles to obtain the final visualization result. Furthermore, the start tag may also include attributes within the tag, to indicate other information; such as identifiers for style information, and some tags can be used to embed reference to external multimedia resources, such as images or videos; e.g. to indicate an external hypertext reference (a "link"), the hypertext "<a>" tag and the following syntax can be used
<a href="http://www.website.org/home.html">Name of the webpage</a>
The reference can also be another .html file within the same website, (a "relative link"), and that's the way navigation inside the Personal Website is created
<a href="mailplus.html">Final Project</a>
There are lots of HTML tutorials and references on the web, the most notable being maybe HTML Dog and W3C Schools. An an help with HTML coding and style formatting there's also a good number of HTML editors and frameworks.
As HMTL editor I decided to use Pluma, default text editor of my GNU/Linux system distribution which has also some basic HTML tag-editing support
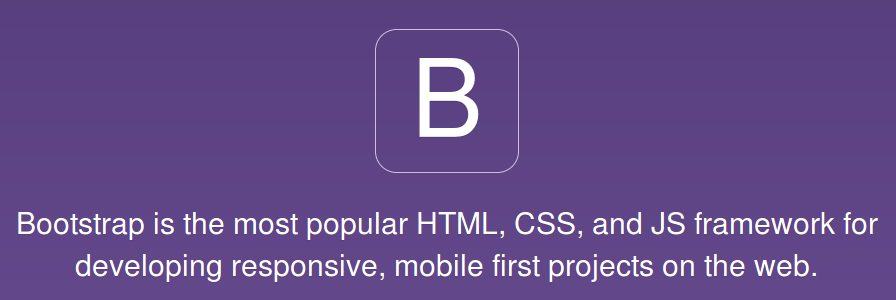
As Personal Website framework I decided to give a try to Bootstrap, a free and open-source front-end web framework for designing websites and web applications; it contains HTML- and CSS -based design templates for typography, forms, buttons, navigation and other interface components, as well as optional JavaScript extensions.
Once created the basic Personal Website structure (main, "assets", "bootstrap" and "jquery" directories), I created the different .html files (index.html, mailplus.html, 01.html, ...) then uploaded everything to my Personal Website home directory on the Fab Academy webserver through git software, as described in the previous section.