Shown how you made your mould and created the composite.
Described problems and how you fixed them.
Included your design files and 'hero shot' photos of the mould and the final part.
Read and linked to the material safety data sheet (MSDS) and technical data sheet (TDS) for the resins that you're using.
I know most people is doing the 3D mold by milling, but as the Assessment book only says design and make a 3D mold I realized it was not mandatory. I wanted to finish the surfboard I had started back in week 3, but the Multicam, (the huge laser we have here at FabLab Barcelona) broke some weeks ago, and laser cutting the pieces in smaller chunks was just going to take too much time I paused that project for a while. Even tough, I wanted to keep exploring the composites made with a ribs mold.
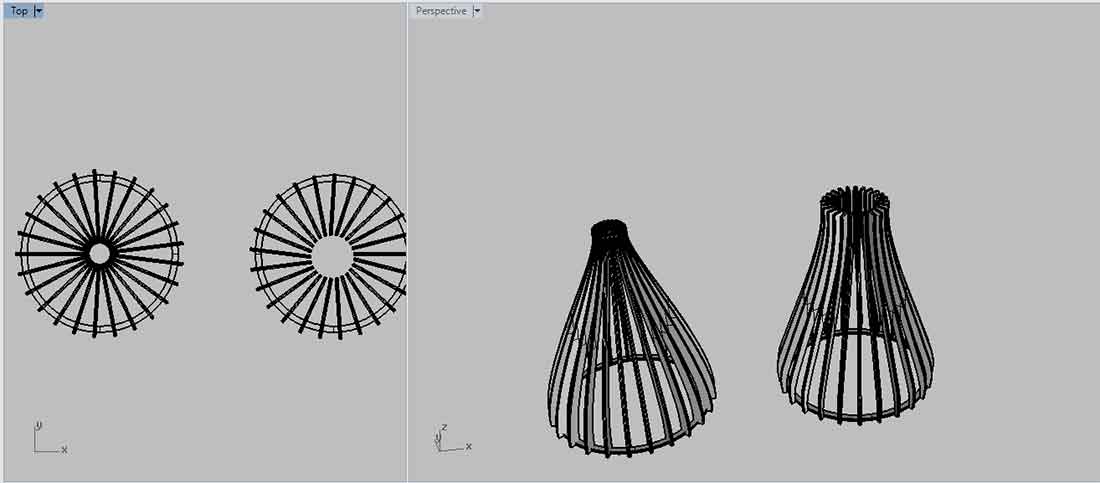
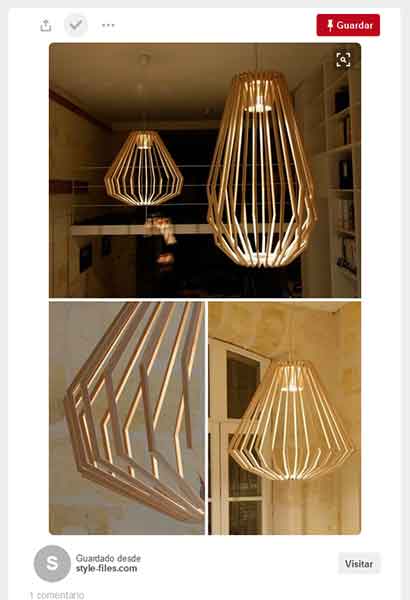
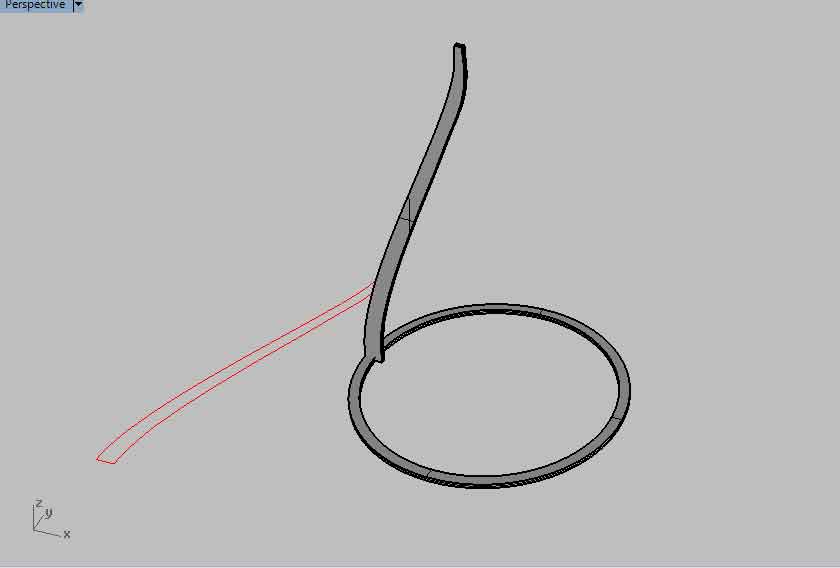
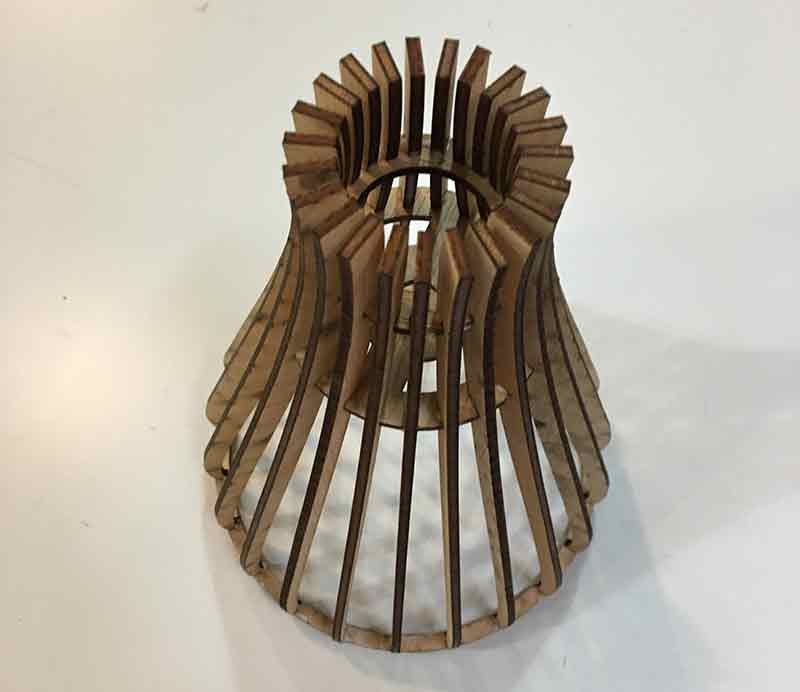
Also during week 3 for the press fit assignment I investigated a lot on ribs made lamps, I run into a lot of designs and I redesign one of them in order to make a whole in one lamp + shade made with wood and composites. From what I learnt from my previous lamp and also thinking on the fabric adherence to the mold I went for more ribs. I first did a couple sketches based on those Pinterest snaps and threw them into Rhino. I started with a spline and a circle and did a polar array adding elements until I was satisfied. This time the design was not a parametric one, so it was mostly a Ctr-z and redo effort.
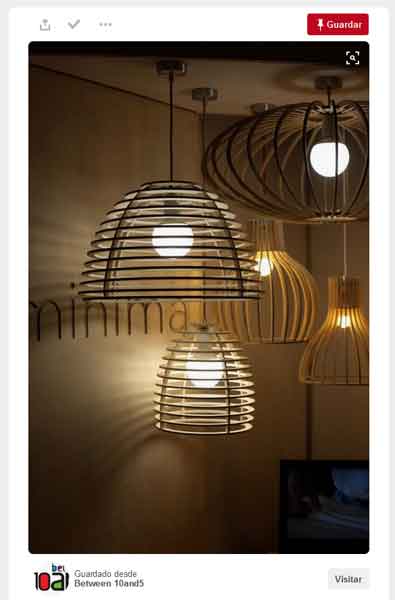

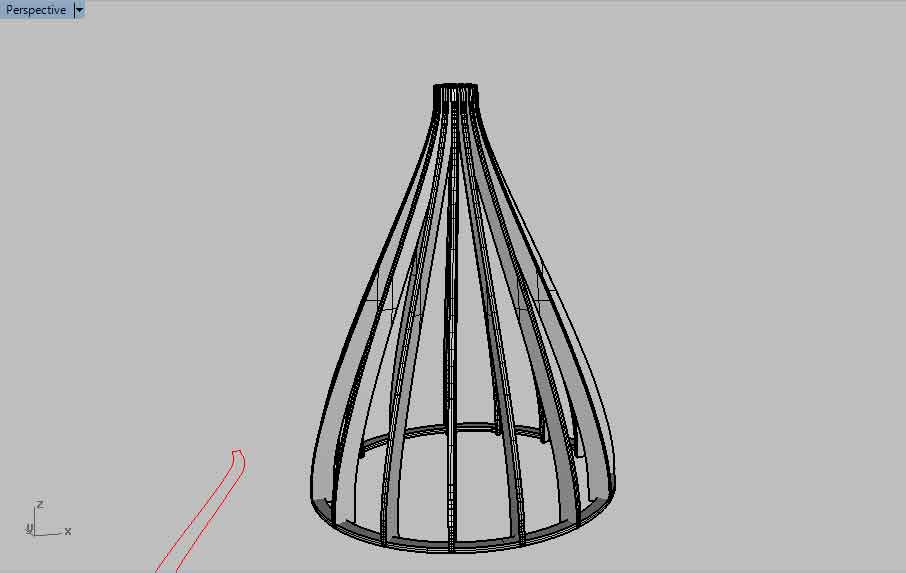
After a bunch of iterations and a couple different models I was happy enough with the design. I ended up having 25 ribs.
For this week we had to read the material safety data sheet (MSDS) and technical data sheet (TDS) for the resins that we were using. This is important because epoxi is a hard chemics and have to be handleled properly.

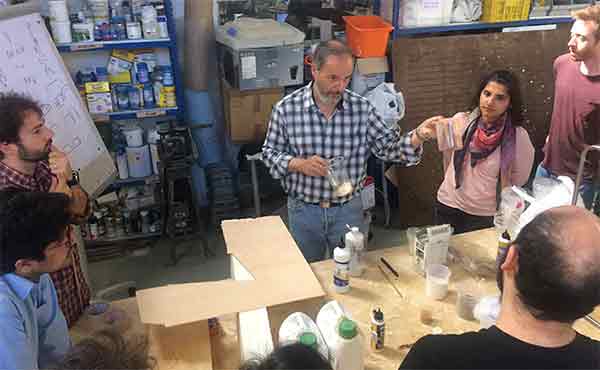
For the compositing week, we had a couple of master classes that where super interesting. The first one was a bioplastics class. Clara Davis from FabTextiles, showed how by mixing glycerin and jelly you could create bioplastics. Depending on the percentages of each element you will end up with a more elastic or more rigid plastic. It really looks like a polymeric plastic, but it dissolves in water.That same day Santi explained us the basic of composite process by a practical show.

The other workshop we had was with Joaquim Melchor from ARTCONT. This one was especially interesting because it was about natural composites. It is not exactly what the assignment was about, but we learned a lot. We experimented with some natural fibers mixed with epoxy, but also ceramics mixed with potassium silicates, polyethylene with sawdust and some plywood bending plus resin experiment. (I had to borrow the pictures of this workshop from my classmates's web as I totally forgot to take any)
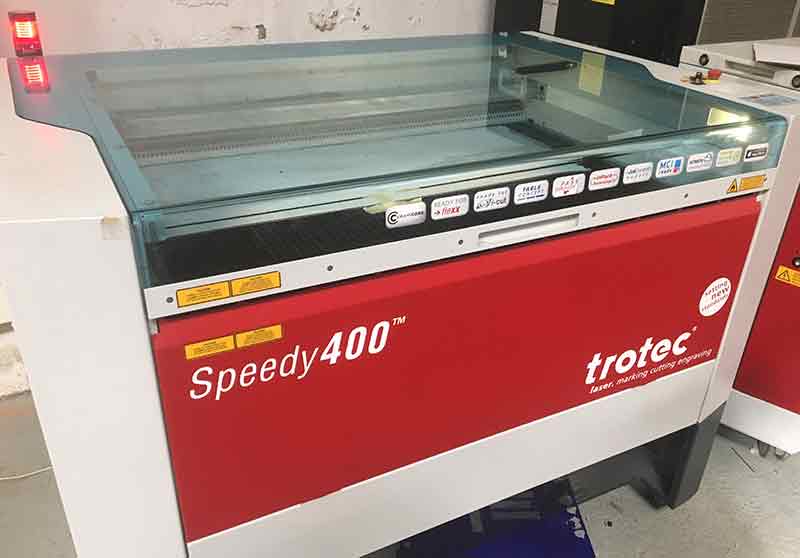
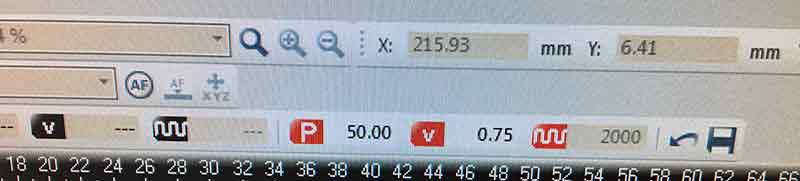
Once we had the chance to experiment with these workshops it was time to get our hands dirty! I cut my design on the laser. We had lots of trouble with the lasers machines and apparently all of them broke at the same time. Fortunately, we could bring the one that usually is in the Green Fab Lab down to the Barcelona Lab. This machine has its own software, but is very alike to the other ones. I used 3mm plywood and with 50% power, 0.75 speed and 2000ppi, was a perfect fit.

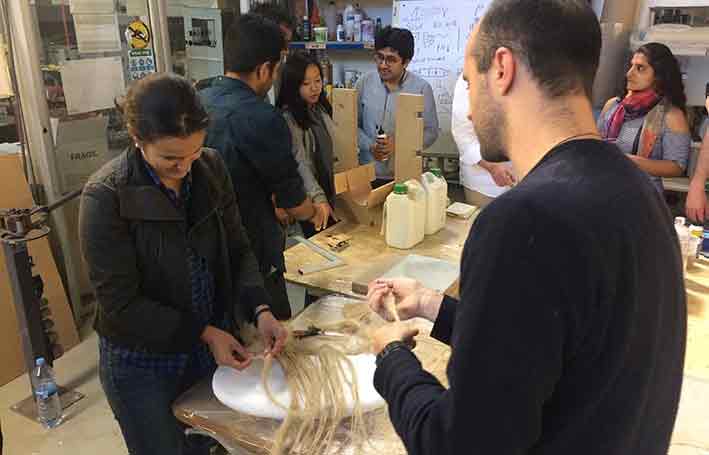
After that I assembled my model and check for a white fabric I could use as the aim of this composite is to have a lamp shade. I found a not too thick canvas fabric that seemed perfect for this.

Well, apparently this week's malfunction didn't only affected the lasers machines, the vacuum bed we have here and with most of my classmates did this assignment was out of service too. I did this assignment with Marc and we had to be creative. We used a vacuum bag, one of those that are use to compress clothes and quits. If well sealed it does the job pretty good.
The layers that are usually used on a one-sided mold are:
1. Plastic layer to protect the machine. As we are using a vacuum bag we didn’t really needed.
2. 3D mold
3. Release plastic layer, this one makes demolding easier as epoxy doesn’t stick to plastic. I didn't use this one either as I want my composite to stick directly to the mold to create an all in one lamp + shade
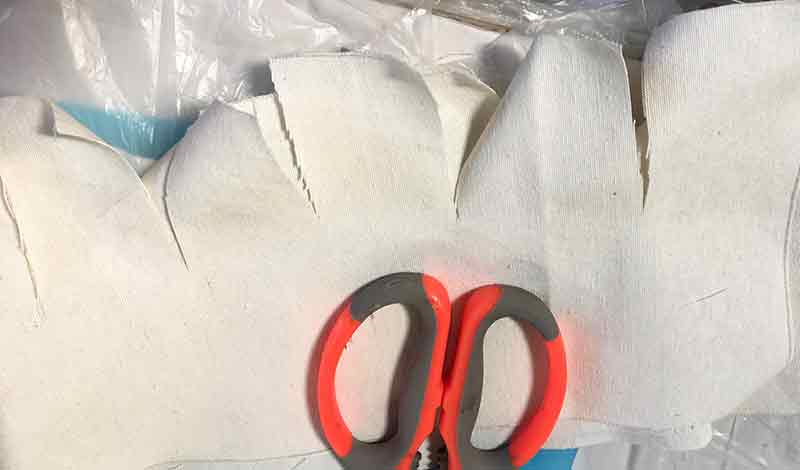
4. 2 or more crossed fiber fabrics with epoxy. The more layers the hardener the composite will be. This also depends on the kind of fabric used. I used 2 layers of a white fabric very similar to the one used on painting canvas.
5. Punctured plastic layer. This one allows the excess of epoxy to soak and be absorbed by the next layer.
6. Absorbent fabric layer. This one will soak the excess of epoxy allowing a homogenous composite.
7. Plastic layer to protect the machine. As before as we didn’t use the vacuum bed machine we didn’t used it.

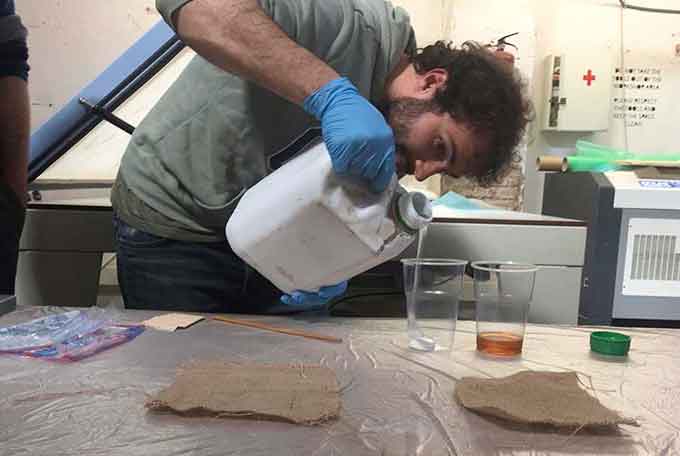
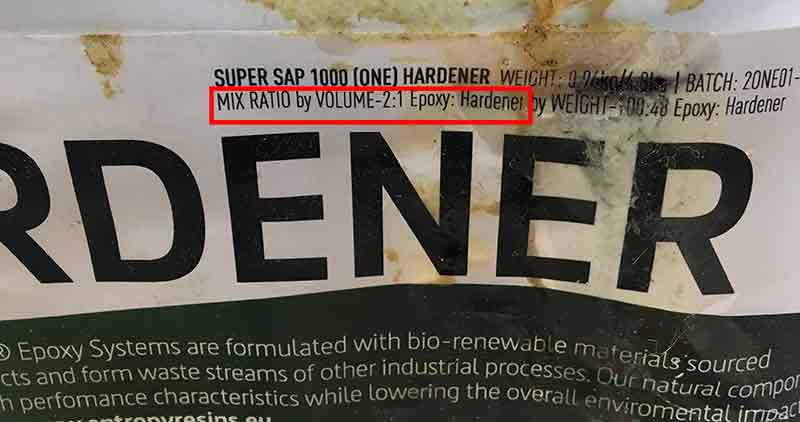
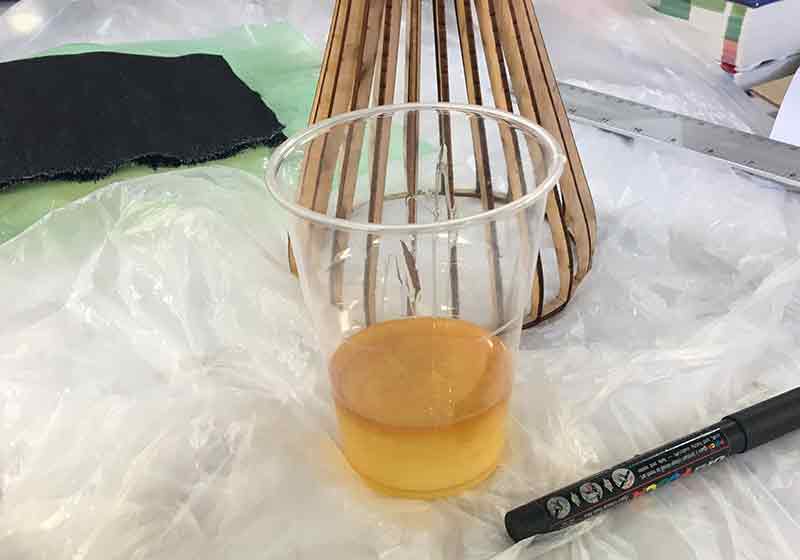
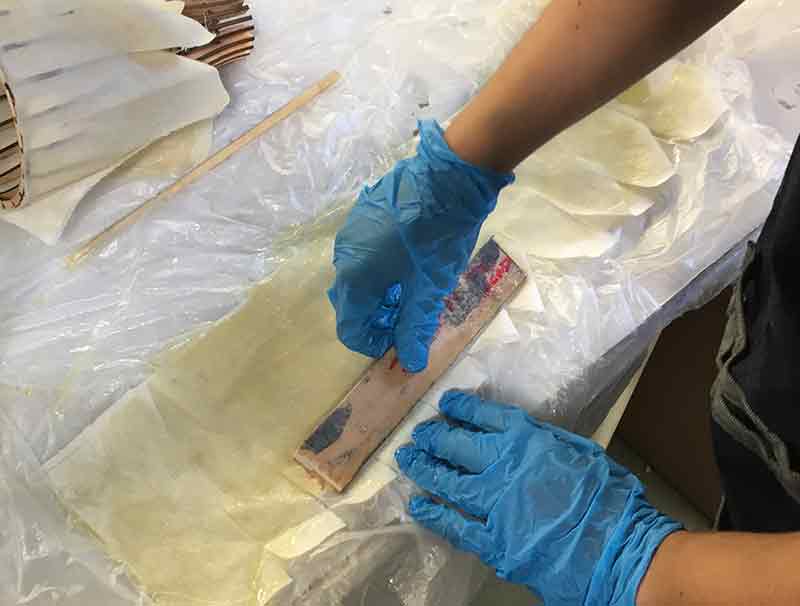
Once we had the order of the layers we needed clear enough we started mixing the epoxy. The one we used goes on a 2:1 Epoxi:hardener by volume. We didi the mix in a plastic cup and started working hard because the super warm weather outside was going to cut us some time on the curing process.
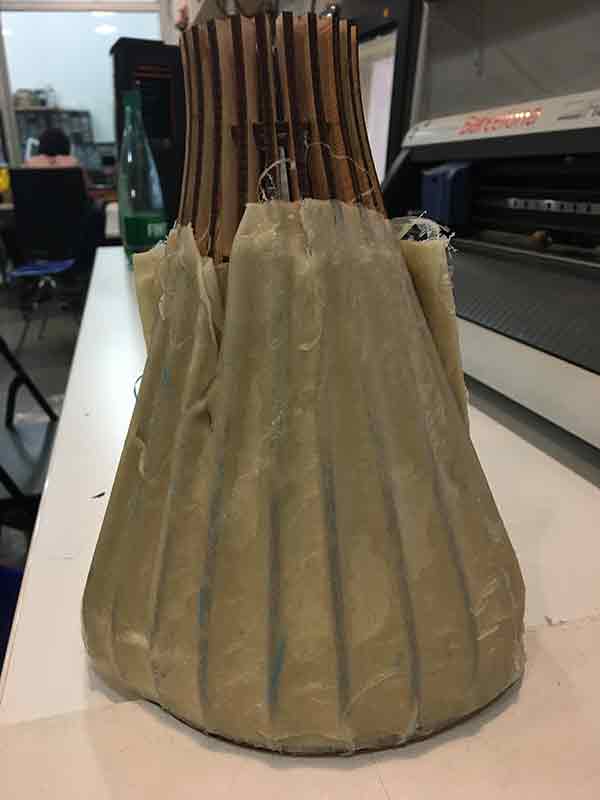
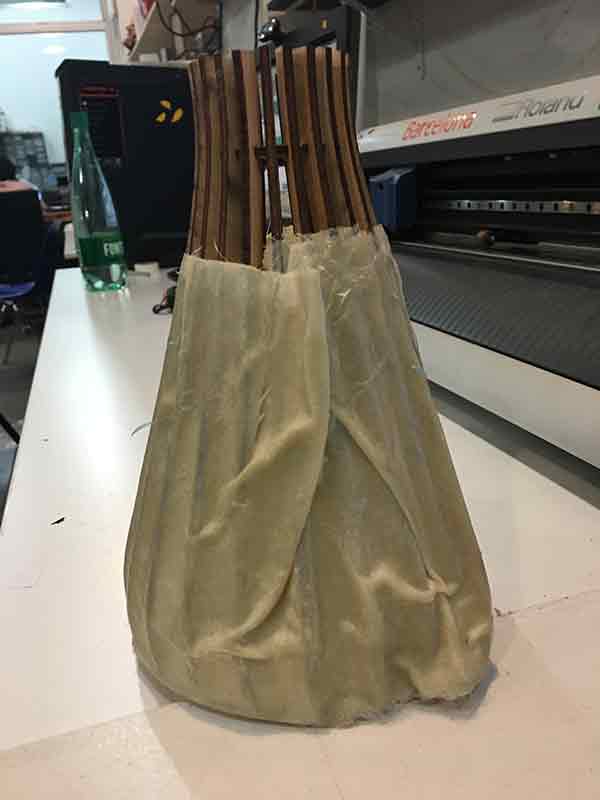
I did a series of cuts on my composite fabrics to be able to generate a decreasing in section circular shape. Theoretically this should have worked, practice is never as good. When I was assembling the layers I realized that a 360 degrees composite is not easy.
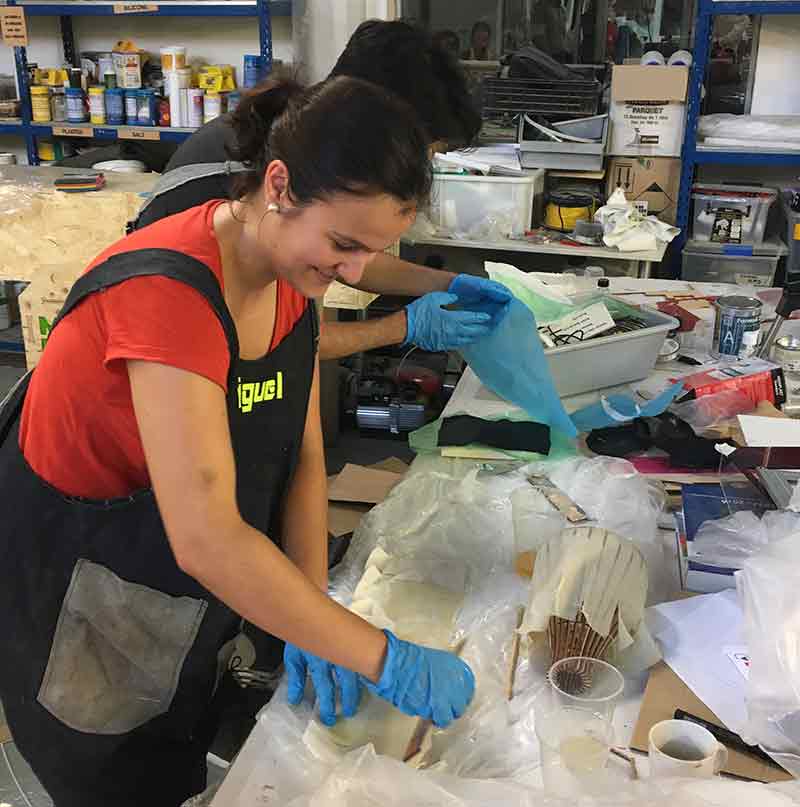
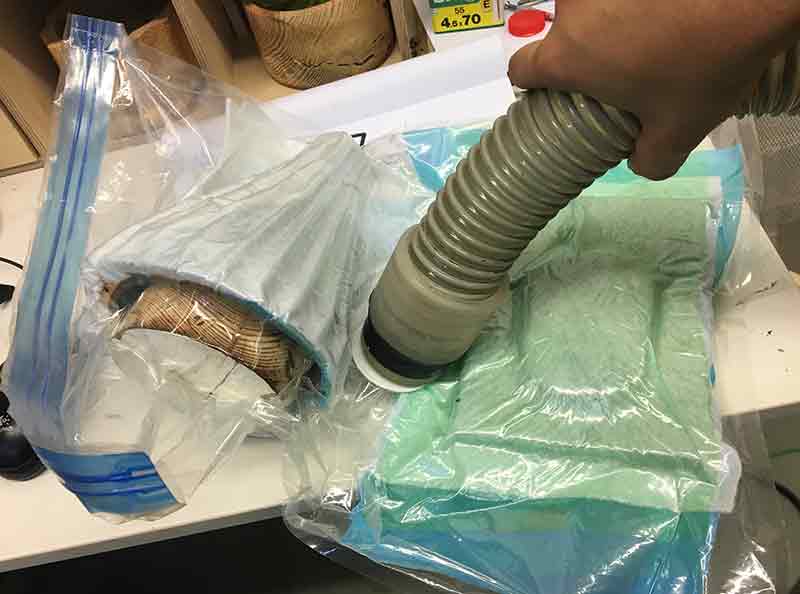
The firs problem I encounter was, that the suction power was so, that the lamp crashed due to it. I had to open the vacuum bag and put something solid inside to make sure the void was secured. The other problem I encounter was the one I supposed when assembling the layers. Having a 360 degrees composite is not easy and the result is not perfect. I have a couple folds, that meke the result not very beutiful but the shade is very hard.