Ruby Sun
Fab academy 2017
Week 8: Embedded programming
A. Understand the relationship between Arduino and Attiny 44
B. Using Roland Modela Player 4
C. The Milling process
D. Molding
A. Understand the relationship between Arduino and Attiny 44
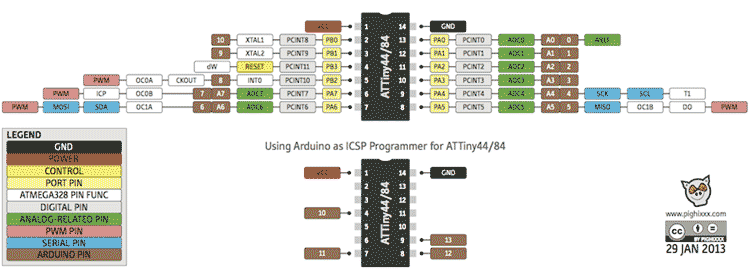
In order to program a microcontroller, we need to know the correalation between the microcontroller and the Arduino. The diagram below shows the relationship.
B. Preparing Arduino IDE
1. Download Arduino IDE for installation
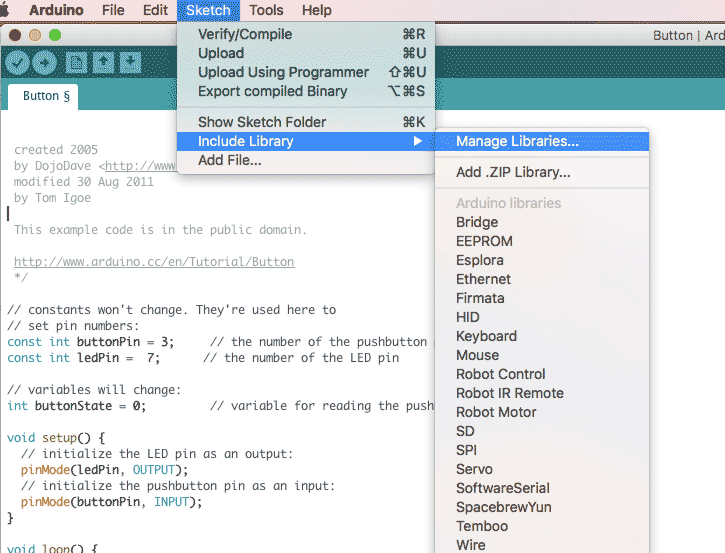
2. After installation, go to Sketch, include Library and Manage library
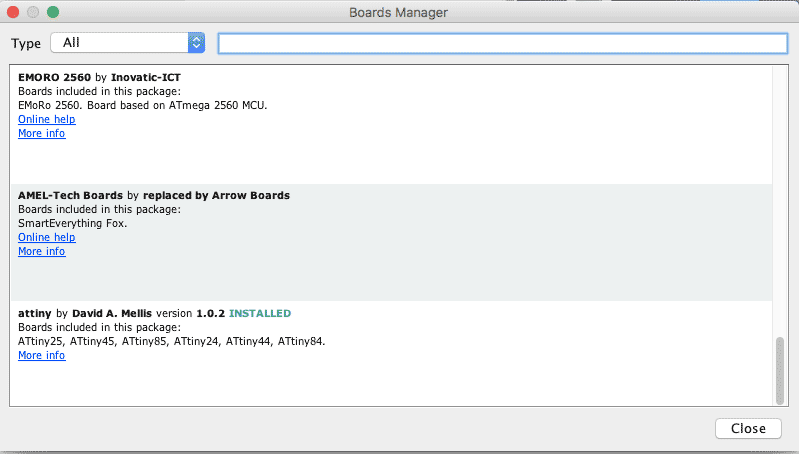
3. Type Attiny 44 and install.
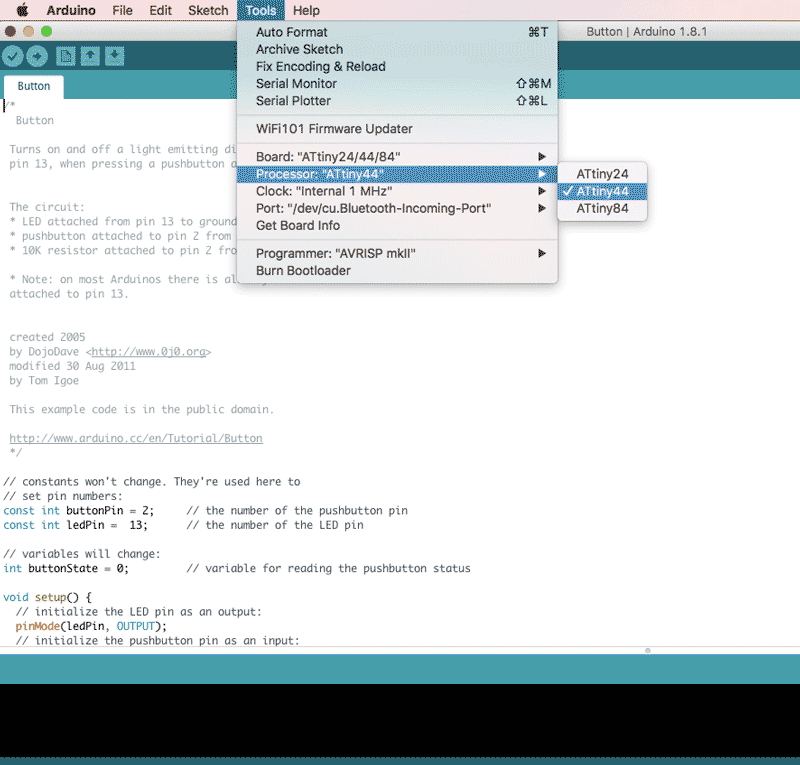
4. Board: choose Attiny 44
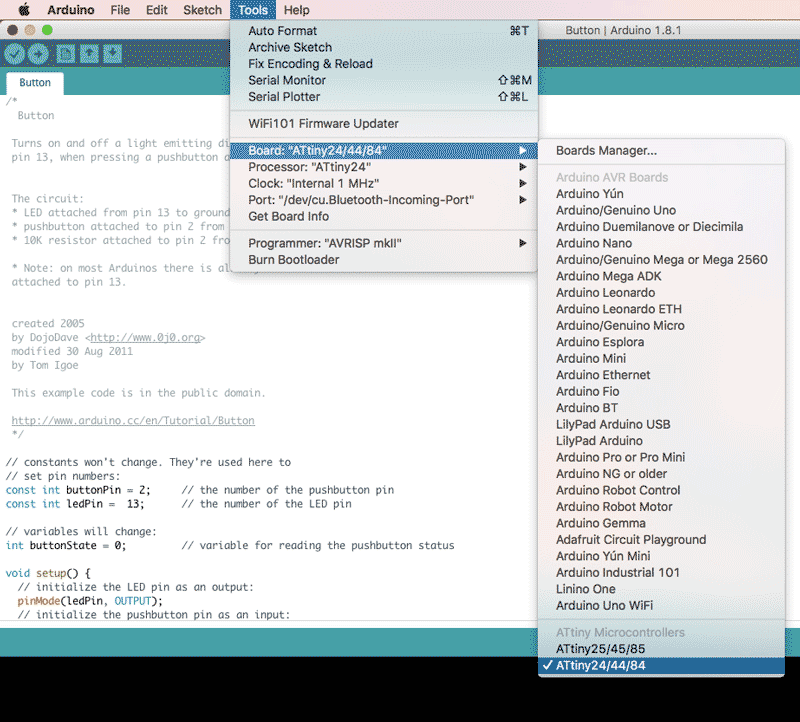
5. Choose ATtiny44 for Processor
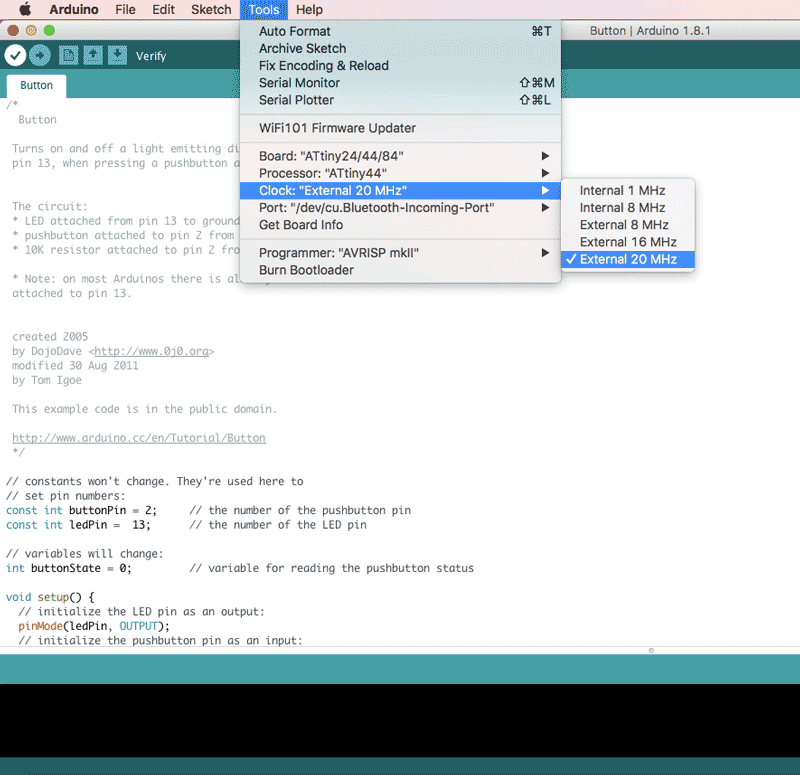
6. Choose External 20 MHz for the Clock
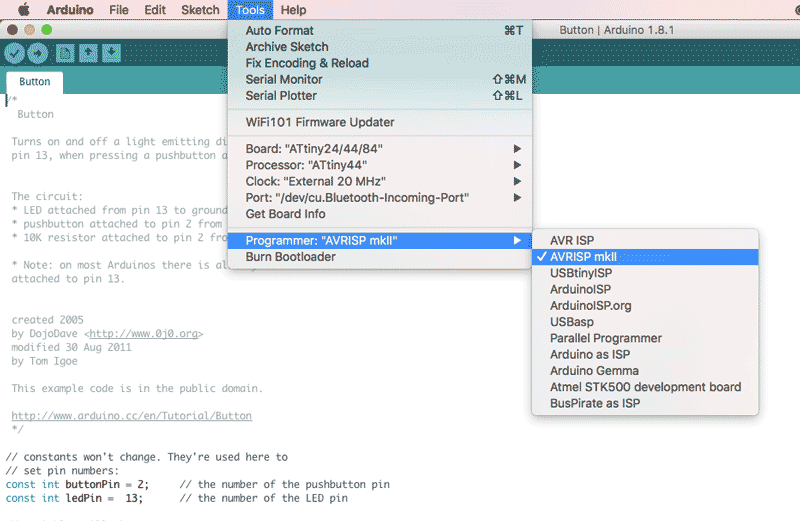
7. For the programmer, i will use AVRISP mk11
8. For the port, a new port will appears after the connection.
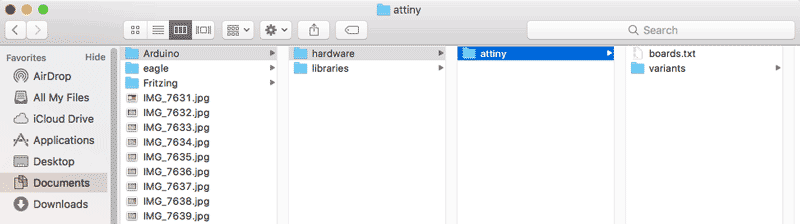
For Mac user, please download the support for Attiny 44 for Arduino.
C. Connect the board for programming
1. For the connection between the Hello board and the FabISP, we need 2 females connectors and a 10 wire cables (Separate the last 4 wires starting from the red colour to make the 6 color wires.)
2. Connect the 6 pin header on the board with the FTDI cable, while the other side connect with the computer.
3. The other side of the FabISP must be connected via USB to the computer.
D. Programming the Attiny 44
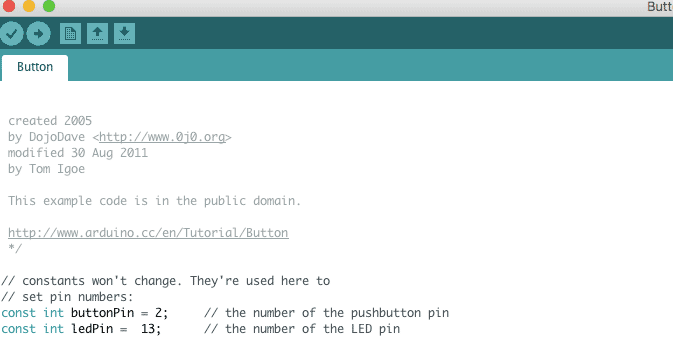
Open the button program in Arduino
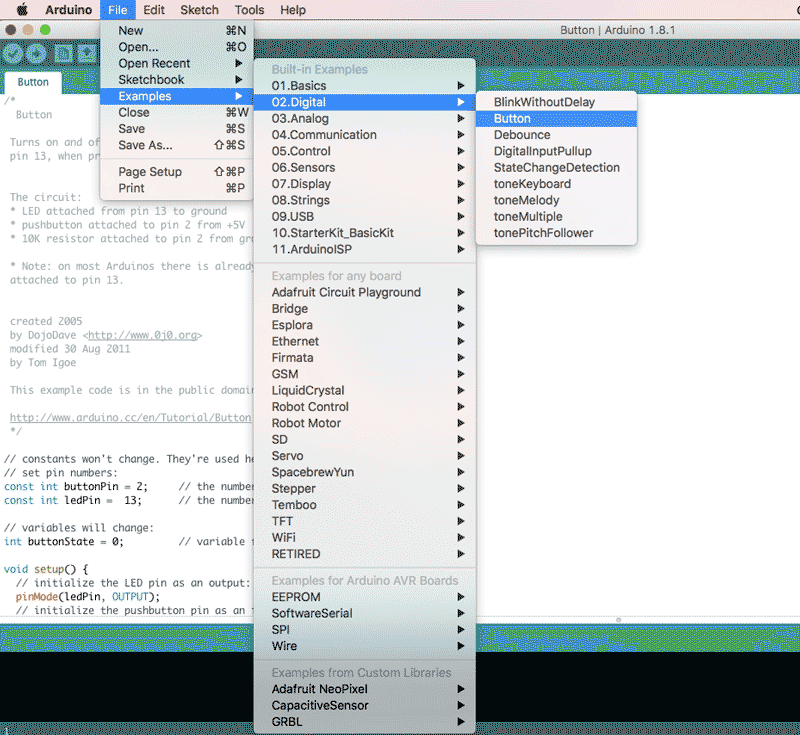
The following number pin is the default setting for Arduino.
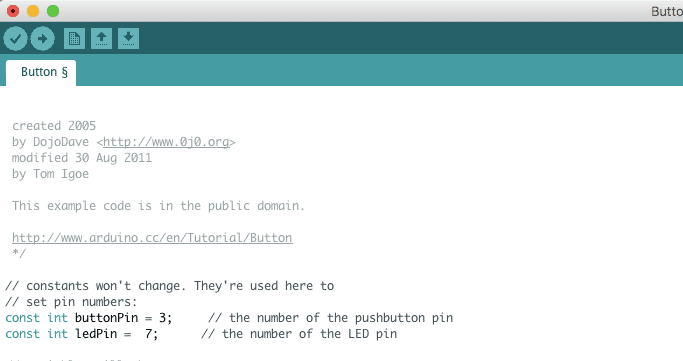
Change the pin number for Attiny 44 according to the diagram on the top page.
Finally, go to Tools and Burn Bootloader. At first the LED light is not lighten up. and I dsicovered is because of the mislocation of the LED components ( the green line on the LED components should be away from the resistor.
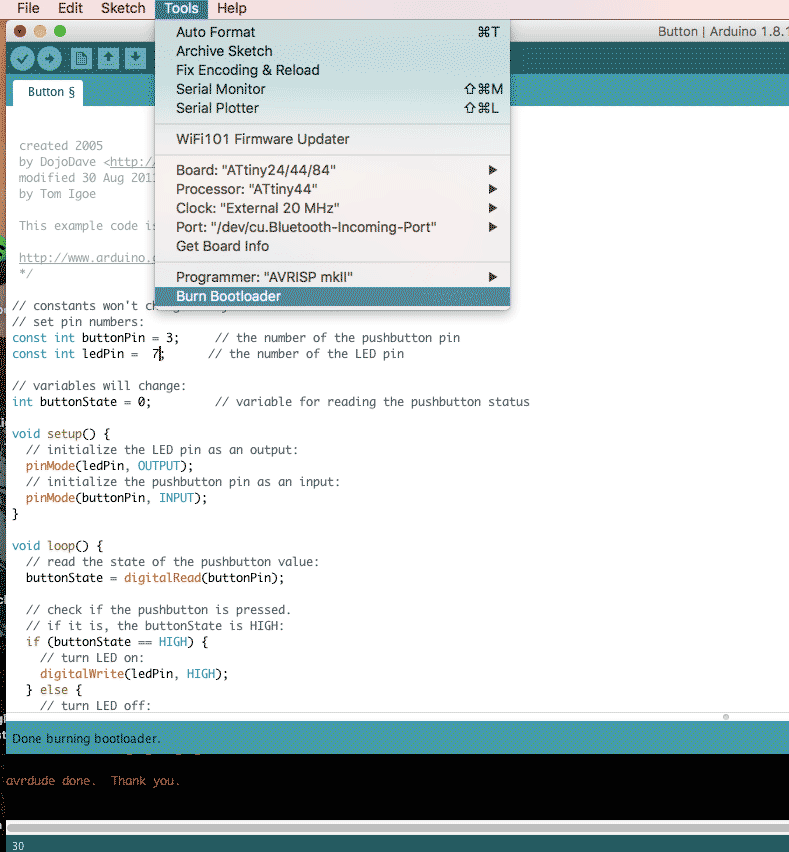
It is working!
Please press the link for downloading.