Ruby Sun
Fab academy 2017
Week 7: Computer controlled cutting
Learning outcomes
A. Using Rhino for design
B. Producing Gcode file for milling
C. Machine milling
D. The Milling process
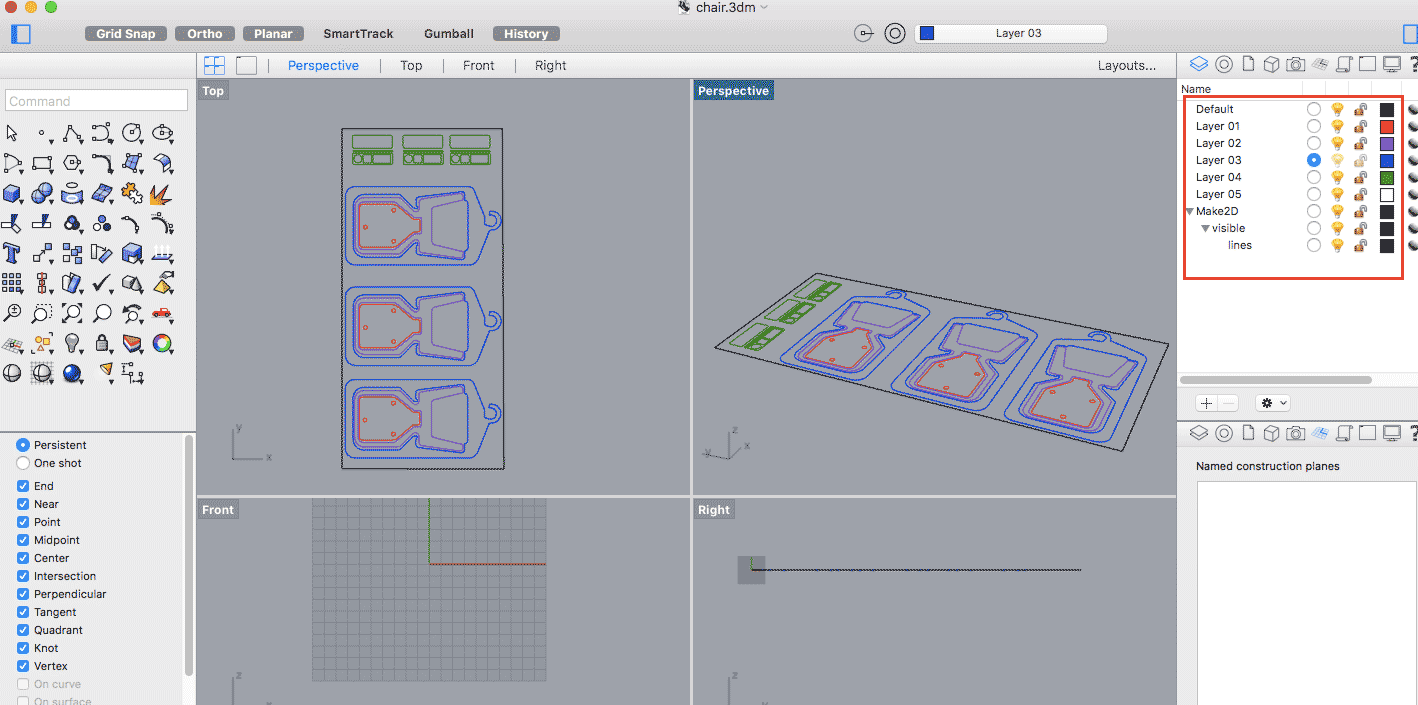
A. Using Rhino for design
I used the rhino for drawing the chair and group components with different colors.
B. Producing Gcode file for milling
1. Move the drawing horizontally
Type 'Move', then select the points and press the 'rotate' buttons.
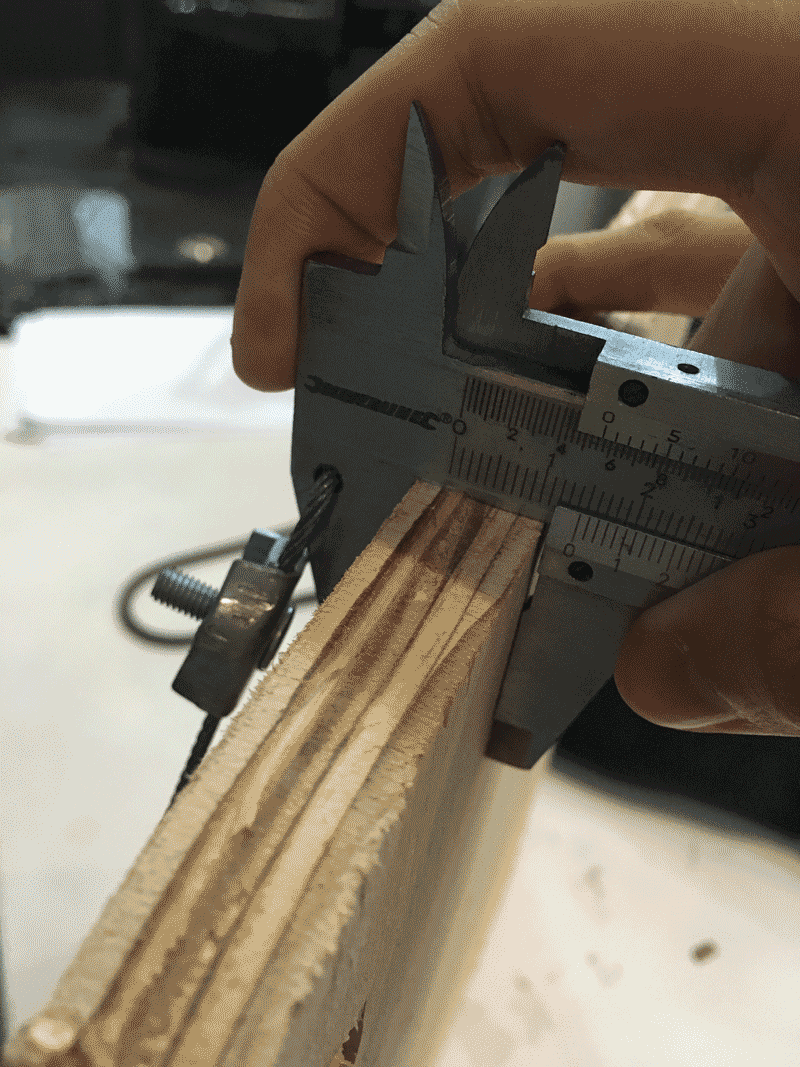
2. Check the material thickness
Before making the screw, check the material thickness by the catapillar and the material thickness is 15mm. Choose the 'Gumball view' in Rhino for better viewing. Also check the gap between each lines and it should be more than 6mm, otherwise the lines are too packed.
3. Extrude Cruve
Use 'ExtrudeCru' with -15 as the wood thickness goes under the plane. After creating the thickness, move the object to a new layer.
4. Go to 'stock' and 'stock from selection'

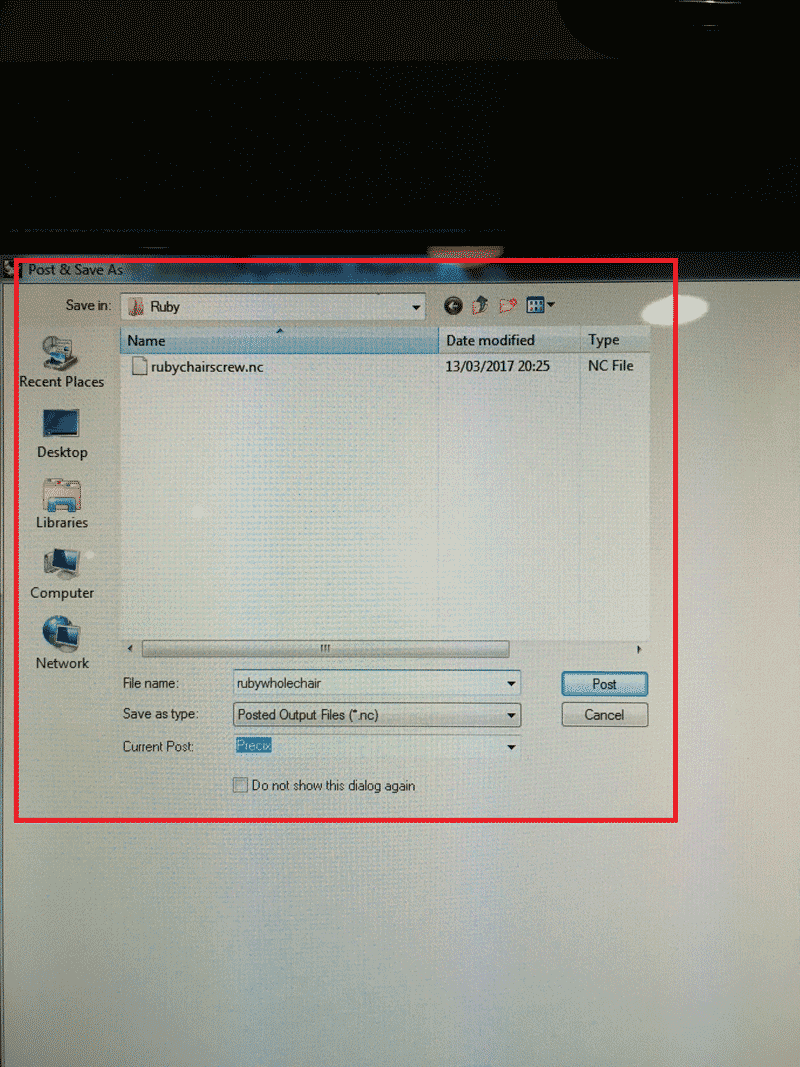
5. For machining selection
Right-click the logo which looks like a wheel and choose 'Mach 3'and which is the 'Precise'. The extension is .nc .
6. Make screws
Choose the picture with a circle dot, and draw the screw on where i want to place them (usually on the corner or in the area where there are loose parts). After creating the screw, then create the new layer and move the objects to the layer.
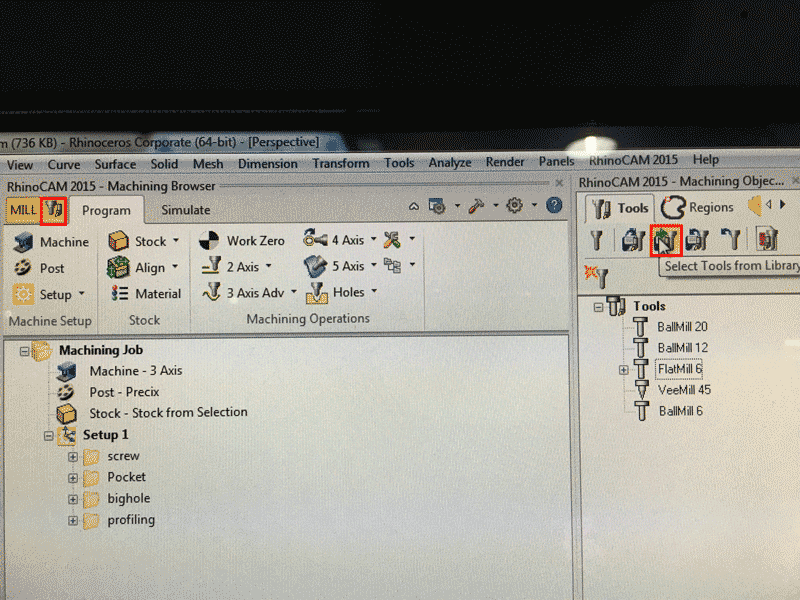
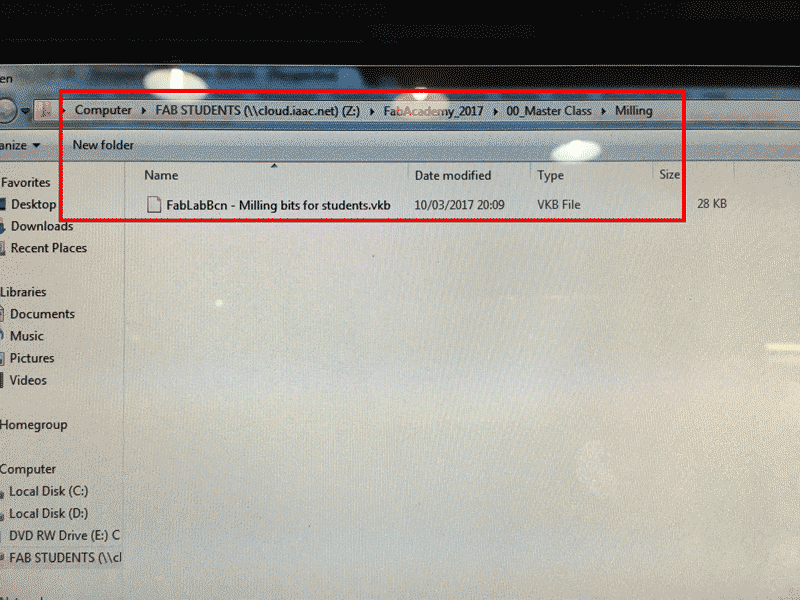
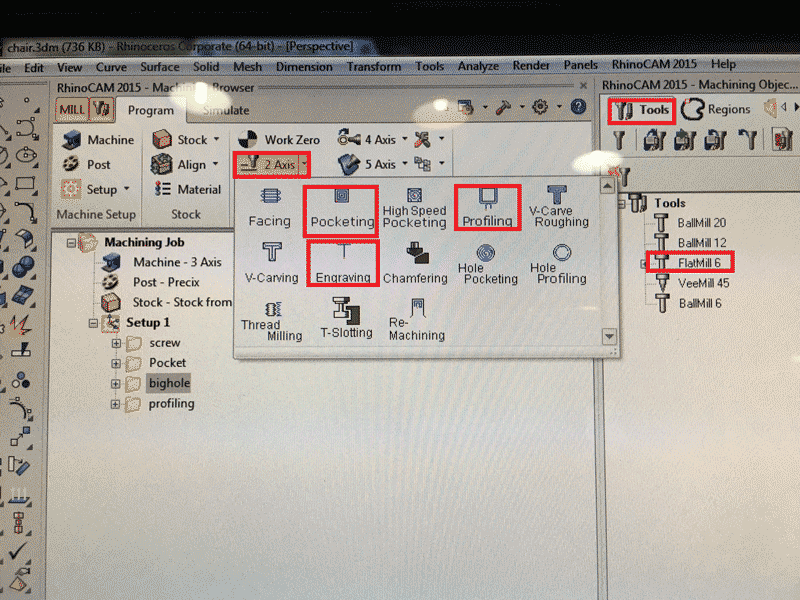
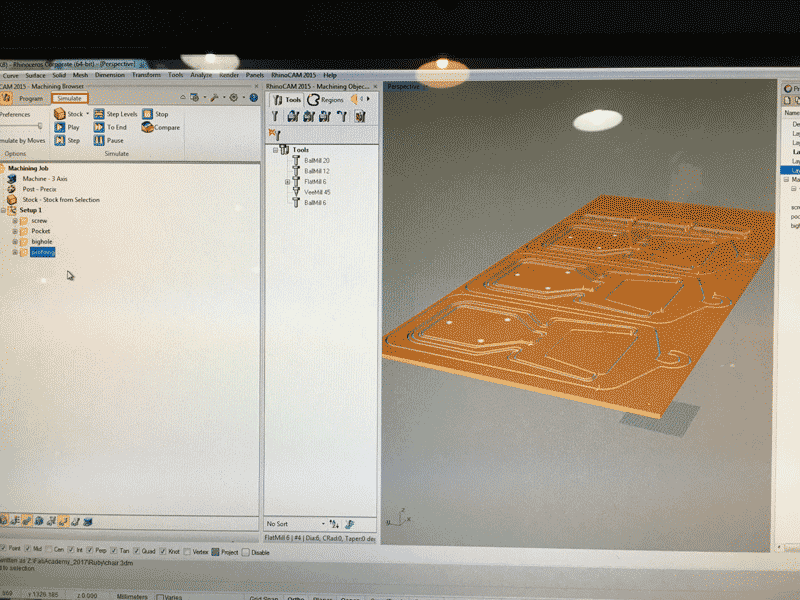
7. Add tools
Go to the 'add tools' logo, then find the folder through 'Fab students'-'Fabacademy2007'-'Master class'-'Milling'. After finding the folders, all the tools are being added, while the most common use is 'Flatmill 6'.
8. Add to 'engraving' in machine operation
Go to ' Machine operation' and '2 axis', then 'engraving'. Press the 'select drive', then right-click on screw layer, select the object and 'enter'. For the engraving, go to 'tool', press tool "Flatmill 6' and generate/save.
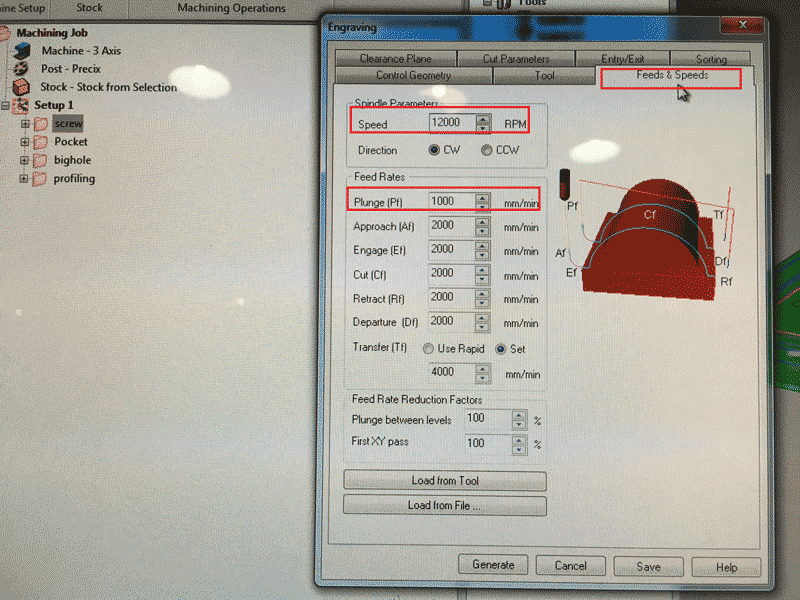
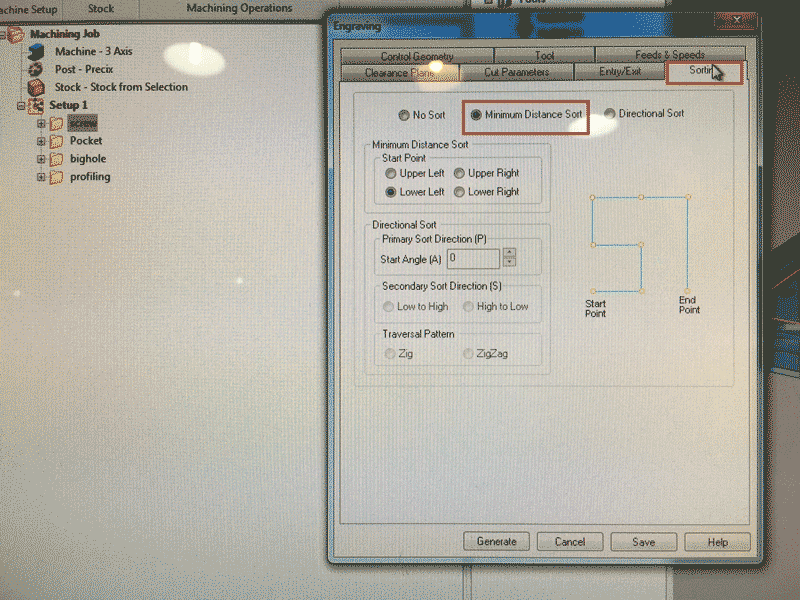
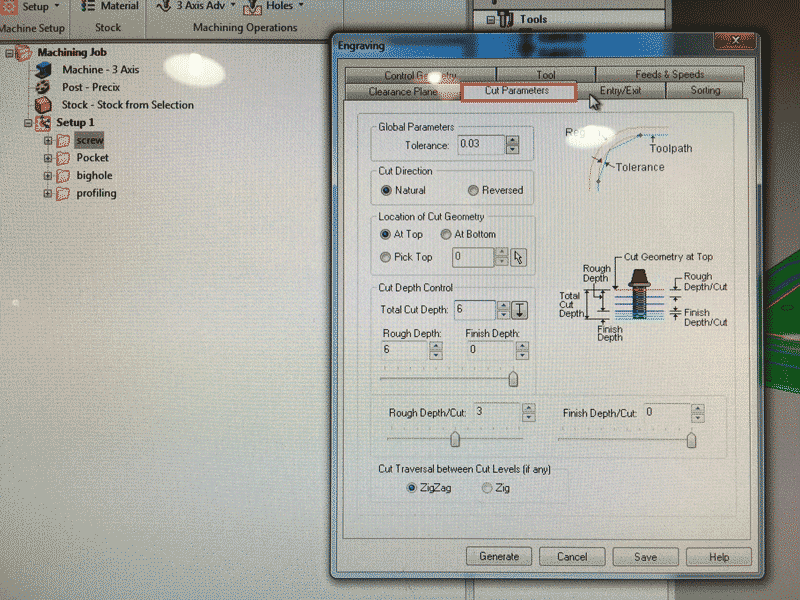
8. 'Engraving' settings
For Feeds and Speeds, change 'Plurge' to 1000 and 'Speed' is 12000.
For Sorting, choose 'Mininum distance'
For Cutting parameters, total cut depth is 6. Rough depth is 6.
For Clearance Plane, Stock Max Z + Dist is 15.
9. Stimulation
Right-click for 'profiling' and stimulate. Double-click (profiling) to appear all things.
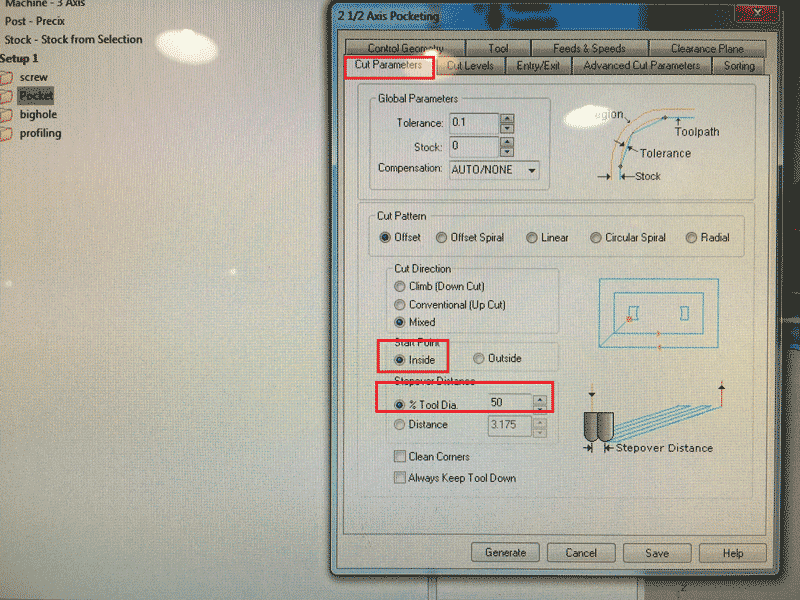
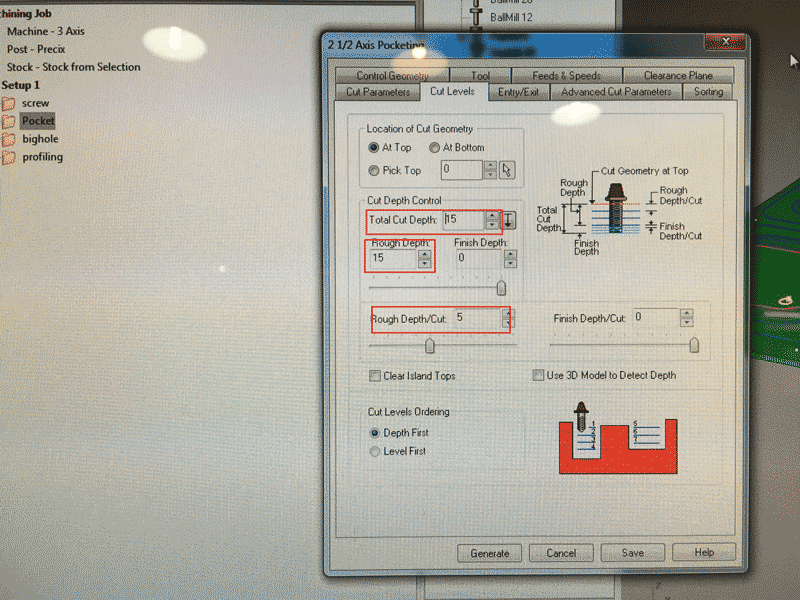
10. Pocketing
Pocketing is for breaking small pieces. In the cut parameters, % Tool Diameters is 50 and set the 'Stock' 0 for no furnishing.Set 'Inside'for start point For the other settings, they are the same.
In the cut level, choose total cut depth as 15, rough depth as 15 and rough depth/cut as 5.
11. Profiling
Choose none for the 'Entry'.
For Cutting parameters, use Outside.
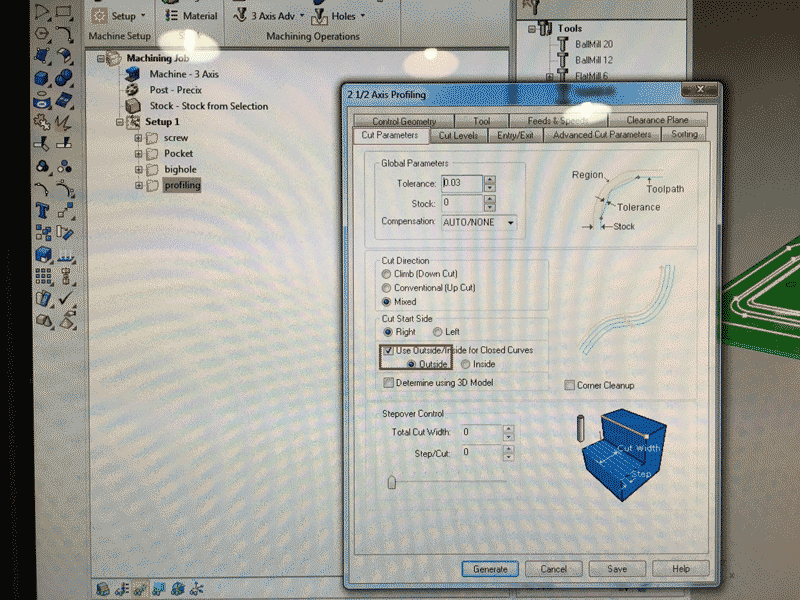
For Advance cutting parameters, create bridge for height 8, length 10. For the other settings, they are the same.
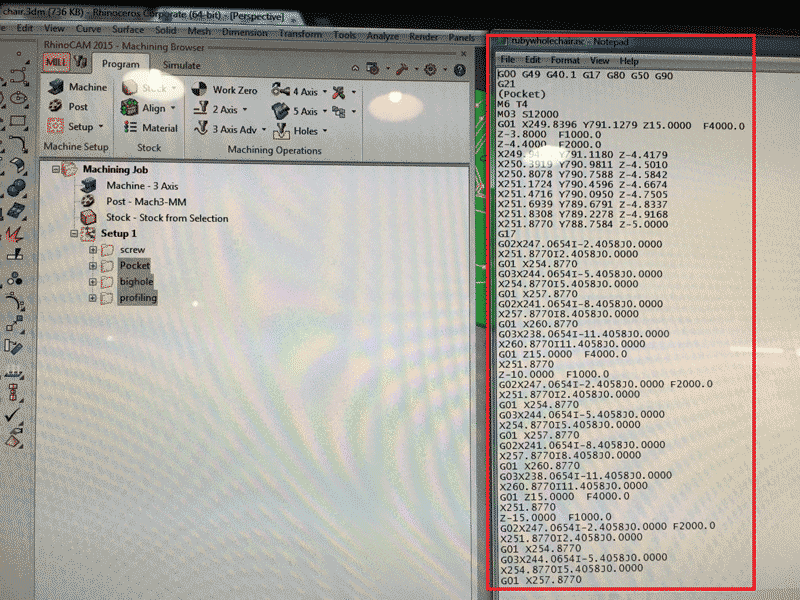
12. Stimulation again and produce Gcode
Choose stock visibility and select the layers for 'post'.Gcode is produced afterwards.
C.Machine milling
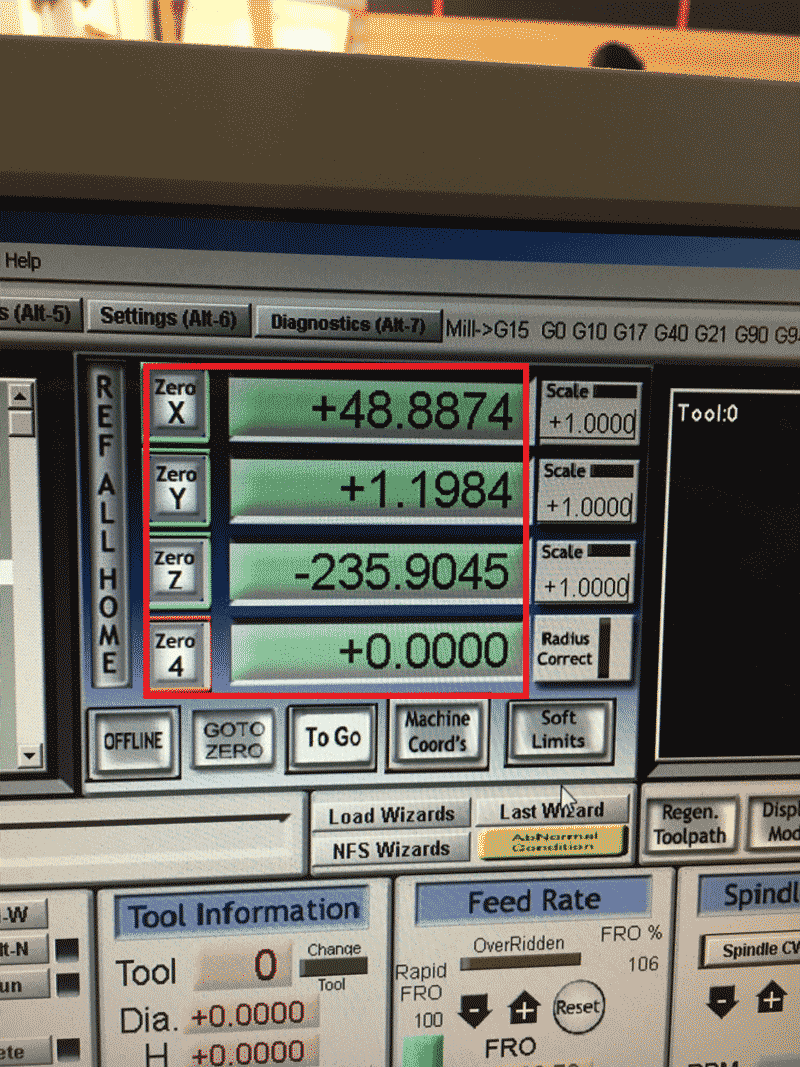
1. Set 'Ref all hole' for zero
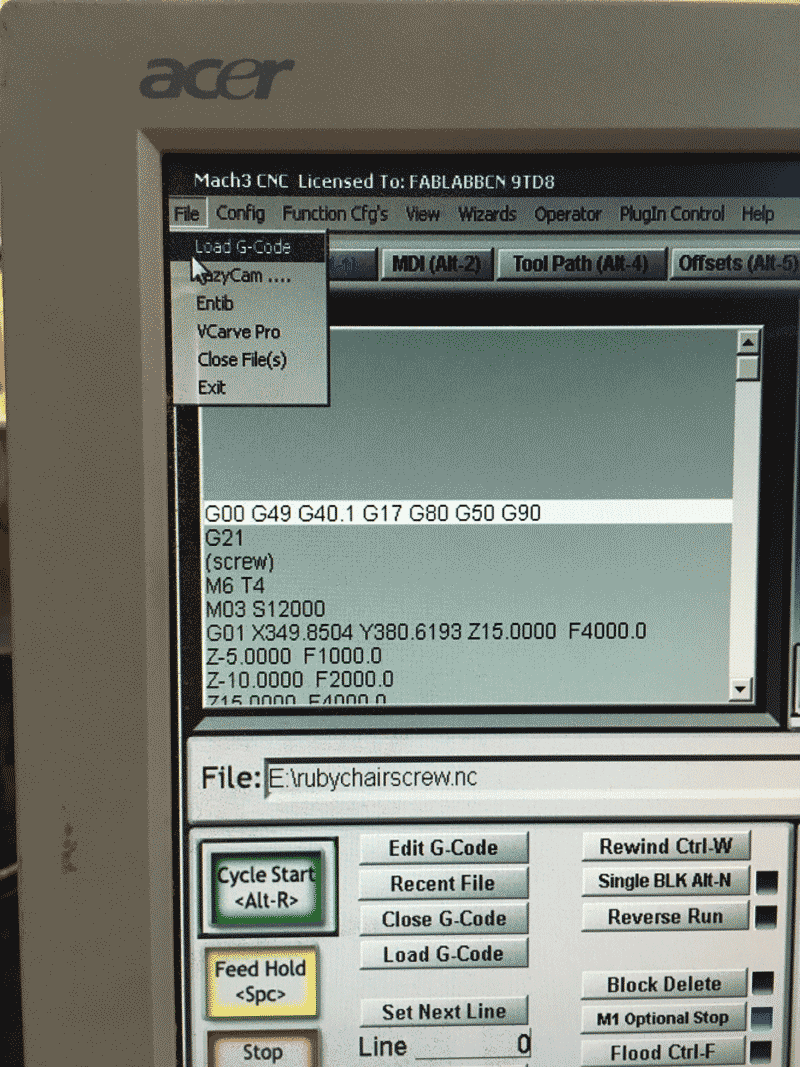
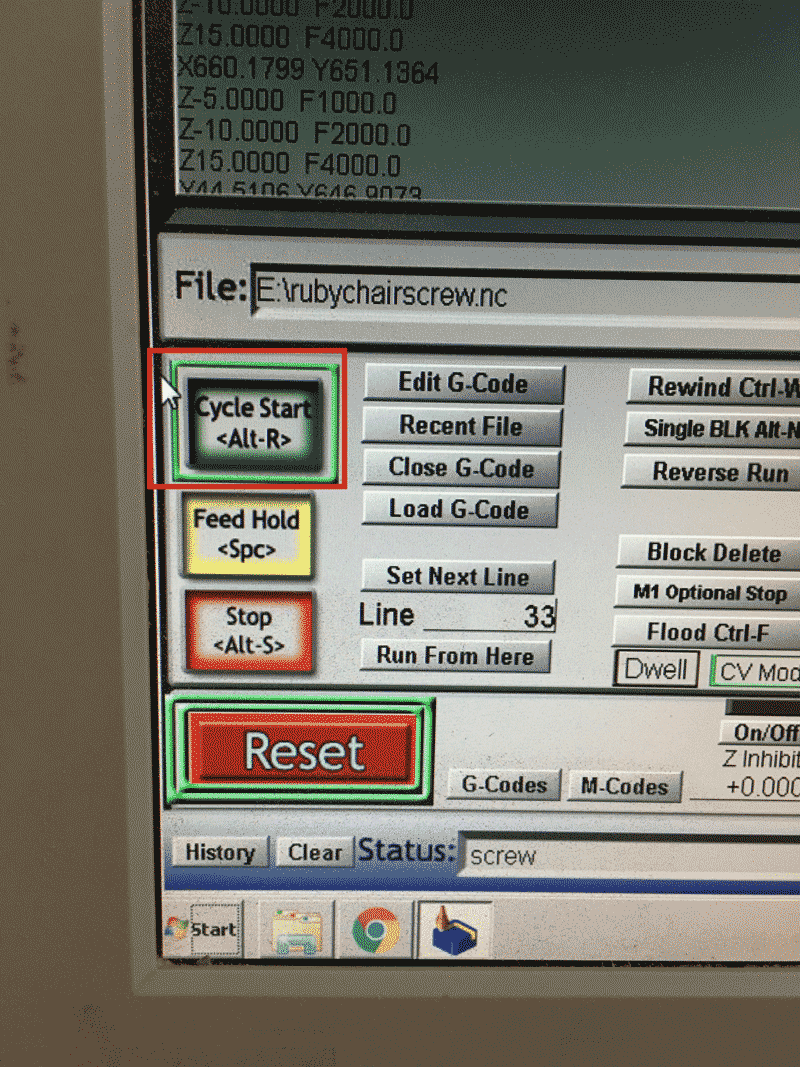
2. Go to 'file' to load gcode'
3. Go to spirdle CWF5 and hit 'Reset'
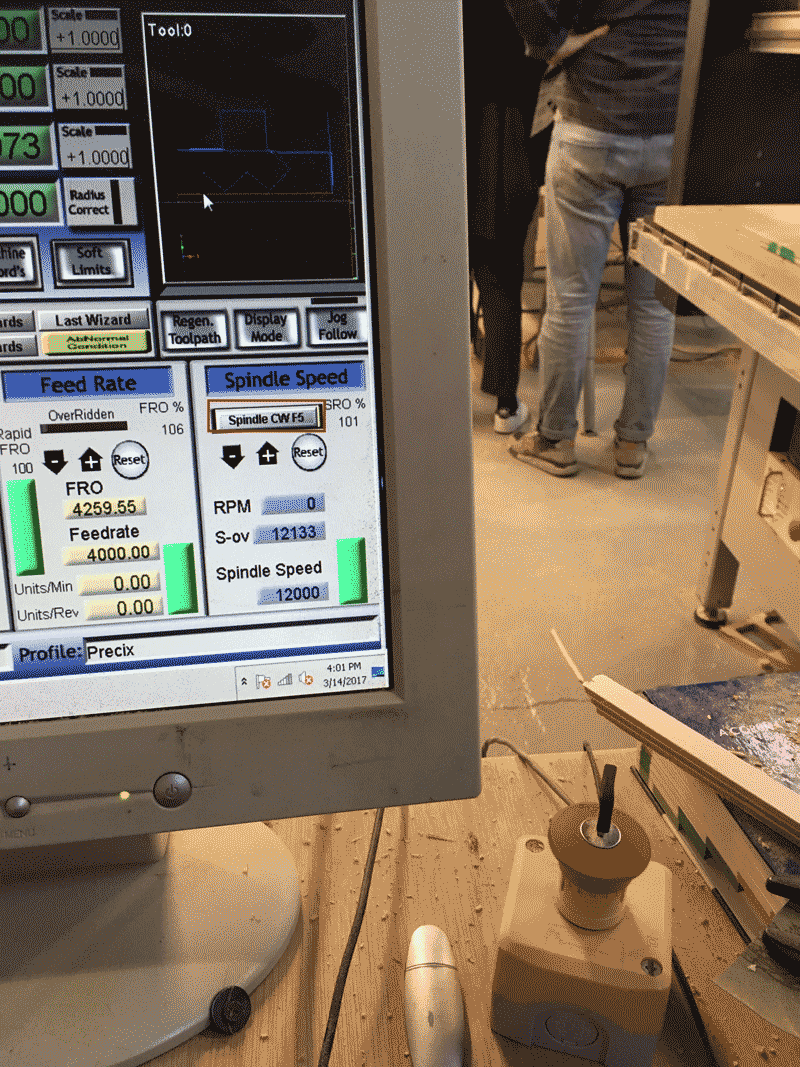
4. Cycle start
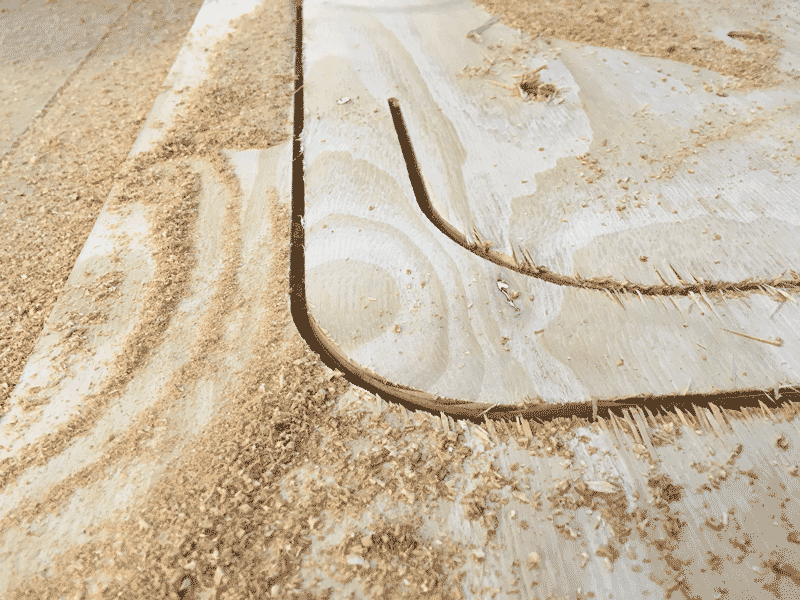
D. Milling process
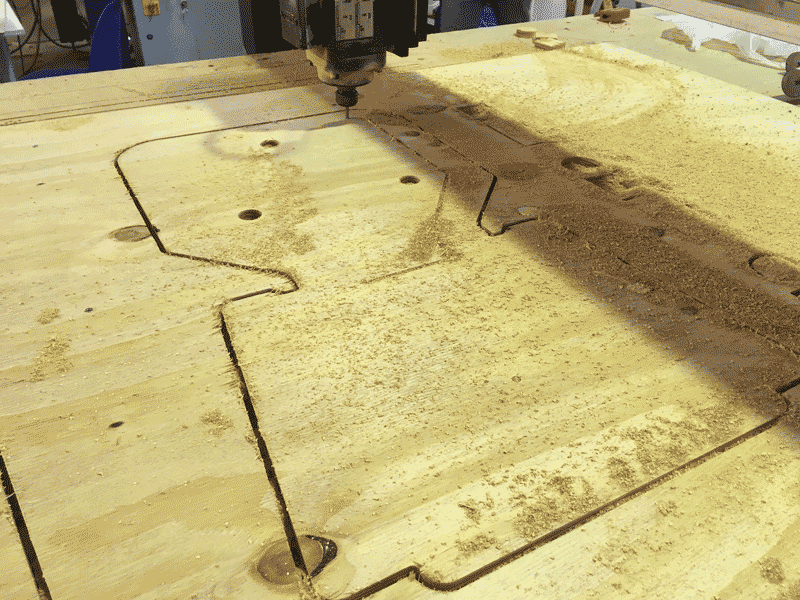
During the actual milling, the wood is always not flatten properly and the wood is not very good for cutting as there are always broken pieces of wood on the edge.
After encounting this issue, i will have to add more screw in the software to reproduce the Gcode for flattening the wood better.
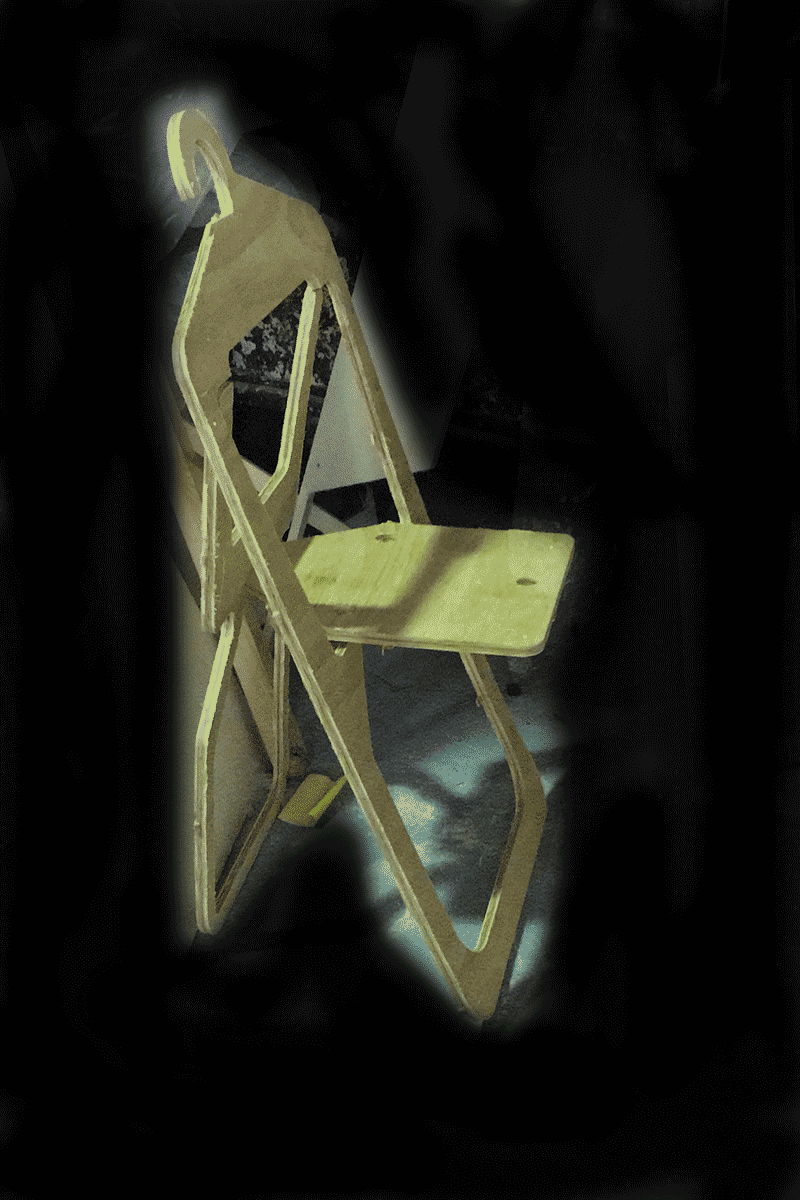
For the chair, there are a few points that i have to improve. First of all, I have to pay attention to the dimension. It is because originally i planned the hole should be in the position with the extruded side, so that it can be locked. Also, The gap between the two lines are too big that at the end i will have to eliminate one cutting line and reproduce the Gcode. Moreover, I still have not make the joints between the planes for folding. I will have to figure out later.
Please press the link for downloading.