Week15 : Interface and application programming
I tested several methods of creating an interface and an application, I decided to chose the input device photocell idea in week 10 as my sample case to build an application. I have tried few of the programming mentioned here before. for the sake of testing as many languages as possible i decided to go with an Arduino board as base to test all the different Ideas, the board is programmed with Firmata Standard, I think it also helped me focus on understanding how the lanugauges interacted with a serial port and a microcontroller.
Processing for visualizing results
I like the look and feel of Processing visualization, and it's ease of use. The IDE is related to Arduino and the amount of online resources is amazing. First attempt was to test a simple code that would simulated the change of brightness on the photocell. I chose a 3D render in processing with a simple sphere in a scene with a directional light and the specular value of the sphere is changing according to the voltage change in the photocell or in other words the resistance
Change in brightness will result in change in resistance and it's seen in the above video as the sphere is changing brightness accordingly as a response to the photocell which shows how the light shines on each photocell. 3D render is used and a specular is changed based on the voltage read by each sensor respectively.
For the code a special serial library is required and I have tested that first with an Arduino board with two Photo resistors attached. The folowing is the code I used.
In the next example I tried something different, i wanted to change show what would resemble the movement of light, I adopted a code that was ment to track the mouse movemnet in the screen. simply by changing the size of an array of black circles as the mouse is closer and all the sarrounding dots would accordingly change size.
I modified the code to show Light direction as a trail moving from one photocell to the other, which also using the serial library was possible. The values from LDR are mapped to the position on the canvas width.
Firmata JhonnyFive Socket.io & Node.js
I used node.js with Socket.io and Jhonny-five modules on an Arduino board with standard firmata. The following is the result of reading analoge sensors.
I had two different values from LDRs shown on a web page.
VTK as another useful visualization tool
I got familiar with vtk during my masters, it is mostly used in medical image visualization with another very powerful toolkit called itk, python and to be more specific iPython (IDE) helped me get easily familiarized with vtk. Most of my final work was written in c++ but python being a scripting language helped me understand what is happening under the hood.
I wanted to use vtk as my visualization tool for the final project, and trying to have all the necessary tools and libraries in one programming environment would make things much easier.
Python brings us together
Python has vtk bindings, opencv, pyserial and to make things more interesting there is even a pyProcessing package or a python mode in Processing. I think I don't need to look further.
How to set up your python development environment?
Adding a module to python is as simple as
1- download module source
2- extract
3- In source root directory and from command line execute
    python setup.py install
4- In a python script
    import (module name)
without errors a good chance is your installation worked.
In many case I need to know the type and number of argument a function would take. I found
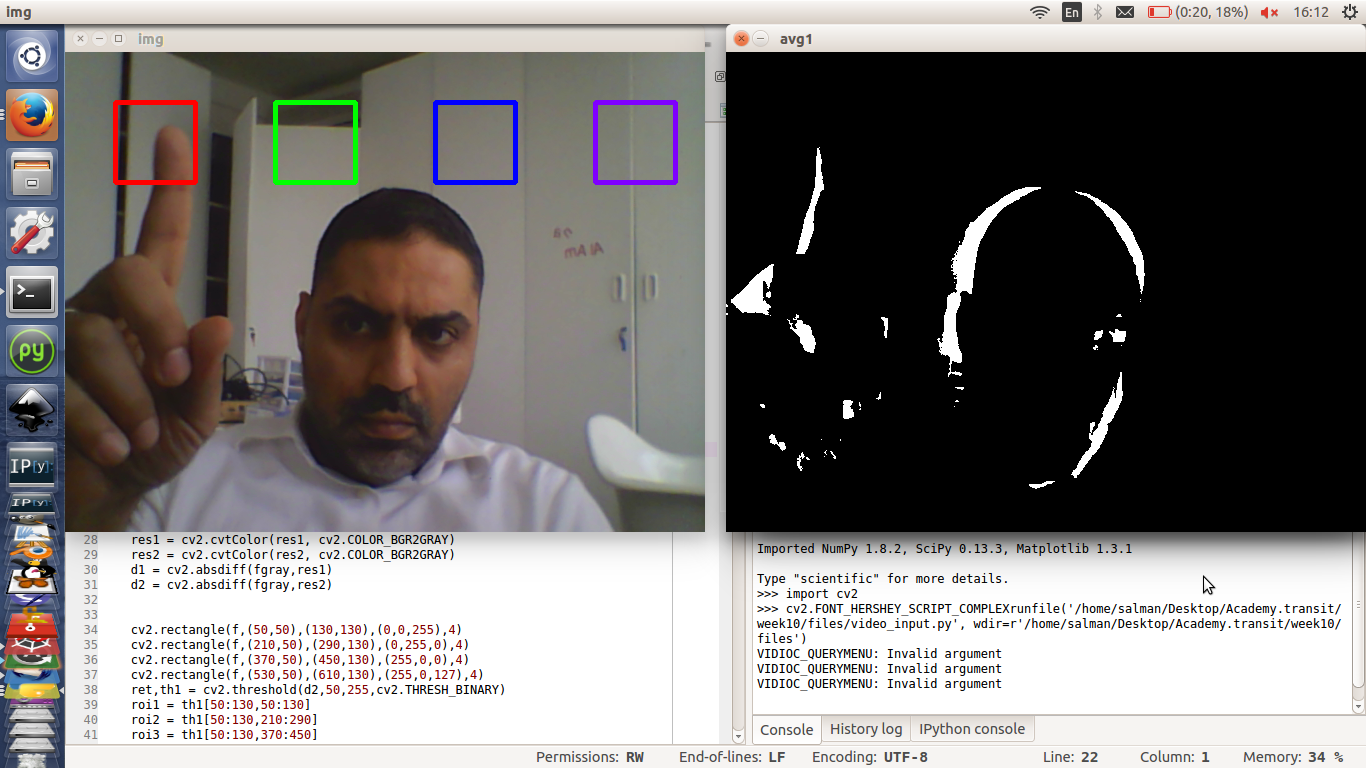
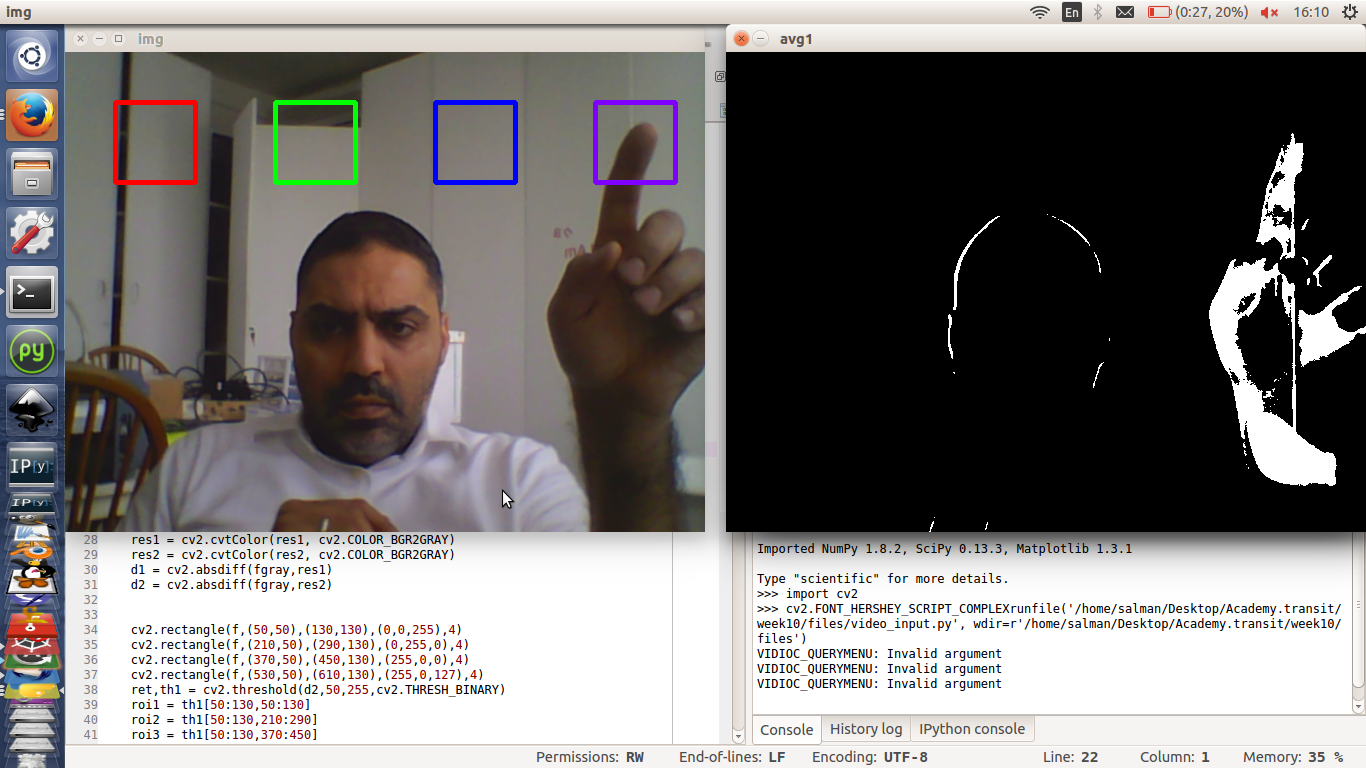
OpenCV in python for a Video interface
In the following code a webcam multiple video frames are captured and the BackgroundSubtractorMOG() algorithm is applied to separte the changing pixel values from the average intensity of the fixed values. This would result in the seperating the image into a foreground and a background with the assumption that the moving parts are background.This code is good for tracking movement of people on a slowly changing backdrop.
import time

from pyfirmata import Arduino, util

board = Arduino('/dev/ttyACM0')

it = util.Iterator(board)

it.start()

digital_6 = board.get_pin('d:6:o')

digital_5 = board.get_pin('d:5:o')

digital_4 = board.get_pin('d:4:o')

digital_3 = board.get_pin('d:3:o')
and in the if statements in the code for the screen region of interest that functioned as an interface I added those lines to simply flicker an led once the area of the screen is touched.
digital_6.write(1)

digital_6.write(0)