Exercise 12
Molding and Casting
Building the FabTinyISP


Development Environment
Before you can build and program the firmware onto your board, you need to set up your development environment. You'll use this setup for all of your AVR programming for the class. The setup differs a bit for each platform, but once the software is installed it should work more or less the same on each platform.
For mac, I install CrossPack
Program the ATtiny45
Programming step
1. To program the FabISP, you first need to install the necessary software for your operating system and download the firmware.
2. Then you edit the Makefile
3. Set the fuses / program the board
4. Verify that the board is working properly
5. Then you need to open up the jumpers to make it a programmer.
(1)Mac OS Software Install
Get and install avrdude / GCC software and dependencies:
1. Download and Install Crosspack AVR - Has an installer.
2. Get Make (via XCode):
If you are running Lion or higher - you can download XCode from the Apple App store.
If you are running a pre-Lion OSX - Get the install disks that came with your mac and install the developer tools.
Download the firmware (This the link. Save it to desktop):
FabISP Firmware for earlier versions of MacOS:
http://academy.cba.mit.edu/classes/embedded_programming/firmware.zip
Open terminal navigate to the desktop:
cd ~/Desktop/
Unzip the firmware.zip directory (the directory will be "firmware.zip" if you downloaded the earlier version):
unzip fabISP_mac.0.8.2_firmware.zip
Move into the newly created firmware directory on your desktop
cd ~/Desktop/firmware
(2)Edit the Makefile
The Makefile is in the firmware directory that you downloaded. The Makefile is set up to work with the AVRISP2 by default. If you are using another programmer, you will need to edit the Makefile. Open the Makefile with TextEdit.
Make Changes :
A window will open containing the Makefile. Go to the line that says:
#AVRDUDE = avrdude -c usbtiny -p $(DEVICE) # edit this line for your programmer AVRDUDE = avrdude -c avrisp2 -P usb -p $(DEVICE) # edit this line for your programmer
- If using the USBtiny programmer or another FabISP
- Remove the "#" in front of the line with "usbtiny" in it
- Add a "#" to beginning the line with the "avrisp2" in it to comment it out.
- save the Makefile
(3)Program the FabISP
Navigate to the directory where you saved the FabISP firmware. If you followed the instructions above, this will be the desktop.
Open your terminal / command line interface and move to the firmware directory.
cd Desktop/fabISP_mac.0.8.2_firmware
Next you need to compile the firmware.
This is a link for instruction
http://archive.fabacademy.org/archives/2016/doc/programming_FabISP.html#mac
Arduino as an ISP
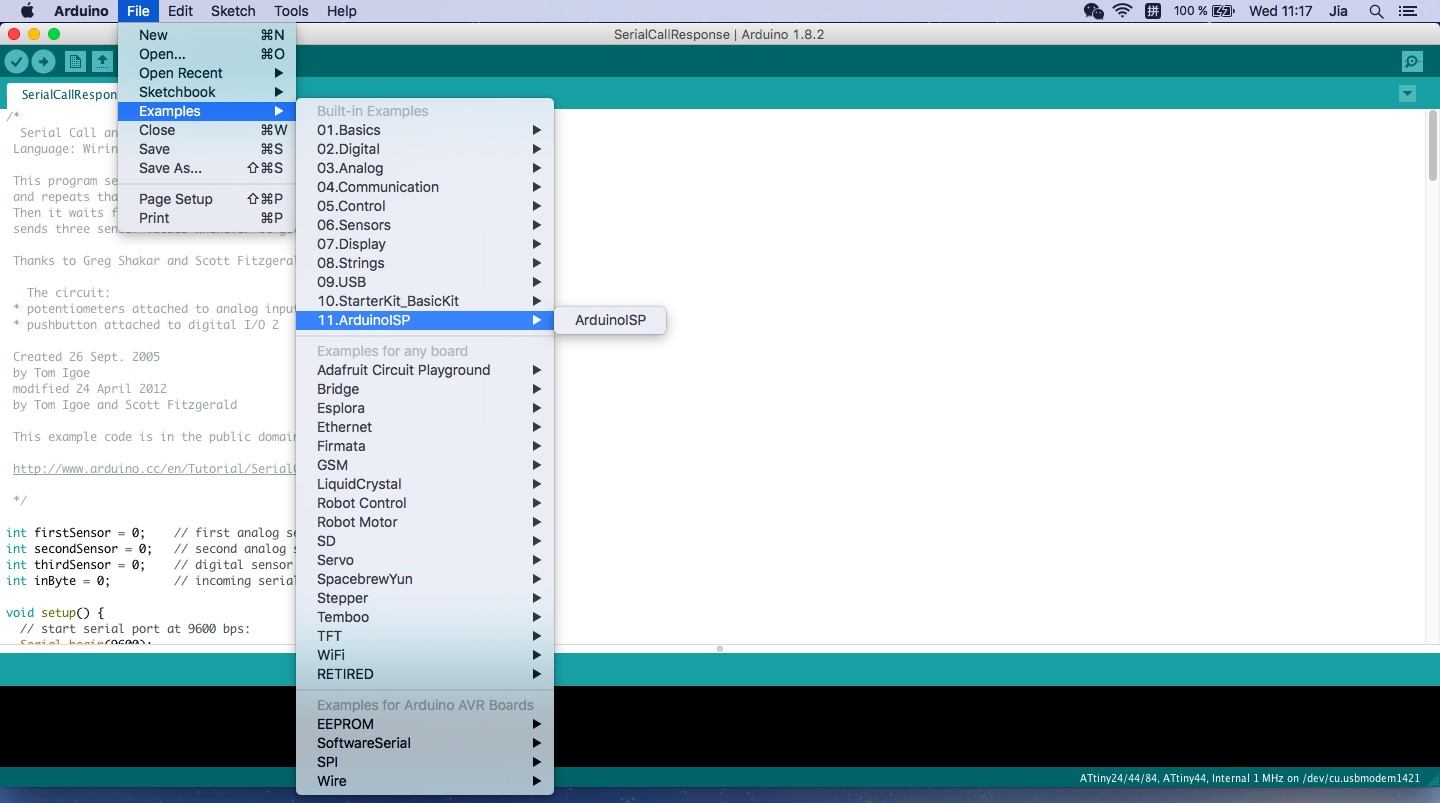
Under File > Examples > ArduinoISP you can find the code you need to upload to your Arduino in order to transform it into an ISP:
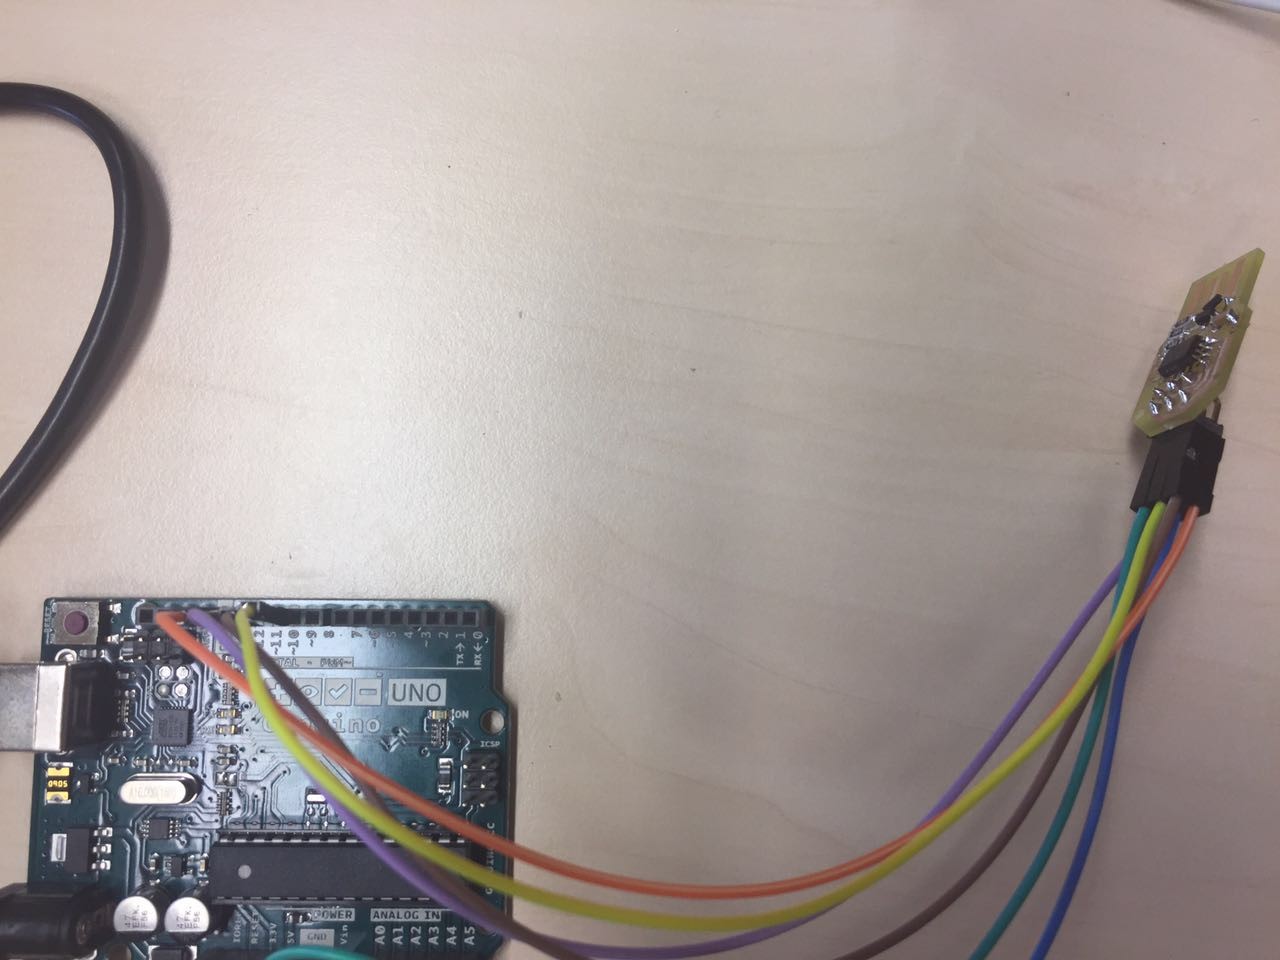
According to the setup of the code, you can then connect Arduino with your FabISP, something like this:
Inside your Makefile for the configuration of your FabISP firmware, you need to use this setting:
AVRDUDE = avrdude -c stk500v1 -b19200 -P /dev/tty.usbmodem1411 -p $(DEVICE)
How do I know which is the port my Arduino is attached to? Open the Arduino IDE, and check under Tools > Port. Then substitute /dev/tty.usbmodem1411 with your specific port.