Assignments
Test the design rules for your printer(s) (group project)
Design and 3D print an object (small, few cm) that could not be made subtractively
3D scan an object (and optionally print it) (extra credit: make your own scanner)
Advantages and limitations of 3D printing technology
Before i started the weekly projects i wanted to learn more about advantages and limitations of 3d printing technology
I found a three examples of advantages and limitations on each subject on the internet
3d printing
Advantages:
-Customization
-Quick production of prototypes
-Low cost production
Limitations:
-Size limitations
-Manufacturing limitations
-Limited materials
3d scanning
Advantages:
Design rules
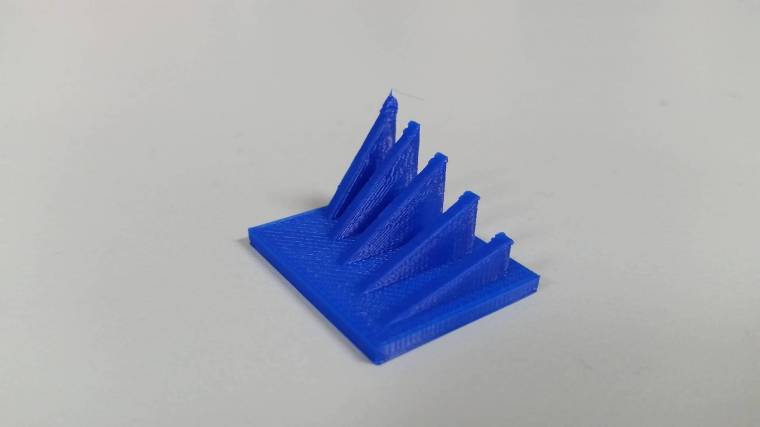
Me and the other interns in the Fab Lab started the fifth week of Fab Academy by printing out the 3D Printer Tolerance Test Neil mentioned on the last meeting
It came out pretty well and we were pleased
Me and the other two interns in the lab divided projects with us
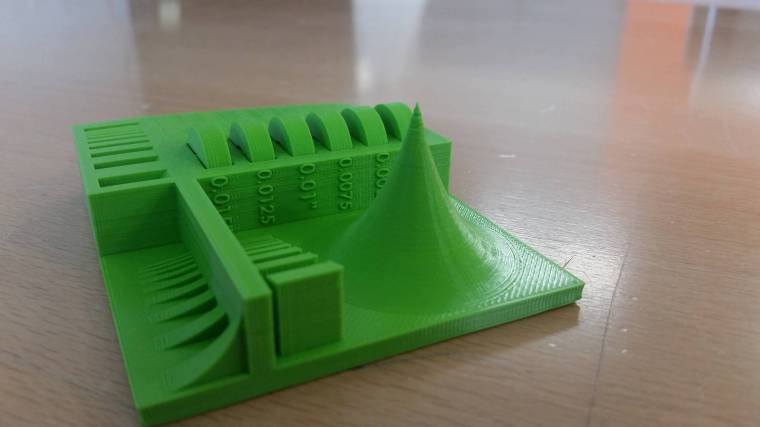
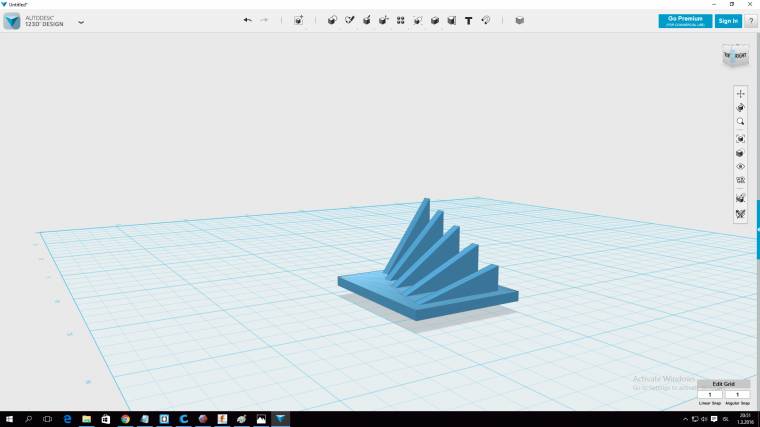
I tested how sharp the corners could be on the printer
I used 123D Design to draw five shapes on top of a plate. The range of the items was from 105° to 145°
The thickness of both the plate and the triangles were 2mm
This test came out pretty well but i´m not sure if it tested the printer enough
I was not sure what else i could do with the corner test so i let this do for now along with the test we made earlier
 The file
Links to the other two students in Fab Lab Vestmannaeyjar here and here
3D scanning
Scan 1
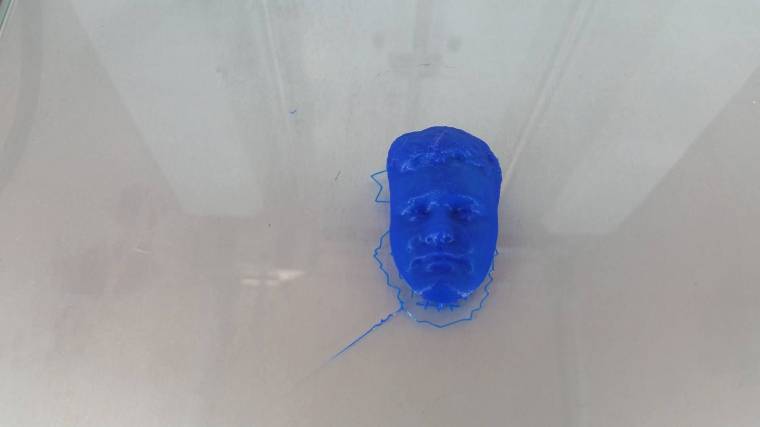
For the scan assignment i was interested in making a 3D scan of a human face
I asked my friend Elliði if i could make a 3D scan of his face and he was more than happy to do so
I decided to use the program memento for the scan
As Autodesk mention on their website: "Memento is an end-to-end solution for converting any captured reality input (photos or scans) into high definition 3D meshes that can be cleaned up, fixed, and optimized for the Web, mobile or 3D printing / fabbing"
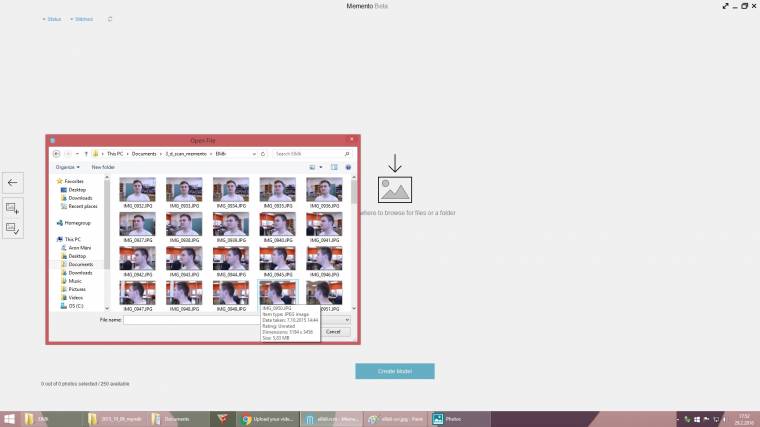
I took photos around my friends face, on top of him and below in 360°
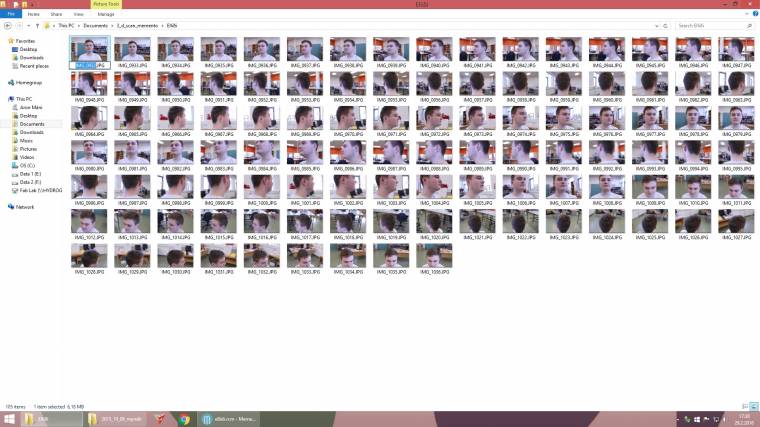
After i was finished taking the photos i uploaded them to autodesk memento and created a 3d model
The model is uploaded to a cloud based drive and the program does all the work for you
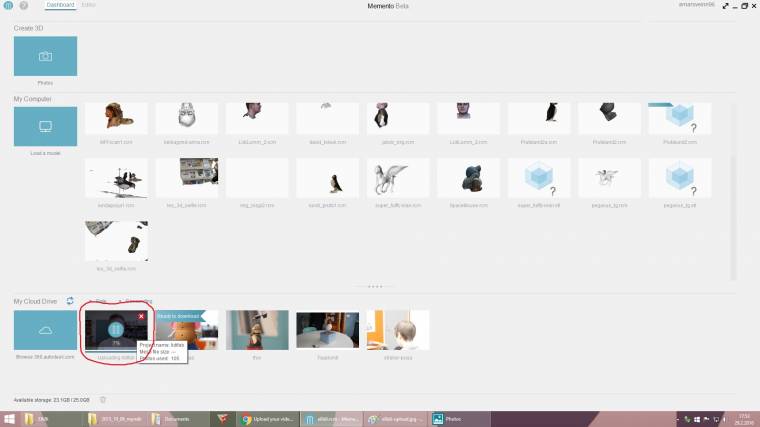
Memento is a super comfortable program that i would strongly reccomend
First version of the scan
The video rendering is made in Memento and i uploaded it to my vimeo account
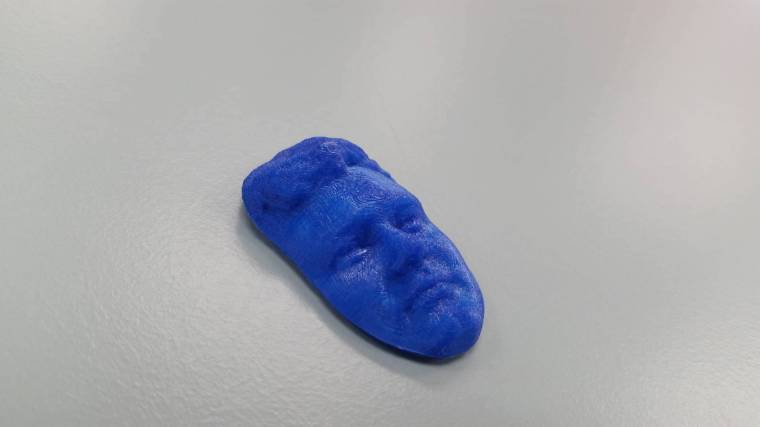
I wanted to print a mini mask of his head and sliced the model in memento
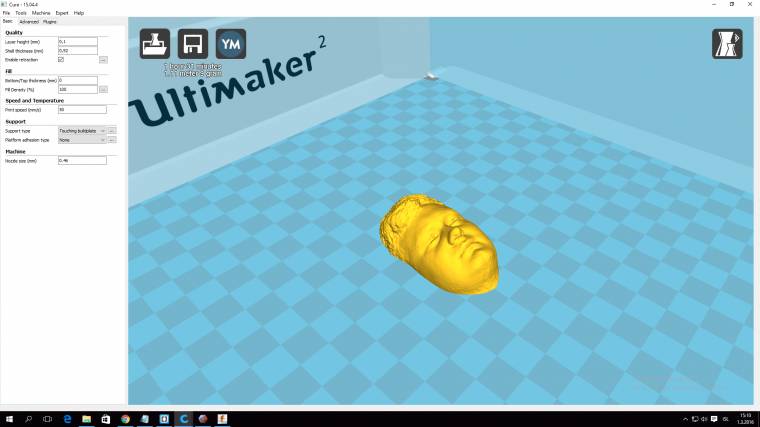
Here is the stl file
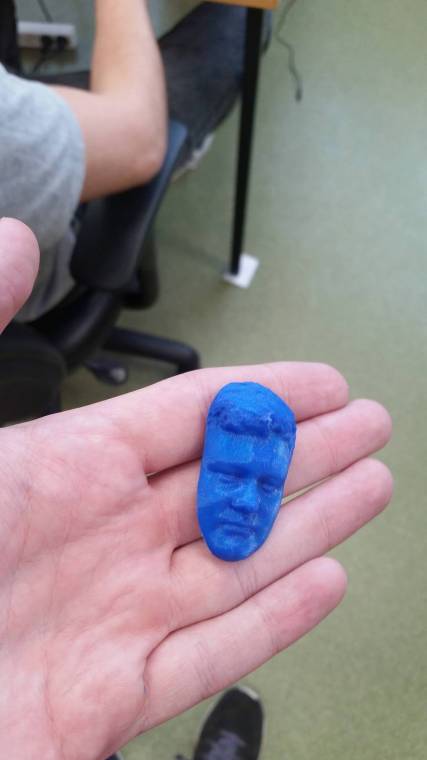
I decided to print a small version but it looked quite nice
Scan 2
I wanted to scan another item and this time use another method
I thought it was ideal to scan something related to the island i live on so i decided to scan a puffin´s beak
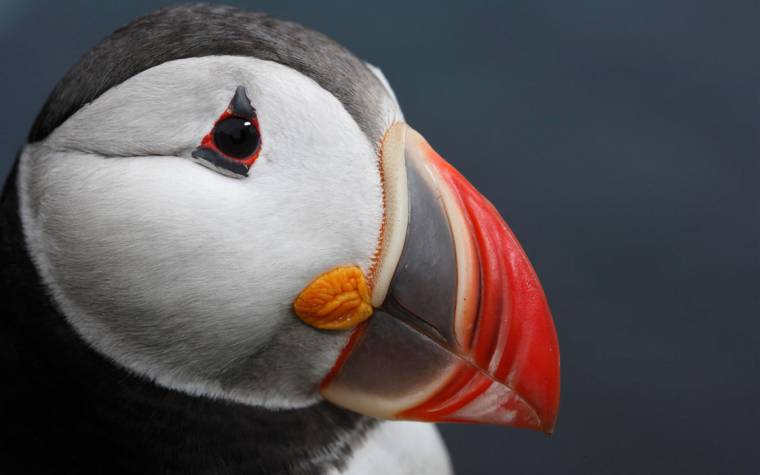
We managed to find a stuffed puffin and i decided to scan the beak with our Roland Modela MDX-20
I placed a little bit of clay under the puffin´s head to make it stable
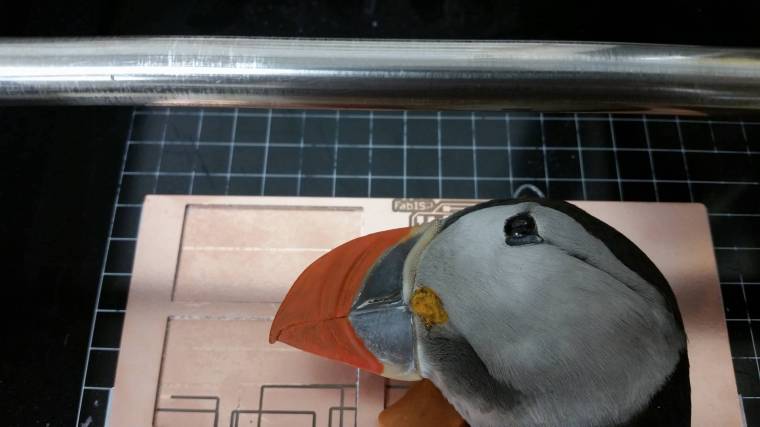
The program i used for the scan is caled Dr. Picza
The modela is connected to a computer using Windows XP
I had to replace the spindle on the modela with the scanner

To use the scanning feature for the Roland Modela i had to open up device manager, choose COM1 in ports, go to resources and change from Current Configuration to Basic Resource Configuration 0000
After that i was able to use Dr.Picza to scan
I made the scanning area a little bigger then the beak, determined the Z-upper limit and Z-bottom
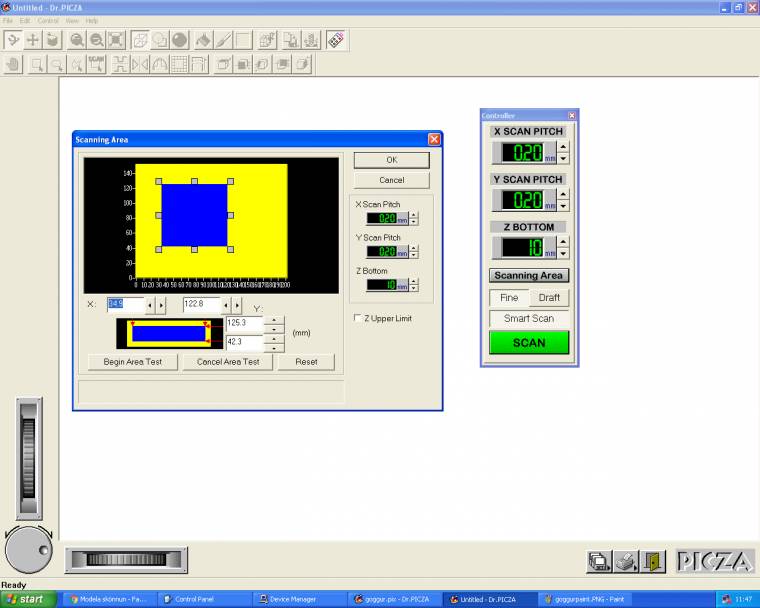
I wanted the scan pitch on the X and Y axes to be 0.2mm. That way the scanner scans 25 measurements per mm²
The scan took about 5 hours and i was fairly pleased with the results
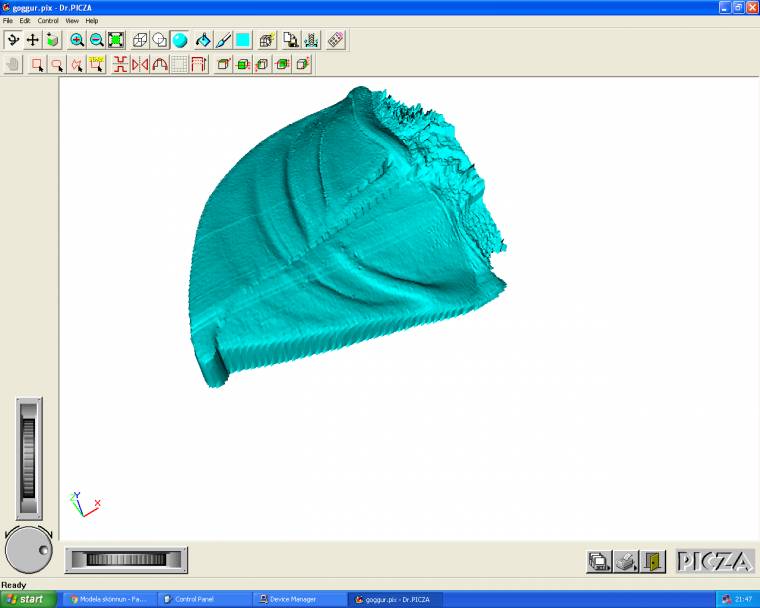
This is how it looked like without any editing
The stl file3D design and printing
The assignment was to design and 3D print an object (small, few cm) that could not be made subtractively
I bumped in to a cool website the other day called shapeshifter.io
Shapeshifter is one of Autodesk´s nice projects and another by them i use in the Fab Academy.
This is from the about section on their website: "Project Shapeshifter is a free technology preview by Autodesk. It provides an easy way to create complex 3D Printable models in your web browser. With a simple tweak of sliders, you can control the object's shape and select a 3D pattern that wraps around it"
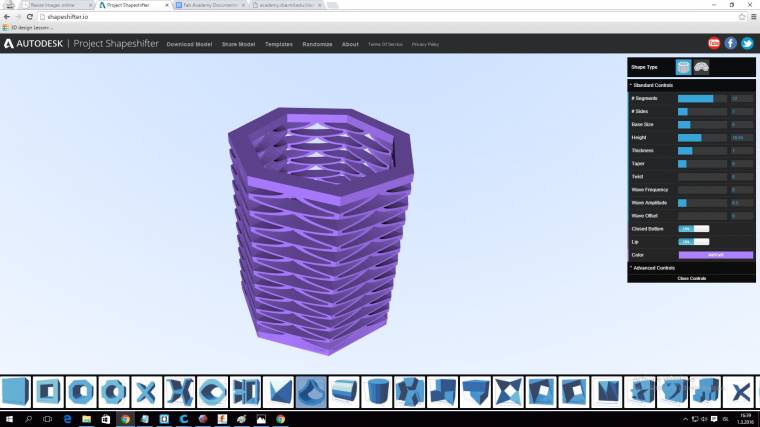
I wanted to make small, good looking garbage bin and ended up with this
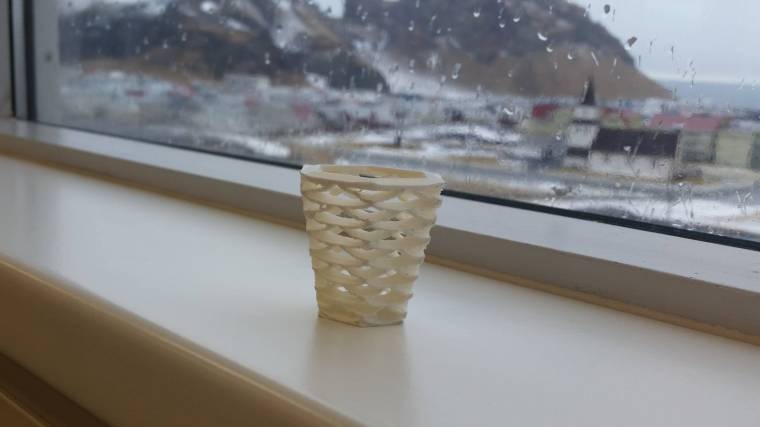
Here´s how the item looked like after the first print
Problems
I wanted to make another 3d scan using another program and method
I downloaded the 123D Catch app for my smartphone and took pictures of a puffin
The photos were processing for a whole day so i gave up in the end but will try this program again sometime
Files from week 5
Face Test file Beak3d scanning and printing in Final Project
I also did 3d scanning and printing work in my final project
I used the 3d model from this week. You can see the results on my final project page (link)