Week 7: Computer Controlled Machining
Assignment:
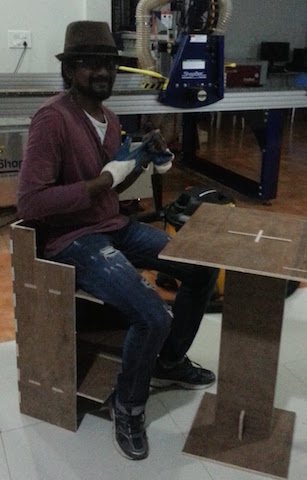
The assignment this week is something exciting, that is 'To Make Something BIG'. It can be anything from sign board to furnitures. At lab everyone trying their hands on making different objects, usable ones from signboards, benches to stairs. For me this week is the perfect time to start off with prototyping and building my smart furniture parts.
The schedule page includes several CNC machines from shopbot to MTM- Machines that make machines, these
are machines that are made within the fablab for several processess you desire.
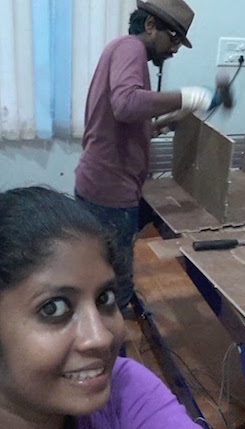
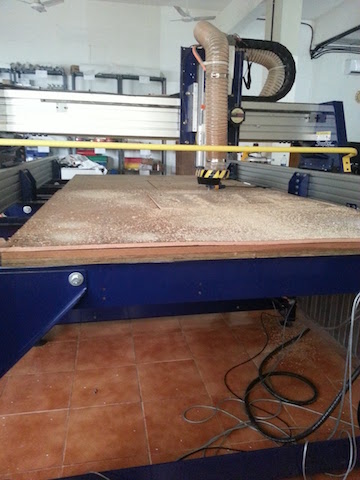
The machine present at our lab is Roland and ShopBot PRSalpha CNC.
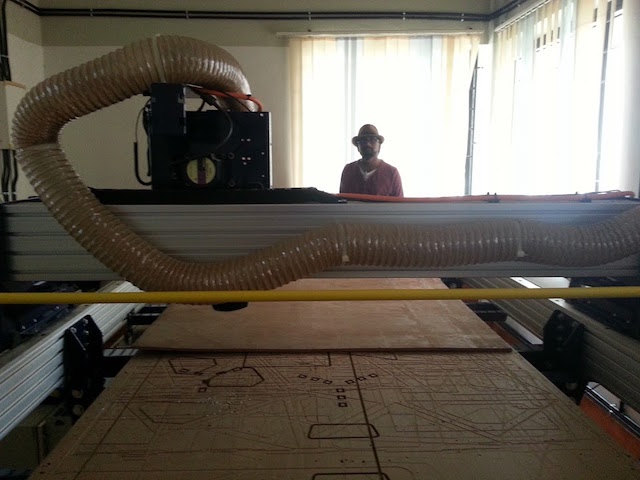
ShopBot is a three axis machine CNC Machine. At our lab we have a full sized shopbot PRSalpha CNC.
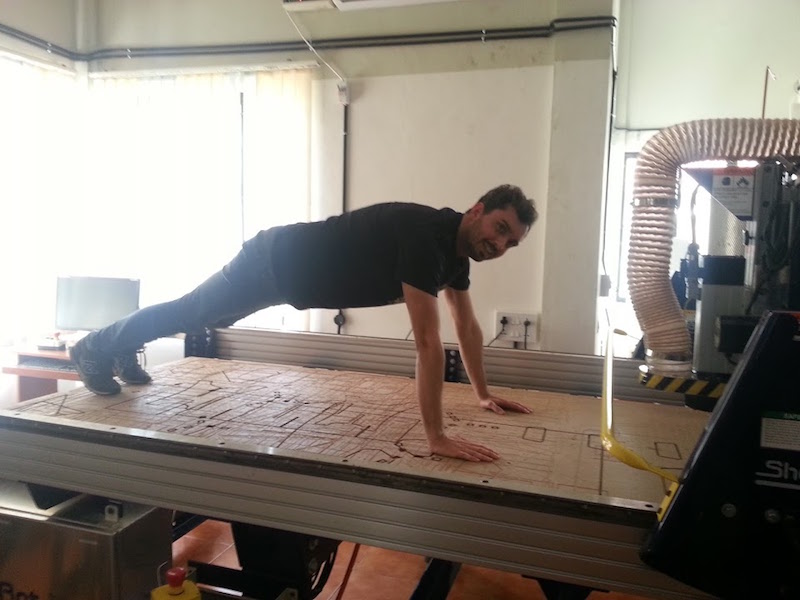
I just found this picture of franc and shopbot (One of the punishment memories...! :D).
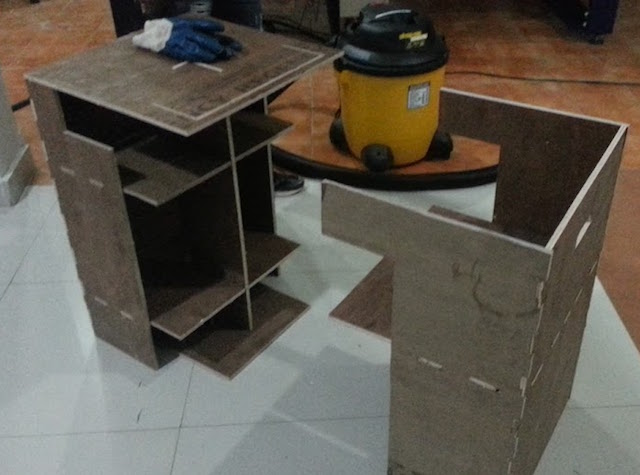
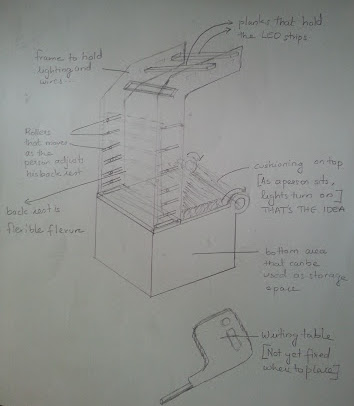
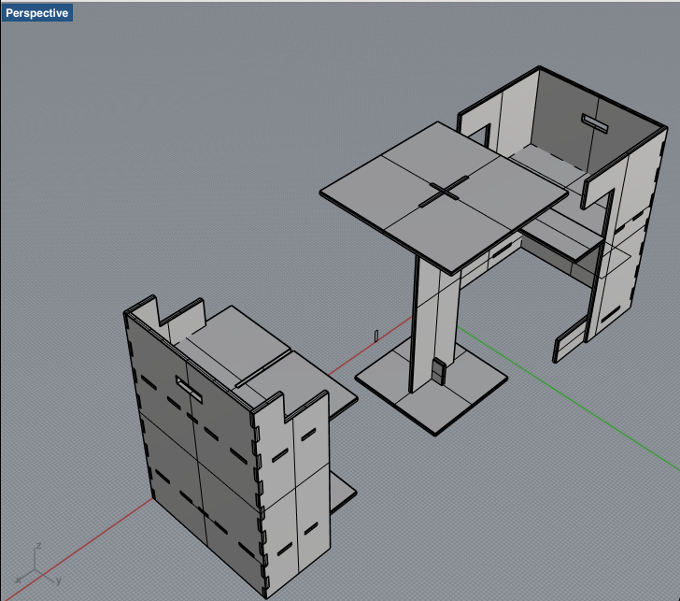
The whole idea was to create a smart furniture in which we could control the light or lamp settings as the person uses the furniture. Also, I did want to use the spaces in furniture for storage. I'm sharing a paper prototyping of my furniture design here.
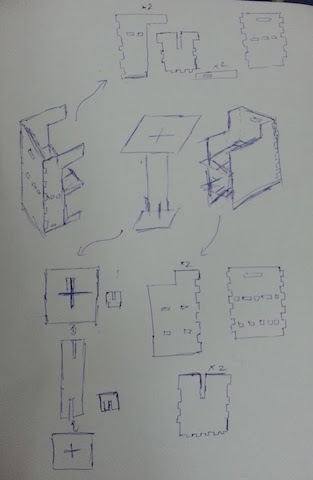
Later on, I changed the design of the furniture. Main reason being that I'm not satisfied with the design.
Another sketching done...
Design Specs
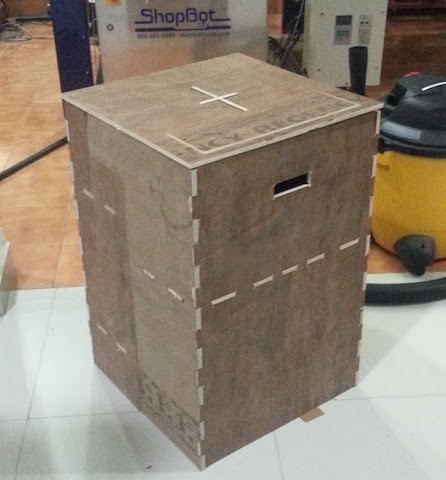
- The Whole furniture block can be nested into a single block.
- The LED strip stand will mounted on the desk.
- There is a storage rack and a chair.
I put an Led strip holder slot too, but after making the furniture decided to opt it out.
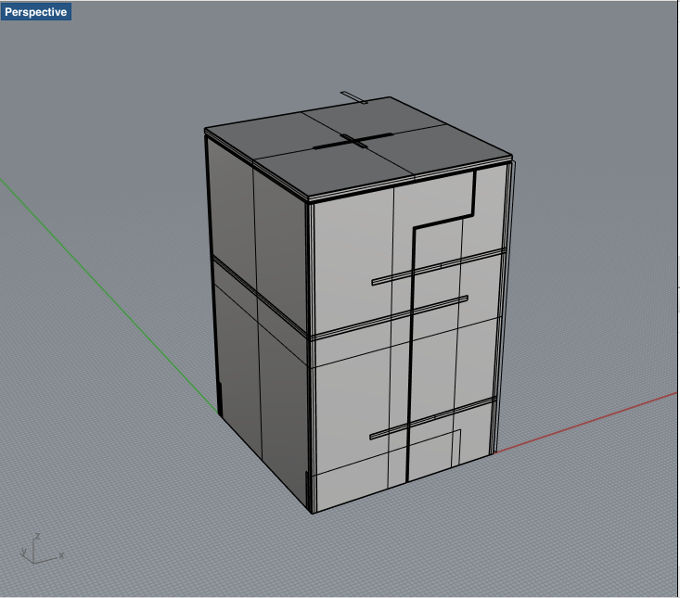
Design File
Design file of the furniture design in 3dm format
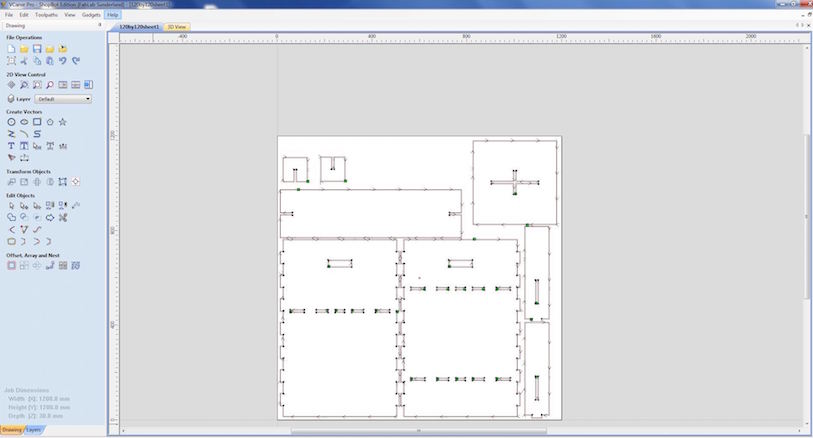
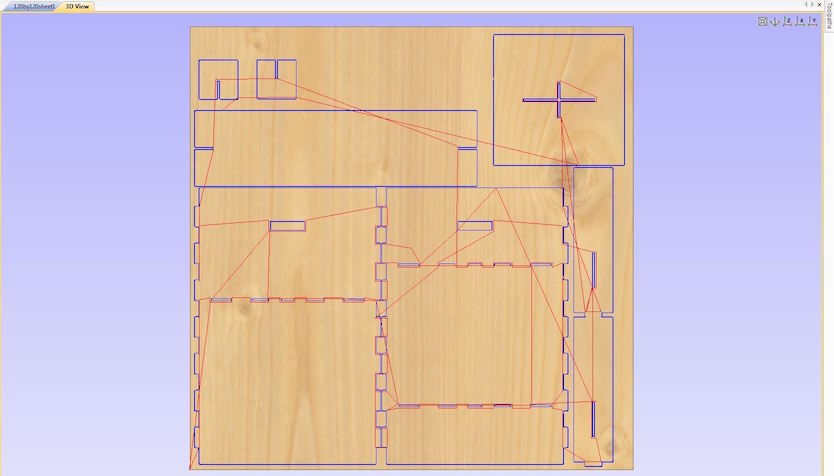
I used MAKE2D command which projects geometry to the construction plane to make a 2-D drawing, to take all the outlines of the cutouts to be done using shopbot. I brought two 120cm by 120 cm plywood from the local store, also I had few left overs from where I could take cutouts from. So, I nested the parts accordingly and seperated them into 4 different files to be sent to shopbot. Nesting is something which is important. You always need not use a new sheet, at times you can find scraps of used material in the lab which you could use and cut down the cost by buying new materials. The designed file is being exported and send to shopbot through V-Carve.
Files in .3dm Formatdesign file (46cm by 60cm) in 3dm format
design file (78cm by 60cm) in 3dm format
design file (120cm by 120cm) in 3dm format
design file (120cm by 120cm) in 3dm format
Files in .dxf Formatdesign file (46cm by 60cm) in dxf format
design file (78cm by 60cm) in dxf format
design file (120cm by 120cm) in dxf format
design file (120cm by 120cm) in dxf format
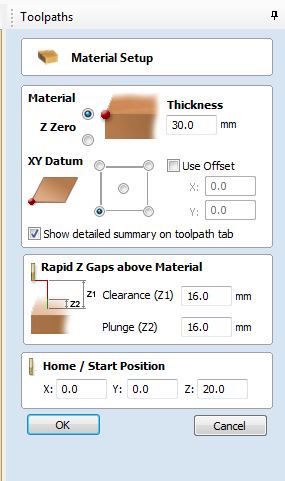
Preparing shopbot for cutting wood
V-Carve:
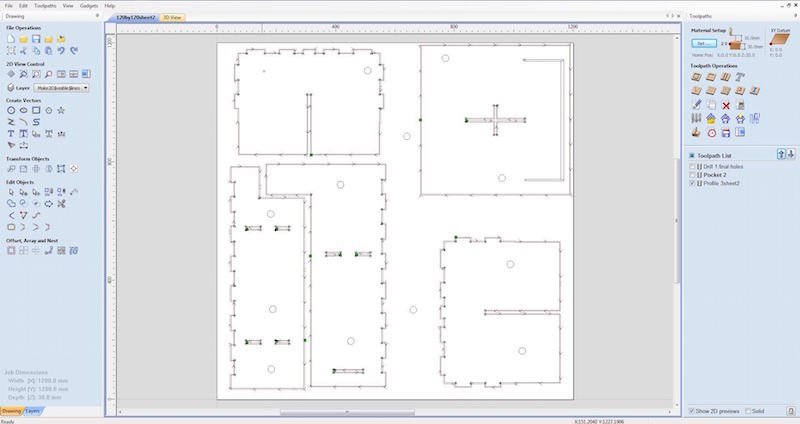
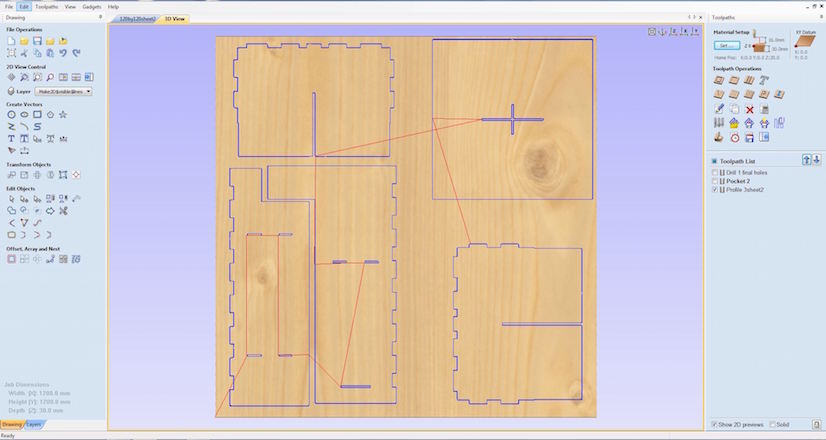
Toolpaths

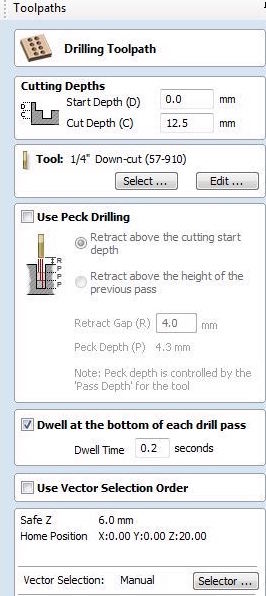
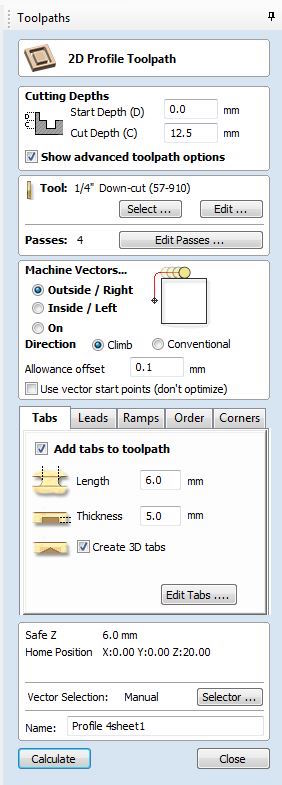
Process I followed in V-Carve:
The process I followed in V-Carve is as follows:
- Drilling few holes to mount screws for the stability of the plank on the bed.
- Drilling the pockets.
- Finally working on cutting the outlines.
Things to note down while doing profiling in V-Carve:
- Make sure you select the right the drill bit size, the speed and the feed rate.
- Making sure that the space in between each cut piece exceeds the size of the drill bit, or else the piece would be joined.
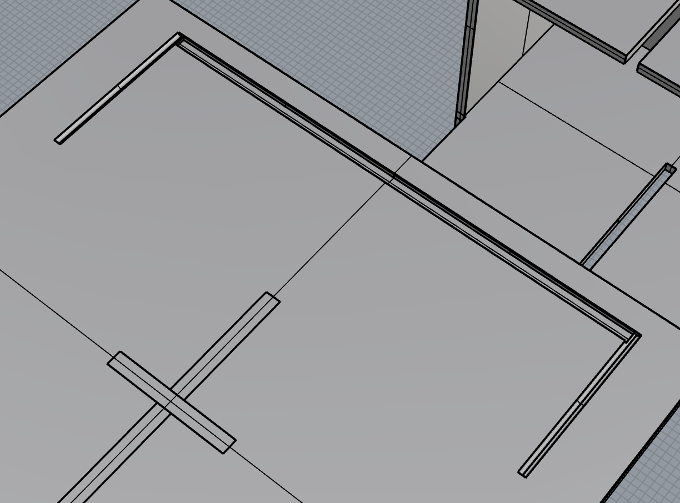
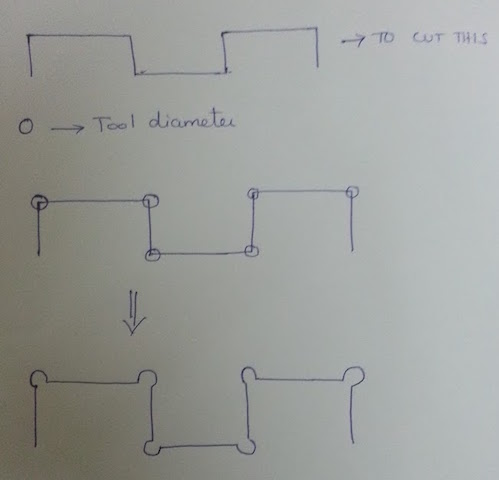
- Create Mickey ears for the joints (those circles at the edges of the joint which makes the bit cut only the required part) as shown in the drawing below.
- Select drill holes and make drill path. Better to create seperate profile for the drill holes and mickey ears.
- When you cut the joints in shopbot you have to consider the tool diameter and make changes in your drawing to accomodate it and create a perfect press fit.
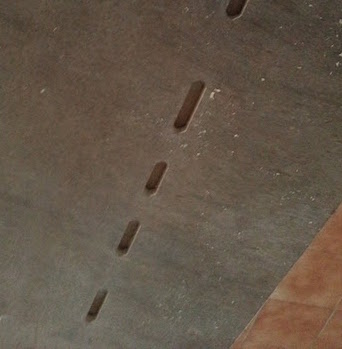
- When you create inner profile make sure you don't select both the mickey ear and the joint, this will give a cut which is the summation of both these shapes. Yes, I made this mistake once and got the cut out as shown below.
- Don't forget add tab's on the cut outs. Or else the cut out might move out of place and disrupt the ongoing process.
Cutting
- Insert the drill bit (1/4 FL)
- Open the shopbot software
- Launch the Spindle Warm Up routine
- To zero the Z axis, position the metal plate under the tool and launch the command, Zero Z Axis
- Position the XY Axis
- Launch drill path then screw the plank
- Launch Pocket Path and then Profile Path
Finishing