My Project...
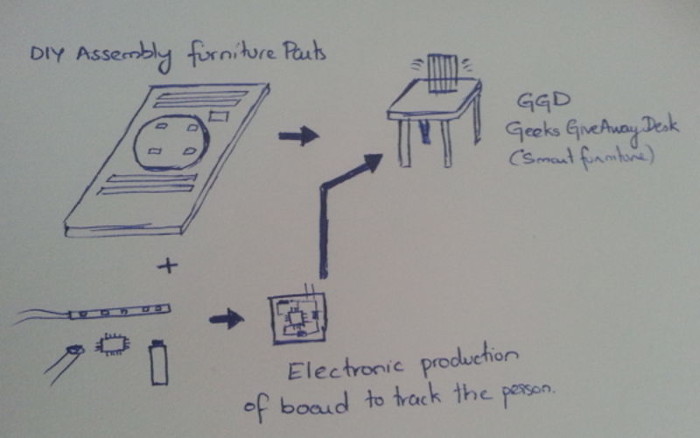
Do-it-yourself assembly cards were something which I used to like since childhood. I'm a big fan of those cards which you could later break and build into a 3D model.
So, I was thinking why not make a productive smart furniture in such a manner. I'm still exploring the possibilities of my project. Just imagine a table that recognises the user and then automatically turns on/off table lamp. I'm planning to complete the project one step at a time, breaking the whole project into small modules. It's fun to explore and learn.
Things to do...
- Explore different furniture designs and design a desk that can be assembled without using screws.
- Design a board to control the LED Table light system.
- How to power up - Battery or other sources to make it stand alone.
- Sensing the person when he is near the desk.
Project Development Milestones
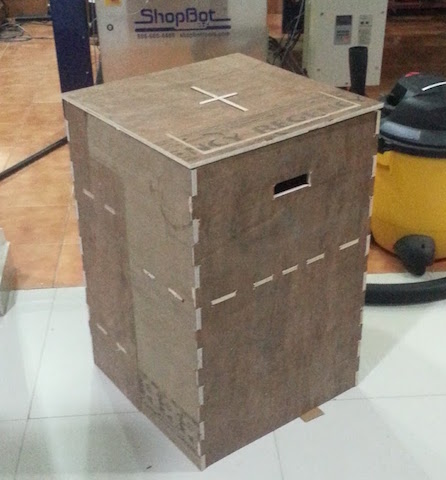
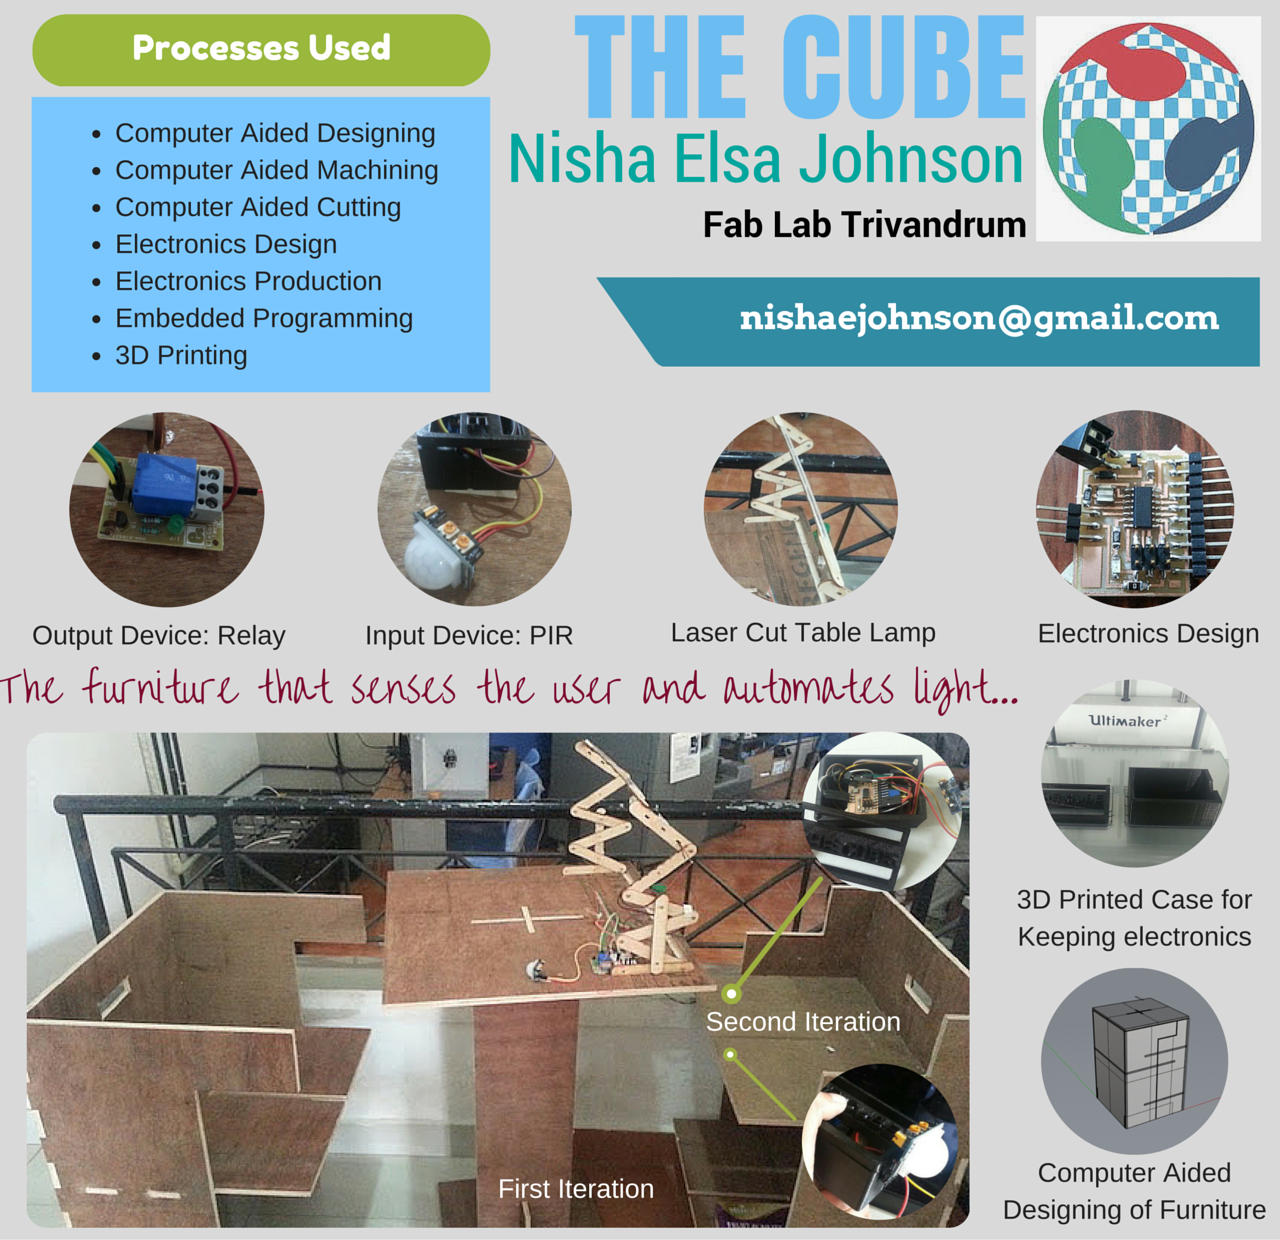
The CUBE:
Fabrication Techniques involved in my final project, “the Cube” are Computer controlled designing
(Rhino), Computer controlled cutting (Laser cutting, Vinyl cutting), Computer controlled machining
(Furniture cutting), Electronics Design (using Eagle), Electronics production and Programming.
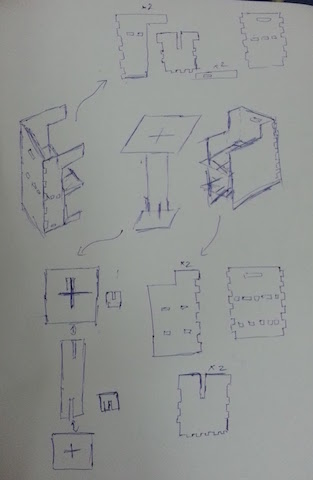 paper prototyping of furniture
Mechanical Design
Furniture Design in Rhino
You can find my Furniture Design and Production
in the
Computer Controlled Machining Assignment Week. The Furniture Design
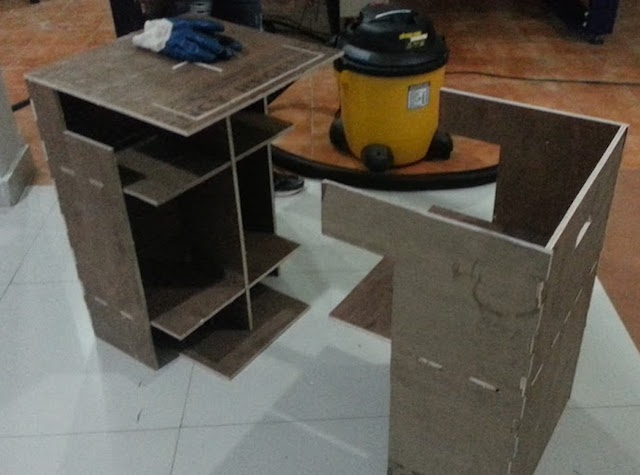
was done using Rhino Software. The furniture has all the three utilities
(A table, Chair and Storage rack) being nested into a cuboidal structure.
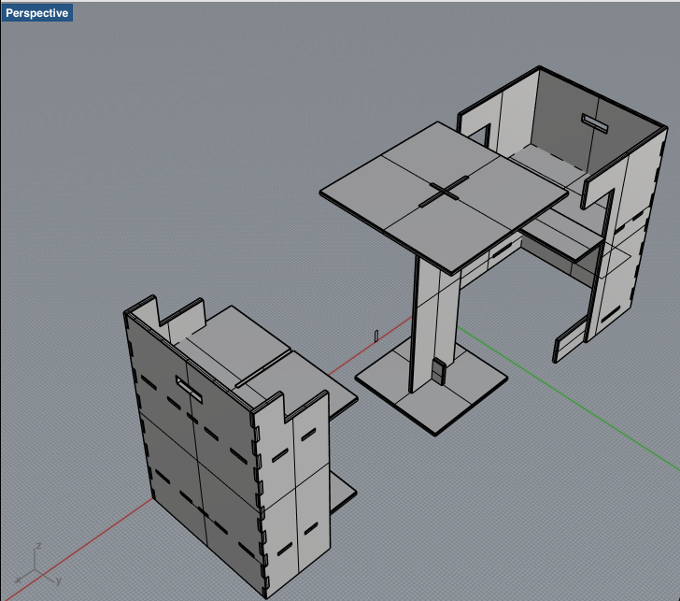 Screen Shots of Furniture Design
Design File of furniture
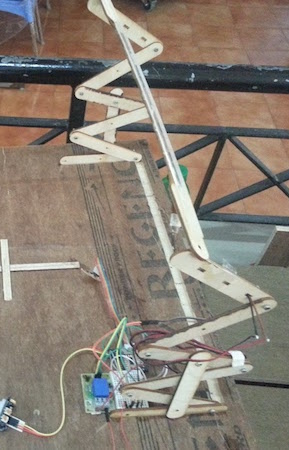
LED Strip Holder Design in Rhino
I have used laser cutter to cut a few strips of craft wood that acts
like holding structure for the LED strip when joined. I used 1mm screws to mount the joints
and I also used a little of quick glue to mount it on the surface of the furniture.
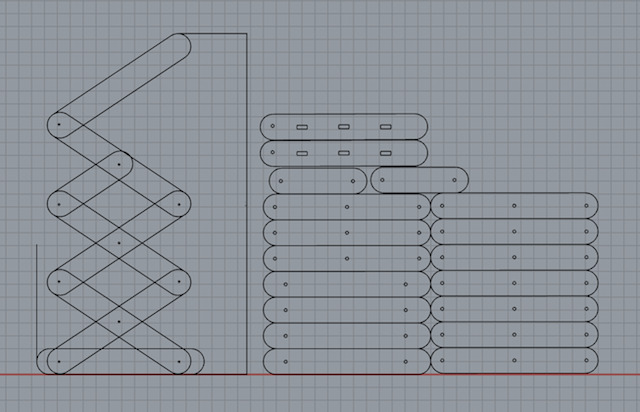 Screen Shots of Cut outs to be taken using Laser engraver
Design Fileof LED strip holder
Mechanical Production
Furniture
Furniture cut outs are taken using ShopBot in 12mm plywood. You can find the
documentation in
Computer controlled machining assignment week.
LED Strip Holder
I laser cut craft wood to make the LED Strip Holder. I used craft wook as the material.
Electronics Design
Input, Output and Power Supply Board
I have used ATtiny44 as the microcontroller and added the input, output and power supply components.
For taking Input from the surrounding I have used a PIR Sensor and LDR.
The Output to LED Strips is given through a 12V relay breakout board that controls
the LED turn off/on as per the output given from microcontroller.
Also, I’ve designed a power supply board with 12V voltage regulator and 5V voltage
regulator. I have two options to supply power to the board and the LED Strips.
To use an LED Driver that has an output of 12 V and then step it down using a 5V
voltage regulator and send it to the microcontroller. I'm using a LED Driver
that gives an output of 12V which is then fed to 5V voltage regulator rather that
using a step down transformer, bridge rectifier and filter capacitor circuit and
get a 24 V that is sent to the 12V Voltage regulator and 5V voltage regulator.
Board png images...
Board Trace

Board Cut out

Electronics Production
Input, Output and Power Supply Board
I’ve used roland modella to mill the traces. The below are the .png files of the board.
Traces are cut using 1/64 bit and board outline cut by 1/32 bit. Input and output
pins are taken out so you can connect I/O devices over them. Also to power up the board
externally I have added a 7805 voltage regulator. The stuffed board is shown below.
Stuffed Board

Programming
Programming the boards using Arduino IDE
At first I subdivided the programming into few sections, then programmed an arduino
board with the input and output components. This was to get the correct code. Usually
error happens and then you go thinking where the error was. So just took a precautionary
and wrote the correct code first before feeding it into my project board.
Find here Program for the project (.ino file)
First Iteration:
Finishing works on Furniture
At first I fixed the electronic board and LED Strip holder on to the furniture.
Then a lot of sanding was done to smoothen the surface.
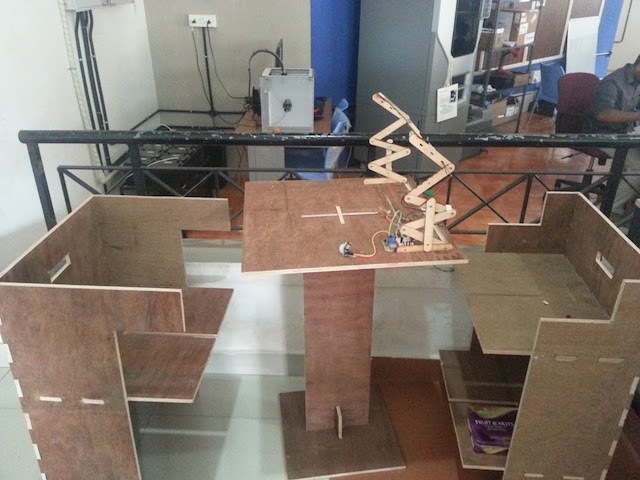
This being the First Iteration, you could see I have connected the
wires together with a bread board and also it's too much messy with wires.
To hide the wires, making a case would also be a good idea. Which would help to integrate
Electronics into the project better.
Second Iteration
Removing bread board and re-wiring is important to change the look of the furniture.
We don't want messy entangled wires anywhere on the desk and also integrating the
electronics into the project is also necessary. So, my second iteration involves this.
Removing the Mess of wires
Personally, even I was not satisfied with the messy stash of wires used for interconnection
of boards that lie in the table. Franc suggested to neatly make connections with
few wires, strip off what ever unnecessary and throw the breadboard to as far as I could :P .
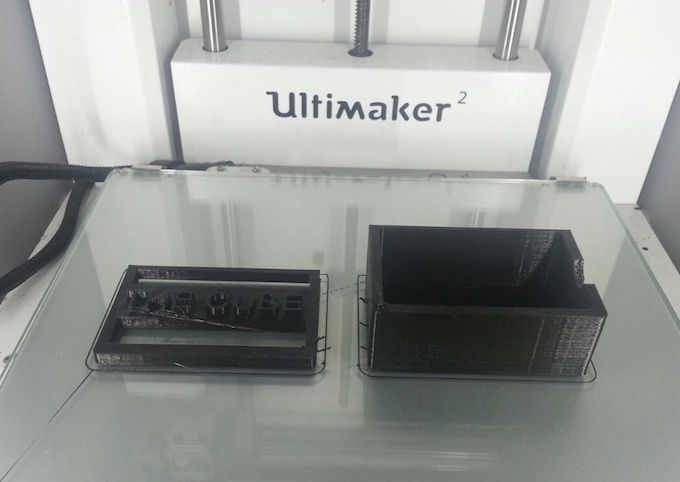
Then make a case, which is not to be made using
Laser Cut (Neil didn't like the way only Laser Cutter was being
extensively used at our Lab!). So, I decided to 3D print a case design to keep the
boards and integrage better with the furniture. For 3D printing, being able to invest time at
lab is a huge factor when it comes to machine usage. Franc has been hugely supportive for me, he says, "Nisha,
you don't need to be at lab, most of the work except the machine usage can be done outside the lab".
True! To be franc, most of my works during project development weeks were done while travelling to the lab
or at similar unlikely situations.
Case Design in Rhino - Screenshots and Design Files
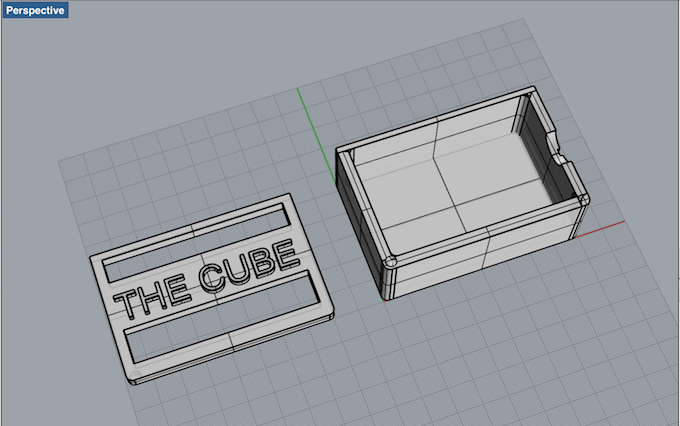
Find here Rhino Design file of box design
Find here .stl format file of box design
Case Right out from printing
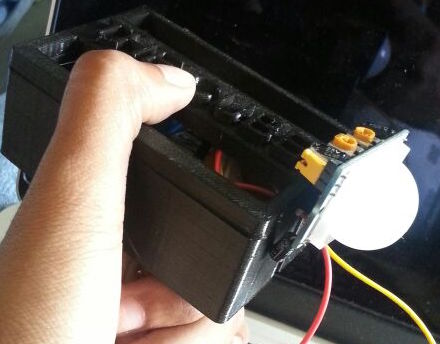
For better integration of PIR sensor into the project, instead of leaving the PIR
sensor outside, I kept it in the slot at the box. And mounted the PIR onto it.
The images are shown below
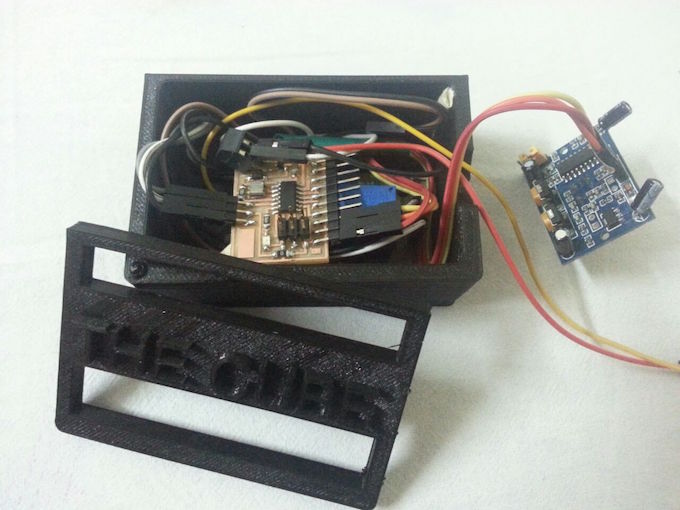
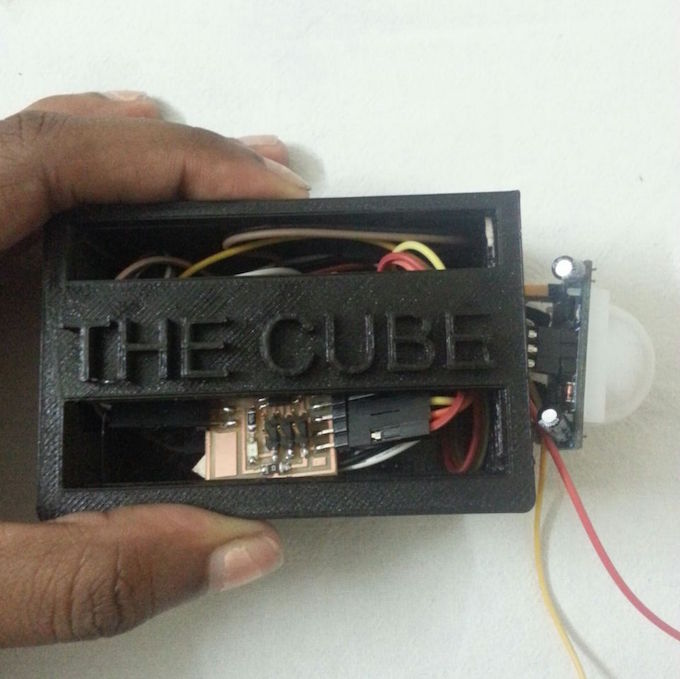
For better integration of PIR sensor into the project, instead of leaving the PIR
sensor outside, I kept it in the slot at the box. The images are shown below
Bill Of Materials
The below are the materials I've used:
Mechanical
Ply Wood----1 No. 8ft by 4ft, 12mm Thickness (Price: $12.60)
Craft Wook----3mm Thickness (Fablab Inventory, Price: $34.99 per piece)
Material for 3D Printing, PLA Plastic Black Spool---- (Fablab Inventory, Price for a spool: $79)
Electronics
PCB FR1 small----2 Nos (Fablab Inventory, Price: $0.18)
Resistors SMD----
10K R (FabLab Inventory, Price: $ 0.00637),
1K R (Fablab Inventory, Price: $ 0.00637)
Capacitors SMD----
.1uF (FabLab Inventory, Price: $ 0.1155),
1uF (FabLab Inventory, Price: $ 0.068),
10uF (FabLab Inventory, Price: $ 0.184)
Attiny 44 SMD----1Nos (FabLab Inventory, Price: $ 1.176)
5x2 pin jumper SMD and header--- (FabLab Inventory, Price: $ 0.666
Ribbon cable---- (FabLab Inventory, Price: $ 63.24 for a roll)
Wires for connection of LED strips---- (Fablab Inventory, $1.50)
FTDI sketch loader device or cable---- (Fablab Inventory, Price: $14.95)
LED Driver circuit---- (Price: $2.50)
Screw terminal---- 1No. (FabLab Inventory, Price: $ 0.463)
HC-SR501 PIR Sensor Pyroelectric Infrared Module KG001----1No. (Price: $2.22)
12V Relay Board Module (Controllable With 5V) ----1No. (Price: $2)
LED strips---- few (Fablab Inventory, Price: $3)
Overall cost of the project is below 50$
License I chose...
I like furniture to be made personalised, rather that being purchased in from stores that are mass
manufactured seeing to an imaginary customer.
This project is under MIT open source license.
The MIT License (MIT)
Copyright (c) 2016 Nisha Elsa Johnson
Permission is hereby granted, free of charge, to any person obtaining a copy of
this software and associated documentation files (the "Software"), to deal in
the Software without restriction, including without limitation the rights to use,
copy, modify, merge, publish, distribute, sublicense, and/or sell copies of the
Software, and to permit persons to whom the Software is furnished to do so,
subject to the following conditions: The above copyright notice and this permission
notice shall be included in all copies or substantial portions of the Software.
THE SOFTWARE IS PROVIDED "AS IS", WITHOUT WARRANTY OF ANY KIND, EXPRESS OR IMPLIED,
INCLUDING BUT NOT LIMITED TO THE WARRANTIES OF MERCHANTABILITY, FITNESS FOR A
PARTICULAR PURPOSE AND NONINFRINGEMENT. IN NO EVENT SHALL THE AUTHORS OR COPYRIGHT
HOLDERS BE LIABLE FOR ANY CLAIM, DAMAGES OR OTHER LIABILITY, WHETHER IN AN ACTION
OF CONTRACT, TORT OR OTHERWISE, ARISING FROM, OUT OF OR IN CONNECTION WITH THE
SOFTWARE OR THE USE OR OTHER DEALINGS IN THE SOFTWARE.
Presentation
Presentation Slide
Presentation Video
Future Developments
Neil Suggested that the functionality of the furniture is good but design
could have been more attractive. So, in future planning to develop a range of fab furnitures
that are not just functional but also good looking!
Final Moments of Documentation
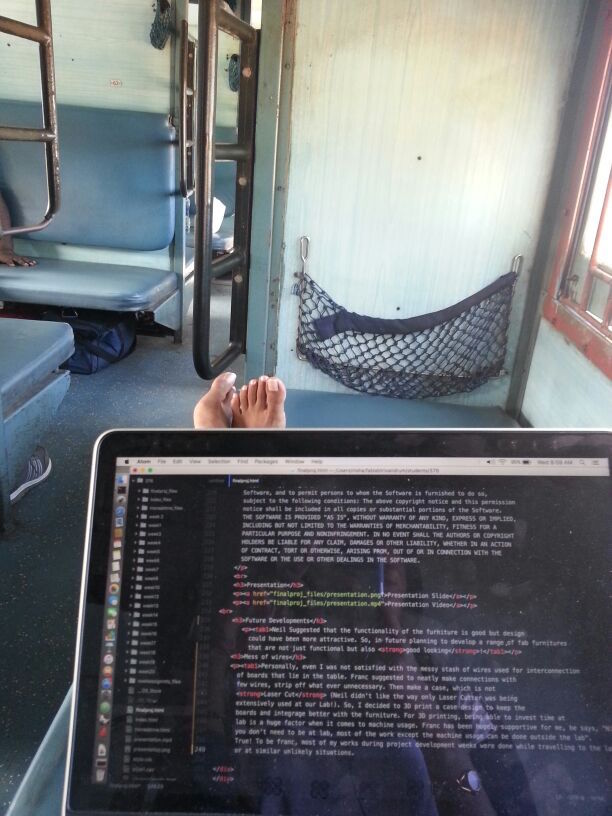
"Document on the GO, Document on the GO", franc says...literally that was
what happening. Some one of a kind experiences documenting right from public train to
hospital corridors to late night fab documentation works. Ok, the academy was hell of a journey filled
with lots of good memories and learning curves! :)
 Not The End but the beginning..