- Stefano Galbo
Beginner
Desing
First I saw in 2015 classe archive looking for an idea, and I thought: what I need at my home? An hanger!
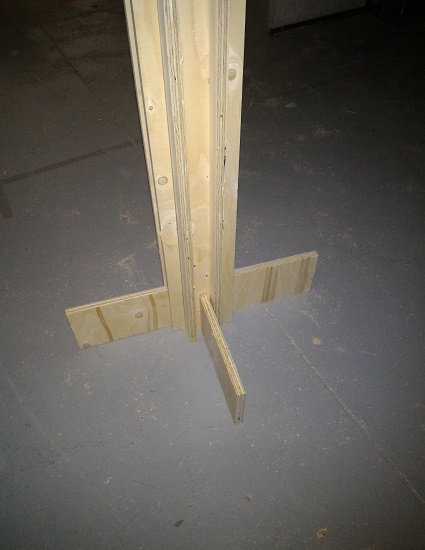
Thanks to a photo on Facebook, I decided a road sign style but I spent a lot of time to chose the structure, to be sure it was very strong. I looked for good junctions on Pinterest, in particular this PDF file where I found my favorite junction.
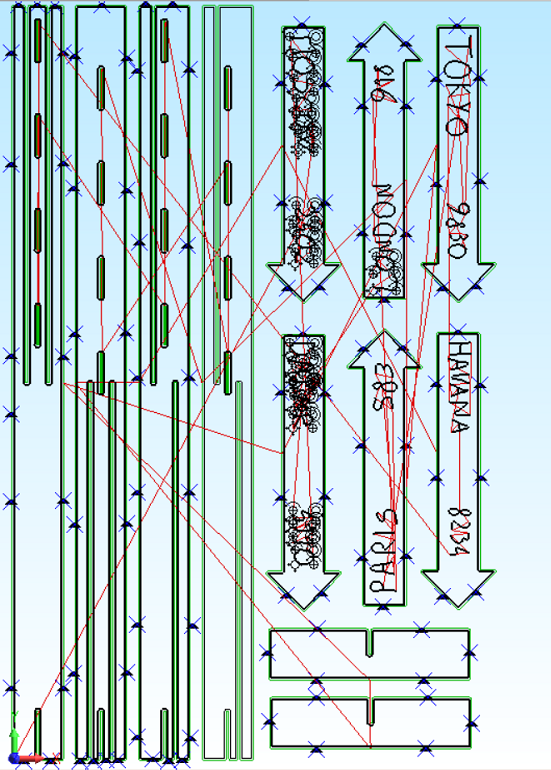
To draw I chose Rhinoceros and in order to make a 2D file for CNC machine I directly worked on top view; I started drawing with polylines and specific measures, paying attention at CNC working: endmill is not able to make internal acute angles, it make a minimum radius in the corner because of its form.
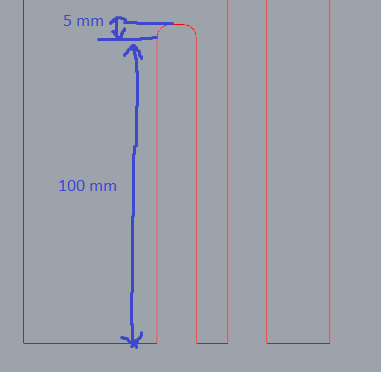
So if you want a pocket of 100 mm height, you have to draw a 100 mm line and then add a further line equal to endmill radius; in this way I have a junction of 100 mm, and I use "fillet curves" just on 5 mm line (because my end mill will be 10 mm of diameter).
After many hours I finished the drawing: most important advices before exporting file are to check starting point at 0,0,0, different layers for different processes, and minimum distance between the parts.
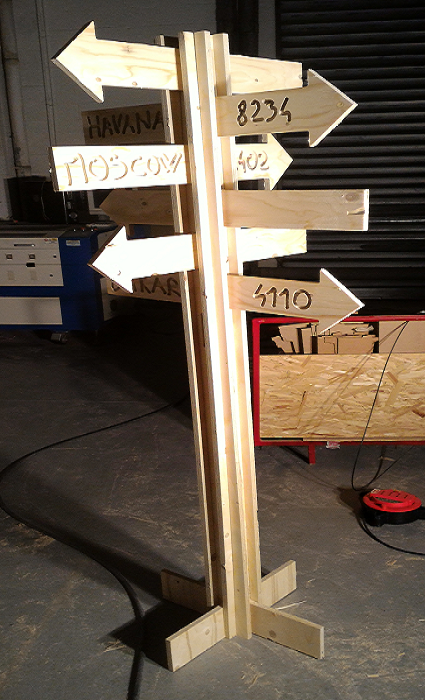
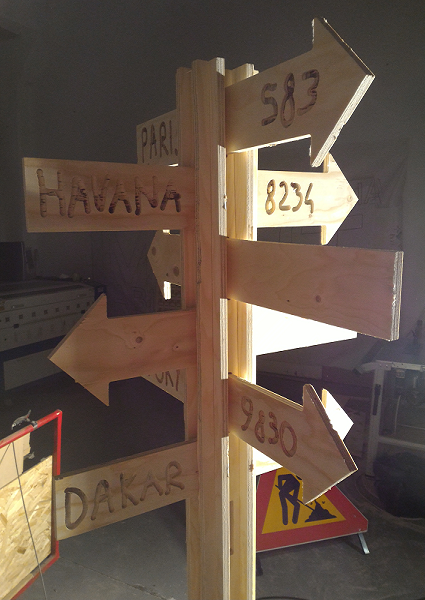
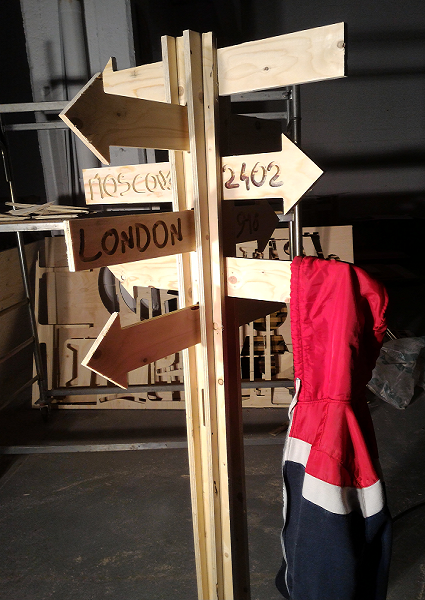
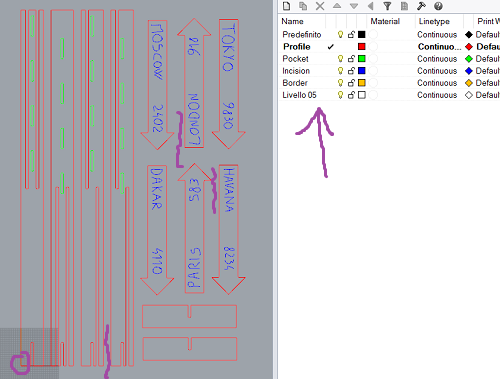
I needed to make two files with Rhino because my object and my wood panel are bigger then the CNC working plane: this is my hanger, and these are two additional arrows.
Finally I exported them in .dxf file (our instructor Stefano Paradiso said R12 Natural is better) and I switched to CAM software (hanger, arrows).
CAM software
We used a trial version of HeeksCNC and I imported dxf file.
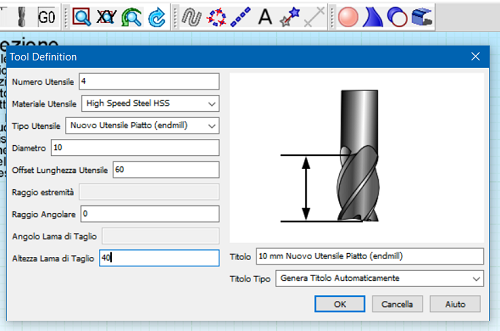
First I created a new tool and I set my endmill parameters, above all diameter and cutting edge height.
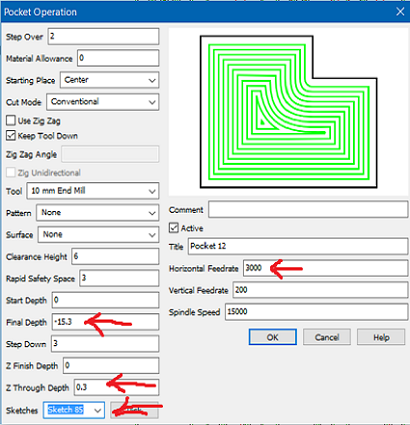
Second step was to create new process: "pocket" is useful to make holes or incision; most important parameters are:
Final depth: how deep the endmill should go. To make holes I set same value of wood thickness (15,3 mm), to make incision I will set 6 mm.
Z through depth: how many millimeters the endmill should exceed the final depth. 0,3 mm is a good value to be sure that the endmill makes an hole without damaging working plane.
Horizontal feedrate: moving speed on XY plane; I set 3000 mm/min to be fast.
Sketches: here I set "Pocket" layer made in Rhino (for incision I used "Incision" layer). If you don't have layers, select manually the objects.
!Correction!: I had many many problems using Rhino layers, it's better to select Rhino layers and use "split sketch". In this mode you will have not 3 entities but many sketches, you have to make a multiple selection and assign it different operations.
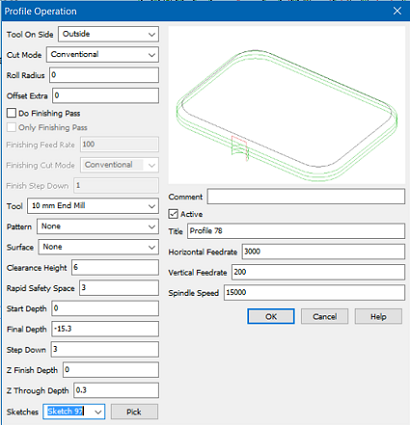
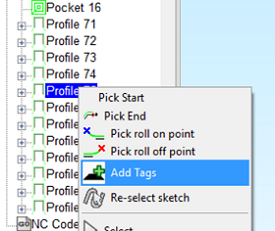
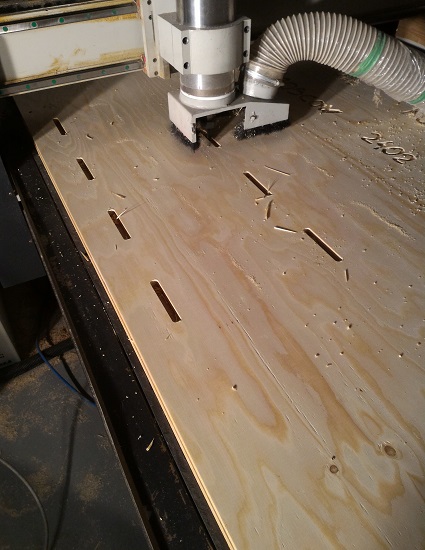
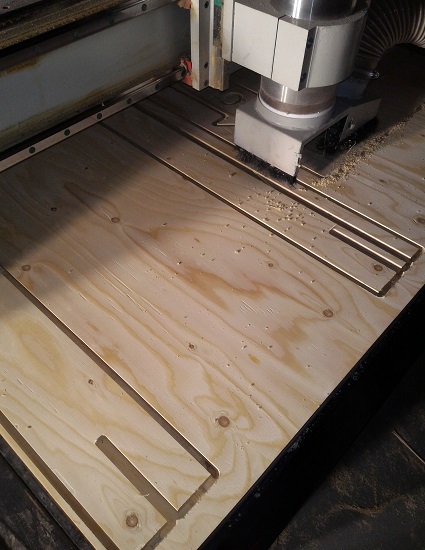
Then I created Profile operation: procedure is the same of pocket operation, but after that you have to add tags, little pieces of not cutted wood useful for stability during the milling. To do that you have to generate Gcode (just in order to visualize milling routes by green lines), then you have to click on "Profile sketches" and finally "Add tags": add them on the milling routes, not on the objects!
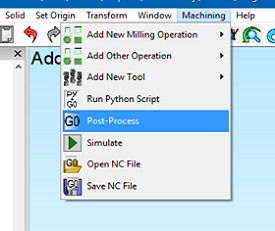
Now I have my Heeks file and its Gcode.
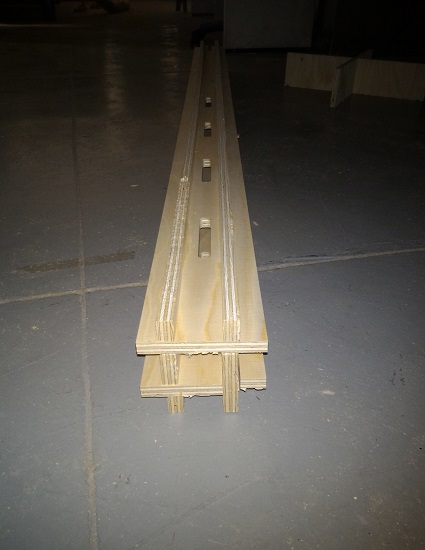
I made the same procedure for two additional arrows, I will make them in a second moment on the remaining wood (file, Gcode).
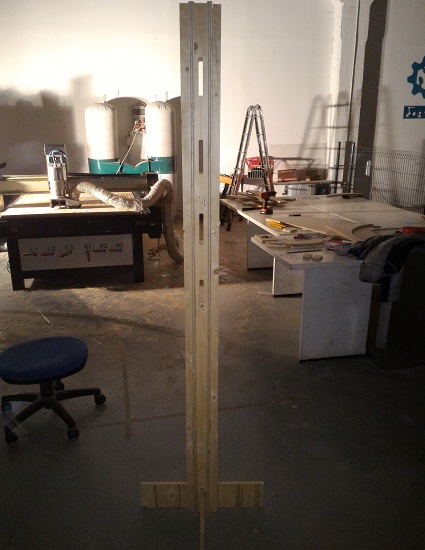
Milling
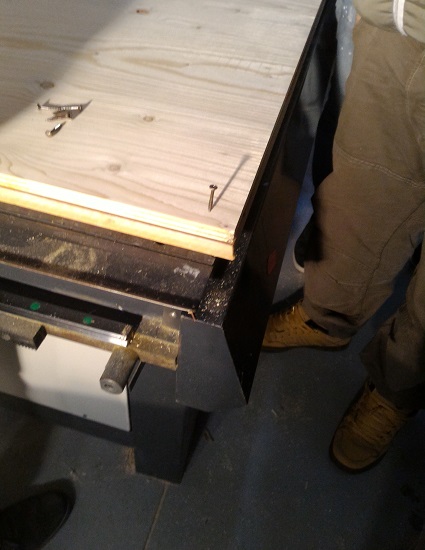
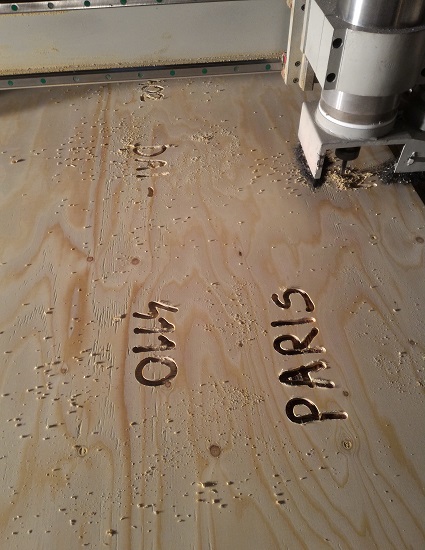
I went to CNC machine and I fixed wood panel to the workplane with screws; I looked at my Rhino drawing to be sure of dimensions, consequently I set XY origin in the bottom left corner.
Then I switched on the Z axis, I moved down the endmill (step 0,1 mm) until it touched the wood: perfect Z origin is when the endmill, moving on XY axes, leaves a mark.
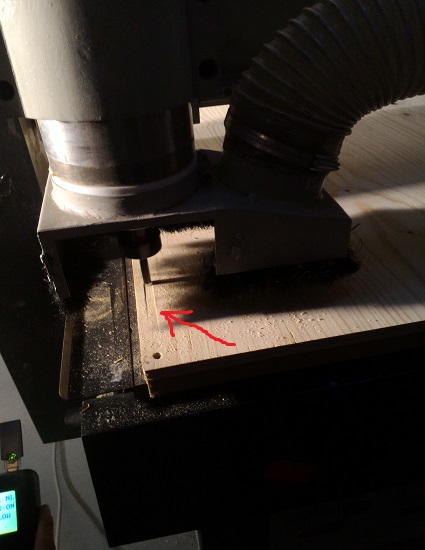
After about 1,5 hour of work..
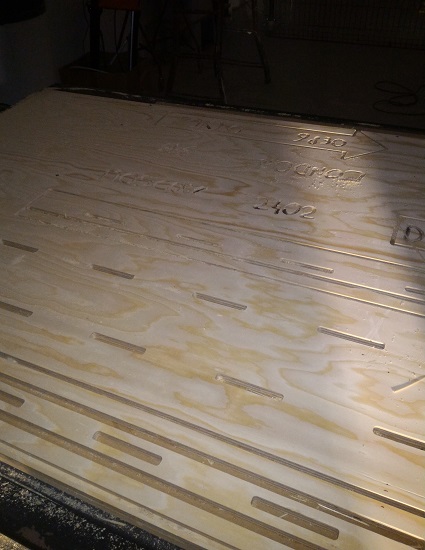
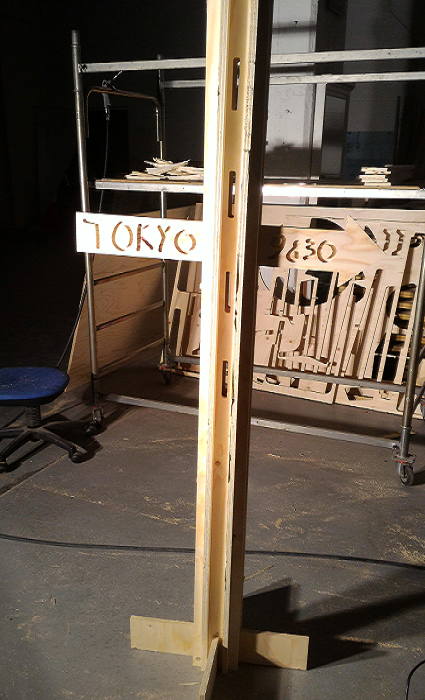
When CNC finished, I had to break the tags with a chisel, unscrew the blocks and start to mount:
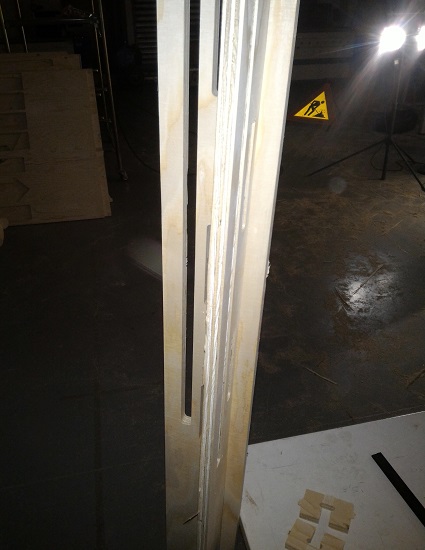
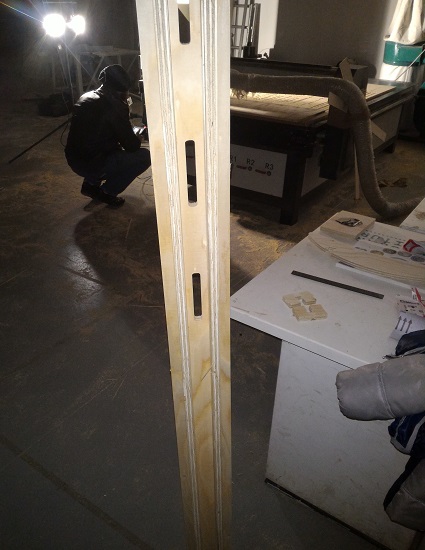
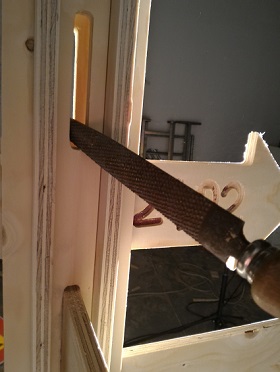
Unfortunately I was wrong to make holes to insert arrows: I calculated a width of 15,3 mm (wood should have been 15 mm), but evidently it's not enough! So I had to enlarge the holes with a rasp.
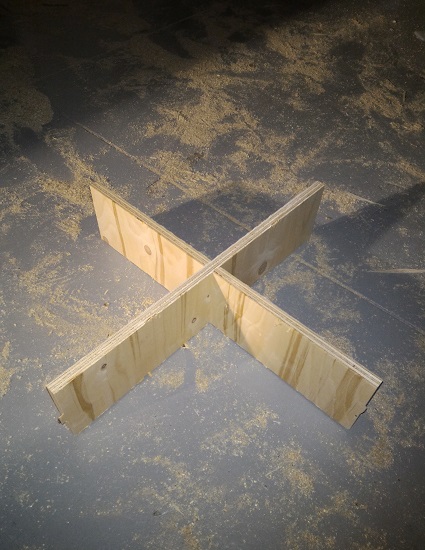
Finally, here my hanger!