Tea Brewer Machine
28 June
Week19 Final Project
Project Idea
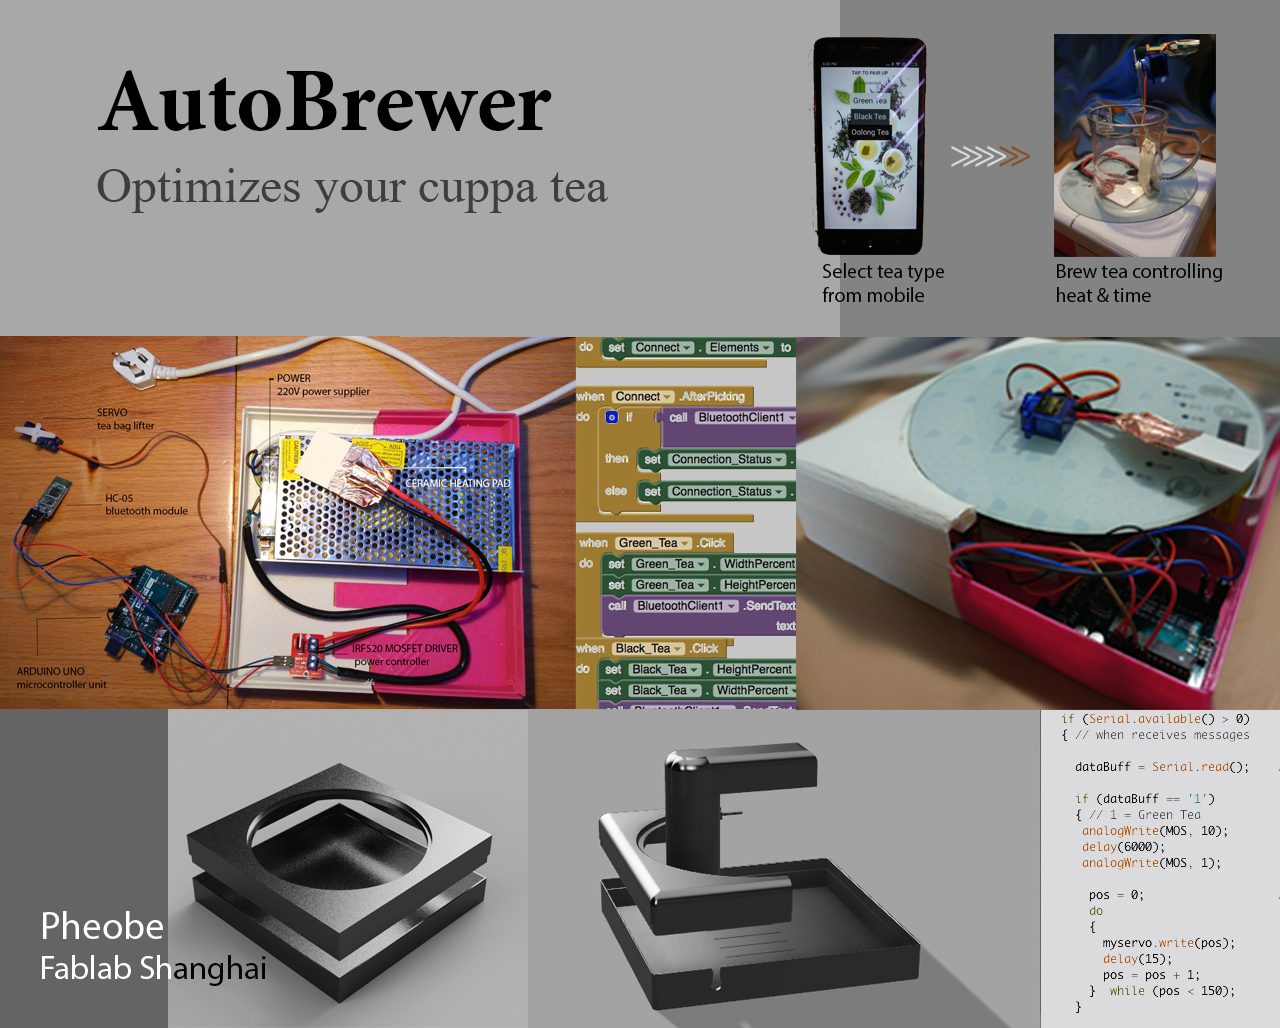
I come up with an idea of making an automated tea brewer in that most people brew various types of tea in the same way. By controlling the water temperature, time of infusion, water-leaf portion, shape of tea pot, and tea pot material, one can get the most of the the tea leaves from both taste-wise and nutrition-wise.
If I could program the procedures to brew different kinds of tea, it would save people lots of concerns. The only thing drinkers have to do is to choose and fill the tea bag. And the machine shall do the rest to get you a optimally-brewed tea.

Materials Needed
MCU: AtTiny45, bronze board, resistors, capacitors
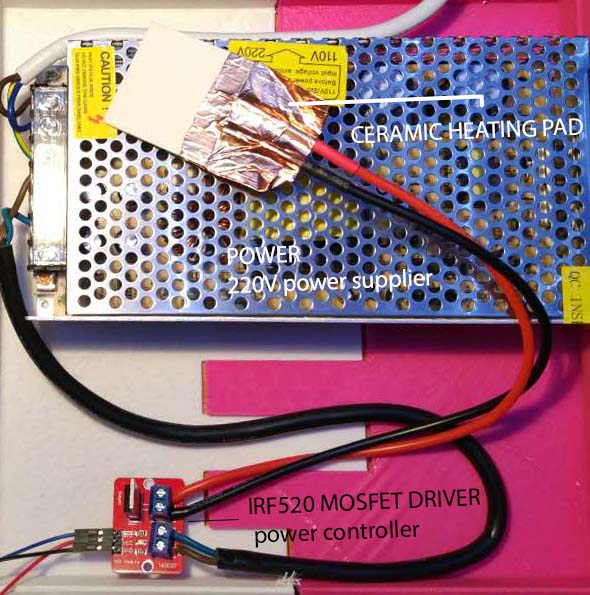
Temperature control: ceramic heating pad, NTC, mosfet module (50RMB)
Communication: HC-05 (bluetooth module) (20RMB)
Mechanics: servo (6RMB)
Case: PLA input material (35RMB)
Others: power supply, MCU, wires, heat-resistant tape (80RMB)
Tools: android mobile phone, 3D printer, milling machine, solder, heat gun, multimeter
I spent about 200RMB on the final project eventually and the rest of the material I need were available in the local fablab.
To compare this plan with the original I made weeks ago, go to week 17 under secion "Build Plan" to see the difference. The week of project development explains why I made those modifications.
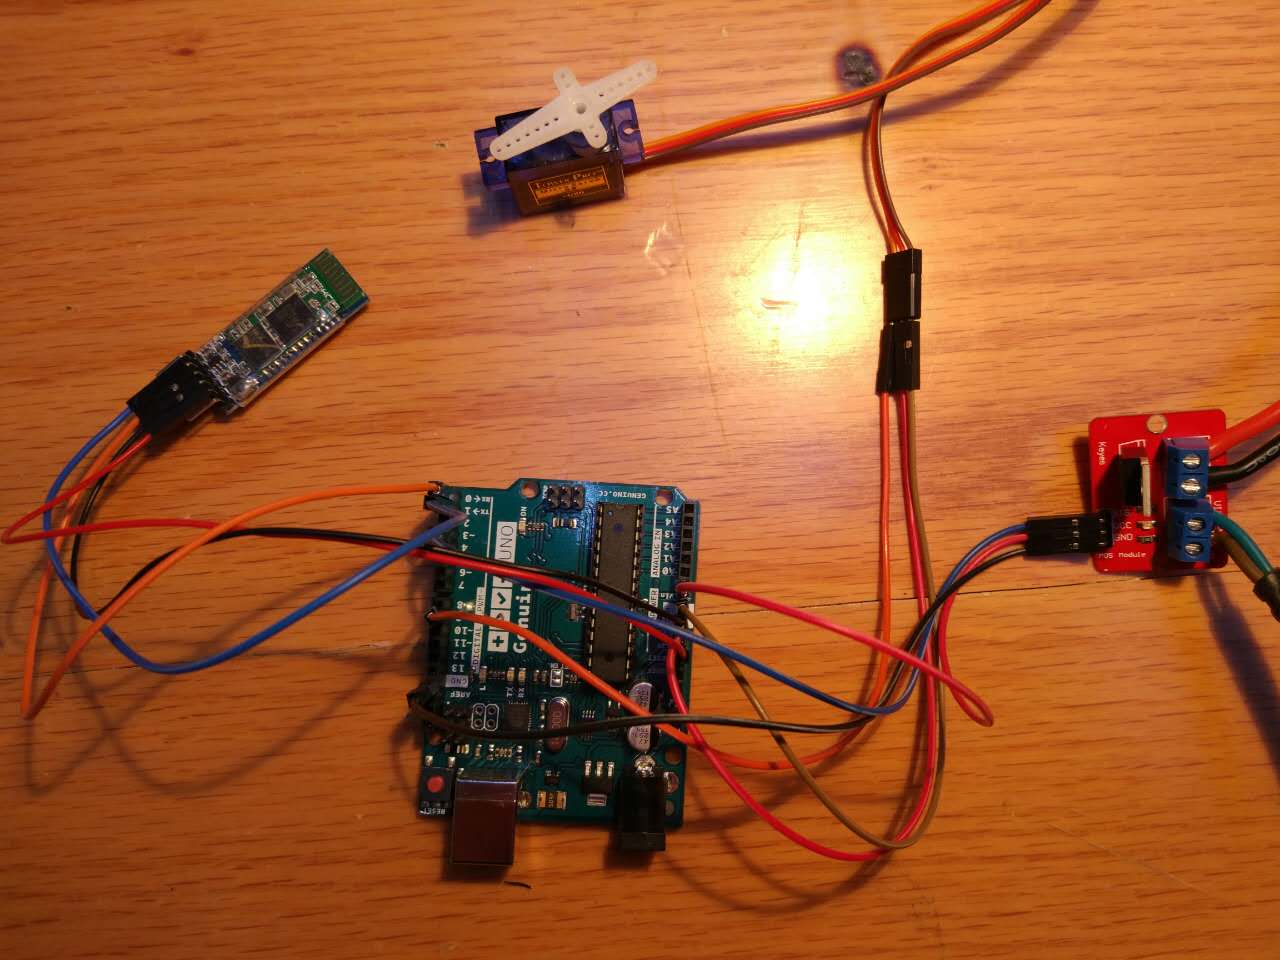
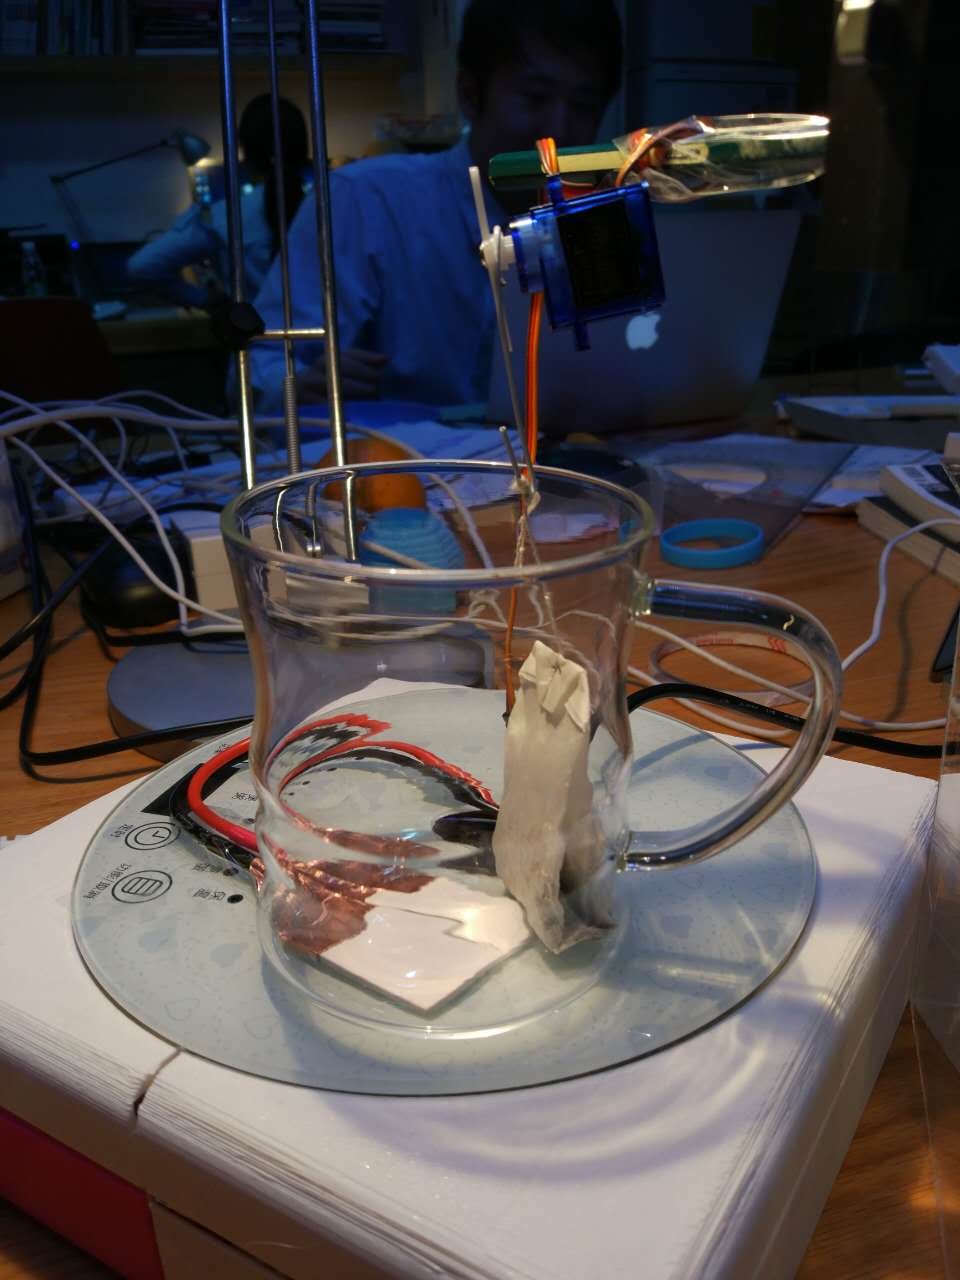
Combining all Inputs and Outputs
I want to the how all inputs and outputs coordinates therefore I used an Arduino to link them to have a quick look at the overal performance.
The HC-05 is communicating with the mobile phone.
Mosfet and the power supply is to support the functioning of the heating pad.
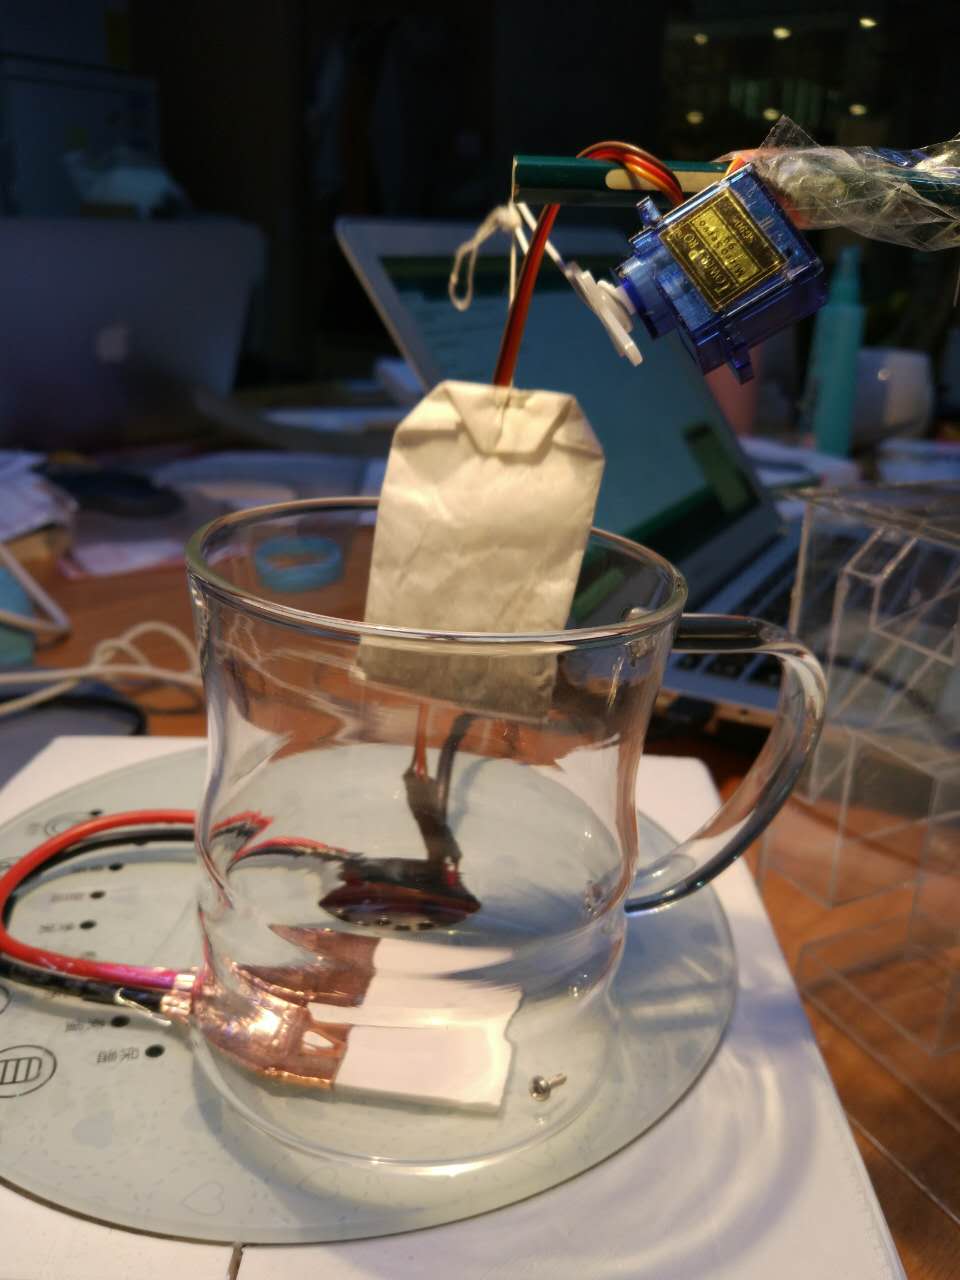
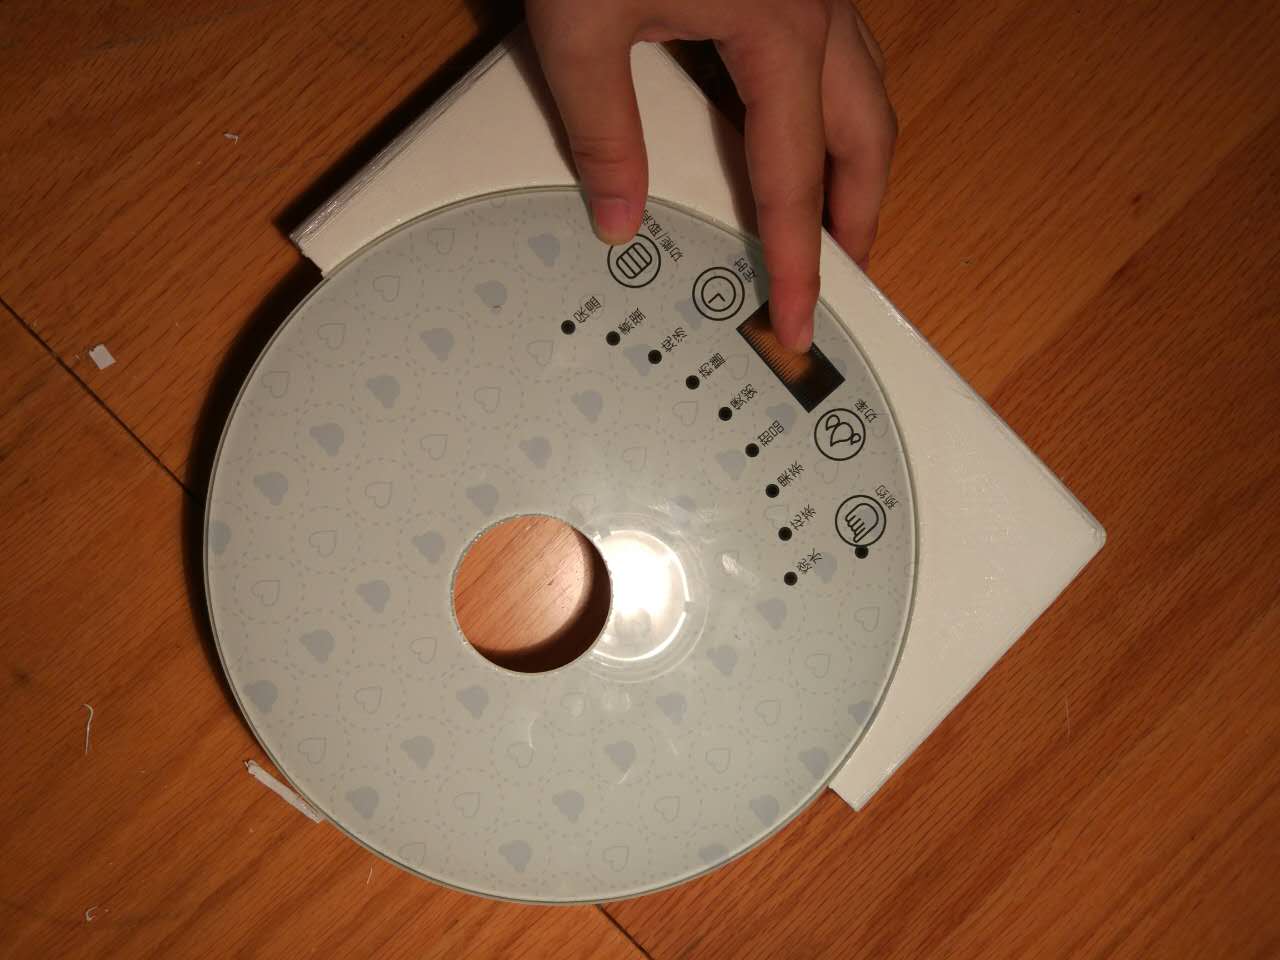
The servo shall lift the tea bag when the designed optimal brewing time is up.

More details documented in previous weeks:
* servo: the top part of week 13
* heating pad: the bottom part of week 13
* bluetooth connection: week 15
---Adjusting the Parameters---
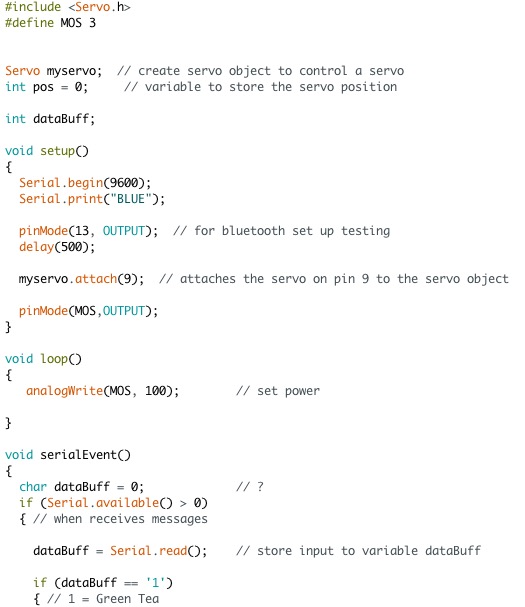
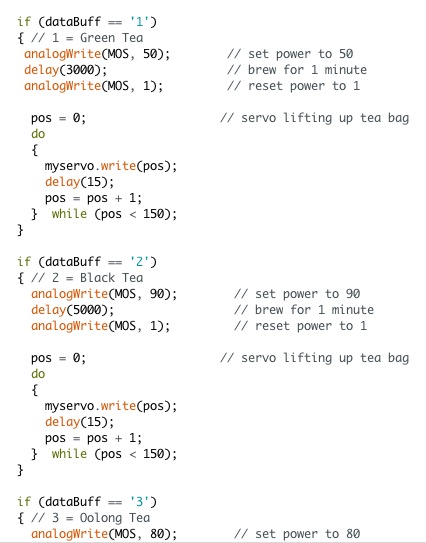
I used the PWM to control the heating pad to heat to the exact temperature that I want. However I did not know the temperature by telling the pwm. Therefore I tested a lot using the thermistor I made in the input week with different pwm value and control for the time that I used. Finally I set the power to 50, 90, and 80 to green tea, black tea, and oolong tea respectively.
To download the code file combining all kinds of functions:TeaBrewer.rtf
---App Development---
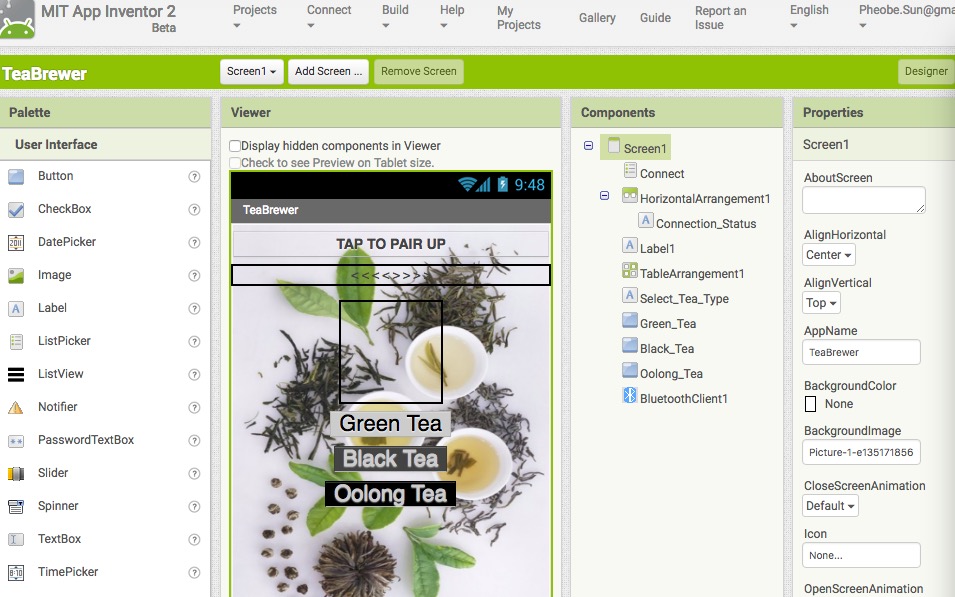
I used the App Inventor to develop my first App.
There are mainly two steps in the design process. Interface design and code.
When click on the 'Designer' on the top right of the page, users can arrange the interface by dragging the design and specific functions from the left column. I designed two mainly two functions on this page: 'bluetooth pairing' and 'choose tea types'. Therefore I created four buttons for users to click on. Also users can easily upload pictures they like to beautify the screen. When I'm done with this, I move on to the second step - code.
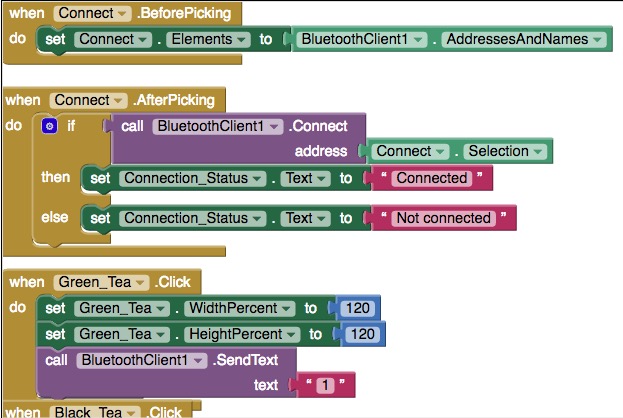
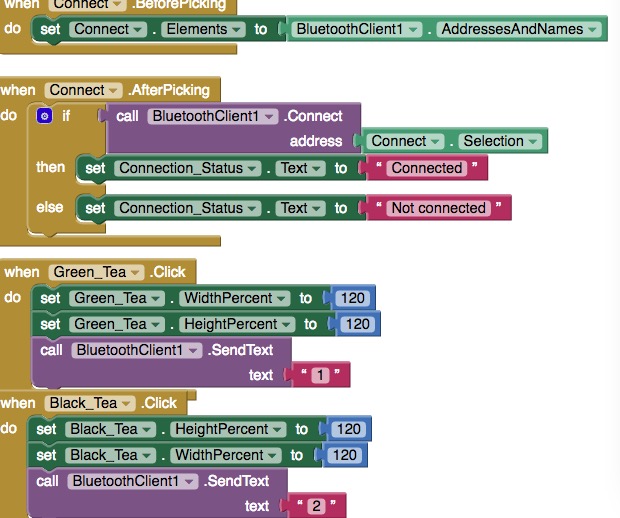
Click on 'blocks' on the top right screen to define the actions of each elements created in the designer's page. I define the action of connecting to bluetooth devices when the 'Connect' button is clicked upon. Then I made the type line beneath the button show 'Connected' or 'Not connected' using an If Command when the responding result is true/ false respectively.
In the process of sending order to the MCU, the app would send signals 1, 2, 3 corresponding to the tea type of their choice (green tea, black tea, and oolong tea). That said, the app is actually sending numbers instead of words to the MCU. And the MCU which I've already programmed during the previous weeks, would take different actions when it receives orders of 1, 2, and 3.
For more details check the page: week 16
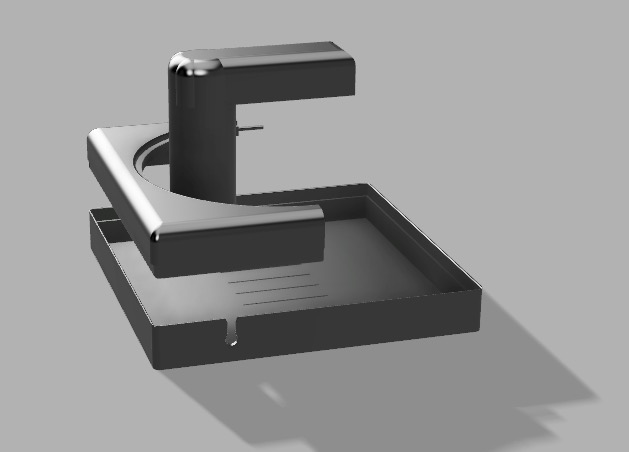
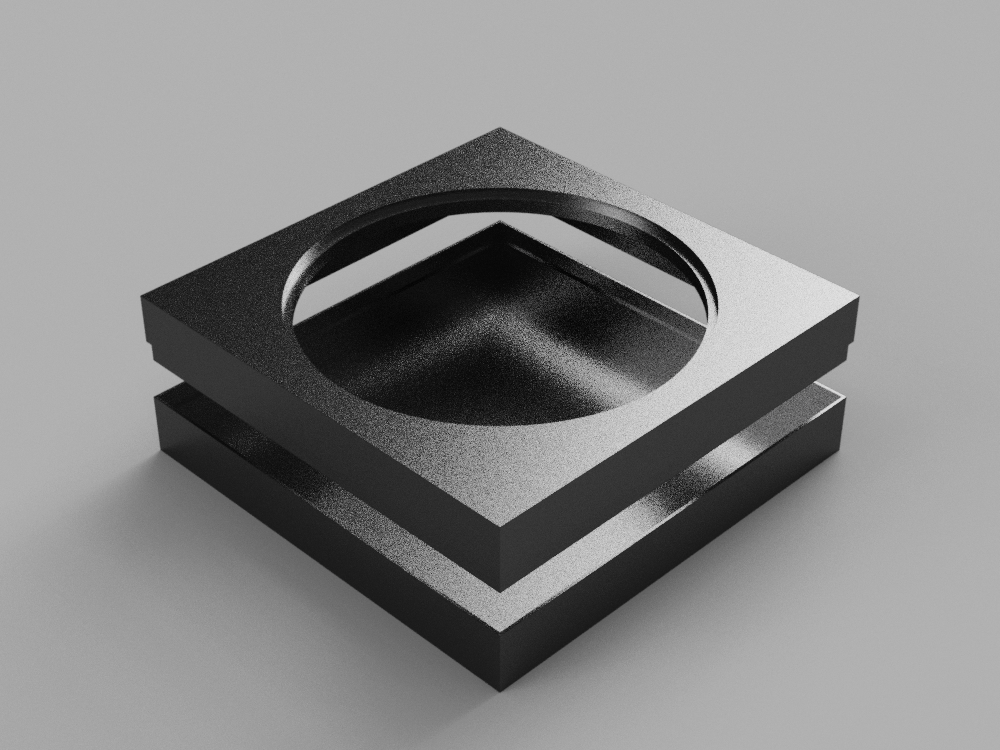
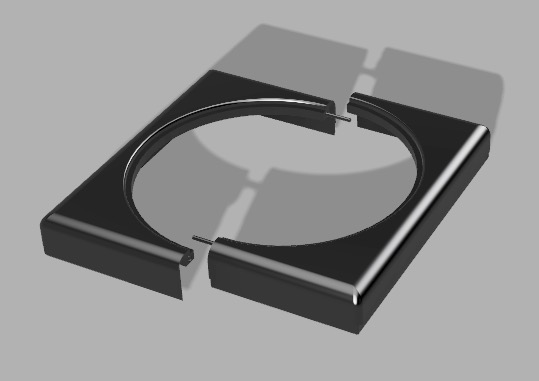
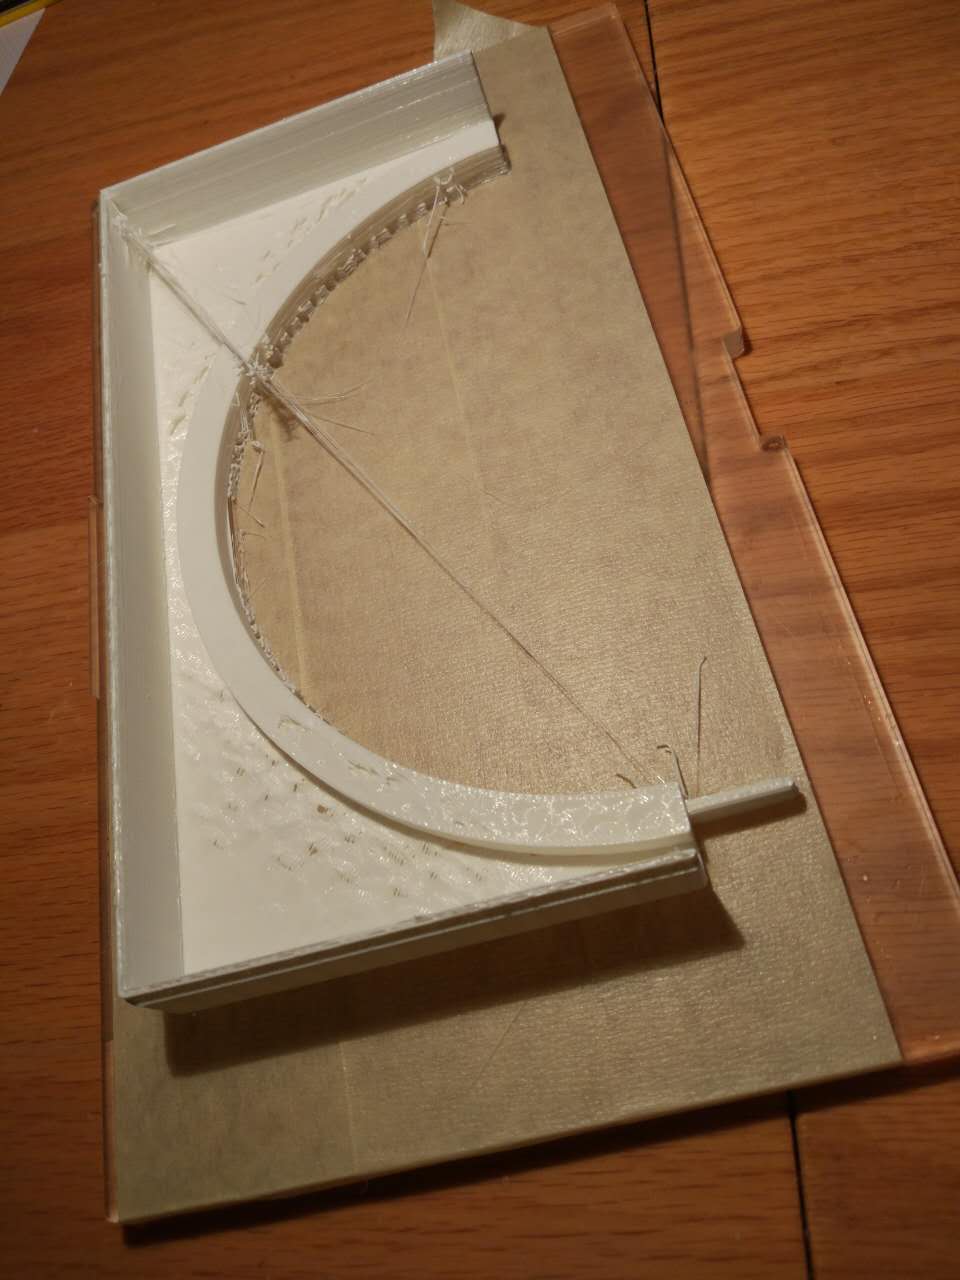
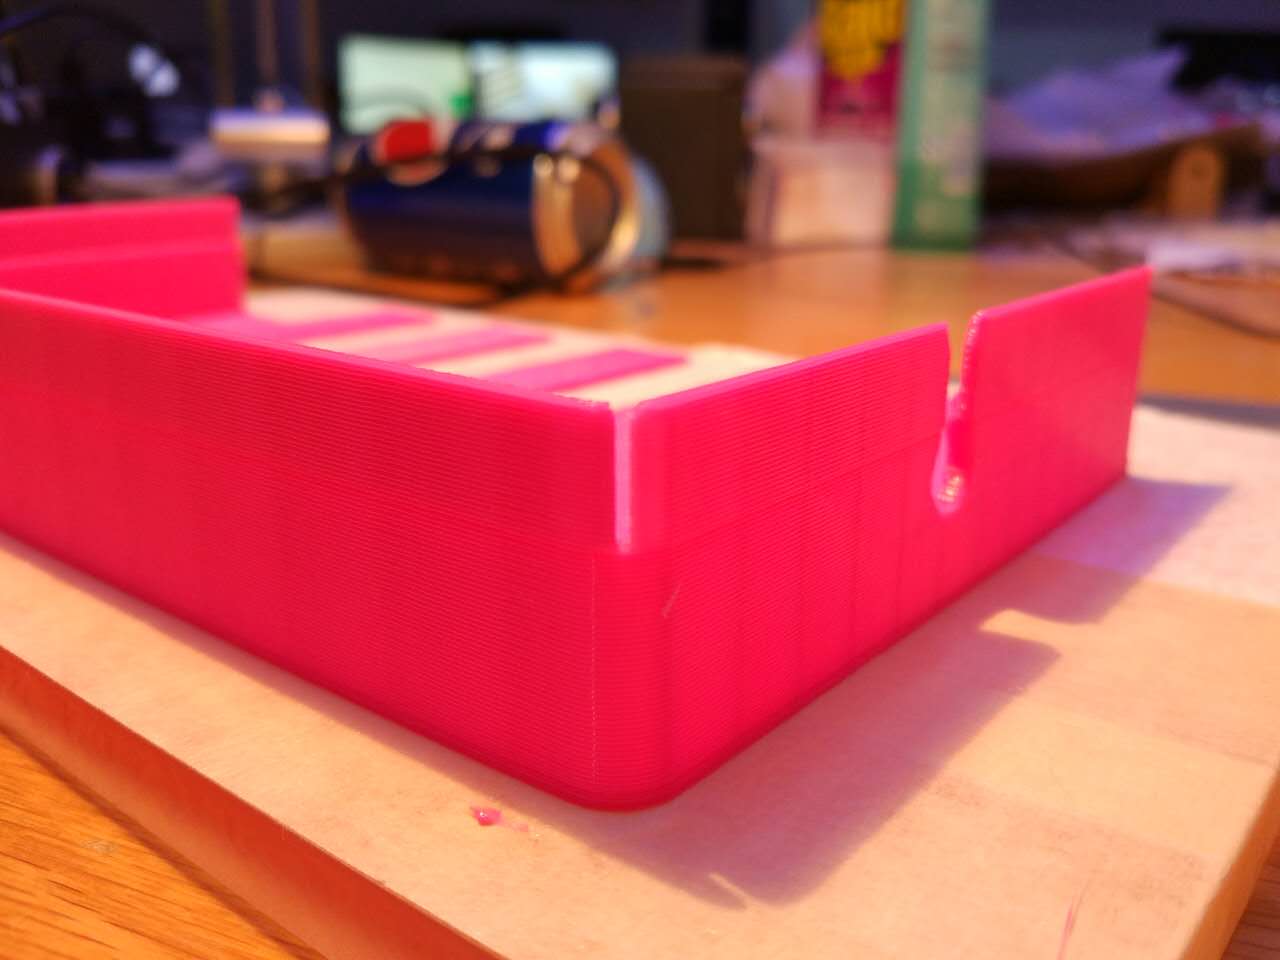
Box Design
I had encountered a problem that the design is larger than the limination of the 3D printer in the lab. I solved this problem by cutting the design into four pieces. Two top and two bottom. Therefore I designed a linkage part for the two splitted parts to fit perfectly. This part can only be made by 3D printing since there's a hole on the XZ plane which normal CNC machine cannot process.
For more details check the bottom part of week 5
The design file can be downloaded here:keychain-thickness-adjusted.f3d
Licences
The license I choose would be Creative Commons. It's not a software only license so that I could share my 3D modeling file as well. Also the site has disclaimed all warranties of the project uploaded. Therefore users adopt such early-stage project at their own discrepancy.
☞ Further Development
1. I shall control time of fushiones since tea leaves can be brewed for several times as oppose to tea bags which would usually be thrown away after 1 fuse.
2. I shall design a better-looking top case to hold the servo. And find a way to avoid drips from tea bag when it's been lifted.
The presentation can be found here: presentation.mp4presentation.png