 3D SCANNING AND PRINTING
3D Tutorial
File: The file must be a STL file, a closed mesh (ready to print), it is a not modifiable file so it is recommendable to have the modifiable version of the model: dxf... etc.
Model:
• It must be a 100% closed solid ( closed polysurface, closed mesh)
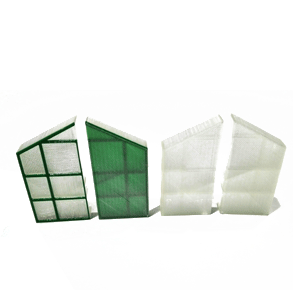
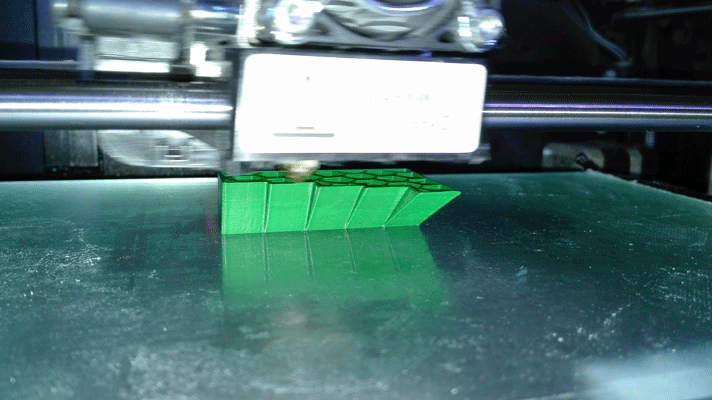
• The machine cannot print on the air, this means that all the cantilever elements on our model must be over some supports that we will remove afterwards. Makerbot desktop can design these supports by default but not always are easy to remove.
• When printing bridges, never with a bigger span than 6cm. It is very important to design thick enough structures that can support these spans. A good example of a bridge would be a door hollow, for a 6cm span, at least the supports must be no thinner than 0,5cm.
It is important not just how long is the bridge but how thick is the pillar that we are going to do because if the pillar are too narrow there is not enough space to hold the bridge.

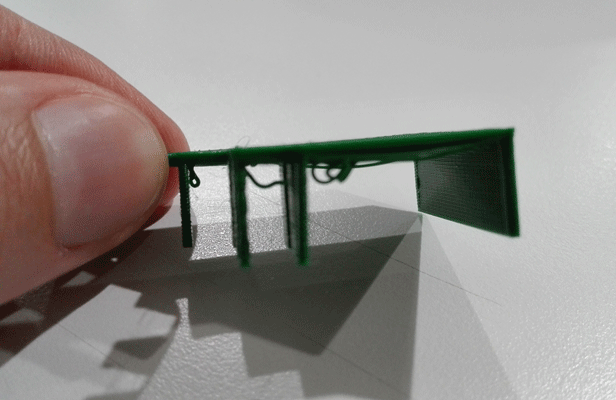
• There would be some elements that need to be printed over a base or raft that prevents the model from being moved or felt. This option can be modified on the makerbot desktop settings so the program can design them.
The angles:
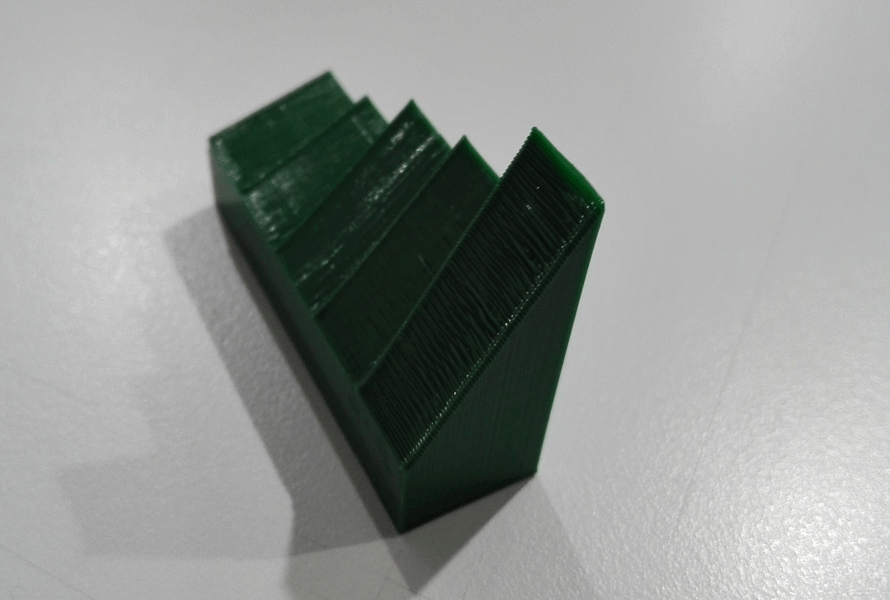
I did a few angles test to know how the machine do them, so the machine starts doing it good from 40º to 90º with 30º we can see that the 3d printing it is not so good.
Units: we will be working with mm.
Accuracy:
• X and Y axes: 0.01mm
• Z axe: 0.0025mm
Machines measures: The file must not exceed the machines measures: 285mm long 153mm width 155mm tall.
Tolerances: When printing pieces that are hooked the tolerances are very important:
• For tight pieces we will give a 0.3mm value.
• For mobile pieces we will give a 0.5 value.
On the X and Y axes the minimum tolerance is 0,4mm (the extruder thickness)
On the Z axe the minimum tolerance is 2 layers of h
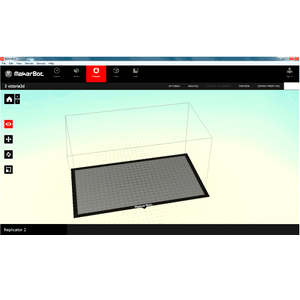
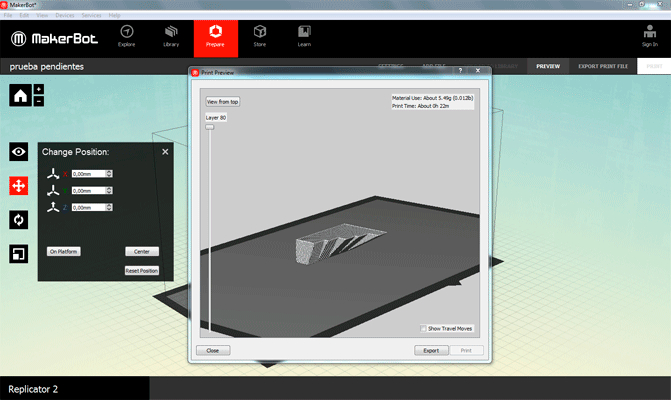
Once we are on the Makerbot desktop program we open our STL file we want to print.
If when you open the program it appears a window that say "Put object on platform?", that means that our file is outside of the printing box of our machine so we place it on the platform clicking “on platform”
If when you open the program it appears a window that say "Object too large", that means that our file is bigger than the printing box of our machine or it is rotated so it doesn’t fit on that position. We click on “don’t scale”. If our file is located in a wrong position we change the rotation. If our file doesn’t fit on our box we should scale our file using another program even though we can do it with the makerbot program. It will be more accurate.
Objects can be seen in different points of views: top, side and front.
They can also be moved to fit into our machine or for optimizing the impression. The objects must be placed on the platform by clicking “on platform” and in the center clicking “center”.
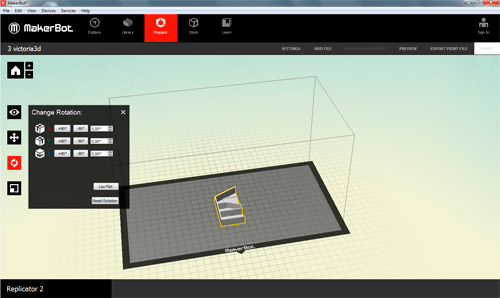
They can be rotated to fit in the machine of for optimizing the impression. They must be over the base by clicking “lay flat”
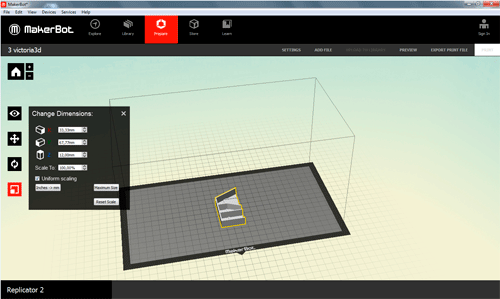
Objects can be scaled but it is recommendable to import our files on the right scale.
Once we have our element in the print position, we go to the print settings and we open the custom settings:
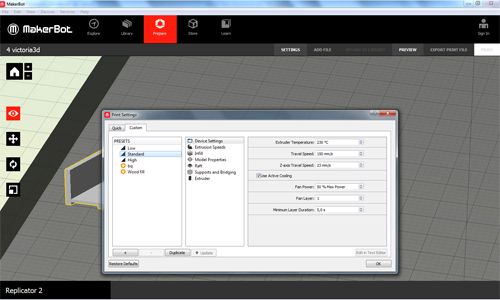
Profile: we will use one or the other depending on the detail level that we want.
According to the profile that we put the layer height values will have a value of
• Low: 0,25-0,40 mm
• Standart: 0,15-0,25 mm
• High: 0,05- 0,15 mm
The temperature depends on the material, for PLA 220º, by default we have 230º 230th but we have realized that it is too much for the PLA.
We don’t change the speed
Raft and Support:
• Support : the machine cannot print on the air, this means that all the cantilever elements on our model must be over some supports that we will remove afterwards. Makerbot desktop can design these supports by default but not always are easy to remove.
• Raft: there would be some elements that need to be printed over a base or raft that prevents the model from being moved or felt. This option can be modified on the makerbot desktop settings so the program can design them.
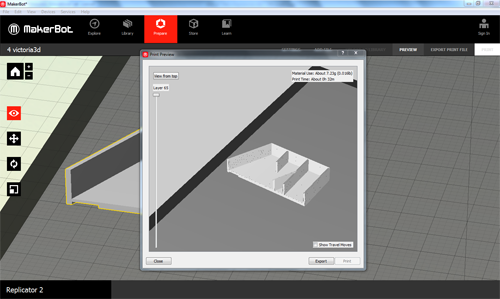
Once we have the file ready to print:
When we send the file to print, the program makes us a summary of the estimated time of printing, the amount of material used, resolution and if the bases or supports are activated.
BEFORE EXPORTING THE FILE WE HAVE TO HAVE READY THE PRINTER
The 3d printer that we use is the Makerbot Replicator 2
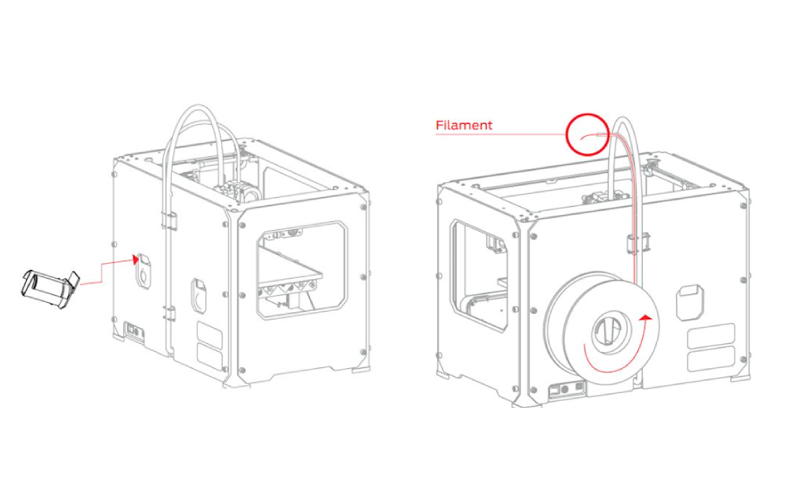
The first thing to do is place the PLA filament, for this:
1_We will place the PLA roll support (depending on the type of roll we will need a size or other).
2_ We put the roll in the support provided upward.
3_ We put the PLA filament inside the plastic tube that goes to the extruder
To load the PLA filament in the MakerBot Replicator 2 we have to press Utilities in the front screen of the machine , Change filament, and load, then the machine begins to heat to catch the filament, once the extruder is a beep sounds and we introduce the PLA filament at the top extruder, we can help it by pressing the lever on the right side of the extruder.
To load the PLA filament in the MakerBot Replicator 2 we have to press Utilities in the front screen of the machine , Change filament, and load, then the machine begins to heat to catch the filament, once the extruder is a beep sounds and we introduce the PLA filament at the top extruder, we can help it by pressing the lever on the right side of the extruder.
Once the PLA filament starts out of the extruder it is ready (it is advisable to wait a bit to make sure that the PLA filament that leaves are not the remains of the previous print)
We must be careful not to touch the extruder because is already at 230 °.
When the filament is inserted correctly press M many times the machine screen tells you (we have to do it gently because the button is very sensitive and may give more times than we wanted to give)
Once the filament is well placed we can give print from the program MakerBot, we can do it from the machine or exporting it to a SD card.
To unload the press filament Utilities, Change Filament and Unload, and when the filament is hot , we must push the lever on the right side of the extruder in order to help to unload.
If you want to stop either to change the filament or because something is wrong.
Pause/Unpause it is for very short pause, because the extruder will remains hot .
Sleep (Cold Pause)/Resume Build This allows stop printing for extended periods of time. During a break in the cold, the menu will change to Resume Build. We press M to continue printing.
If you want to cancel printing press Cancel Build.
Once we have finished printing not turn off the machine until the fan turns off, so that the fan extruder cool down properly.