Week 9 - 10
Mechanical design and machine design.
This week is a group assignment. We are supposed to make a machine. We had a discussion about what kind of machine we want to make, we decided to make a polygrapgh. We tested the mechanism of the machine with operating it manually, but we decided to make another machine which is a foam cutter. The home page of Fablab Egypt contains the whole details about the team and the overall process.
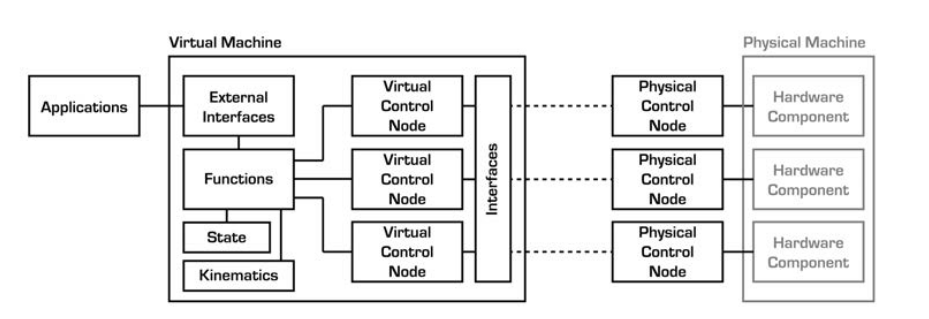
My part was to configure the gestalt boards and control the motors. The machine has 4 motors, each two of them are synced together in X-Y plane. I was so confused about the gestalt, because i couldn't find any documentation about how to use the boards and how to build the virtual machine. I found an interesting paper Ilan's thesis. It helped me a lot to understand the whole concept of the gestalt and the framework approach.
So the gestalt approch is that we build a virtual machine with virtual motors. The virtual nodes communicates with the physical nodes using FABNET which is just a bridge between the computer and the gestalt boards. One interesting thing is that i didn't have to hardcode any identifier to link each virtual node with its physical one, When we first run the machine we can simply link them.
I found a tutorial on fabacademy website that helped me a lot to get started with the boards.
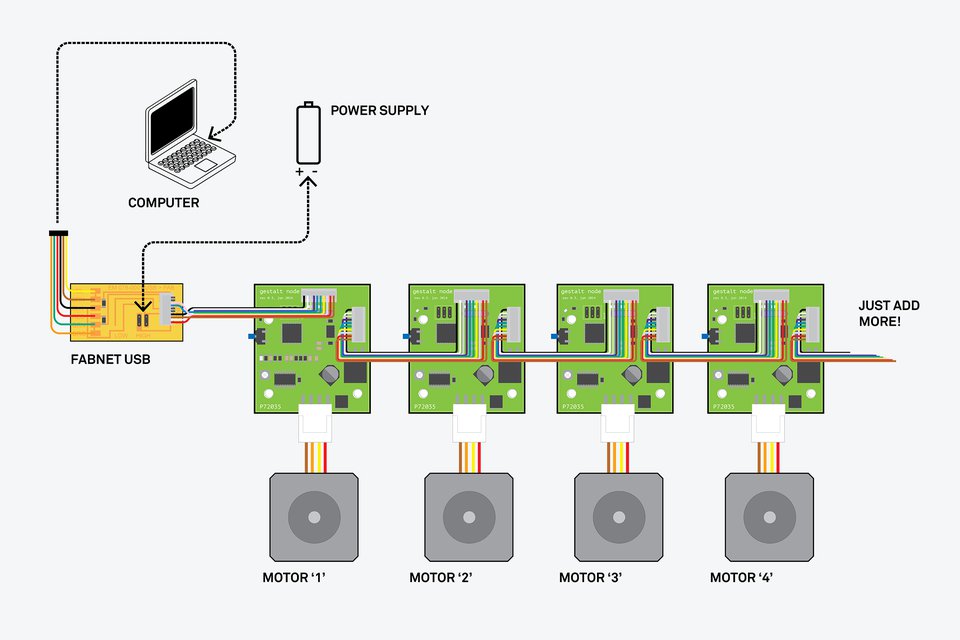
The first thing we need was to make the FABNET board. There is two versions of the board, i made the one from Bas so i can connect the boards directly through ribbon cable.
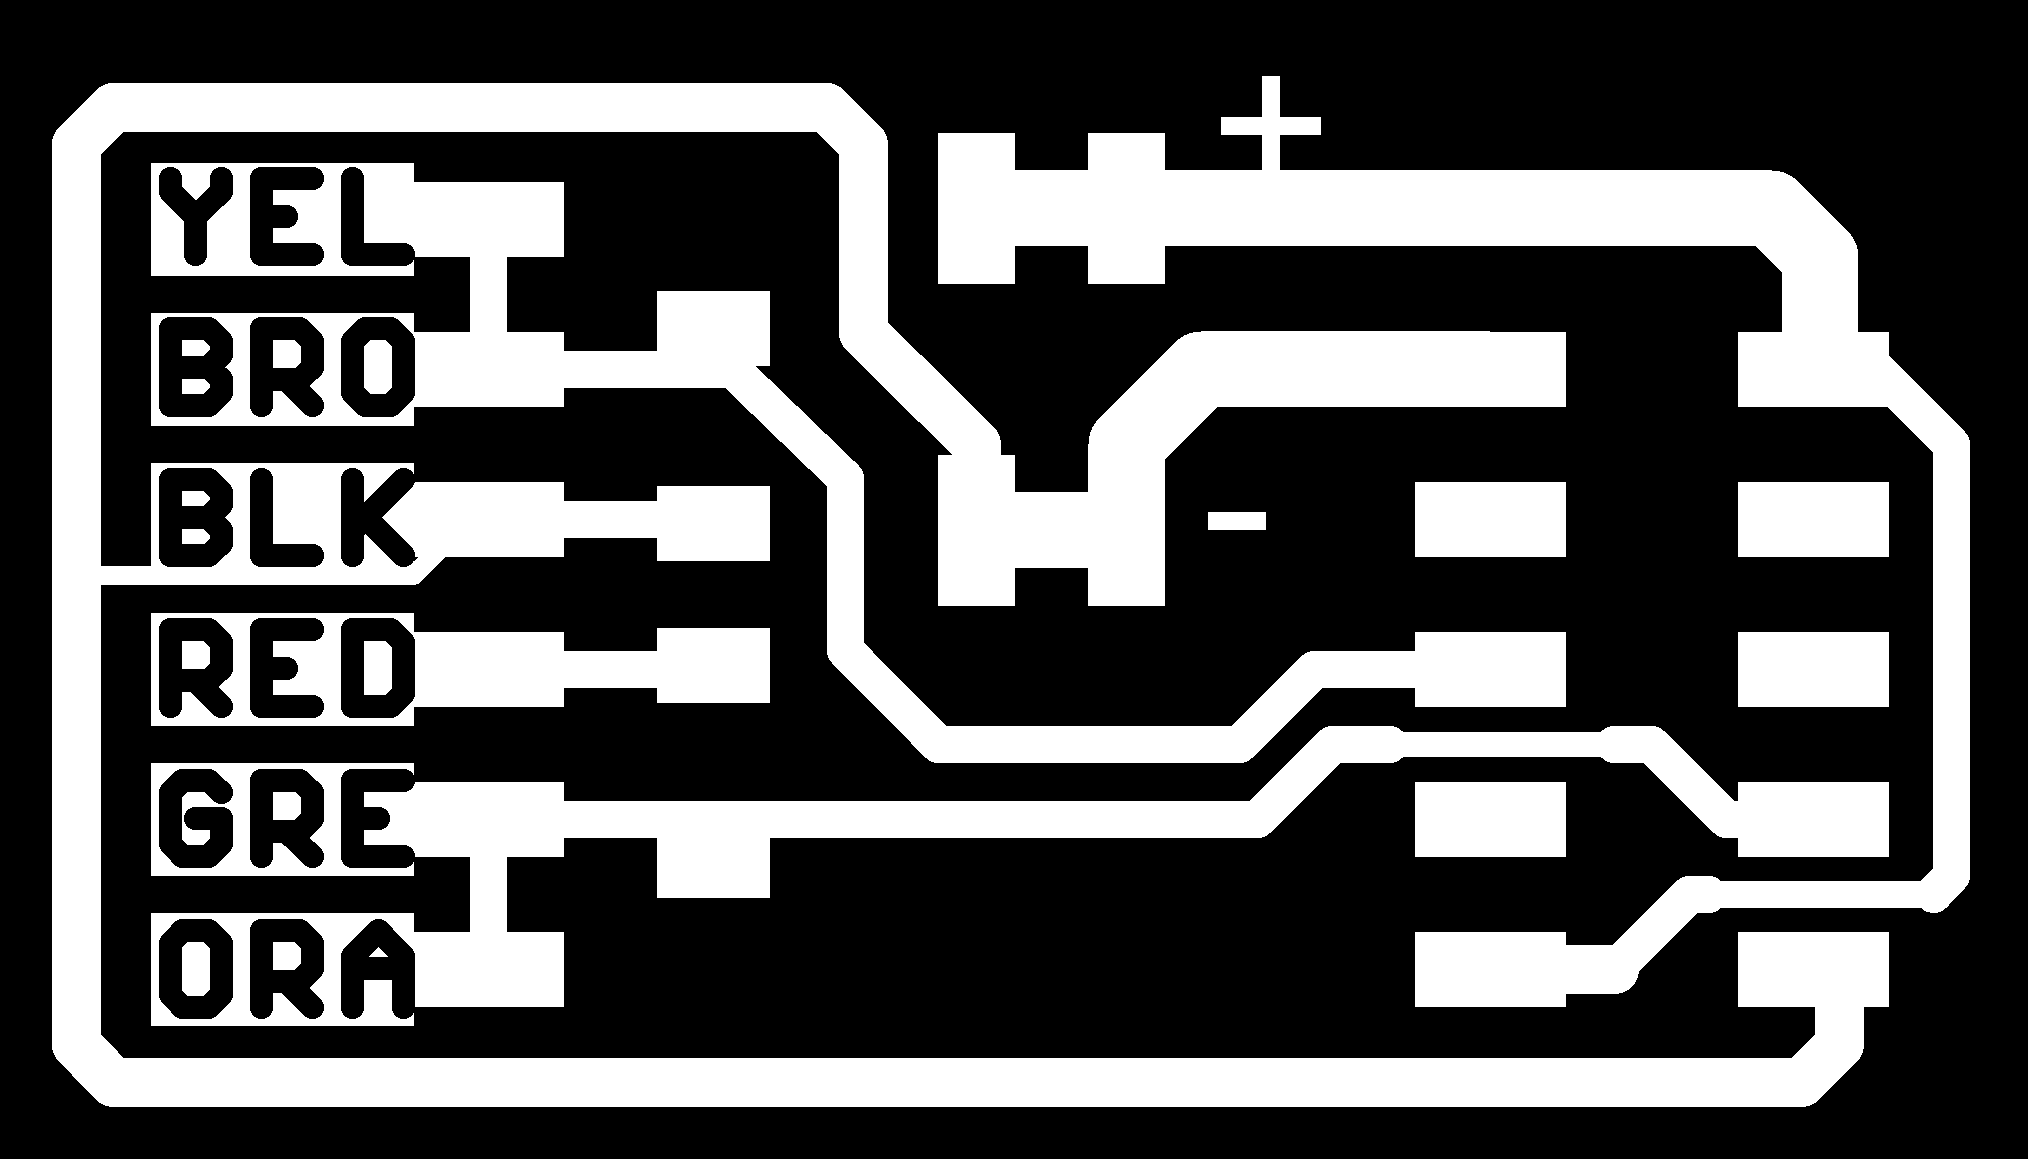
Download the PNG files of FABNET:
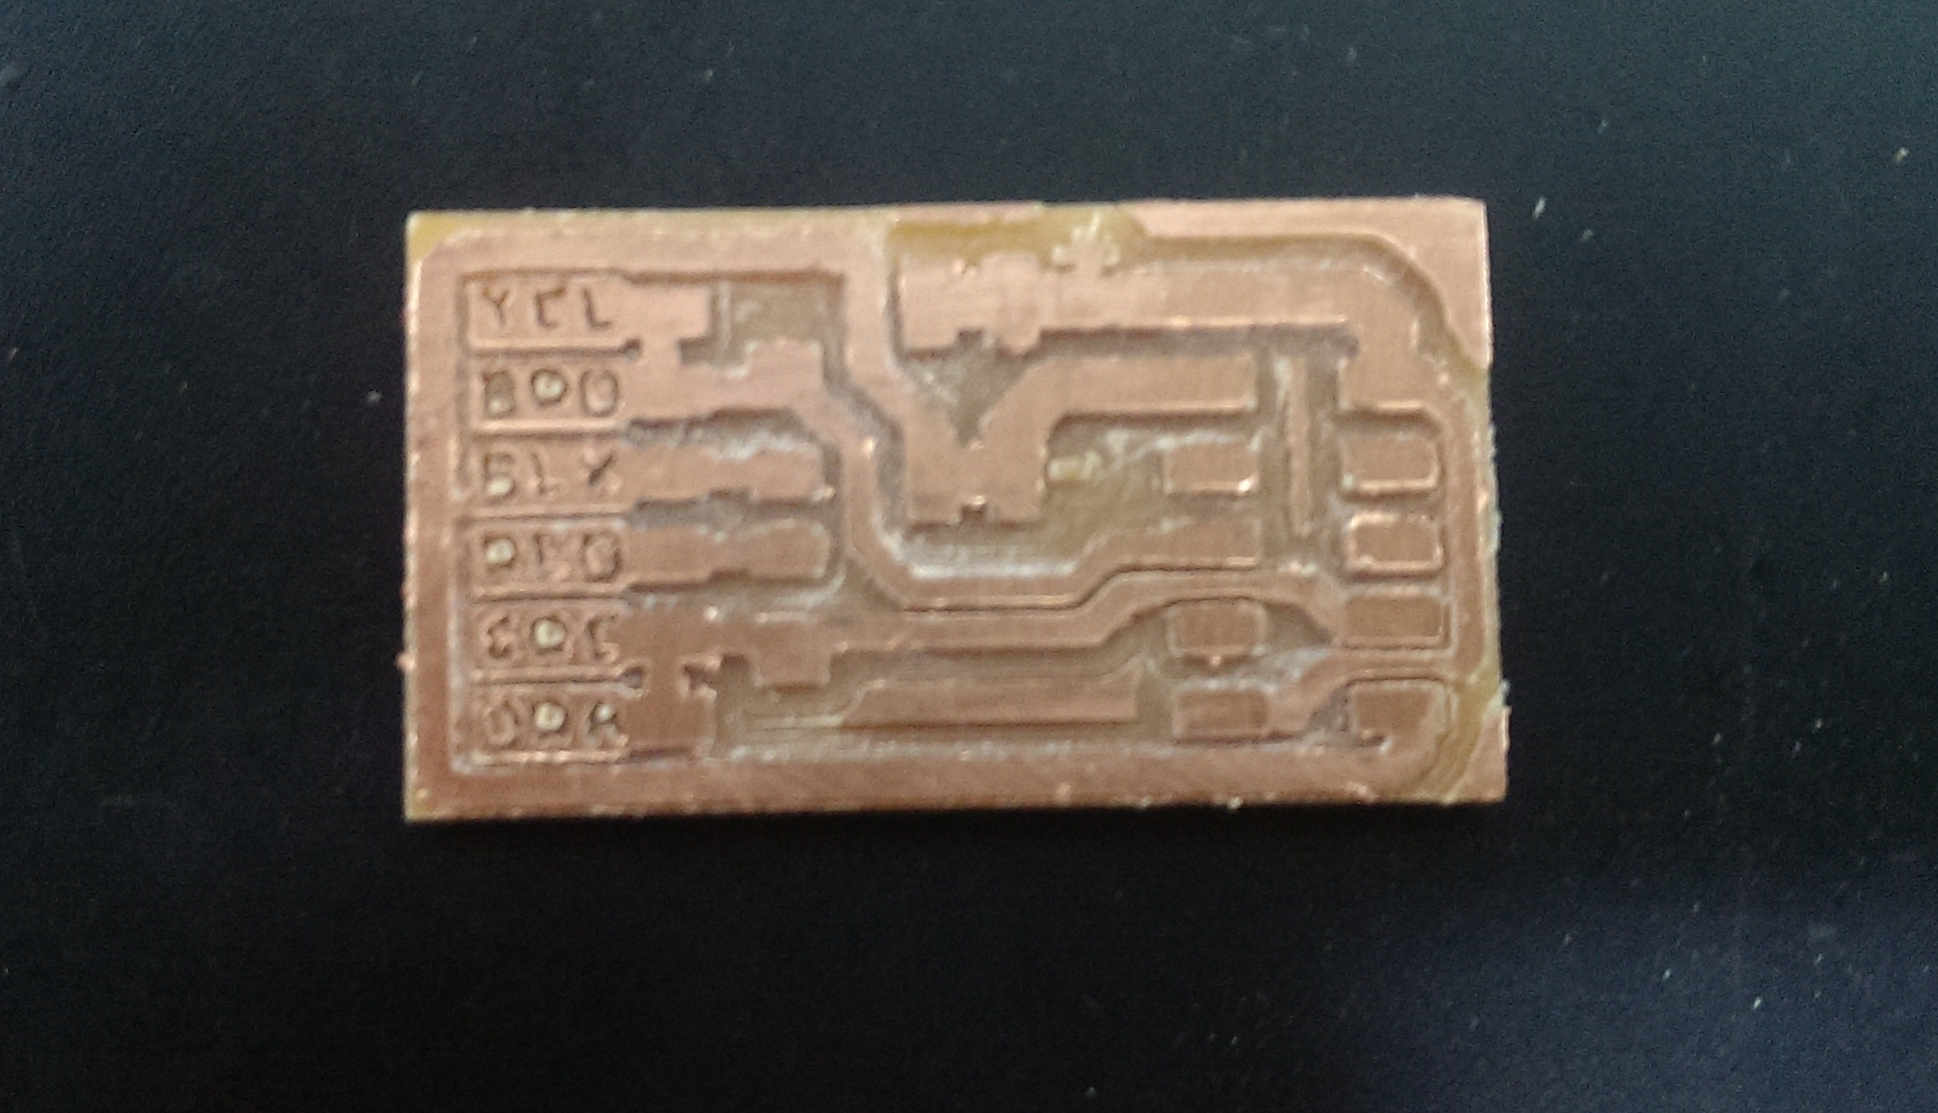
TracesFABNET circuit machining and soldering
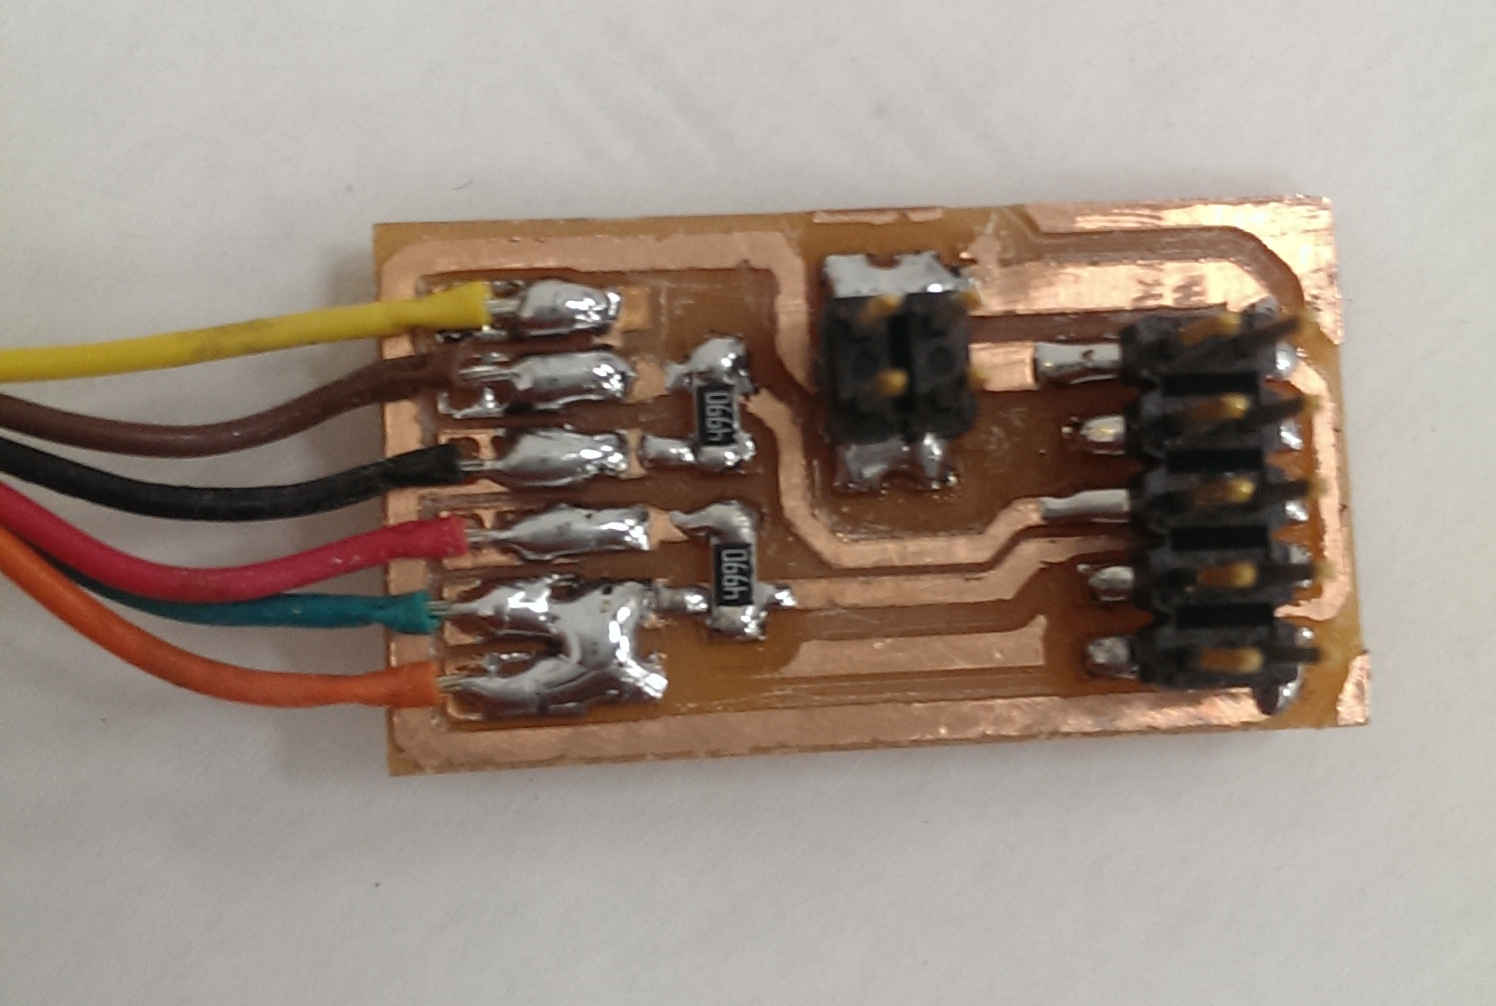
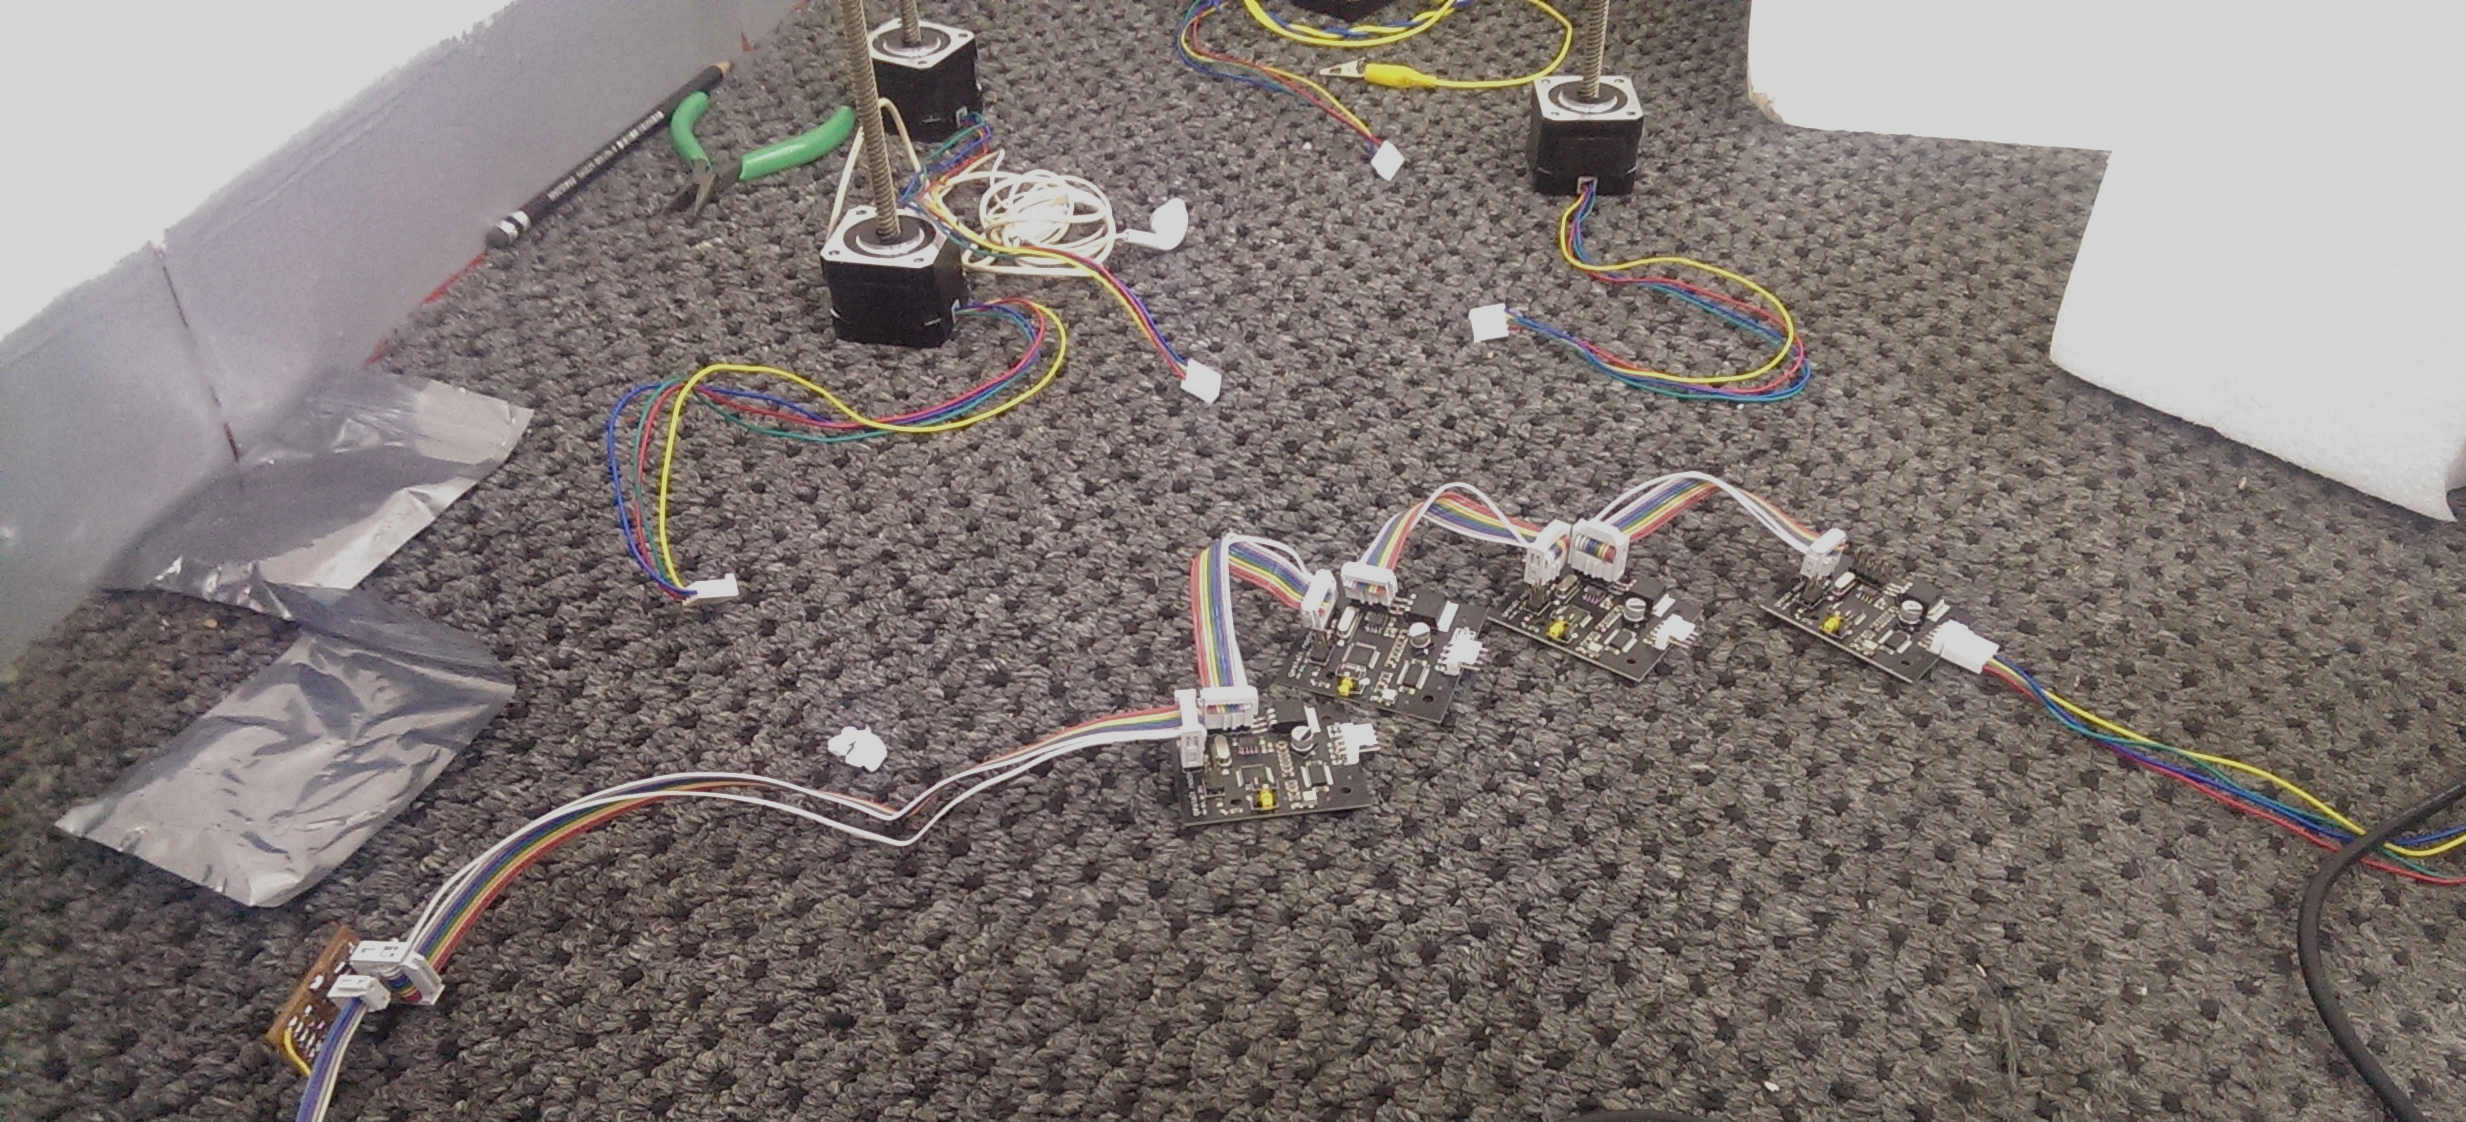
Connected the gestalt nodes to FABNET using ribbon cables, and powered up the whole system.
I downloaded the pygestalt code and run setup.py to install it. Sudo python setup.py install
One more thing, You will need to install pyserial if you don't have it installed. Sudo pip install pyserial.
To test that everything is configured correctly, i used Nady's single_node.py located in examples/machine/htmaa/. I tested the movement of one motor and it worked.
gestalt single node test from Mohamed Kamel on Vimeo.
I read the implementation of some machines in examples folder in Nady's repo. It took me a while to understand the implementation, as there is no avialable clear documentation about it. So basically the code contains these basic blocks
To create a machine you have to import all of the following module into your python code.
from gestalt import nodes
from gestalt import interfaces
from gestalt import machines
from gestalt import functions
from gestalt.machines import elements
from gestalt.machines import kinematics
from gestalt.machines import state
from gestalt.utilities import notice
from gestalt.publish import rpc #remote procedure call dispatcher
import time
Define the virtual machine class. It contains all the functions of the machine like the number of axis, kinematics .. etc
#------VIRTUAL MACHINE------
class virtualMachine(machines.virtualMachine):
This part sets the communication part. The interface used to communicate, serial port, baudrate.
def initInterfaces(self):
        if self.providedInterface: self.fabnet = self.providedInterface     #providedInterface is defined in the virtualMachine class.
        else: self.fabnet = interfaces.gestaltInterface('FABNET', interfaces.serialInterface(baudRate = 115200, interfaceType = 'ftdi', portName = '/dev/ttyUSB0'))
Here we define the axis of the machine, we are using 4 motors two for X and another two for Y.
def initControllers(self):
        self.x1AxisNode = nodes.networkedGestaltNode('X1 Axis', self.fabnet, filename = '086-005a.py', persistence = self.persistence)
        self.x2AxisNode = nodes.networkedGestaltNode('X2 Axis', self.fabnet, filename = '086-005a.py', persistence = self.persistence)
        self.y1AxisNode = nodes.networkedGestaltNode('Y1 Axis', self.fabnet, filename = '086-005a.py', persistence = self.persistence)
        self.y2AxisNode = nodes.networkedGestaltNode('Y2 Axis', self.fabnet, filename = '086-005a.py', persistence = self.persistence)

        self.x1x2Node = nodes.compoundNode(self.x1AxisNode, self.x2AxisNode)
        self.y1y2Node = nodes.compoundNode(self.y1AxisNode, self.y2AxisNode)

        self.xyNode = nodes.compoundNode(self.x1AxisNode, self.x2AxisNode, self.y1AxisNode, self.y2AxisNode)
Then we define the kinematics properties of the machine which is the physical specs of the steppers, led screw. If the values are not accurate the movement won't be incorrect.
def initKinematics(self):
        self.x1Axis = elements.elementChain.forward([elements.microstep.forward(4), elements.stepper.forward(1.8), elements.leadscrew.forward(8), elements.invert.forward(False)])
        self.x2Axis = elements.elementChain.forward([elements.microstep.forward(4), elements.stepper.forward(1.8), elements.leadscrew.forward(8), elements.invert.forward(False)])
        self.y1Axis = elements.elementChain.forward([elements.microstep.forward(4), elements.stepper.forward(1.8), elements.leadscrew.forward(8), elements.invert.forward(False)])
        self.y2Axis = elements.elementChain.forward([elements.microstep.forward(4), elements.stepper.forward(1.8), elements.leadscrew.forward(8), elements.invert.forward(False)])

        self.stageKinematics = kinematics.direct(4) #direct drive on all axes
The last part of the code is the main control function that use the defined machine to move. We create the machine, set the speed of the motors, and send it the movements. So we put coordinates to cut a square.
#------IF RUN DIRECTLY FROM TERMINAL------
if __name__ == '__main__':
    # variables
    speed = 10

    foamcutter = virtualMachine(persistenceFile = "test.vmp")

    # foamcutter.x1AxisNode.setMotorCurrent(0.7)

    foamcutter.x1x2Node.setVelocityRequest(speed)
    foamcutter.y1y2Node.setVelocityRequest(speed)
    foamcutter.xyNode.setVelocityRequest(speed)

    # # moves to test with
    #moves = [[140,0,140,0], [0, 0, 0, 0]]
    moves = [[0, 0, 50, 50], [50, 50, 50, 50], [50, 50, 0, 0], [0, 0, 0, 0]]
    for move in moves:
        foamcutter.move(move, 0)
        status = foamcutter.x1AxisNode.spinStatusRequest()
        # This checks to see if the move is done.
        while status['stepsRemaining'] > 0:
            time.sleep(0.001)
            status = foamcutter.x1AxisNode.spinStatusRequest()
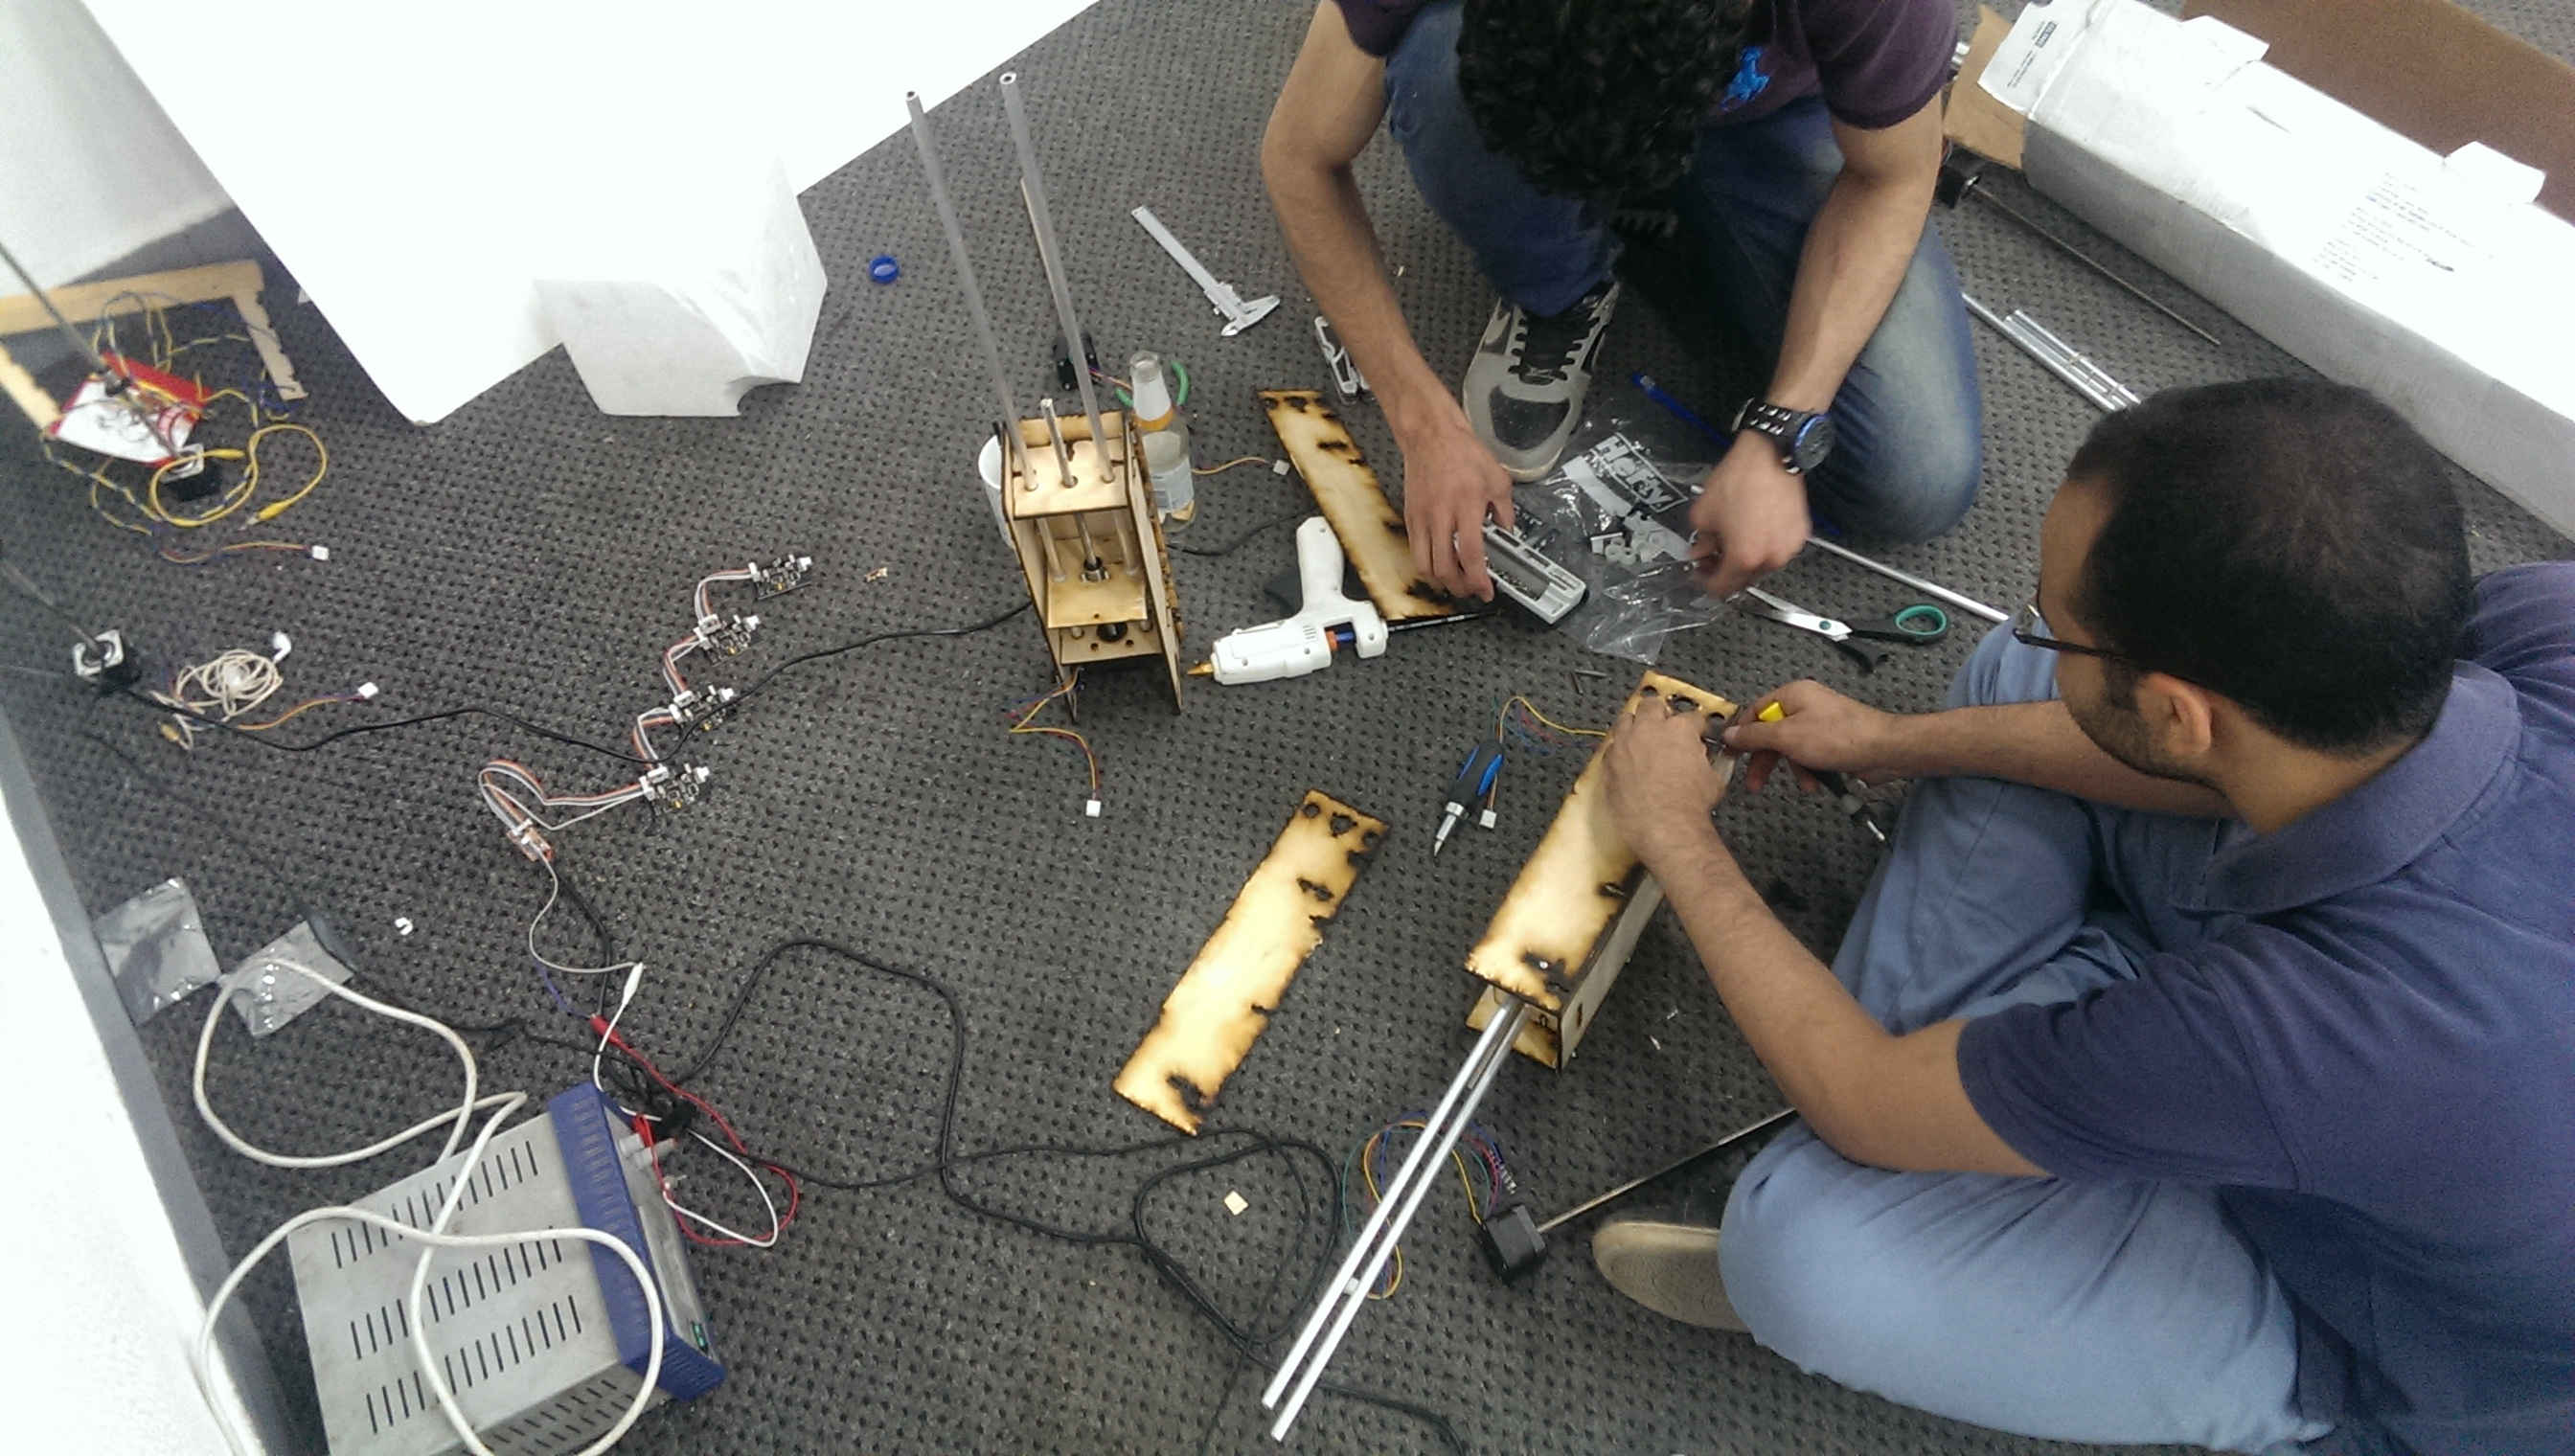
We worked on assembling the machine then we tested its motion.
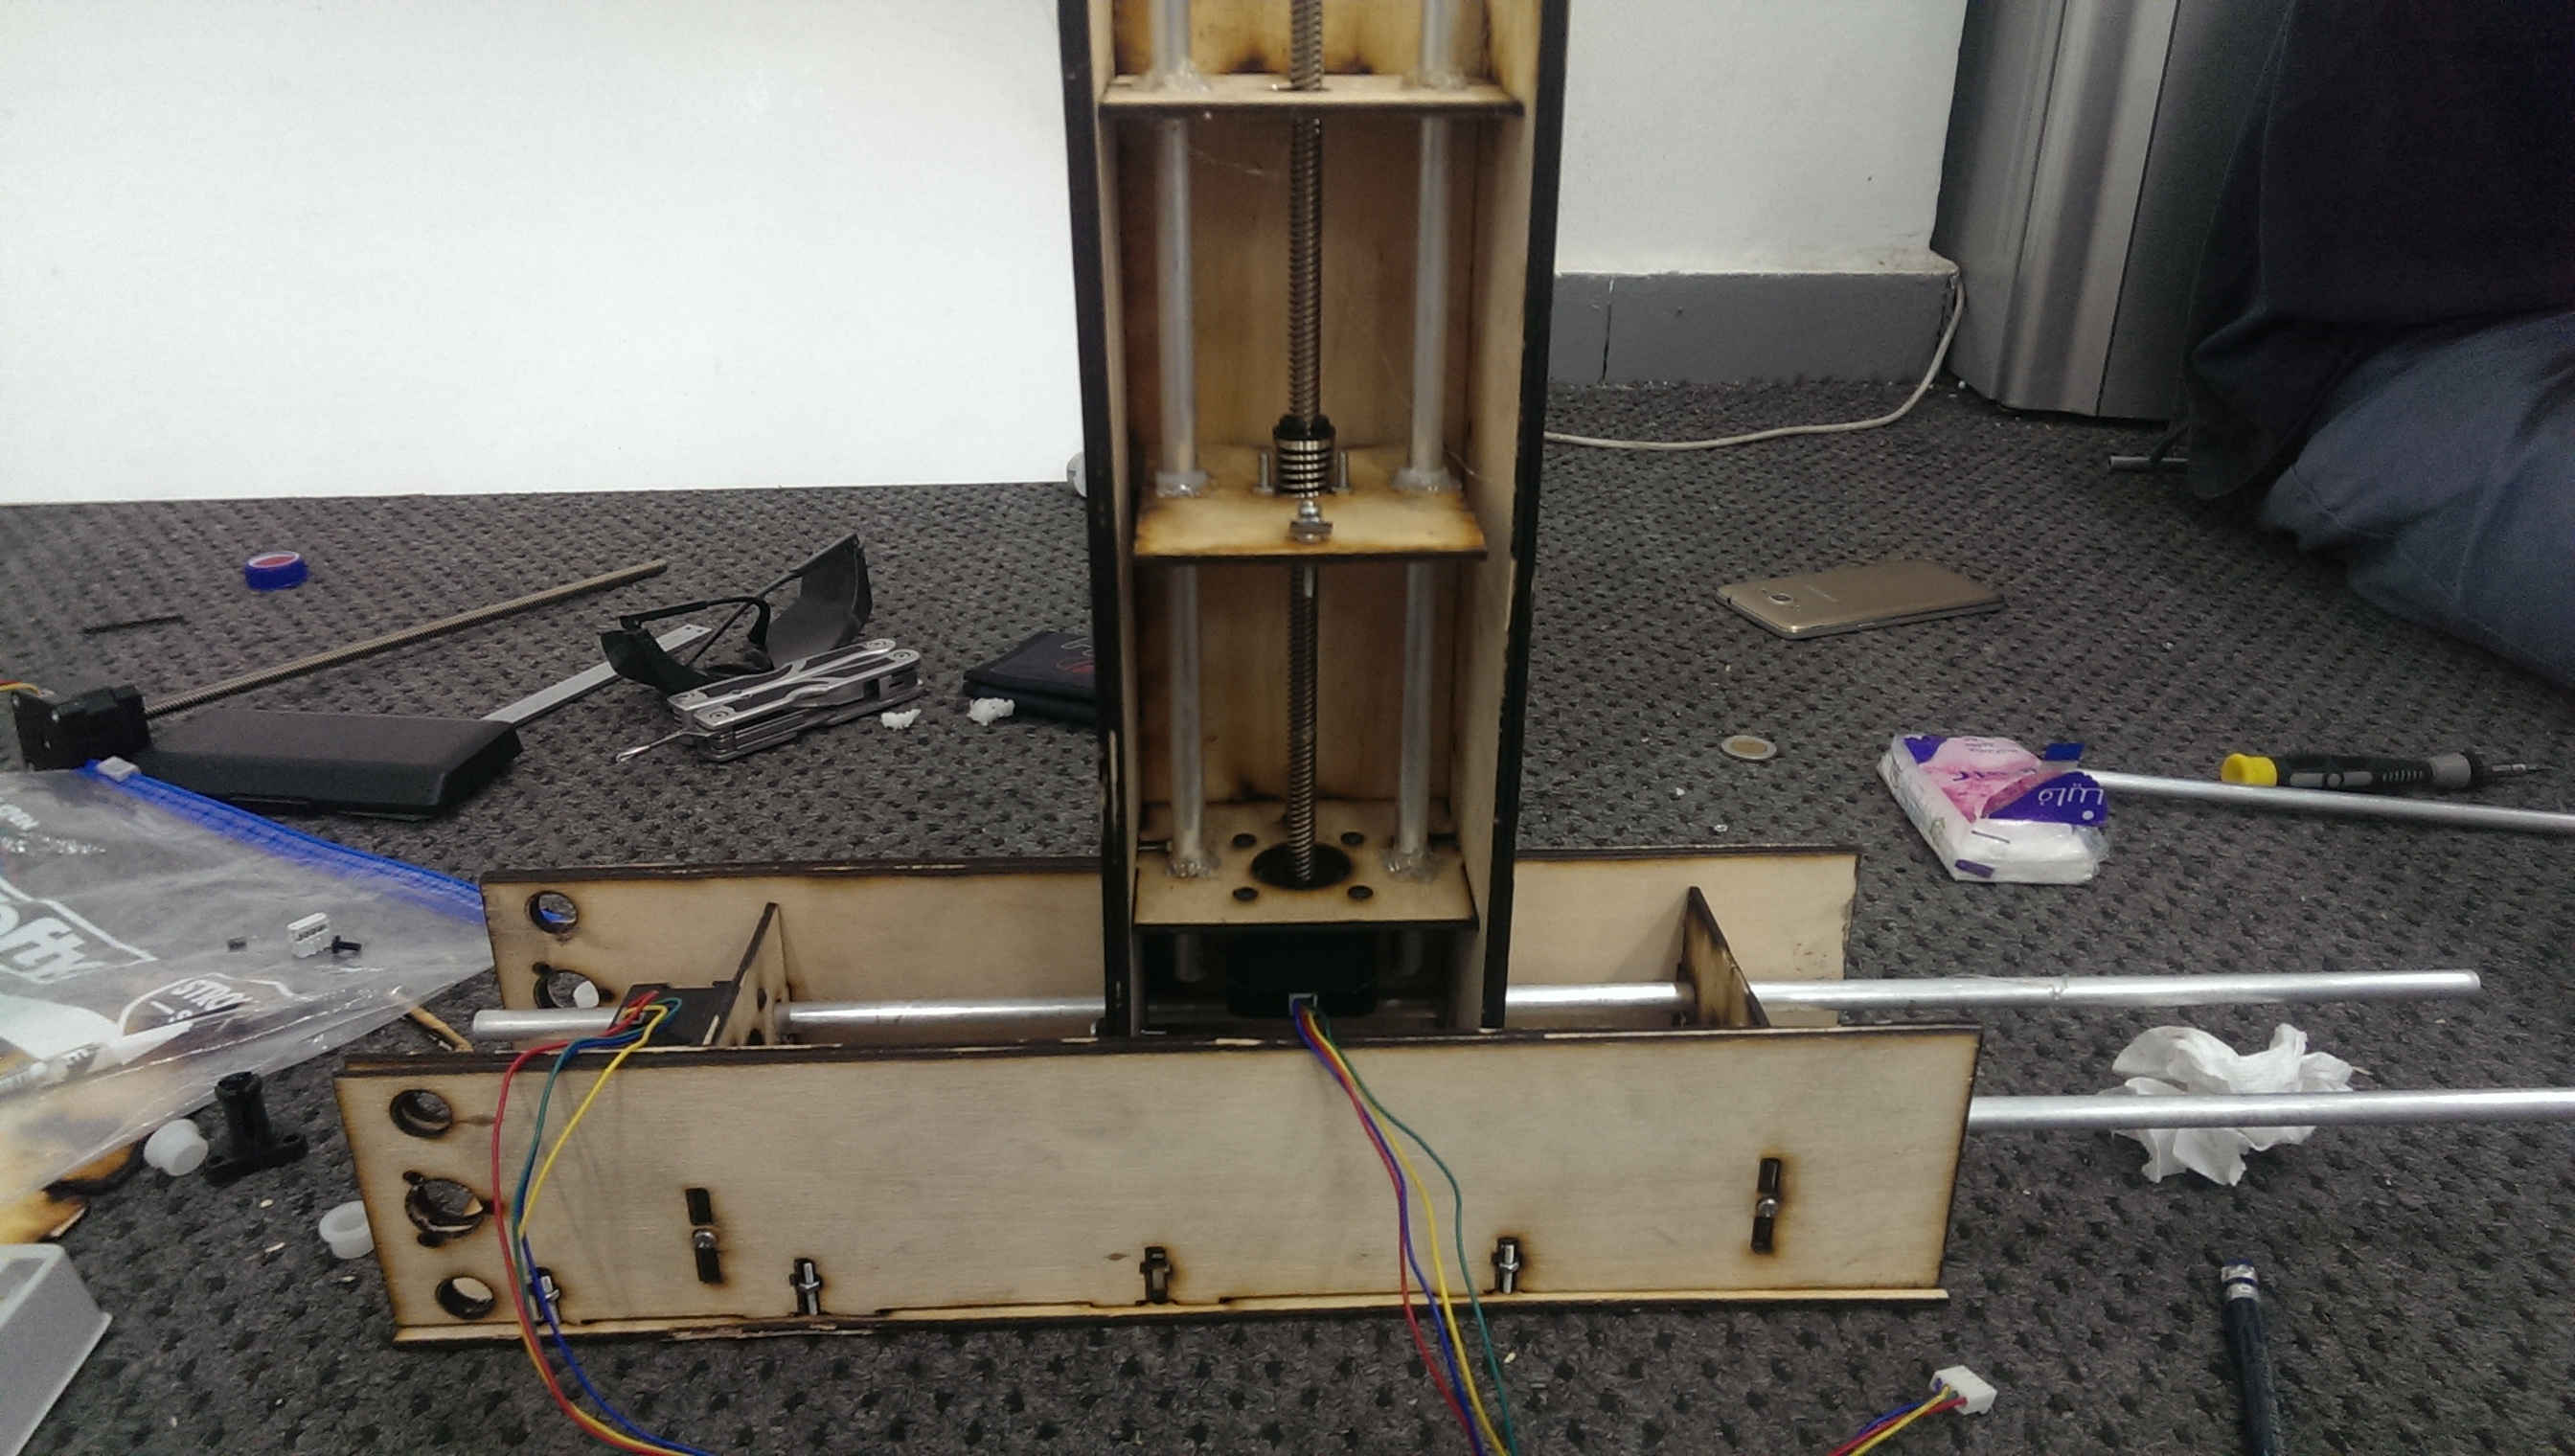
We ran a motion test to check the range and the synchronization.
Finally, Everyone has finished his task and now everything is ready, the software, the hotwire, the chassis, and gestalt nodes. We cut a stair like shape out of a foam. Hope that we can imporve it to cut more complex shapes.