Steven Fett
Fab Academy 2016
Week 1
Practices, Principles, and Project Management
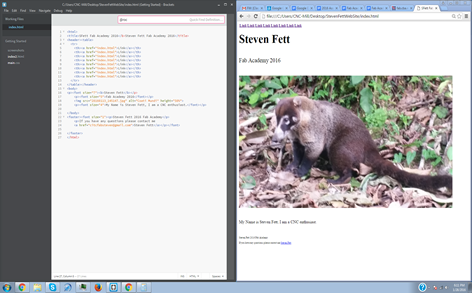
Website building, and learning Git
Using Brackets for live editing HTML was refreshing. Seeing tags function in real time made setting up my site quick and insightful. Trying to focus on a unifying layout was difficult in Brackets, as having multiple pages open and referencing links and frames between the two quickly became convoluted and hard to keep track of. Keeping chunks of code universal to my site was not an option in this software as I was used to creating layouts in CSS and referencing the page layout in my HTML document only focusing on text and content. It's time to find something else.
For resources I used:
Using Git took a bit of reading. The concept of Git is simple, yet fairly abstract.
After watching a few videos and going through a couple tutorials I starting playing with commands in my empty repository.
Git is hard. remembering which command to use while trying to make sure other people aren't pulling while I make my commit is frustrating. I perform git fetch, git pull, move my files into my git directory then as quickly as possible perform git status, git commit, then git push. While crossing my fingers no one else has worked in the repository while I am.
The Git client I used was simply the one from Git-hub
Git Hub Tutorials:
Essential Git
Code School
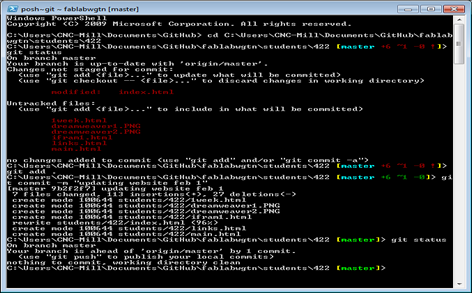
Remembering to treat my repository as living document, I try to use good habits as I move forward. Here is a snippet from one we resource.
USE GOOD NOTES AND DATES DURING A COMMIT
I quickly moved onto Dreamweaver as I realized I was going to need site control and more robust platform than pure code could provide.
I set up my page to have an index with two i frames, one on the left and one on the right. I named these frame targets mainframe and links frame. All links on my website will use the targets "mainframe" , "linksframe", or "_blank" to open a link in an external tab or window.
I was planning on keeping my weekly projects in one page with anchors and links for navigation. Keeping my page in one long page reads in a more linear fashion.
I'll be continuing to update this portion of the page as I add new features.
DreamWeaver Tutorials:
JUSTIFICATION SWITCH HOLD ON!

<---------------------------------------------------------------------------------------------------------------------
Week 2Computer Aided Design
2 (and 2.5) dimensional, and 3 dimension design and drafting
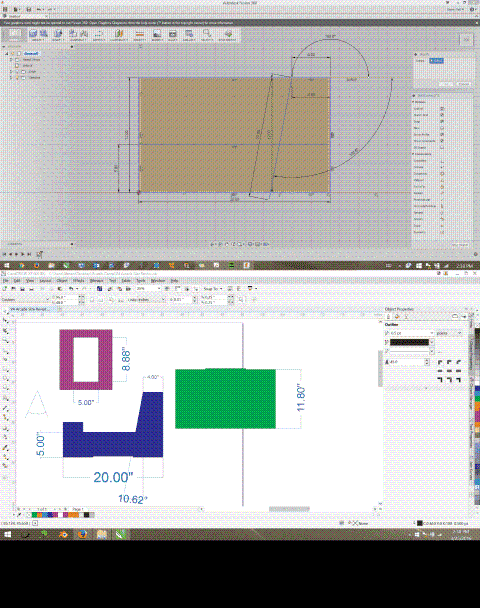
I've been using Corel Draw for the past 3 years and I find it to be more stable and powerful than most other 2D design software short of Architectural 2D software. Keeping in mind the rate I may be expected to work; doing my own Fab Academy work and supporting my other Fab Academy peers.
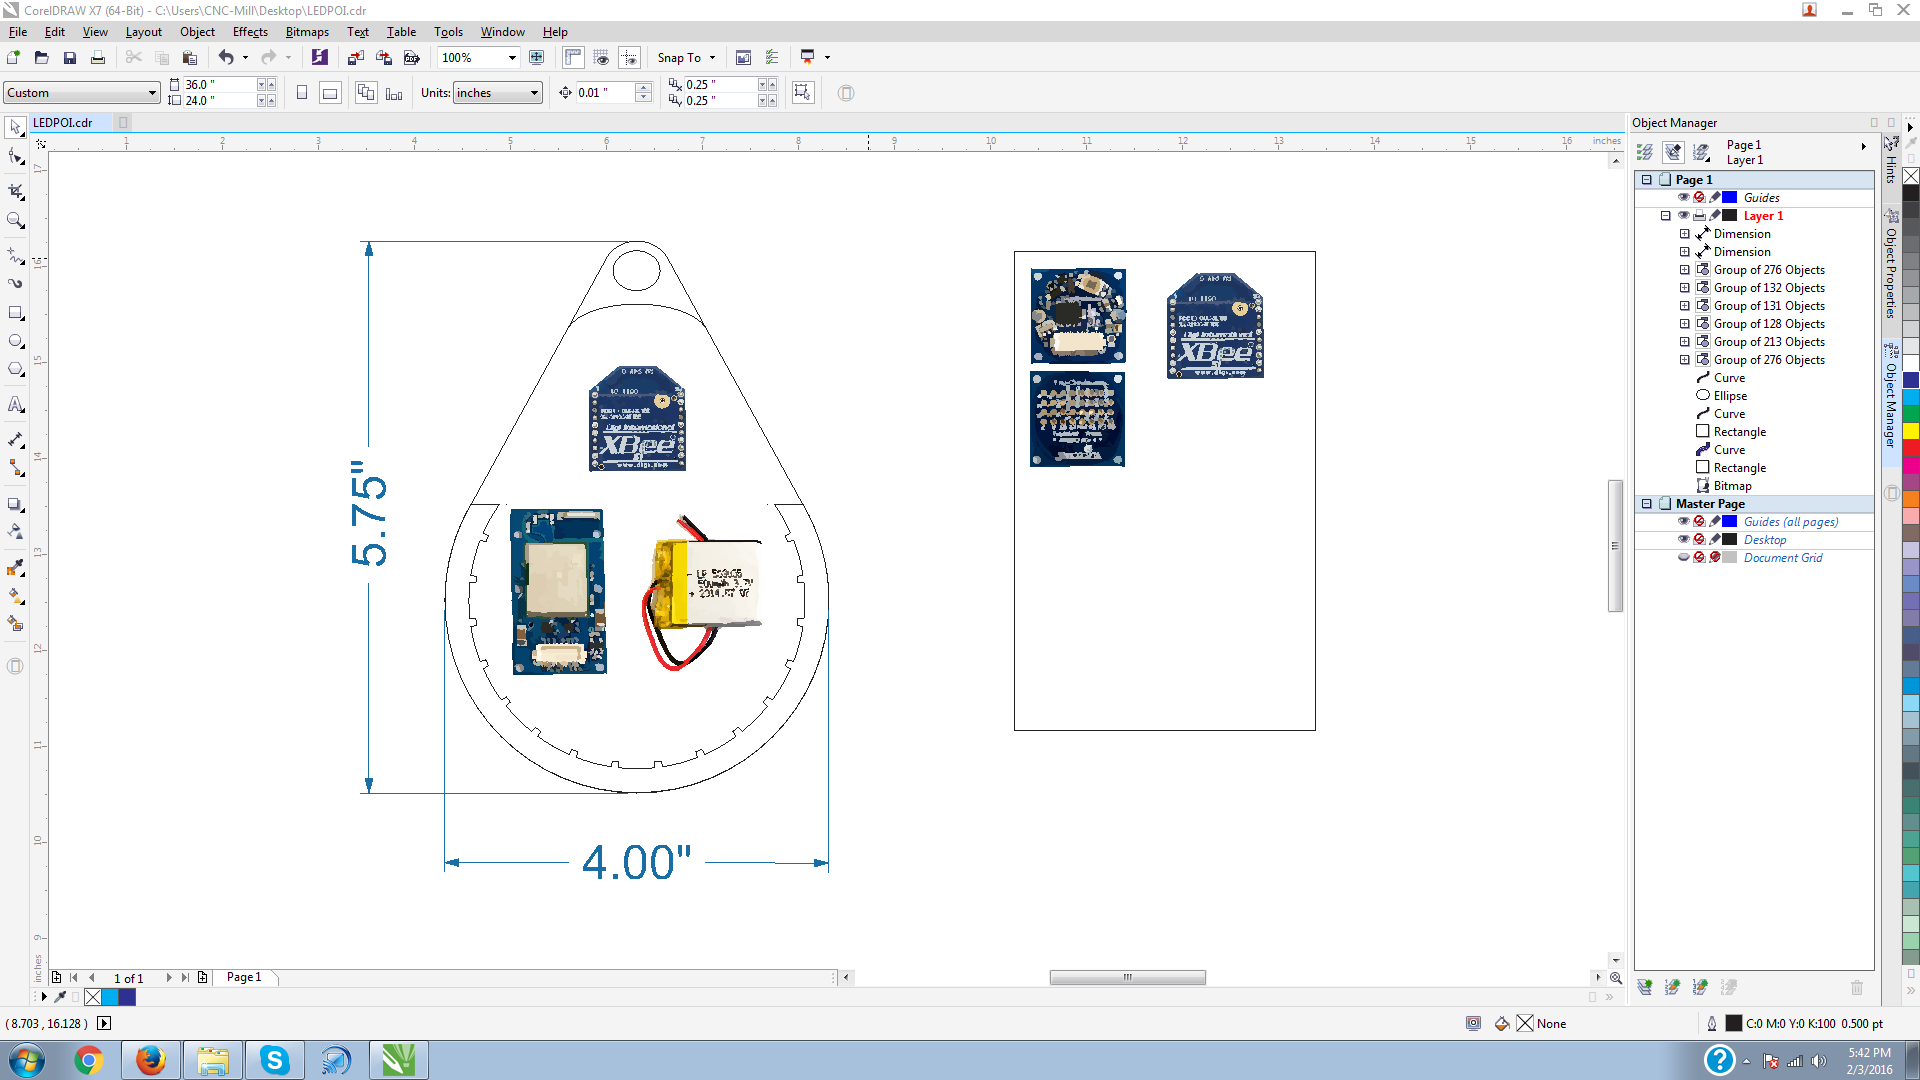
My first step was to convert my paper sketch into a digital format so I can easily revise and machine my idea. pulling images from the web of similar hardware I'll have to create for the sole function of this device.
Using Corel Draw comes as second nature to me, I've been using it on a daily basis for the past 4 years and enjoy its ability to import and export nearly any file type. I've also learned that many plug-in made only for the Adobe suit can be made to run in Corel with the addition of a couple .dll files.
Designing in Draw is fairly straight forward. Create shapes that are dimensionally correct, overlapping multiple shapes to create a more complex shape then using the Object merge function will create a new shape out of the shapes exterior borders. Corel also features clip functions such as "Front Minus Back", "Back Minus Front" these functions simple subtract one shape from another.
I was hoping to give Solid Works another try, as we were told we might be provided with licenses for Fab Academy. I had filled out the forms multiple times with no response. In the mean time I'll be focusing on Trimble Sketchup (formerly Google Sketchup).
I find Sketchup to be a blunt tool, a hardened steal maul. The greatest stone sculptures are made with dented hammers and marred chisels.
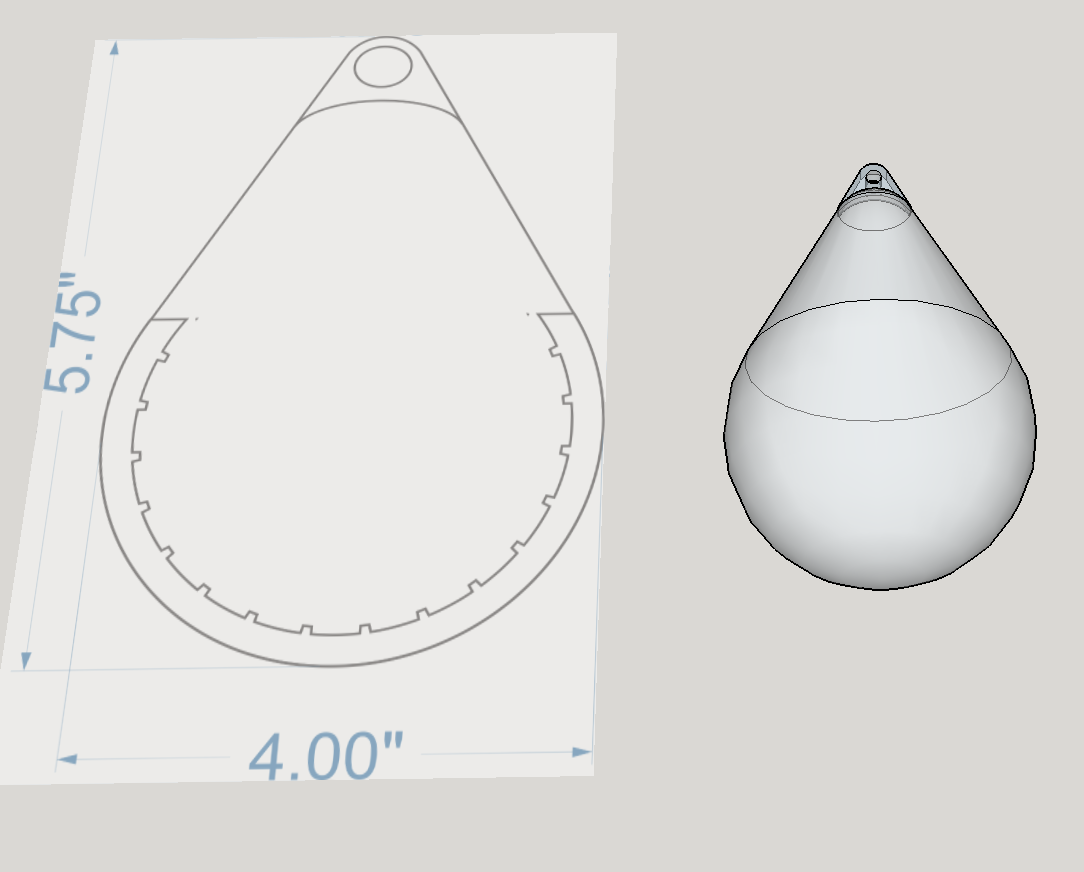
After creating my ideal dimensions in Corel, I jumped into Sketchup to create a 3d mock-up to define my working volume for electronics. Creating the 3 dimensional tear drop shape threw me through a loop for a short time. I used a modified follow me sphere. Follow me is a function in Sketchup that allows you to draw Two 2D shapes in perpendicular planes then augment one of the shapes to "follow" the other through their plane. This is best shown with the two circle sphere tutorial.
Sketchup Sphere Tutorial
Following this tutorial I drew the smaller sphere as a teardrop instead. The "cleat" or "anchor" at the top of my tear was simple not selected during the follow me function. I am looking for a plug-in or script available for Sketchup that will allow me to quickly create a parametric wall for my mock-up. So as my model will have a defined wall while still being hollow, making room for my electronics.
Project File (may include newer work than is shown on this document)
Using Parametric LINK
After watching most people use either Solid Works or Fusion 360 for a lot of 3D design I decided to pick it up. I was confused by the layout of the tools at first. After using the software for longer and longer periods of time I found using Fusion 360 to have a rather intuitive UI layout for how many features and functions the software had. Fusion 360 Seems to pack an awful lot into a small package. In the Future I will attempt to enter all of my drawings into fusion 360 to create my own project libraries to be referenced in the future.