

Week 10
Output Devices
Assignment:
Add an output device to a microcontroller board you’ve designed and program it to do something.
Electrical Safety:
1 mA: OK
10 mA: Shock
100 mA: Fibrillation
Power Supplies
Pwm:
Pulse Width Modification
Speaker:
MOSFET Transistor
NDS355AN (enough to run a shopbot)
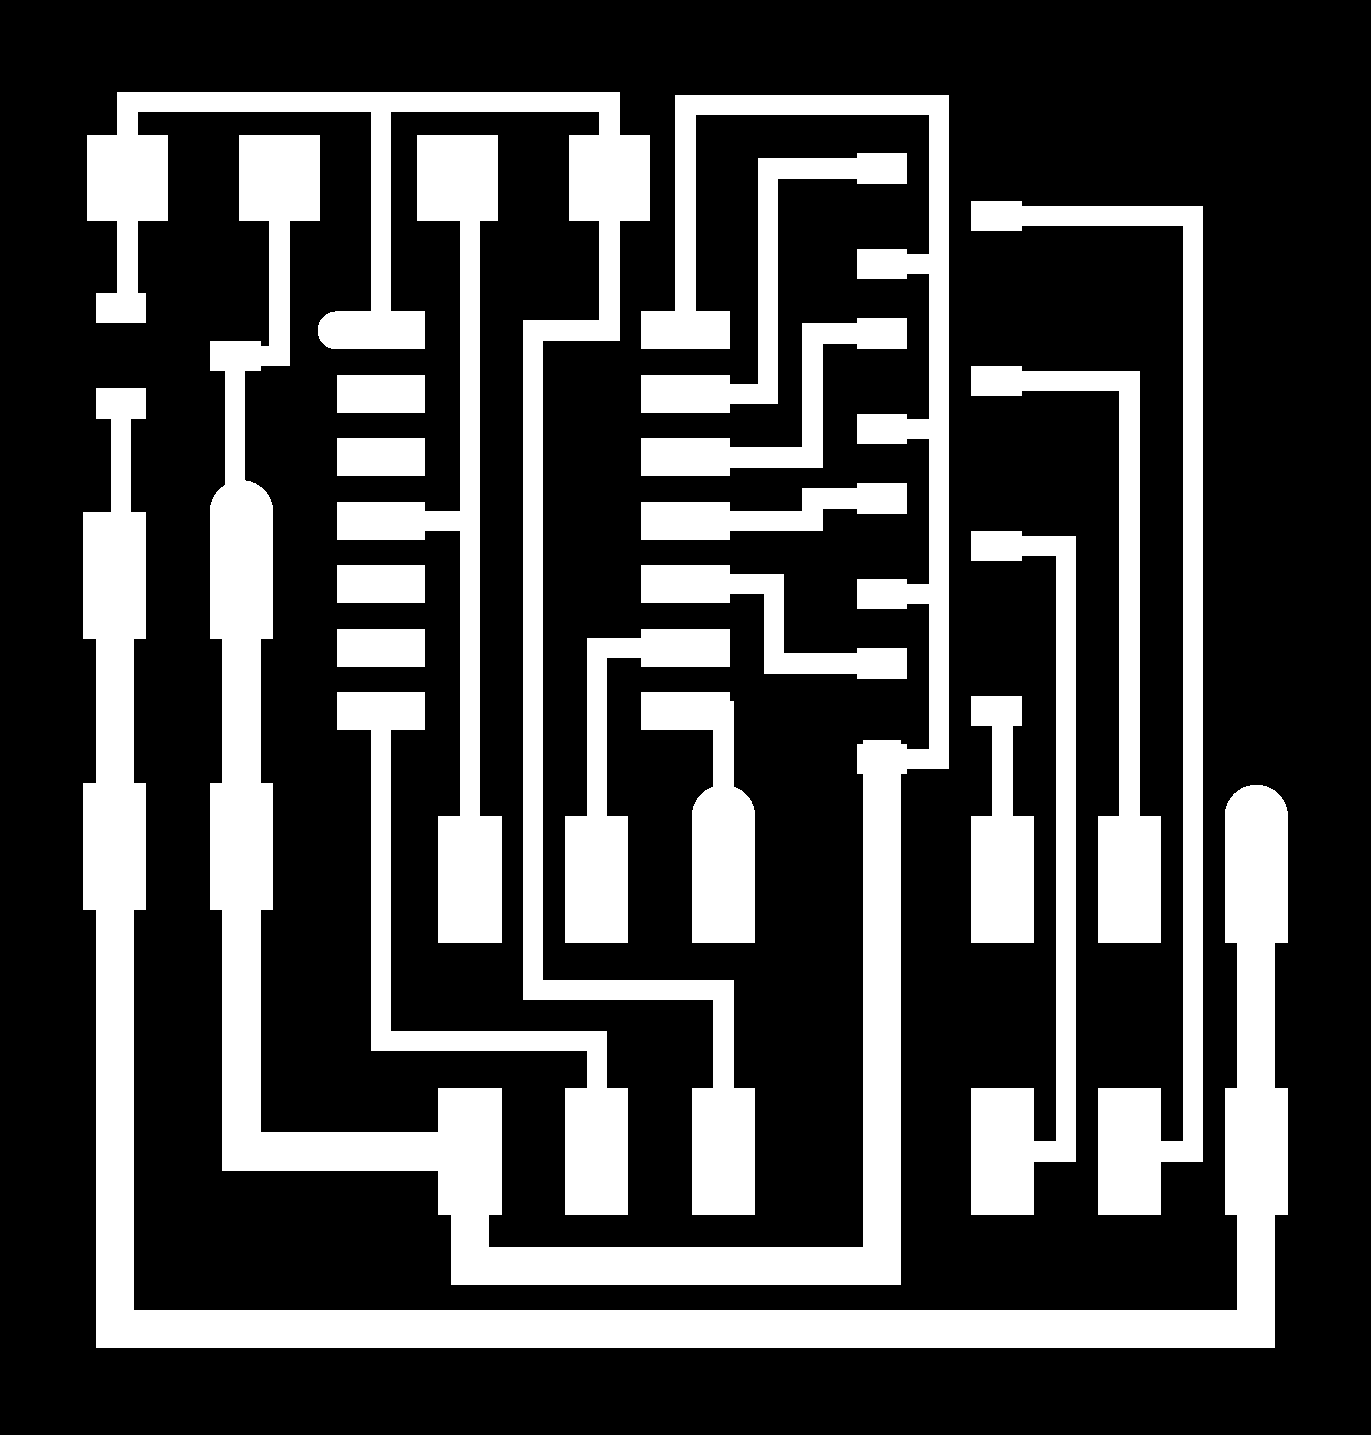
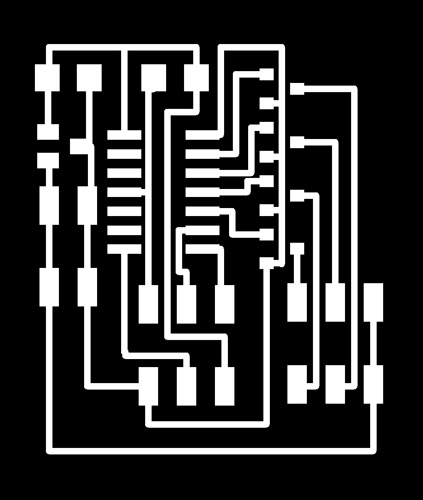
Board, hello.speaker.45.cad, components, traces
Motors:
DC Motors- Simplest Motor
Servo Motor-Motor can turn positions, send the direction you want it to point, 50 cycles per second-in each cycle there is an on & off time. Run oh regulated power for a larger regulator
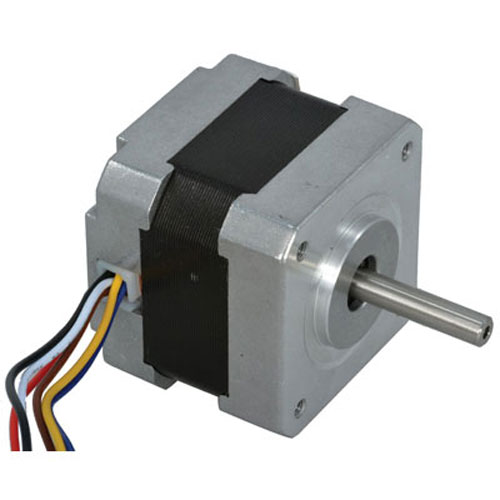
Stepper Motor (the type of motor I want to use for my Kitty Matic!)-2H Bridges drive the stepper on time/off time. I need to use a Unipolar Stepper Motor. Either: 12vdc/30ohm Or 7VDC/350Ma
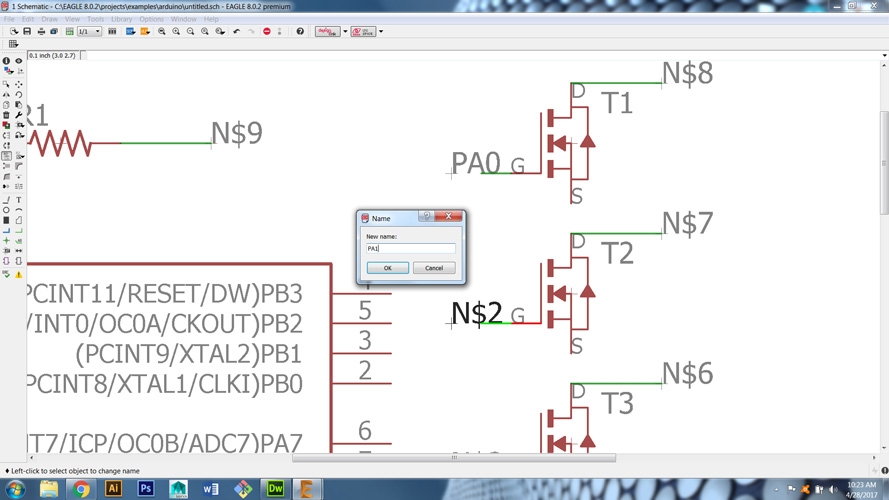
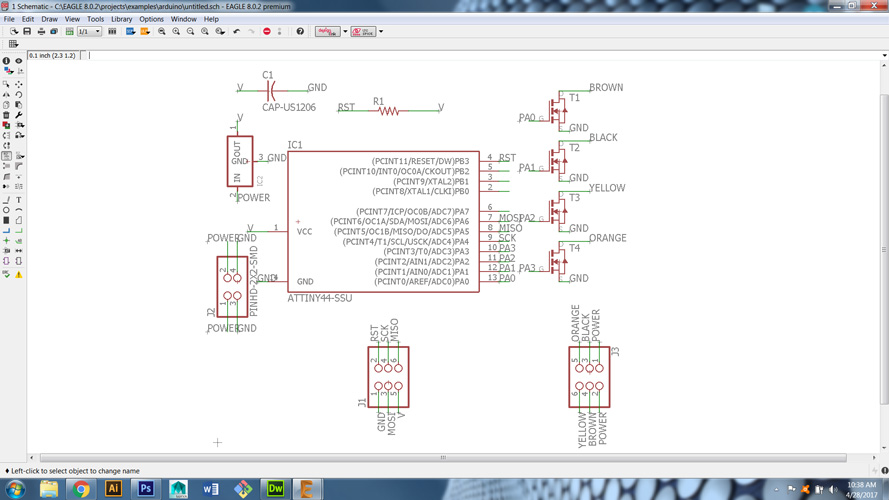
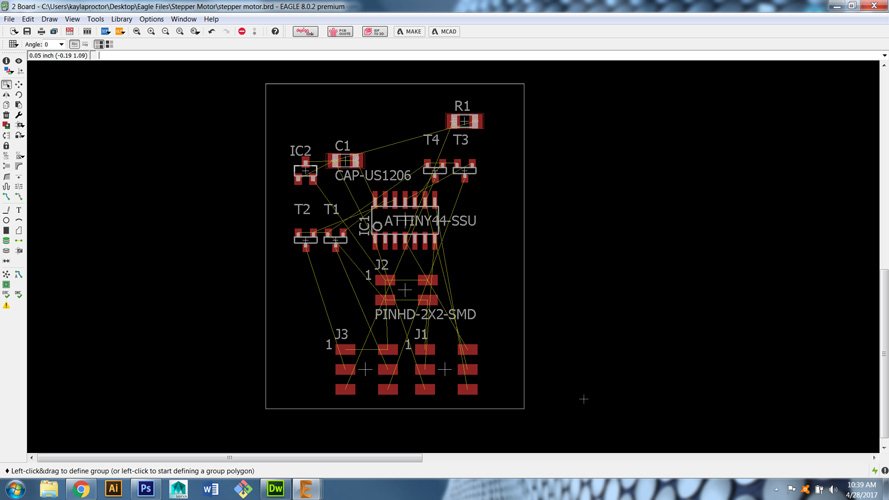
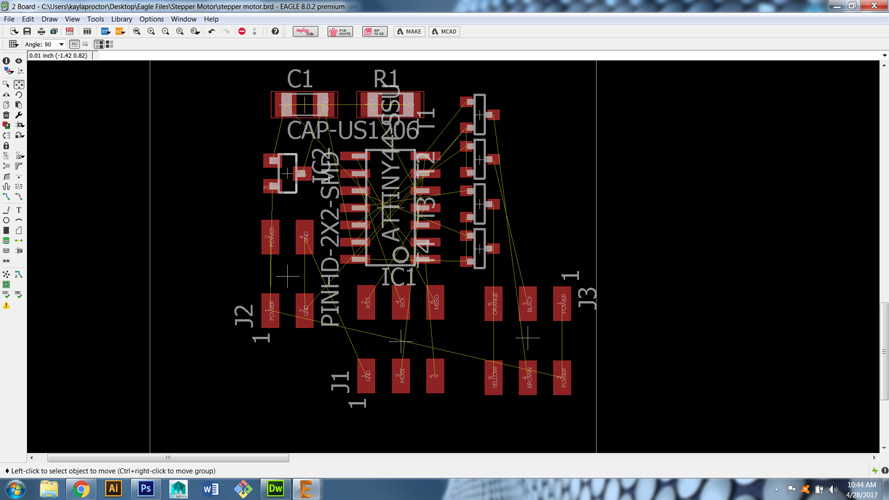
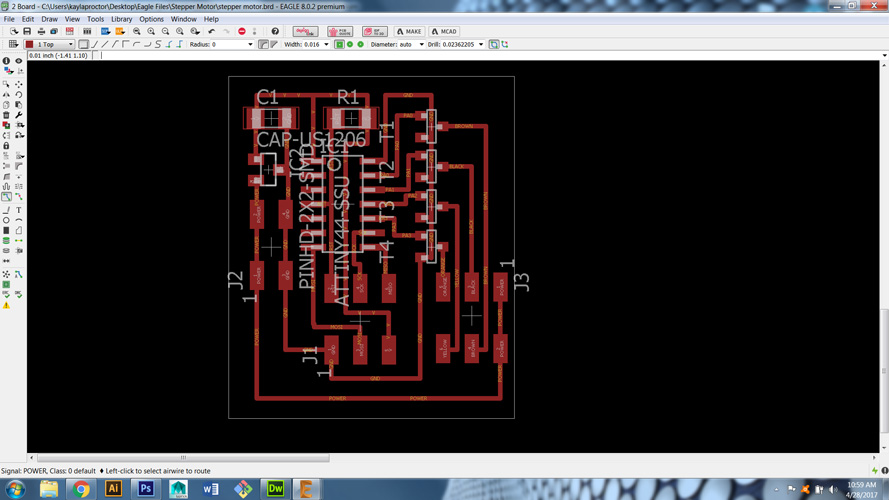
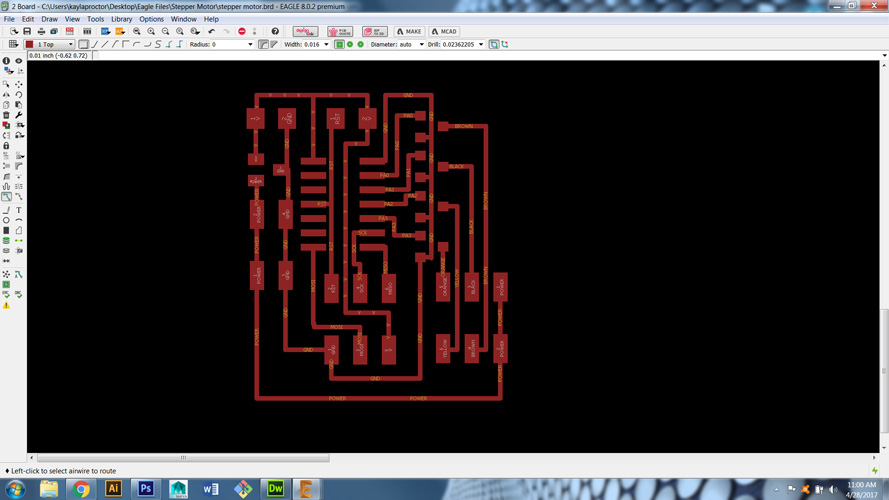
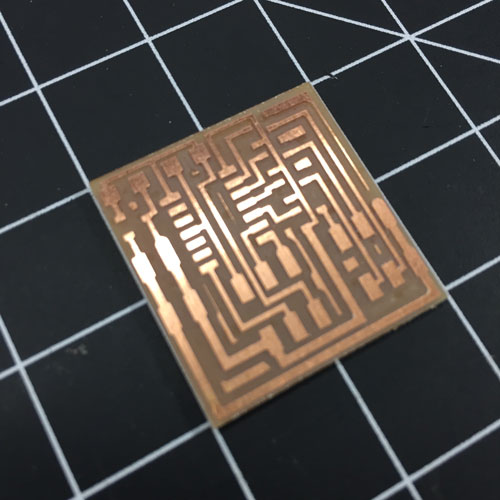
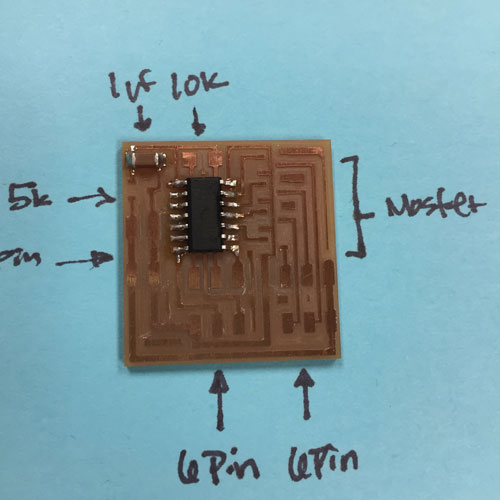
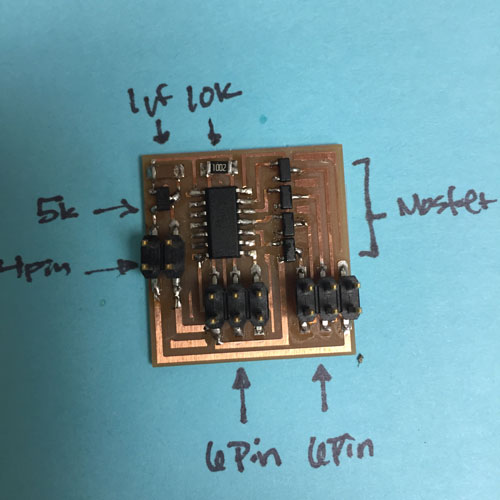
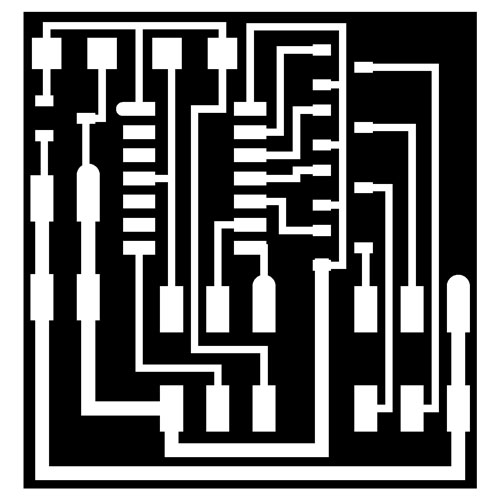
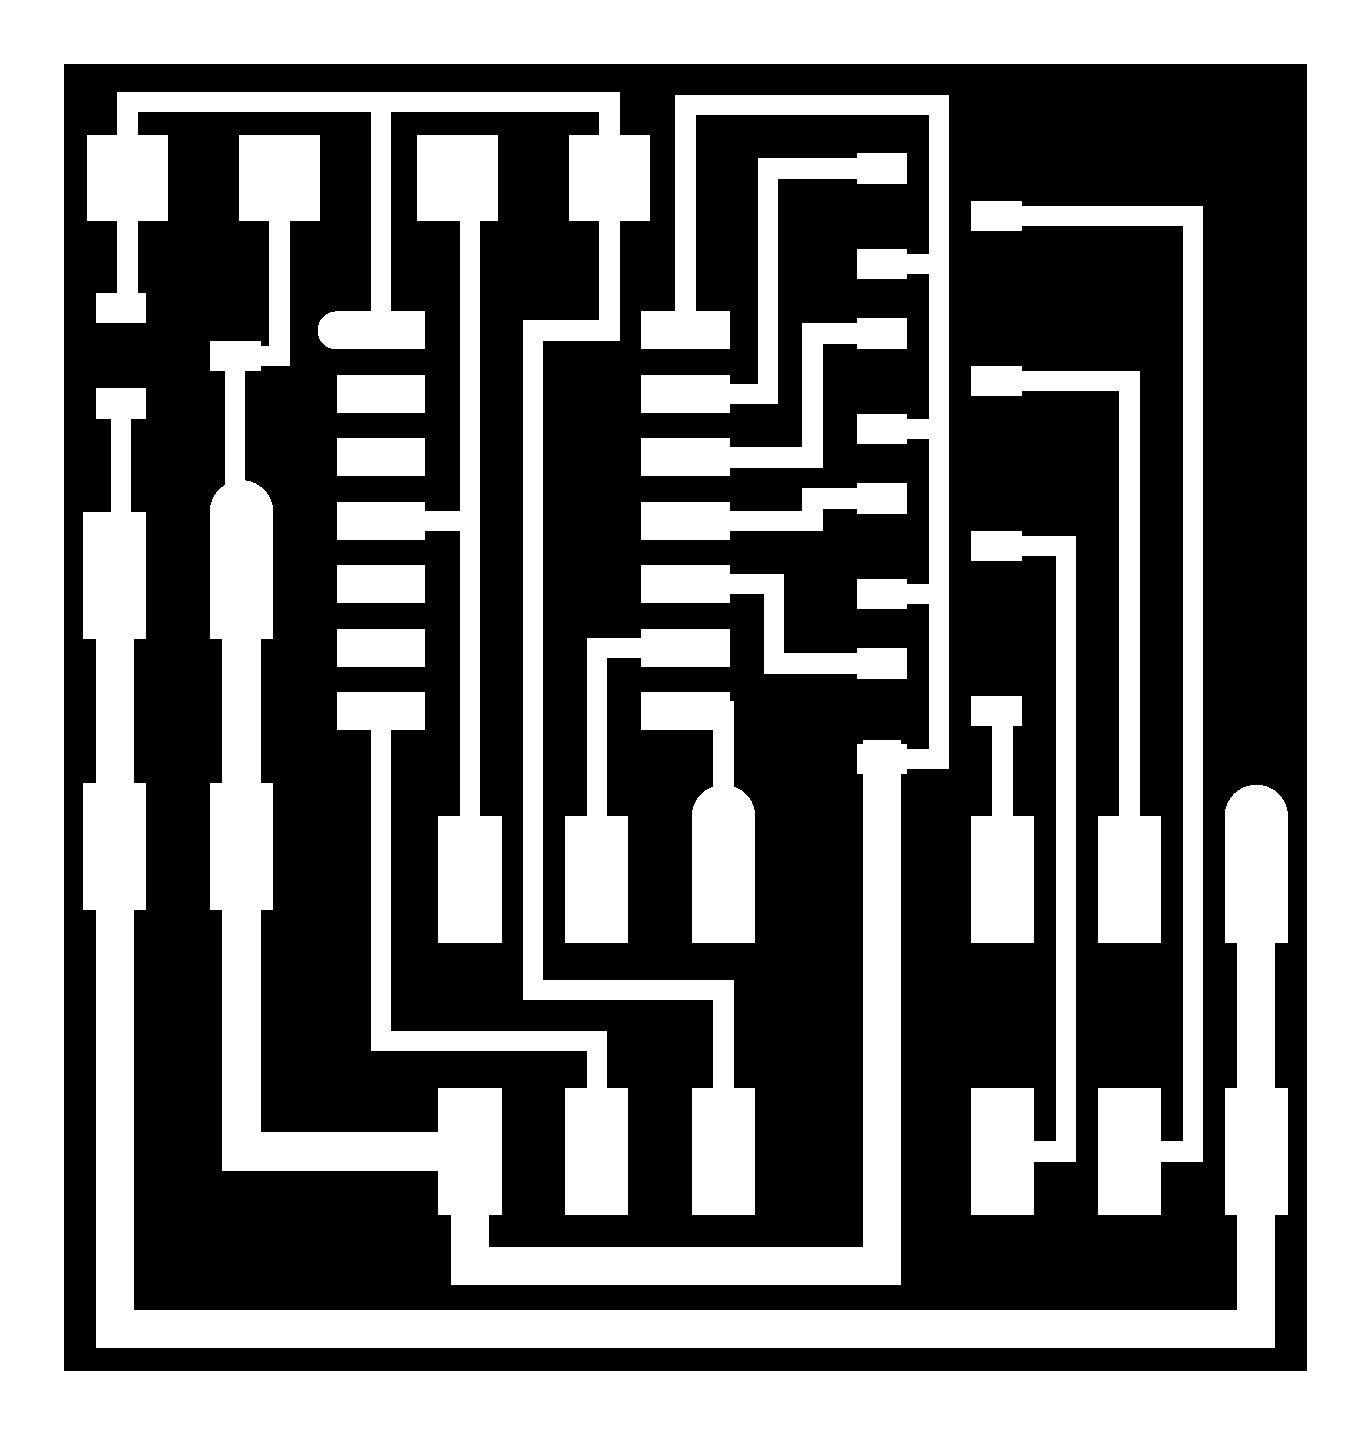
Making the board:
I used the following as resources when desiging my board.
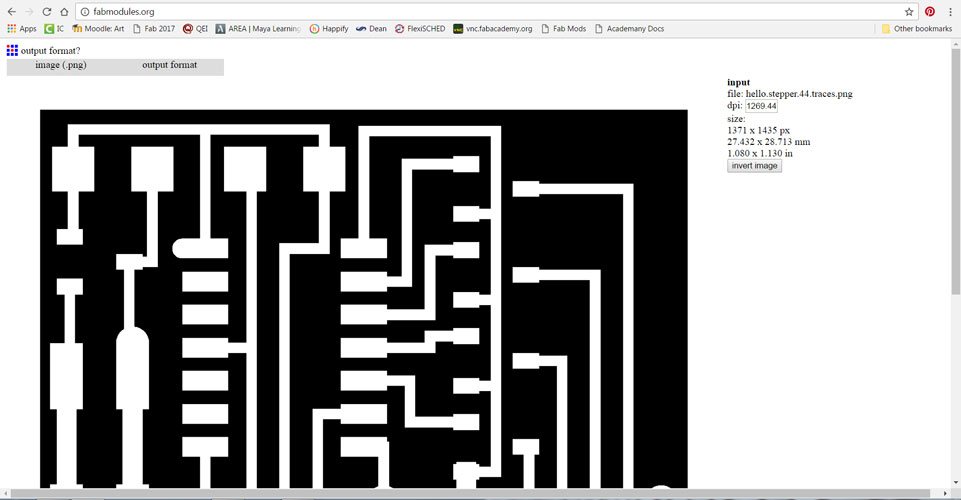
Board Traces http://academy.cba.mit.edu/classes/output_devices/stepper/hello.stepper.44.traces.png
Board Outline http://academy.cba.mit.edu/classes/output_devices/stepper/hello.stepper.44.interior.png
Here is the progression of designing the board:

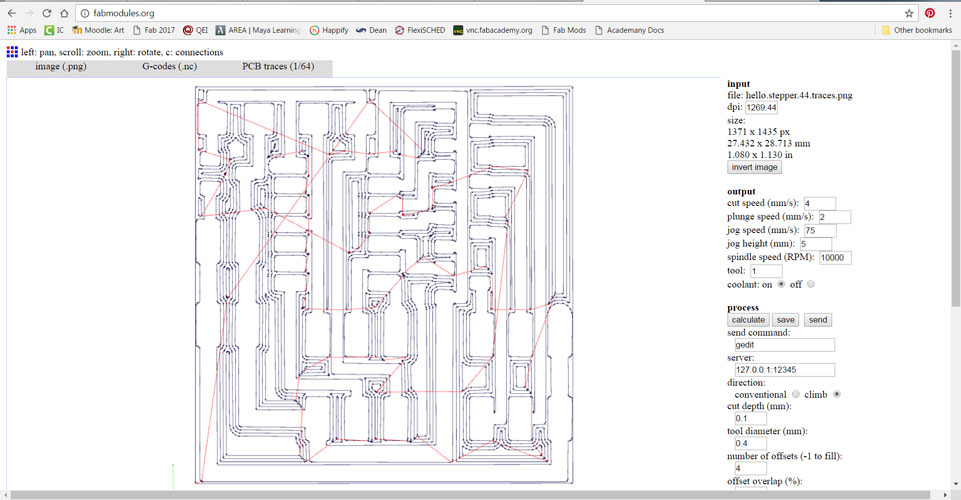
Setting the board up to be milled:
Open fabmodules.org
- Input format
- Image (.png)
- Board Traces
- Output format
- G-Codes
- Process
- PCB Traces 1/64” (1/32” for outline)
- Calculate
- Save to flash drive
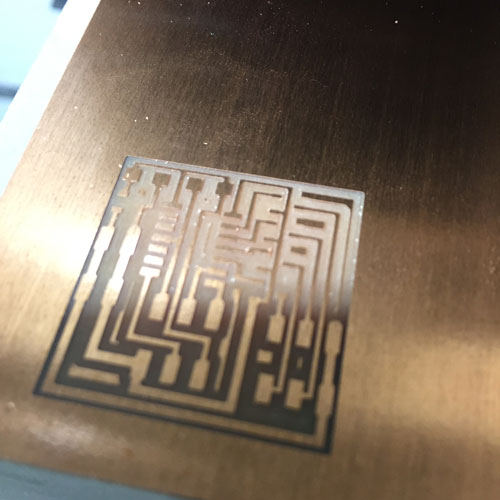
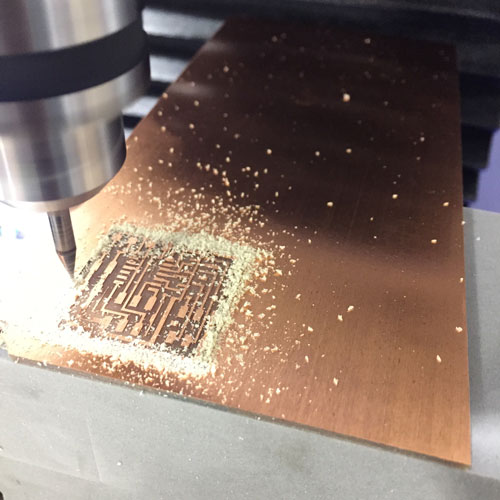
Mill to board on the CNC Mill
- Follow week 4 directions on milling FR1
- Wash the board after it is finished with the traces and the outline
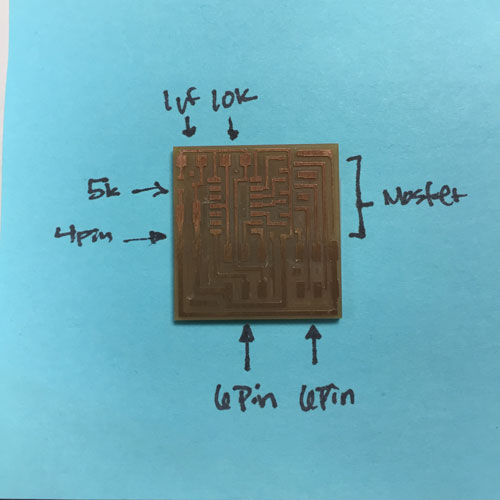
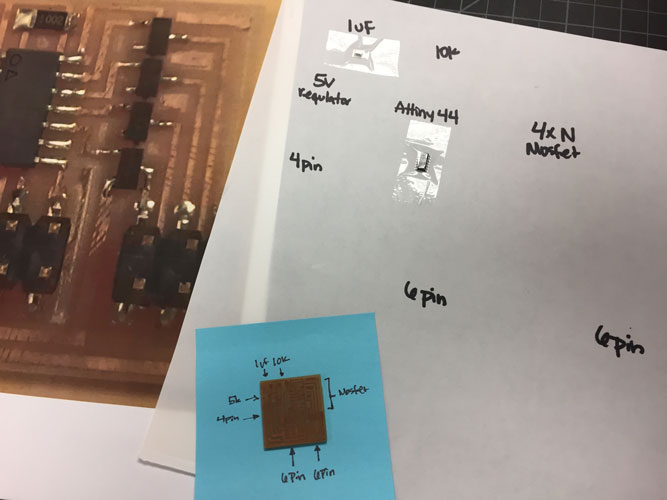
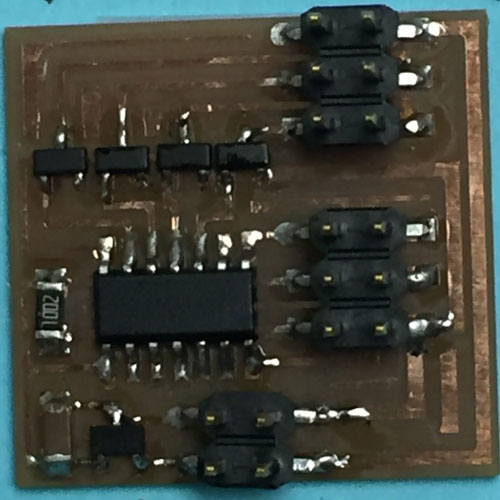
Solder the parts to the board
- 1 uF Capacitor
- Attiny44
- 10K Resistor
- N Mosfet x 4
- 9V Battery Connector
- 2x2 pin Connector
- 2x3 pin Connector
- Motor (Stepper Unipolar)
- 2x2 Connector Socket 4POS
- 2x3 Connector Socket 6POS
Programming the board with a Unipolar Stepper Motor:
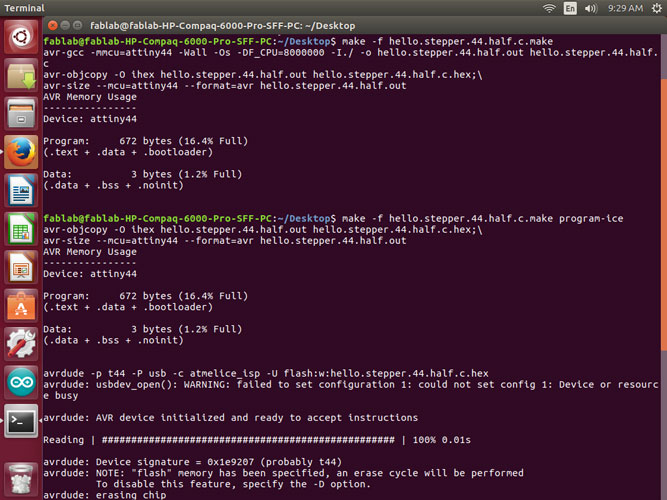
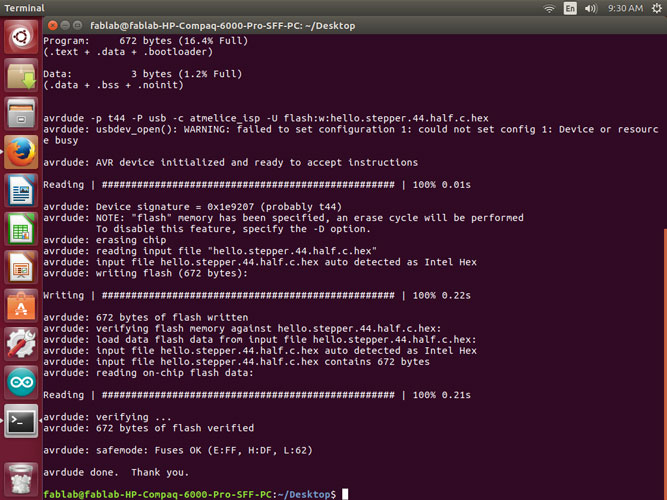
In Linux I downloaded the hello.stepper.44.half.make file and the hello.stepper.44.half.c file and placed them on my desktop
The board was plugged into the Atmel ICE and the power supply (9V) battery. While programming I had the motor disconnected.
Linux
- Open the Terminal (right click on the desktop)
- cd ~/Desktop/ (This opens the desktop directory in the terminal)
- ls (This will list files in the directory that is open so you can see what files are available)
- gedit make –f hello.stepper.44.make (Look at the file to make sure that your programmer is listed)
- My programmer is listed as atmelice_isp (I had to add this line to the c file)
- make –f hello.stepper.44.half.c.make (This will run and complete the avrdude: avrdude done. Thank you.)
- make –f hello.stepper.44.half.c.make program-ice
- If you need to reuse a command just add or change something you can use the up arrow on your keyboard in the command line to see past lines
I then disconnected the Atmel ICE and the power. Reconnected the motor and then plugged back in the power. Once I had all of the parts on the board, the motor and the 9V battery connector I had to connect the wires for the motor to the schematic in the right order. I had a little bit of an issue with this! I followed the data sheet, but it seemed that the data sheet and the original schematic did not match the actual C code that was written for the board. So I had to change a few wires around. I found out that my orange wire was to be connected to either my 1 or 2 pin, for power. Then I needed to start with the 3 pin and connect the rest in a certain order. It took me 3 different tries and configureations. See the videos below for the progression!
Attempt #1, Attempt #2, Attempt #3, Final Video
I then modified the program to have the motor only move clockwise, counter clockwise, one step every second and then 50 steps every minute (video not included)! (See project files at the bottom of the page)
Clockwise: hello.stepper.44.half.cw.c
Counter Clockwise: hello.stepper.44.half.ccw.c
1 step every second: hello.stepper.44.half.ccw.c 1 step every second
Week 10 Photos