
#week 5
3D scanning and printing
This weeks assignment
Test the design rules for your printer(s) (group project)
Design and 3D print an object (small, few cm) that could not be made subtractively
3D scan an object (and optionally print it)
3D printing
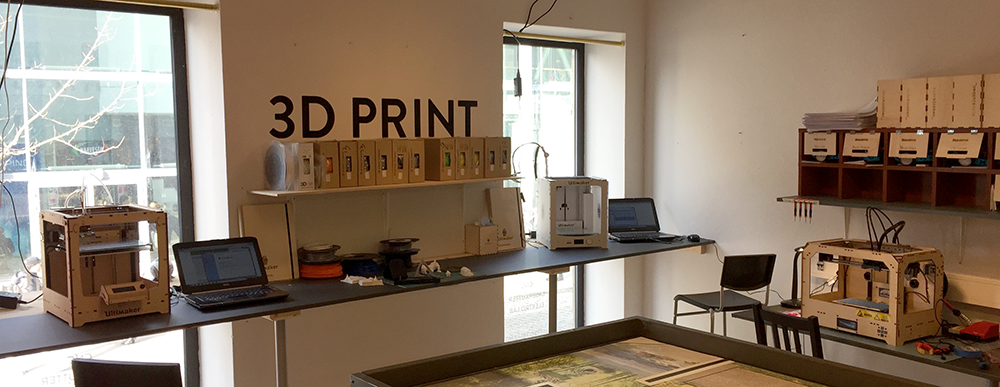
For our group project, we set off testing the different printers in the lab. I tested the Ultimaker Original+ and the Wanhao Duplicator3, and Jakob tested the Ultimaker2.
I started with an open source testprint which we found on Thingiverse - that has a lot of different variables that will test most of the different challenges of a print. What I found out with this print was that it confirmed the two biggest challenges I have had with this printer. One is the top of the cone - which ends up like a "blob" and melts the filament on the top. The other challenge is bridging. I went over to a "Bridging test" file that I ended up spending a whole day trying different settings to see how to get the bridging "right". I am still not happy with the result - but it is a lot better than what I started with!
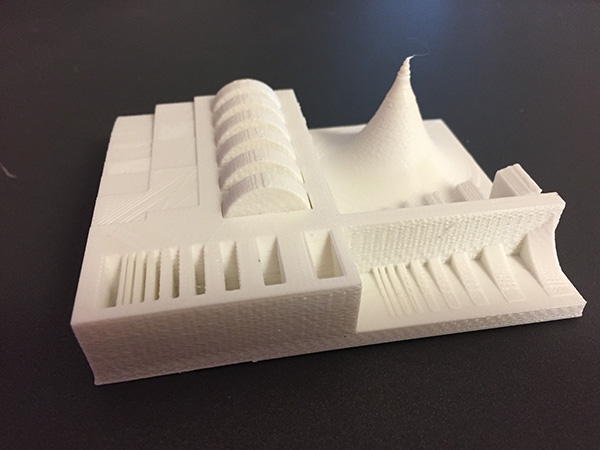
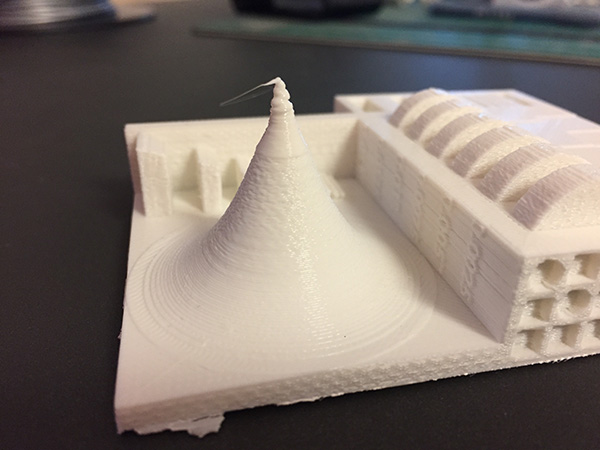
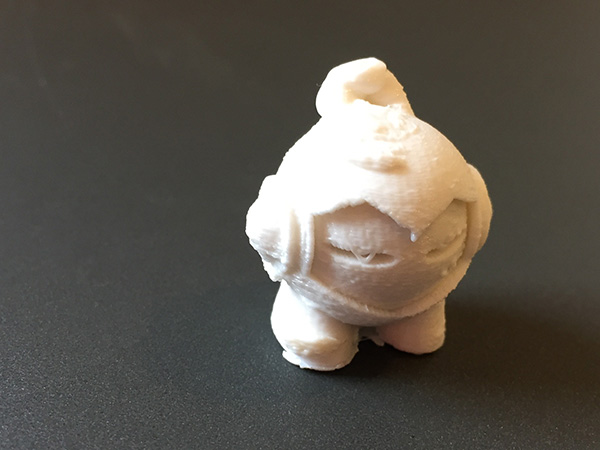
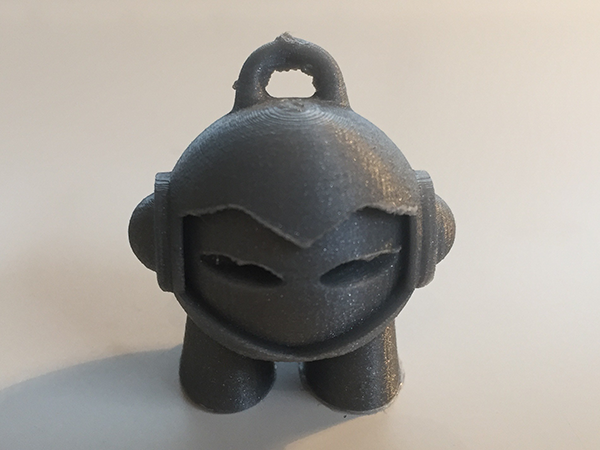
The result with the "blob" on the top of the cone is apparently a common issue with cura. This keyring is another example of how the top of the print is melting the filament.
I wanted to check how the same print would come out on the Ultimaker2+ - (silver print) and as you can see, it is a lot better.
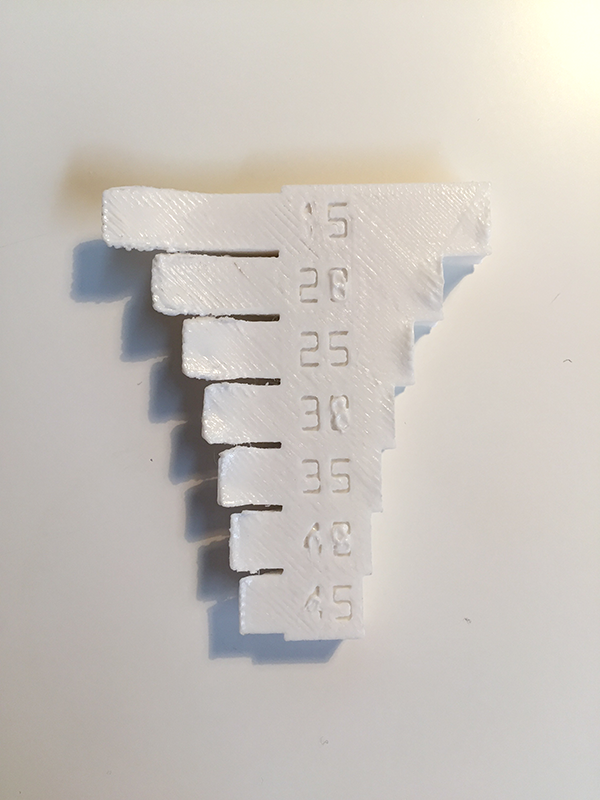
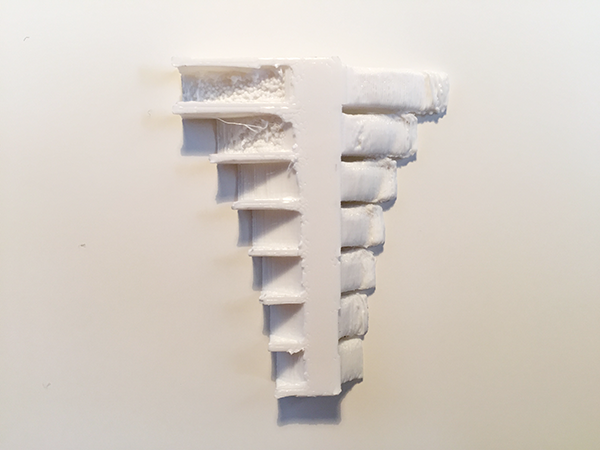
Bridging test
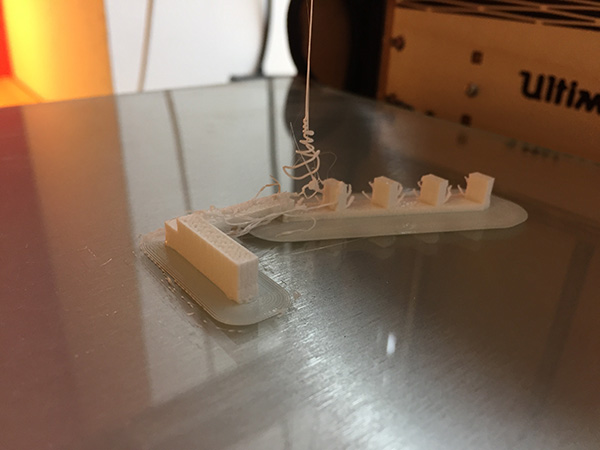
Starting point, where I used a high printing speed of 70, and it was very visible that this was too fast.
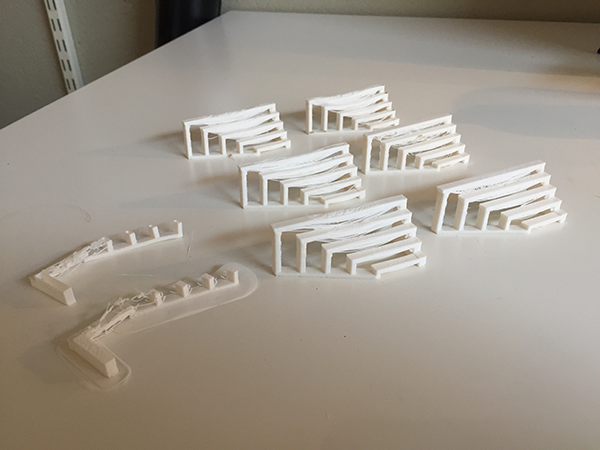
I kept lowering the printing speed and the temperature so the plastic wouldn't come out so fleksible, and a few tries later - the print started to come out better.
So far the best result yet came with the settings PLA 2.85, 0.1 layer height, speed 30 and temperature 180.
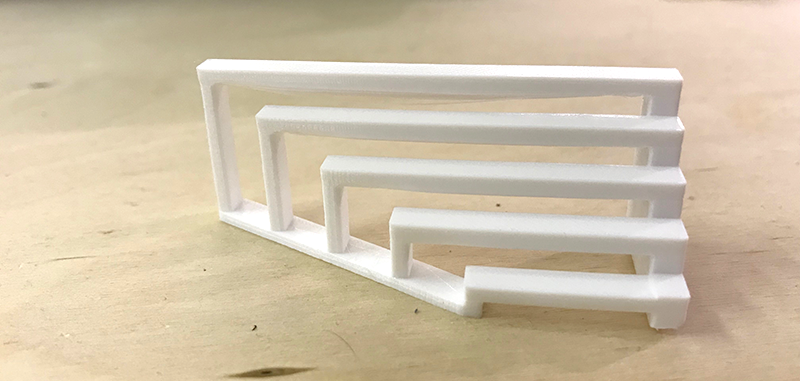
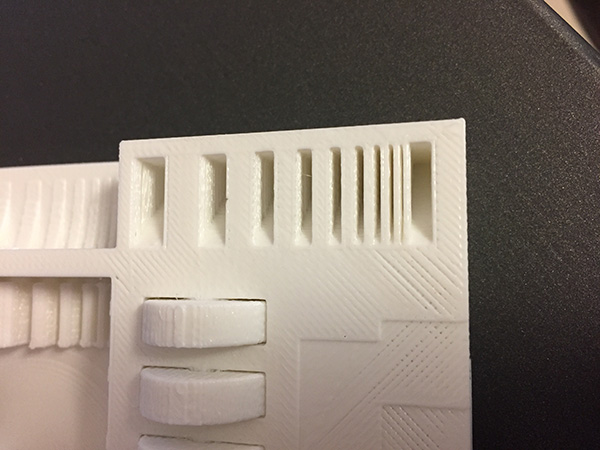
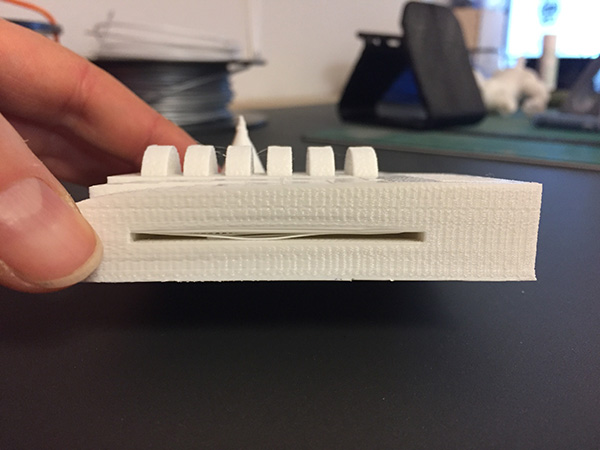
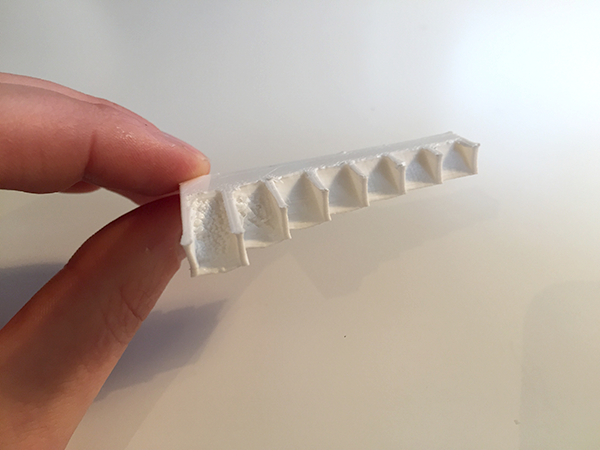
Overhang test
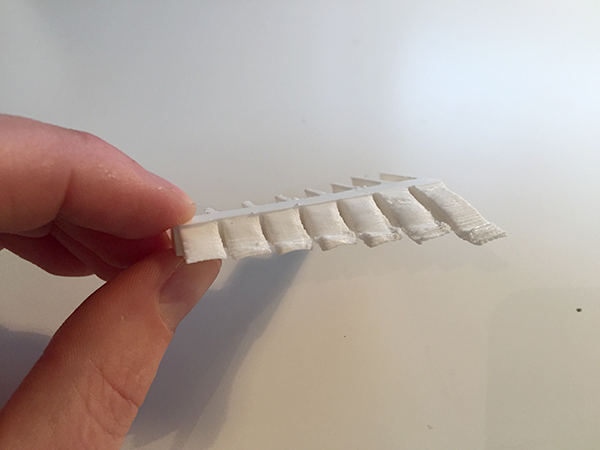
The overhang test showed that overhang prints under 25 degrees angle will not work.
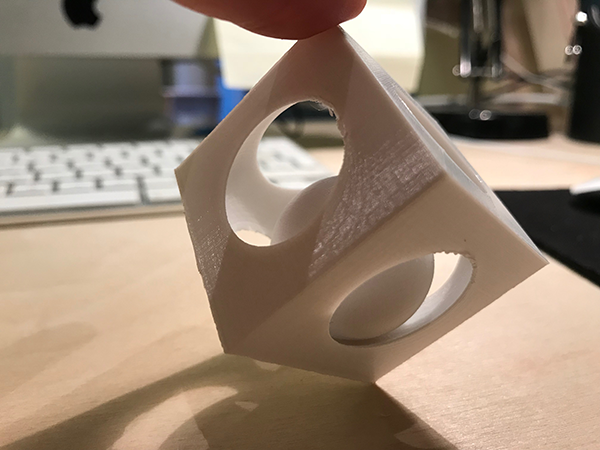
Printing an object that could not be made subtractively
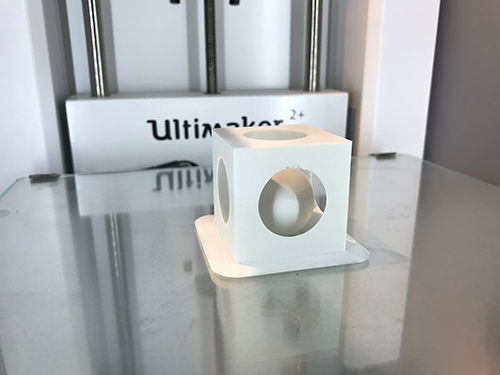
I chose to design and print a figure consisting of a sphere inside a square, which shows really well what is the unique side of 3D printing, that could not be made with a subtractive technology since the inner edges/curves would not be unreachable with a tool to remove the material on the inside.
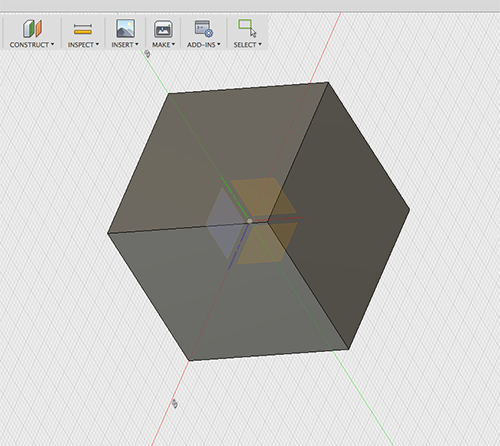
I started off by designing a cube in Fusion360.
Then I created the mid planes for placing the sphere in the middle.
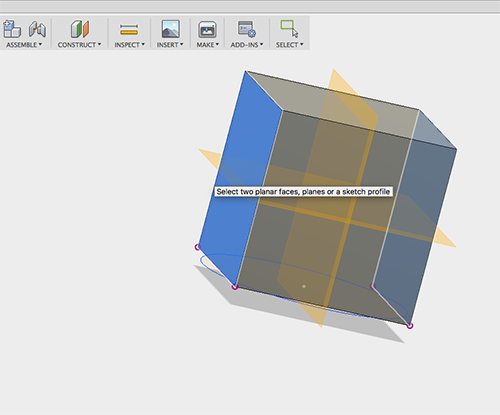
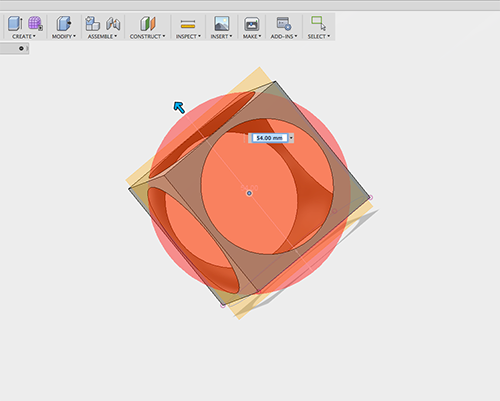
Then I made a sphere that was a bit too big for the square, and used it to cut out the circular space in the middle.
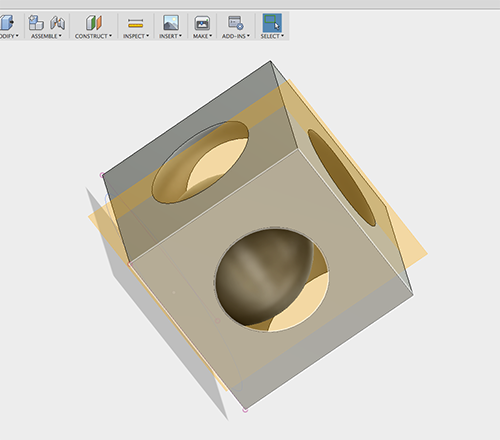
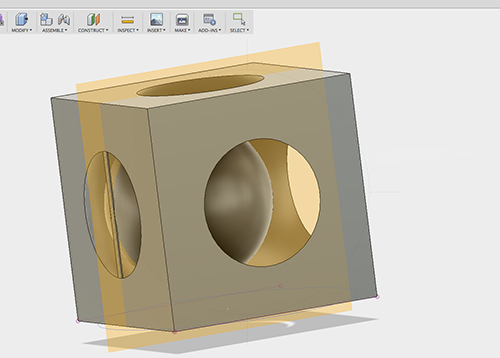
Finally I made another sphere, that I made too big to fit through the holes, and small enough so it would roll around inside the square.
And I added a line on one of the sides, to I would be able to import "two" bodies to cura - since Cura will not let you place one object inside another when printing.
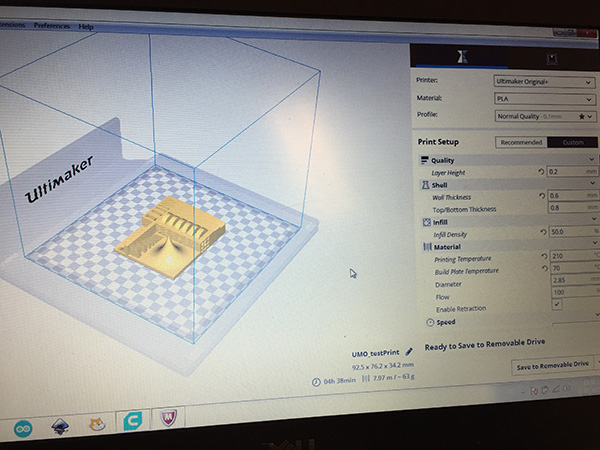
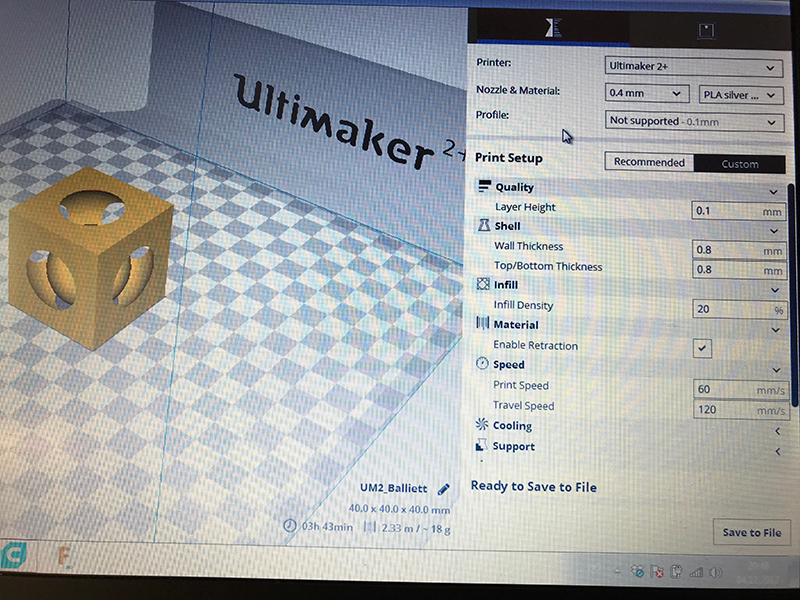
I then exported the body in Fusion360 as an STL file, and imported it into Cura. The settings I chose was 0.1 for layer height, print speed 60, infill 20 and no support.
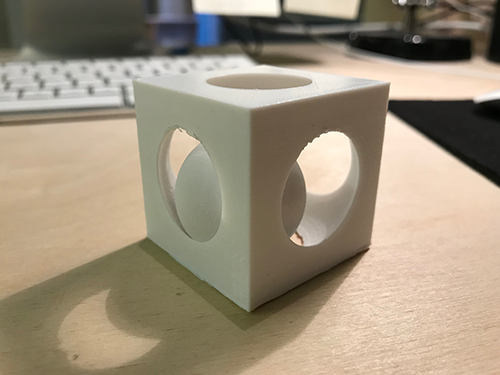
Final result
The final print came out nicely, and the ball is rolling around inside it!. As you can see from the images, the briding on the top of the holes is a weak spot on the print - but the rest of the print got a perfect finish with a high resolution.
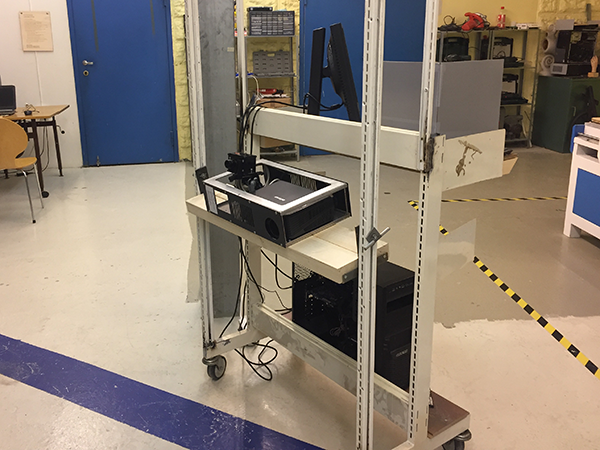
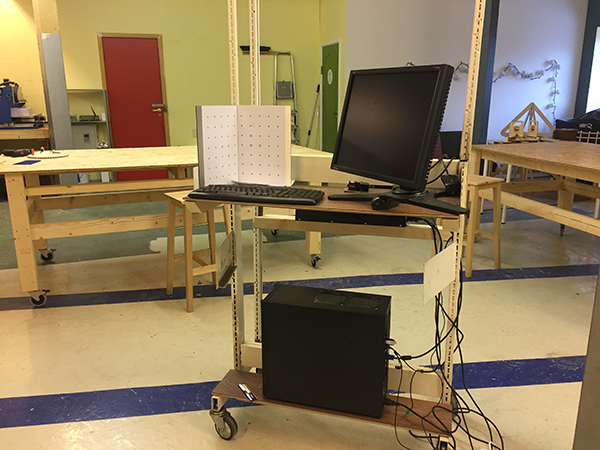
The 3D scanning was done with David Laserscanner. The scanner was mounted on a system on wheels -
so it would be possible to scan larger items by moving around the object instead of making the object rotate.
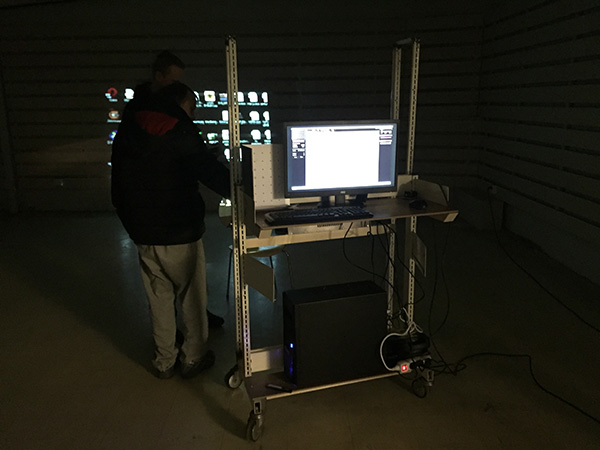
Jakob and I did a scanning session where we first got a lesson from Odd Egil, who built the scanner - before we continued to scan eachother. I scanned his head, and he scanned my head.
3D scanning
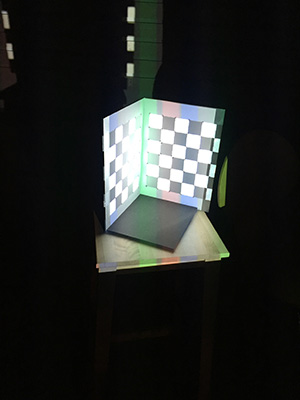
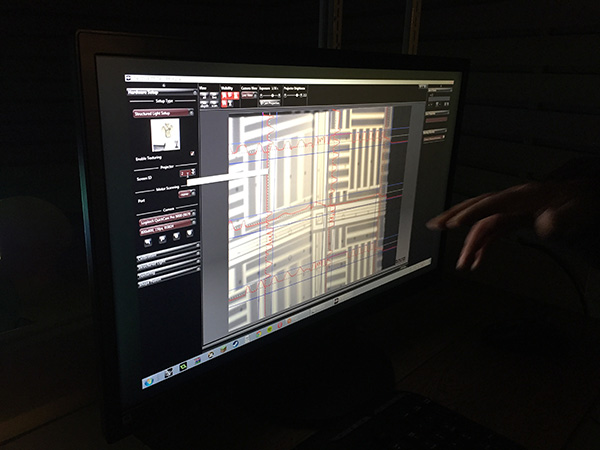
The scanner has to be calibrated to fit the right size of the object. This time we calibrated it to be able to scan an object the size of an A4 sheet. It is possible to scan bigger objects, but you then need a bigger calibration sheet and move the camera and projector further away from eachother.

The scanner is placed on the object so the cross on the screen is in the middle of the object.
I moved the scanner around the object, scanning from all angles. Making sure
the scans overlapped eachother to an extent.
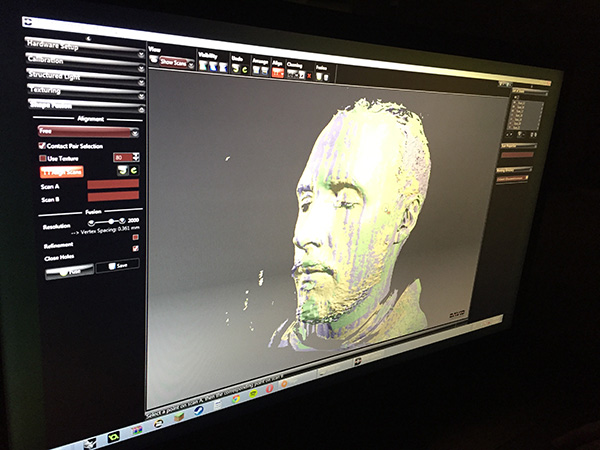
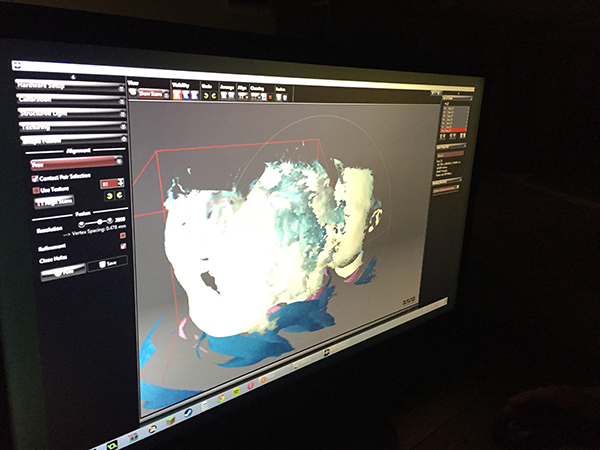
After scanning all the angles, David lets you align all the scan layers to one shape.
After aligning the layers, you then fuse all the layes into one solid shape, and save it as an obj file.
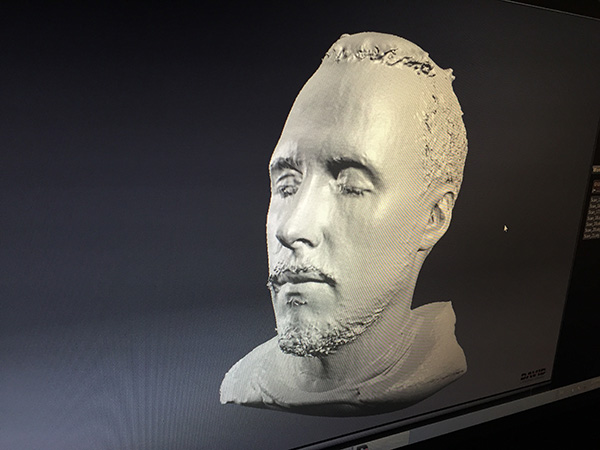
3D printing a 3D scanned object
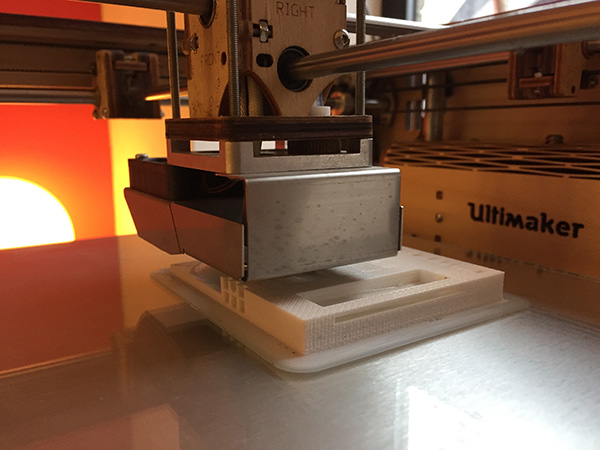
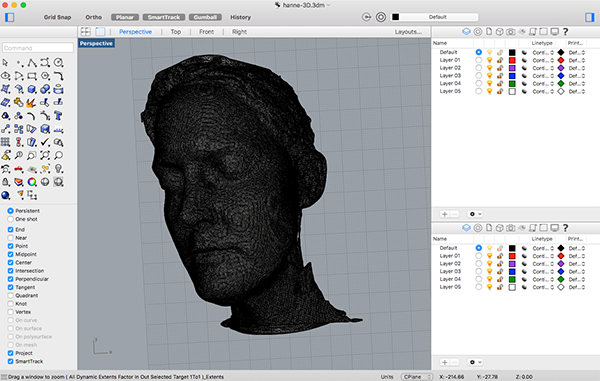
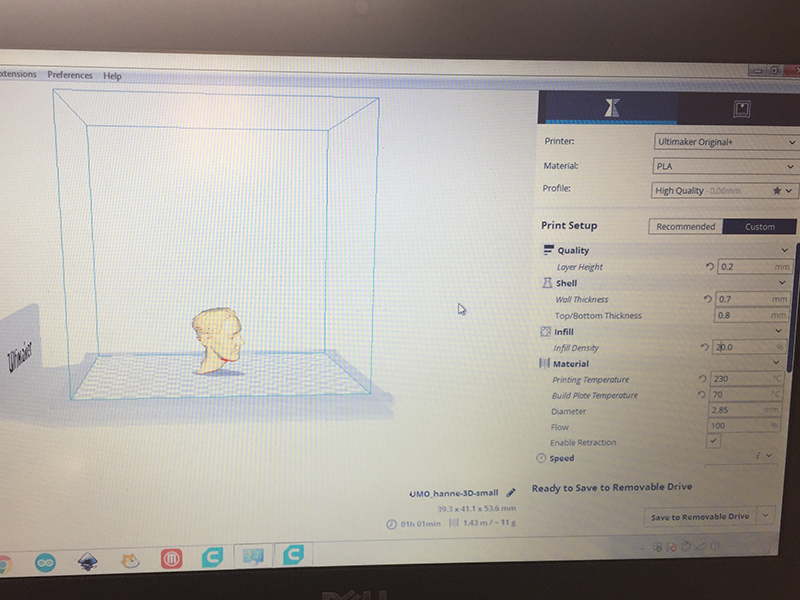
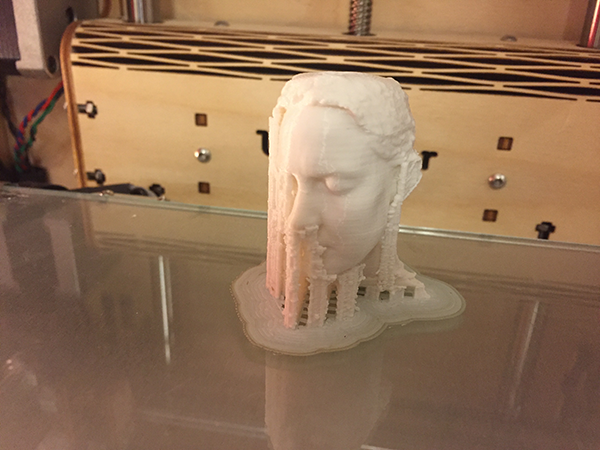
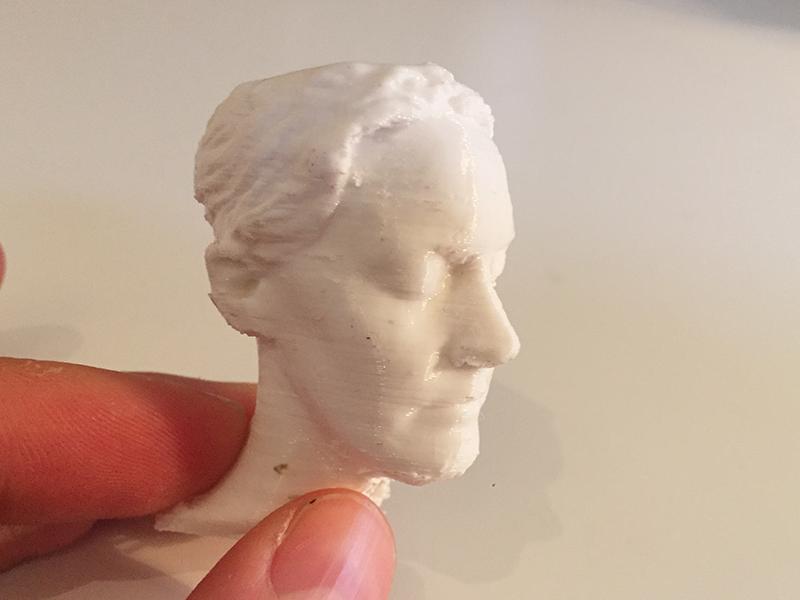
Since someone else did my scan, I wanted to test to print my own model. This was done by first opening the 3D scan file obj in Rhino. I then cleaned the model for all "noise" so the 3D printer wouldn't try to print it. Then I exported it to STL and opened the file in Cura. For the printing I chose the Ultimaker Original+. Print spec: PLA 2.85, 0.2 layer height, speed 60
Learning outcome
The learning outcome this week was really good about testing the printers limits, and 3D scanning, which was totally new to me. The whole process of building the scanner, learning the software and seeing the result was really great. "Closing the circle" when being able to print something that you scanned an hour earlier was also a really great exprience. When it came to the 3rd printer, Duplicator 3 - we ended up with the conclusion that this printer needs some adjustments inside the feeder. The priorties of looking at this has to be done in a later time.
Lessons learned
The biggest 3D printer lesson was figuring out how sensitive the temperature differences is when it comes to printing. And that for bridging especially, lowering the temperature and speed has a lot to say for the outcome.
For 3D scanning, the lessons learned was how limited it is to scan an object with a lot of inner corners/angles - and it has a lot of difficulties scanning shiny objects. Also, working with the stl/obj scanned file, can be a challenge if you do not have a program that works well with meshes. Therefore, cleaning up the scan should be done in the scanning program before you fuse the scan and export it as an stl/obj.