Designing Spine Guard using Rhinoceros
For this week, I decided to build a spine guard using composites which will be a useful safety accessory when riding a motorcycle. I wanted it to have certain amount of flexibility as well. So those areas where flexibility is needed, I would use only 1 ply and the rest I would add at least 5 plys to make sure those are stiff and strong.
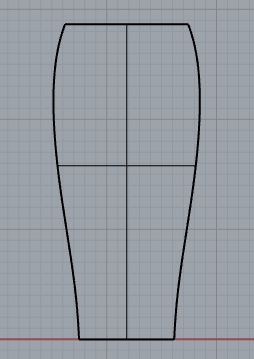
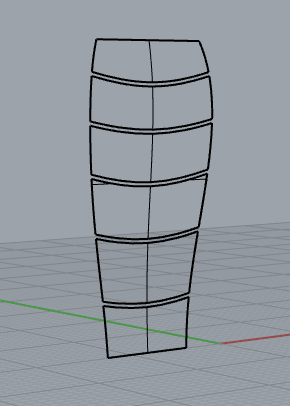
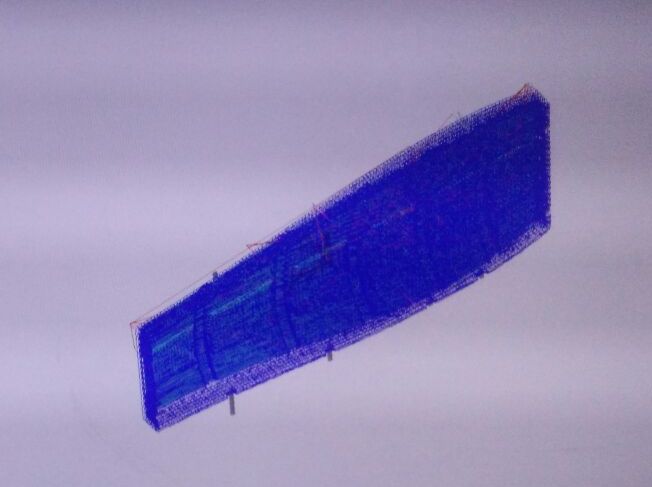
The following is my design for spine guard using Rhino,
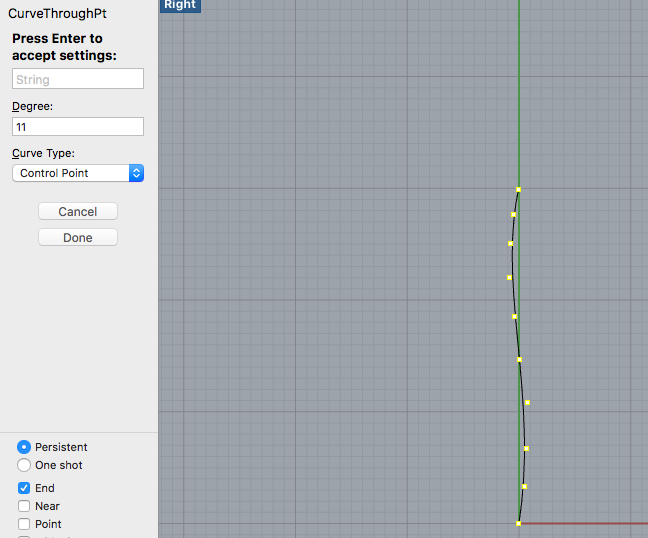
These are the screenshots I took when working on the design. I started of with using points, then used curve through points with curve type set to control point. Used extrusion, split, etc to end up with the above design.

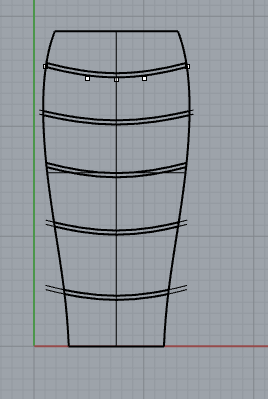
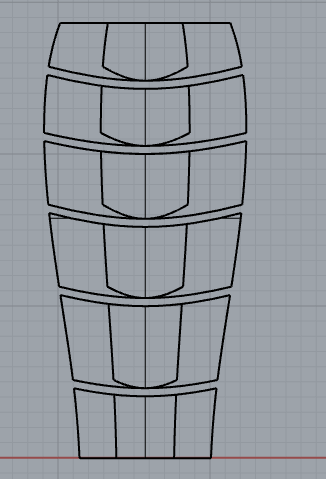
The extrusion height was 5mm at the center spine section and 3mm towards the edges. The extrusion height is based on the thickness of the burlap, which is 1mm. So I need 5 burlap layers in the center extrusions and 3 layers towards the sides. And 2 layers covering the entire shield.
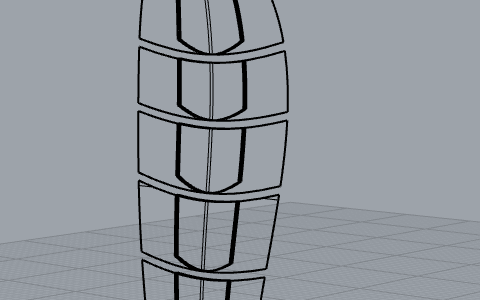
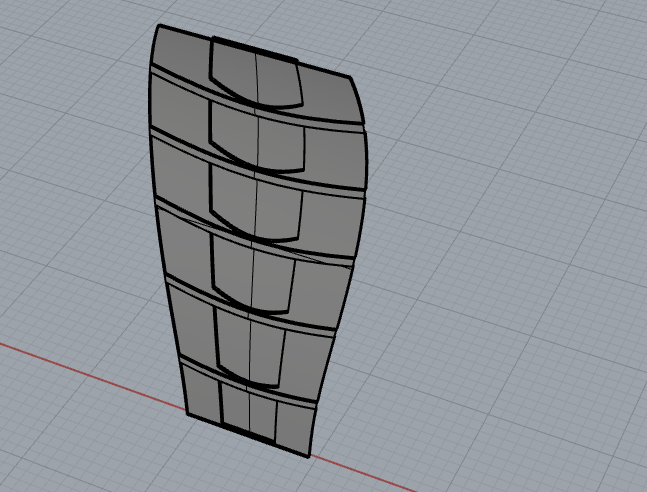
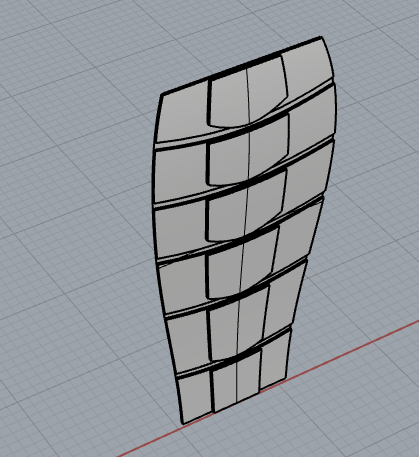
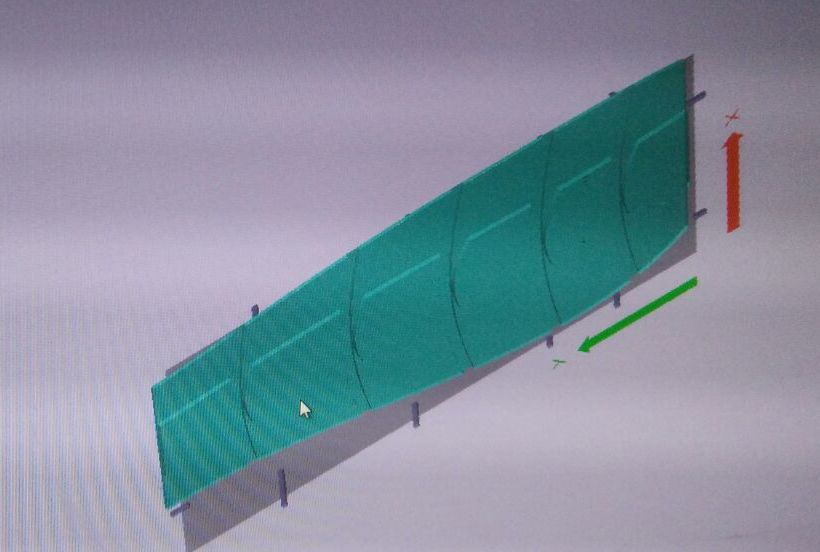
After Extrusion, the final design,
I would also need to cut the cloth based on the design since there are slots for increased thickness and stiffness.
Constructing the mold in shopbot
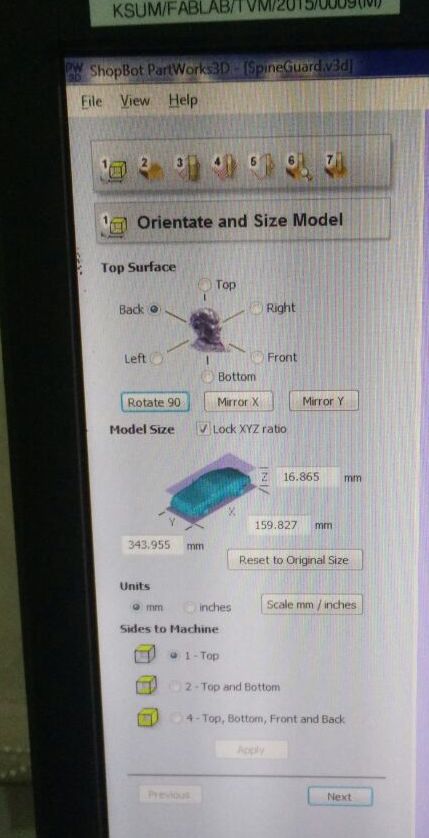
I exported the design in .stl format into Shopbot PartWorks3D. And set the orientation of the design in it.
Orientate and Size Model
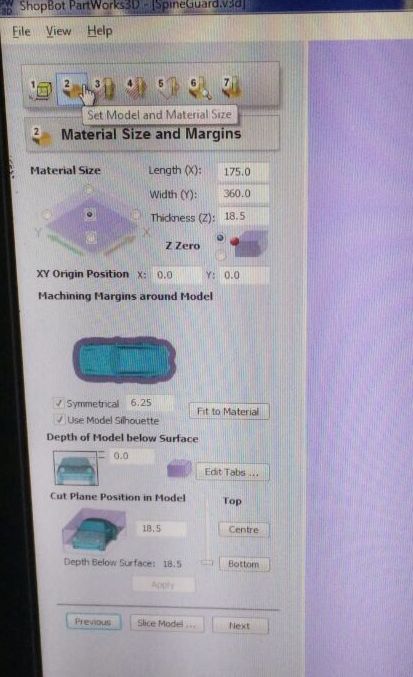
Material Size and Margins
I used an 18 mm plywood, considering my design size is only 16 mm in total.
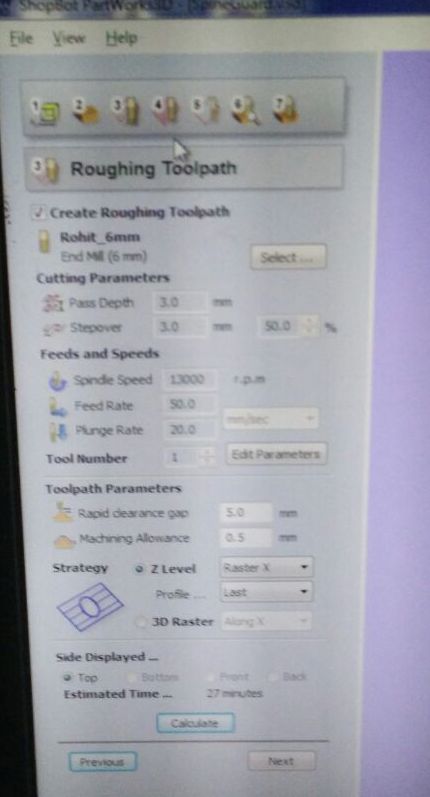
Rough Toolpath
I used the 6mm end mill for the rough cut. Feed rate was set to 50mm/sec and step over at 3mm
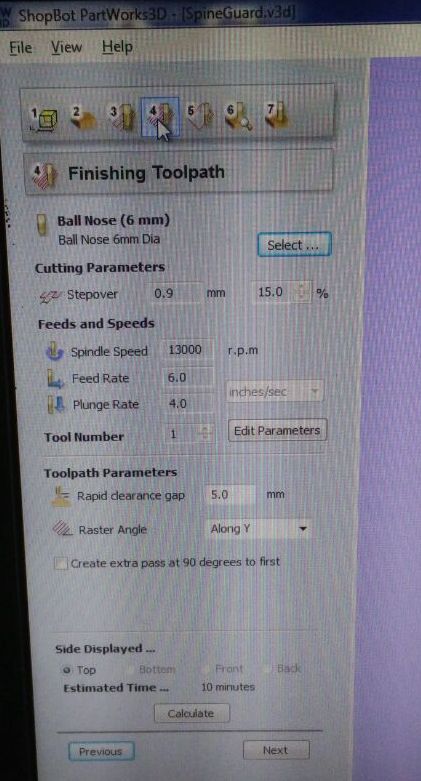
Finish Toolpath
I used the 6mm ball nose for the finishing cut. Feed rate was set to 6 inch/sec and step over at 0.9mm. These were preset, so I did not have to change.
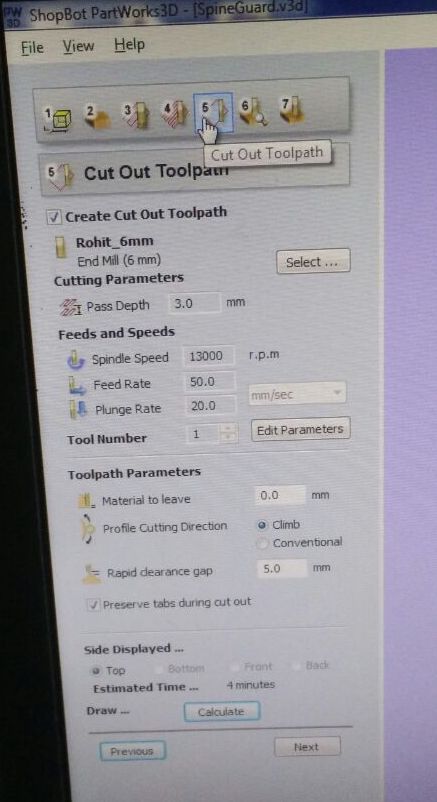
Cut Toolpath
I used the 6mm end mill for the rough cut. Feed rate was set to 50mm/sec and pass depth at 3mm
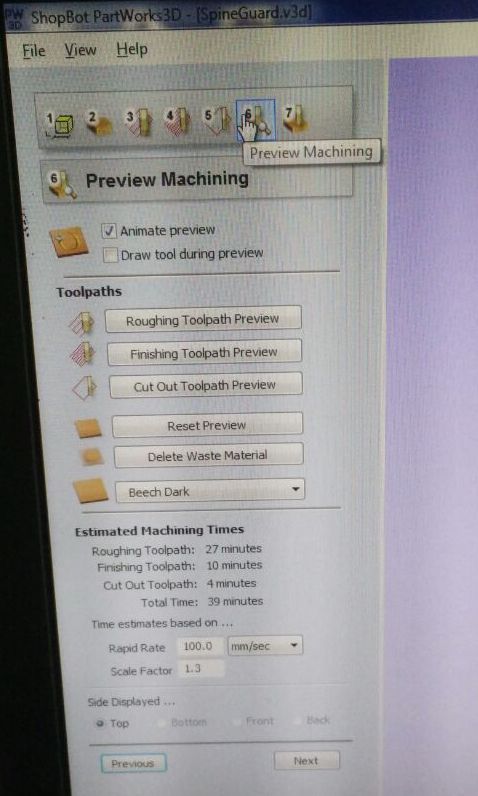
Preview machining
Estimate times are also shown.
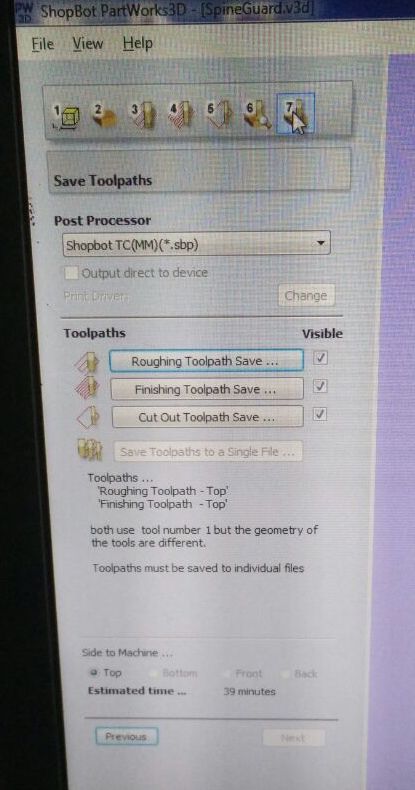
Save toolpath
Shopbot in action
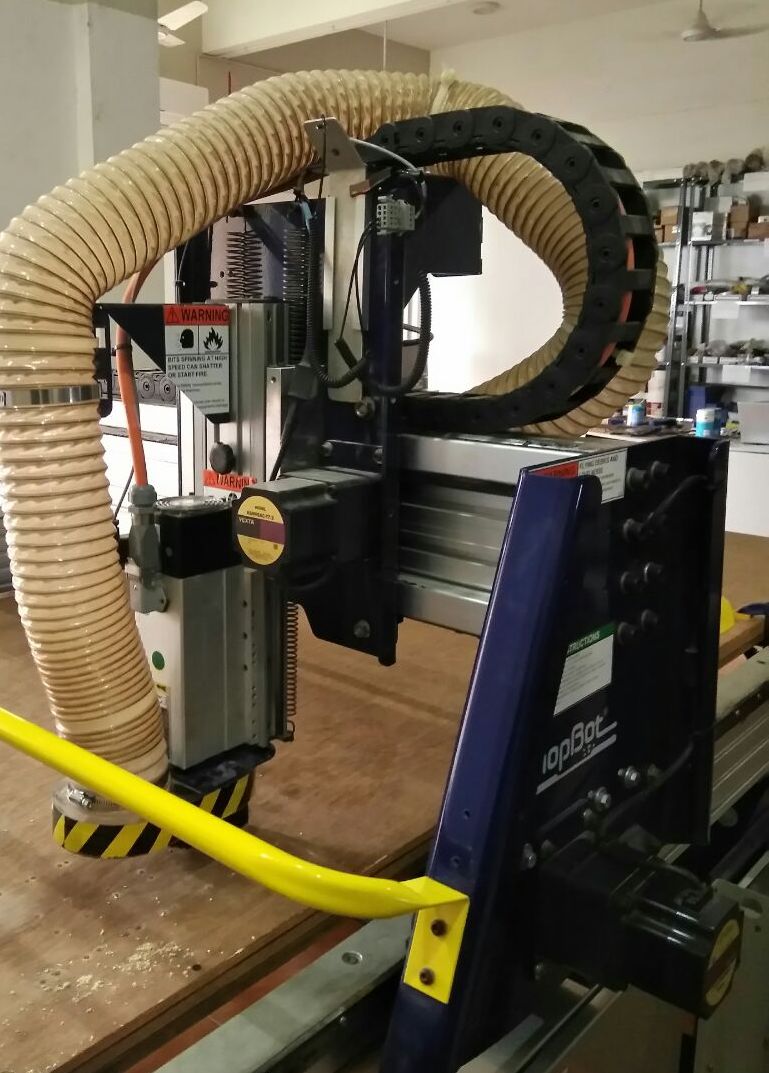
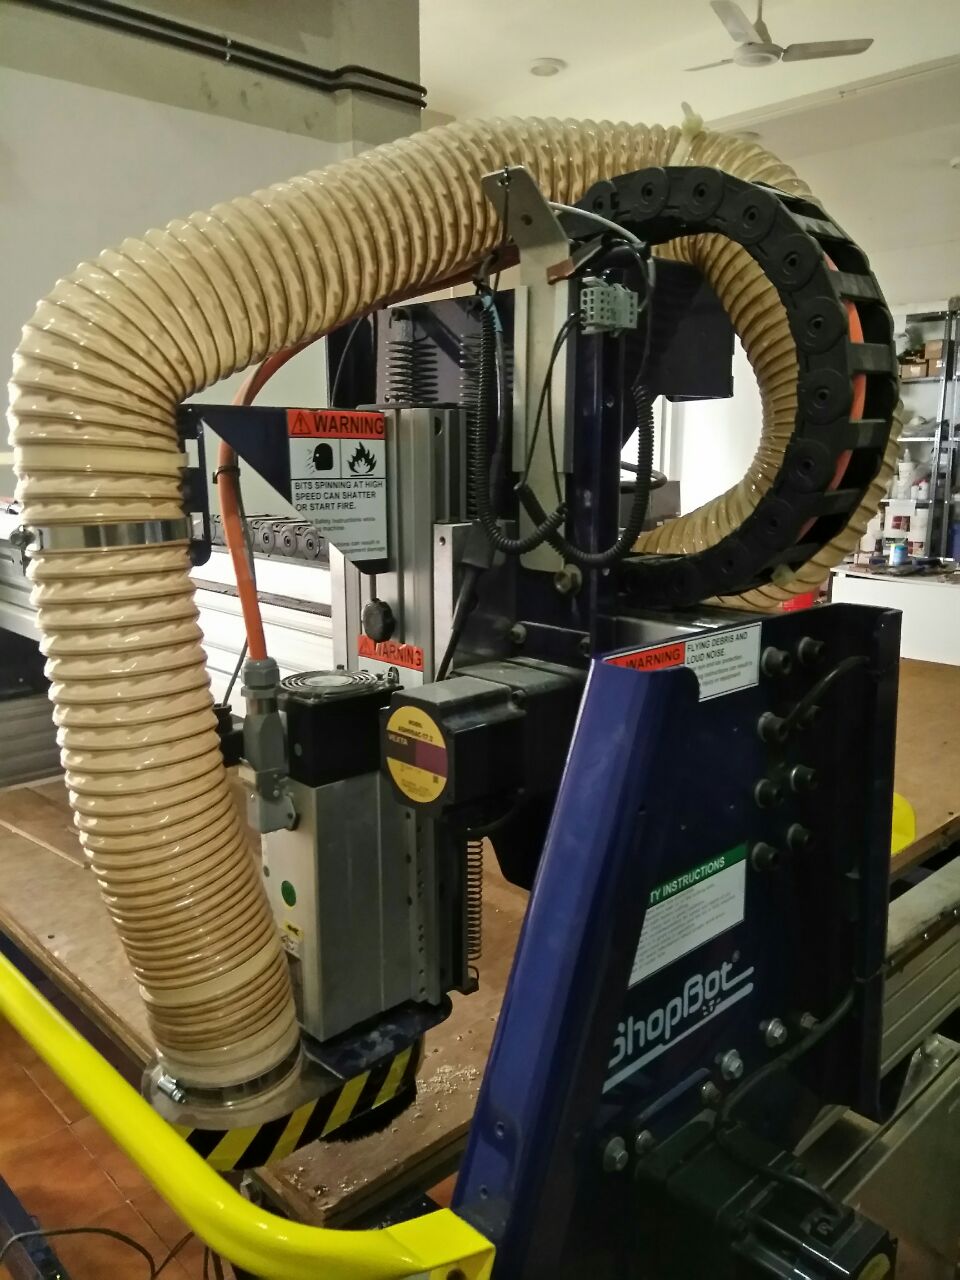
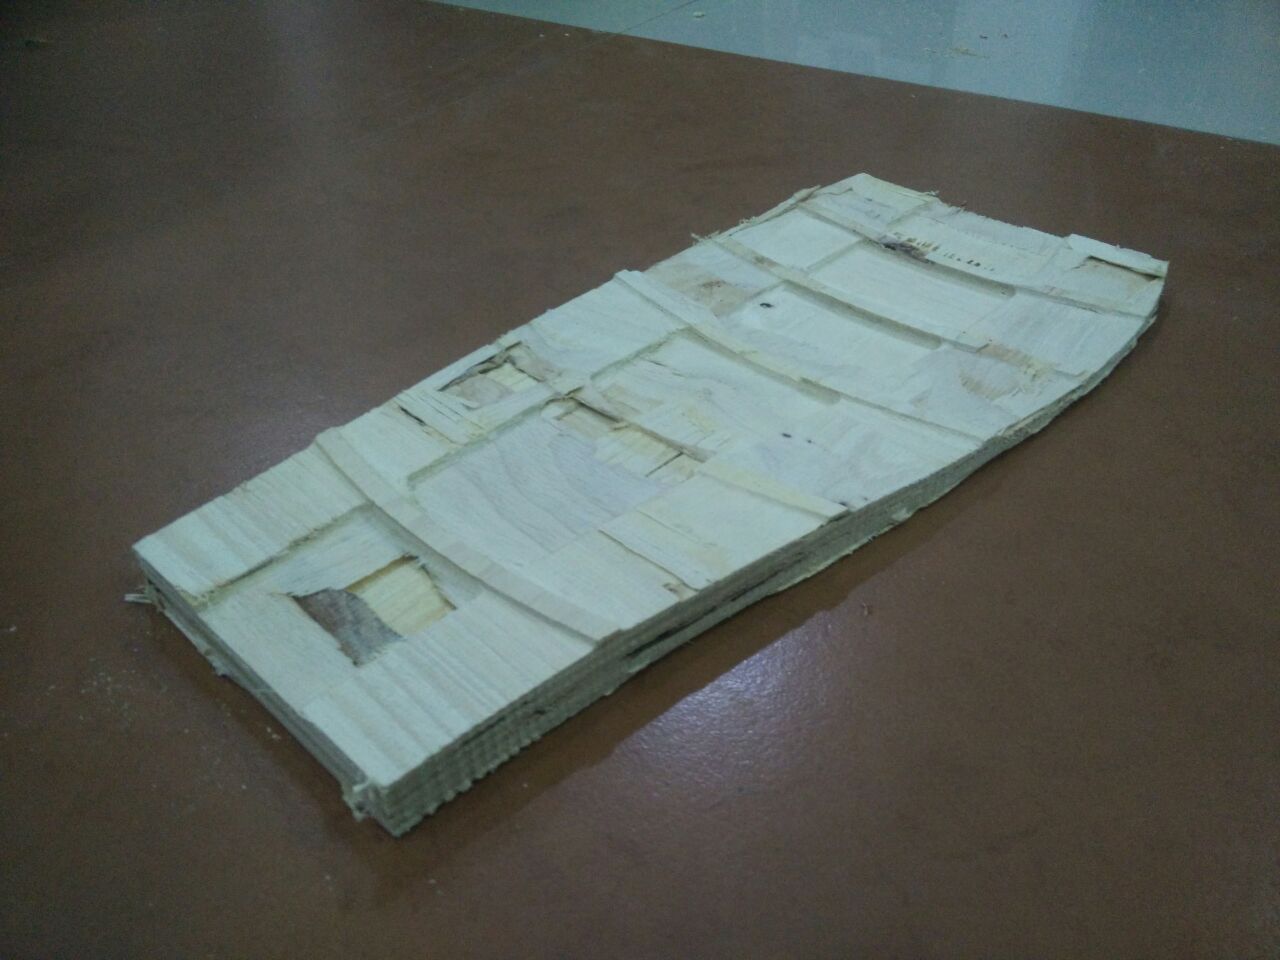
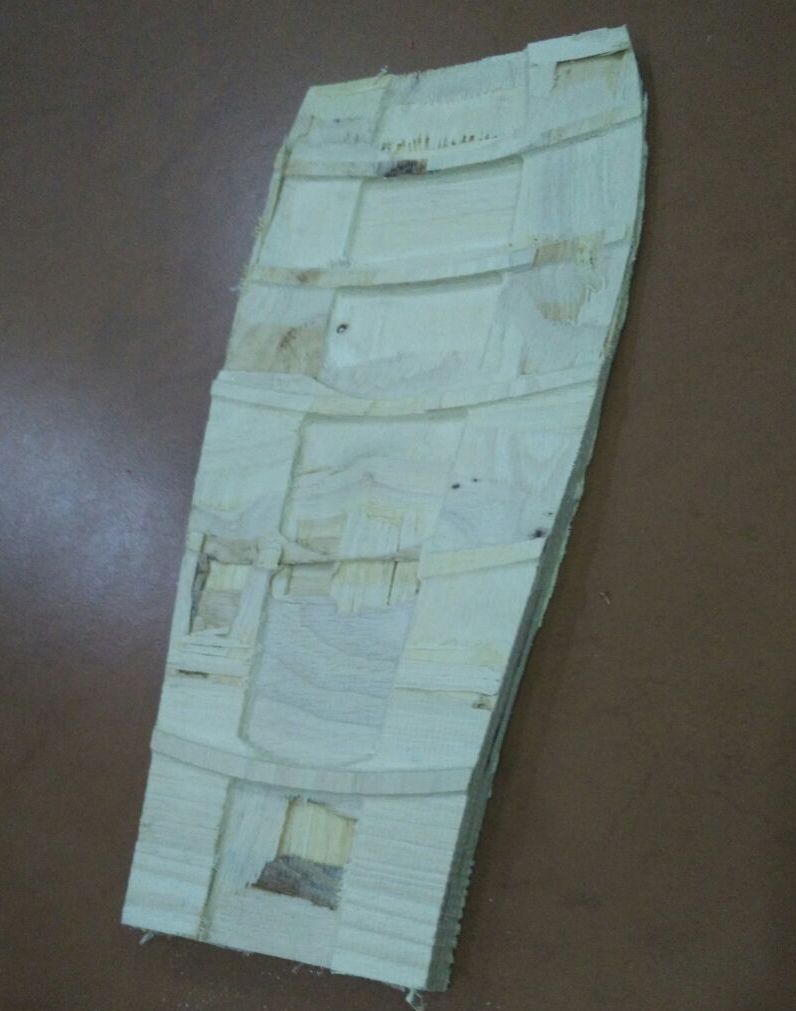
Hero Shot of the mold
The plywood wasnt that great, but it works.
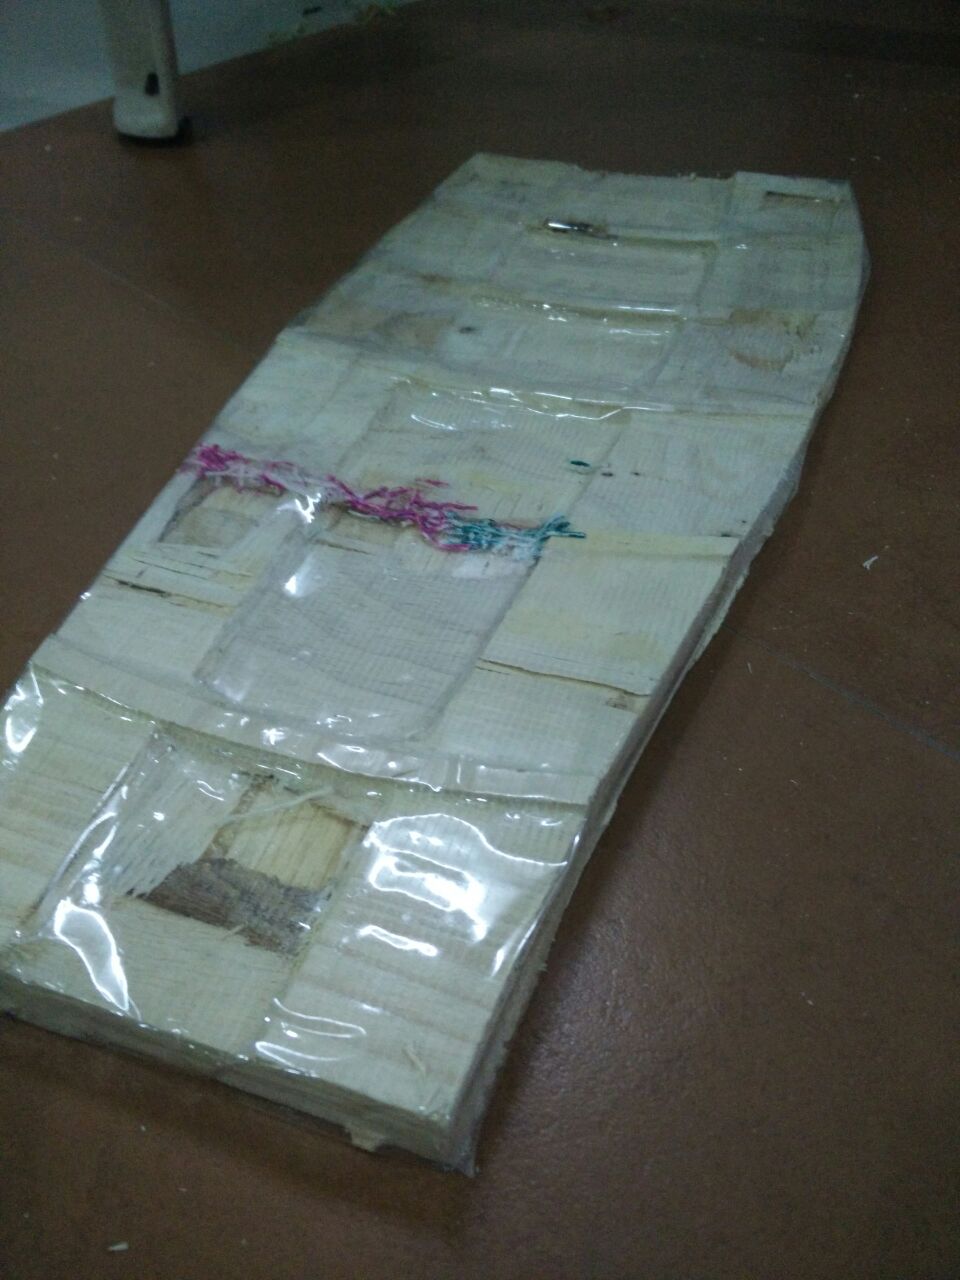
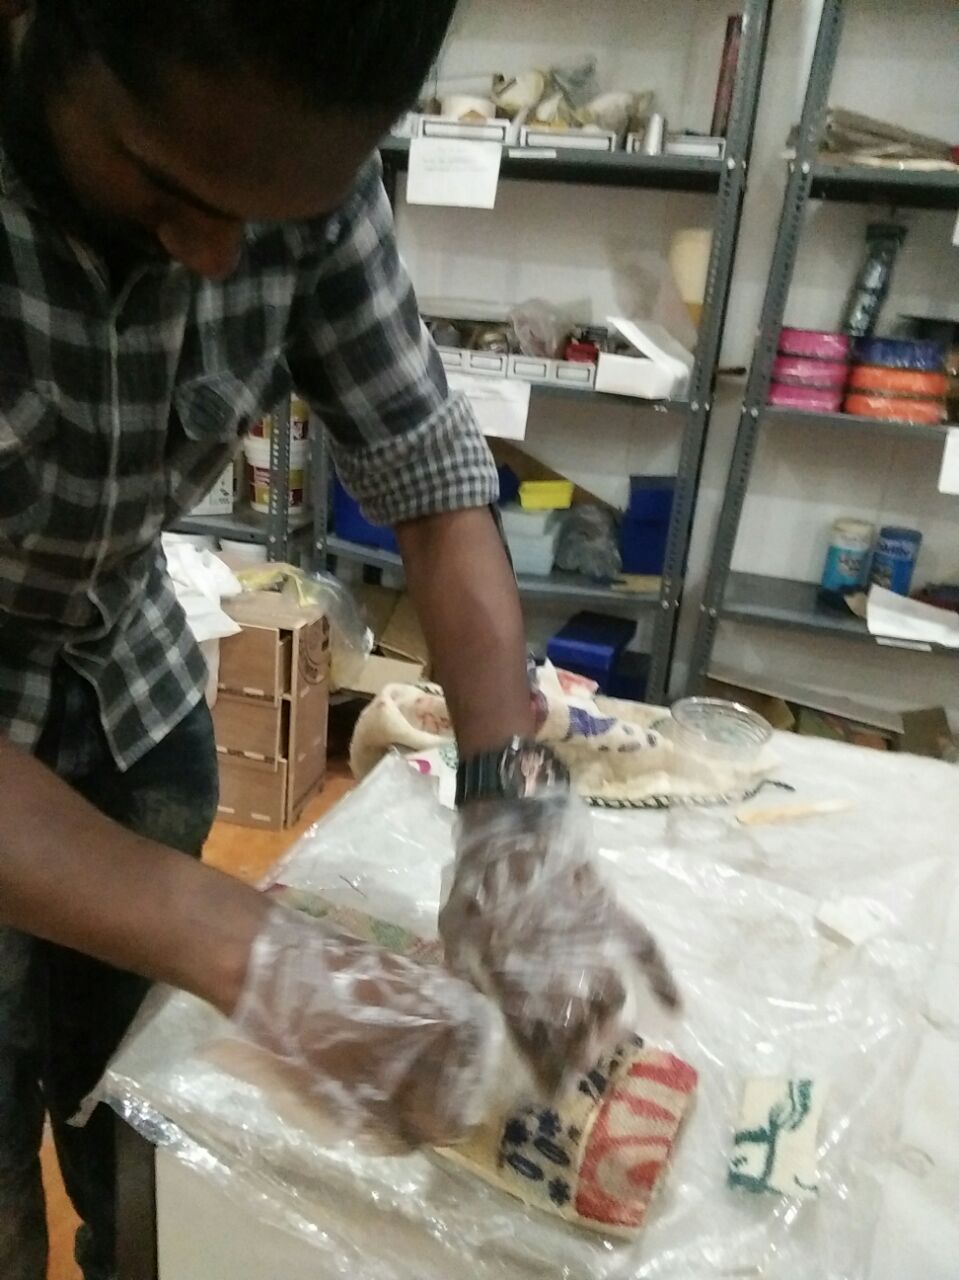
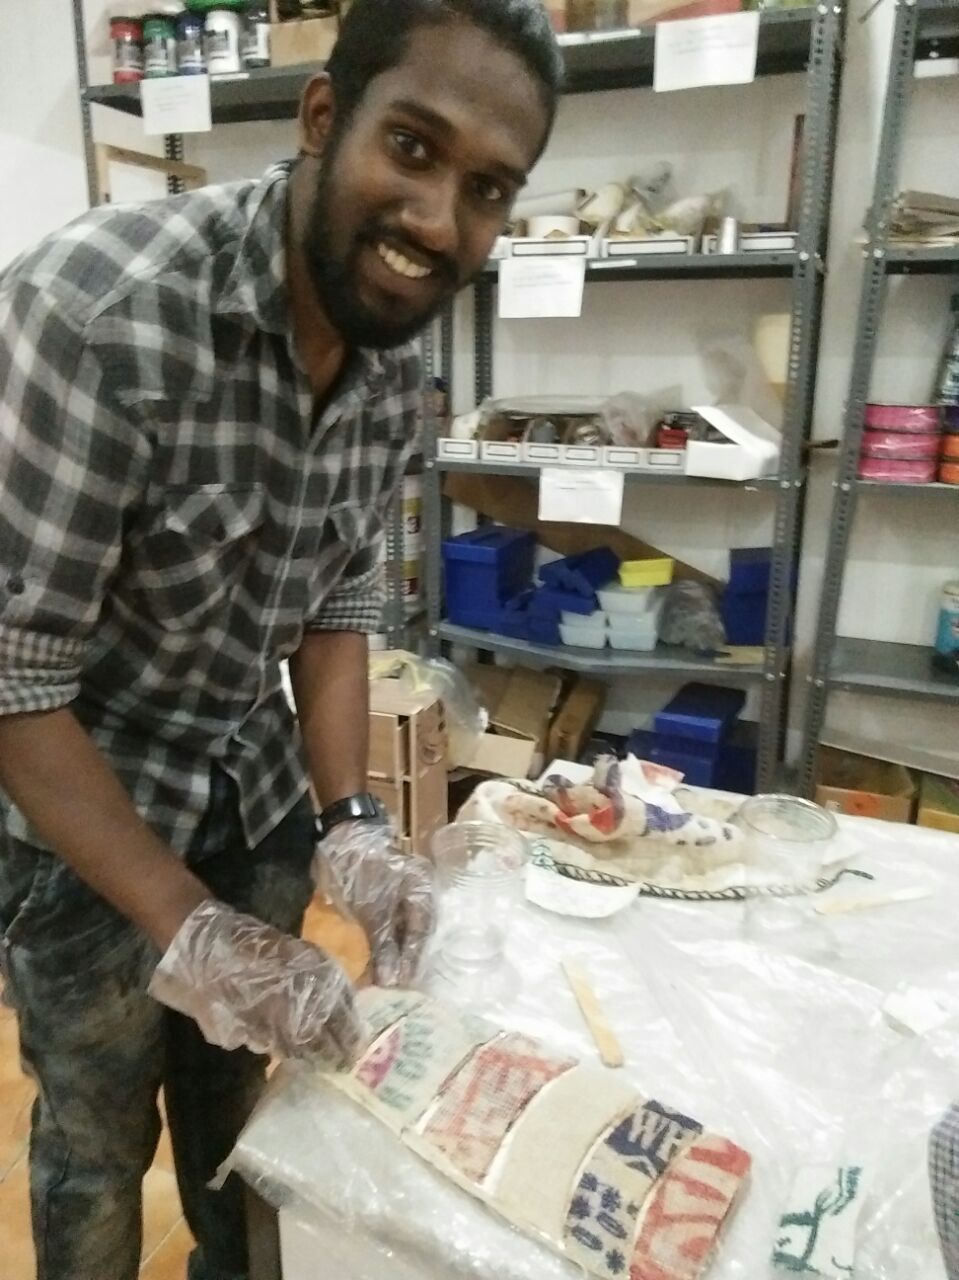
Creating the composite
I used plastic tape to cover up the mold. I used knife to cut the section of depth so that the design stays intact.
Certain depth did not come clean because of the poor plywood quality, so I placed some extra burlap and rolled them to give a bit height and then covered it with plastic tape.
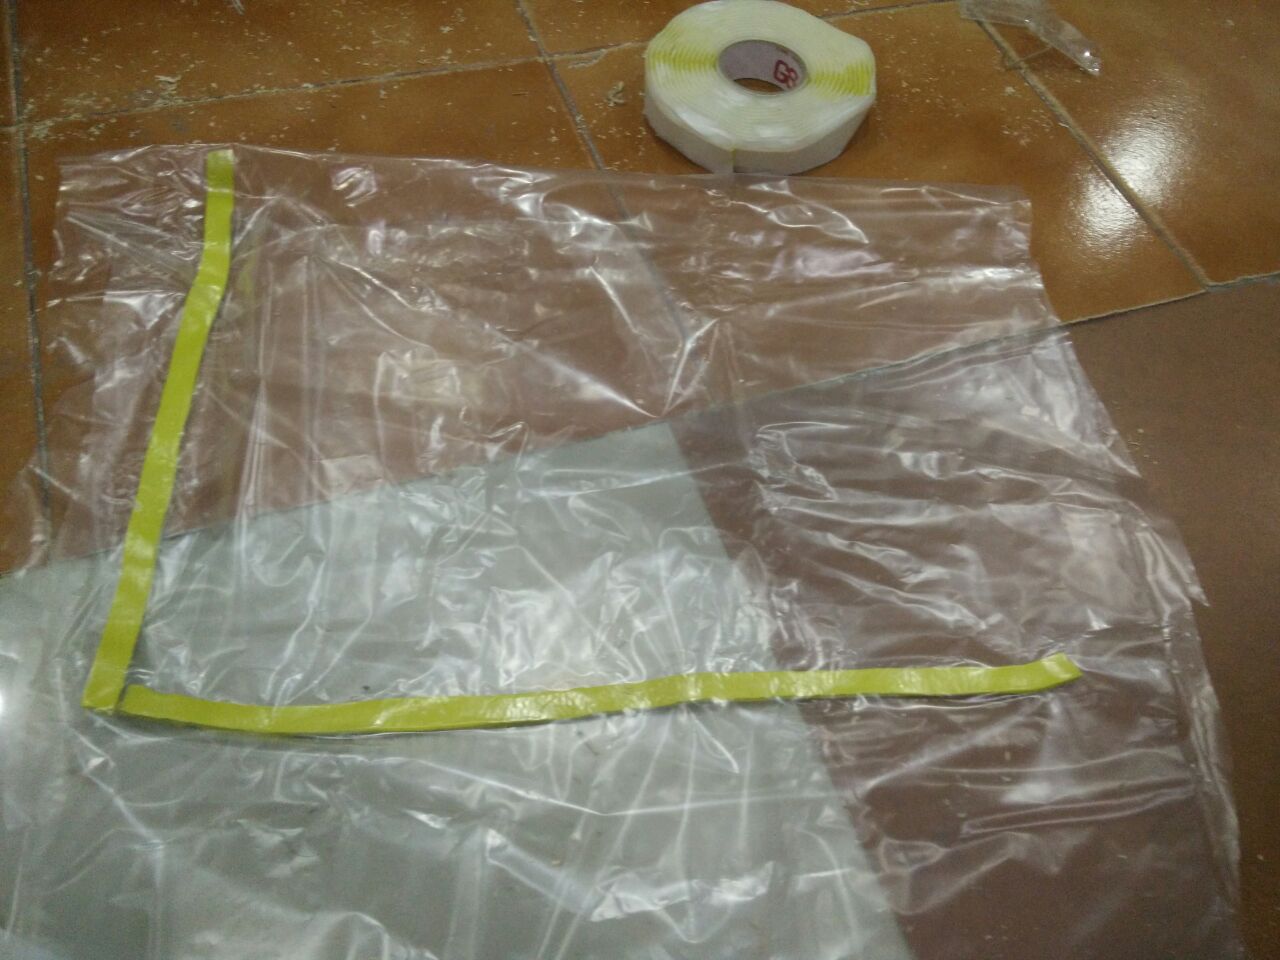
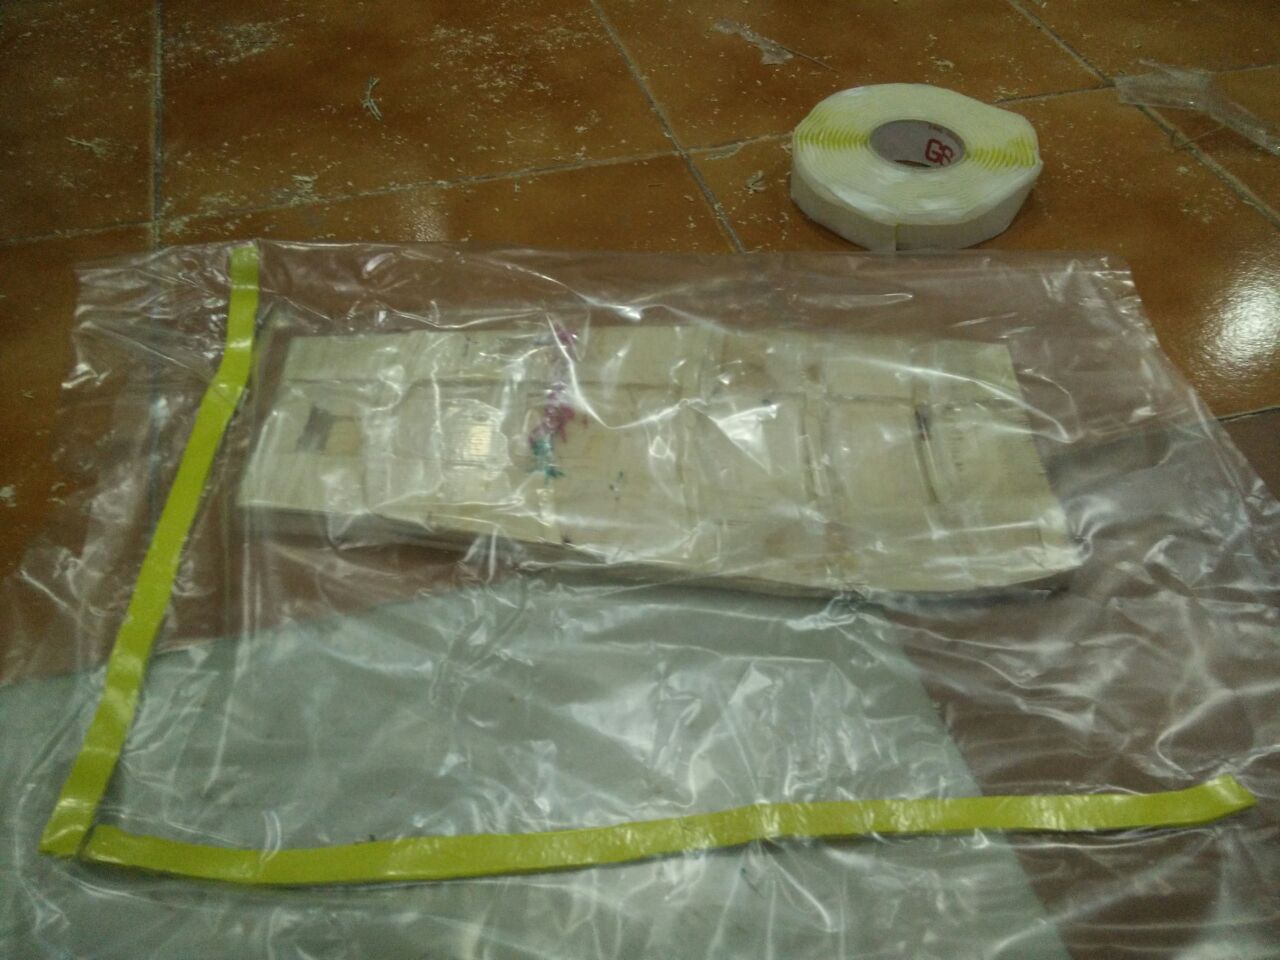
Creating vaccuum bag
Used sealant to seal up all edges with one opened, which will be sealed up when I complete the composite mold and kept in it.
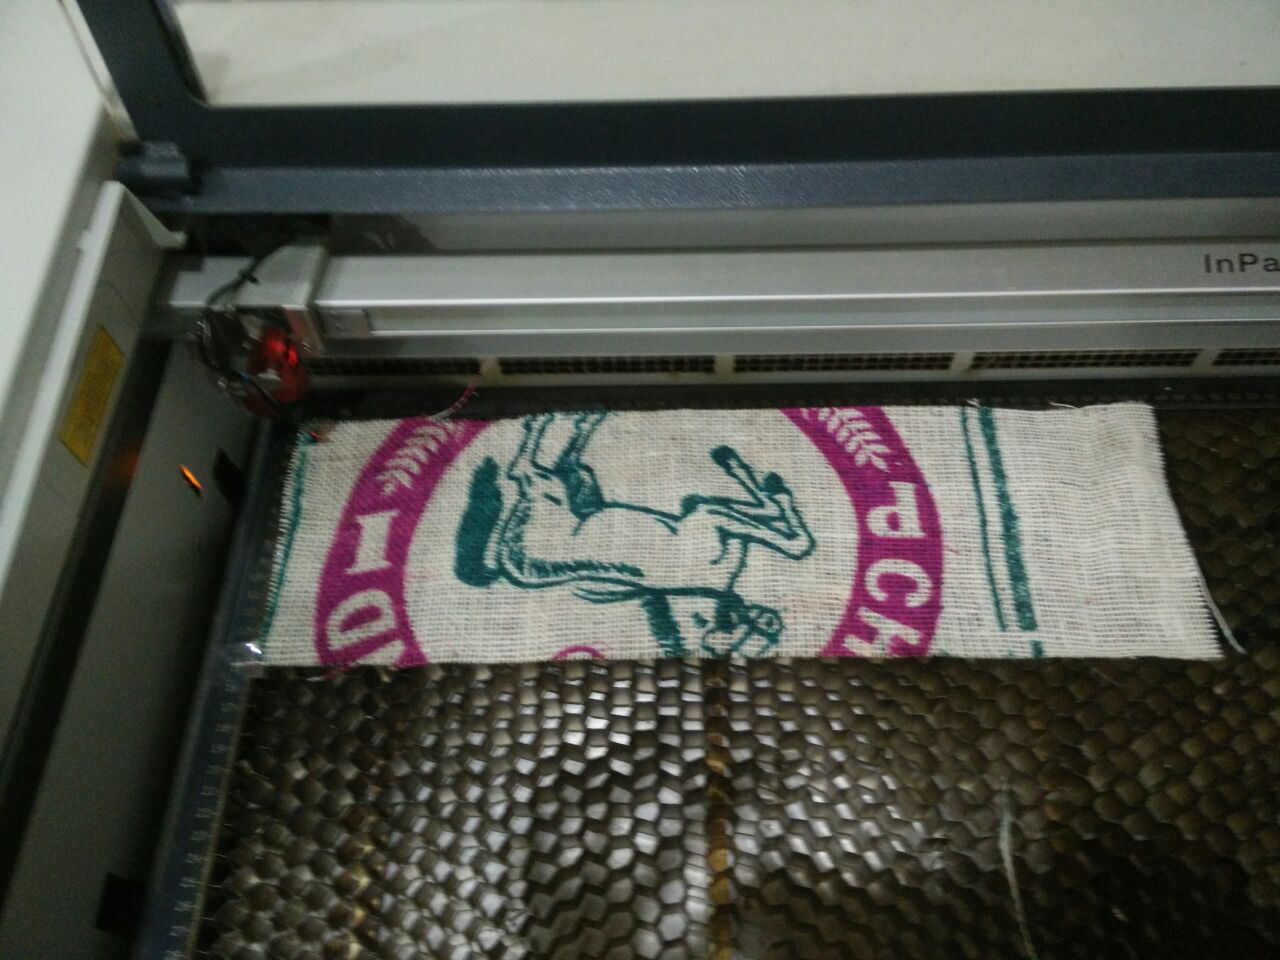
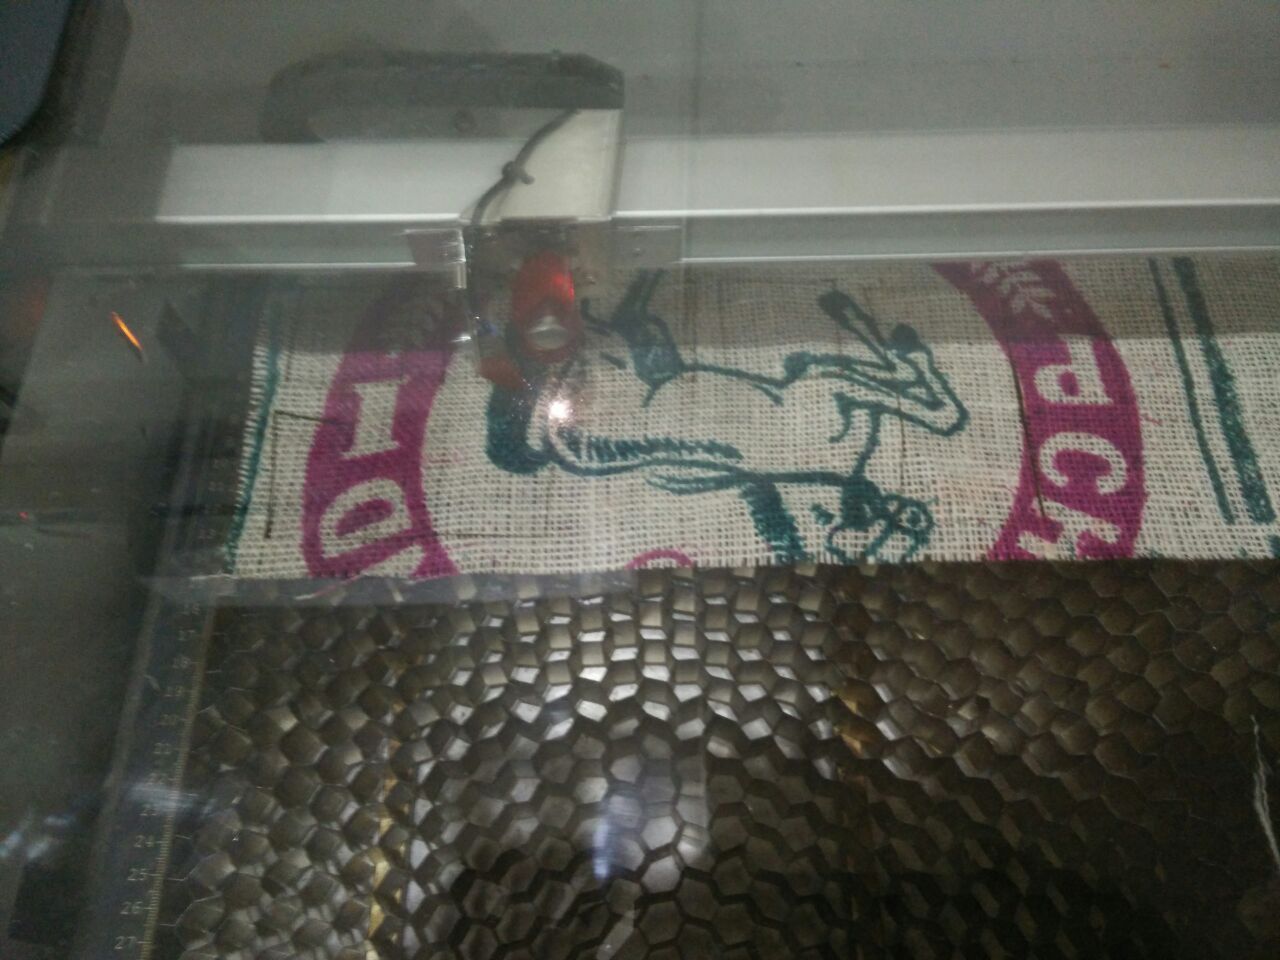
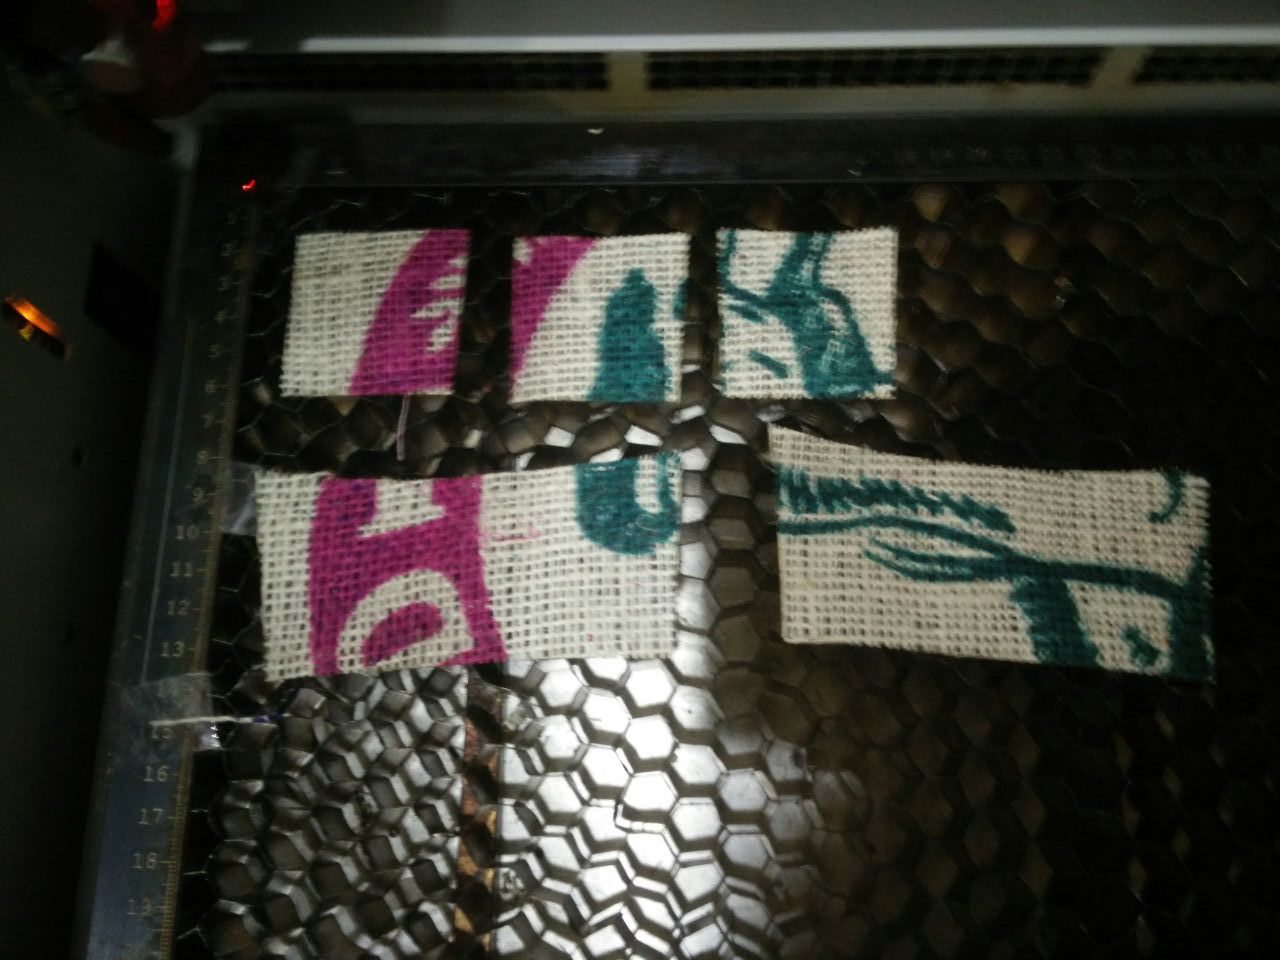
Laser cutting the burlap
Since my design as small pockets, I needed to cut the design out on the burlap.
I exported the design from Rhino in .dxf format and opened in it Inkscape, arranged them for laser cutting.
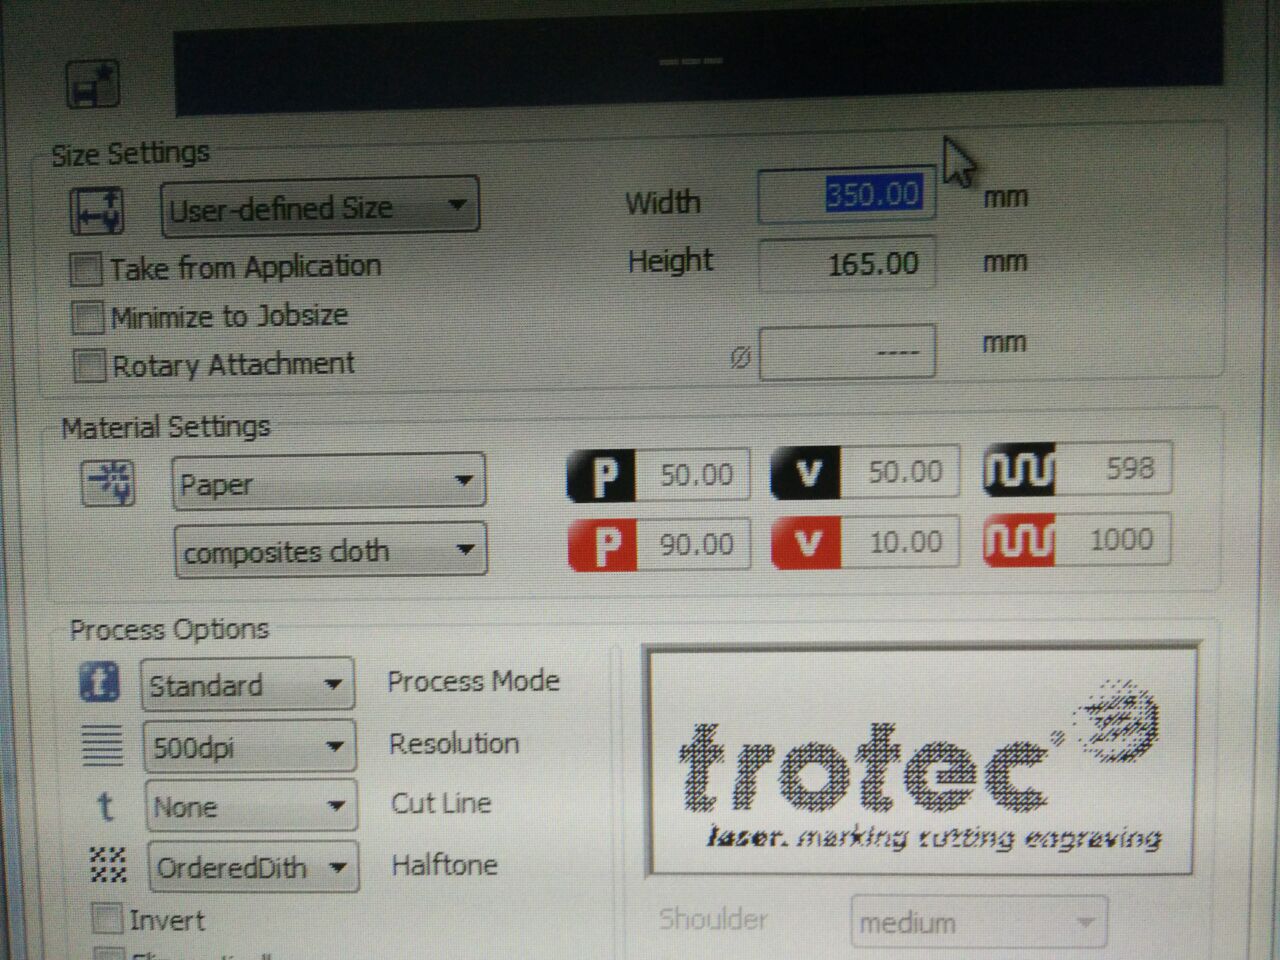
The settings were also changed for cutting the burlap,
Power: 90, Velocity: 10, Frequency: 1000
The .svg and .dxf are listed in the Design Files section.


Challenge Faced
The laser wasn't cutting properly, so with the help of Ajith, we found out the lens of the laser was covered in plastic soot.
We are lucky, we found this and cleaned up before working with the settings and increasing the power. Otherwise we could have cracked the lens, which inturn could make the device useless.
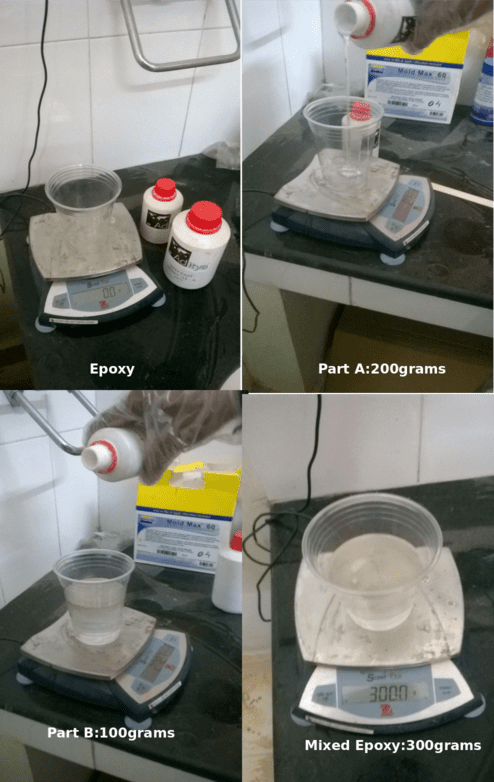
Mixing Epoxy
I used Easy cast epoxy 33 which was available in our lab. Its a 2 part resin, which is to be mixed at 100(Part A):50(Part B) ration. Since my proportion is the same as that of Ajith's, I scraped the following image from Ajith's document. :D
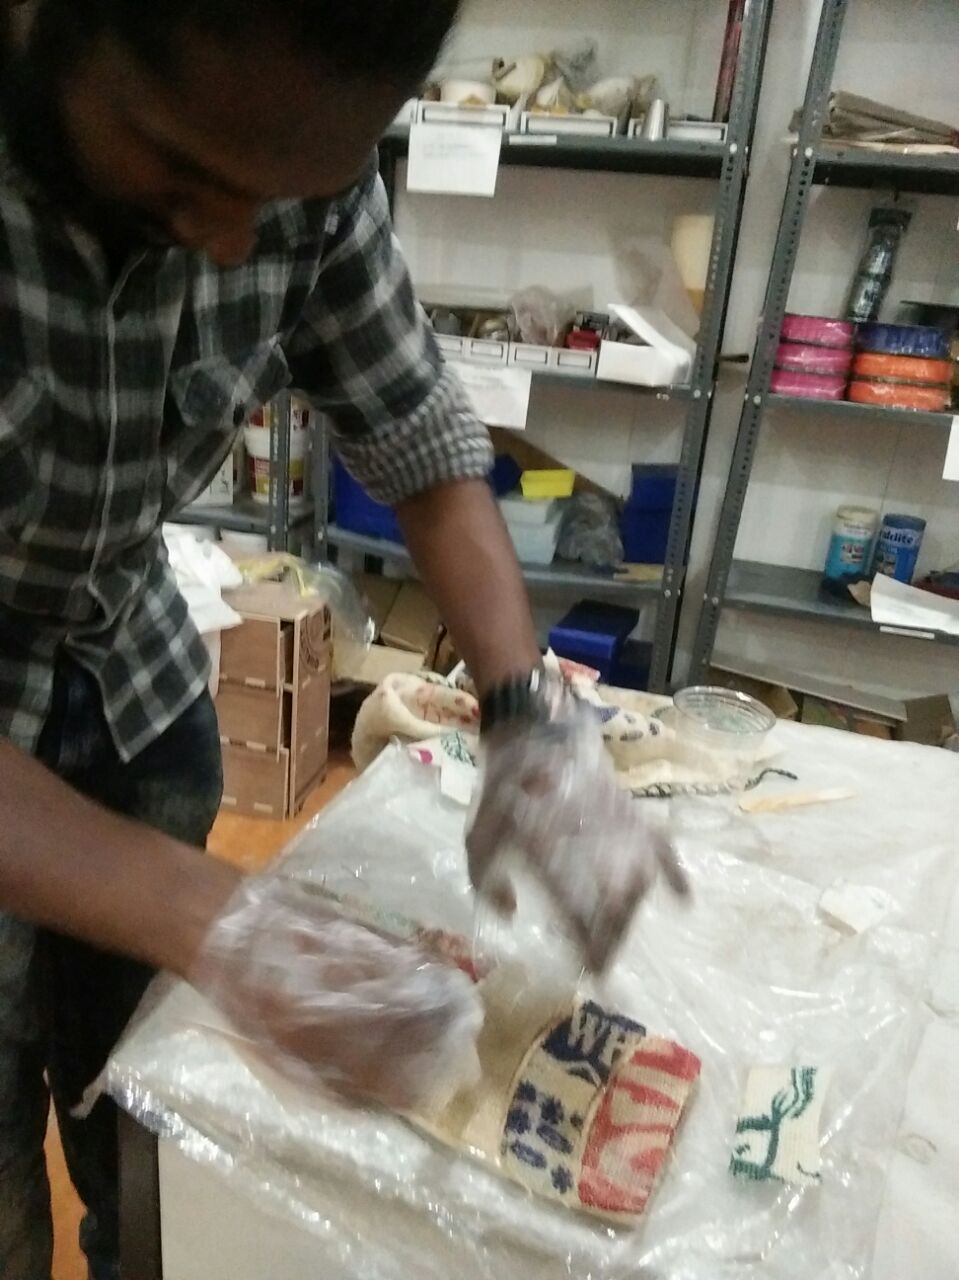
Appling the resin and layering up the mold
After thoroughly mixing the resin, apply the resin on to the burlap. All layers of burlap are to be covered with resin.
Vacuum sealing the mold
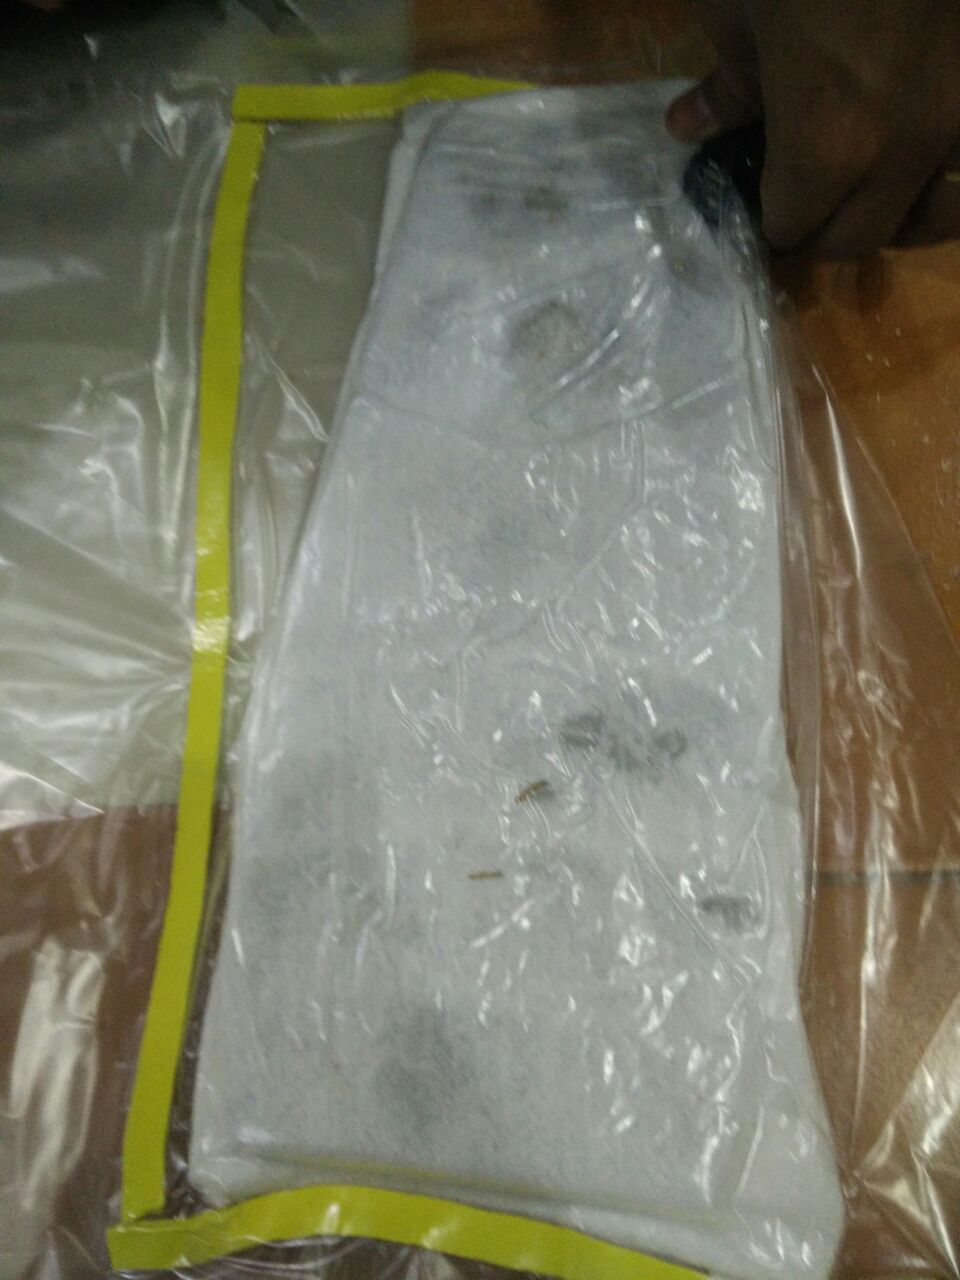
I forgot to cover up the mold with polythene sheet (with numerous holes) before covering it up with breather fabric. This lead the breather cloth getting stuck to the composite.
Hero Shots
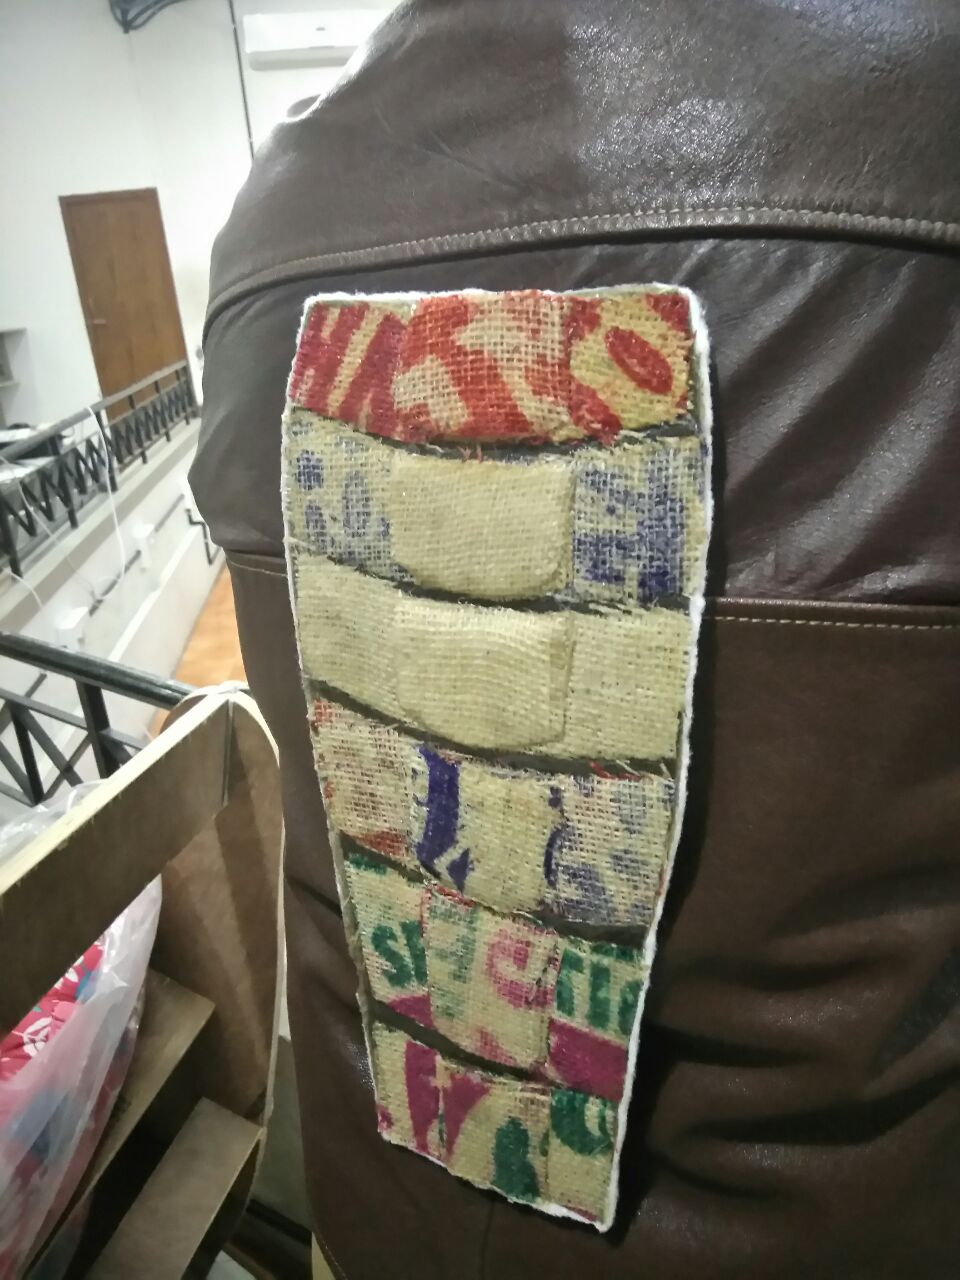
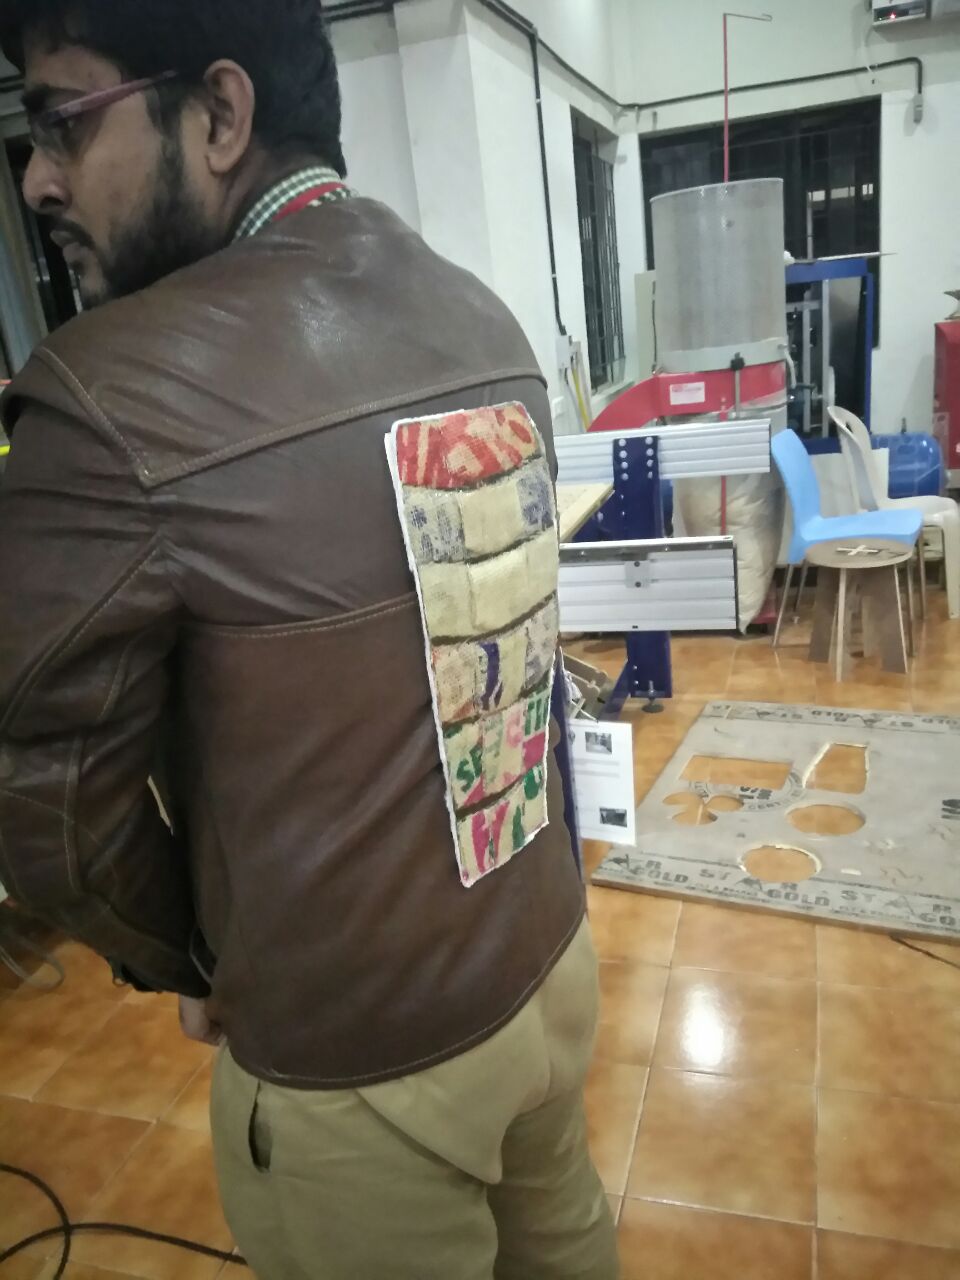
I used double sided tape to stick it onto my jacket. The breather cloth that was stuck to it, gave it a softer feel.
Having only 2 layers to hold up the entire structure gave the design good flexibility. And thus the center spine section accumulating some 7 layers gave it good toughness.
Video of us giving the guard a hit test.