This is one of my favorite weeks, I've been wanting to work with composites for a long time. There are a lot of cool things you can make with composites like Airplane wings, Boats, Surfboards, Skateboards etc. Hence I'm really excited to begin this weeks work.
Composite material is made up of two or more materials combined together to make a superior material. The main constituents of composites are a matrix and a reinforcement. Polymers are the main matrix materials, here we are using epoxy as the matrix material. The reinforcement materials are fibres, here we used burlap and cotton cloth as fibres material. The main advantage of these are light weight and high strength.
For my first work, I though I would make an Airplane Wing. My plan was to learn how to make a composite wing so that I can build my own model airplane in the future. Hence I started with the design work.

I started by drawing the cross section of the wing in Rhino. I wanted the shape to be sleek and minimal so that it can reduce weight.
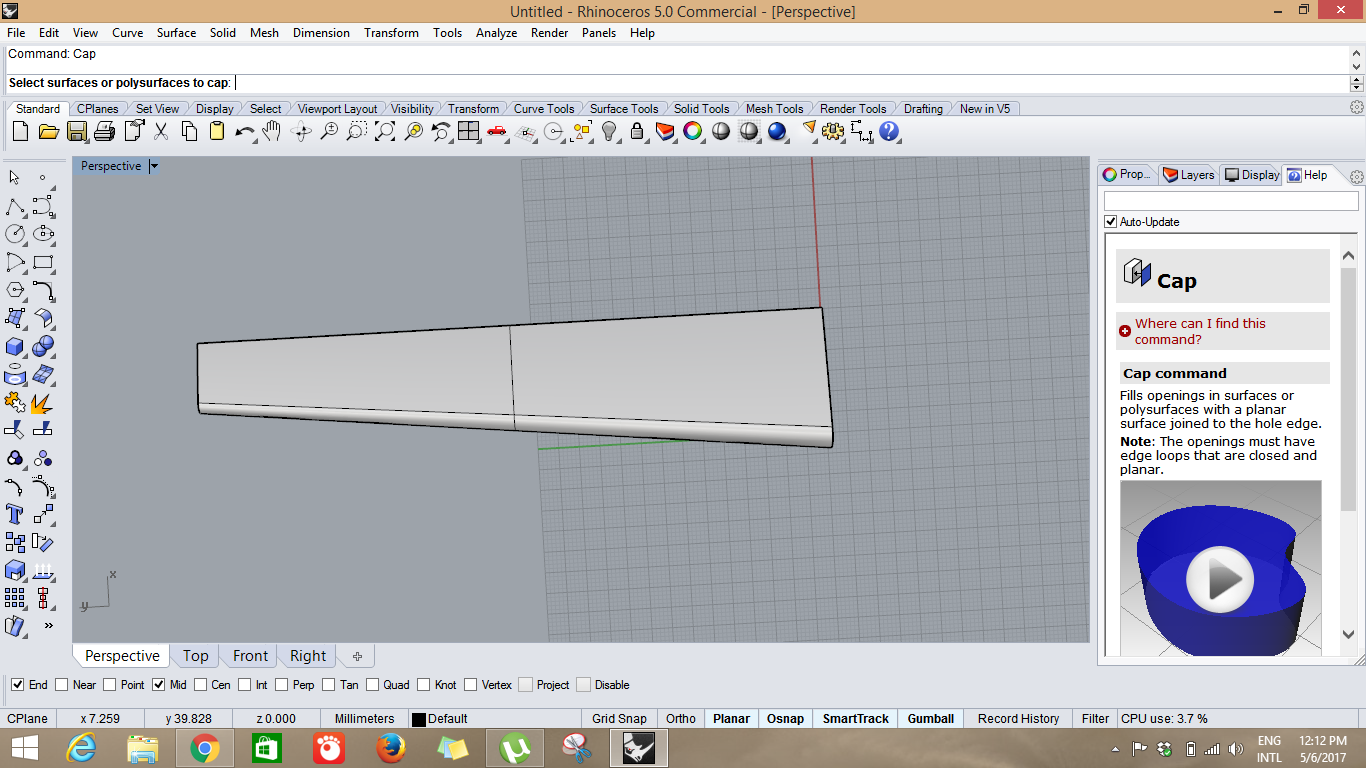
I created a 3D model of the cross section by using the Loft command to create a tapering structure in the wing, so that it gradually reduces in area towards the outer tip.

This is the final completed 3D model. I exported it as an .stl file and then proceeded to machine the wing. my plan was to cut the wing out of foam and then use that as a core and layer the composite over it. Then I'll get a wing with a composite outer shell and a foam core.
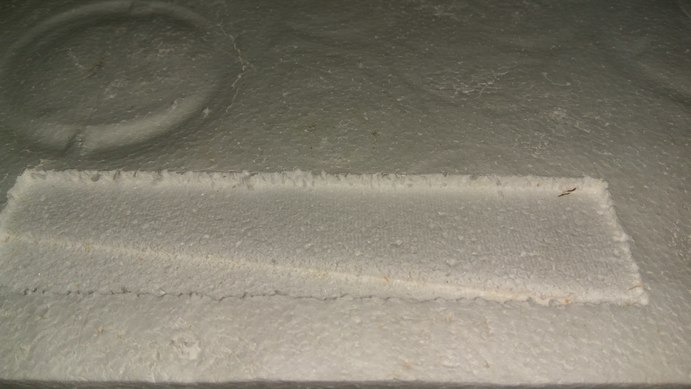
I did a test cut of the small wing in foam and realized that it would not work. The foam we have in our lab is a low density polyethylene and that I would to use double sided milling. This means I have to find some way to fix the foam to the board properly.
Because of these reasons I scrapped the idea of cutting in foam and started to think of something else I could do. Then it hit me. I could make a wing constructed entirely of composite material. For this I needed to make a double sided mold.
So I switched form my idea of making an airplane wing and started designing a rear wing for my car. This wing will act as a spoiler, creating down-force when air moves over it and thereby keeping the car planted at high speeds.
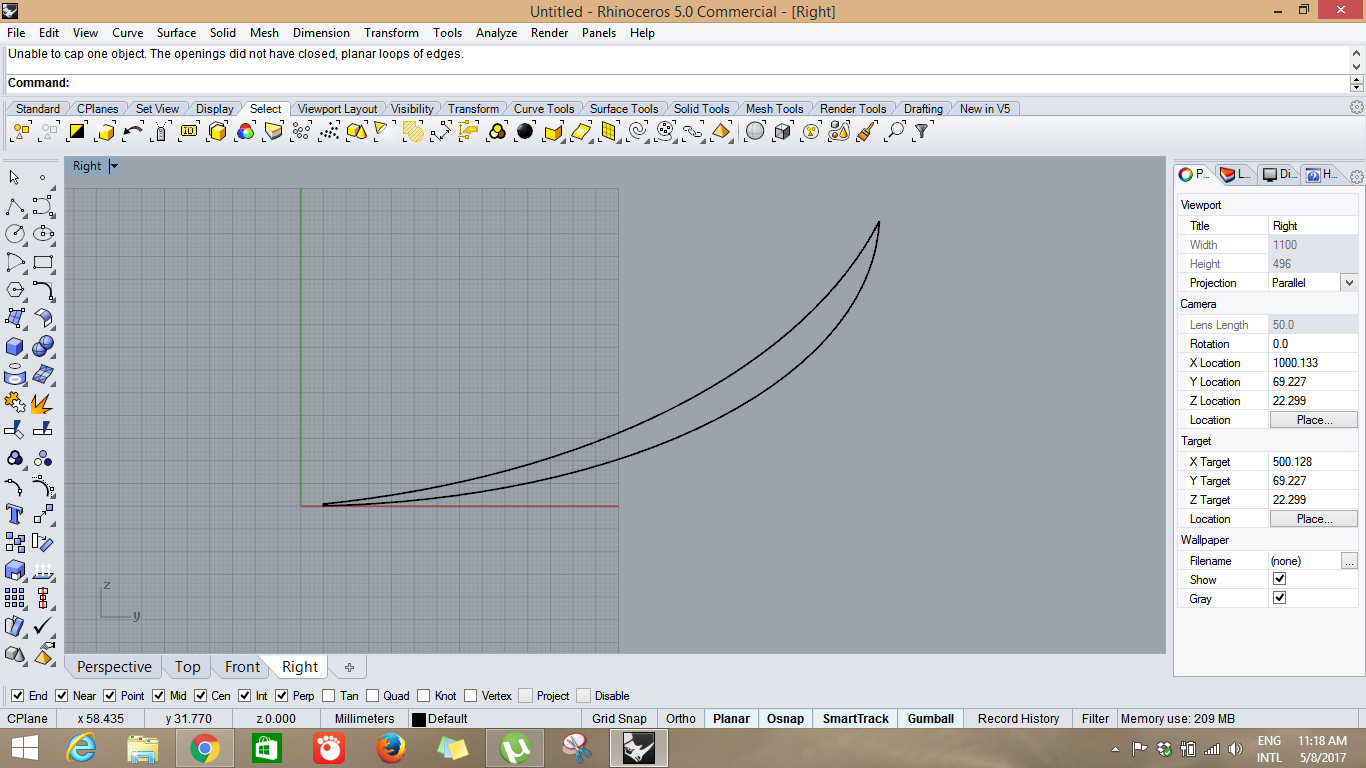
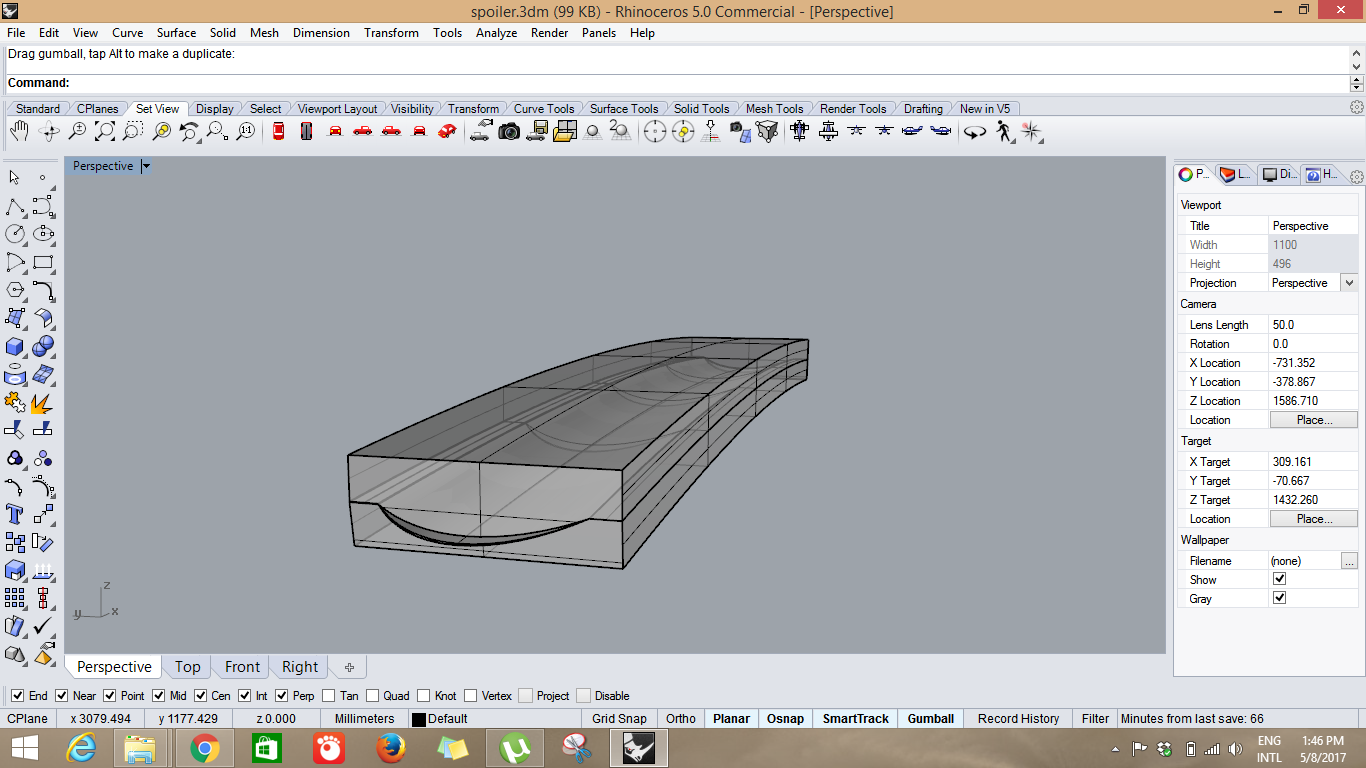
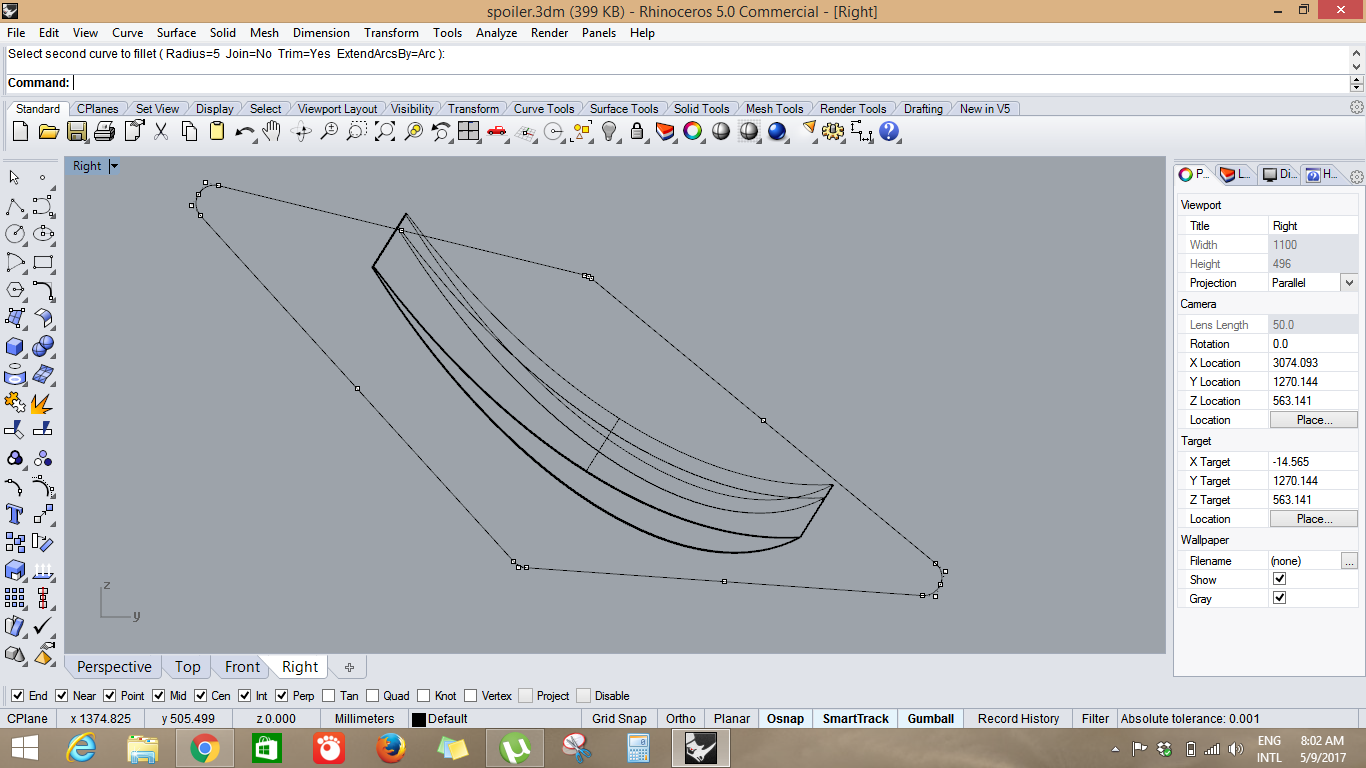
I started by drawing the cross section of the wing in Rhino. This will be an inverted wing as it need to generate down-force instead of lift. Hence the inverted C-shape.
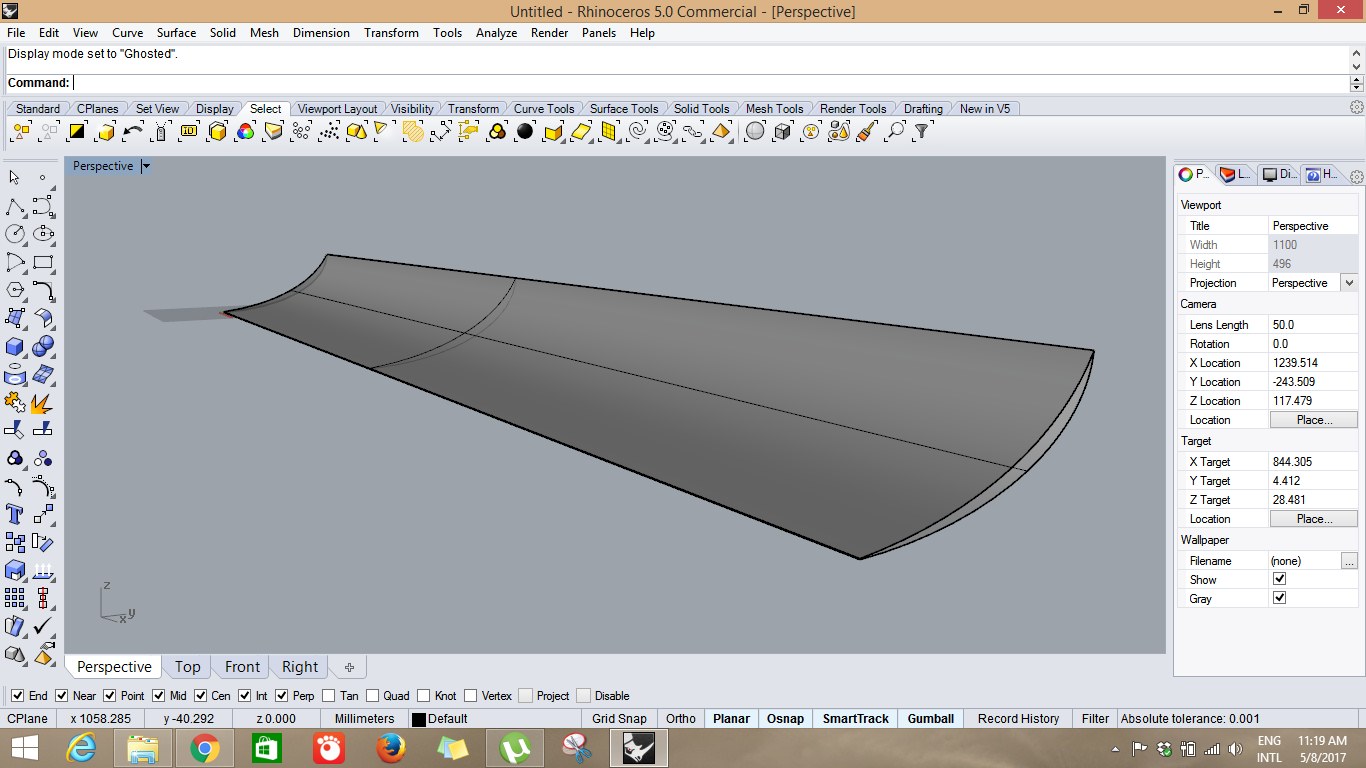
I took measurements from my car and then using that as a reference, I extruded the model into the 3D shape using the extrude crv option in Rhino and got my 3D model. It looks a bit boring. The top of my car is not flat, it has a gradual curve. So I decided to bend my wing a bit.
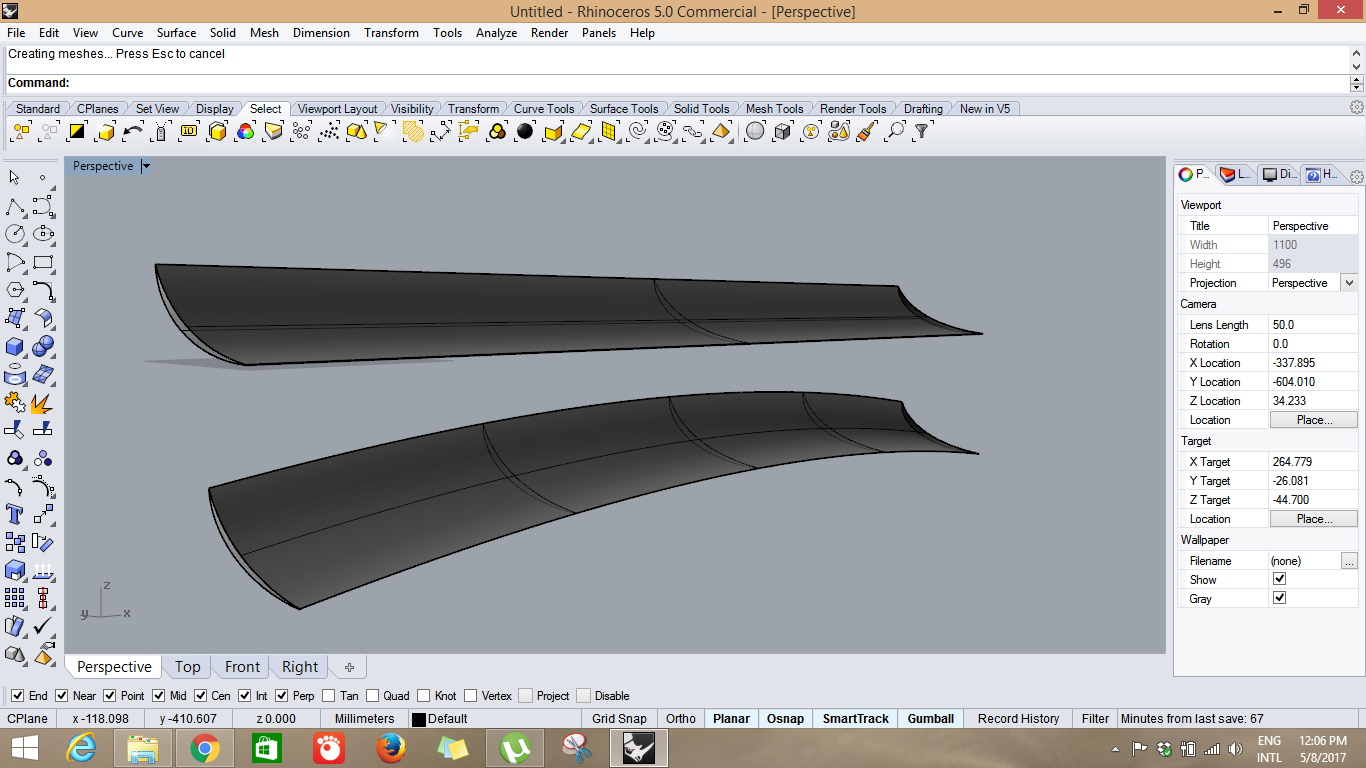
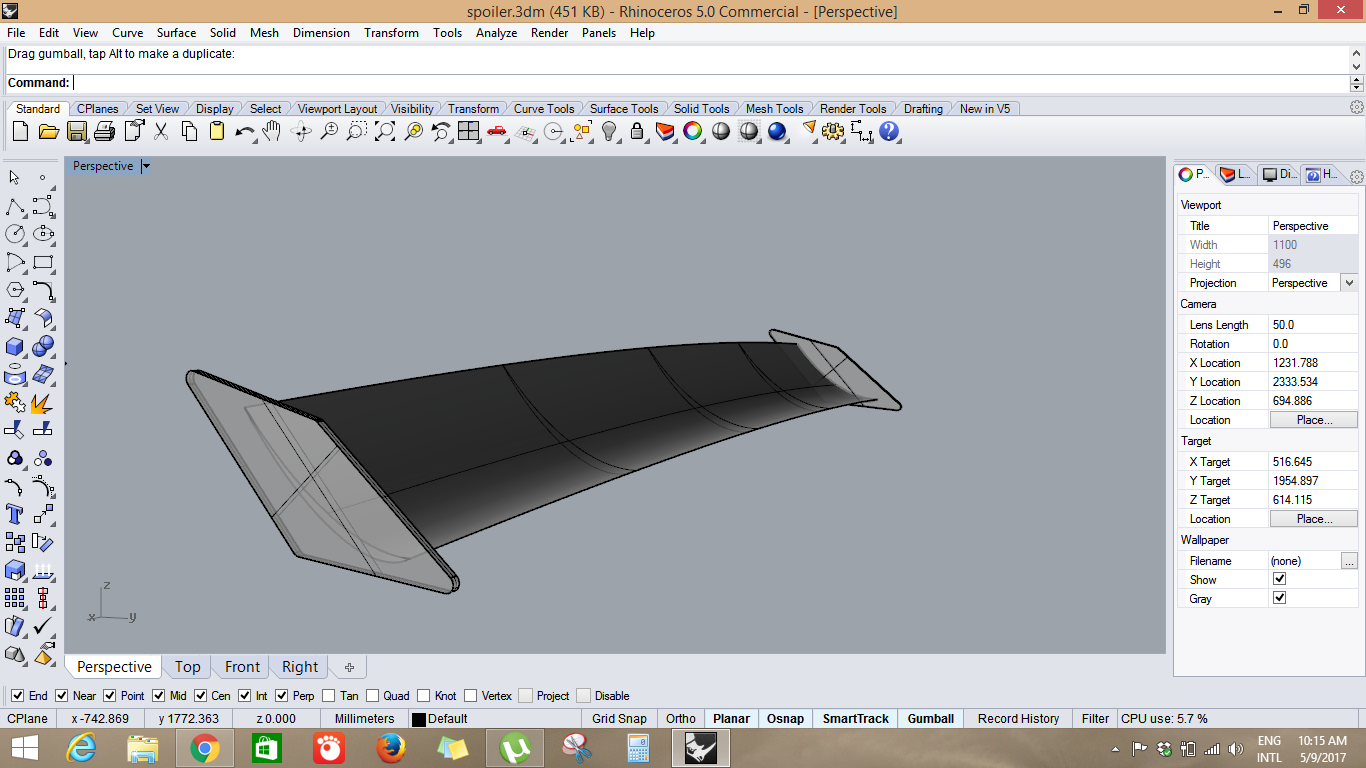
This time instead of the extrude option, I drew a path perpendicular to the cross-section and gave a gradual bend to it. I then used the Sweep tool to sweep the profile onto the path to get my shape. This worked well. After some modifications I landed on the perfect radius of curvature. The problem is that I could only make this out of 18mm Plywood, as we did not have foam in our lab. Hence I planned to stick two pieces of wood together to get a 36mm thick plywood to work on.
Hence accounting for the thickness of material I had to work with I kept by design to be under 36mm in height.
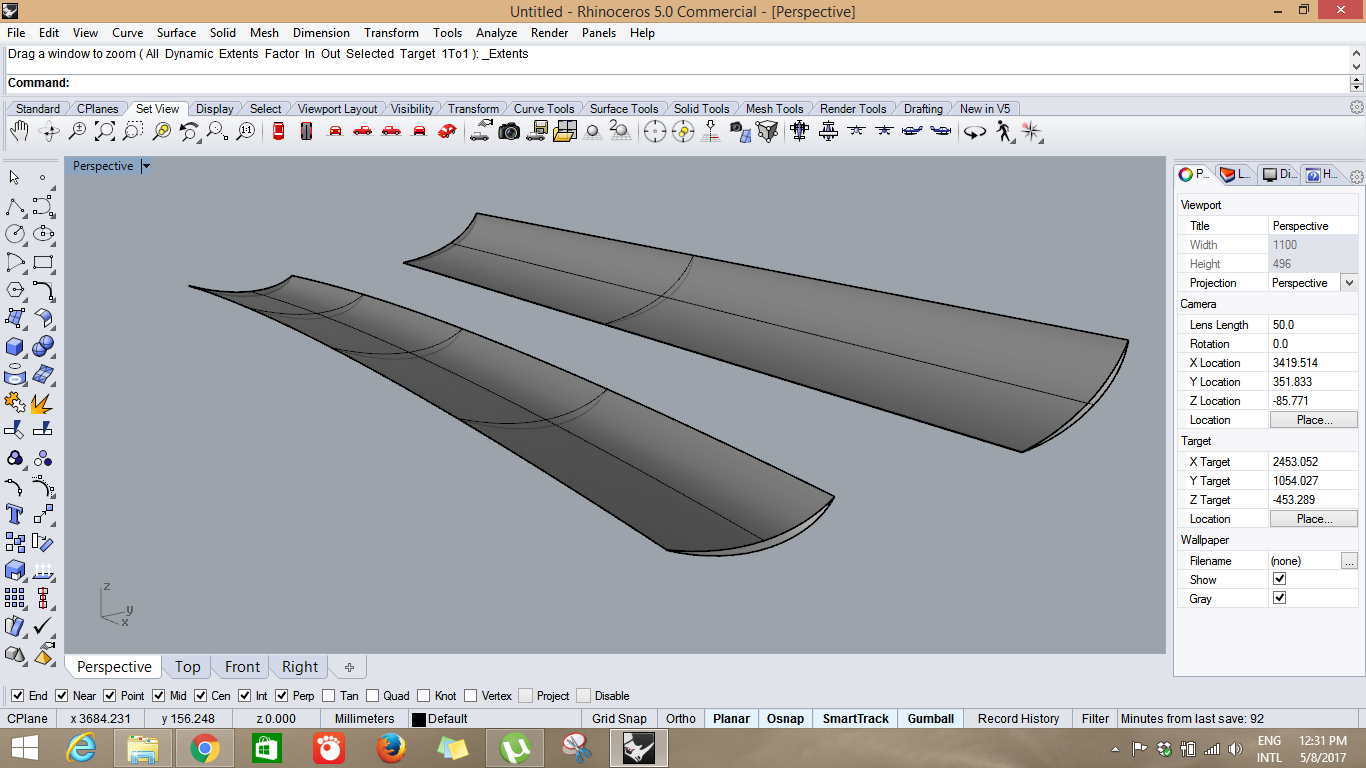
My next task to make a double sided mold with the 3D model of my wing. hence I split the two surfaces of my model into two parts which I can then use to make two molds.
Since the curves on both up and down side of the wing are different I has to go with a double sided mold, otherwise I could have made it using a single side mold using vacuum forming on the other side.

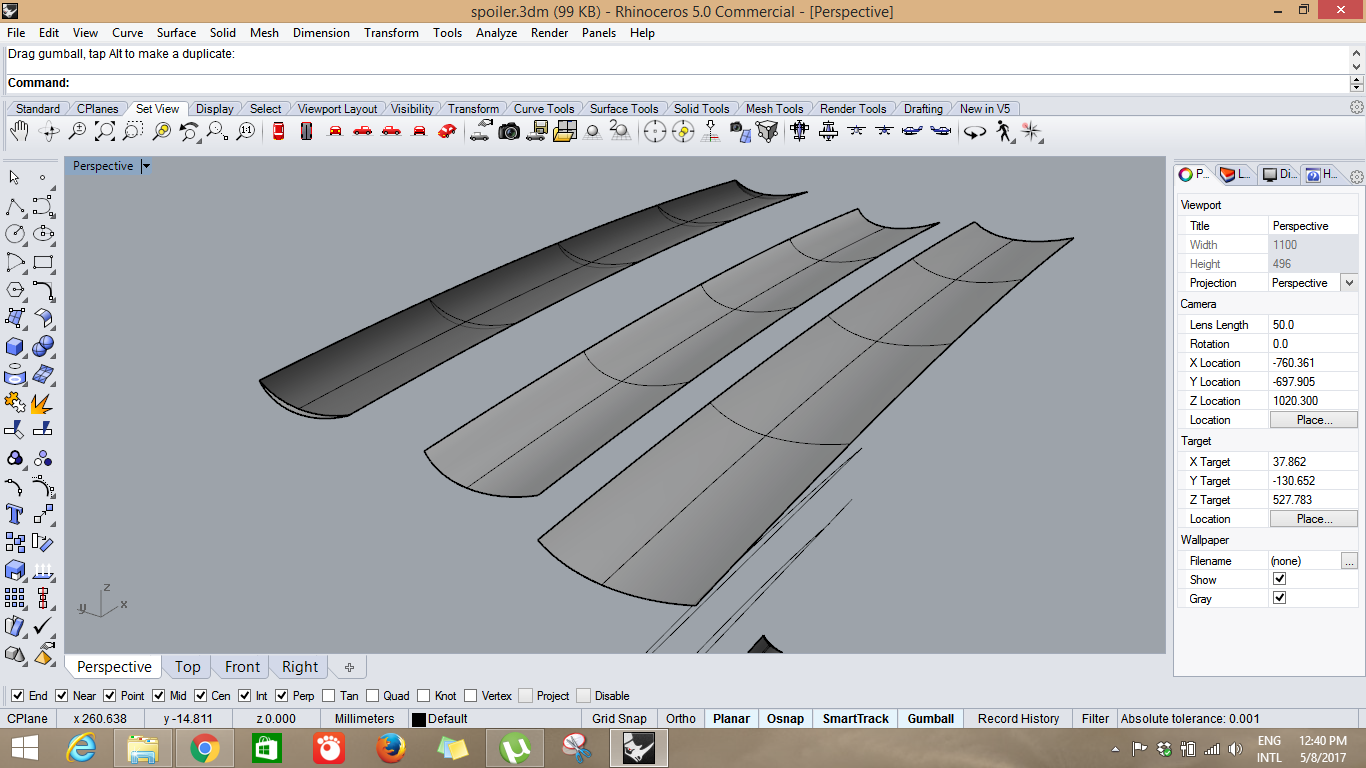
I then drew a shape in the cross-section of the surface which will act as my mold. I then used the Sweep 2 command to sweep the profile onto the surface. This gave me a beautiful mold with one of the surface of the wing on top.
Similarly I inverted the curve on the opposide side an drew a profile around it and used the sweep command to generate the second mold. I then put the molds in the correct orientation to see if they would mate properly.
Thankfully they fit together nicely. My molds were ready, now all I have to do is machine them.

Here are the two parts of the mold side by side. I will have to machine them separately.
My CAD model is done, now I have to get the wood read for machining. Since we only have 18mm thick Plywood, I would ahve to stick two pieces of wood together to make it ready for machining.
I cut out some pieces of wood from the scraps we had in our lab and stuck them together with some wood adhesive.
Since plywood is made up of layers, you have to make sure that there are no loose layers where you are sticking. Hence it is best if you scratch the surface of the wood to peel away any loose layers, and pour the glue over them, spread it evenly and then Close it shut.

I used some wood clamps to make sure that my board were tightly placed together. I left the glue to harden over night before using it.
I was a bit skeptical of the strength of the bond between the two pieces, since the only thing holding them together is the glue, and that plywood consist of layers. I was afraid that while machining the layers would peel off and then the top piece would shift.

Hence from a safety standpoint I inserted some wooded dowels by drilling holes in the wood. The dowels are made with soft wood by shaving off the excess wood to fit the hole.
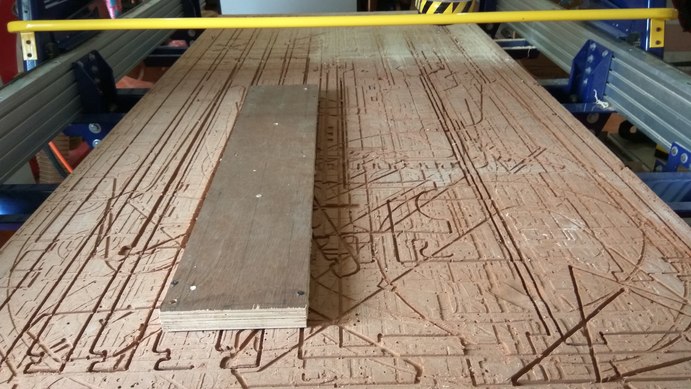
Finally the two pieces of wood are glued and dowels are inserted. I fixed the wood on the bed of the machine and made preparations to start machining.
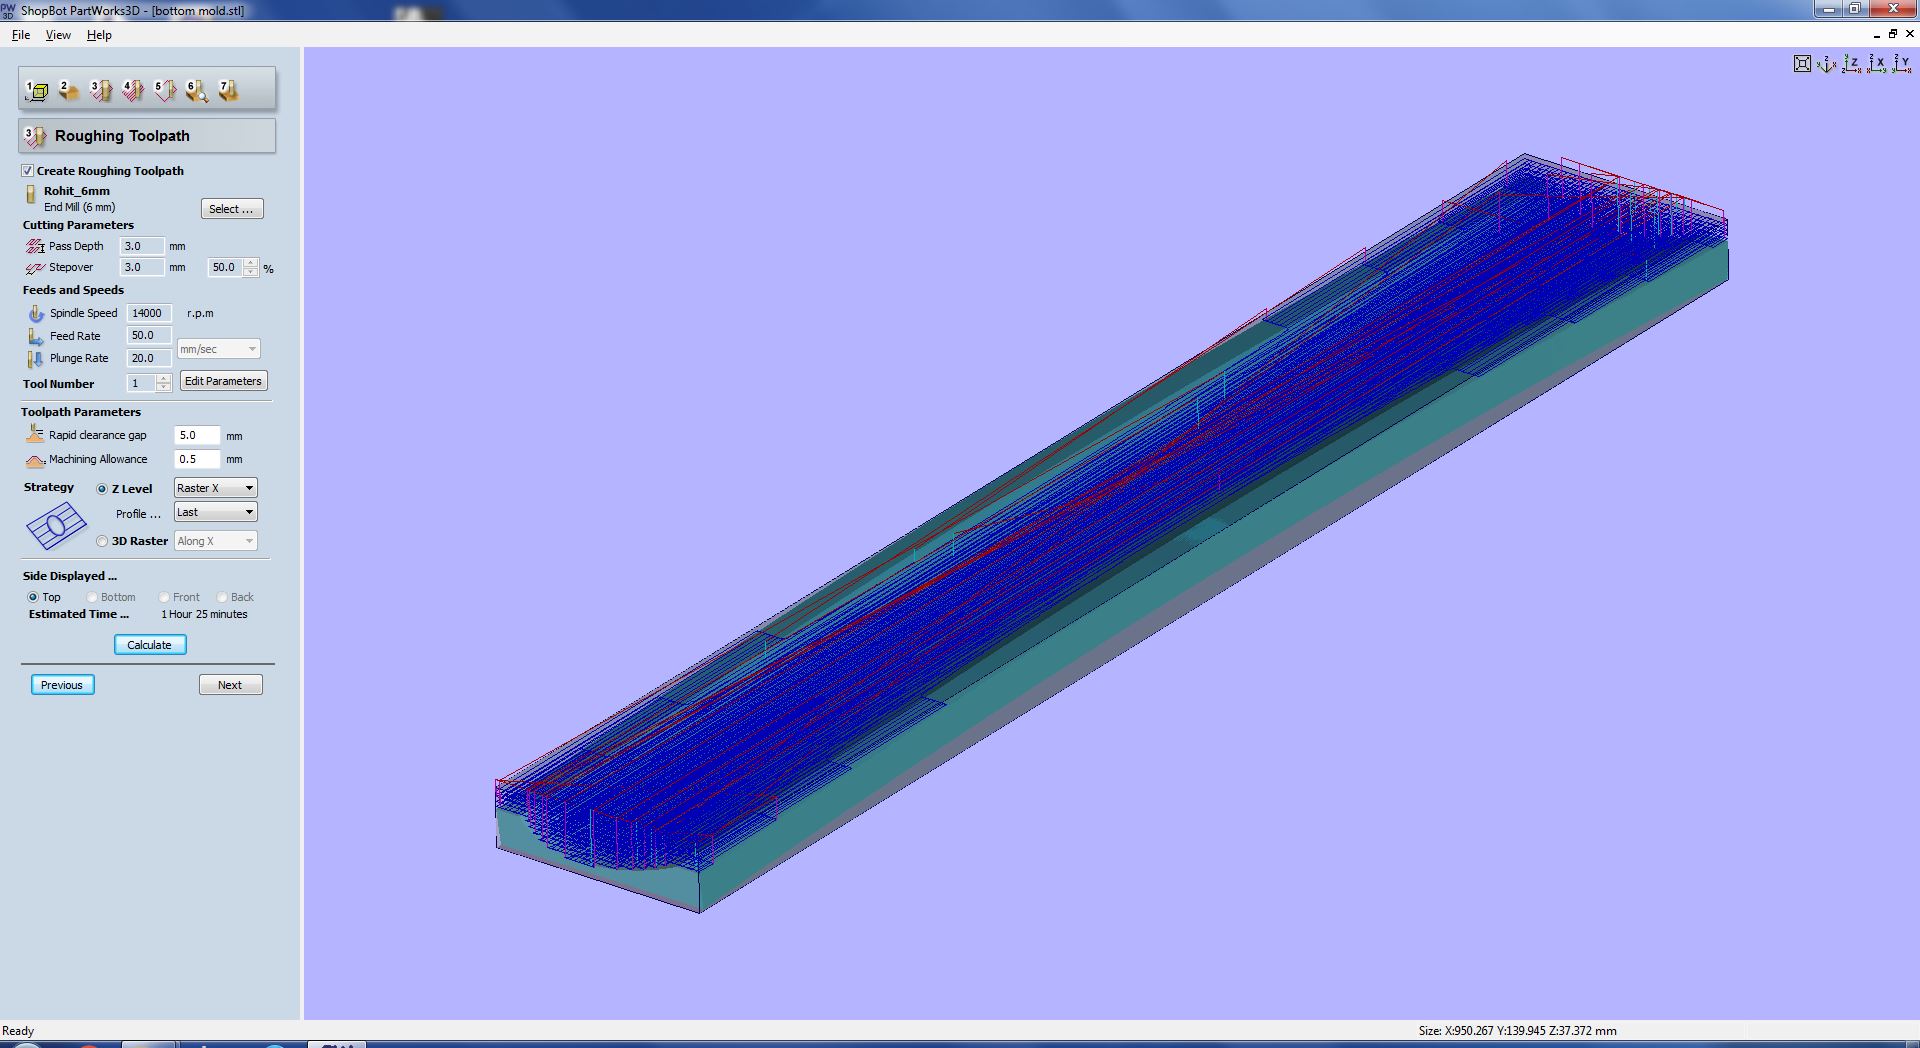
I loaded the .stl fine into part works and started giving the machine settings. The machining process takes place in two stages first a rough cut to remove most of the materials and then a finish cut to get the required shape. For the rough cut the wood was cut with a 6mm upcut end mill with feed 50mm/min RPM 1400rpm Depth of cut 3mm.
The rough cutting took more than 2 hours to complete. I was scared that when it reached the glued section the wood would fall apart. but thankfully that didn't happen.

The rough cut came out well. There were no cracks in the wood and the glue held it together well.
Next we move onto the finish cutting.
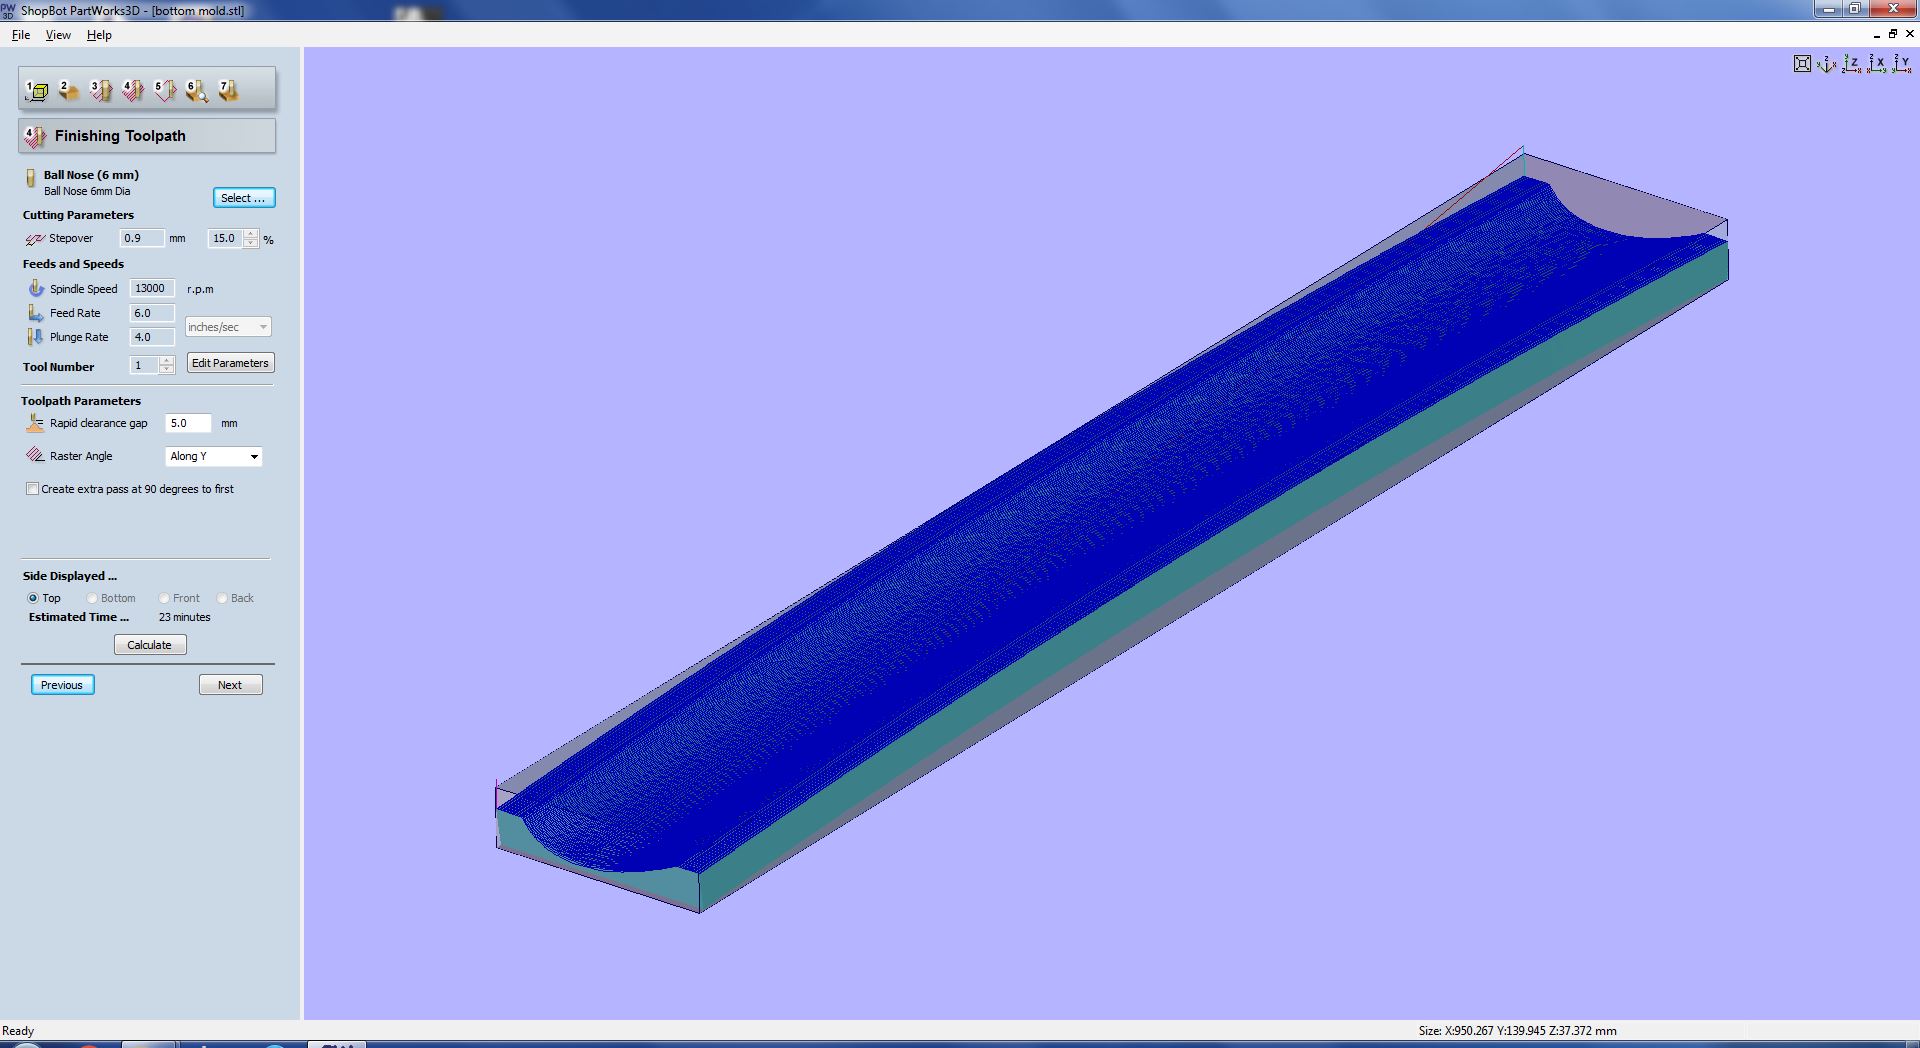
The finish cutting is done with a 6mm ball nose end mill. The machine settings where feed 6inch/sec RPM 1300rpm Stepover 15%. The ball nose gives better surface finish and only it can traces the actual profile of the cut. We can't use a flat end mills because it will leave steps when curves are there.

The cut took more than two hours, the machine was moving perpendicular to the rough cut.
The cut came out beautifully the finish was really good and I'm happy none of the layers peeled off. After the finish cut, I gave a cutout tool path to cut out the actual mold from the stock material.
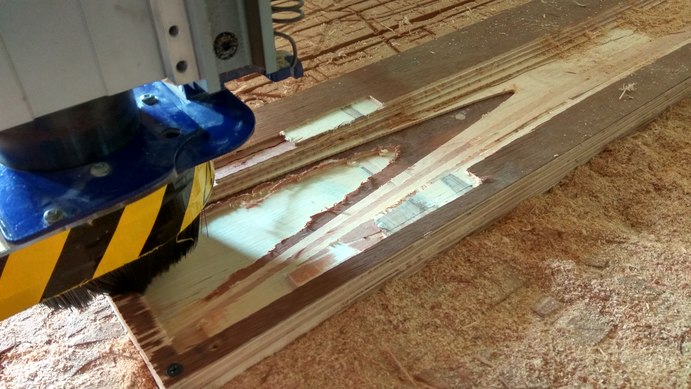
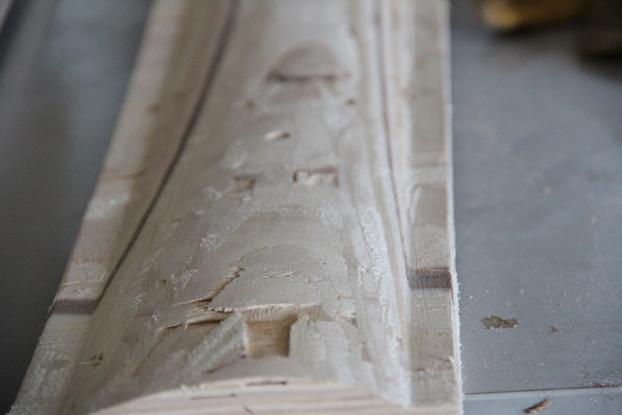
In a similar way I made the top mold. This time a small piece from the top layer peeled off, but thankfully it was a small portion and I can fix it later.
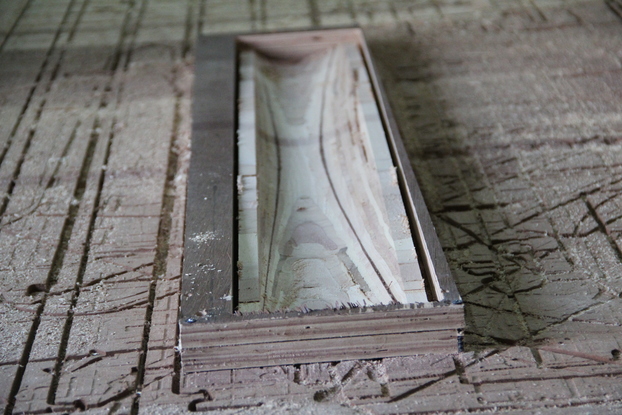
The mold cut out from the stock material. The finish is not perfect but a little sanding will fix that. Here you can see the small chip which broke off. I will need to repair it later.

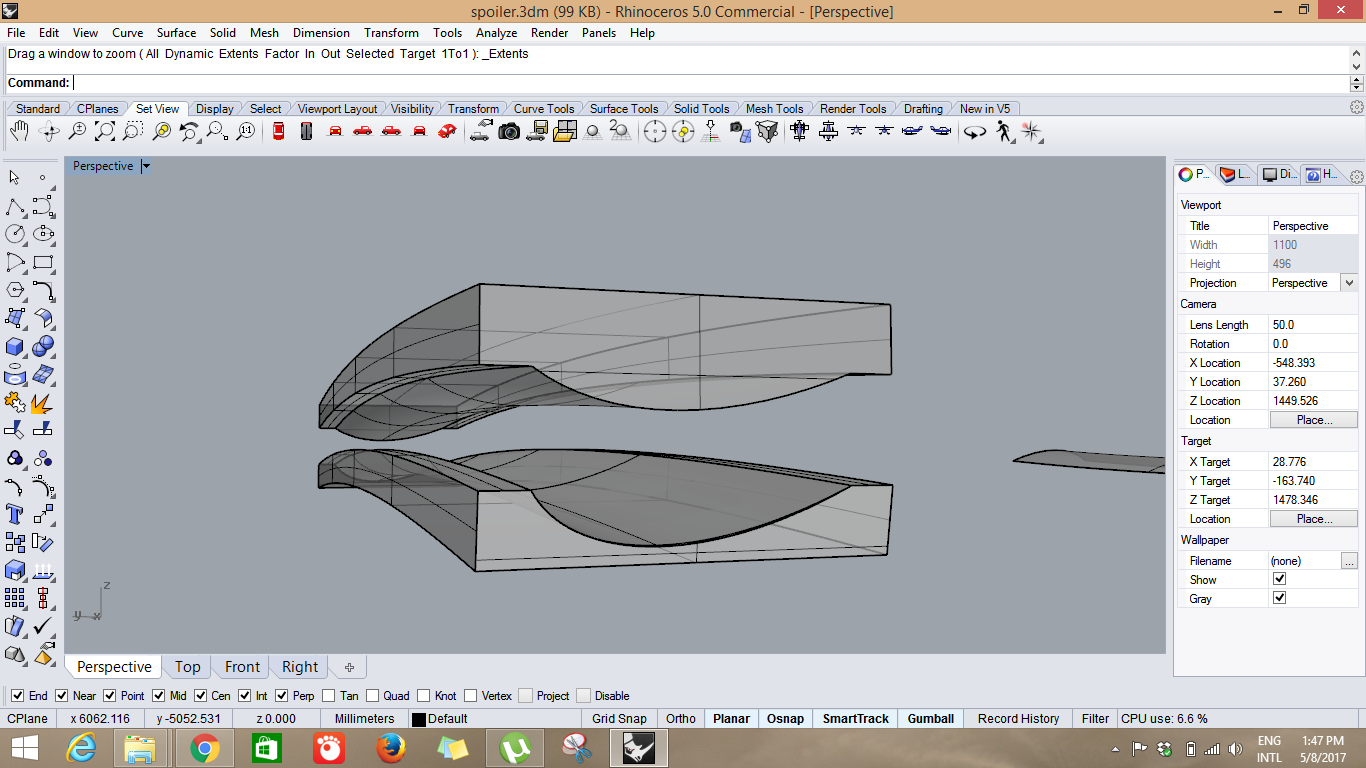
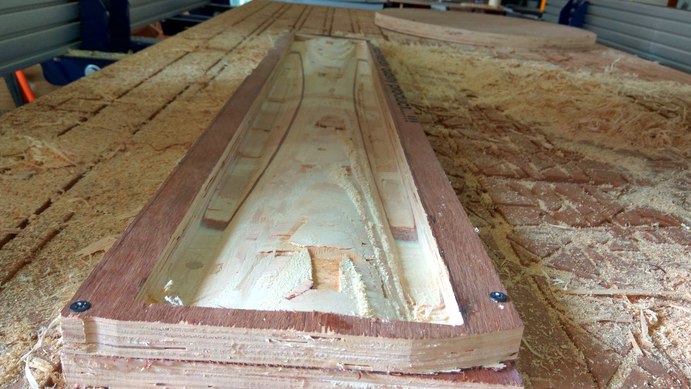
The two halves of the mold kept side by side. They both came out beautifully.

The two halves of the mold fit together perfectly. Now to do the finishing touches.
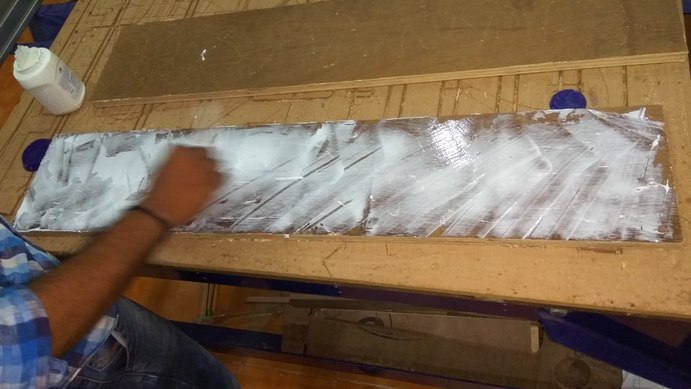
I had a small imperfection in the top mold where a portion of the wood chipped off. I needed to give a smooth surface to the mold, so I used some transparent cello tape to cover all the imperfections in the wood.
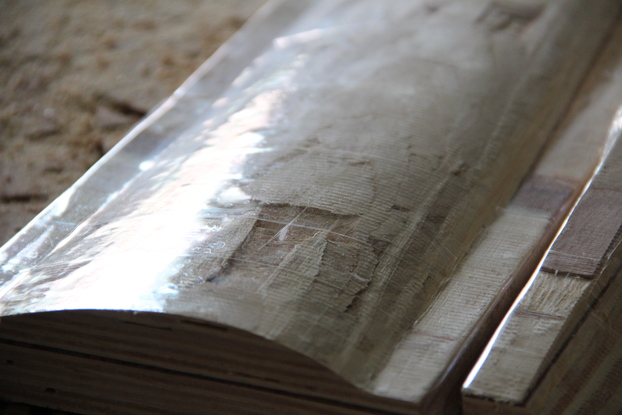
I used the cello tape for two reasons, one is to cover all the imperfections on the surface of the wood and give a smooth finish. The second is to form a barrier between thee resin and the wood.

I layered the tape along the entire length of the mold to cover the full area. I made sure to poke holes in some places where air was trapped so that I can get a flush surface.
The next step was getting the materials ready for putting into the mold.
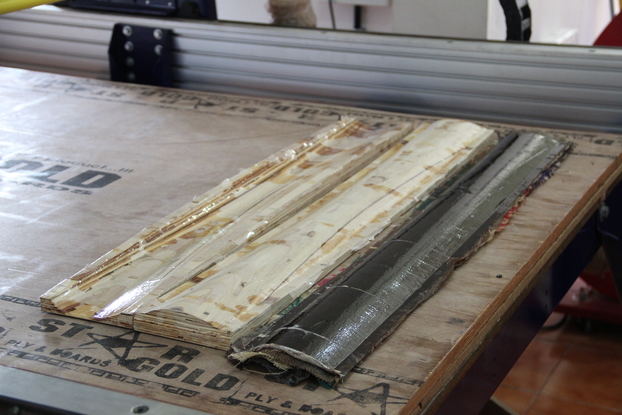
For my composite I plan to use burlap as the fabric material and an epoxy resin. I used the laser cutter to cut the burlap into rectangular shapes which I can then lay on my mold. Since the laser cutter bed is not long enough to accommodate the full length of my wing, I decided to split the cut and make two rectangular sheets and then layer them side by side.
This creates a problem where there will be very less material covering the middle portion of the wing, hence I increased the length of the rectangular sheets so that they overlap in the middle. This should give some strength in the middle portion.

Burlap laser cuts beautifully, but you have to be careful so the no loose threads get entangled in the moving head of the laser cutter.

I made extra copies so that I will have backups if I needed them.
Burlap is a very porous fabric, this is good if it is used as the middle layer but not so good as the first or the last layer.
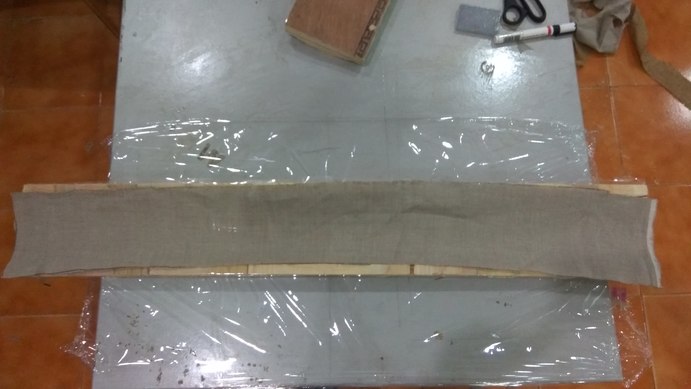
We have a tighter woven cotton fabric in our fab inventory. I used that as my first and last layer. I cut this fabric to the full length by hand. I needed a total of 4 pieces, two for the bottom and two for the top.

I covered the work area using cling film so that it doesn't get damaged. Then I proceeded to make the resin for the composite.
In our lab we have Easy Cast epoxy 33 an epoxy resin purchase locally. It is a two part transparent resin, since it is a locally sourced product there is little documentation on it. We have gone through it and the mixing ratio of part A to B is 100:50 respectively. Some of the features are listed below.
1.Very less viscosity like water
2.Will cure at room temp in 24 hours
3.Can Cure in 30 minutes if heated at 65 degree centigrade.
4.Resting time: 2hours
5.Shore hardness: ~ 80 shore
6.Safety: wash the area with soap under plain water.
I put on some gloves and started mixing the resin. I used about 300gm of it in total. The resin is exothermic and will start to get hot after mixing. Always be sure to wear safety equipment when working with resin.
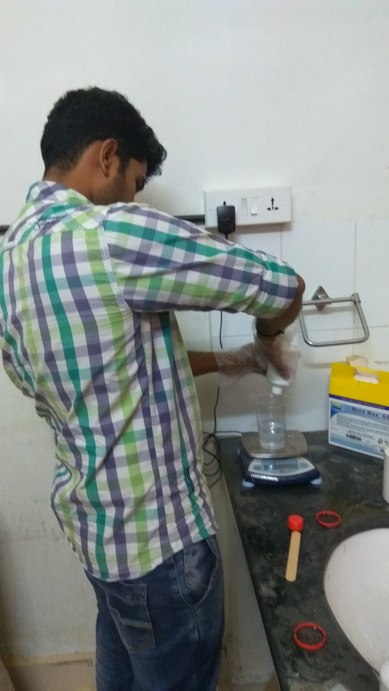
A good idea is to mix the resin in small batches, because if you mix too much of the resin and leave it in the cup, the resin will get hot and it might even melt the cup, thereby spilling the resin all over the work area.
I mixed mine in two batches. Once I had the resin its time to move on to laying the fabric in the mold.
There are a few ways to do that, either you can lay the fabric and then pour the resin on top of it. The way I did it is that I dipped the fabric in the resin and then squeezed out the excess resin with my hands and then lay the fabric in the mold. This way I could ensure that even coverage was there.
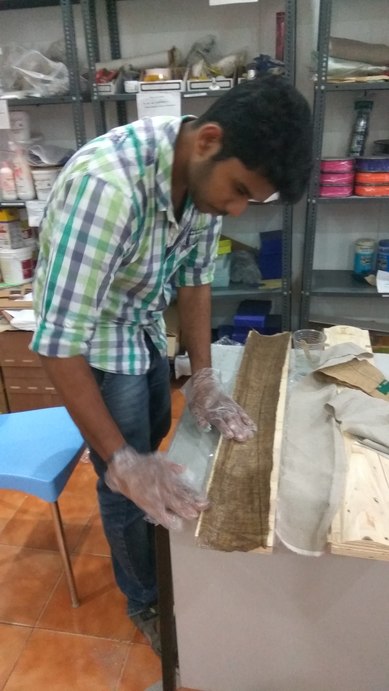
I layers the resin soaked fabric on top of each other and then using my hands pressed everything together to make sure I removed all the air bubbles.

In the middle portion where the fabric will overlap I put a small piece of wood (tounge depressor). This would provide as a rigid support for the over lapping fabrics.
The thickness of my wing is not uniform, in the lower portion thickness is more compared to the upper portion, so I cannot layer the fabrics evenly. Hence for a couple of layers, I folded the fabric lengthwise and laid on the bottom portion, so that the thickness would be more there. Then on top of that I laid the rest of the fabrics evenly.
Finally all seven layers of fabric are in place. The top two layers were the cotton cloth, same as the bottom layers. I poured some of the resin which was left into the mold and proceeded to close the upper part of the mold.
Since mine was two sided mold I did not have to go for vacuum bagging. I closed the mold with the second part after aligning it with the bottom. I then used wood clamps to make sure that there was a tight seal.

I then left the mold to cure overnight with the clamps on.
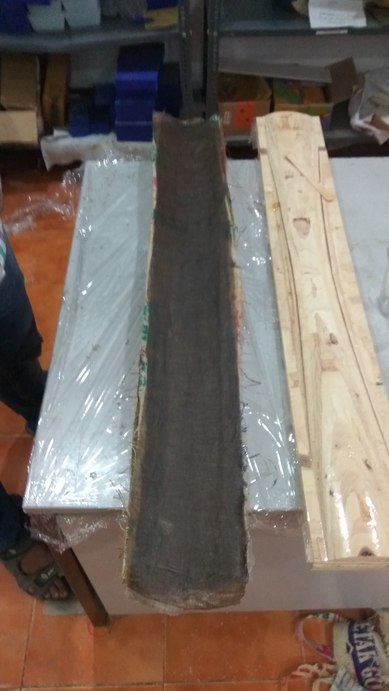
The next day I came and removed the clamps and pried open my mold, some of the resin had leaked into the wood and stuck to it. With some effort I was able to open the mold
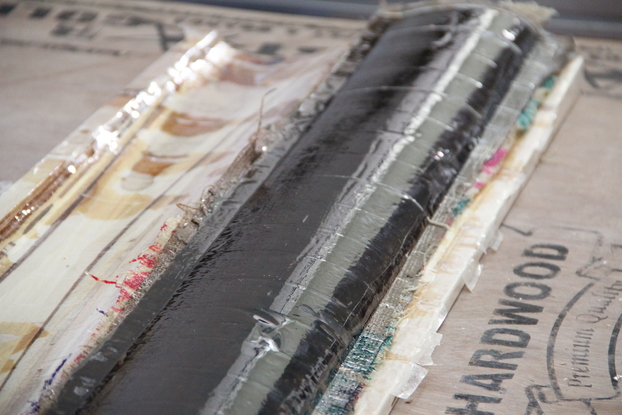
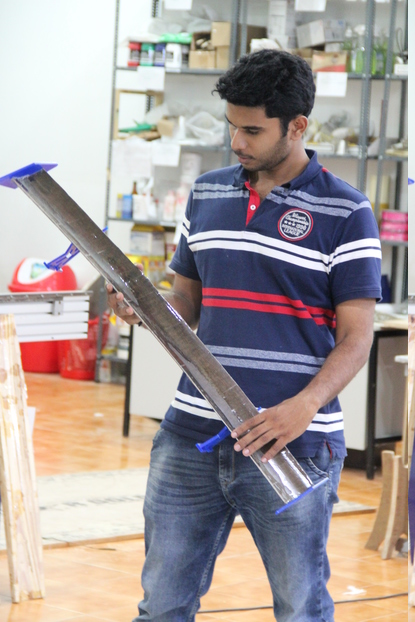
The part came out beautifully. The surface finish is good. There is a bit of trimming left to do to finish the edges but the overall it looks great.

I trimmed the edges using a scroll saw. This was the first time I had used it but its really easy to use it, it consist of a reciprocating blade and you feed the material into it. You have to be careful and keep in mind that this is a reciprocating blade that means that there is a chance that the work piece will lift off. In the machine there is a small handle lock which you can drop down and place on your part, like a sewing machine, this will make sure that the material stays in place.

This is the final trimmed wing. I'm really pleased with the result. It looks like a really cool airplane wing. Who knew a mold,some burlap, and some resin could make such awesome structures.

The wing is surprisingly strong, If I put in enough force I can bend it but still its hard enough. I'm glad my attempt was successful, now I'm thinking of making something large in the future. There are a lot of possibilities.
Now that my wing is done, I have to make the rest of the components so that it can act like a spoiler. This means I have to make two side wings and a support for the wing.
I started with the side wings. I used the Poly line tool to draw out the basic shape. After a couple of attempts, I ended up with a shape I liked.
I went ahead and created a 3D model for it, so that I can see how they will look on the wing.
They look awesome, the spoiler is starting to take shape. I love the way the winglet gives definition to the wing. Originally designed to reduce the wing tip vortices, In my design though, its more for show than function.
I'm happy with the design, I exported them as a DXF. I will laser cut them later.
My next job was to make the support for the spoiler. For this, I exported the original cross-section of the wing and opened it in SolidWorks. Sometimes I find the lack of parametric design in rhino limiting. SolidWorks is easy to work with dimensions.
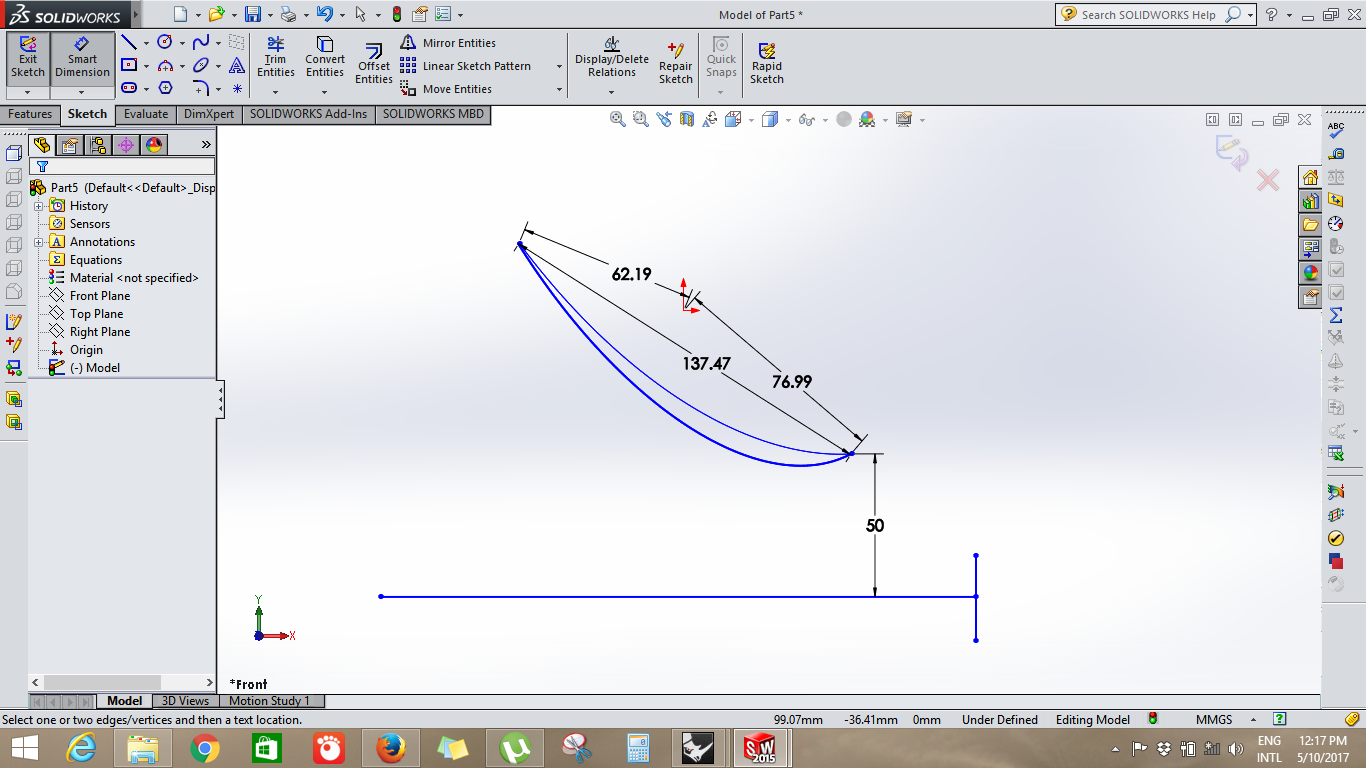
I started designing in SolidWorks, I wanted the wing tip to be 5cm from the surface of the car.

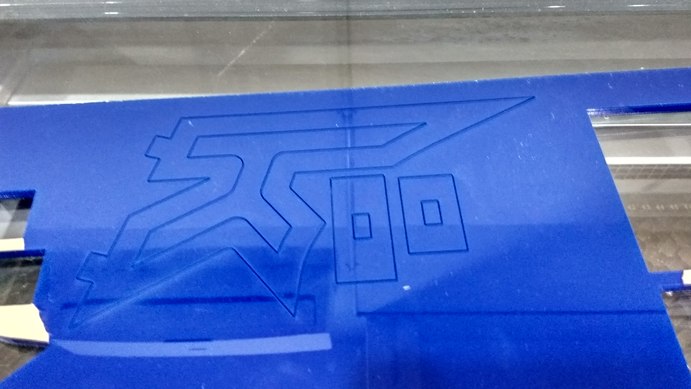
I drew a base for it in the shape of a 'K' to make it look cool. This will provide some sharp edges to my curved design.
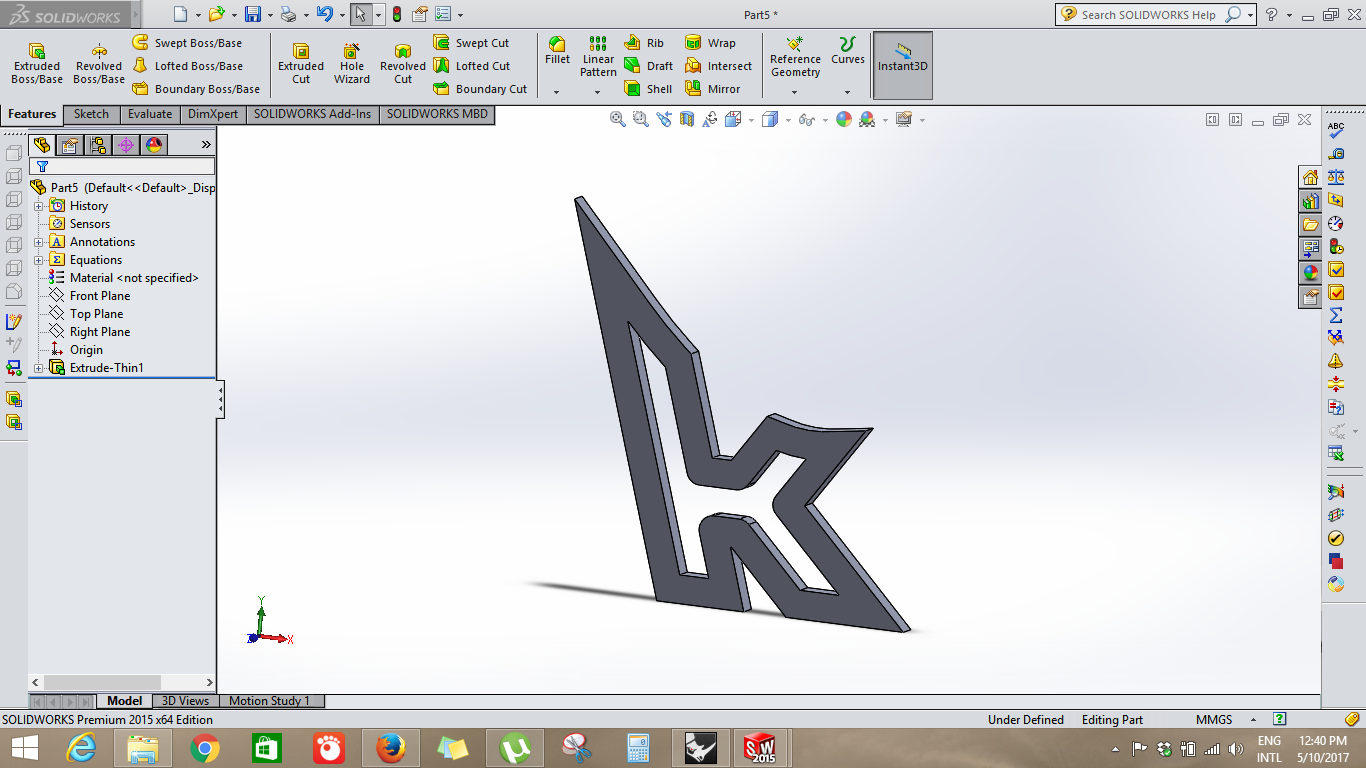
This is the final model in 3D. It looks awesome, I had used the Offsets tool to create some of the internal geometry. I also drew two rectangles which will go in the bottom of the support and which will act as the base which you can stick onto a surface.
The next step is to laser cut the parts. I exported all the design files as DXF and proceeded to cut them on acrylic. Acrylic is a good choice for this build, since its water proof and it looks cool
I loaded the DXF file in Rhino, gave the appropriate colours for cutting, and also the machine settings, and cut out the design in 6mm Acrylic.

The parts are ready for assembly, Since this is a prototype, I'm using Hot glue to stick the winglets and the support for the wing.

This is the final spoiler, ready for putting on my car. The parts are hot-glued together. It looks awesome, now time to test it out.
I placed the wing on my car, using double sided sticky tape. Its only a temporary wing. I did not test drive it as I know the supports are not strong enough to stand up to the down-force generated by the wing.

The spoiler looks awesome. The dimensions match that of my car. The blue really looks good with the white. If in the future, I do decide to make an actual spoiler for my car, now I know what I have to do.

I'm really amazed by the possibilities that have opened up to me after going through this week. Composites are an area I would love to explore more.
I already started thinking about more things I'm making in the future like an Airplane wing, A compound Bow, A Skateboard etc.
rahulsrajan.com
rahulsrajan01@gmail.com
Trivandrum, Kerala ,
India.

Technopark, Kerala, India

