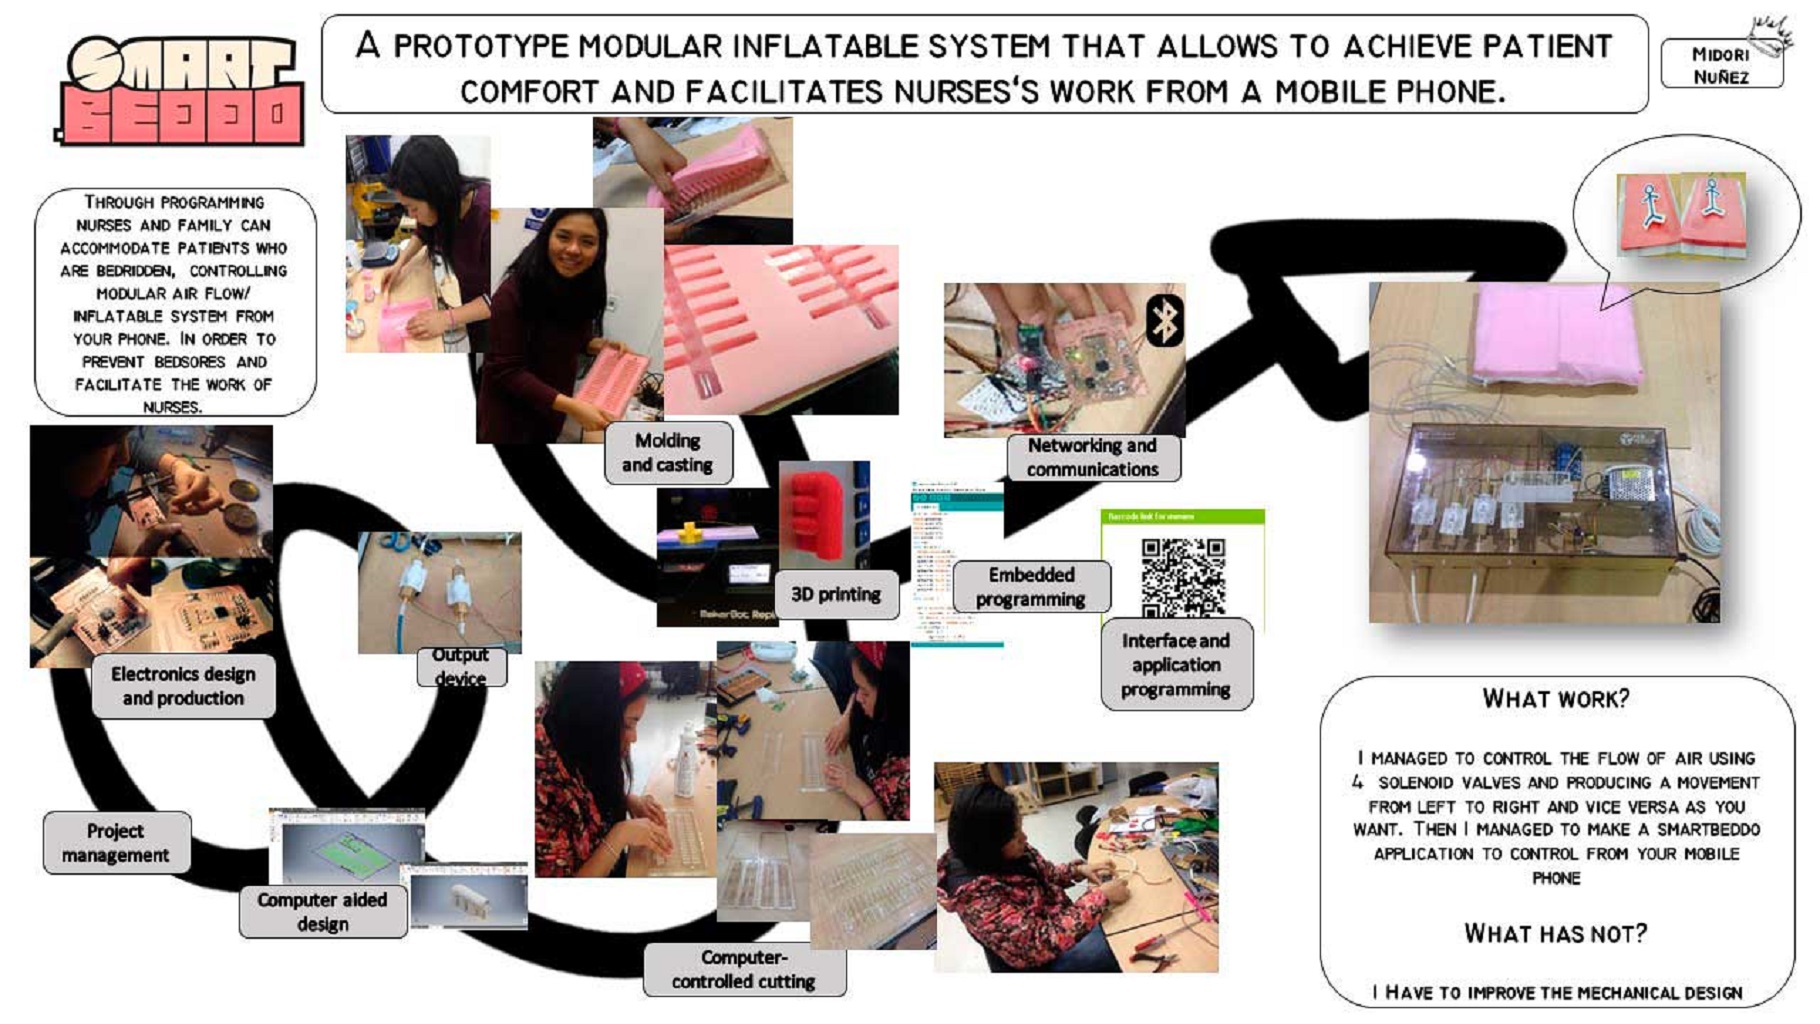
First prototype:
When I started materializing my idea I started producing what I could imagine using the materials at my reach. As you can see, in my first try, I made a matrix with fabric and velcro. Inside each module, I inserted a giant baloon and connected them with a small hose of 6mm diameter and 3D printed joints, designed by me.
Using a small air compressor, I could tell the joints did work and the inflation process of the modules was alright. This was what I needed to control for accomplish the goal of moving the patients by sending signals.
Next prototype:
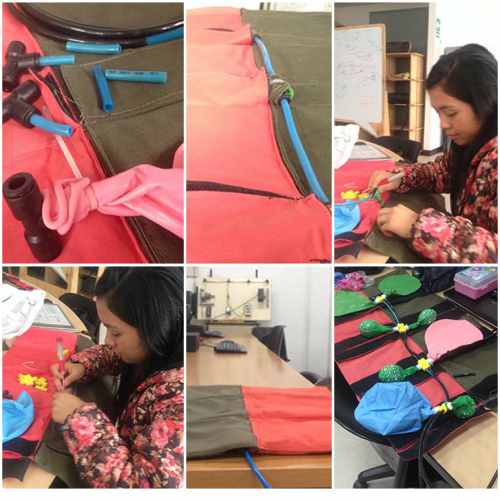
Searching on the Internet, I found another alternative, which was more oriented to my project idea: prinflatables. This project inspired me to continue working, but this time in creating the technology to do this process. I thought this: to use the shop bot with the "bit" I made here in Tecsup. So I took a steel bar and gave them the following shape, connecting it to a soldering iron. Then I adapted a recyclable object here at the FabLab: an unused machine which I dissembled and shaped it like this to adapt it to the shop bot; and all of this to achieve a correct thermo sealing according to the design I would use for the fabrics (for this design I took the "Aeromorph" project as a reference). The geometric design would be achieved with the shop bot, but for the thermo sealing I considered the use of springs, for a little pressure is needed to make the both fabrics to stick to each other.
I could not finish with this idea because I didn't had the permission to use the shop bot, but is pending to continue investigating for a next project I have in mind, and also because it is an alternative for the prototype of my project.
Final prototype:
I had checked, for a long time ago, information about Pneumotics or Soft Robotics and they took my attention for accomplishing it. Because of the lack of materials here in Tecsup, it could not be done, for the requests for those materials needed to be done with more anticipation, and also at this point I didn't have a clear idea for my project, so the people here in Tecsup didn't understand this idea as well.
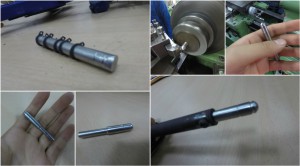
Despite all of that, I tried. With the support of my friend Jhon, with a piece of recycled wax and taking as a reference the work of Fabio Ibarra, I tried to make a little mold (here you can see few pictures of it. Then I used a material remaining in the FabLab to see if it worked and I filled the mold with it, so it finished looking like this. This meant It could be possible by making this kind of molds.
I still did not had idea about how would I do my project, until one day when I remembered my friend David told me about a local store which sold a kind of silicone. So before going to buy it I made a try with a remaining of the material he used for his molding assignment. Then I got this. When I realized this material was flexible and resistant, and that actually it worked well for inflation, I decided to buy it.
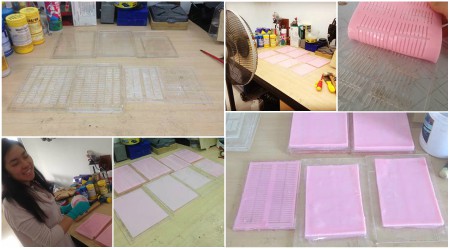
Now, the next step was the mold. I thought to make it with acrylic, so to know this worked I tried making a small circular mold (following another try I made with the 3D printer) of 3mm thick. When I realized it worked, I decided to design the next mold.
After that test, I could assemble the following molds, cut by laser and using a special glue. Here you can see the molds:
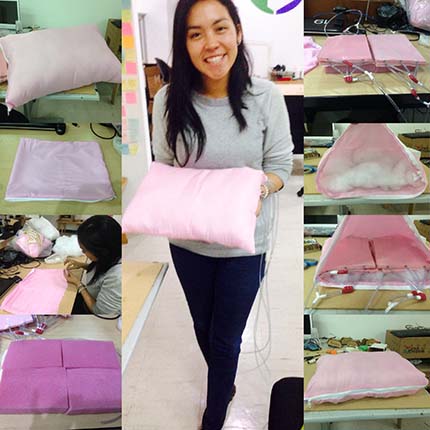
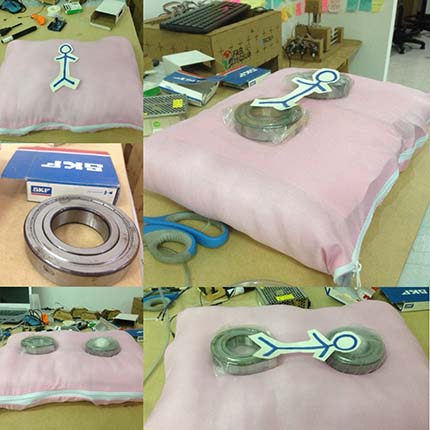
Then I prepared the corresponding material (they had given me a red catalyzer, so the material turned to a pink nuance) and I started to fill the molds. I let them repose for 6 hours average and I got the parts A and B. Then I added them the little hoses and sealed it using the same material, letting them repose for 6 more hours.
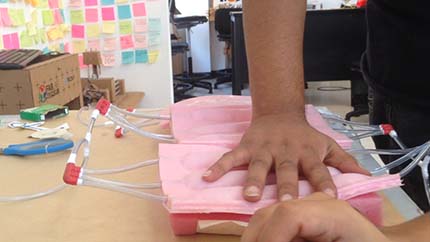
So I got the following modules. I started to join them with the 3D printed joints and I sealed them with rosin for avoiding an air escape, and then also a little bit of glue for fixing the hoses with the silocone (this was after several attempts to directly inflate them with the air compressor). For this demonstration I only made four modules, as you can see below.
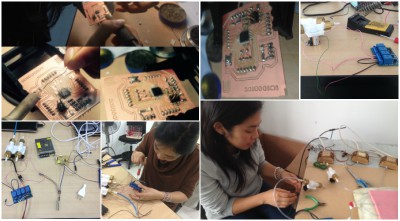
Electronic and control phase
For the control part I redesigned my fabduino board, calling it "mimiduino". This served me to control via bluetooth the solenoid valves and a USB board, and also I designed it with the aim of transmitting 5V for the USB operation.