The assignment
This week’s assignment was to read the material safety data sheet (MSDS) and technical data sheet (TDS) for the resins I’m using and design and make a 3D mould (~30x30cm), and produce a fibre composite part in it.
Preparation and Safety Issues
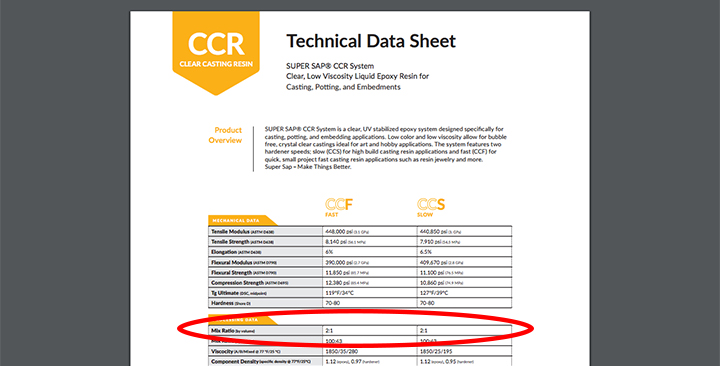
I started by identifying the resin and hardener we had in the lab and then looking for the resin's MSDS and TDS.
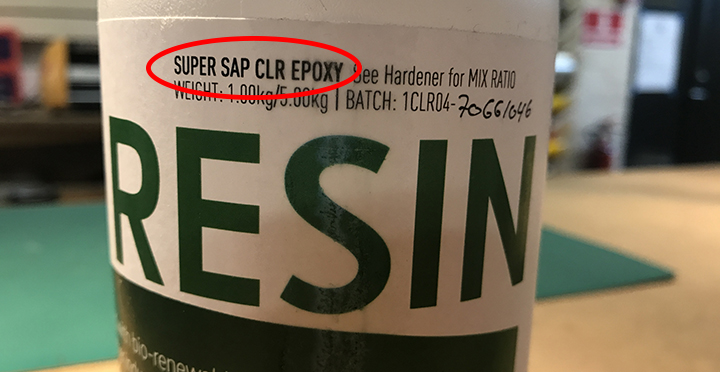
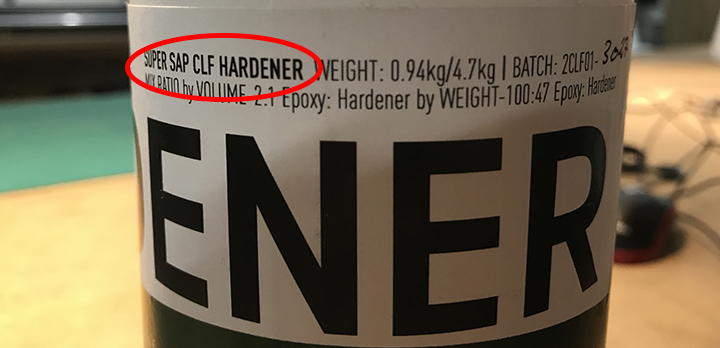
From the TDS, the most important info has to do with the ratio. In this case, if we go by volume, the ration is 2xresin to 1xhardener.
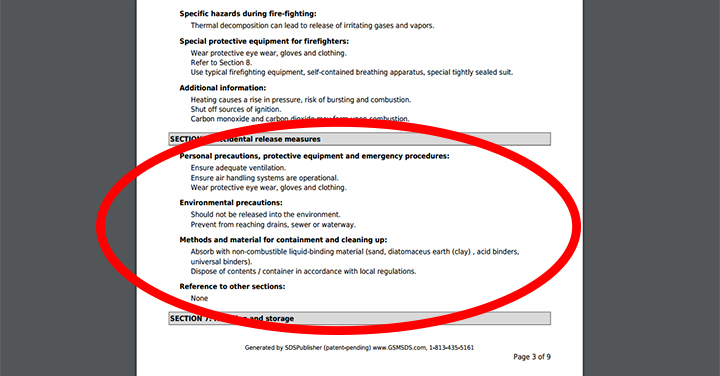
By reading the MSDS, I understood I had to be very cautious. I would need to wear protective eye wear, gloves and clothing and make sure the area I was working with the resins was well ventilated.
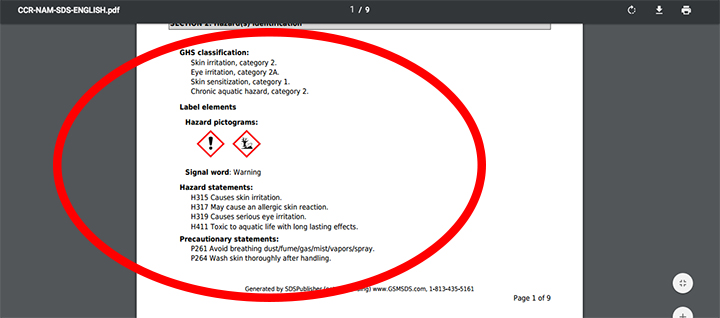
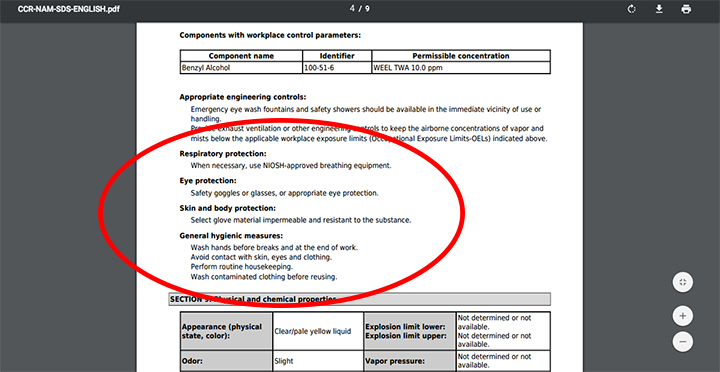
Furthermore, I would also have to be careful cleaning up and disposing. I shouldn't wash containers or brushes, to prevent the resin from reaching drains, sewers or waterways. Instead, I should just dispose of it after use.
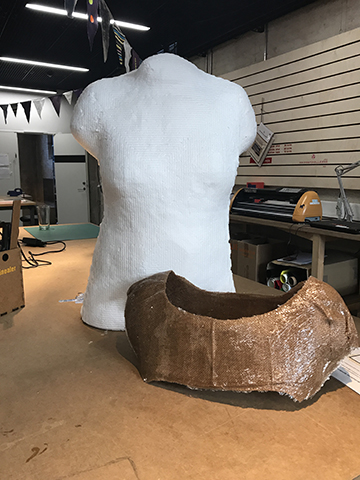
The 3D Mould
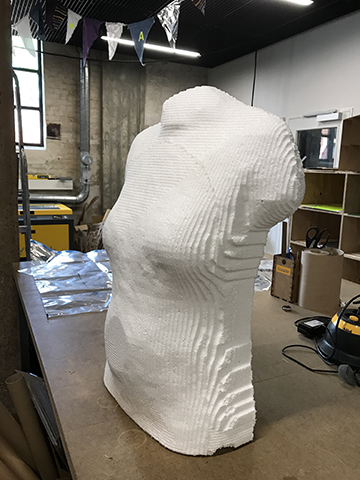
I have decided to make a shoulder plate, using the mannequin from week 7 as the 3D mould. The shoulder plate can be used to help supporting the main weight from the wearable I’ll be creating as final project. I’ll do a hard composite, in order to complete this week’s assignment. However, what I’m really interested in exploring beyond FabAcademy is the production of semi-hard composites that can be used with a sewing machine and meaningfully integrated in clothing.
Producing the fibre composite
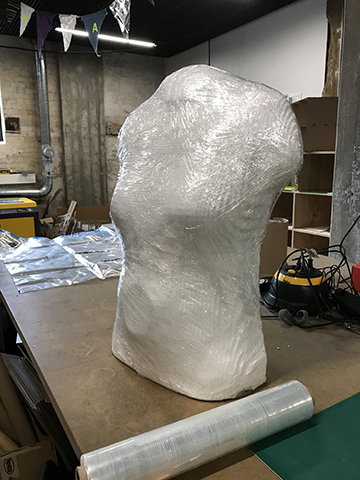
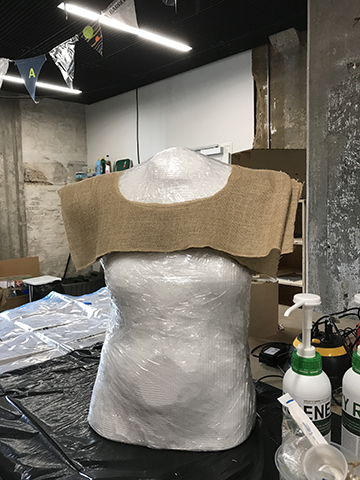
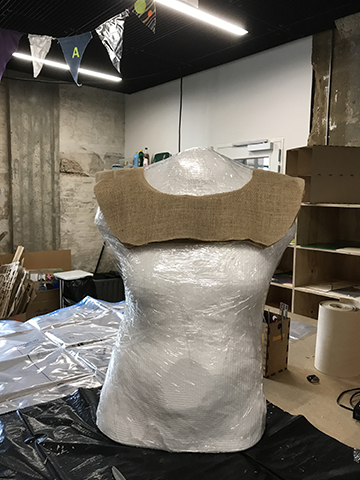
I started by wrapping my 3D mould in plastic foil.
Then I cut 3 layers of burlap and trimmed it, so it could better fit the mould. I also covered the surface where I was working and a great area around it with big plastic garbage bags and put on protective eye wear and gloves. I didn't wear special clothes, but I have put them to wash right after I was done.
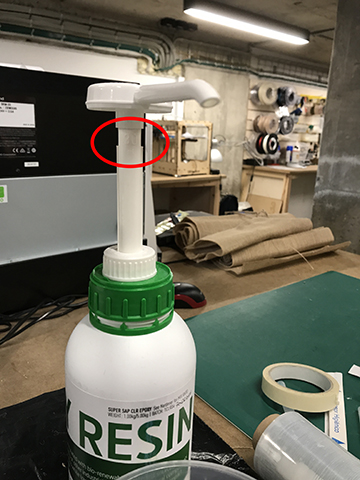
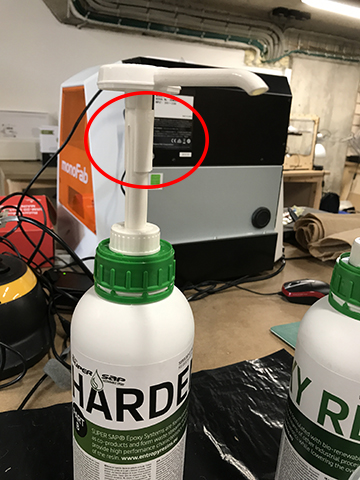
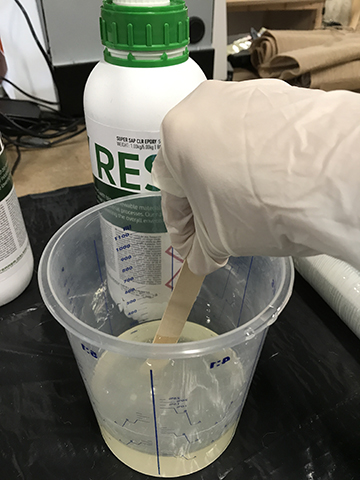
It was very easy to hve the right ratio between the resin and the hardener. The resin we had in the lab came with special pumps and accessories. The resin showed it would pump 30ml at a time. The hardner had a removable accessory, that made it pump only 15ml at a time.
So I pushed 3 times on each (90ml of resin to 45ml of hardener) and mixed it with a wood stick. I positioned the first layer of burlap in the mold and used a brush to spread the solution. I realized that 135ml was the perfect quantity to cover a single layer of burlap. So I repeated this process 2 more times, doing a total of 3 layers of burlap.
When I was done, I covered the whole mold in plastic foil.

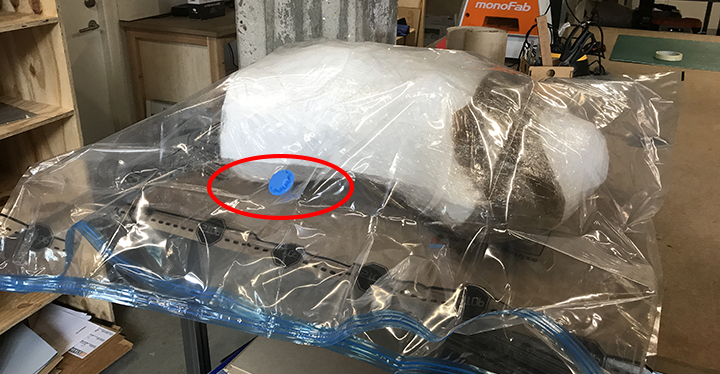
I set the mold inside the biggest vacuum bag we had in the lab, and closed it well. Then, I opened the valve, connected the shopvac, and let it remove the air until I could see it was not extracting an more. I then put the valve back.
I disposed of all materials used: cup, stick, brush, gloves, garbage bag, etc. and and left until the next day. Before leaving, I could notice that the area where I applied the resin was considerably warm.
NOTE: I have now idea how many pairs of gloves I used in the entire process!!!!!
The final result
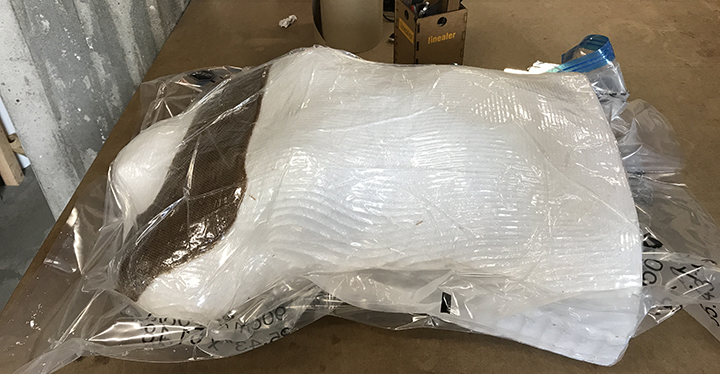
When I arrived the next morning, I put on some gloves and eye protection and inspected the result. I removef the mould from the vacuum bag by simply opening the bag with my hands. Then I removed all the plastic foil with the help of a scissor.
The composite was quite rigid. I tried it and it fitted perfectly my body shape.
As Neil suggested in class, I hit the composite a couple of times and hard and it proved to be quite strong!
Files
All files regarding the 3d mould can be found in the end of week 7.
To download the files regarding Material Safety Data Sheet and Technical Data Sheet, see below (right click with the mouse and chose “save as”).
SUPER_SAP_CCR_MSDT and SUPER_SAP_CCR_TDS
