
Until 15 Mar 2017
Computer-Controlled Machining
CNC!!
Contents
- Design + 3D Model something big
- V carve for CNC mill
- Mill something big
- Make something big
- 7th The Fab Academy meeting
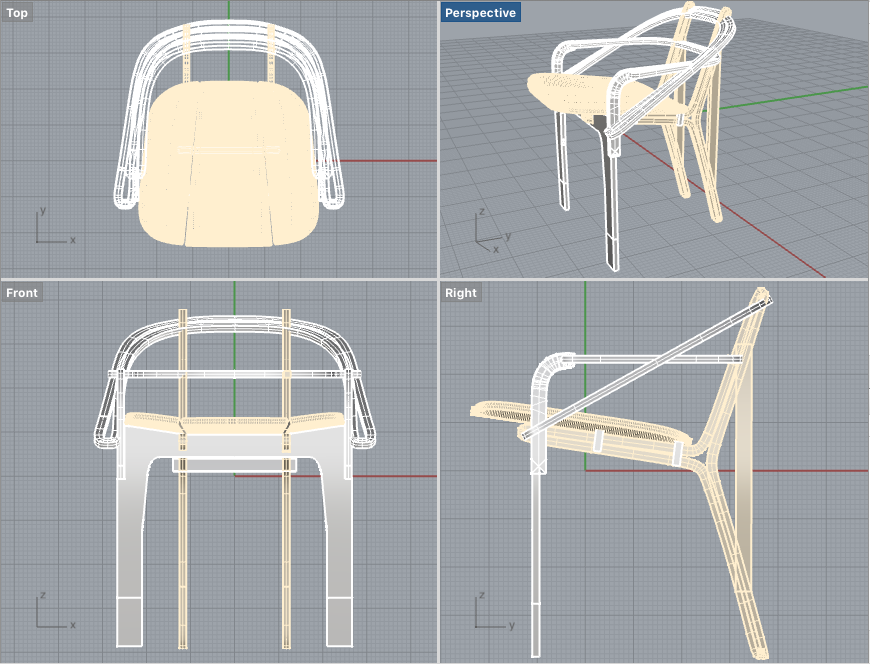
Design + 3D Model something big
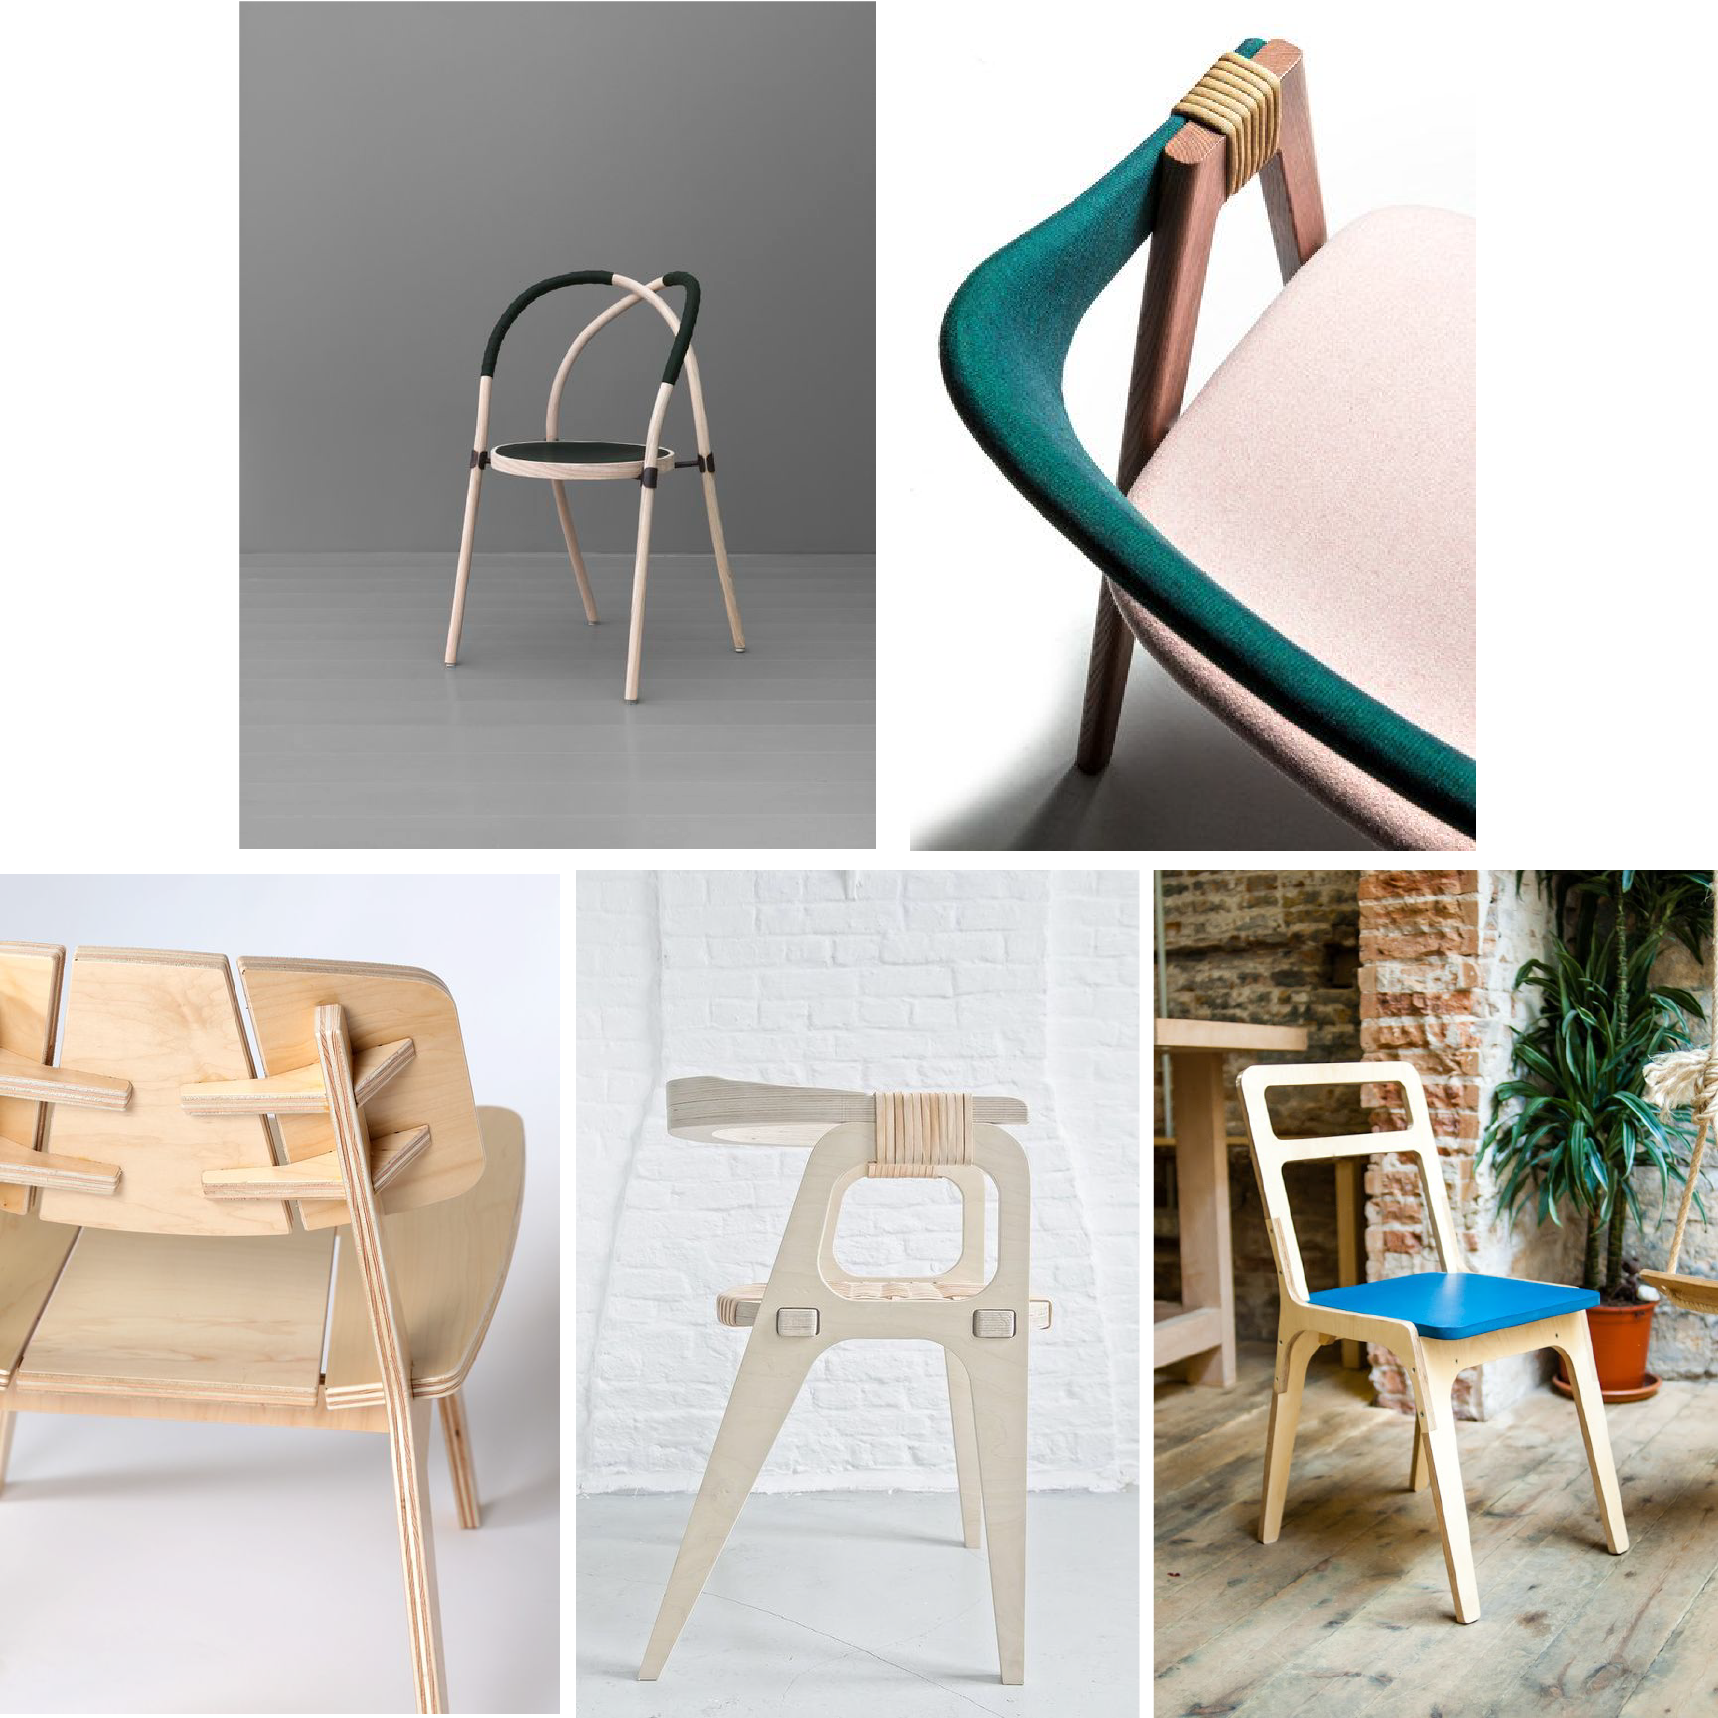
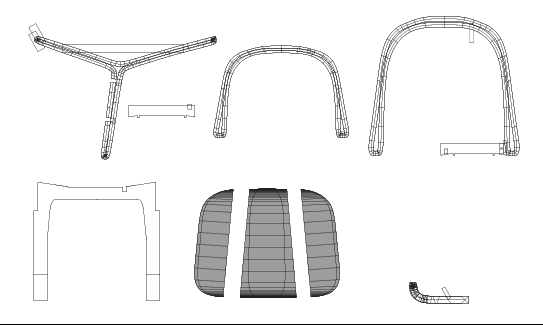
Some reference chairs.
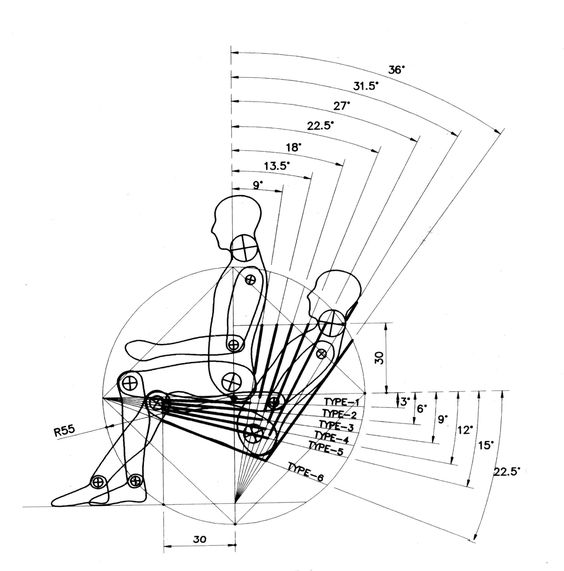
For comfort, I used 18 degree by 9 degree angle.
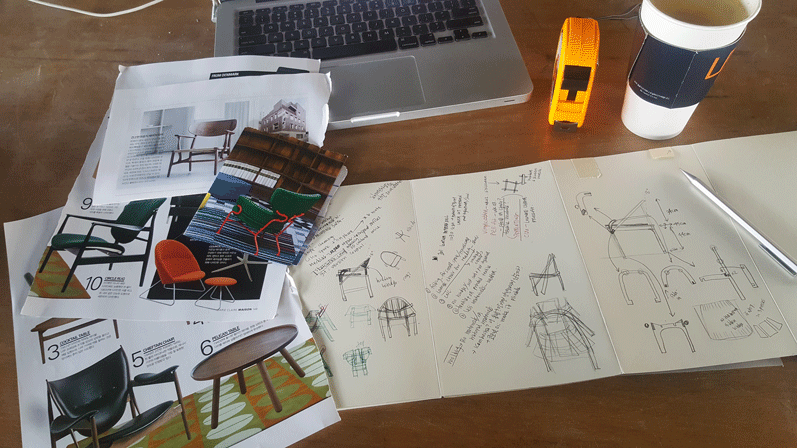
First I used pencil and paper to design.
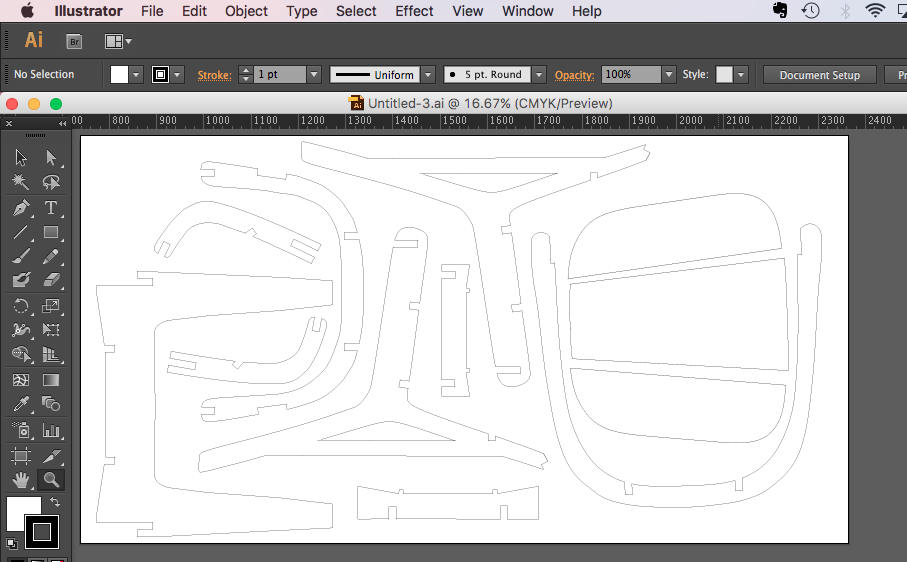
One big mistake I had without knowing at this point is that I exported Rhino file into .dxf and used in Illustrator. Anyway. I fixed some errors and deal with polylines.
I made 2 laser cut prototypes. First prototype, I wasn't happy with the fit
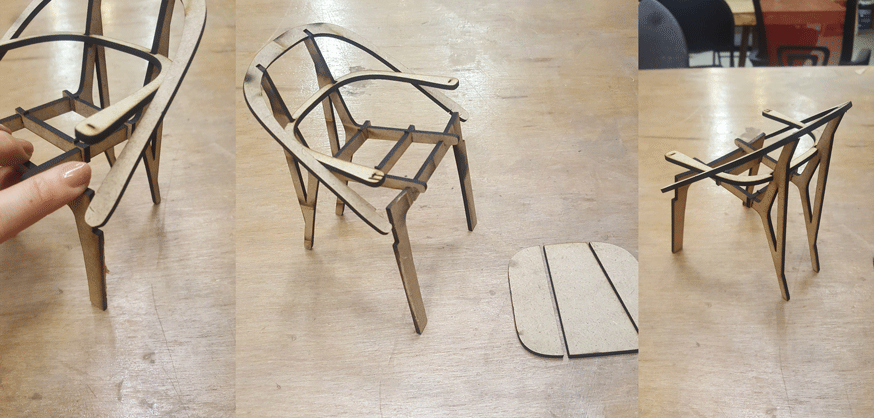
Second, it was better.
I still found some errors.
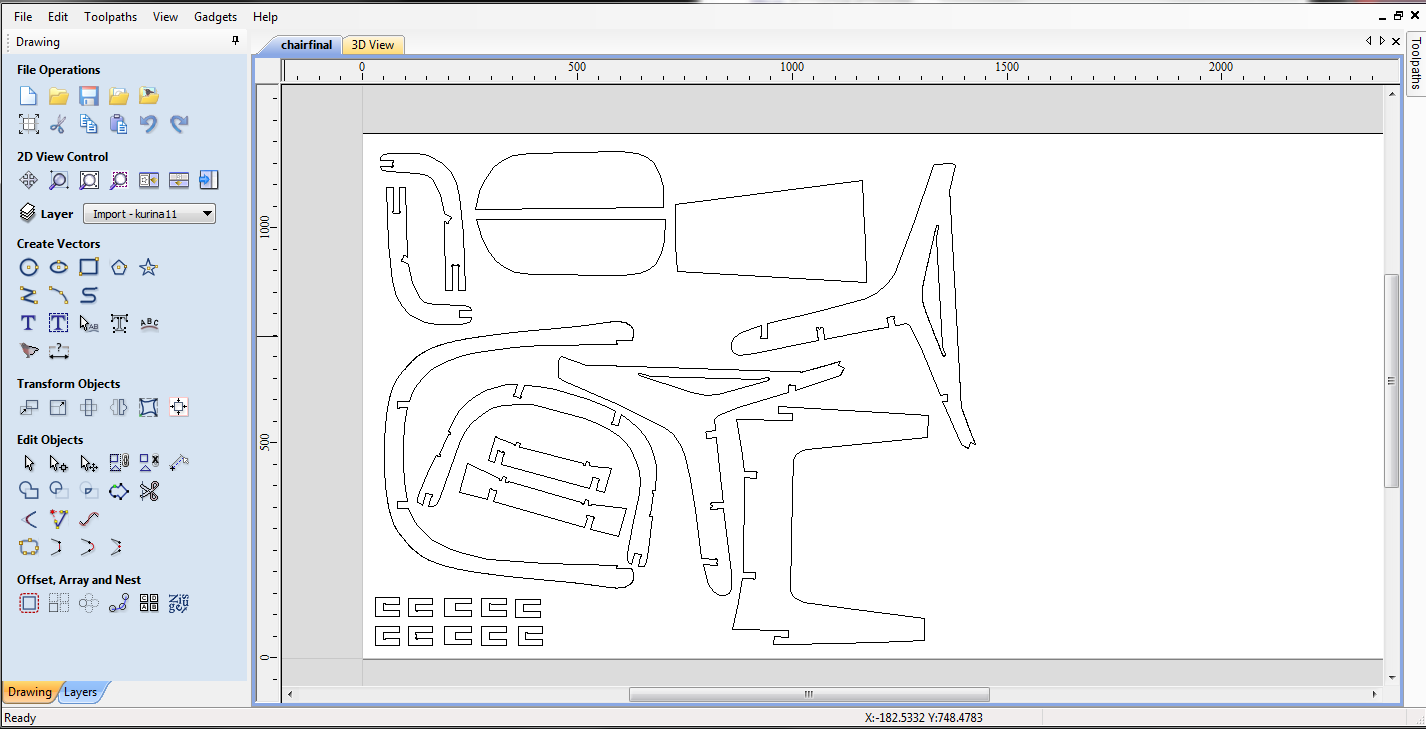
V carve for CNC mill
Import the files in .dxf, .pdf or .ai. and place the pieces on the screen. To move the parts, click once and click again.
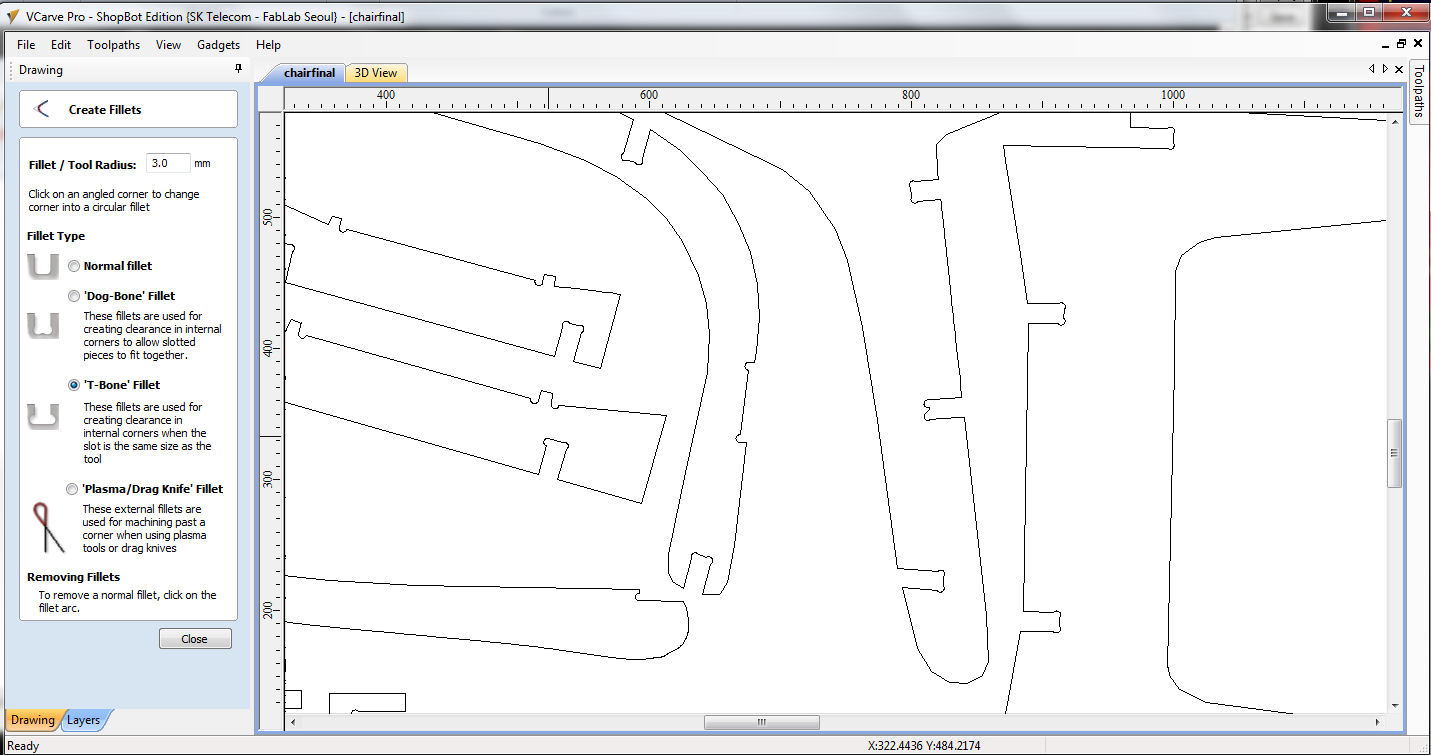
Create Fillets
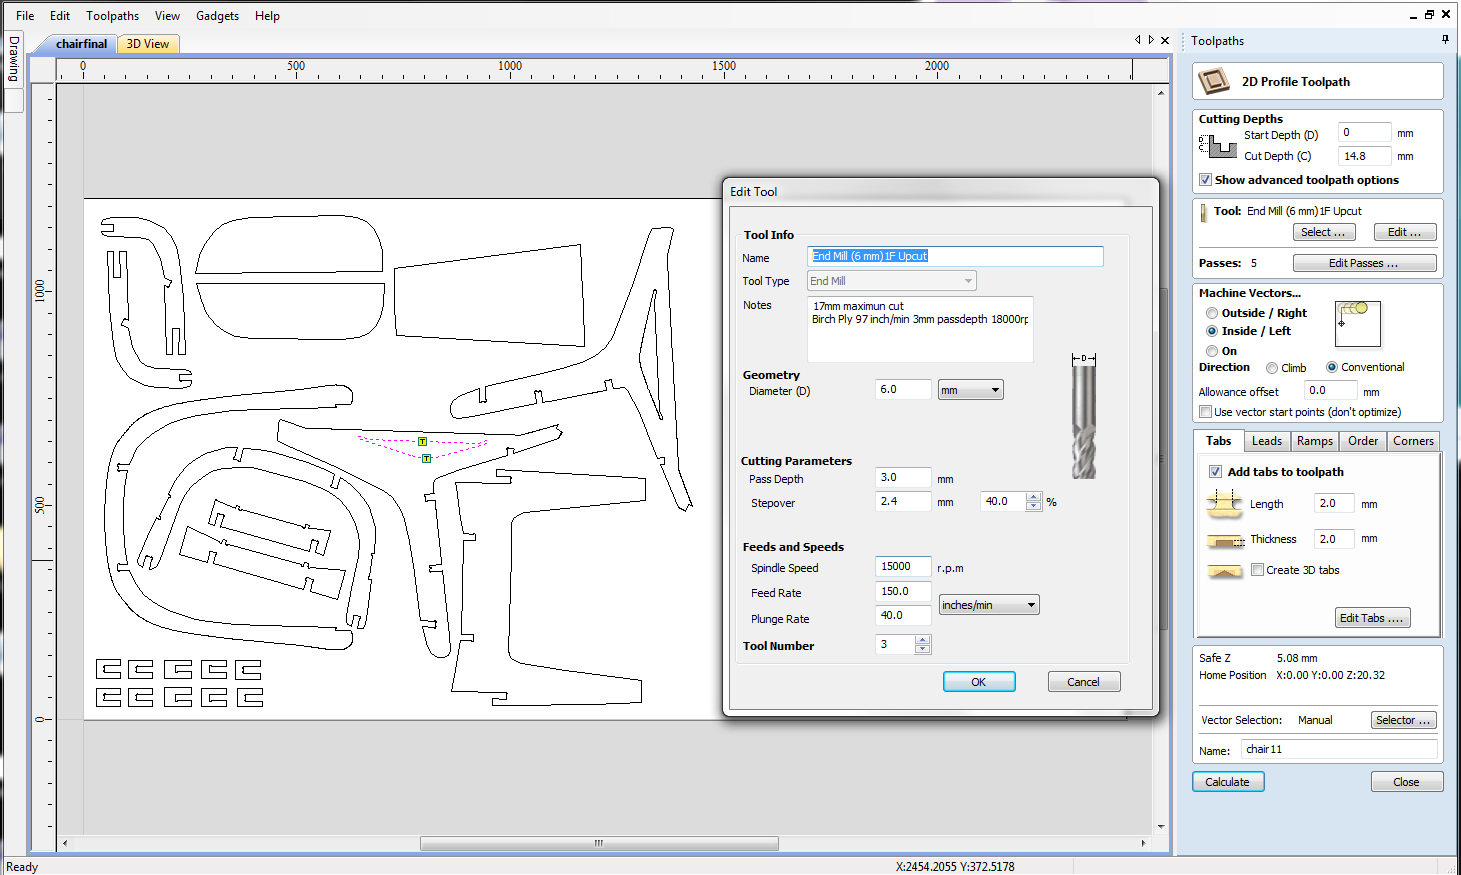
Setting Toolpath
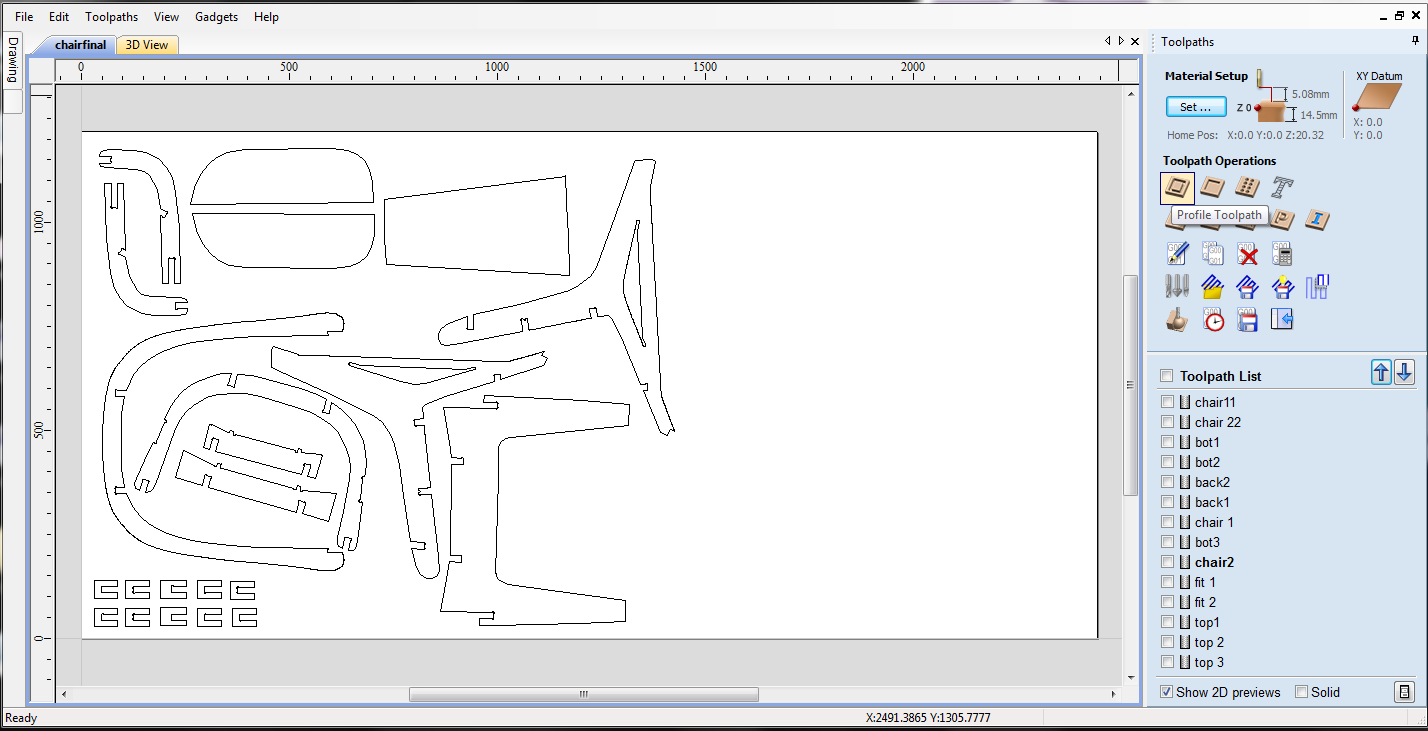
Set up the values. Start depth, endmill settings(spindle speed, feed rate), and machine vectors, adding tabs, and ramps.
GOLDEN RULE
Chip load(amount of chip that we create): ~0.001-0.010”= feed rate(inches per minute) / (RPM x number of flutes)
Cut depth: ~ tool diameter/2
Step over: ~ tool diameter/2
After moving the parts, recalculate all toolpath.
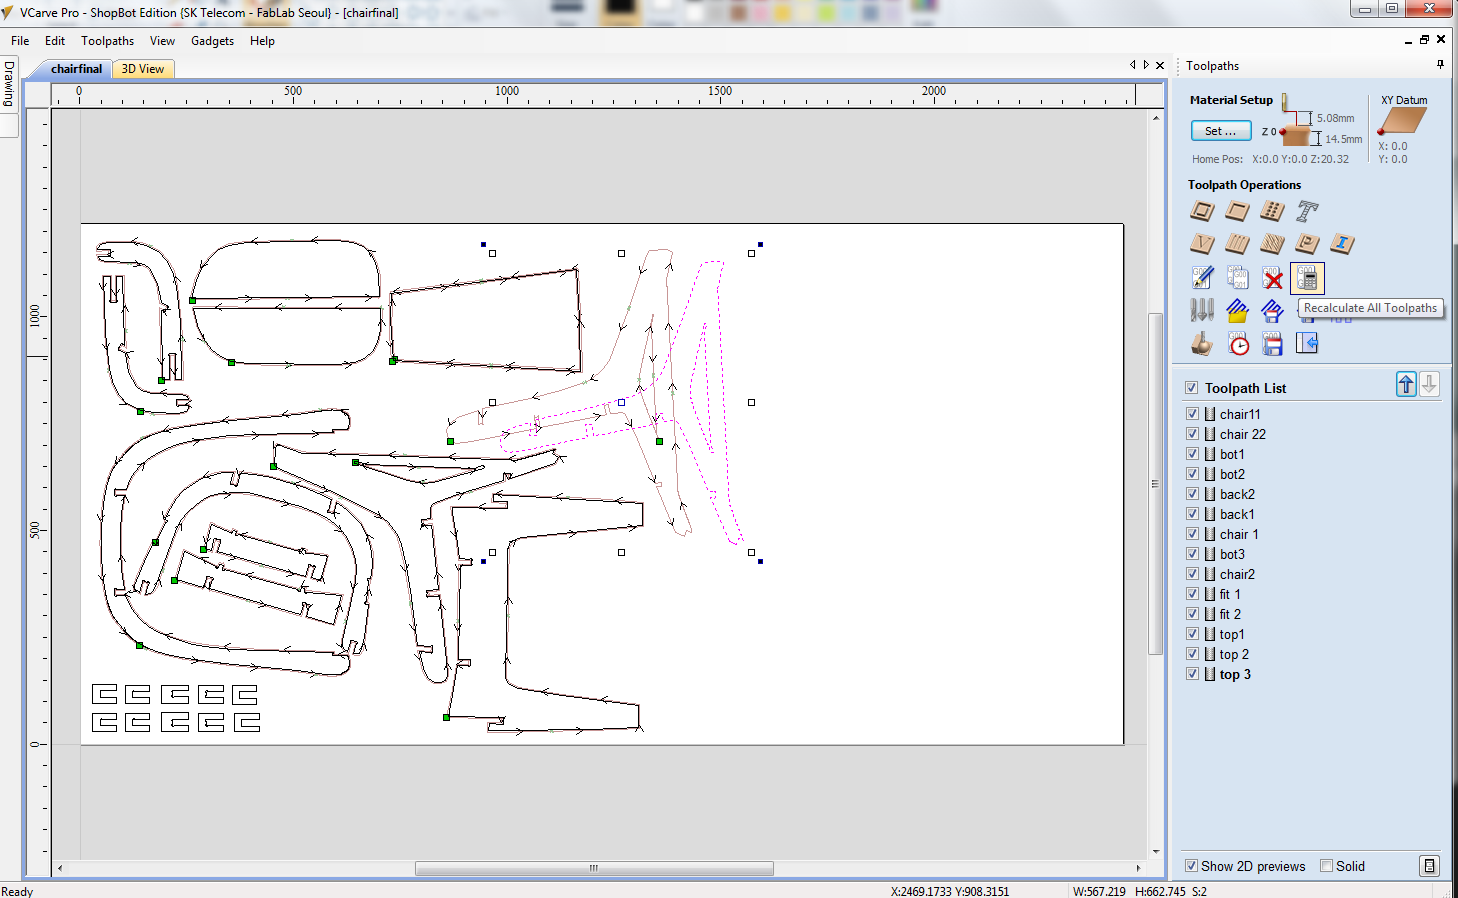
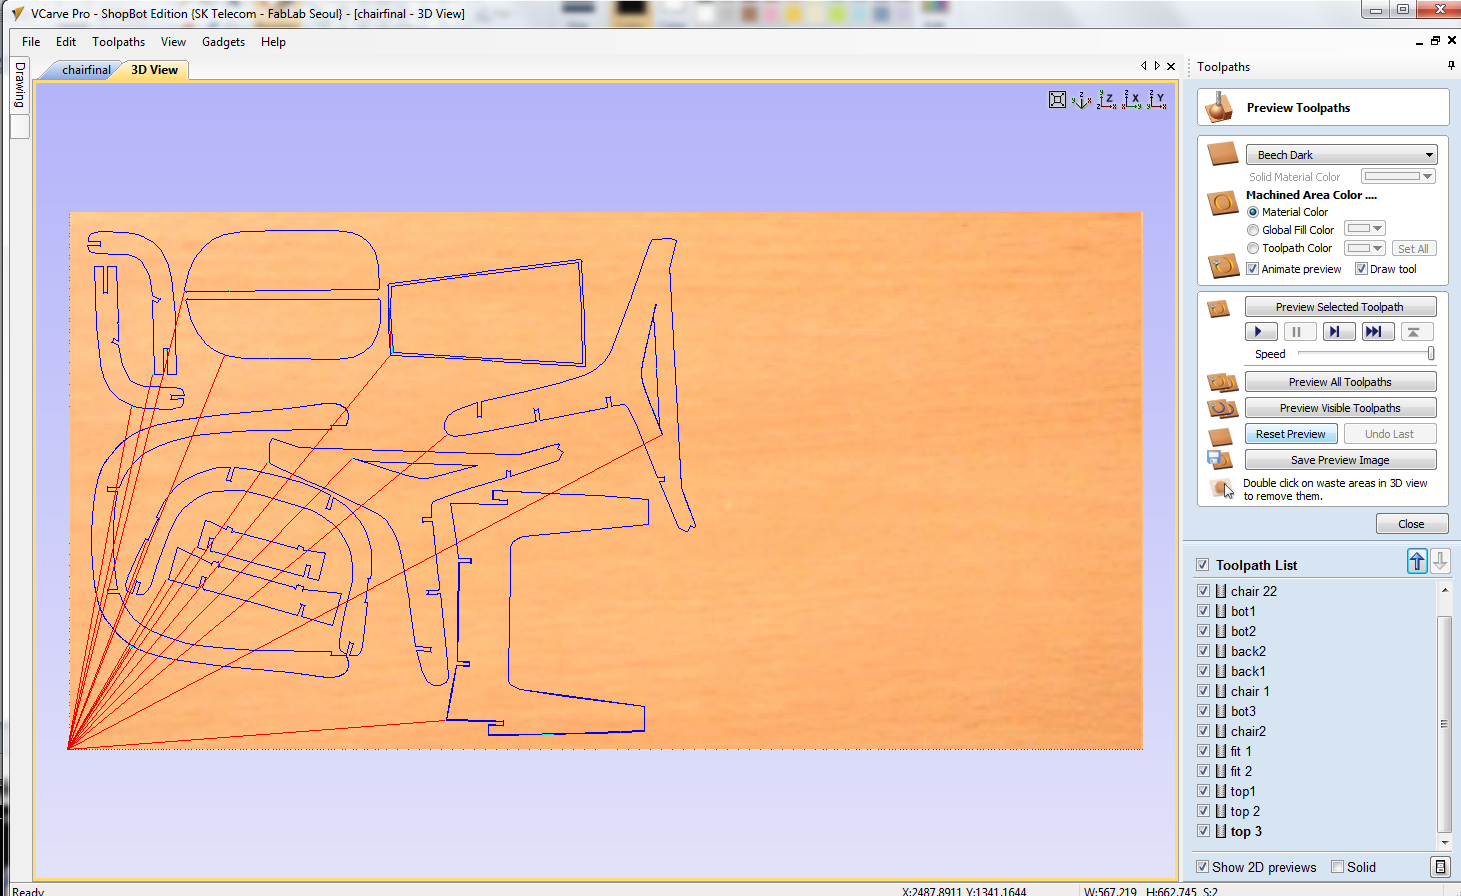
Always nice to see the toolpath preview to prevent any mistakes of cutting too close, loosing tabs or etc.
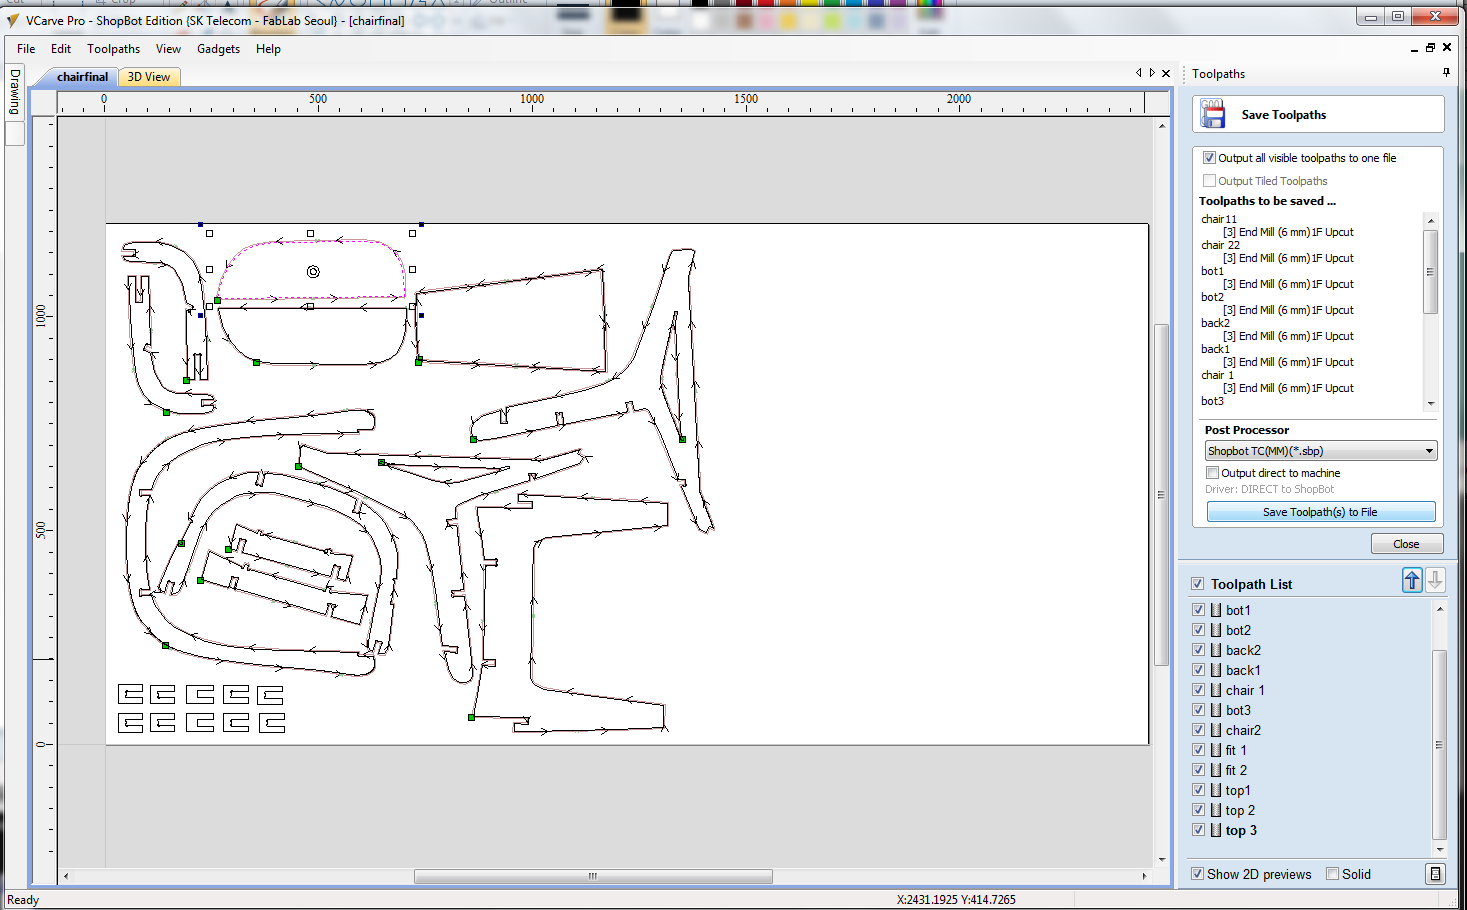
Save the toolpath to file
Mill something big
link to Fablab Equipment Shopbot CNC 96-48 PRS ALPHA
CNC Computer Numerical Control
CAD Computer Aided Design
CAM Computer Aided Machining
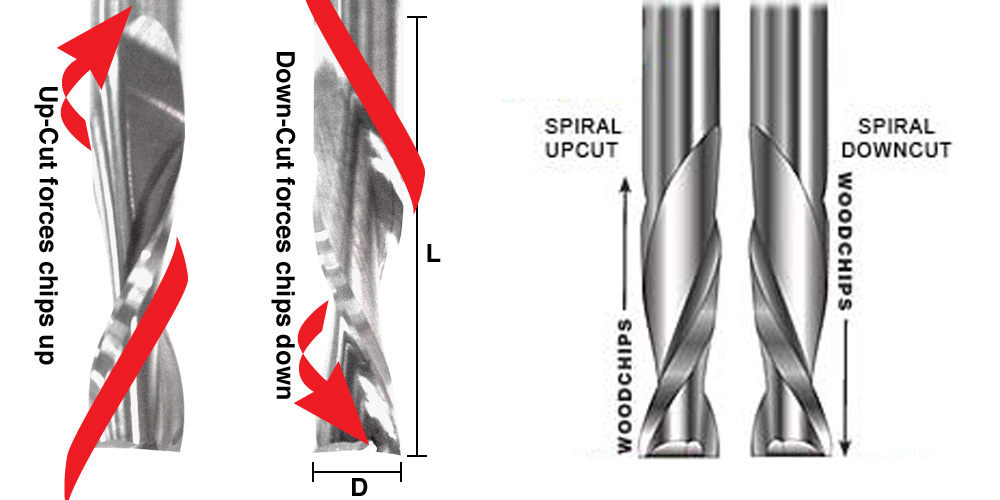
Drill goes vertical and mill goes horizontal. Mill is much heavier. End mills are made with made HSS(high speed Steel) and Carbide. Mill coating- TiN, TiCN, TiAIN, AlTiN, Diamond. (YOU CANNOT CUT the material with same material coated end-mill.) The shopbot only rotates in clock direction. Up cut pushes everything up. It is great for metal and strong things. Upcuts might lift up the material. Down cut pushes chip up. pushes down so it better holds the materials, slower, bottom edges of the materials craked. Overall tool length should include shank+ cut length. Flute is the cutting part and shape of the end mill. More flute is more delicate needs to works faster. For this mill homework, I've used 6mm upcut mill.
* Dont cut holes with down cut = FIRE
(Reference image from Google)
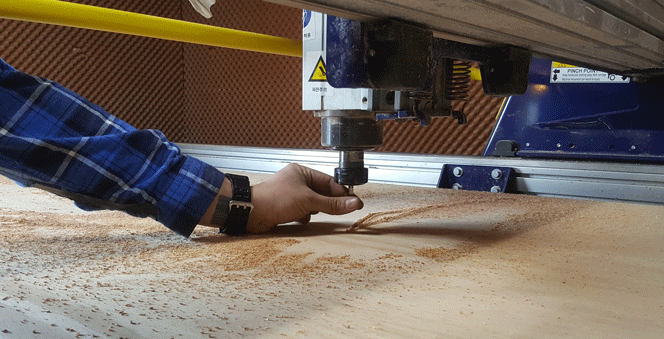
We need to warm-up the machine before using! cuts < c5 spindle warmup routine.
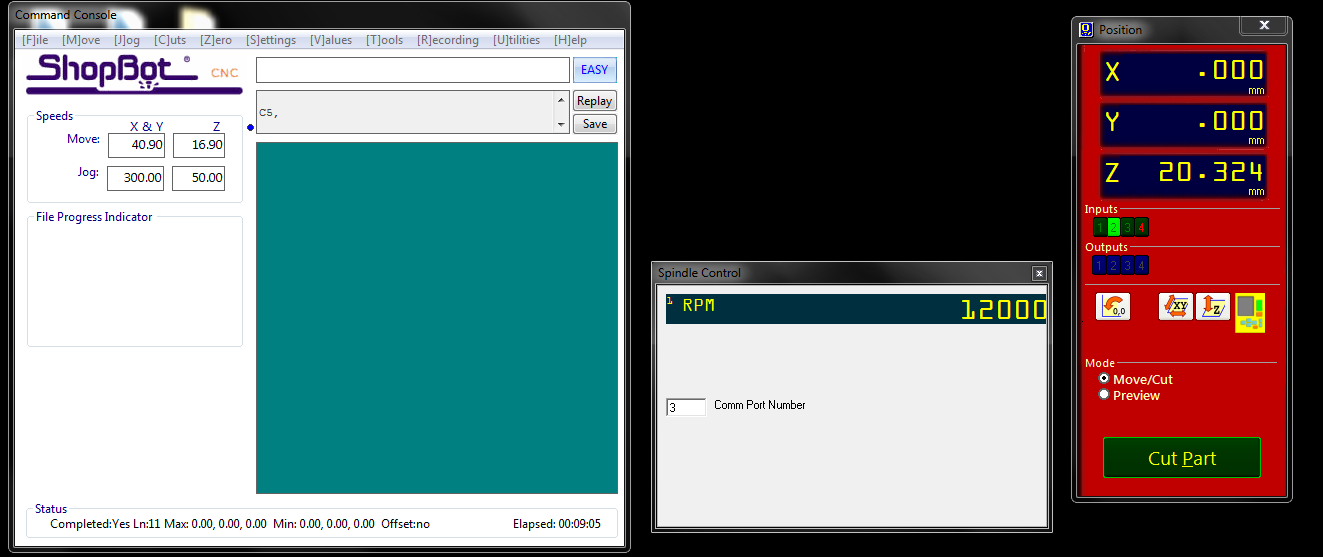
Alway make sure that when we are printing, have shopbot command console, spindle control, and position open on screen.
Setting up XYZ!
Make sure when you set X and Y value that you base your value at the middle of the end-mill not the edge. First set up the X value with controller and Zero< zero[x] axis to set as origin. Repeat the process to fix Y axis than Y.
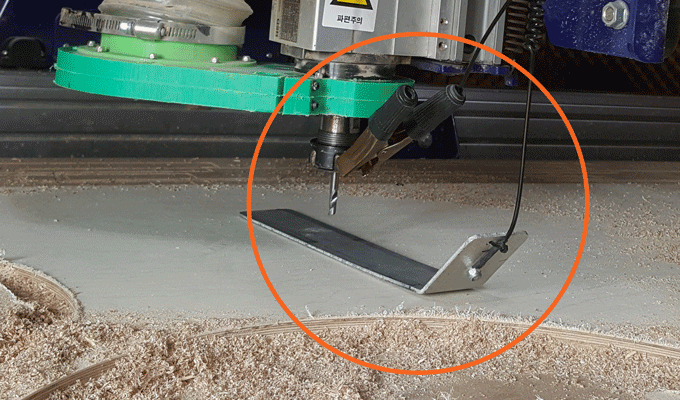
Z has unique way to set. We need the clamp and metal plate. Put the metal plate at the bottom of the end-mill and clamp nearby the endmill. Than select to measure the Z value through the software. Make sure that you put those back where it belongs after measureing the values.
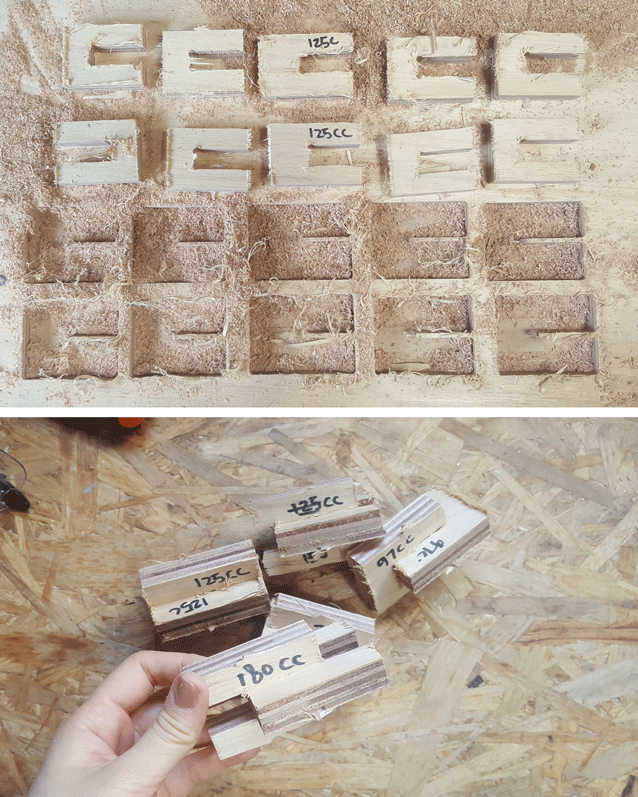
Testing to finding the right spindle speed + feed Rate.
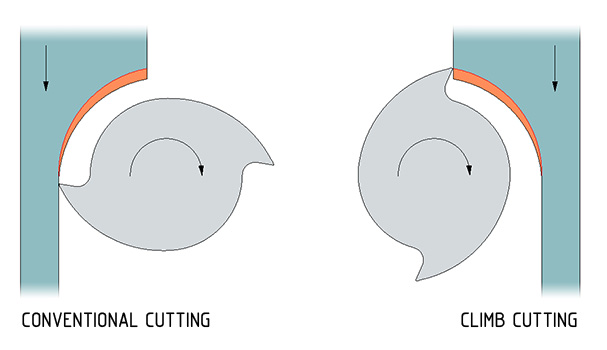
For testing, I tried climb + convensional, 75, 97, 125, 150, 180 feed rate and 18000 RPM.
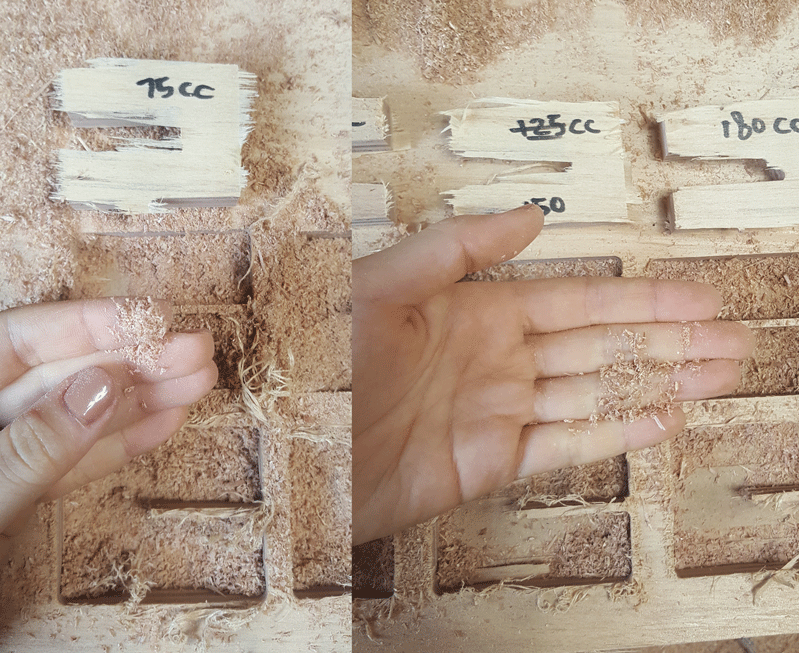
Depending on the smoothness and chip, we were able to find the right values for this shopbot CNC mill. If chip became a dust, it means it's recutting, so we need more feed rate. As a result we found that 125 feed rate convensional cut was the smoothest and sharpest and 14.8mm fit nicely.
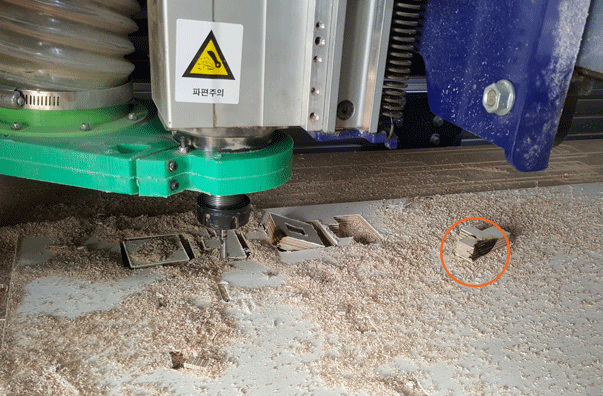
Error: The tab for this test cut was too thin, so it came out and end-up causing smoke!
PANIC BUTTONs: You can hit the space bar on the computer to pause or use mouse. At this time, when I saw the smoke I panic and didn't even think about these options. Instead, I pushed the red button on the shopbot. It just shut down the CNC within less than 2 second. I almost lost the settings, but thankfully it was still vaild when we reopened the shopbot 3 software.
After getting the numbers for the CNC mill, we did the finger test to find if the endmill is over heating. Start printing the file, but stop about 1~2 min after milling. One hint is to stop when the mill is cutting, not when it's still traveling/on the air. If the endmill is too hot, it might just burn the endmill. It will shorten endmill's lifespan. *** ONLY AFTER THE MACHINE STOP COMPLETELY.
After finger test, we realized that the endmill was too HOT, so we reduced the 18000 RPM to 15000 RPM and 125 feed rate to 150 feed rate. The reason why the endmill is getting to hot is because there weren't enough chip load to cool the endmill.
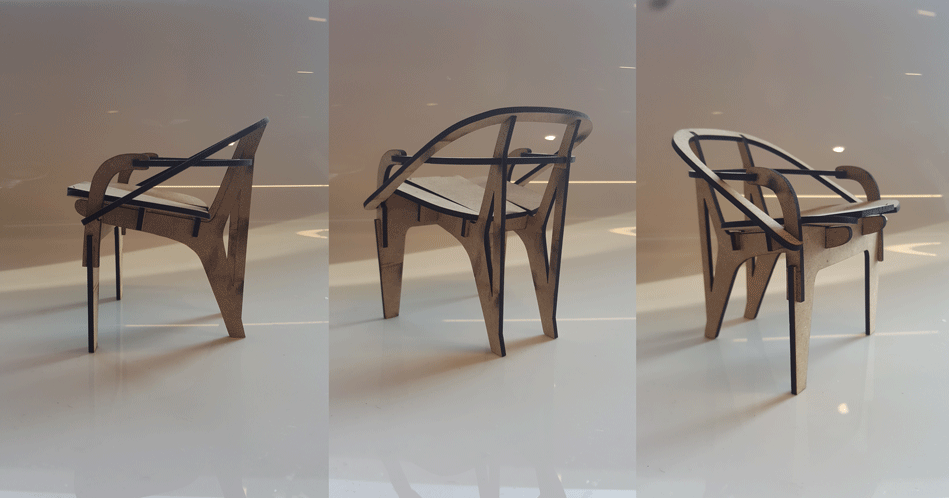
Milled pieces for the chair
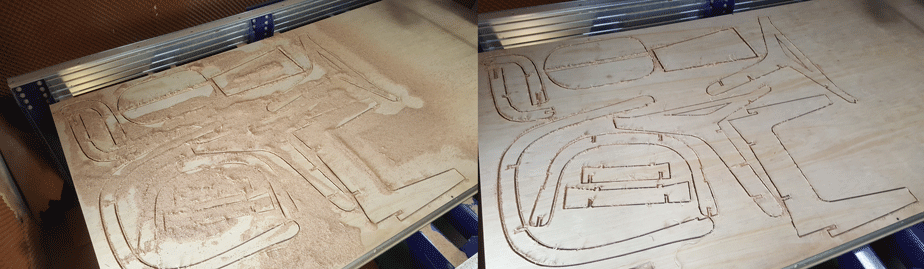
After milling, I realized that the endmill didn't go through the wood. My first mistake was that I didn't measure my plywood in different direction. I only did one side and it was 14.5mm. As a result, I had to mill .8mm deeper to have the right result. When CNC finish milling, vaccume first, make the parts out, and unscrew to remove the leftover wood.
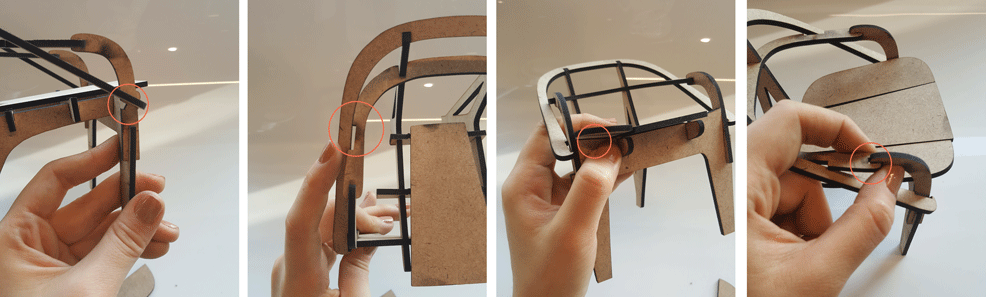
Make something big
DONE!

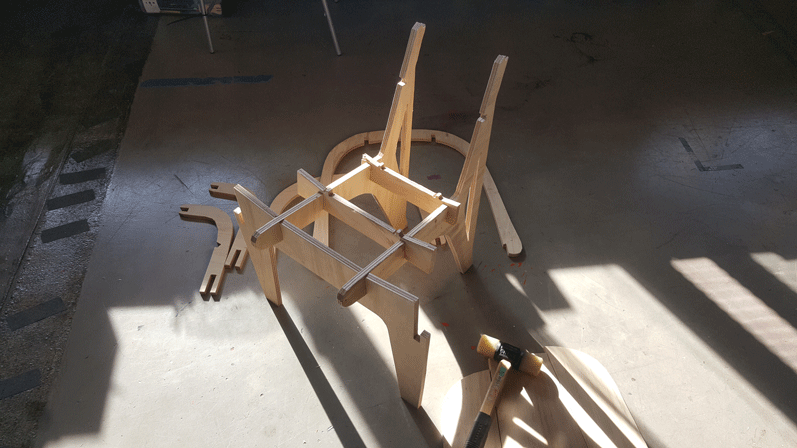
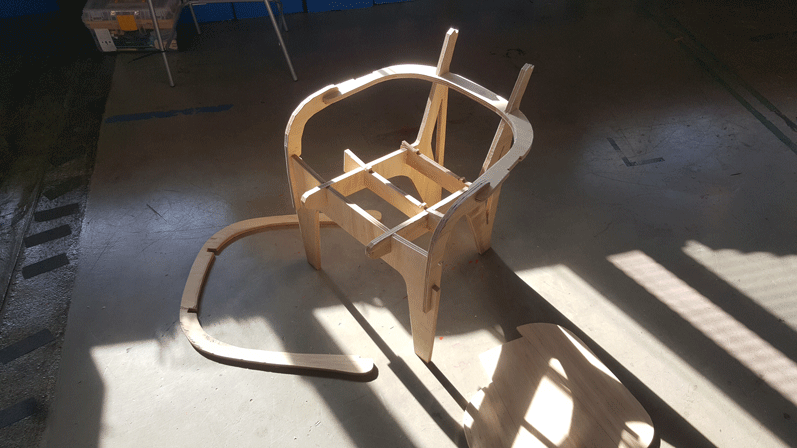

I still have some problems with joints but overall it was successful!
7th Meeting:
Computer-Controlled Machining March 8, 2017 11pm~2am(Seoul)
Homework
o - Explained how you made your files for machining
o - Shown how you made something BIG (setting up the machine, testing joints etc)
o - Described problems and how you fixed them
o - Included your design files and ‘hero shot’ photos of final object