Week 8: Embedded Programming
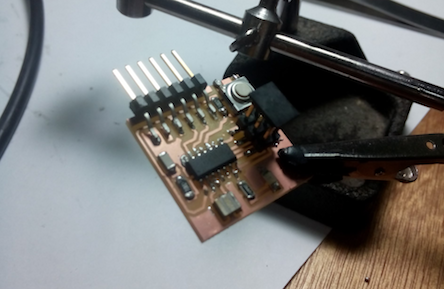
This week the assignment was to program the Hello World board we made in Week 6 (Electronics Design) and program it to do things in a programming language. The assignment also involved reading the data sheet for the ATTiny44 Microcontroller made by Atmel. The ATTiny44 is the chip on the Hello World Board.
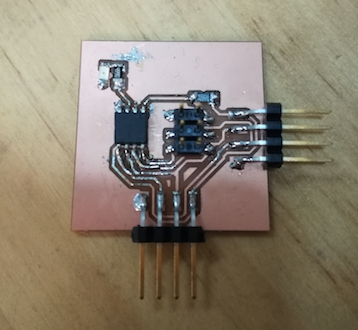
I used the board made in electronics design week.
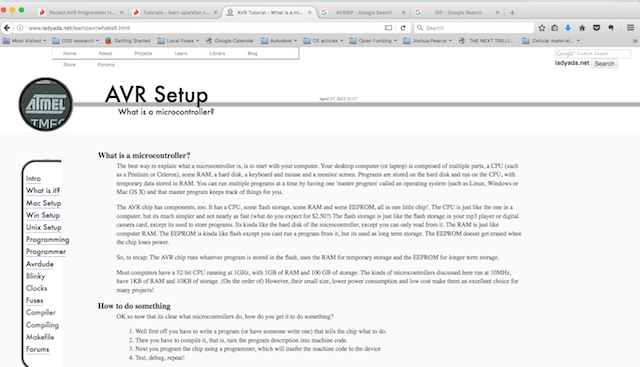
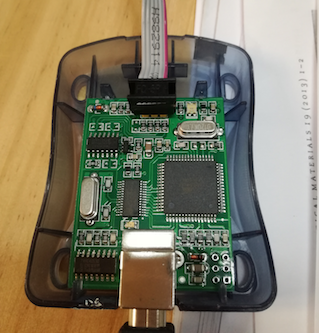
I had to look up a lot of the technical terms being used this week. I found this tutorial very useful in explaining the basics and going through step by step in plain language. Step one was understanding what an AVR microcontroller is. Basically, it has a Central Processing Unit for running programs, a flash memory to store programs, RAM for temporary storage and EEPROM for longterm storage. The assignment is to take a program, compile it into the 0101 machine language that the computer understands (called a .hex file for micro controllers), and using a programmer, transfer the program onto the Hello World board ATTiny44 chip to do things like blink an LED. It was useful to take off the lid of the AVRISP to demystify its function.
To begin, everything went smoothly. I downloaded the
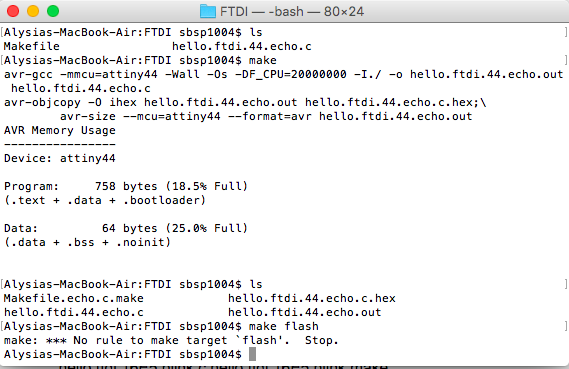
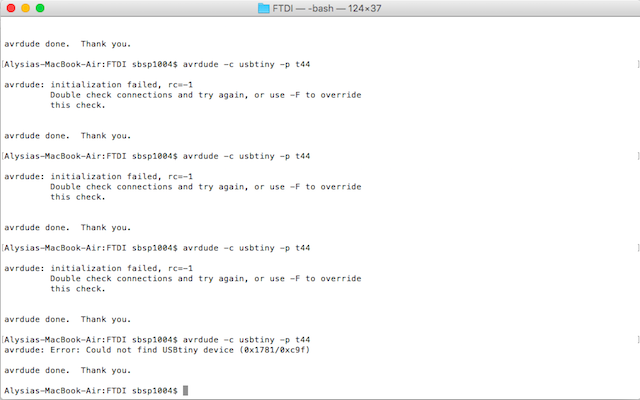
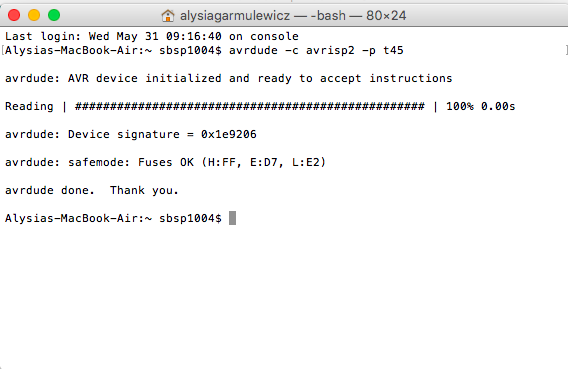
We ran the make file that compelled the c file into a .hex file. We then connected the Hello World Board via the AVRISP programmer to my computer, and used AVRDude to transfer the hex file onto the ATTiny44. The problem was, it didn’t work. We kept getting these error messages.
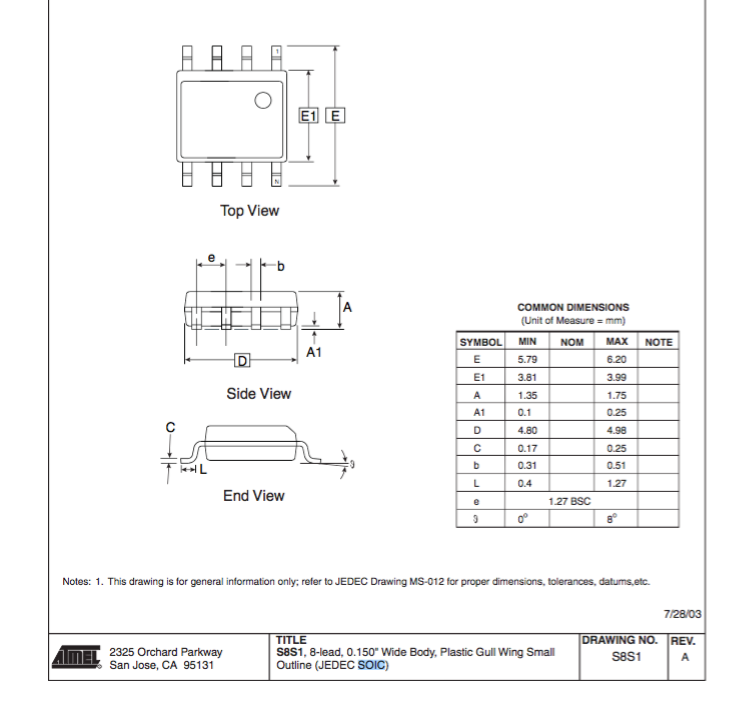
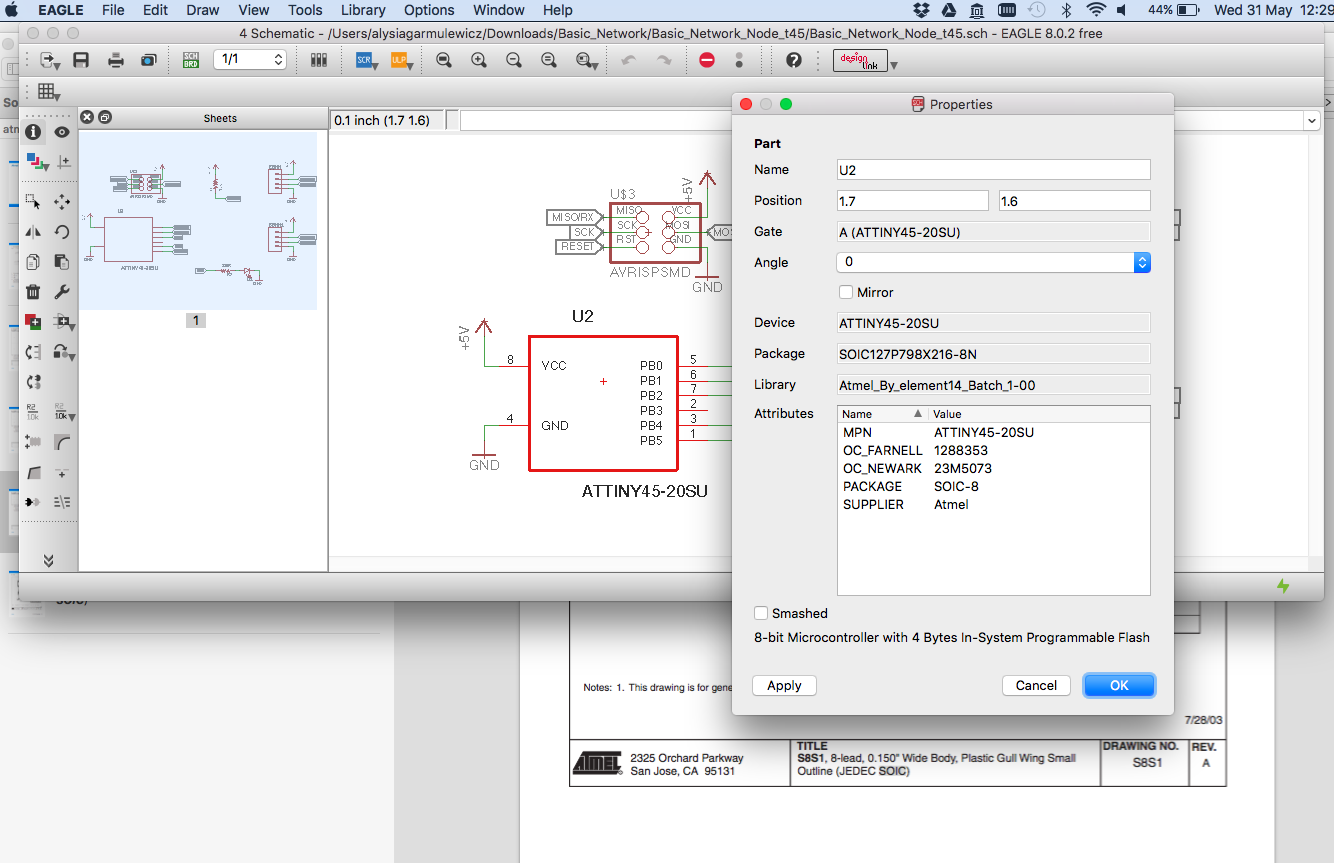
I had to finish this week's assignment with another board fabricated in the lab. This board has an ATTiny45 microcontroller. I read the datasheet and noted the following parts:
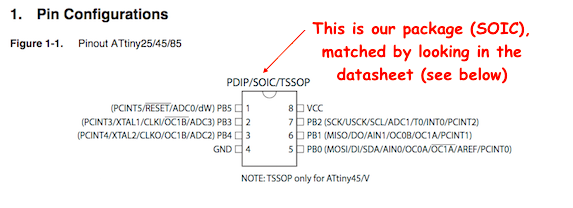
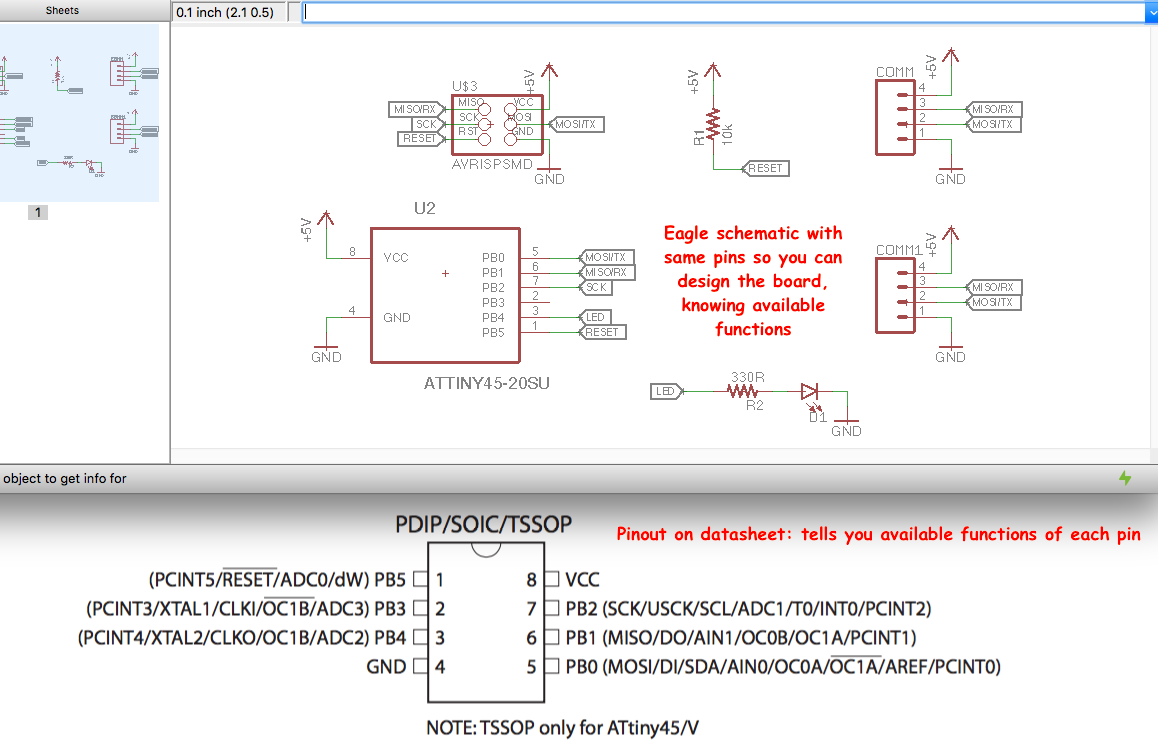

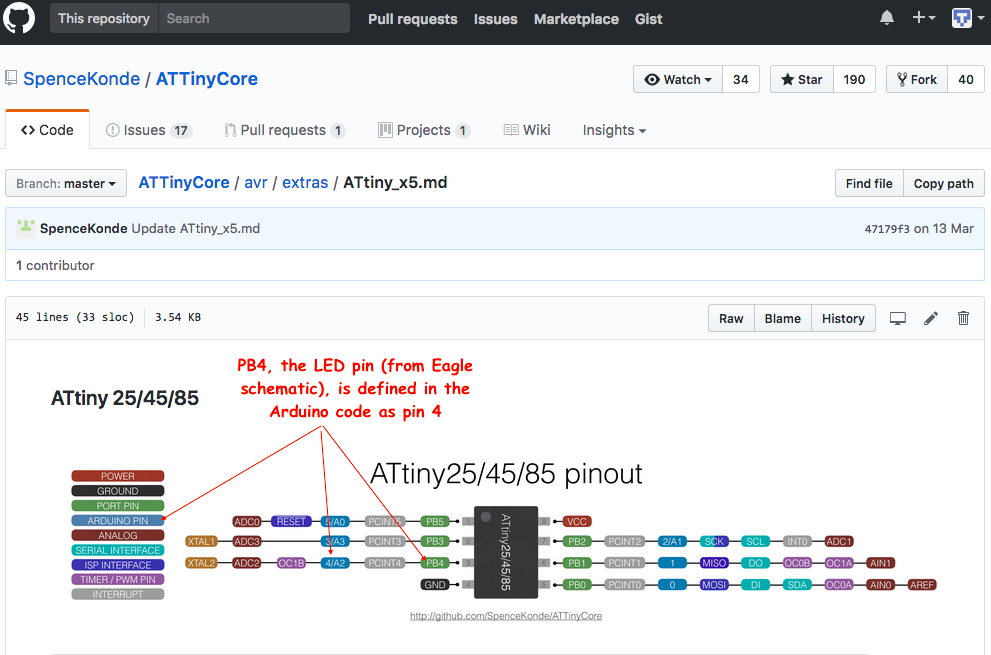
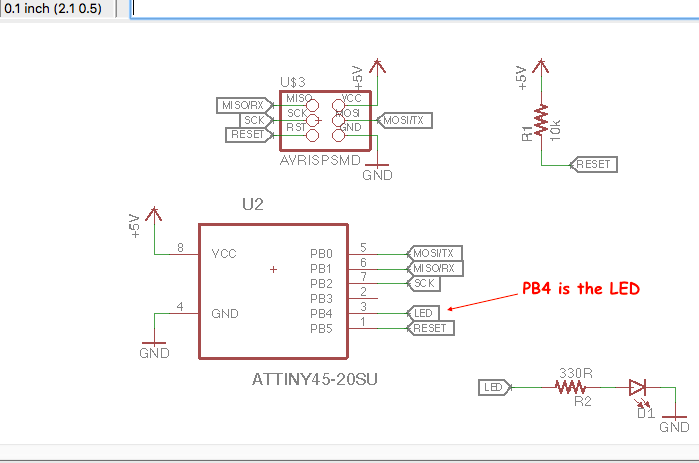
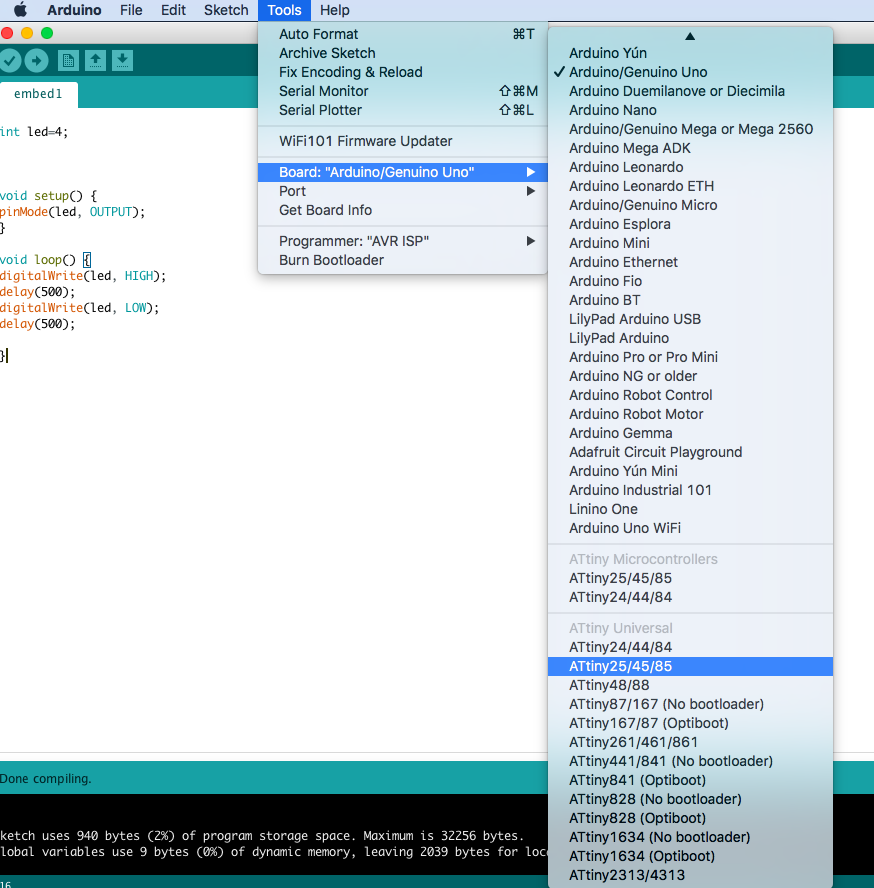
Then came the programming. My aim was simply to blink the LED in different timing patters. This time I used the Arduino programming interface, and in order to do so, I had to download the ATtiny Core for Arduino from Git Hub. Below you can see the pinout given on the ATtiny Arduino core. In this case you can see pin 4 is defined in the Arduino code as the LED pin. This is important, as in the code you need to first define what pin you want to talk to.
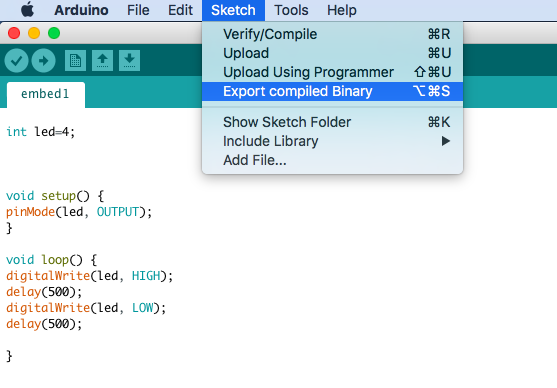
First I had to connect the avr dude and compiled the hex file with no problems! I exported the binary hex code (see below for the file).
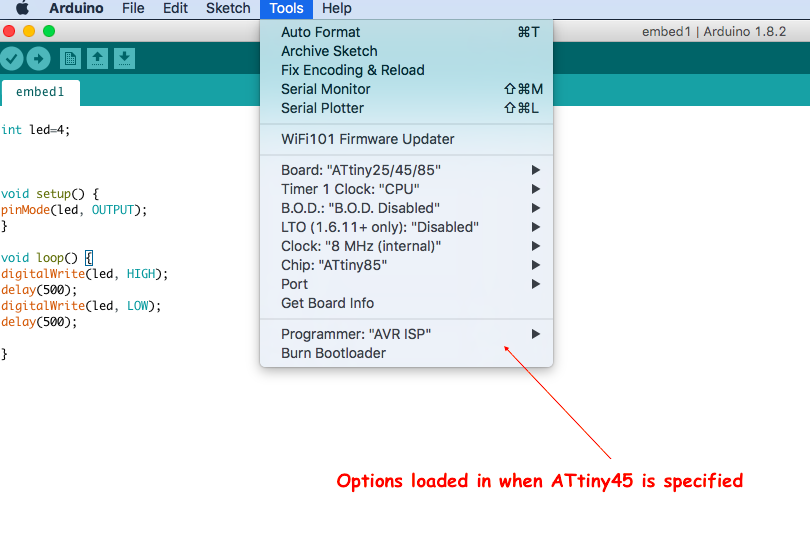
I then specified loaded the following settings:
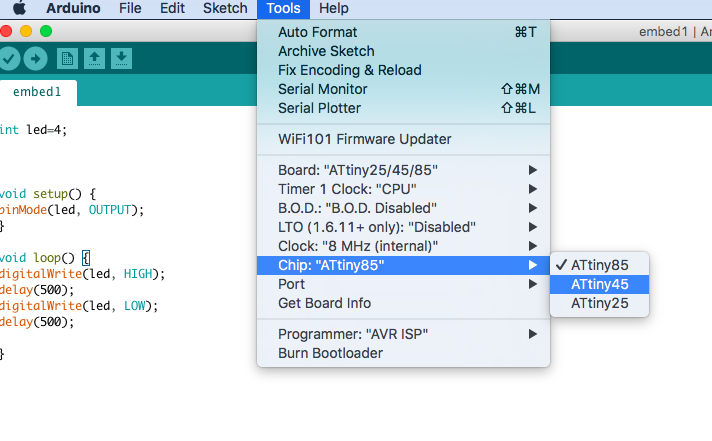
Finally I wrote the code, first defining pin 4 as the LED, then setting up the LED as the OUTPUT, and finally writing a loop where the LED was told to go on (HIGH), and then off (LOW), after specified time intervales (given in miliseconds) Below is a video where you can see how changes in the code (changing the time interval between on/off, results in the LED blinking)
Here are the files from this week:
Second board files and programming codeHere are the files from this week:
Arduino code hex file Eagle board Eagle board schematic Board png