Assignment 14

composites
Again there was a possibility to make one part to my final project as a weekly assignment so I decided to make legs for my camera rail by composite design. This way I get light and sturdy legs to my camera rail.
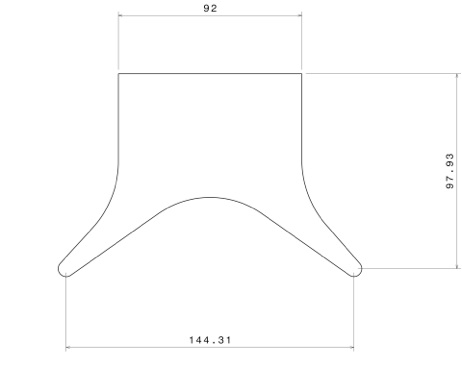
Sketch of my camera rail leg with dimensions.
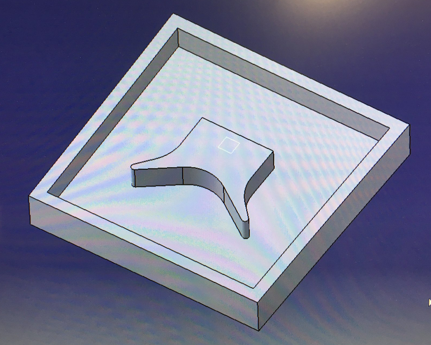
3D model of mold
HSM milling routes simulation
Process making a composite went next steps.
I made milling routes with Inventor HSM just like I have made earlier to assignment 7 so you can find steps how to make routes from my assignment 7 report.
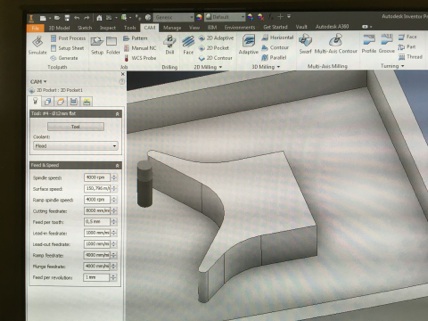
HSM milling tool values
Milling on process

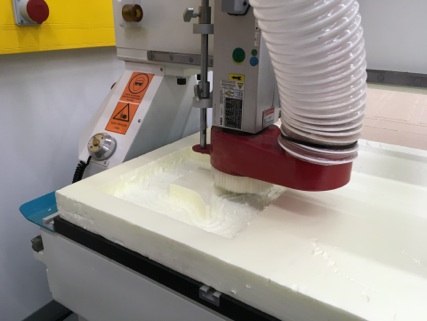
Milled mold
I used 4000 rpm as a spindle speed and 0,5 mm feed per tooth. Tool was 4 teeth 12 mm ball head mill. I lowered cutting feedrate during milling to 80% so it was 7200 mm/min. Surface was quite good but I should have use little higher spindle speed. In our lab router it is impossible to raise spindle speed during process (but it is possible to lower it) so next time I make sure that that I use too high spindle speed in my milling works rather than too small so I can adjust it during process if needed. I attached stock to router table by using router vacuum table. I put stock on the table start vacuum pump and opened vacuum valves so vacuum sucked stock firmly on the router table.

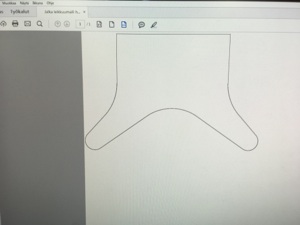

I started by making 5 mm offset model from desired leg outlines. Using offset model I made cutting file for cut leg outlines from twill. I used 5 mm wider cutting model so I can make stiffeners to my camera rail legs. I made offset model in Catia 3D design software and save it to dxf format. Then I opened dxf in Inkscape and delete unwanted lines (Original leg outlines, seen at middle of offset model picture on below).
Offset model 5 mm
Cutting file in pdf format
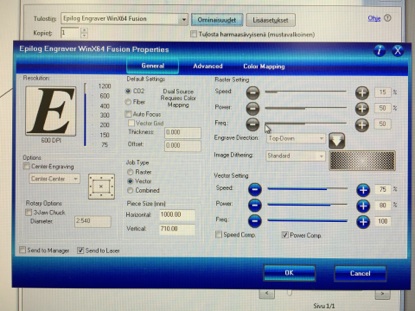
For cutting I used next settings: Speed 75%, Power 80%, Frequency 100%.
Cut settings
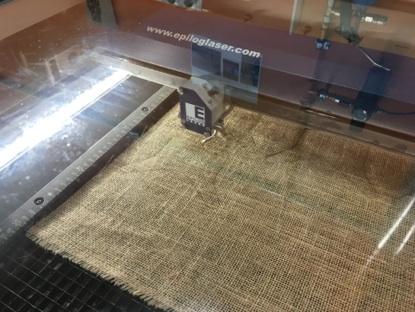
Cutting on process
Cut twill
When mold was made and twills were cut next step was actually making a composite. We use resin and hardener, mold, twills, plastic wrap, cotton sheet, spike roll and vacuum bag. First I mix resin and hardener in can. Mixture was made equal pressing amount of resin canister and hardener canister pumps. Then I covered my mold with plastic wrap and tape it my mold. Then I put first layer of twill on mold/plastic wrap and applied resin/hardener mixture on it. I continued this on every layer and I has 9 layers. First twill and then moisturizing it with resin/hardener. After last layer I took plastic wrapper which was rolled over with spike roll so it has small holes allover for vacuuming composite. Then I put cotton sheet on holed plastic wrapper to absorb extra resin from composite during vacuuming and on cotton sheet I put plastic wrapper without holes. Then I put this sandwich to vacuum bag and using vacuum cleaner to vacuuming it. I read safety and technical data sheets (MSDS & TDS) before making a composite and because my mold was first ready mold so we went whole process through with our Lab FabAcademy members.


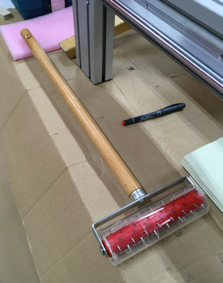
Tools used to make composite
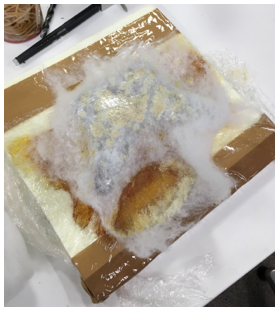
Layers on mold
Cotton sheet on twill layers
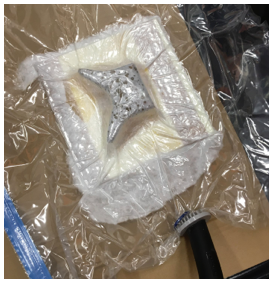
Ready package to vacuuming
Vacuuming composite
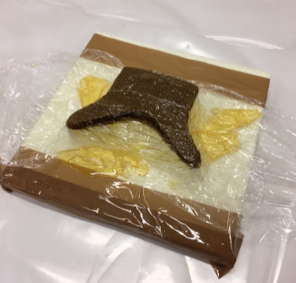
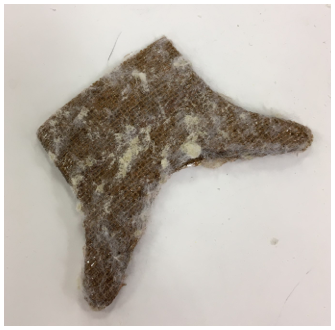
I left composite over night to achieve final hardness and I opened vacuuming bag next morning. Composite was mechanically fine but cotton sheet was attached through plastic wrap to surface of composite so look of leg was not very nice. Also it would have need quite much finishing work by hand so I discard idea to use it on my final project. I tried to remove cotton sheet from my composite leg but when I noticed that quality is not good enough for my final project I quit removing cotton from composite and leave it as seen in picture below.
Cotton sheet attached firmly on leg
Leg removed from vacuum bag

Final composite leg
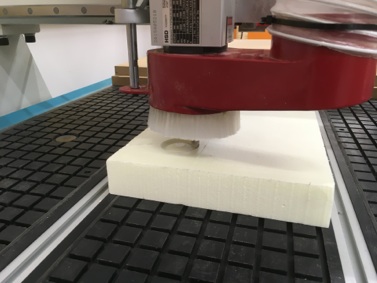
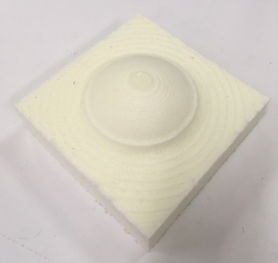
There is also requirement to make a 3D milling with router but like I first planned I don´t need 3D mold for my final project leg. So I decided to make a another 3D mold with router. I made everything like above but shape was different and shown below. I used same milling setting than with leg mold. I milled 3D mold but I haven´t had enough time to make composite by using 3D mold.

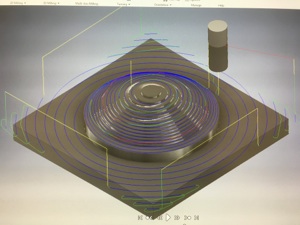

Tool traces in HSM
Milling simulation in HSM
Milling on process
Milled mold
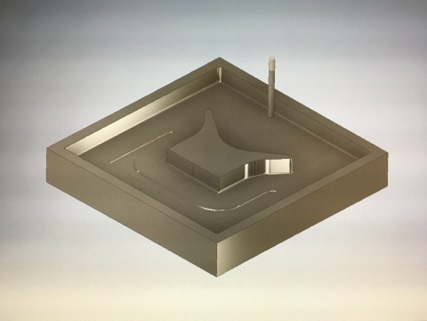
Final 3D mold
It is not the biggest part but it is needed for my final project so I decided to make it anyway. I add stiffeners to its edges for making leg stiffer than just one plane leg. For making those stiffeners I made mold which I can turn composite layer edges on its sides. Once again I start modeling with CATIA and modeled part that I need. Then I made mold by using part and saved it to .stp file for opening it in Inventor and using Inventor HSM CAM for making milling routes to my composite mold.