Procedure:
0. Assignment
1. 3d Scanning Alvaro
2. 3d Printing Alvaro
'Click Here To Go to His Website'
3. Design a 3d Object that cannot be made subtractively.
4. Group's Assignment: My Contribution
4.i. Group's Website
5. Download Files
0. Assignment
Test the design rules for your printer(s) (group's project)
Design and 3D print an object (small, few cm) that could not be made subtractively
3D scan an object (and optionally print it)
LEARNING OUTCOMES
Identify the advantages and limitations of 3D printing and scanning technology
Apply design methods and production processes to show your understanding.
HAVE YOU...
...described what you learned by testing the 3D printers
...shown how you designed and made your object and explained why it could not be made subtractively
...scanned an object
...outlined problems and how you fixed them
...included your design files and ‘hero shot’ photos of the scan and the final object
1. 3D SCANNING ALVARO
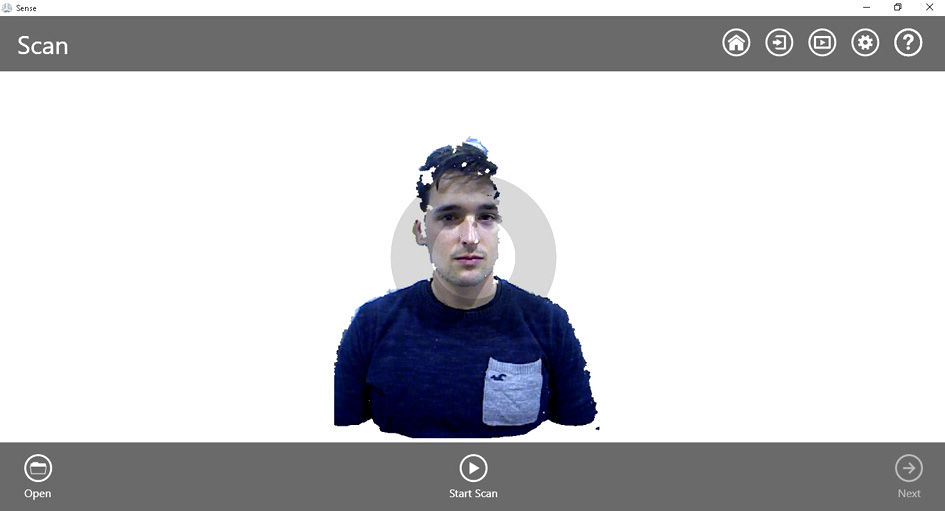
This week's assignment I started with Scanning in 3d. My idea was to scan Alvaro, my colleague, in 3d.
First, I needed to download the software needed. I used 'Sense 3d Scanner'
Process:
1. Make sure the 3d scanner is connected to the software.
2. Select 'Start Scan'
3. Scan carefully the object
4. Once you have finished, 'Save'.
The difficult part came once you press the start button. It is really easy for the machine to get lost. It is important
to make sure the context is all the way referenced while scanning.
Scanning took me 3 scans: a first which I failed, and then two more (the quality of the first one was not the one I was
looking for).
Here are some images during the process:
On the image above, the scan was done in real time, appearing Alvaro while turning the scan around him. The next
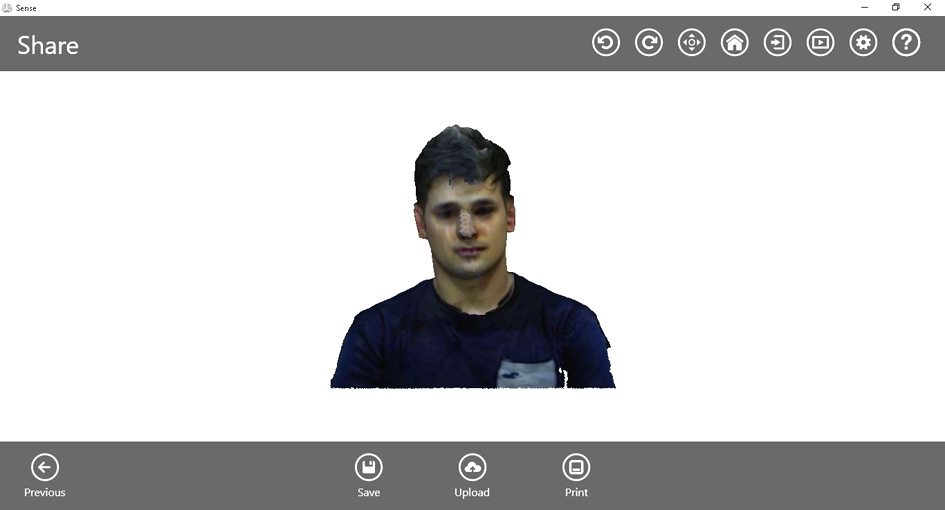
picture is when I finish the scan and the program automatically creates a mesh. Then, save it and import it to Rhino to have a .STL file.
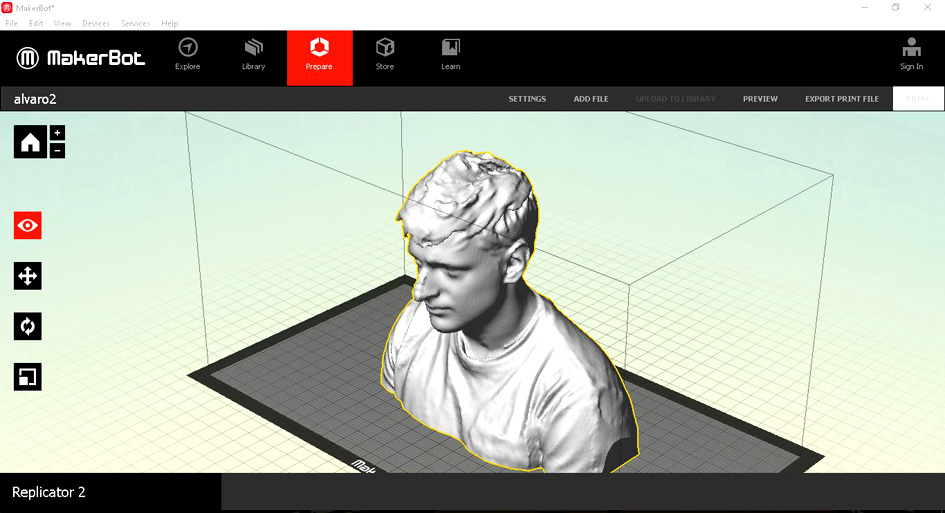
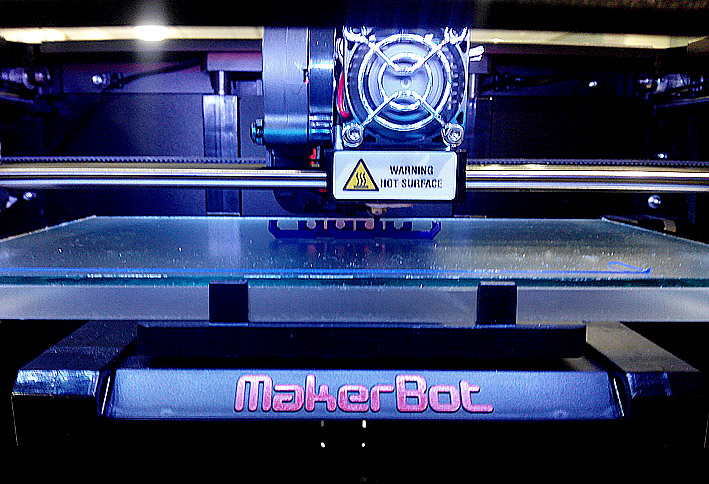
2. 3D PRINTING ALVARO
Importing the file to Makerbot Replicator 2.
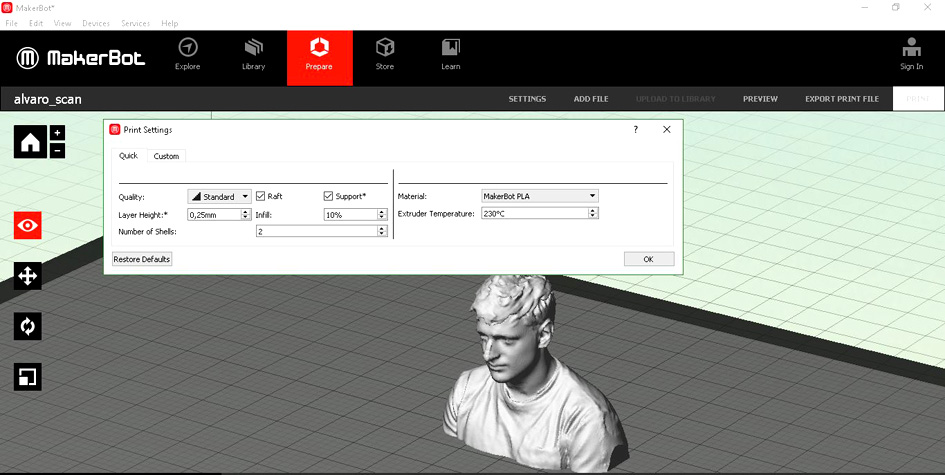
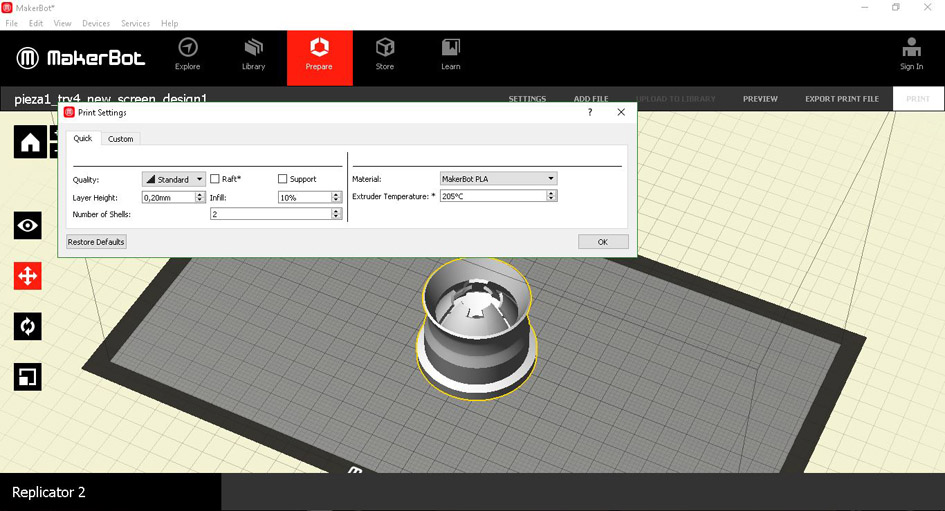
After making Alvaro much smaller, adjusting the printing parameters:
Layer Height: 0.25mm
Number of shells: 2
Raft: YES
Support: YES
Infill: 10%
Material: Makerbot PLA
Extruder Temperature: 230 Degrees Celsius
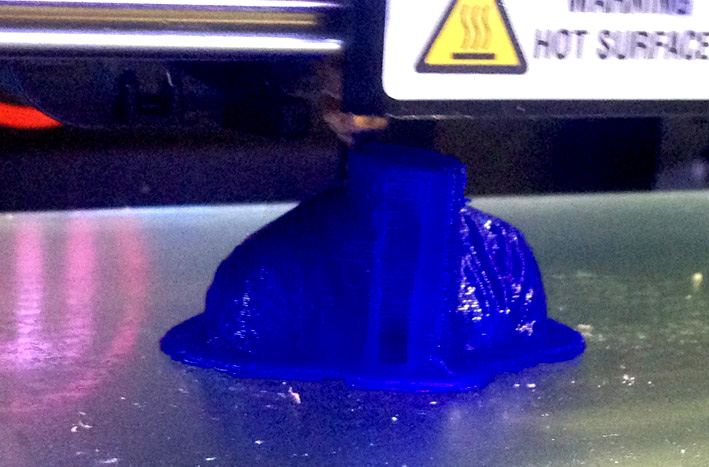
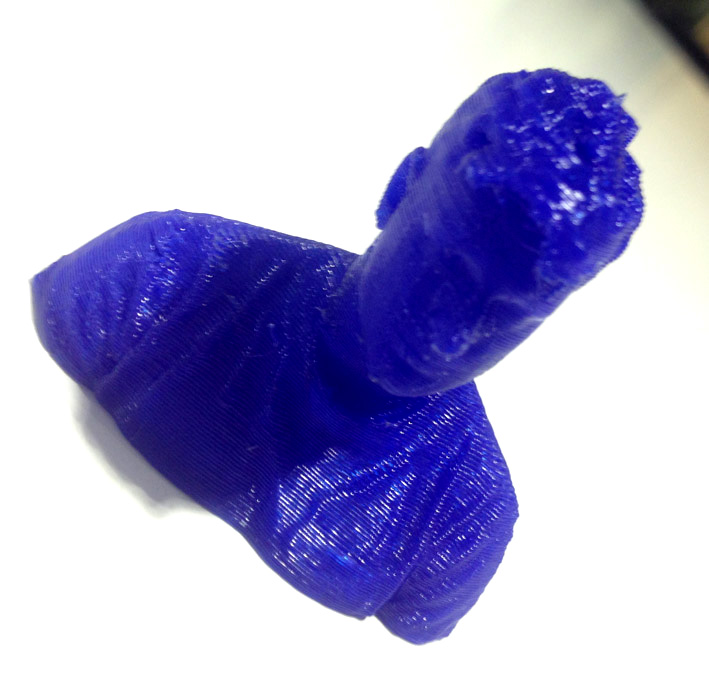
Printing Alvaro
Just finished, with all supports and raft.
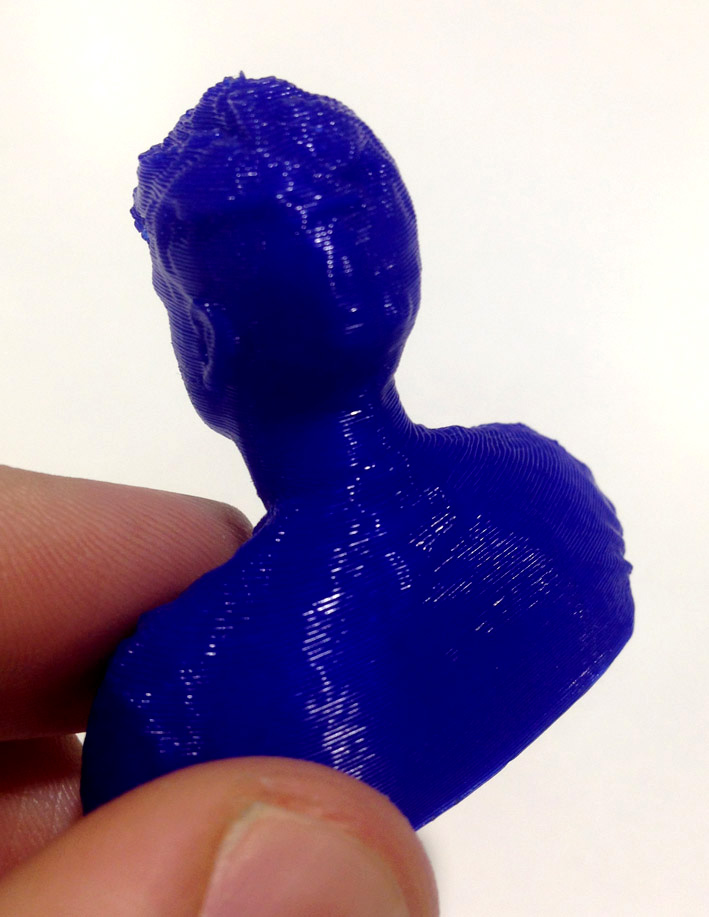
The fidelity the 3d Scanner has is not bad, but it depends on how you have done the scan itself. For example,
scanning Alvaro has been successful as the finished printed object looks alike Alvaro. On the other hand,
when he scanned me, you can tell it is me, but is harder to see.
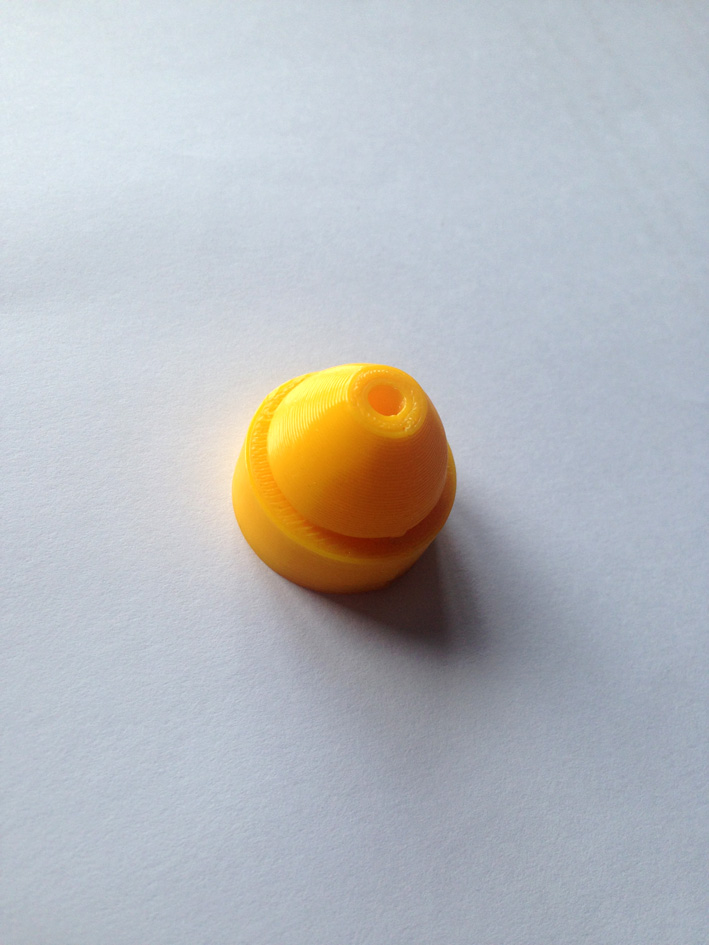
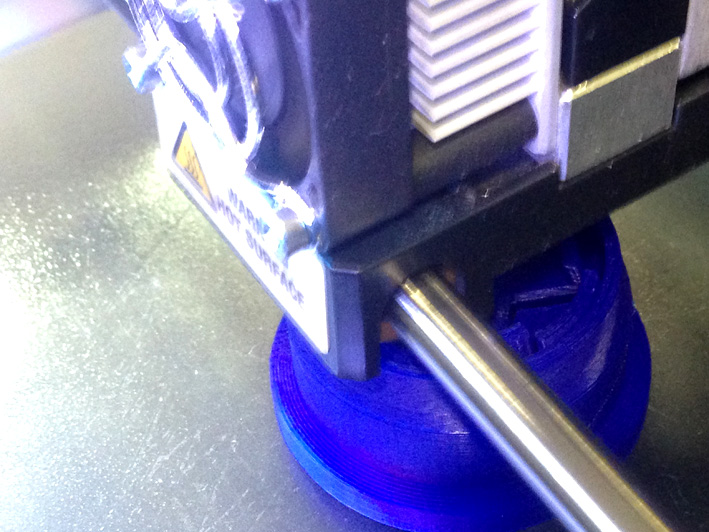
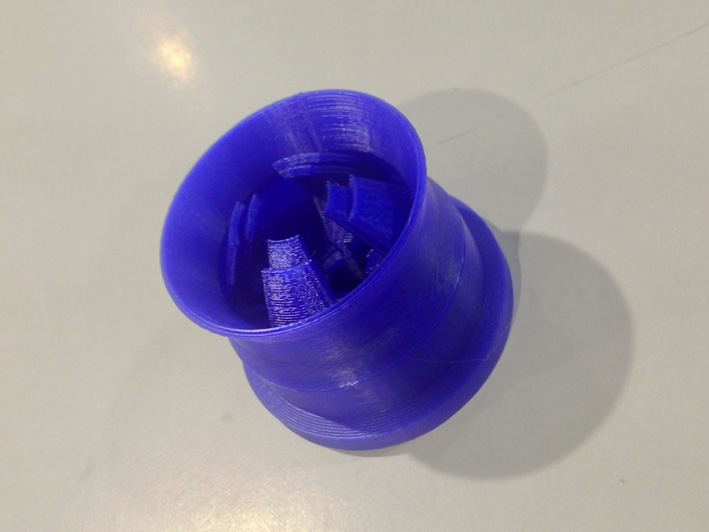
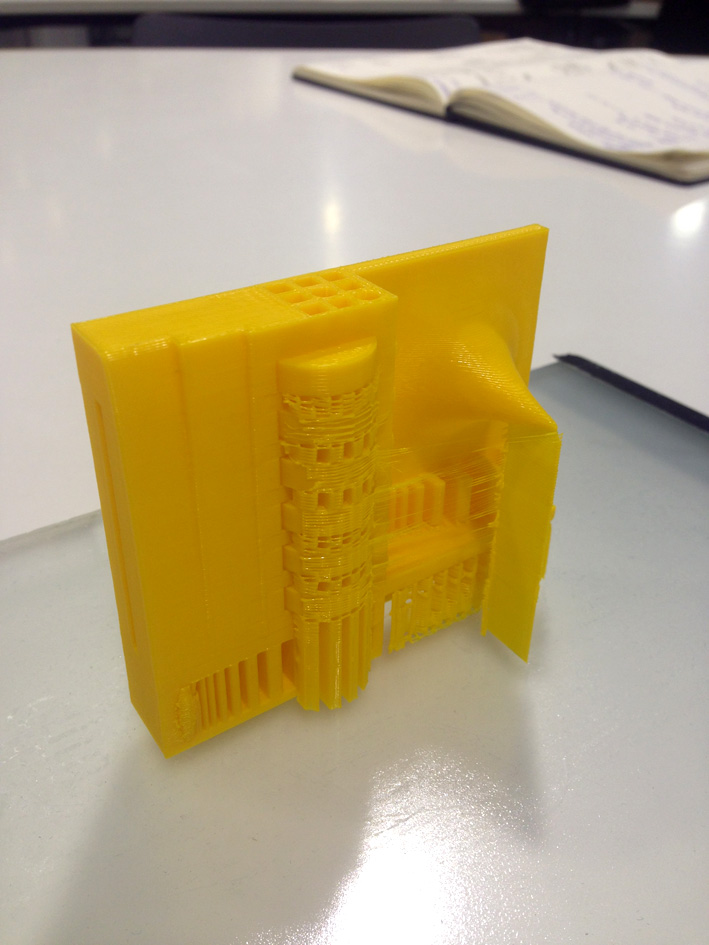
3. DESIGN A 3D OBJECT THAT COULD NOT BE MADE SUBTRACTIVELY
The 3d object I have designed is related to my final project. As I want to create a lightning device, my idea is to
make an object that can be transformed with a rotary movement. The goal is to transform the type of light
with a simple rotary movement.
This idea fits perfectly with this assignment as I want to create only one object (without adding or subtracting any other
parts), having a rotation that lets me change its behaviour.
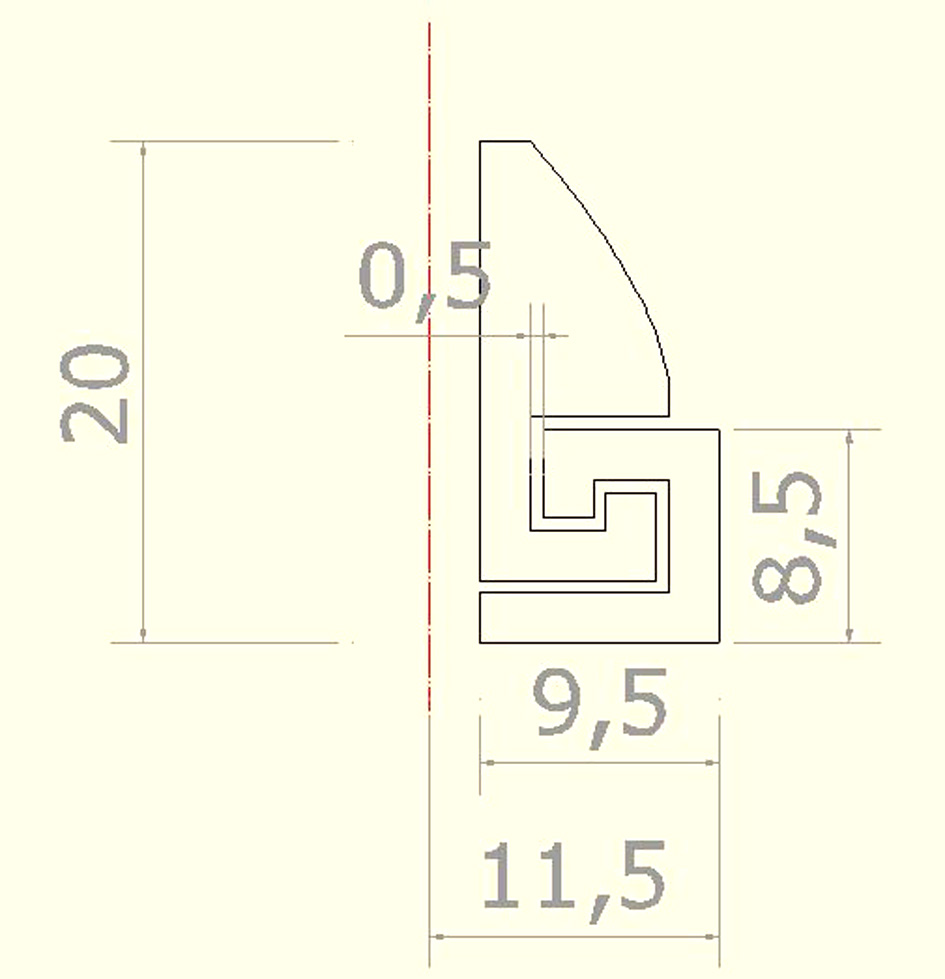
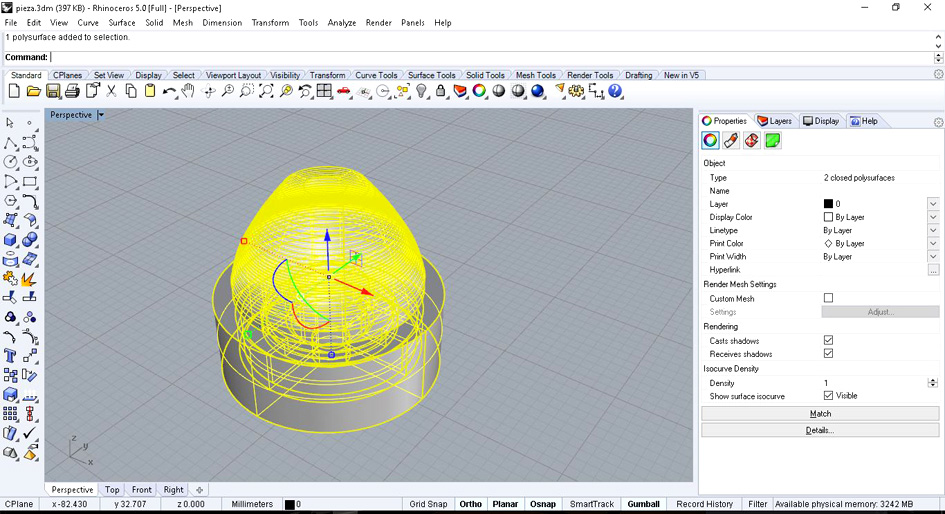
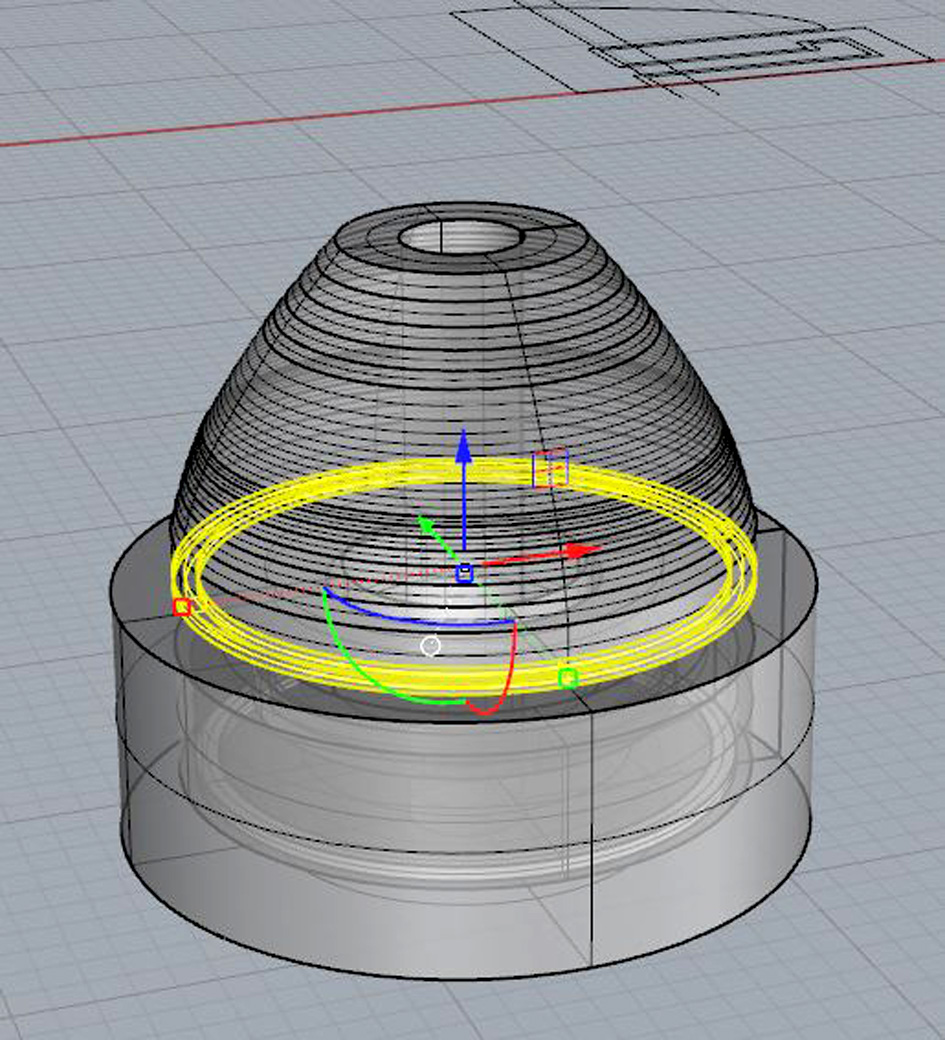
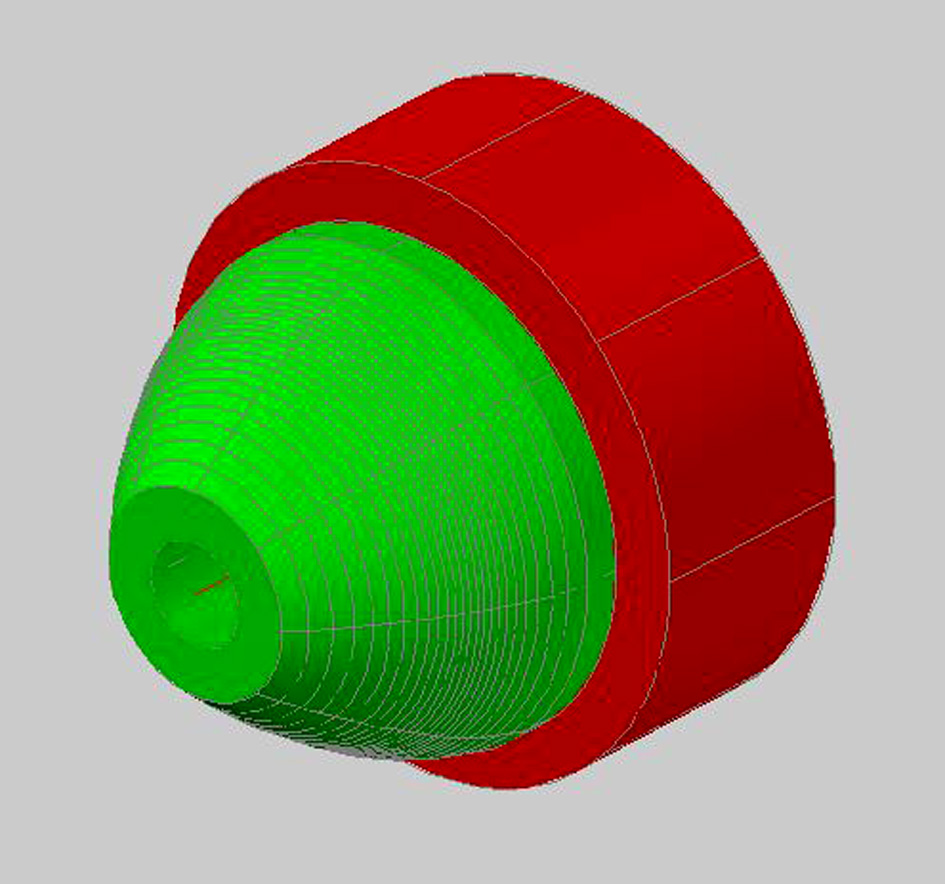
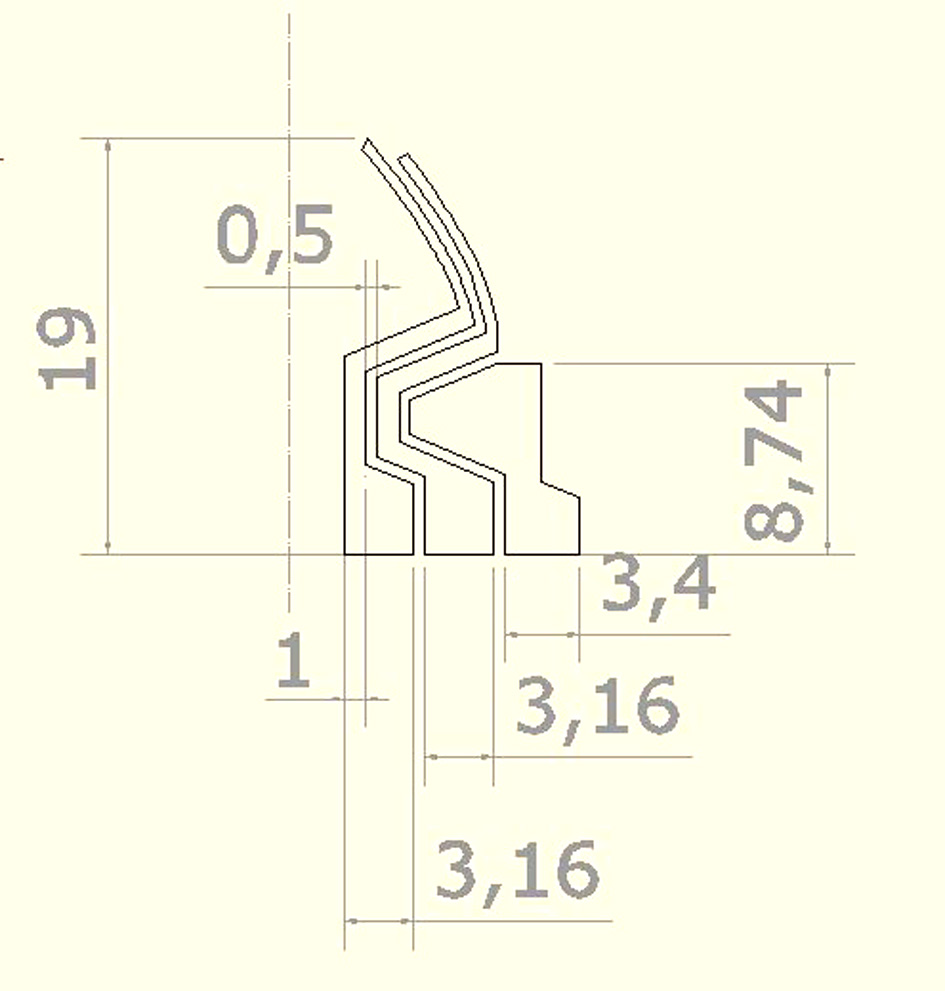
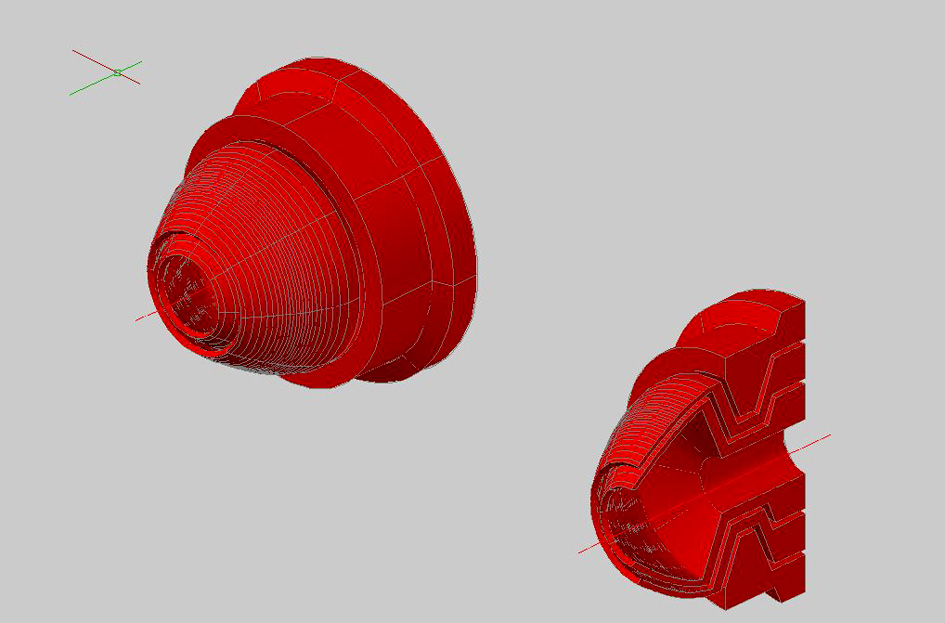
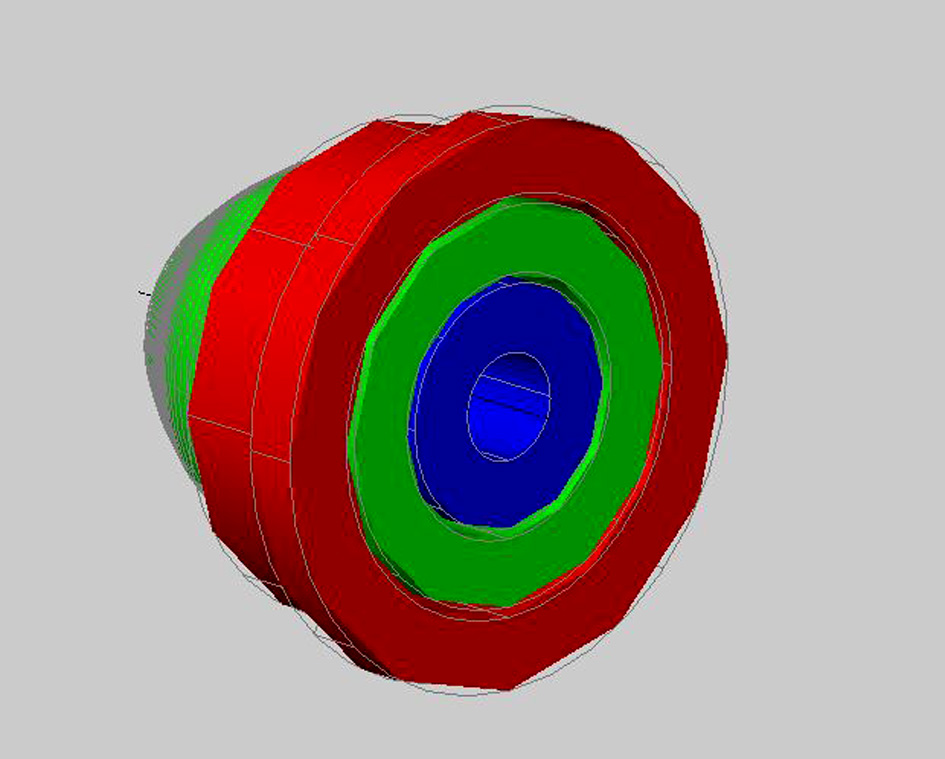
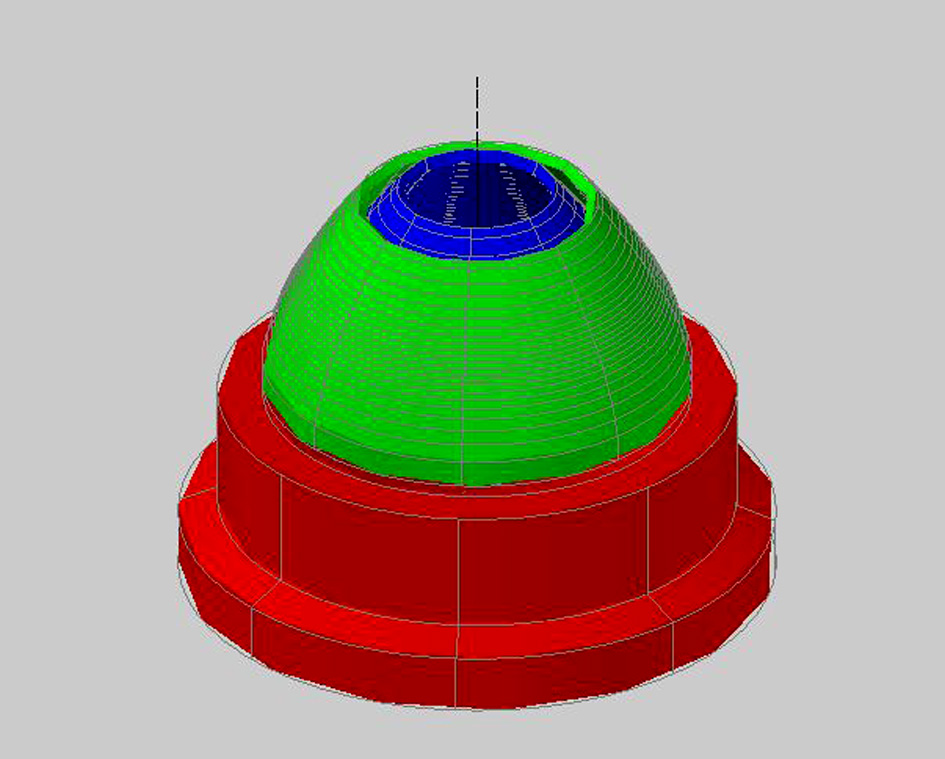
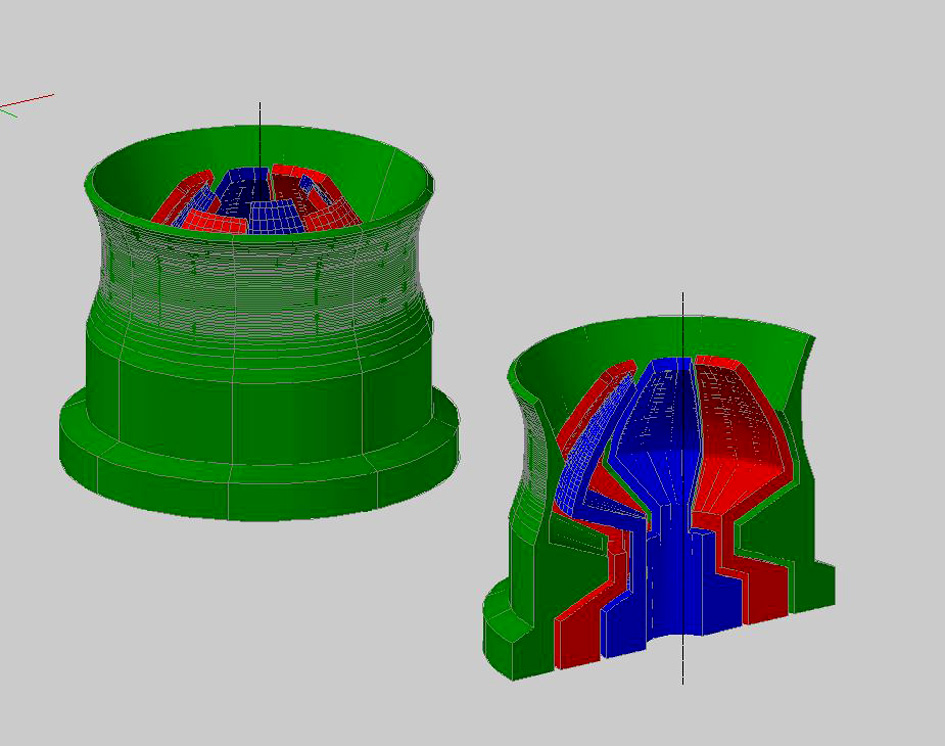
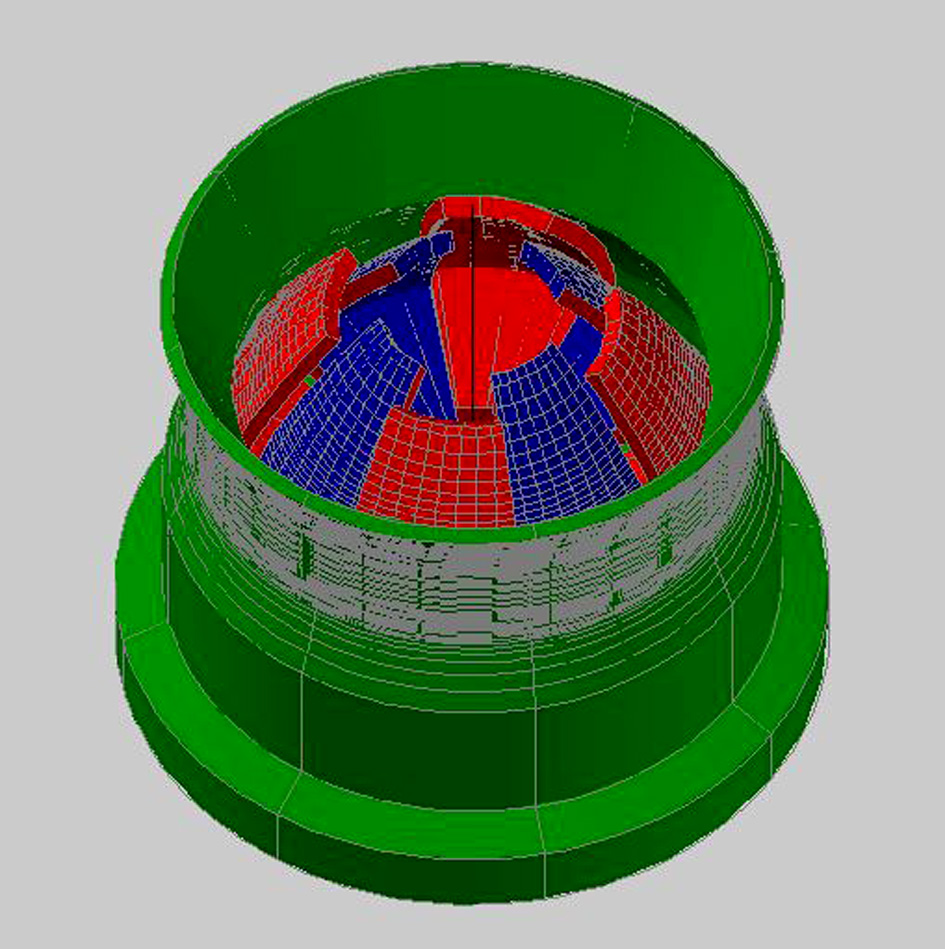
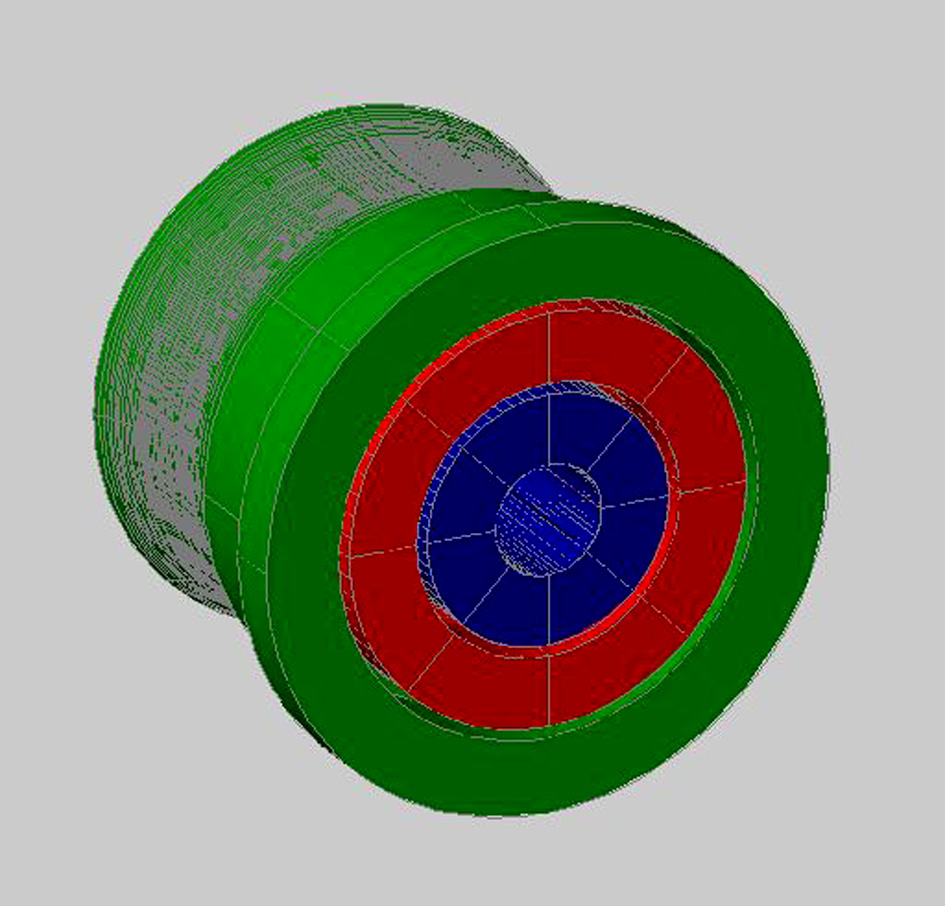
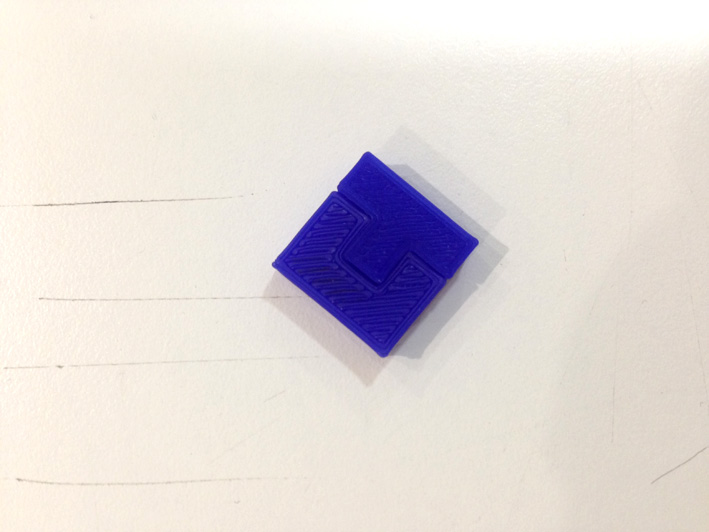
I started investigating with a small object that has two layers (an inner layer and an external layer) that can move
independently. Just below, a cross section and a 3d shape of my design is shown.
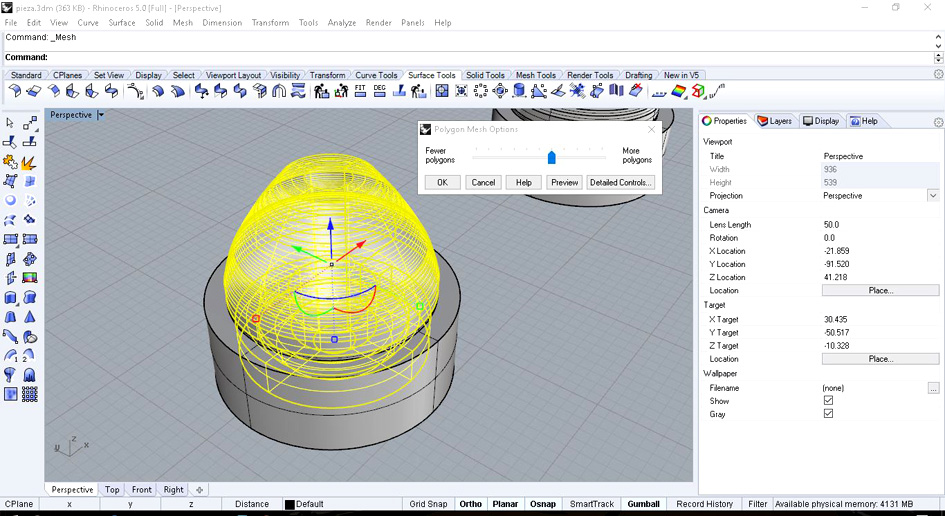
Using Rhinoceros to create my .STL file:
Creating the Mesh
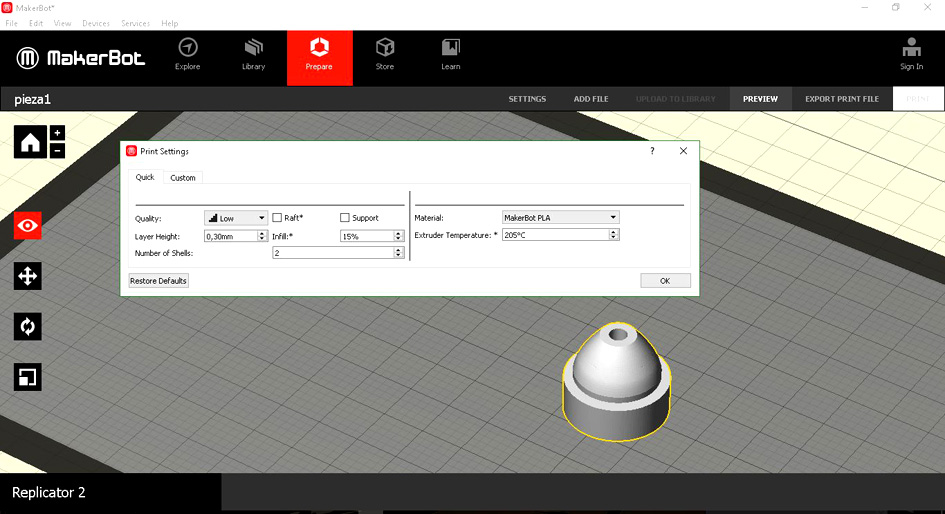
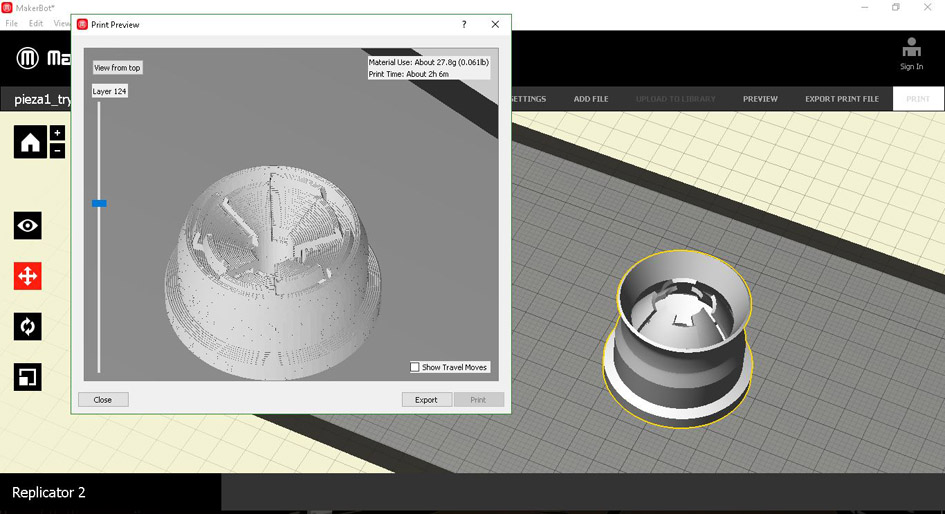
Introducing my object into Makerbot, using the following parameters:
Layer Height: 0.30mm
Number of Shells: 2
Raft: NO
Support: NO
Infill: 15%
Material: Makerbot PLA
Extruder Temperature: 205 Degrees Celsius
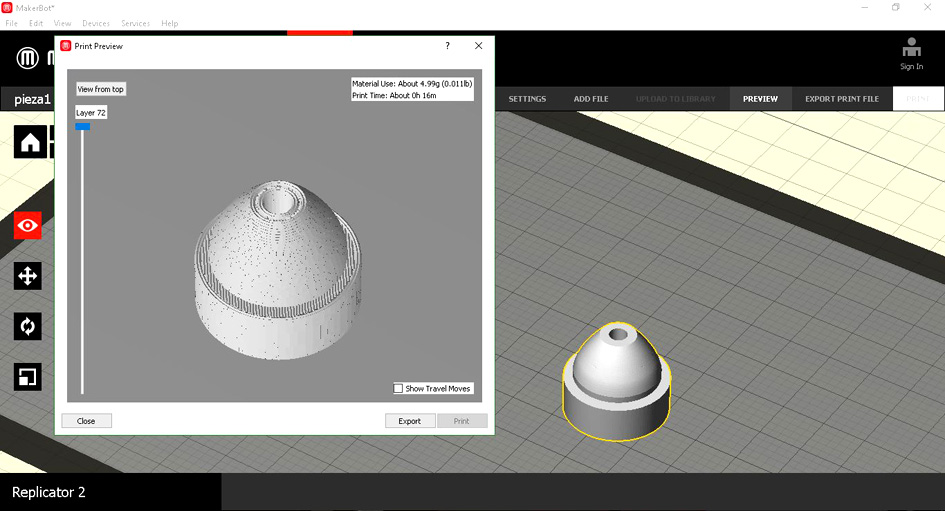
Preview and expected time: 16 minutes
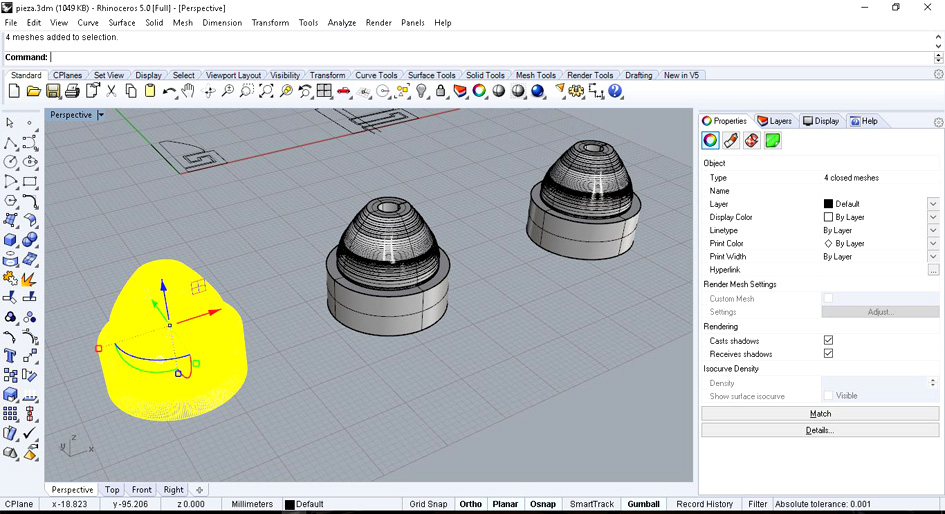
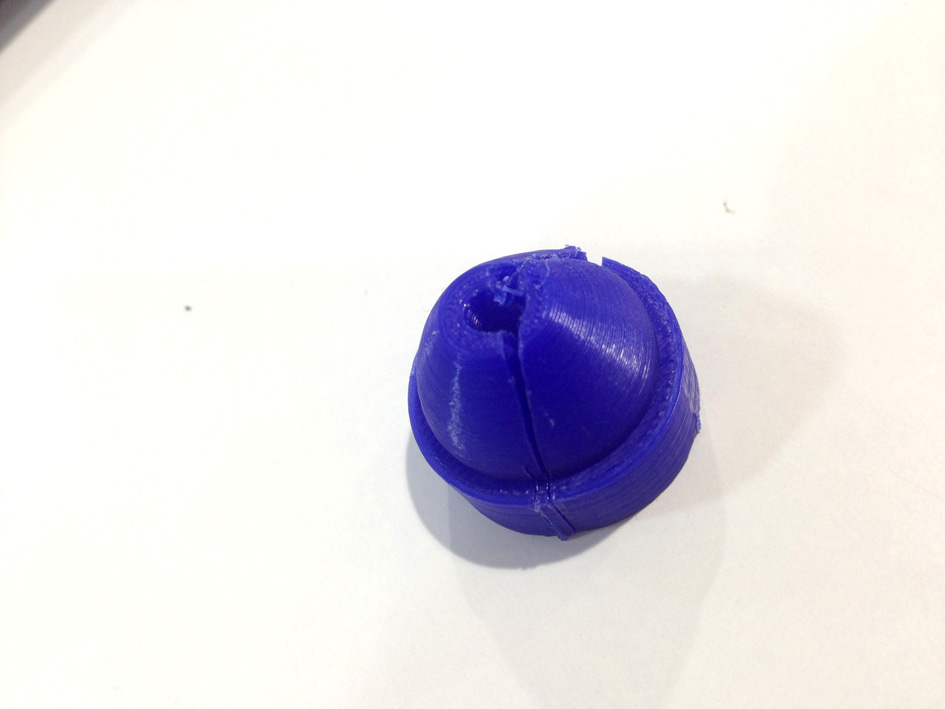
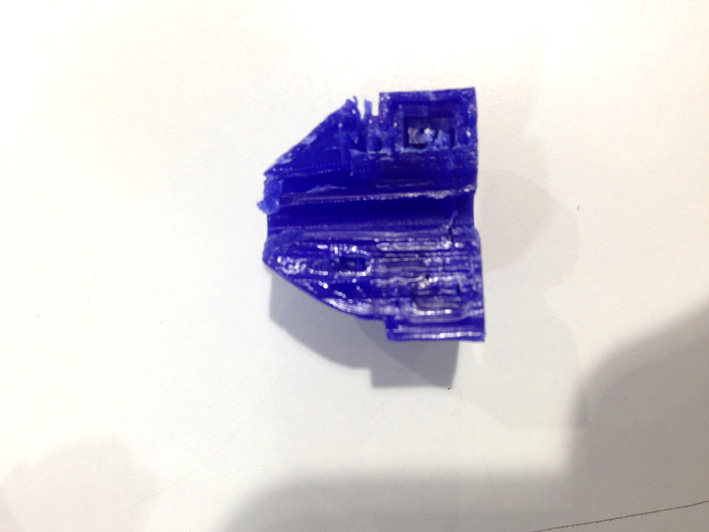
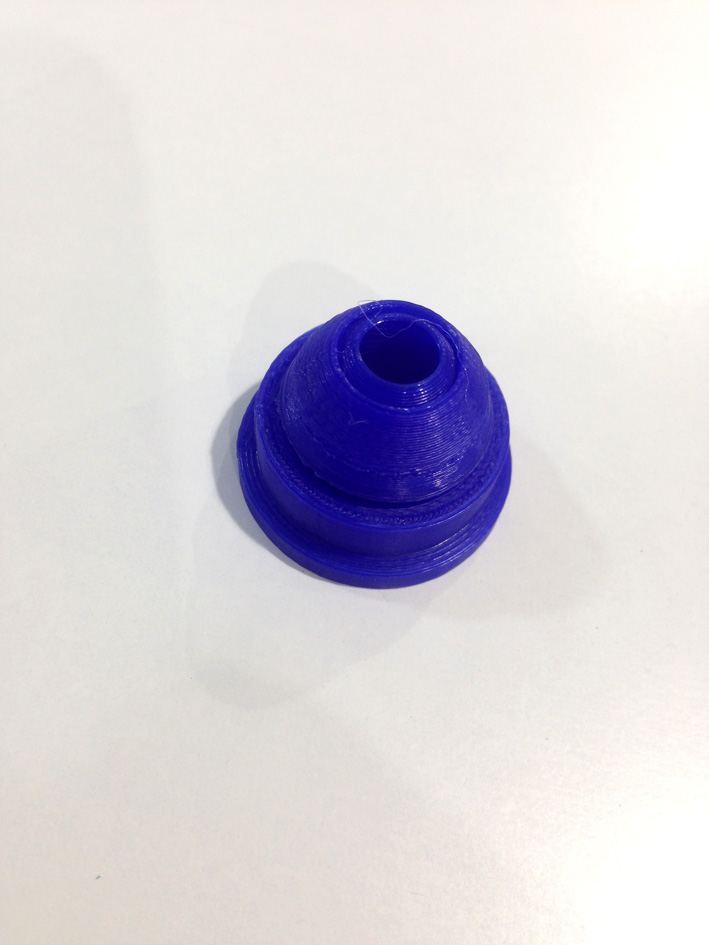
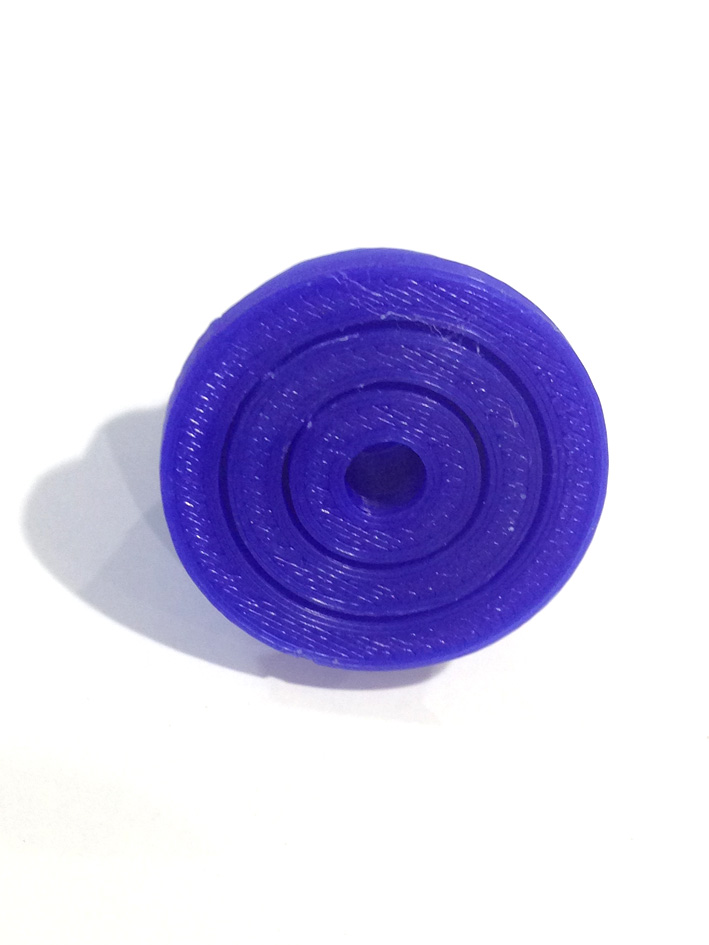
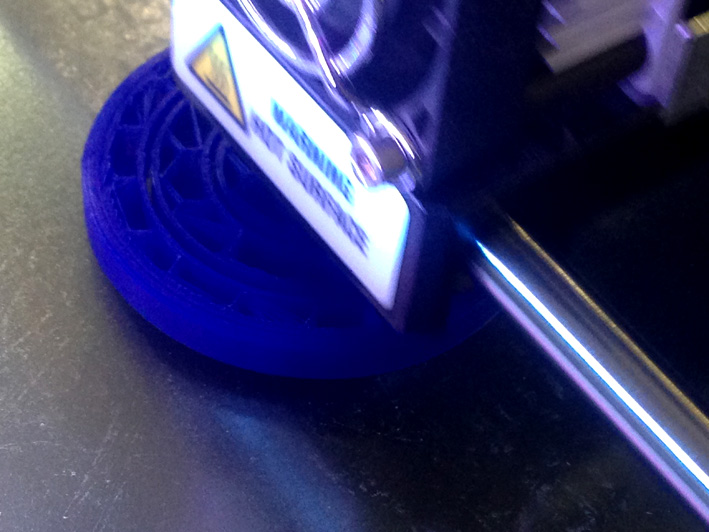
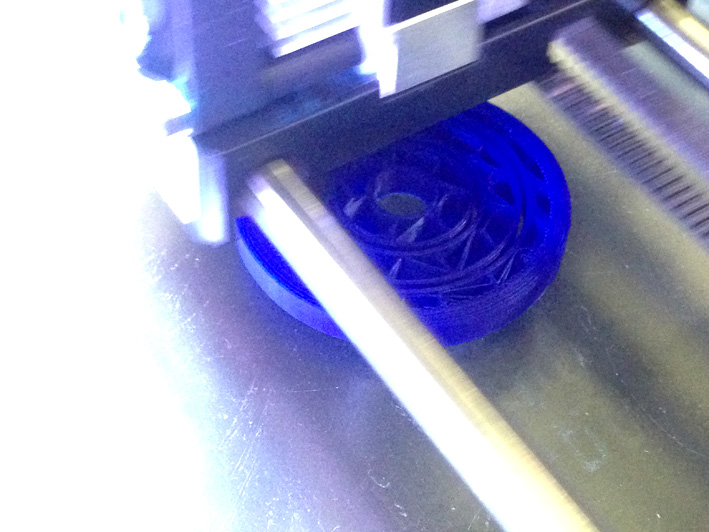
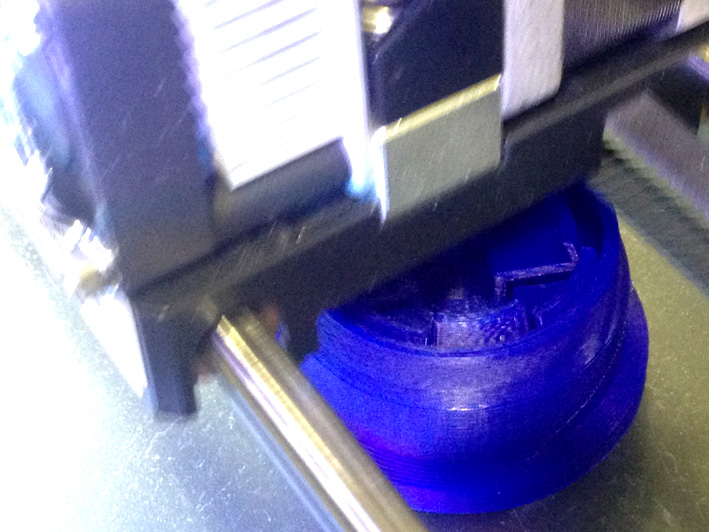
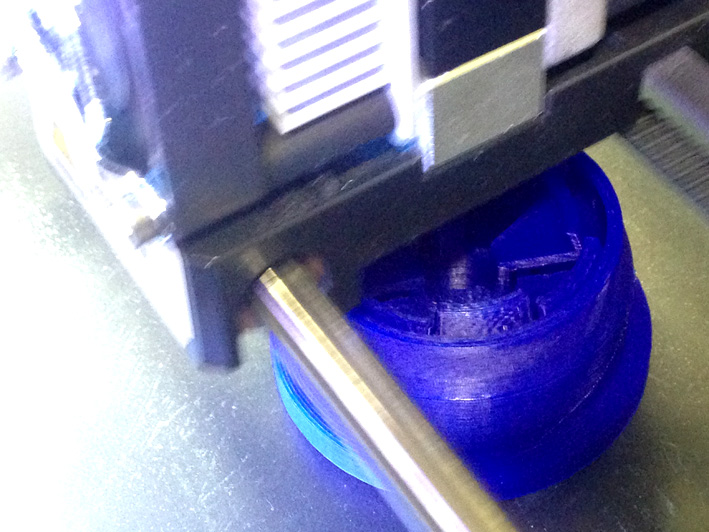
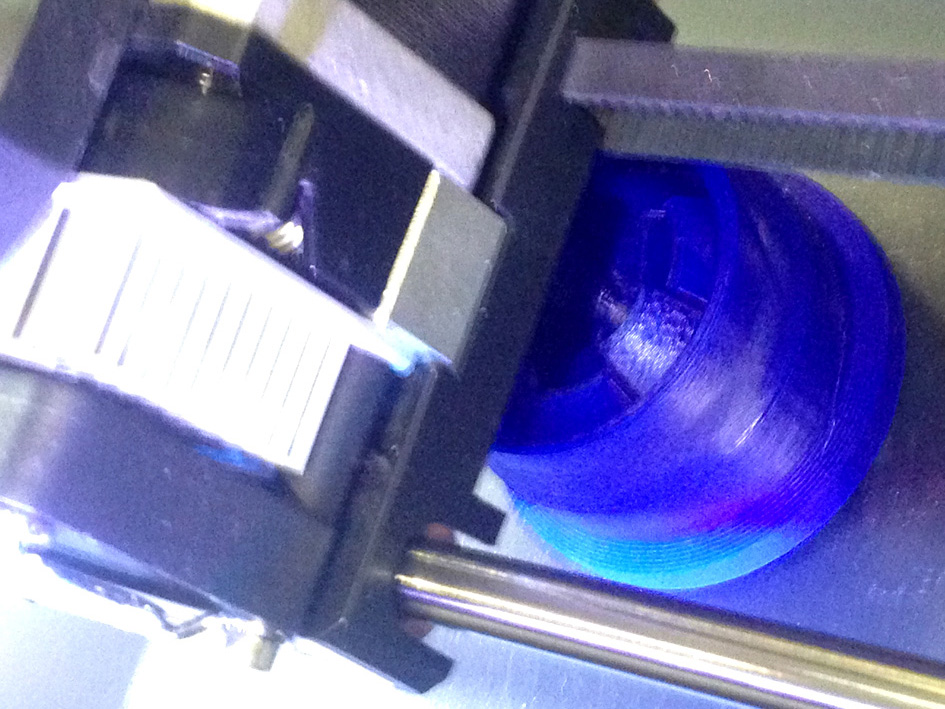
Final Result:
Conclusions:
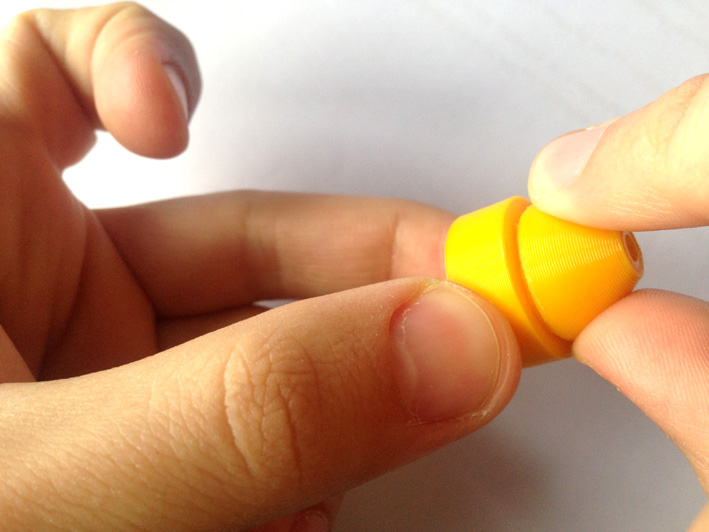
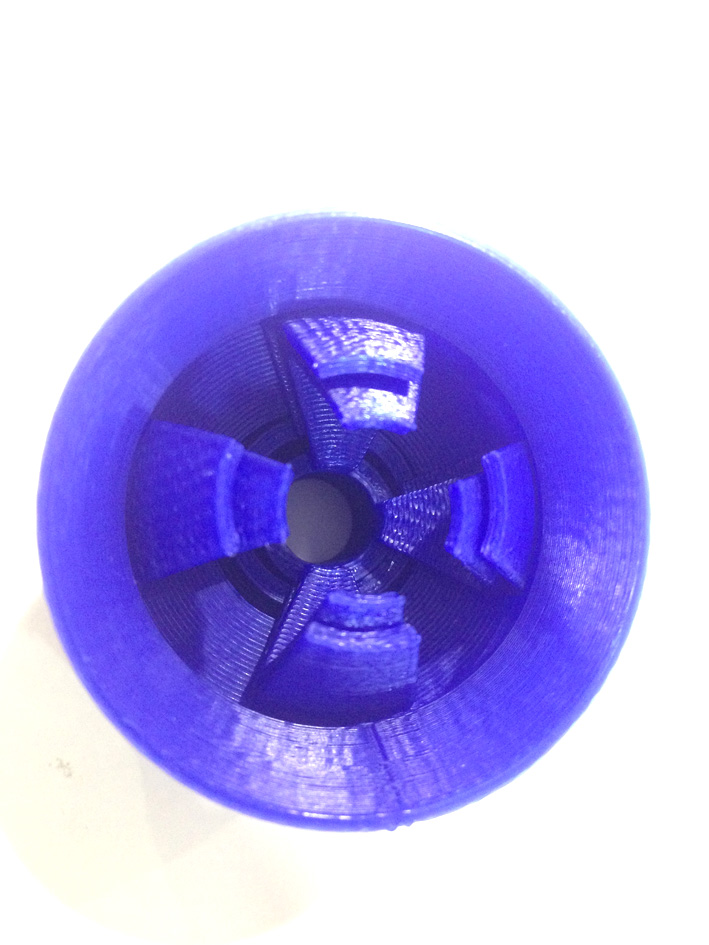
Let's take a look to see what is inside:
If we take a look to the cross section, everything is melted together, not being two independent pieces.
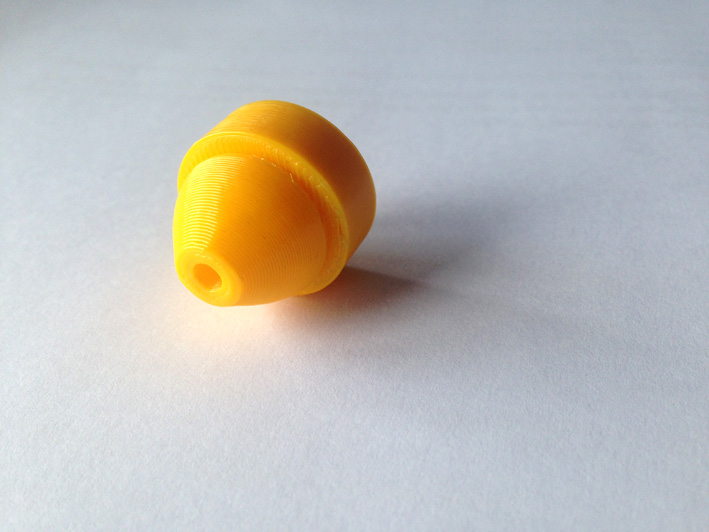
SECOND DESIGN
For this second design, I made a bigger piece so I could have more space between layers. Plus, an easier
way to move them.
After discussing with my instructor, the idea was to create an inner circle of material. This could make a
physical reference between both layers and once it is printed, break them and see if the movement worked.
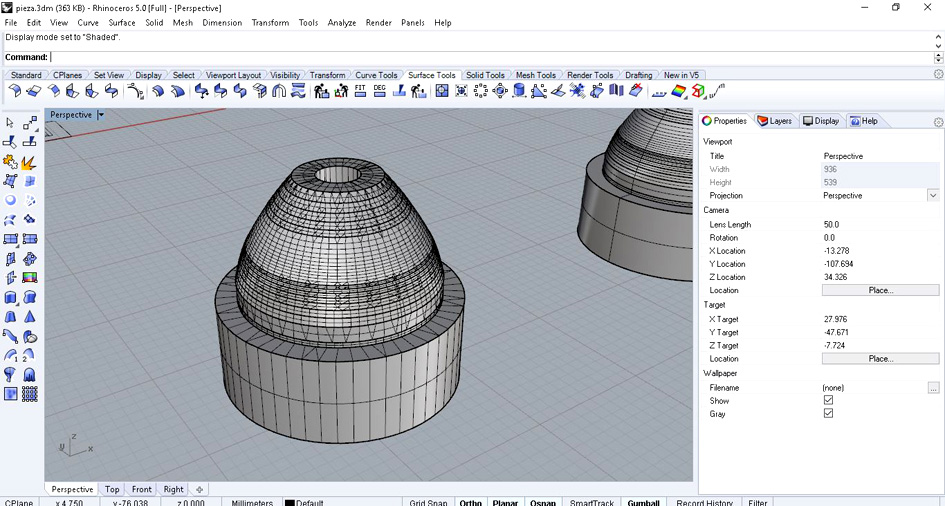
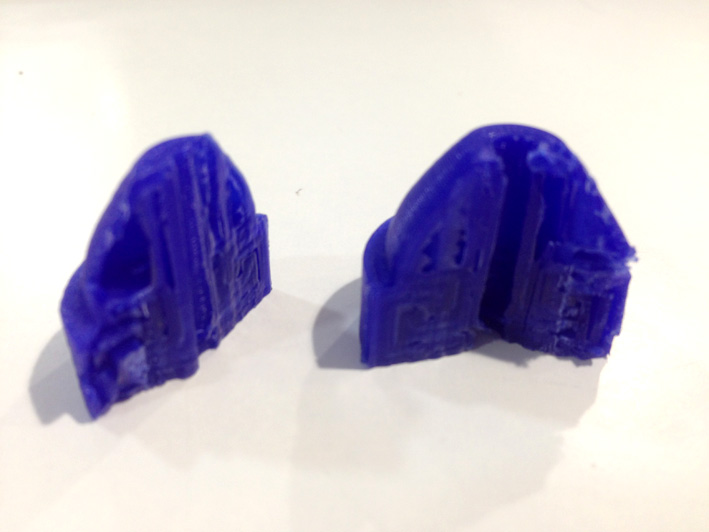
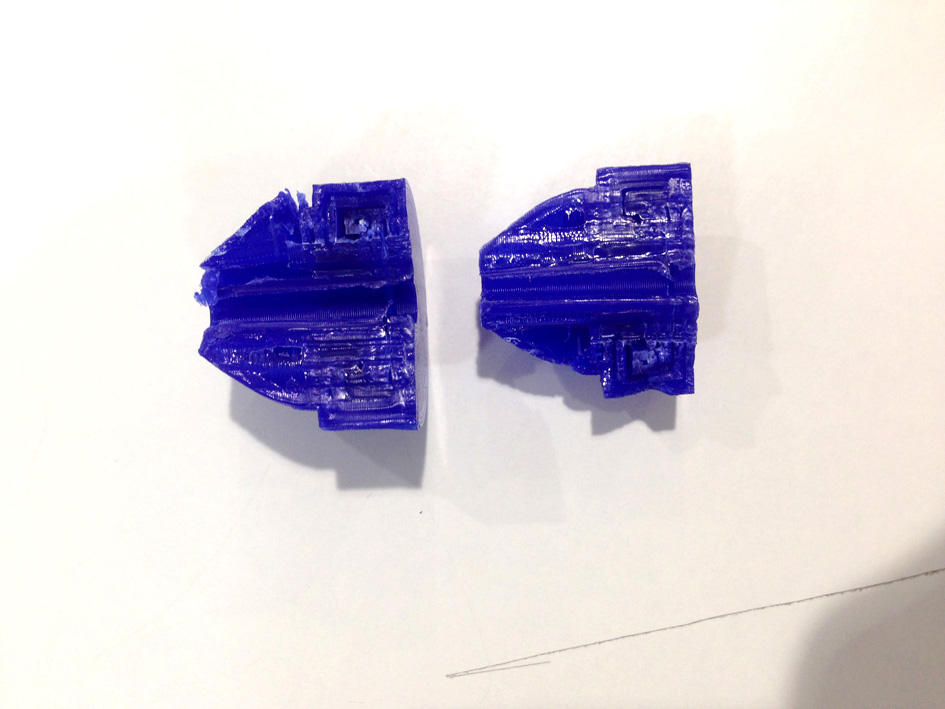
Final Result (same parameters):
Still, the rotary movement was not possible. What I had to do was to test some angle printing limitations to
create a new design.
So far, as a group we did not have yet the angle limitation test mentioned on this website and the group's website.
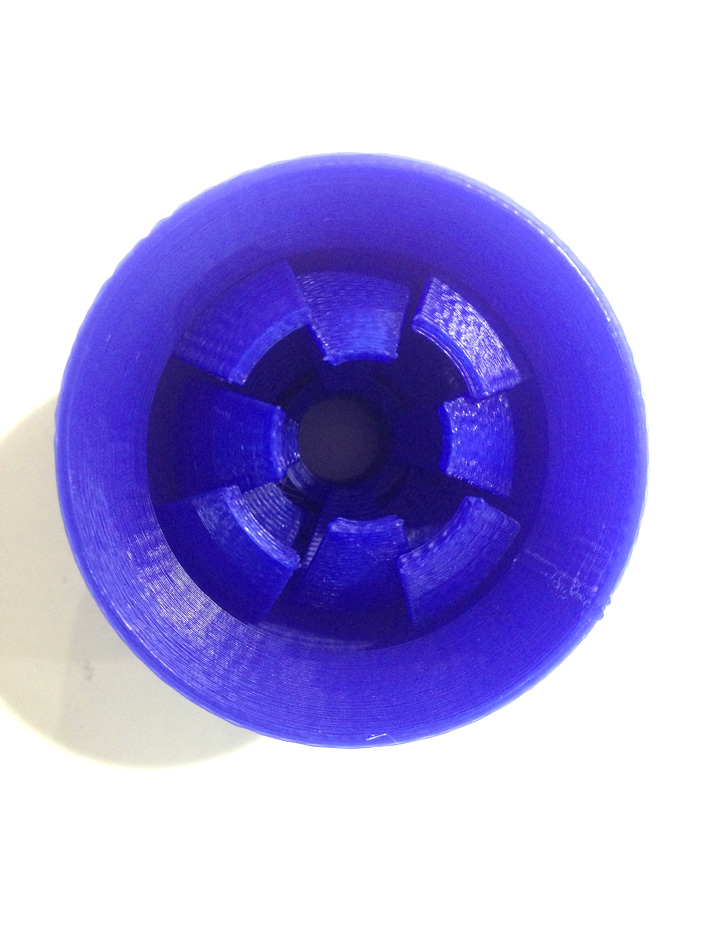
3RD DESIGN
Once I knew that the printer machine did not control its printing with angles of 20 degrees or lower, I used this
knowledge to create a new design to see if the rotation could work.
This time, I used the object as a support while printing. After analysed its angle limitation, it should not have any problems.
Final Result:
Conclusions:
Finally, the rotary movement came out as expected!! Now, the problem was that the two inner layers were one piece. Taking
note of this, I re-designed my piece.
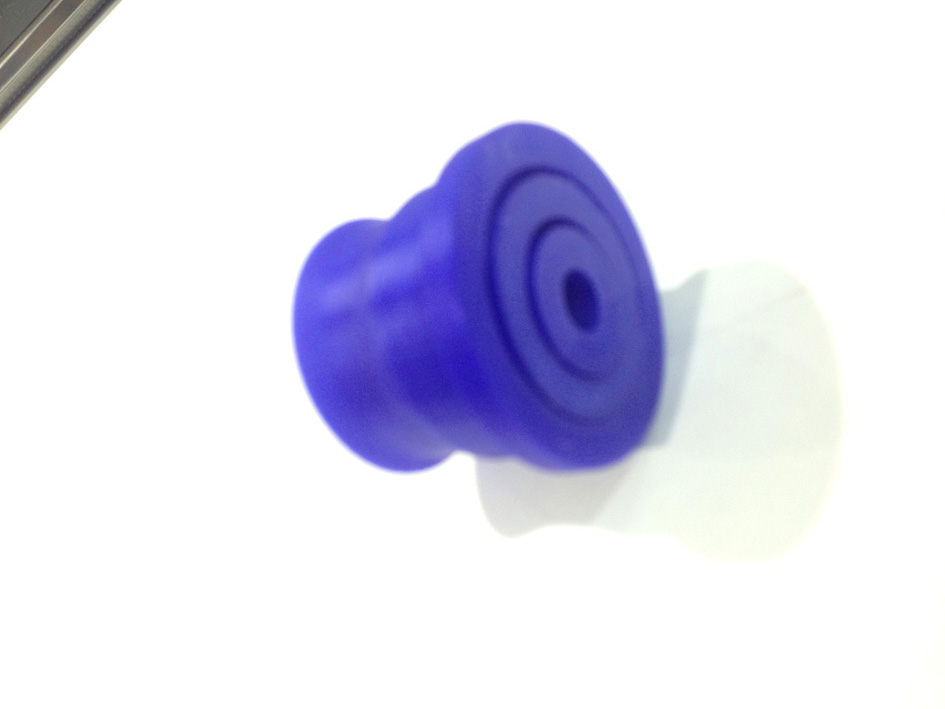
As it is a lightning device, I wanted to start experimenting with the design of the inner layers. This is my design:
Once I have reached this far, it will be easier for me when designing the lightning device's screen to transform direct
light to atmospheric light.
4. Group Assignment: My Contribution
Please, make sure to enter our group assignment website where we describe what we have done to test the limits of out
Makerbot Replicator 2.
Group's Website
My contribution to this part of the assignment has been testing at what angle the machine can print, which tolerances
the machine has, neil's printing exmaple part & conclusions, and other pieces that made me understand how this
kind of printer works.
ANGLES
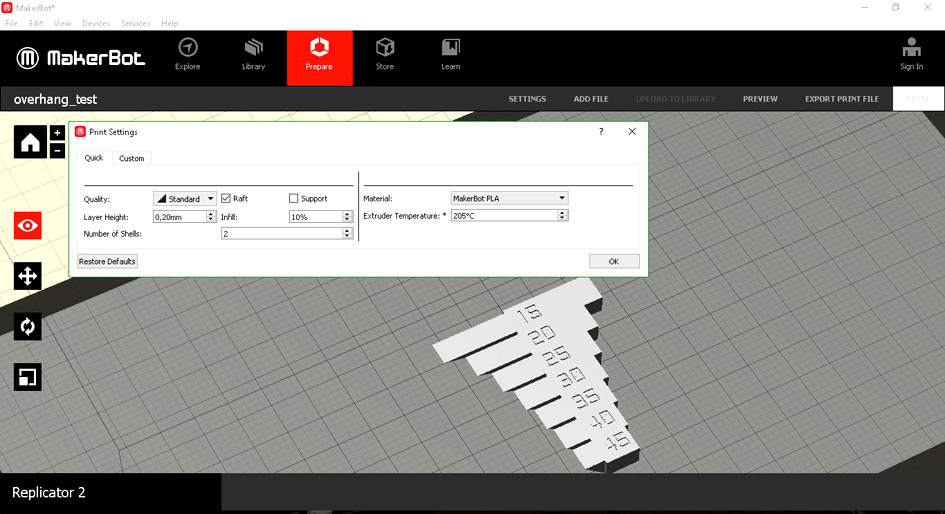
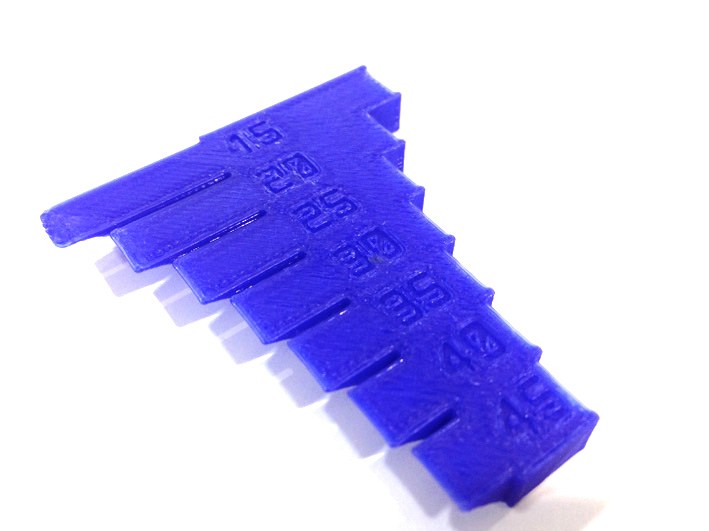
To test at which angle the machine can handle the 3d printing correctly, we selected a piece in www.thingiverse.com.
This model prints different walls at different angles, starting with a 45 degrees wall down to 15 degrees walls,
with a 5 degree step. Here is the model:
Conclusion:
As shown on the picture above, the machine can have the control of printed angles up to 20 degrees. Lower than 20 degrees,
still the machine can print, but not as accurate as someone would like.
Therefore, it is not recommended to print lower than 20 degrees.
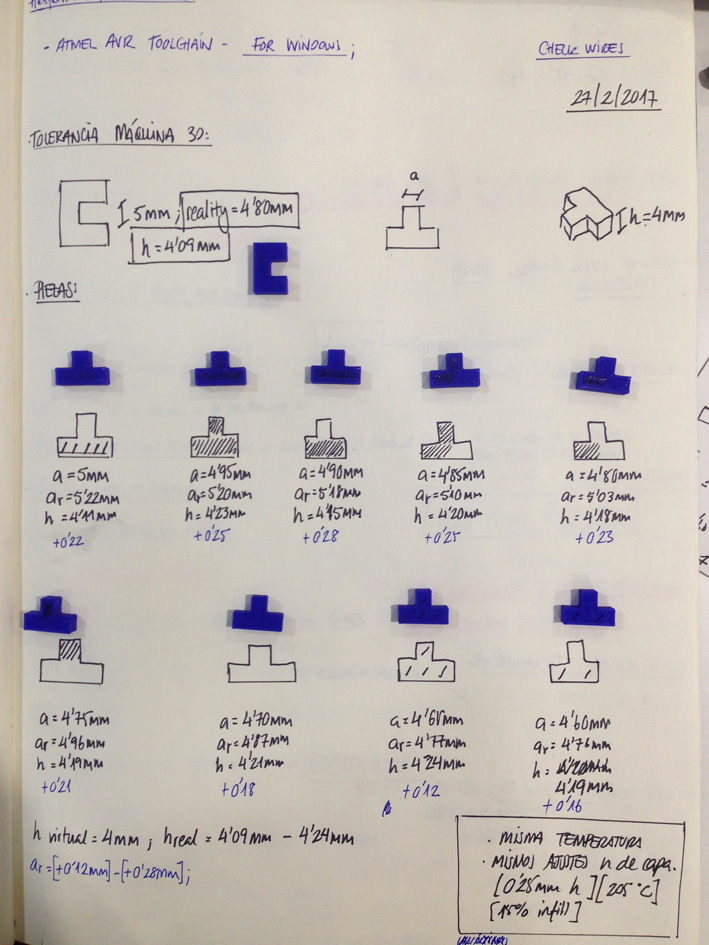
Parameters used on the group's website.
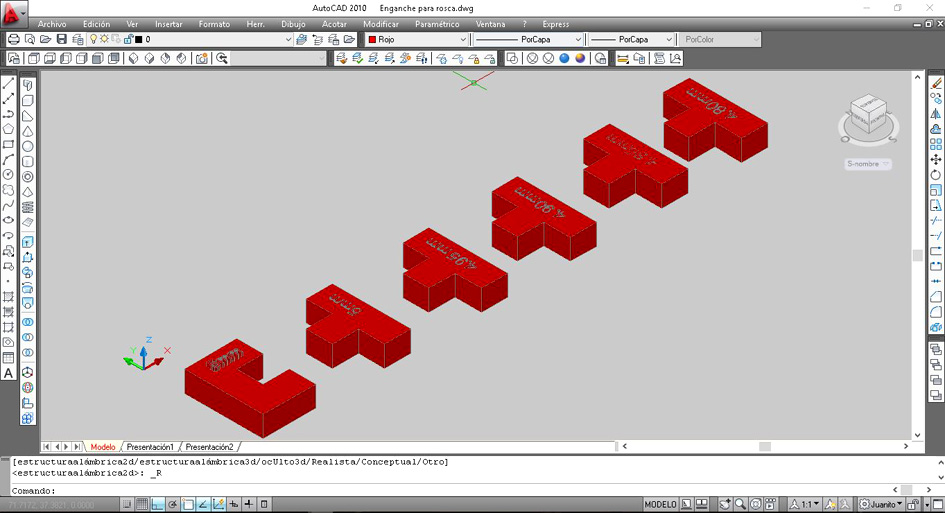
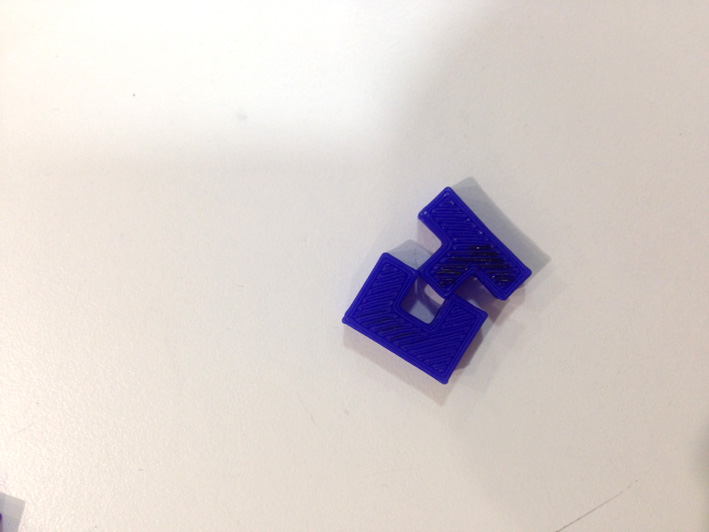
In order to know how good the machine prints our designs, we decided to create a system (male-female), and see how the
finished pieces change from the virtual model design.
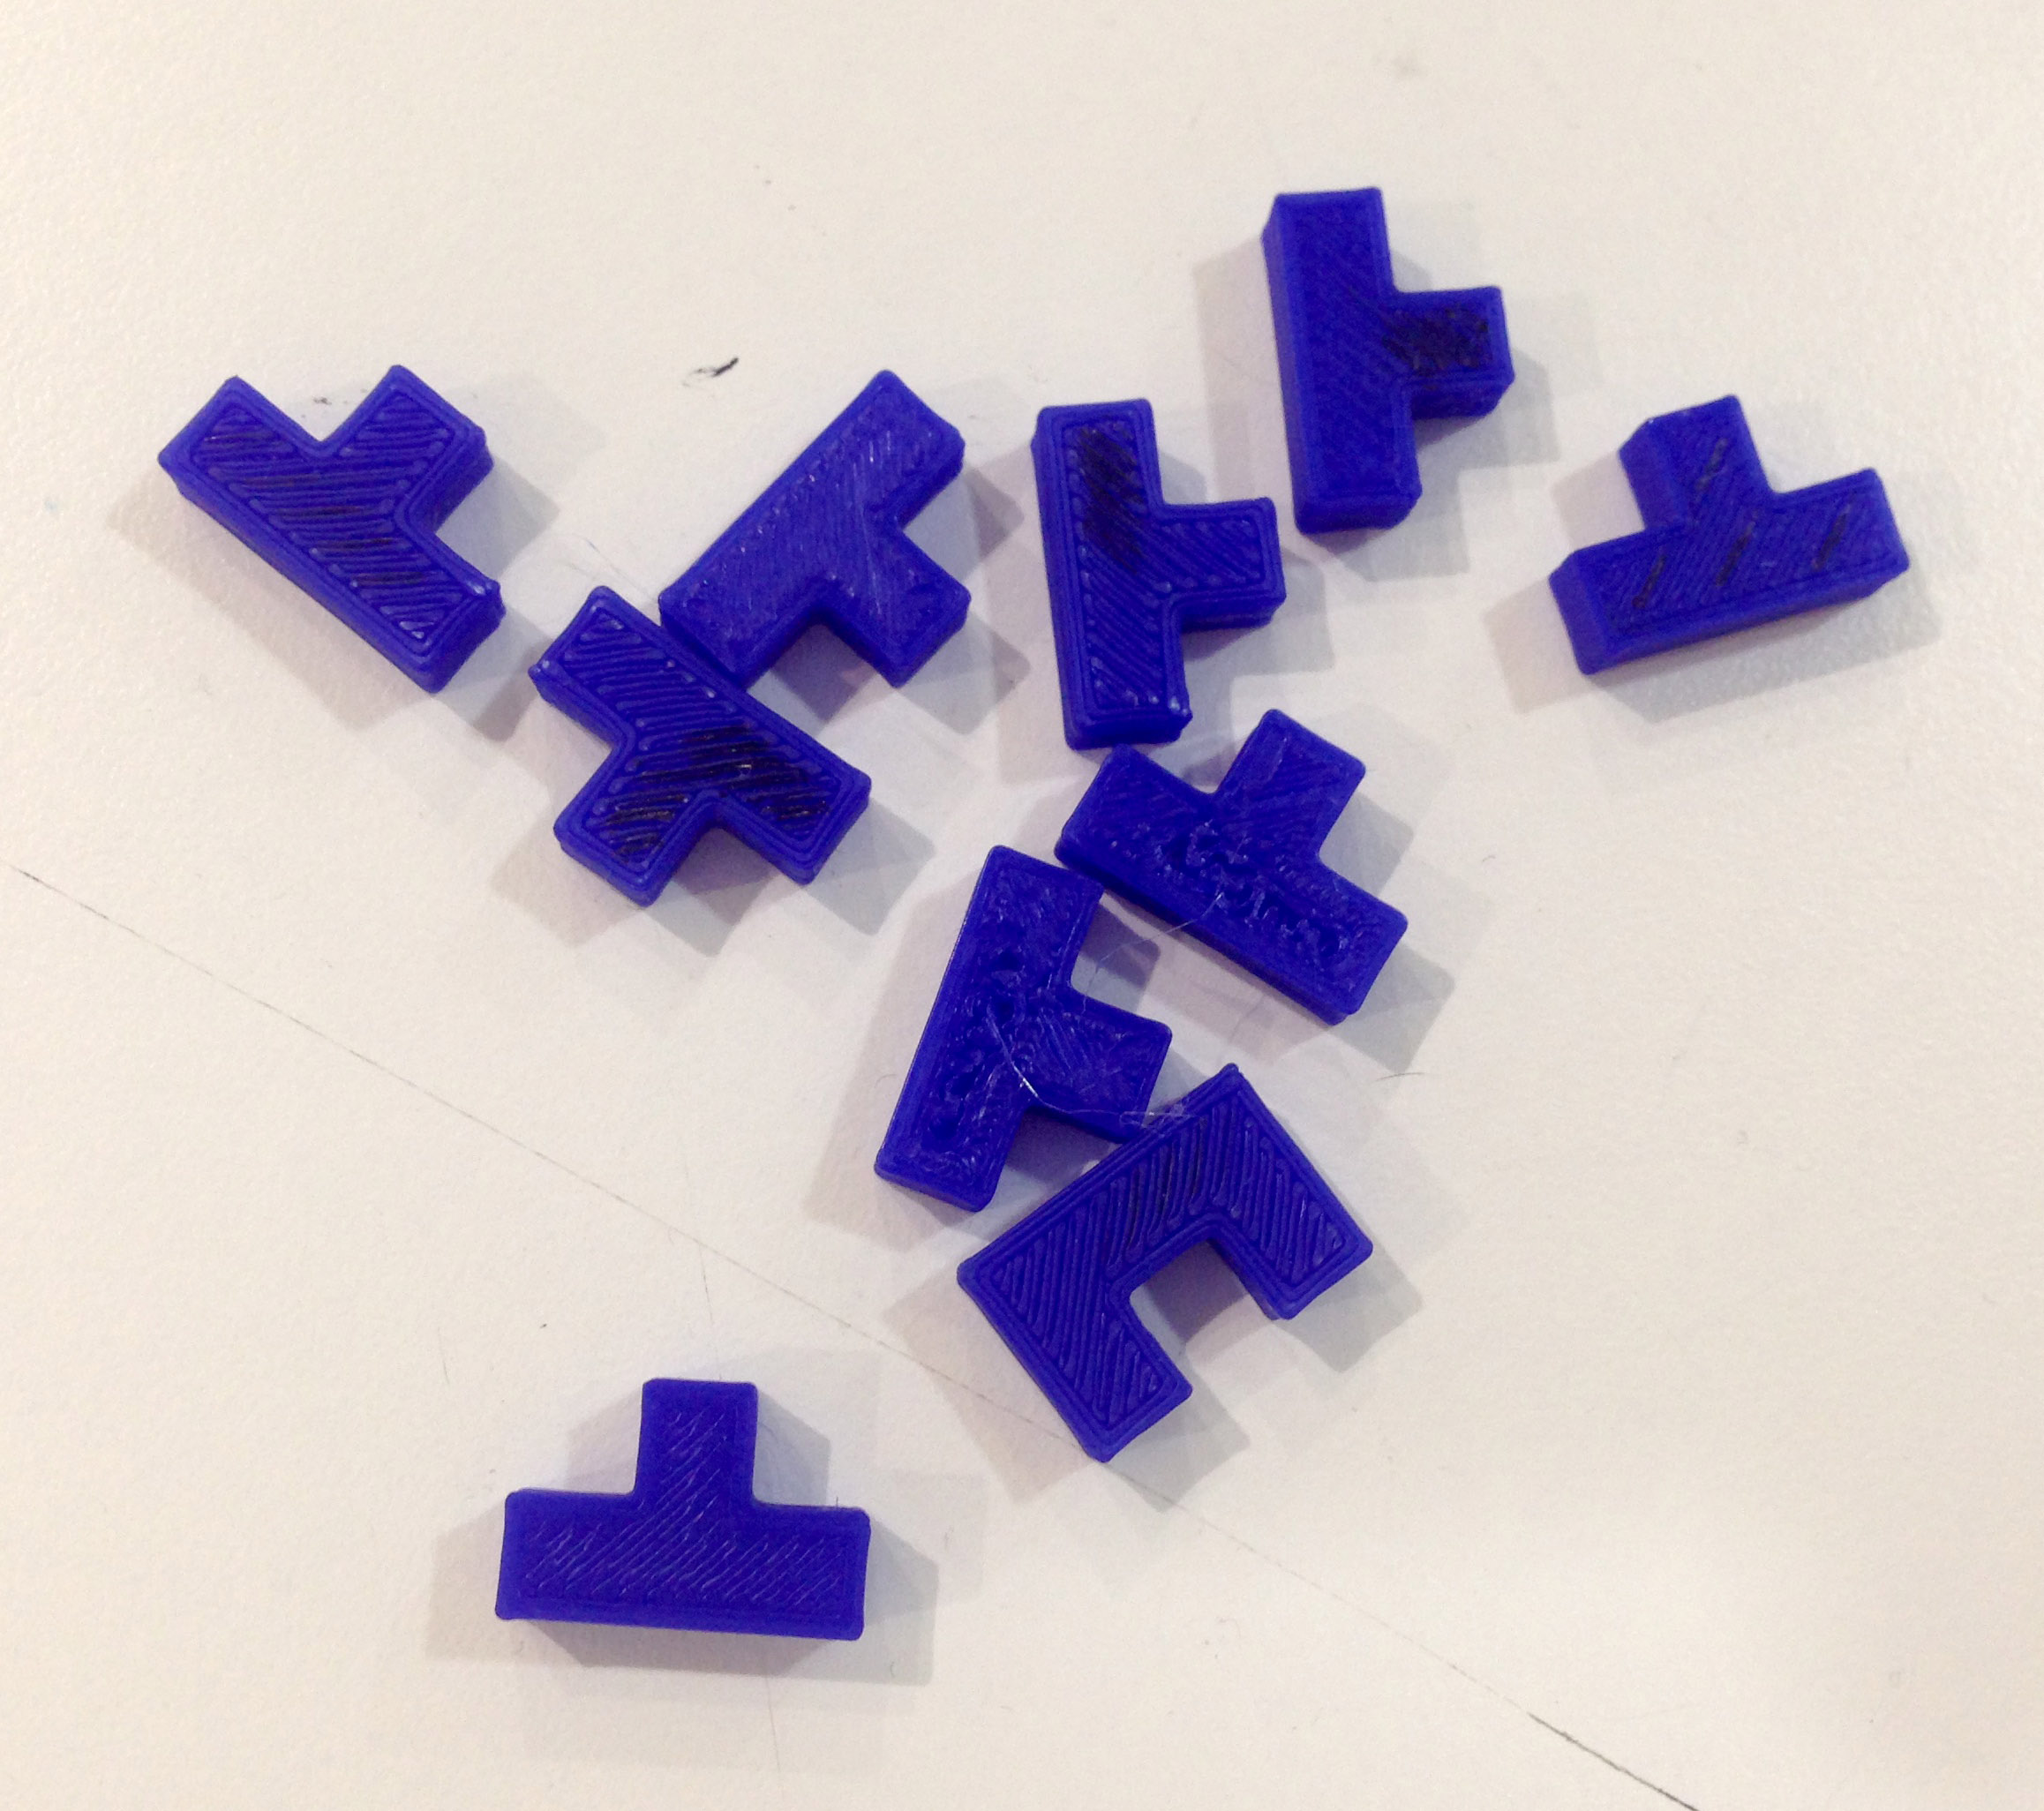
Here are all the designed pieces. We have a female standard piece with a 5mm width, and 9 other male pieces with different
dimensions. These vary from 5mm width to 4.60mm.
How the system works:
Here are the results:
Conclusions:
For a male width, the machine prints an extra +0.21mm on average (min, max; +0.12mm, +0.28mm).
On the X axis (related to the height of the piece that has been printed layer by layer), the machine prints an extra of
+0.16mm on average (min, max; +0.09mm, +0.24mm).
For a female width, this width is reduced by 0.20mm. For a virtual 5mm width, in reality is 4.80mm (an extra +0.10mm on
each side).
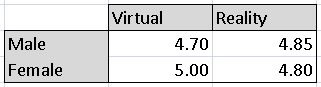
For our male-female system, we need a 4.70mm male virtual width with a 5mm virtual width.
For it to detach comfortable, but without being loose when it attached, a 0.05mm difference between male-female is
enough.
Please, for further info visit the group's website:
NEIL RECOMMENDED PIECE
Being briefly with how we printed Neil's recommended piece, we had to do it 3 times:
The first one, we positioned the piece horizontally, therefore most tests within the piece were not done correctly.
The second try, it was messed up as the printed piece separated from the raft.
The second try, it was messed up as the printed piece separated from the raft.
Conclusions:
The 3d printer can make any form the correct supports.
PLAYING AROUND WITH THE 3D PRINTER - FIRST TEST, GETTING TO KNOW THE PROCESS OF 3D PRINTING
As for Alvaro and me was the first time to work with a 3d printer, we started to load to the machine already- done
examples and see how everything was printed.
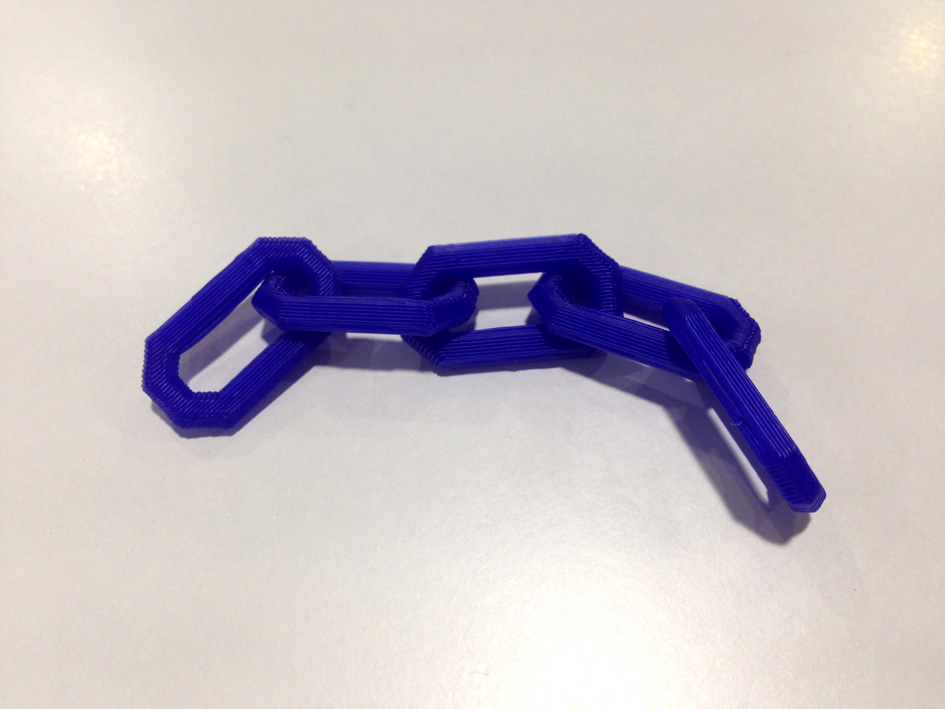
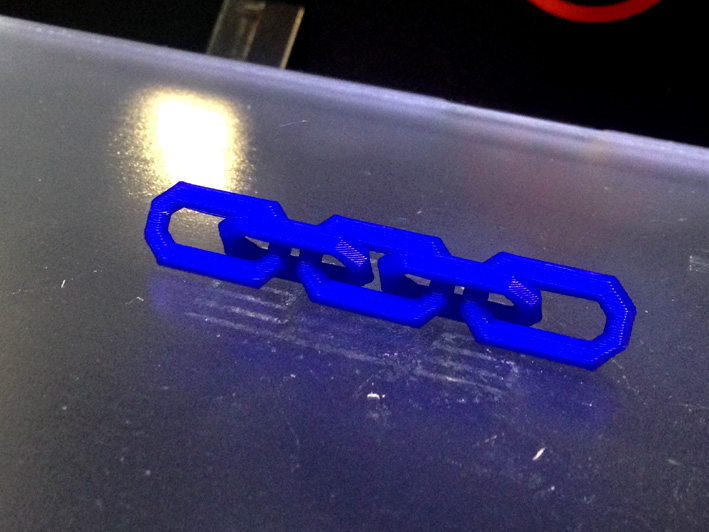
Chain
For this kind of objects, where the finished product is linked together, it was not easy for me to understand how it was
done until I actually printed it. Now I look at it and is obvious, but as I was not used to this kind of
process, it was very surprising and open minding experience .
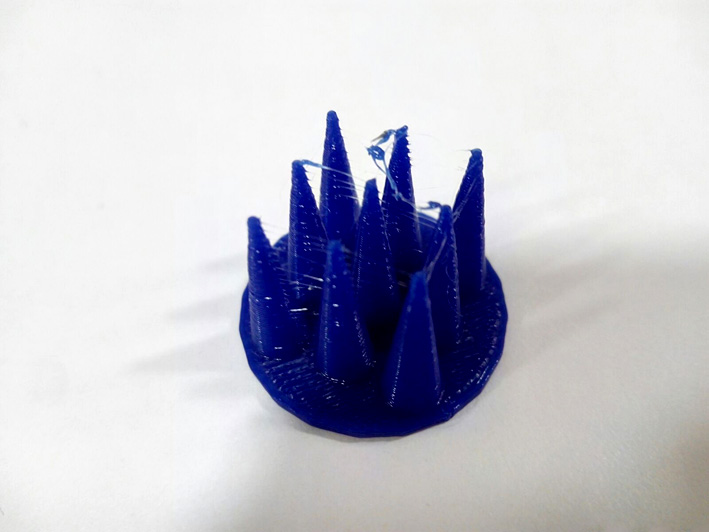
Cones and 'Unleash Yor Creativity'
These two pieces were the first I made, downloading them from thingiverse. As I just wanted to start using the machinge,
these two plus the chain were the ones that tough how the 3d printed worked.
Download Files
**This last link to STL and 3DM files is linked to the FabLab Madrid Ceu's folder. As I have heavy files, my instructor decided it was best to link it to the fablab's folder (16mb).