Week 3 - Group Assignment
Laser cutting Tests
Week 3 - Group Assignment
Laser cutting Tests
Group Members
- Pilar Caballero
- Daniel Amigo
- Álvaro Fernández-La Roja
- Juan García-Maestro
- Javi BuronGarcia
Index
This week's group assignment, we have been testing the lasercutter machine with the following materials:
- 6mm Cardboard
- 5mm Foam Core Board
- 3mm Medium Density Wood Board
- 3mm Methacrylate
Our goals on these test were:
- Measure the kerf fo the materials used
- Create different slots with different widths
- Engraving with both vectors and pixels
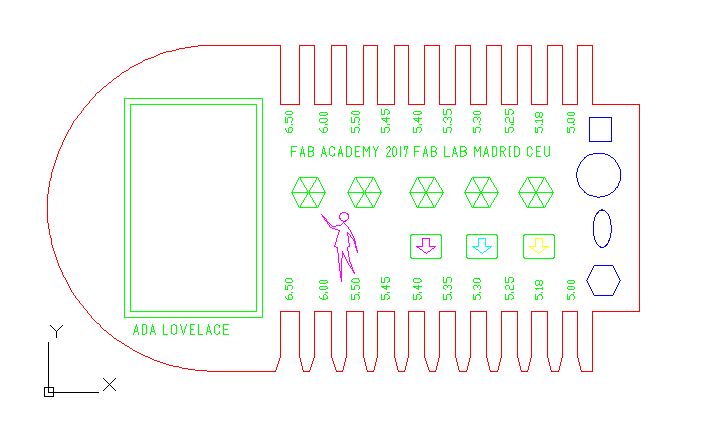
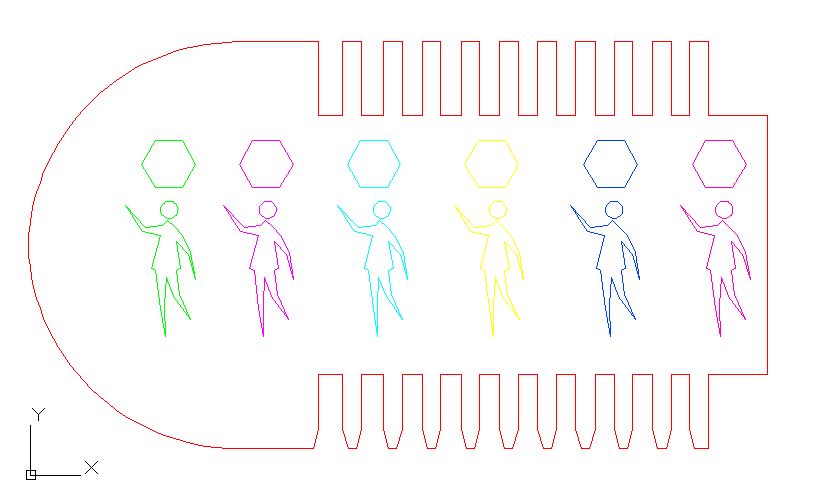
Here is the template we have designed with different widths for each slot plus different colour forms for engraving.Each colour represents a different way of engraving or cutting:
- Green: engraving in the 'cut mode'
- Magenta, cyan and yellow for engraving, but this time in the 'engraving mode'
- Red: cutting the materials
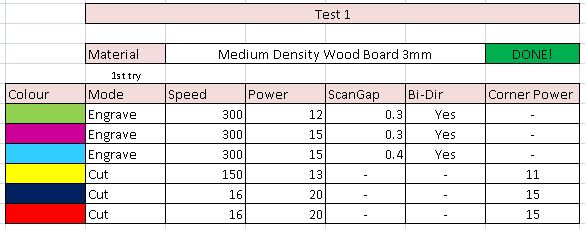
Test 1
Material used: Medium Density Wood Board 3mm. Template used (onwards referred as template A):
Parameters used:
Final Result:

Problems accounted: Neither number nor letters were engraved.
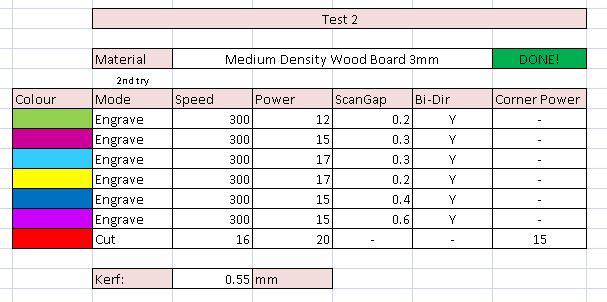
Test 2
Material used: Medium Density Wood Board 3mm. Template used (onwards referred as template B):
Parameters used:
Final Result:
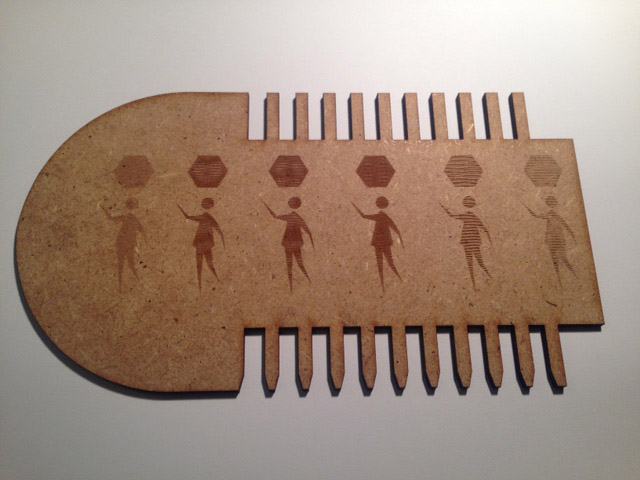
Problems accounted: None.
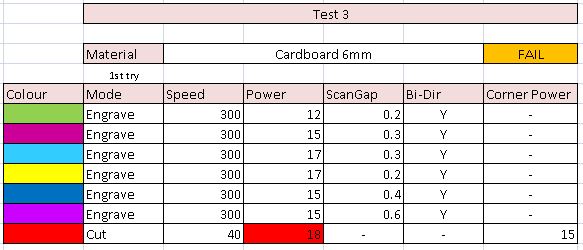
Test 3
Material used: Cardboard 6 mm. Template used: A. Parameters used:
Result (rear side of the cardboard):
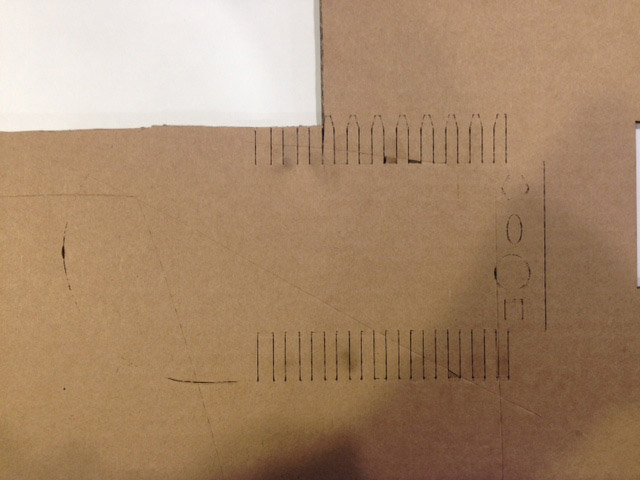
Problems accounted: Not enough power to cut the 6mm cardboard + bad position.
Test 4: continuing with the 6mm cardboard
Material used: Cardboard 6 mm. Parameters used:
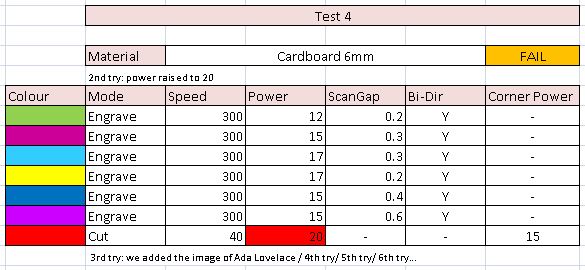
Final Result: Although the power was raised, the laser doesn't cut the cardboard all the way.
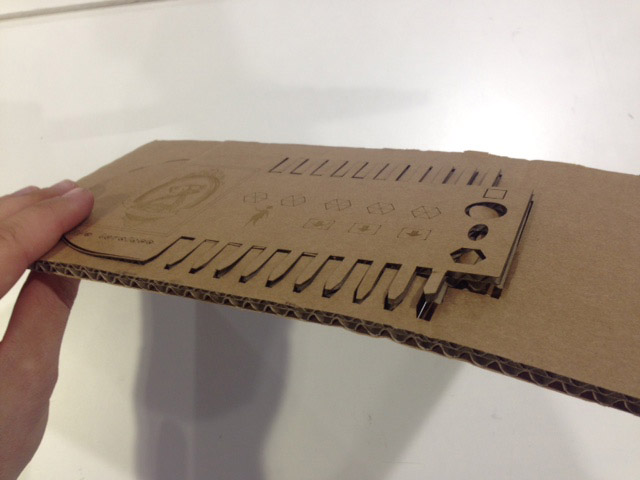

At the 7th try, we made it!
Parameters used:
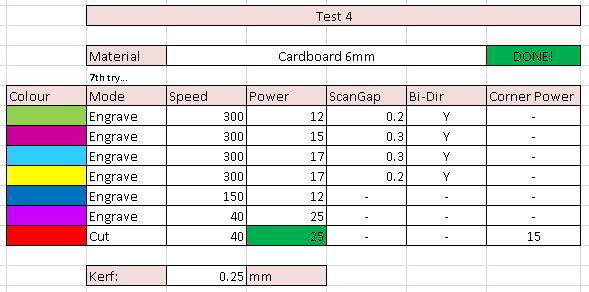
Final Result:
 +
+
Test 5
Material used: Foam Core Board 5mm. Template used: A. Parameters used:

Final Result:

Problems accounted: None.
Test 6
Material used: Methacrylate. Template used: A. Parameters used:
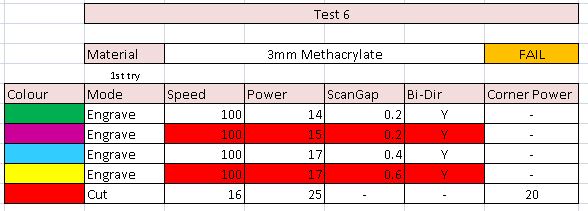
The main problem in the 1st try was that layers magenta and yellow did not engrave correctly. Result:the main problem in the 1st try was that layers magenta and yellow did not engrave correctly.

What we did then was to replace the parameters of the layer that worked in the ones that didn't, and both layers again.
Final Result:
We did it! The texts and numbers were engraved correctly!
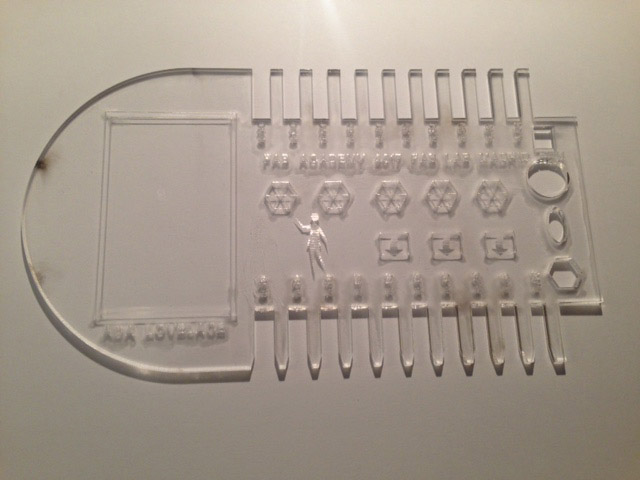
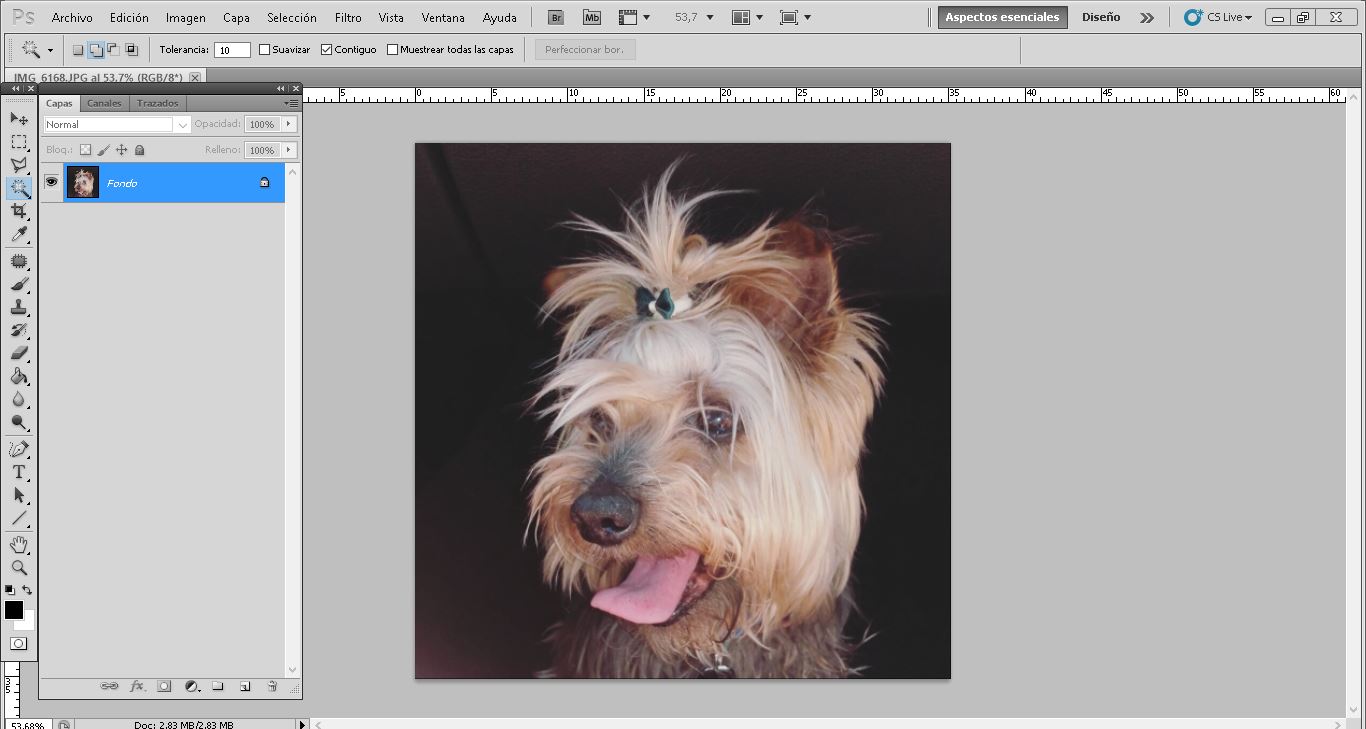
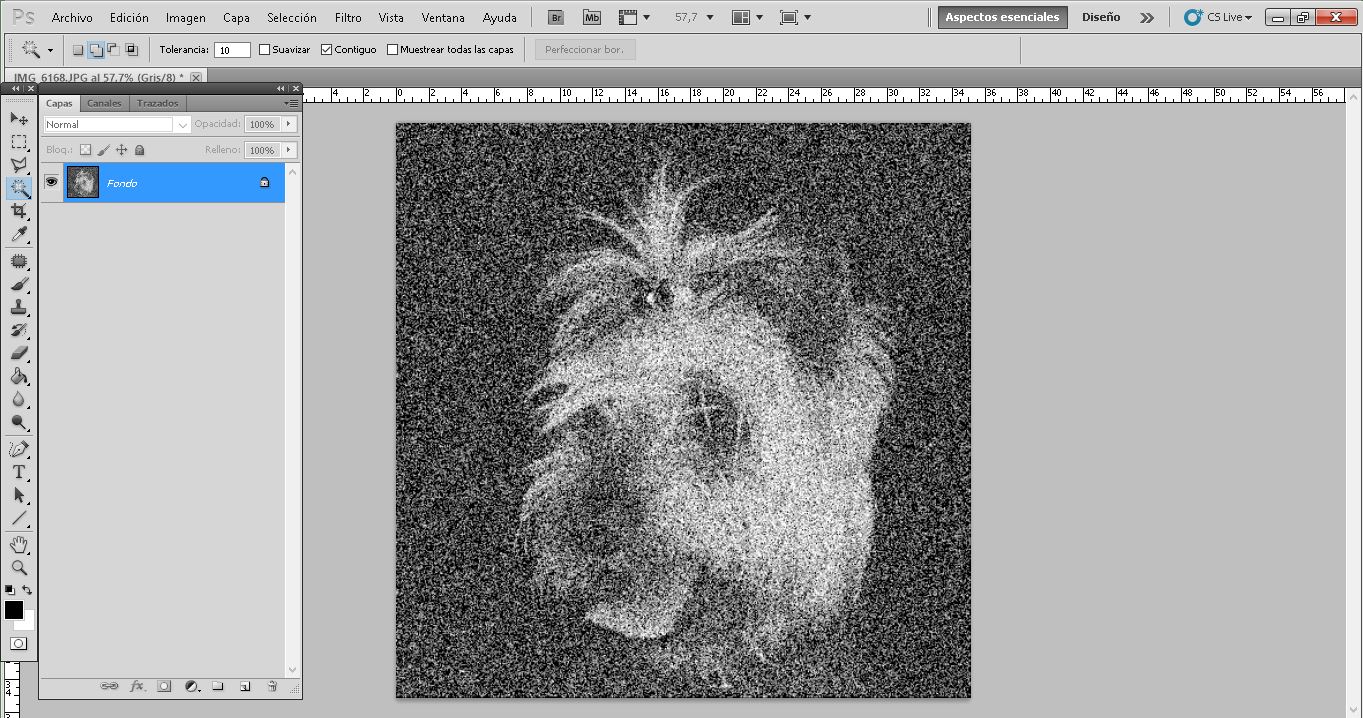
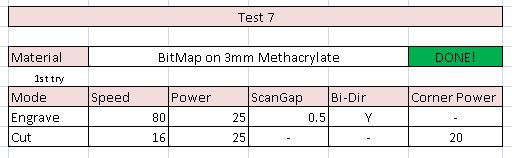
Test 7
We decided to engrave a bitmap image on the lasercutter. We had problems as the lasercutter program did not accept our image several times. The reason was that we changed the mode to a grayscale image instead of a Bitmap image. The rest of the process was quick and easy.
The original image:
Grayscale mode change:

Filter-->Pixelate-->Facet-->Medium Size (final image exported in .bmp, but represented on website as .jpg):
Problems while importing:

Parameters used on the lasecutter:
Final Result:
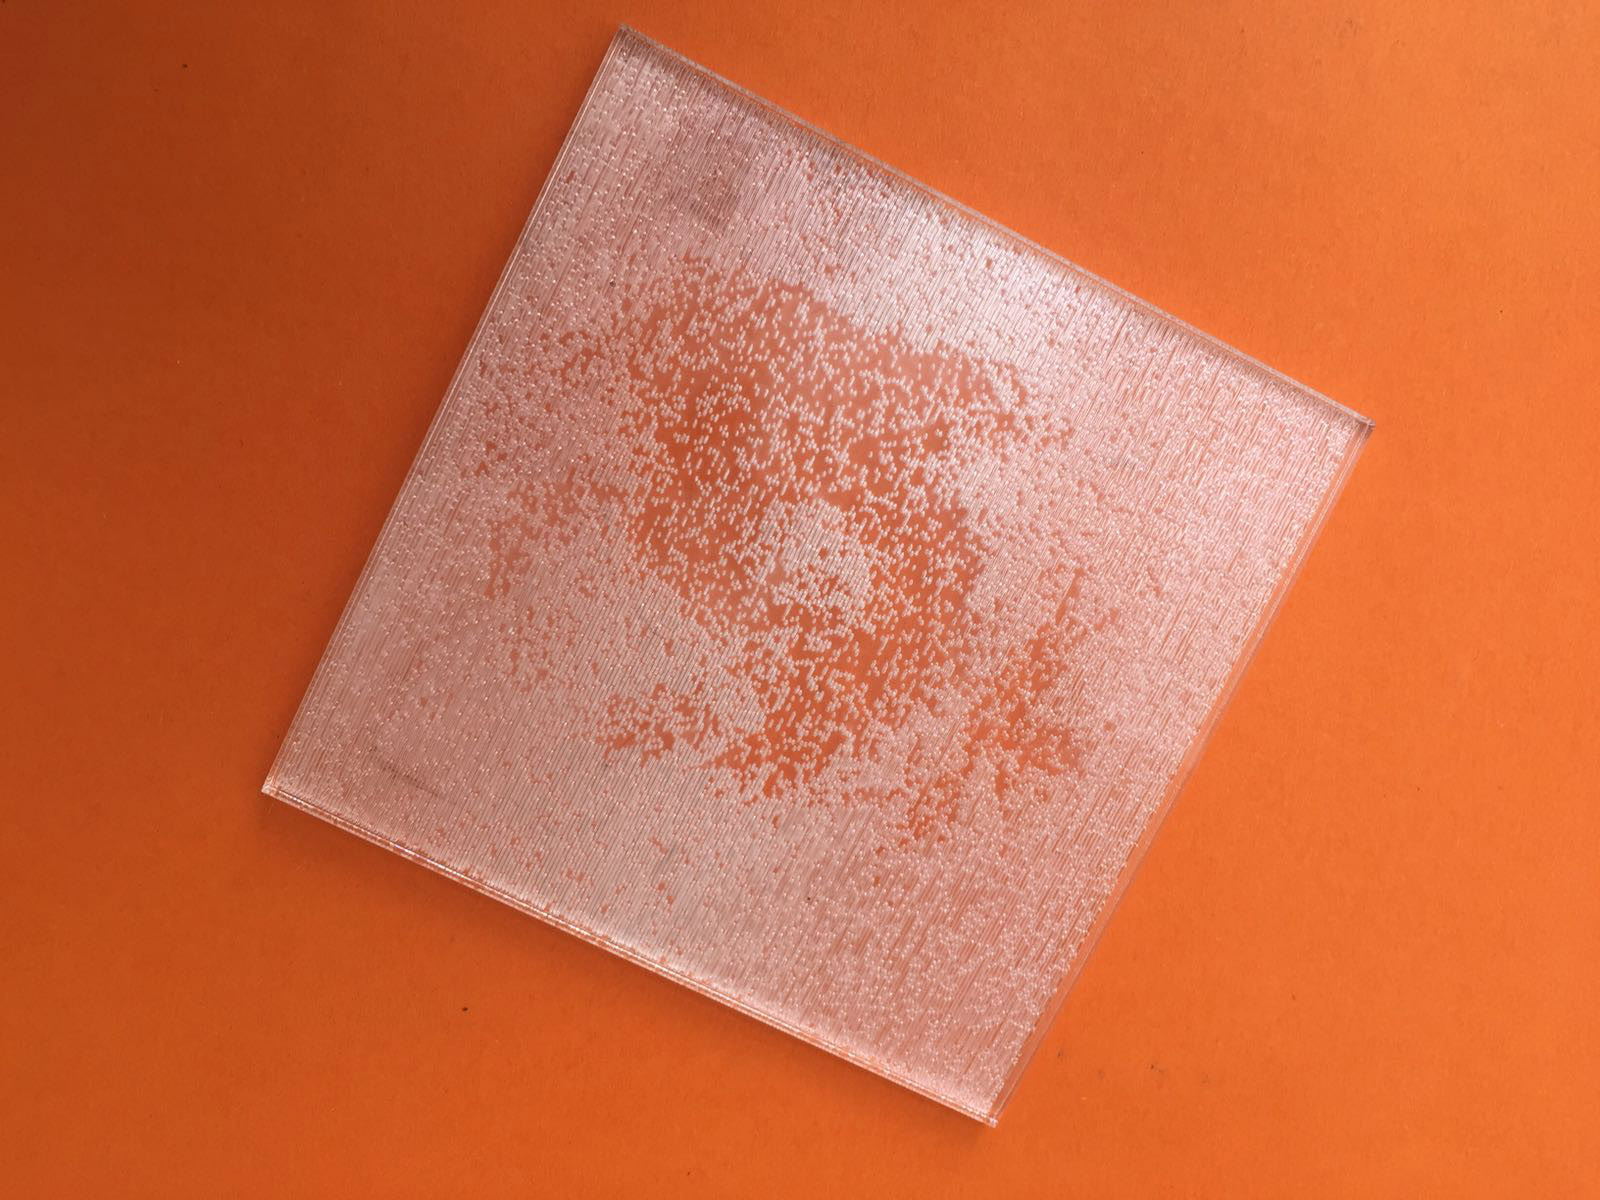
Problems accounted: We should try another image...
Update. Parametric file test
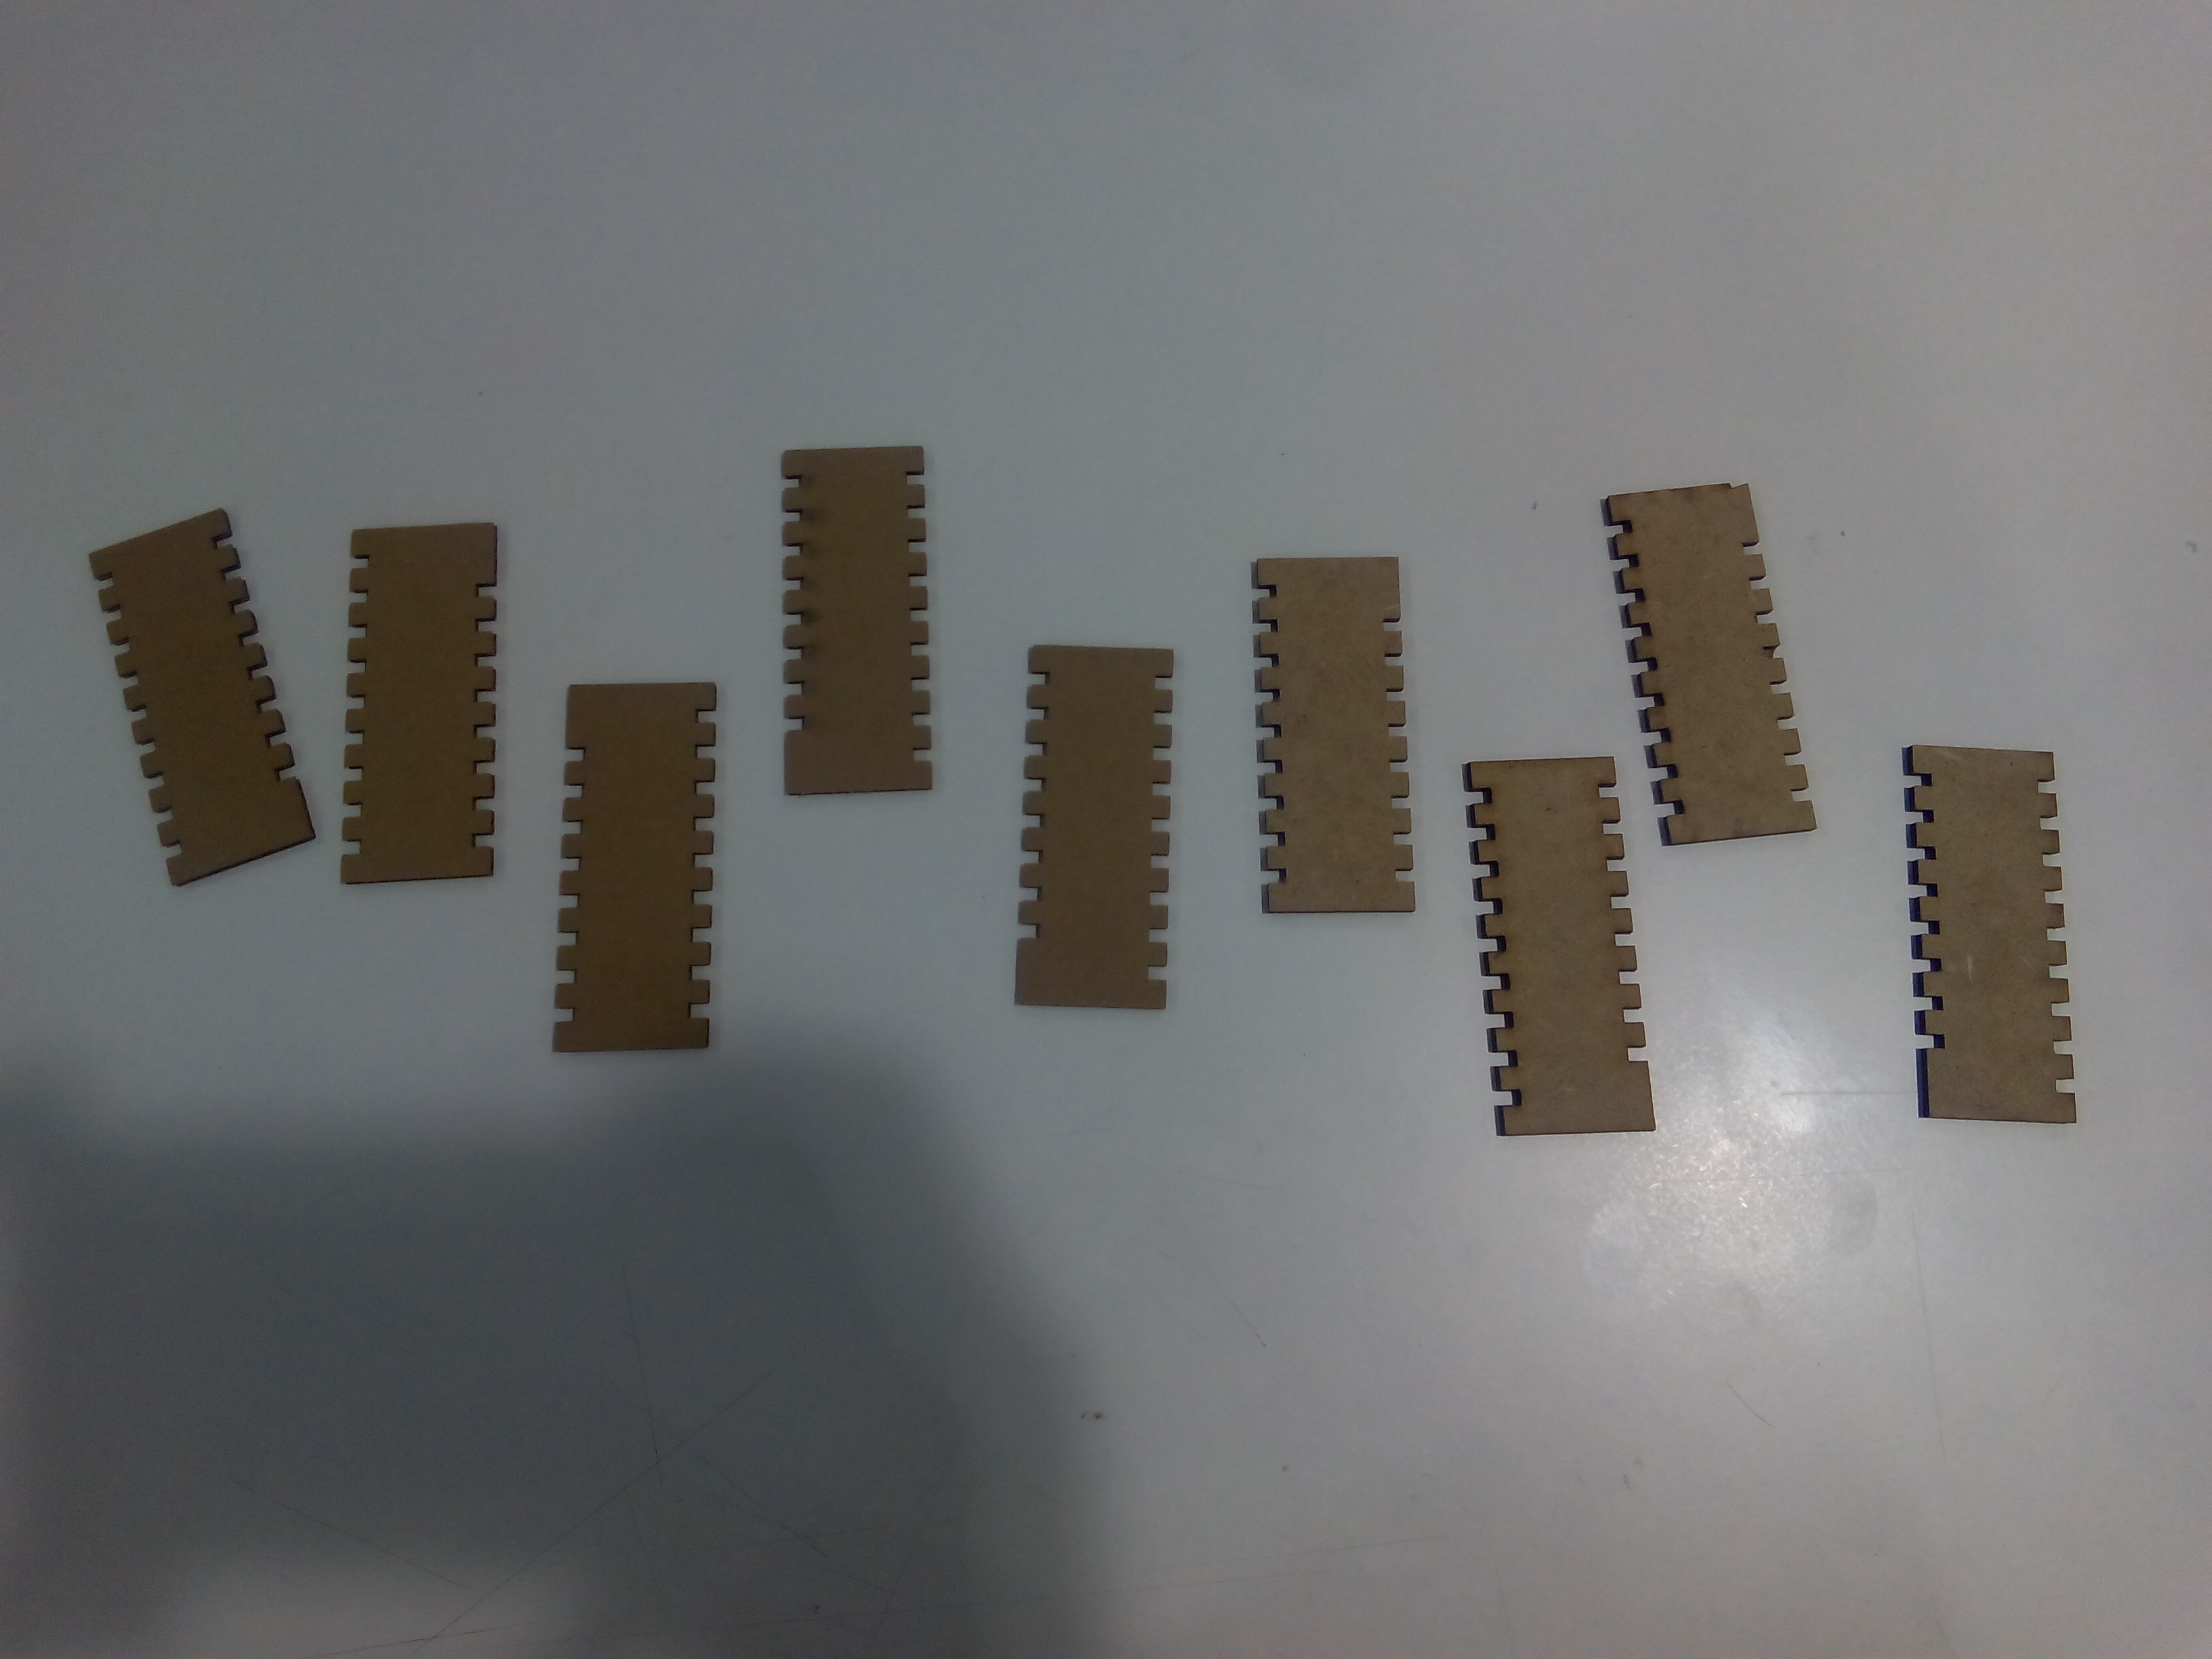
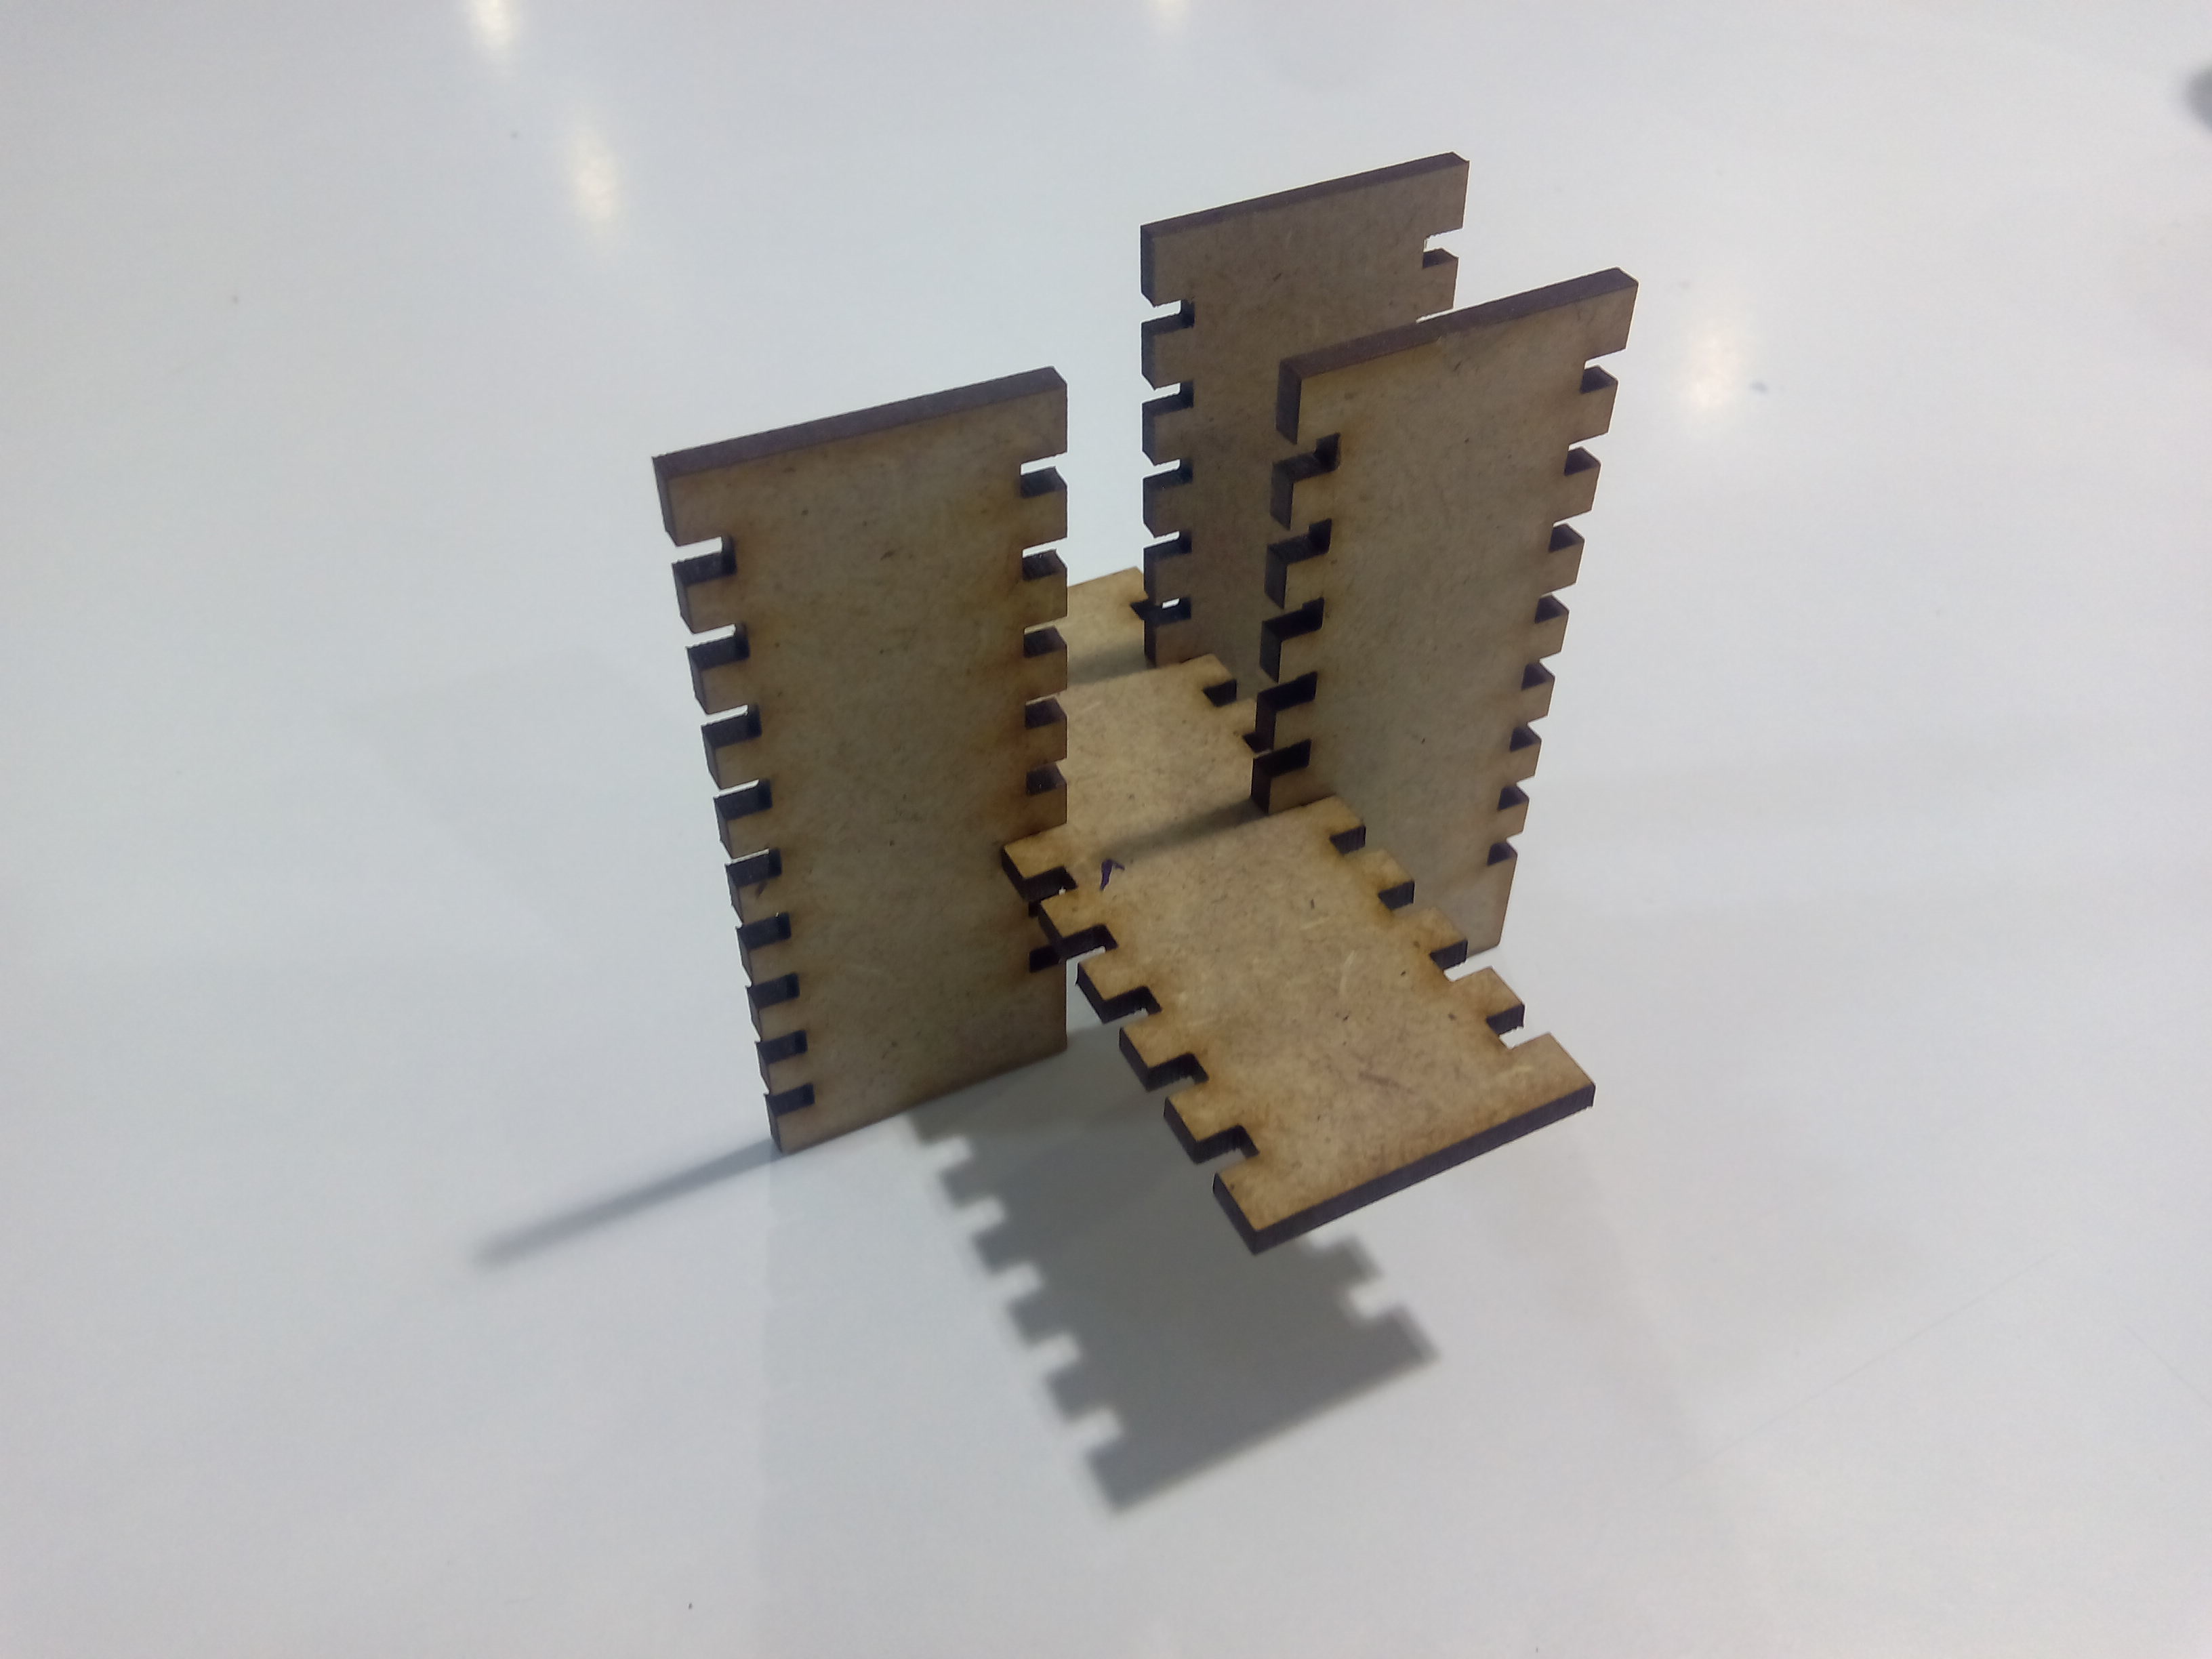
Our source file was not designed parametrically so we decided to do a Antimony sketch with a simple parametric object of 2 by 5 cm with slots.

On the left side incrementing the width of the slot by 0,01mm from bottom to top and or the right side decreasing the width by 0,01mm. This would allow us to measure the kerf of the laser cutter and the right parameters for a snug press fit joint.
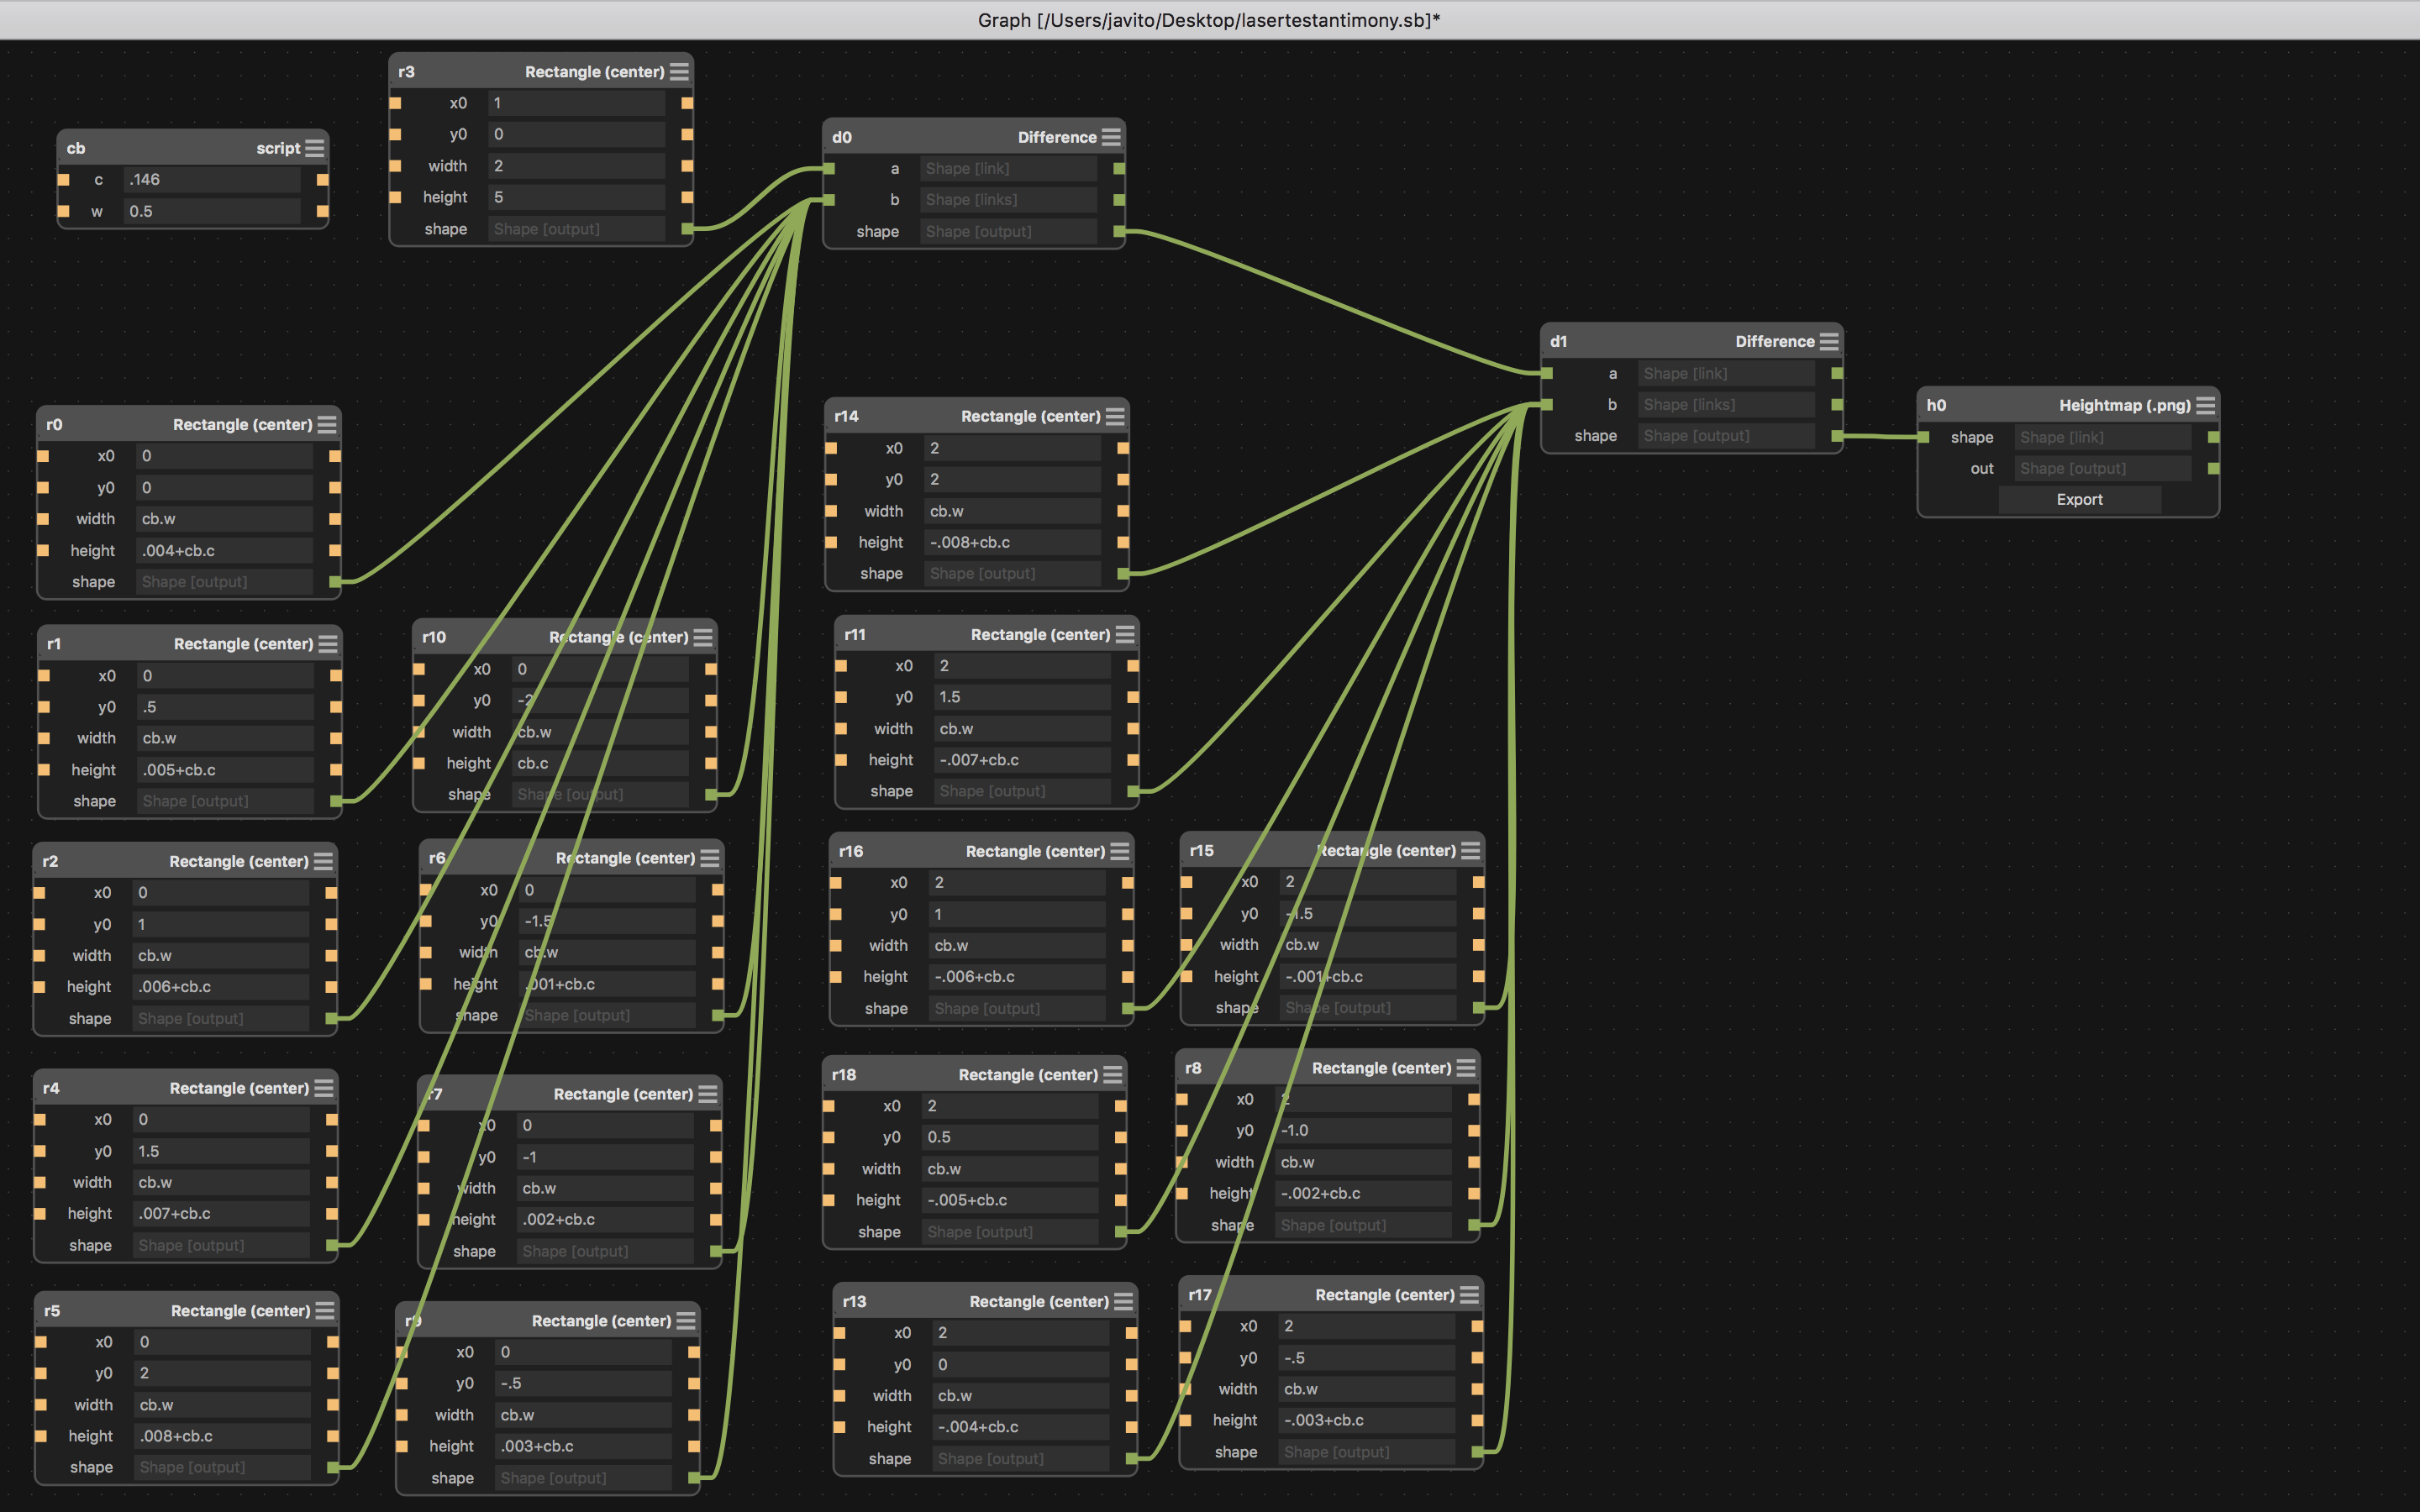
We cut this design in 3mm cardboard and 3mm MDF using the following parameters:
- speed: 16
- power: 20
- corner power: 15