Week 15 - Networking and Communcations
Menu
Networking and Communications
Networks have become ubiquitous. Internet communication enabled by Wifi technology, Bluetooth, new kids on the block like LoRa are everywhere. Still, a lot of wired communication like Serial, SPI, I2C are still an integral part of connected devices. In my final project, I will probably use the serial communication to connect my modified Satshakit to a Raspberry Pi Zero W. Therefore, I will build a second board (ComBoard) to experiment with the serial communication.
So here is the assignment for Week 15:
- design and build a wired and/or wireless network connecting at least two processors
Making the ComBoard
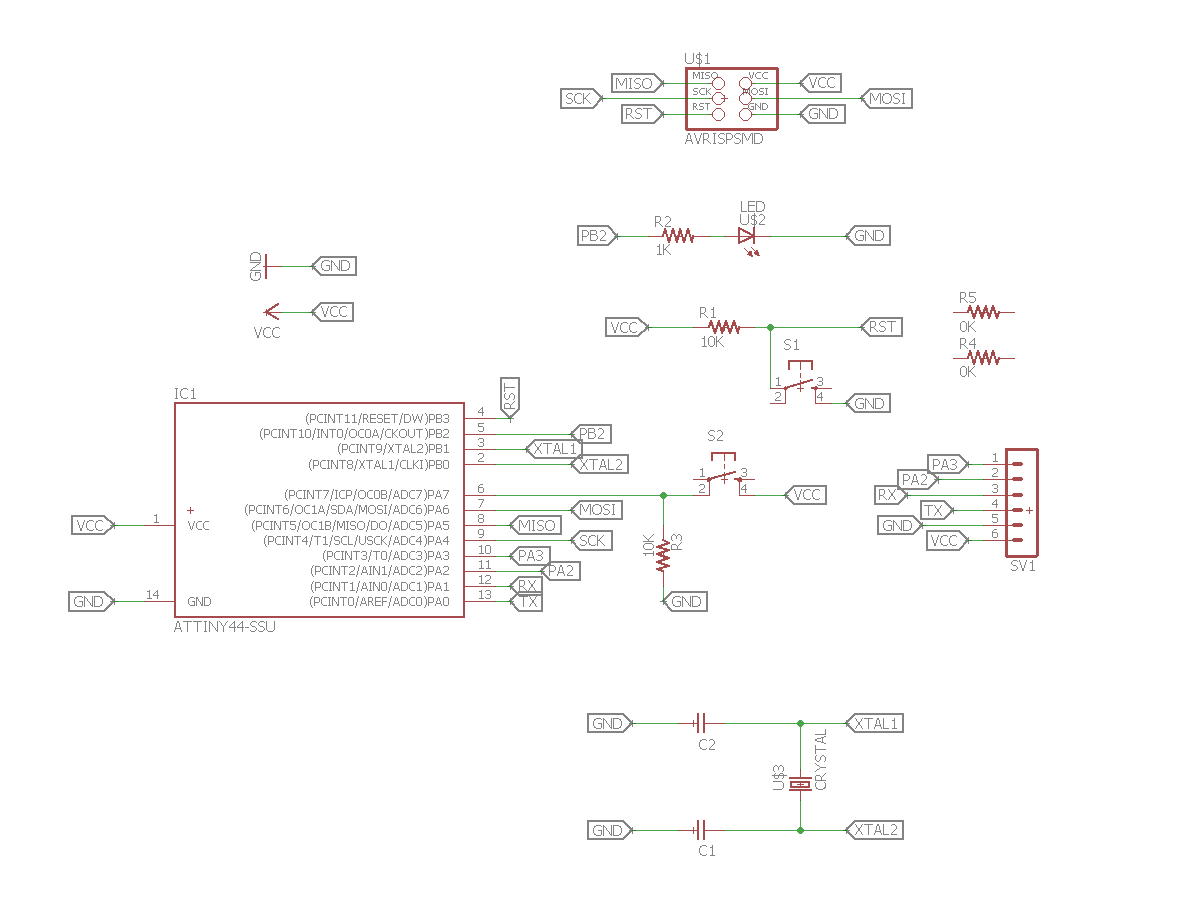
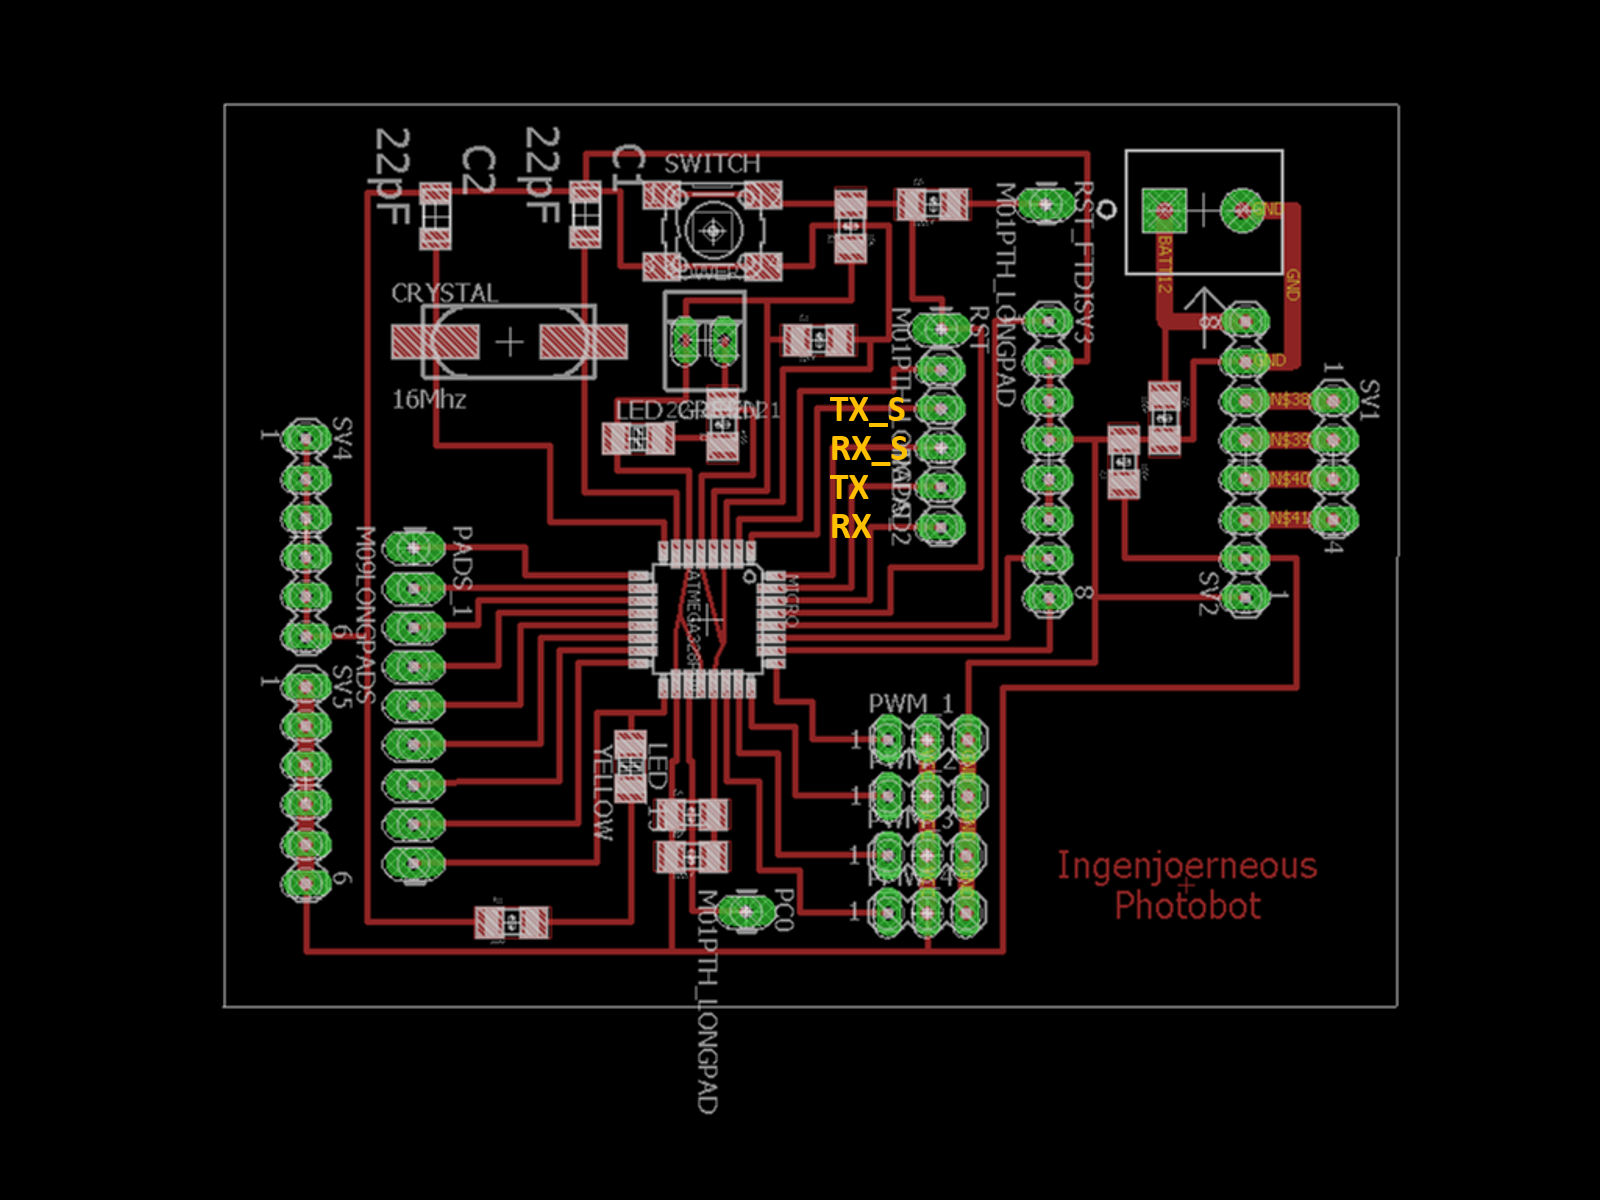
I modified my HelloBoard from week 06, this time routing all the remaining ports including the serial communication.
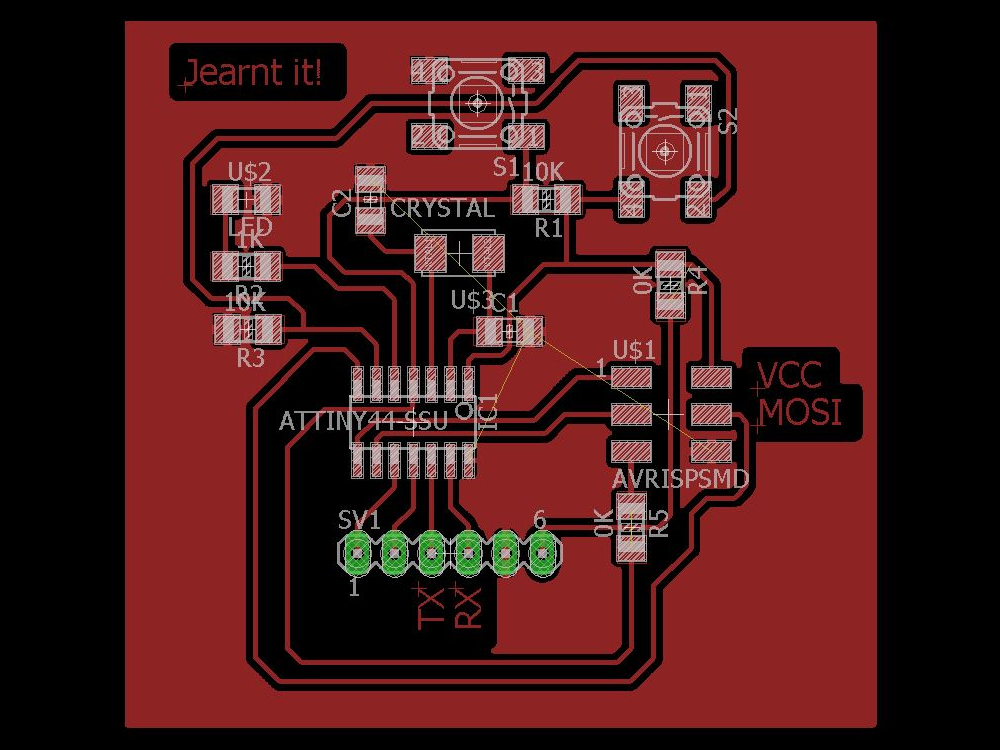
Designing the board
All ports added.
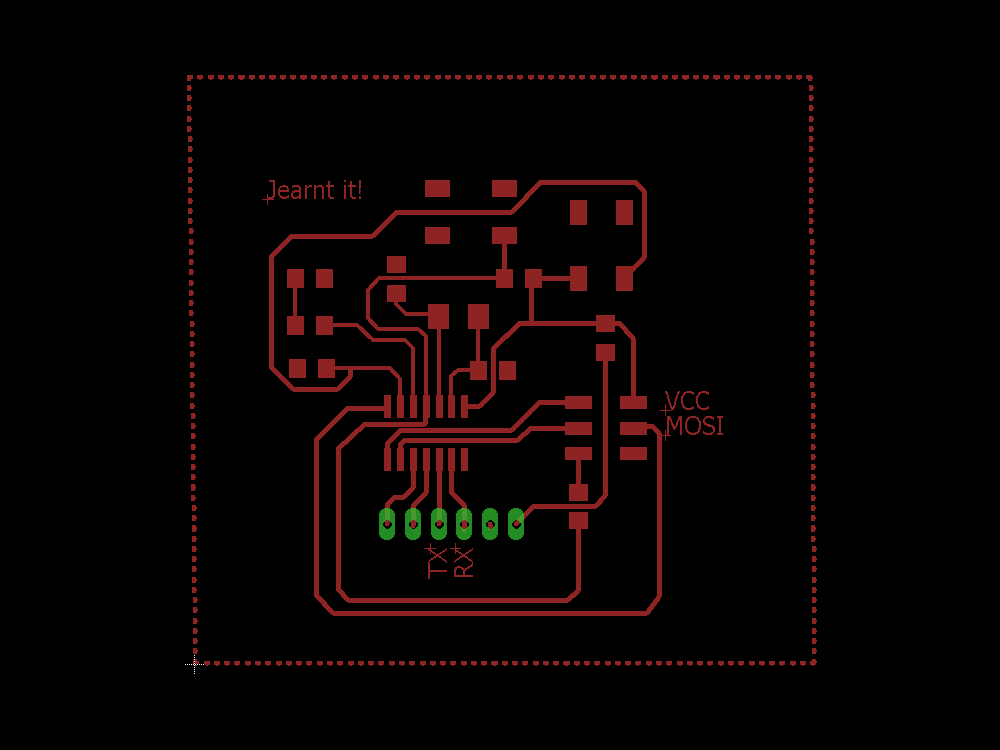
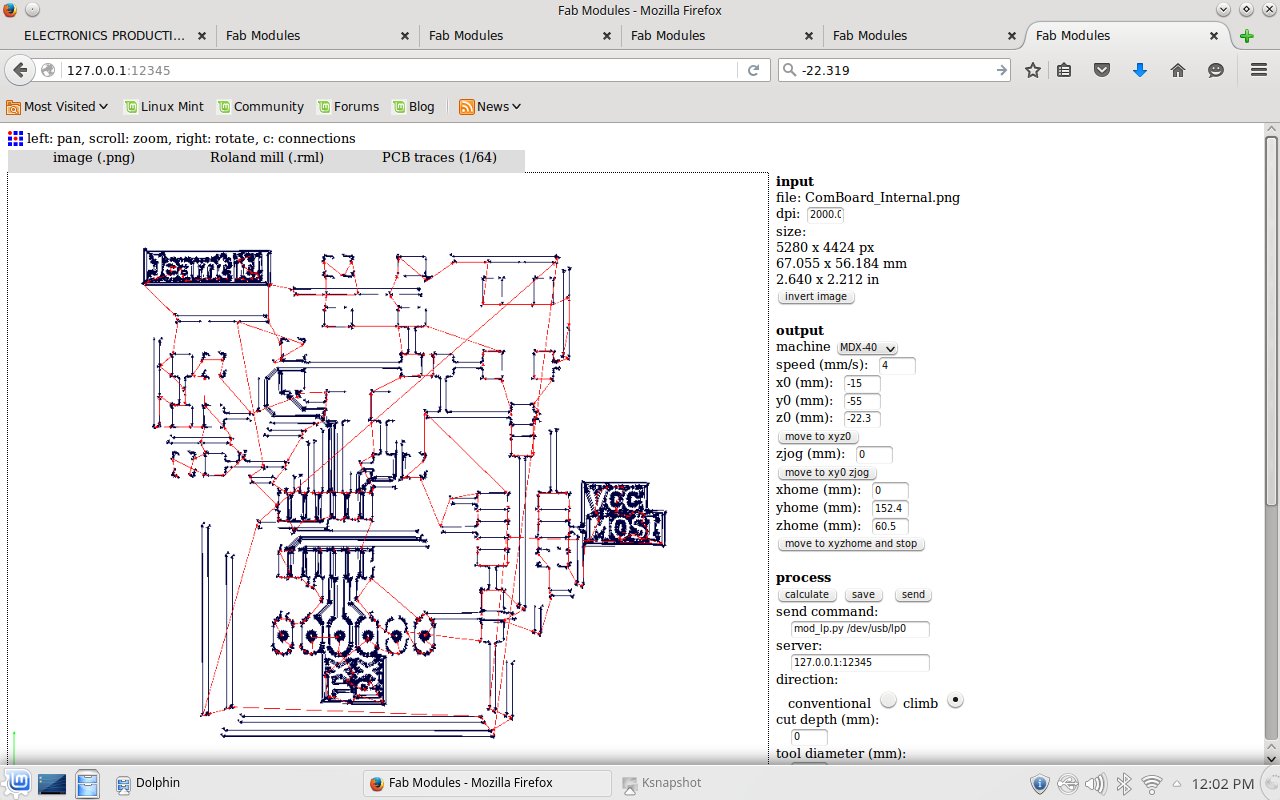
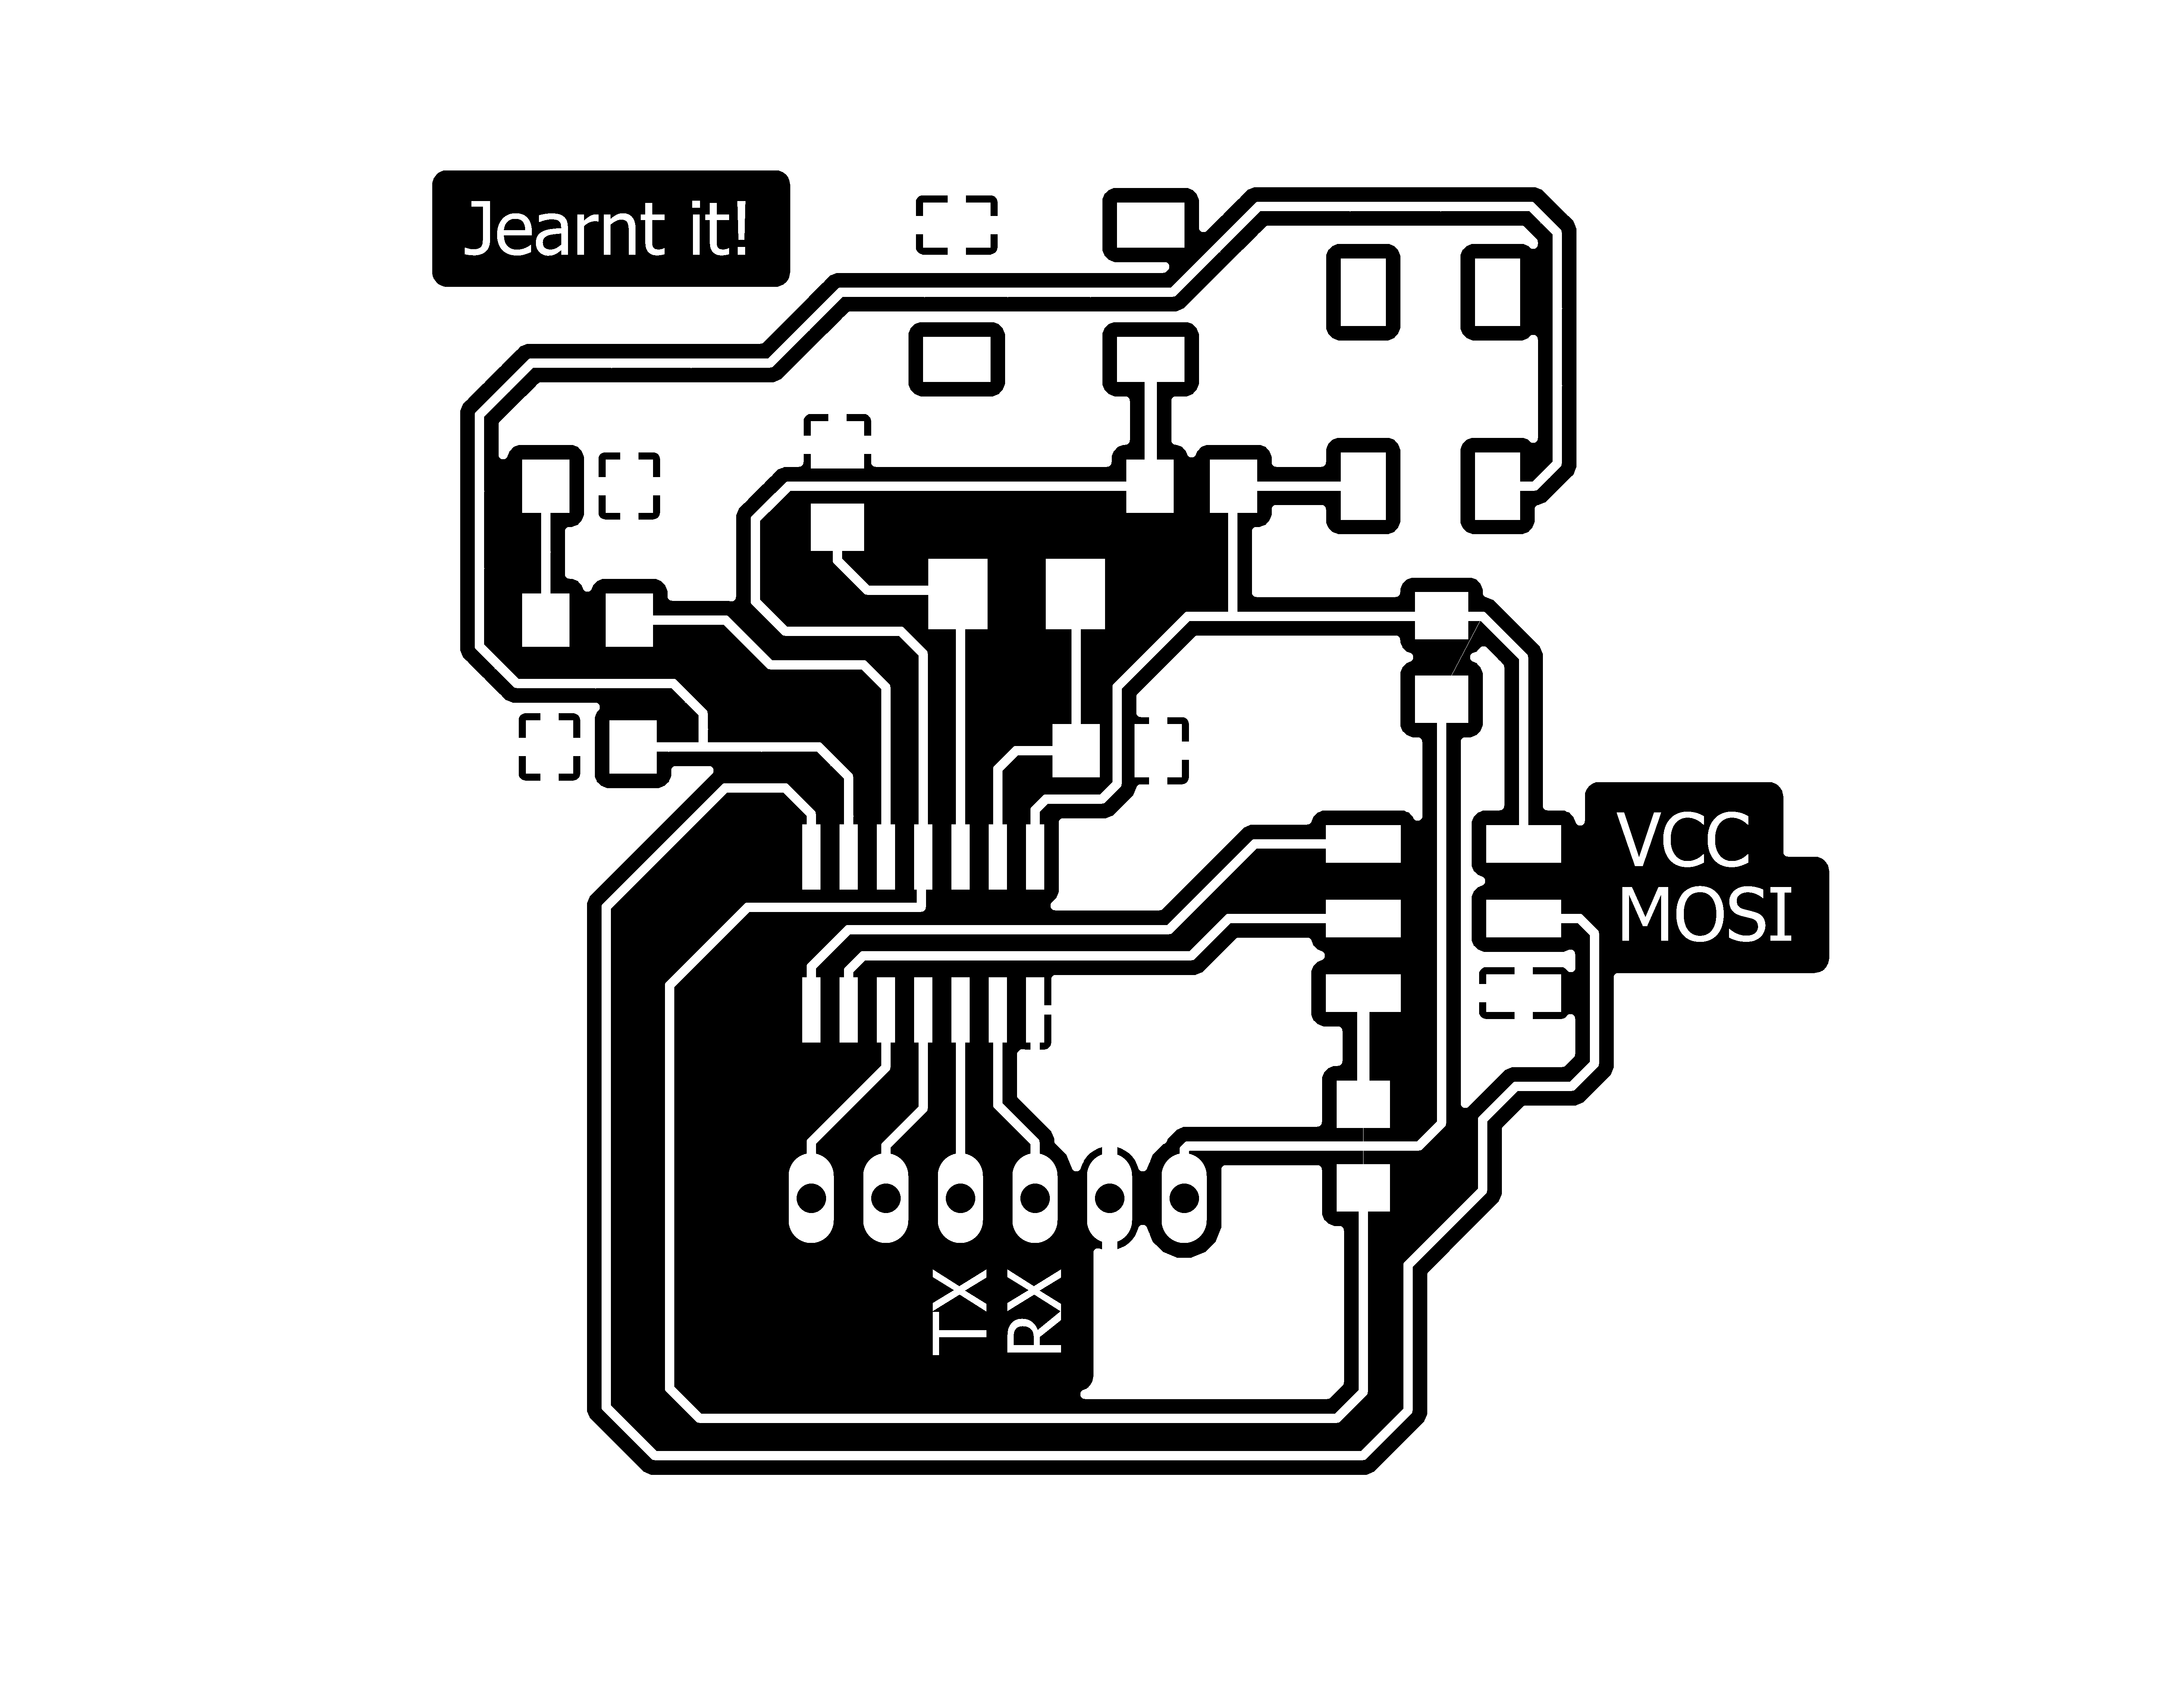
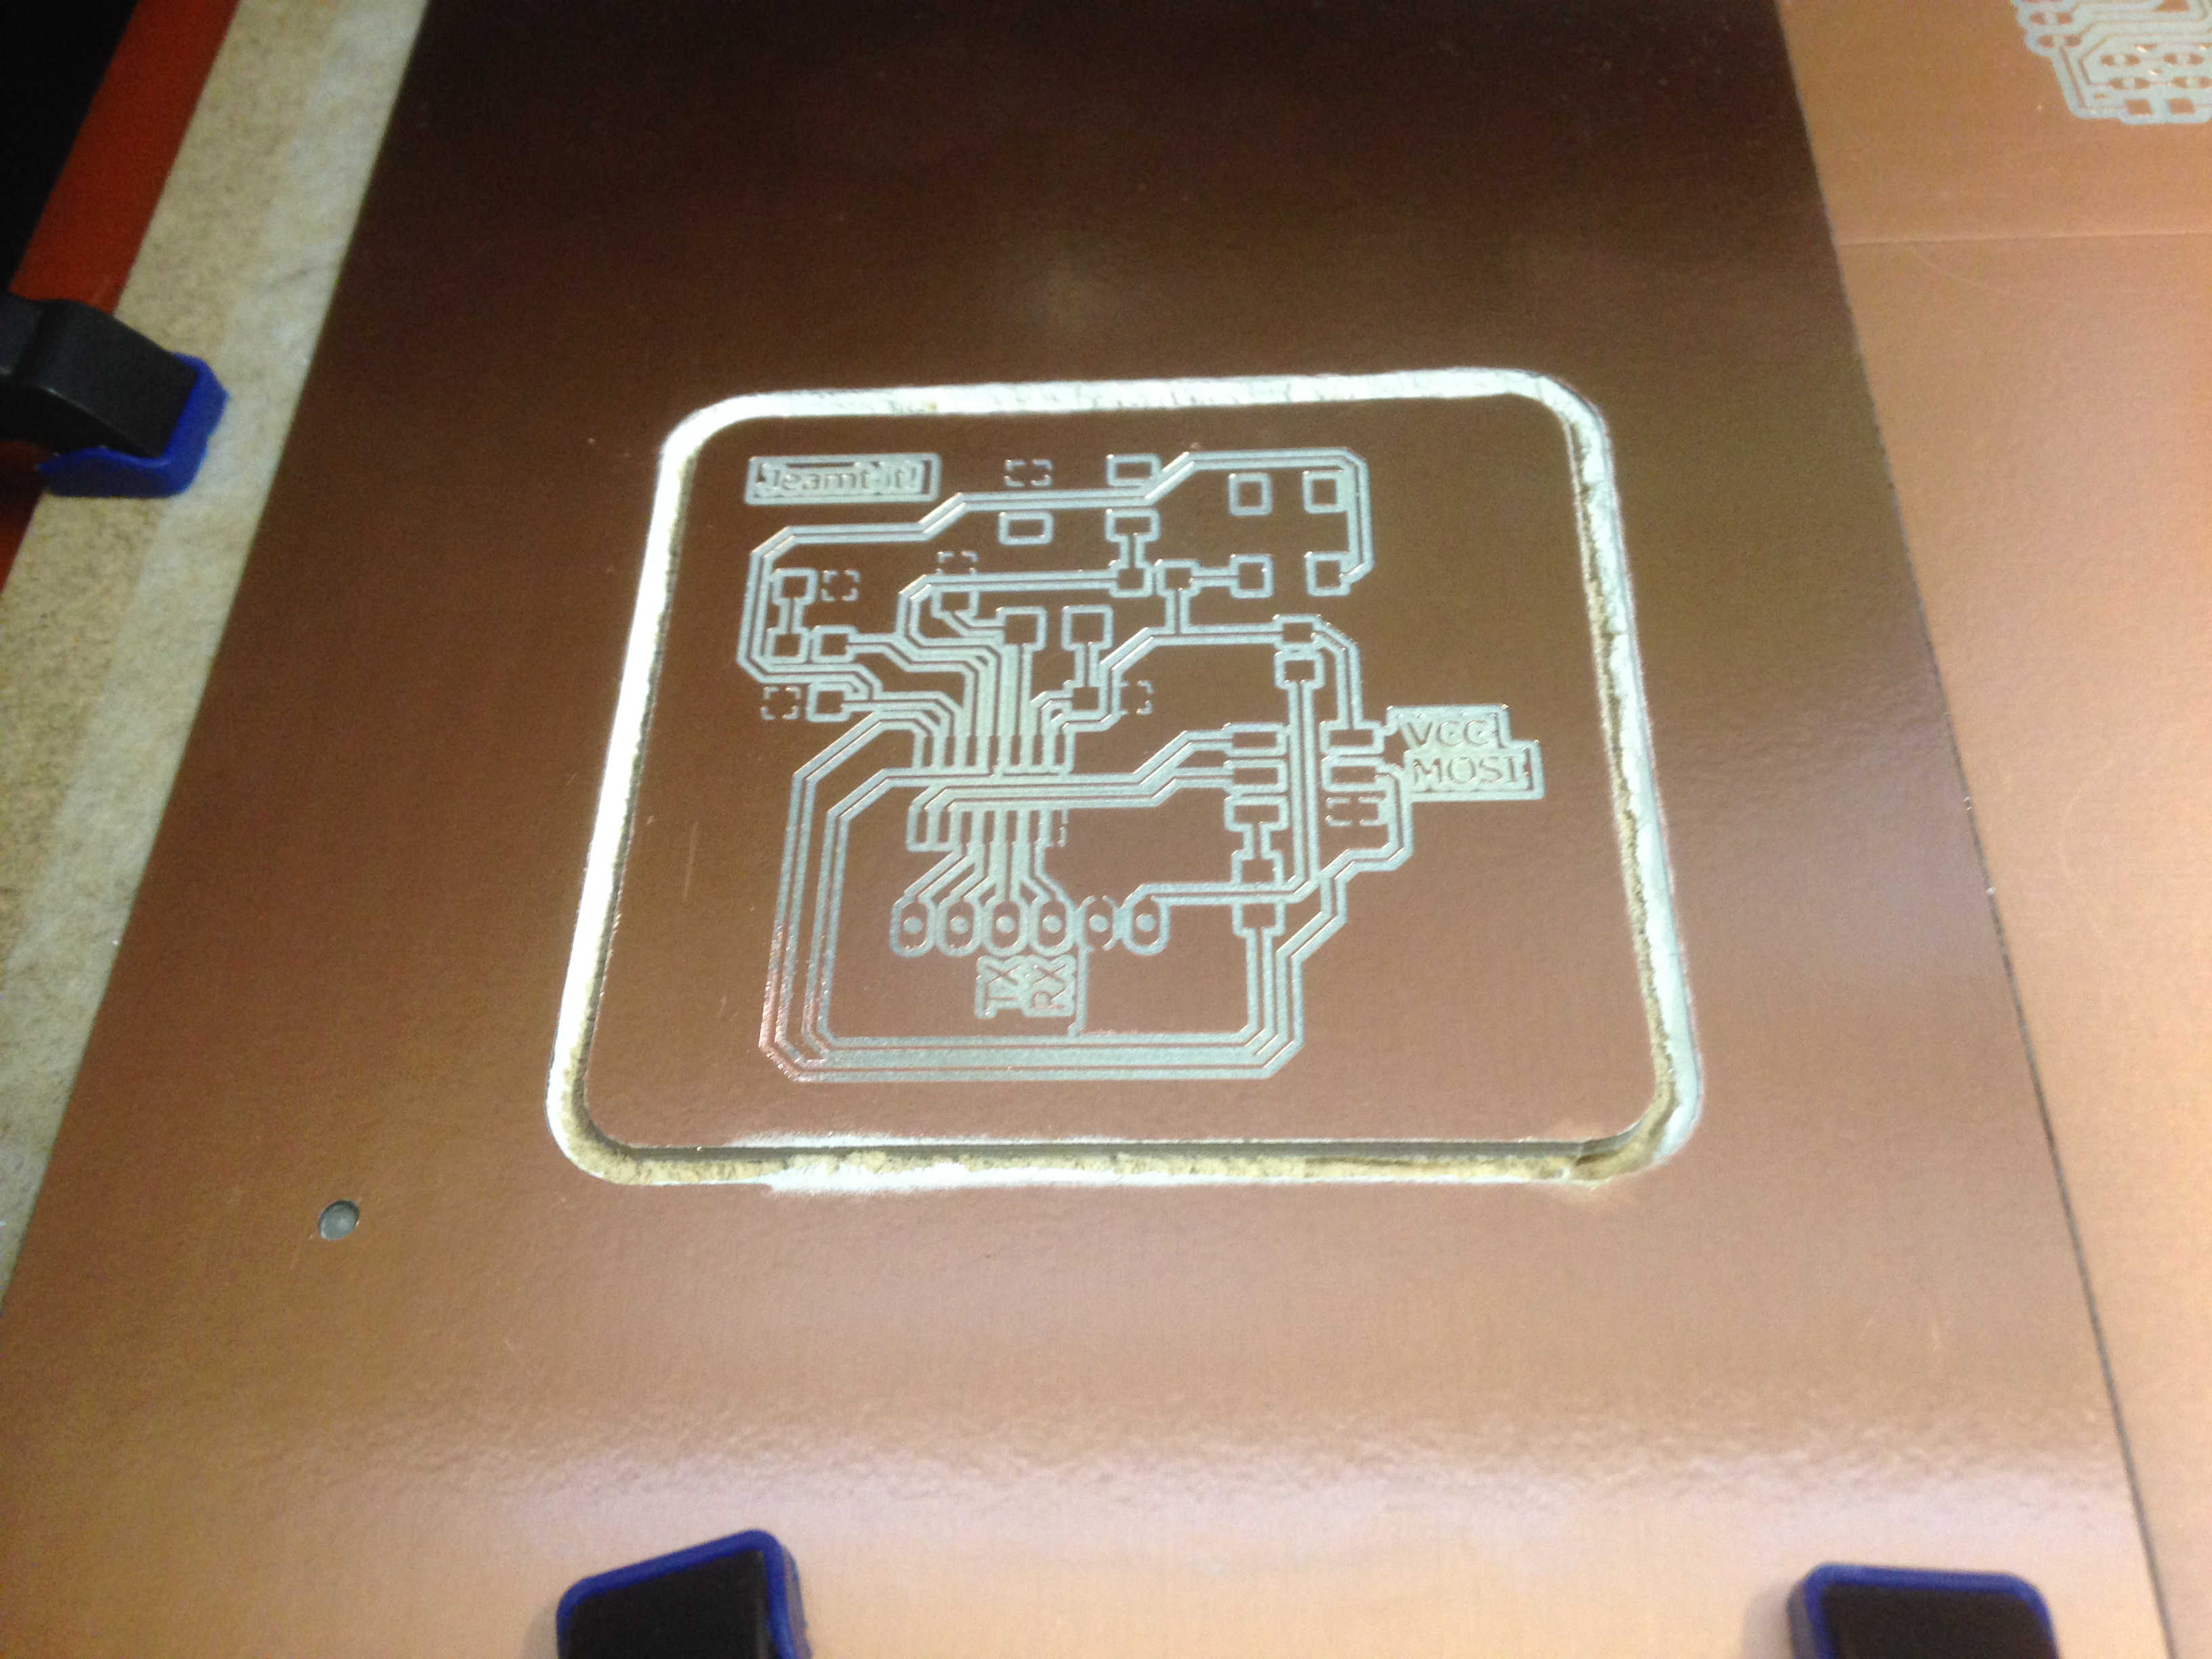
Milling the PCB
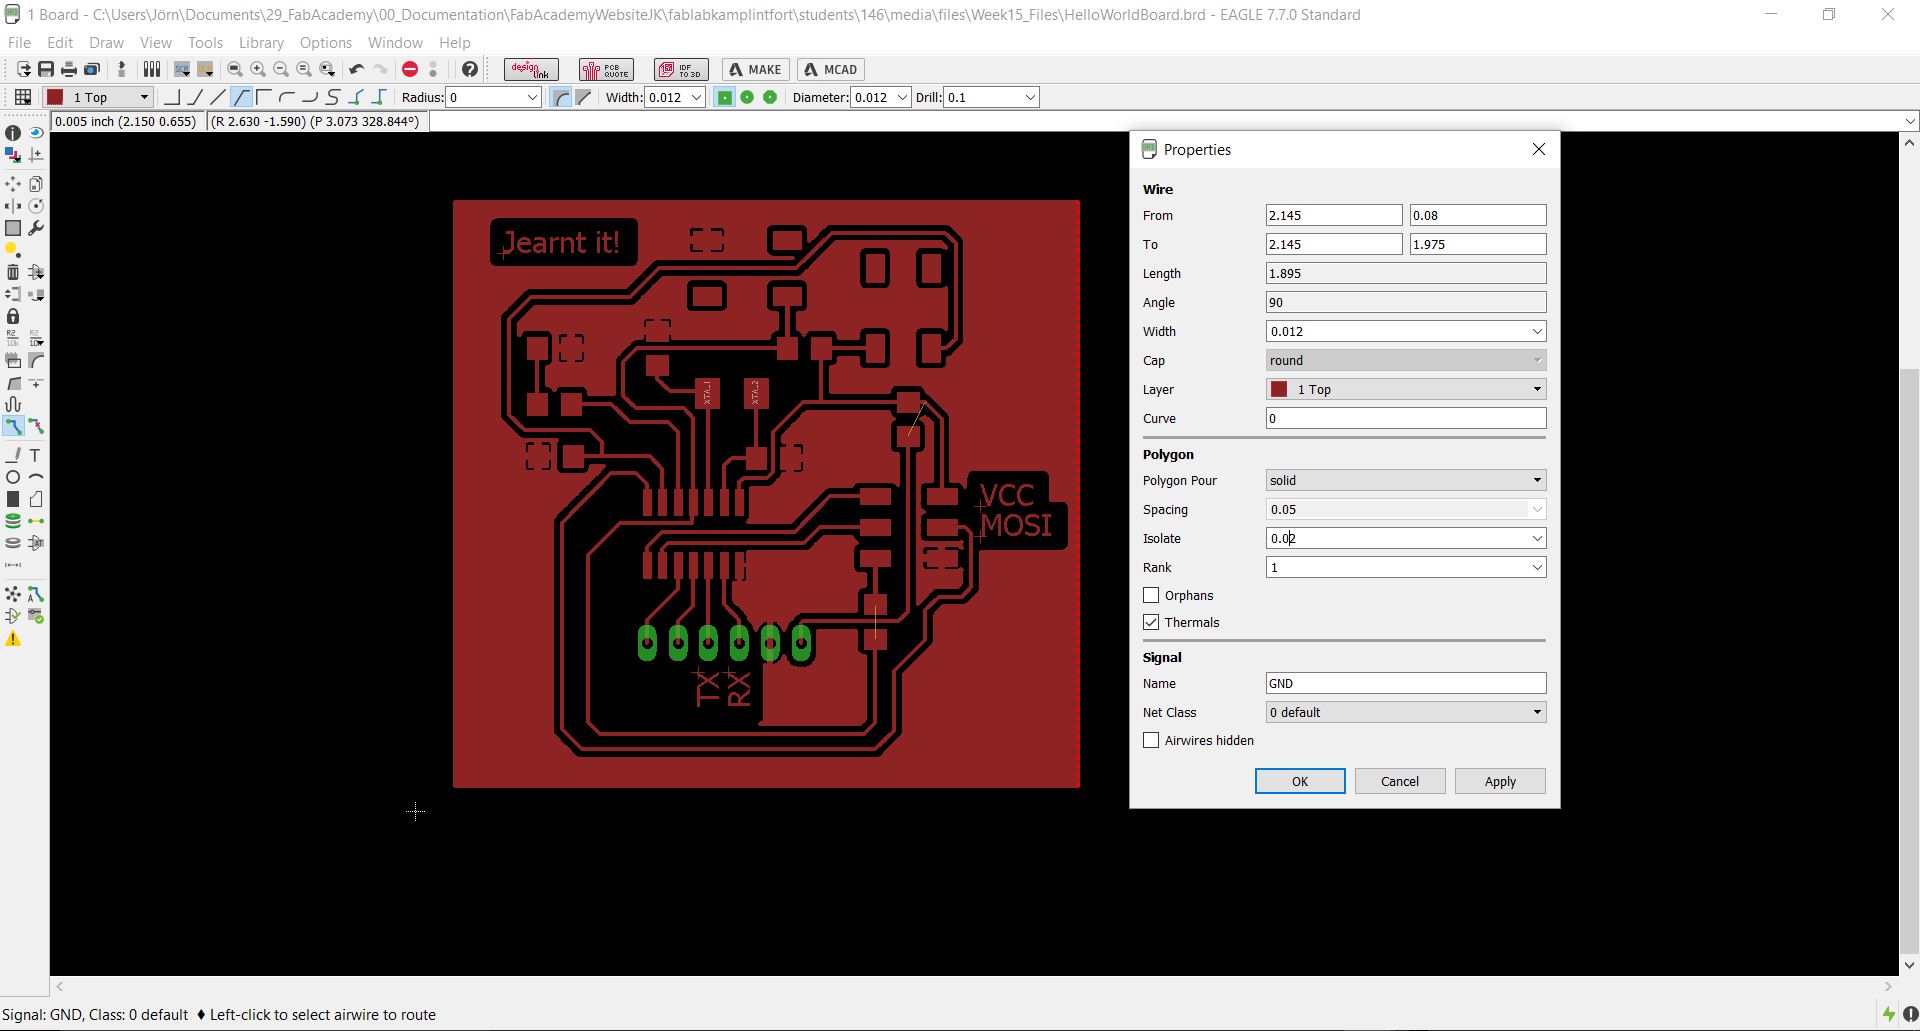
Ahh, same mistake as earlier, too low isolation! Luckily, I saw this in FabModules. I went back to Eagle and increased it setting 0.02.
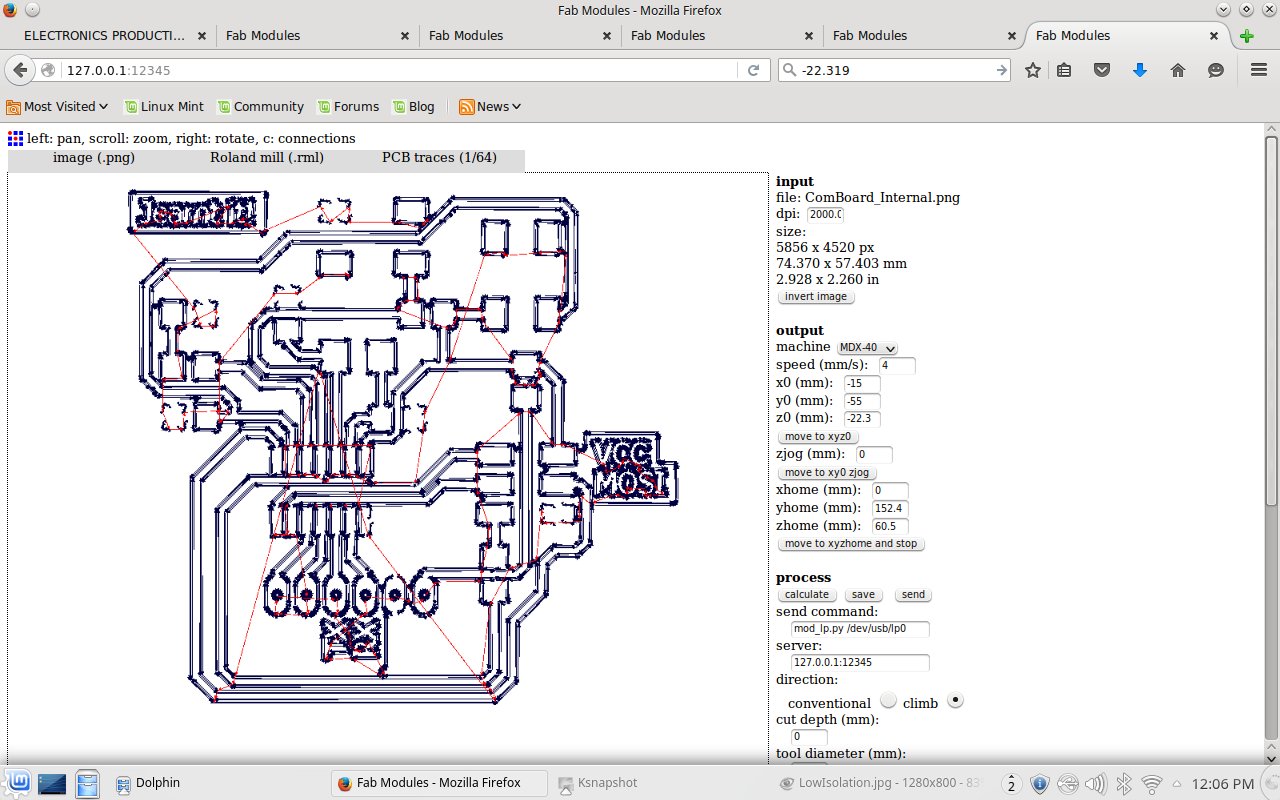

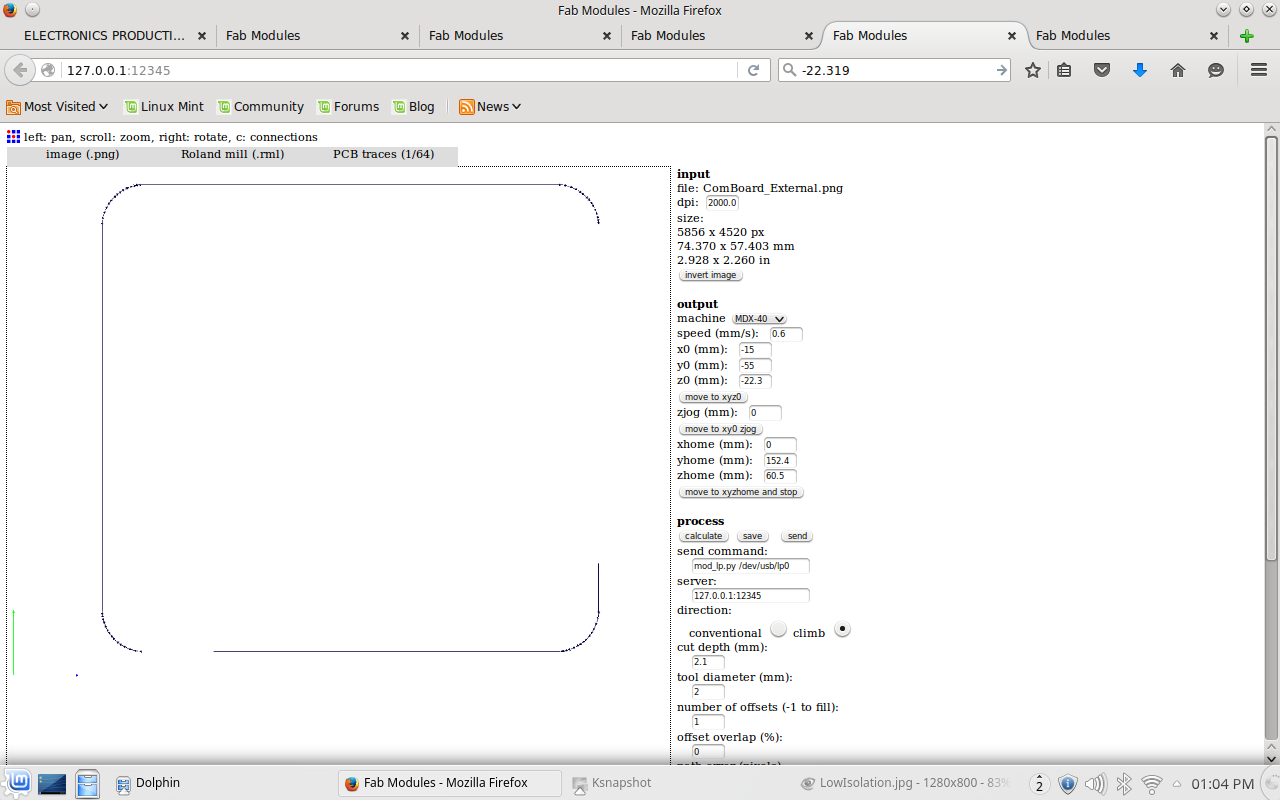
The result came out just fine.
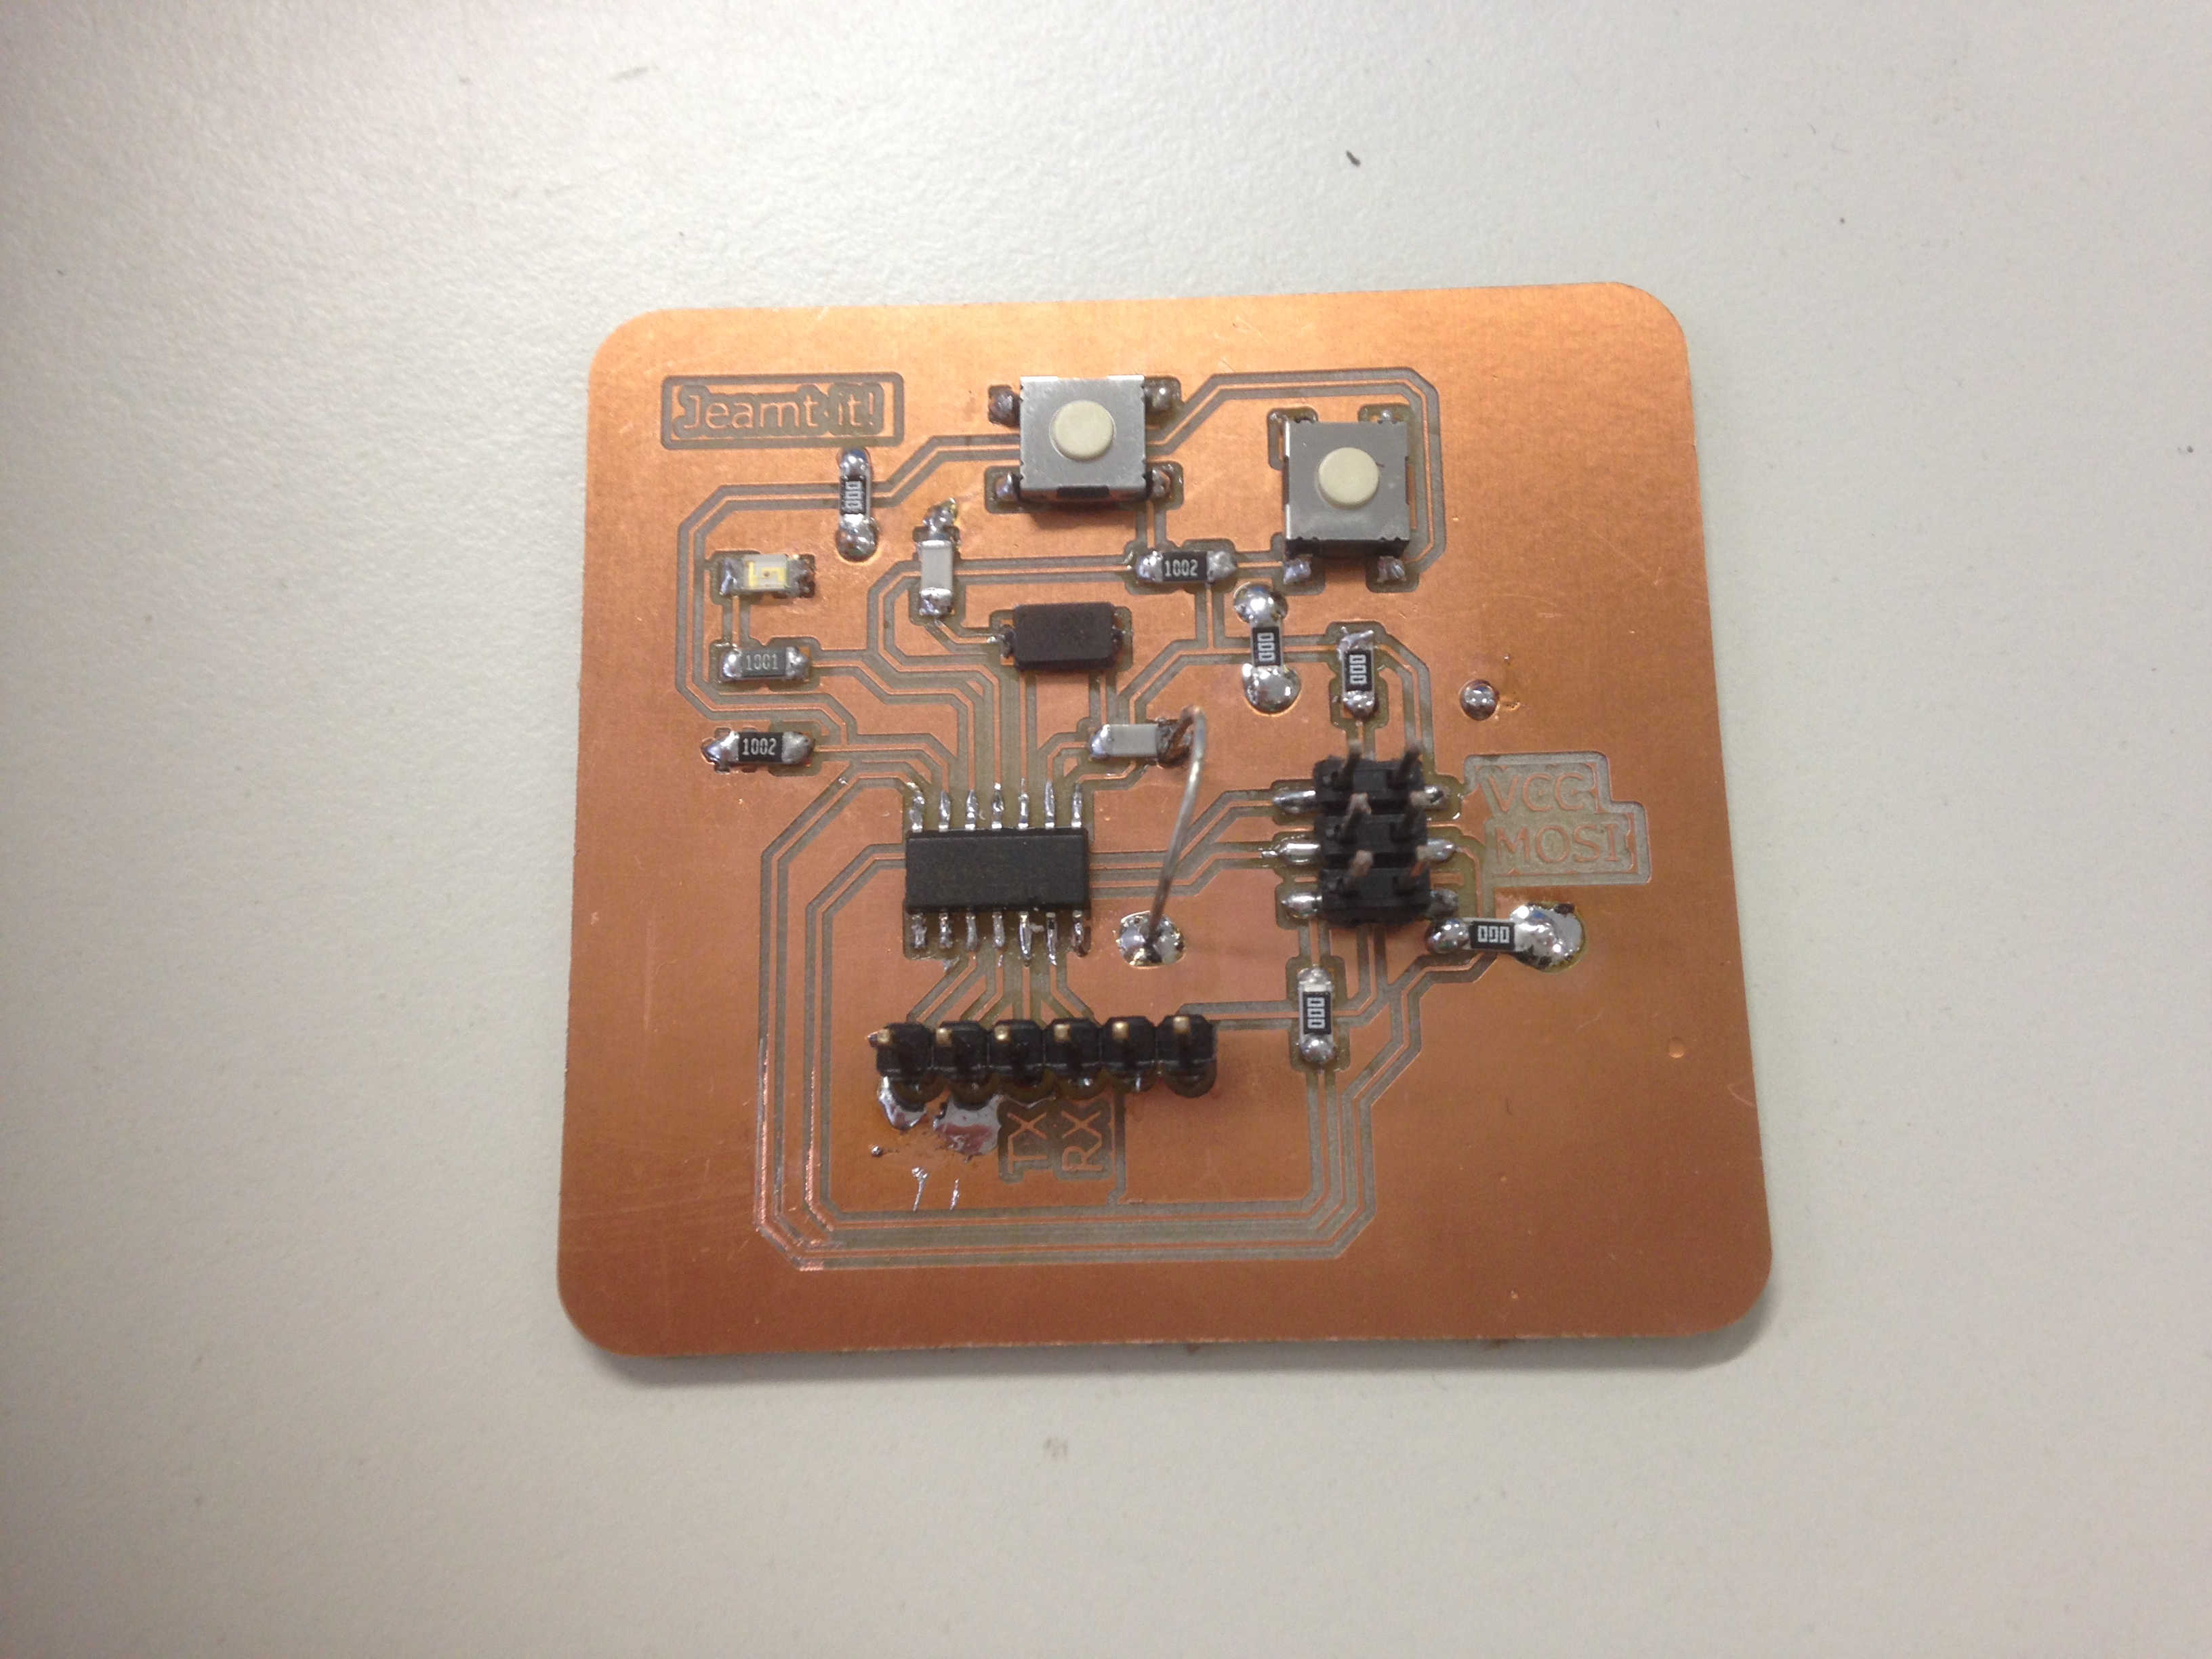
Soldering
After updating with Ratnest, I realized that some traces were lost by increasing the isolation. This only affects the ground layer, so will solve the problem with wires and a few more zero ohm resistor.
Bill of materials
- 1x ATtiny 44
- 1x 20 MHz crystal
- 2x 10 pF capacitors
- 2x switch
- 2x 10k resistors
- 5x 0k resistors
- 1x 1k resistor
- 1x LED
- 1x 6 pin (3x2) connector
- 2x 6 pin connector (inline)
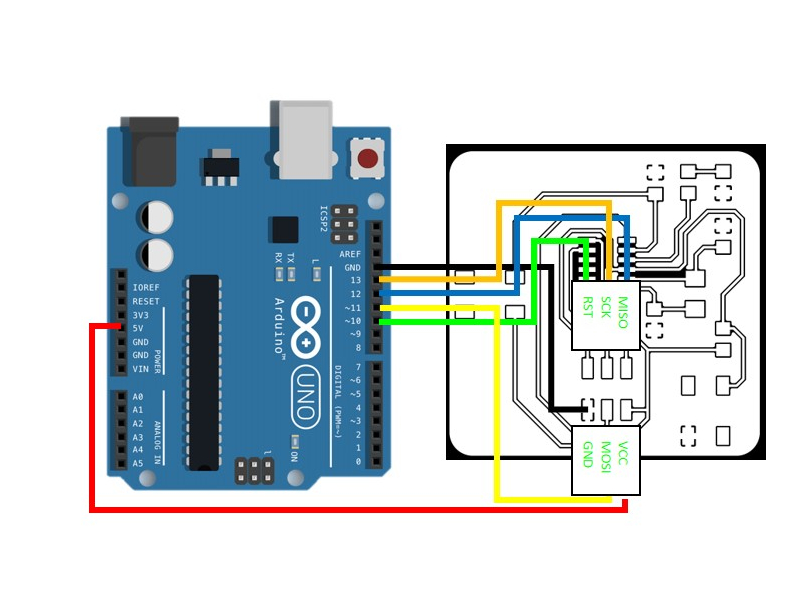
Communication
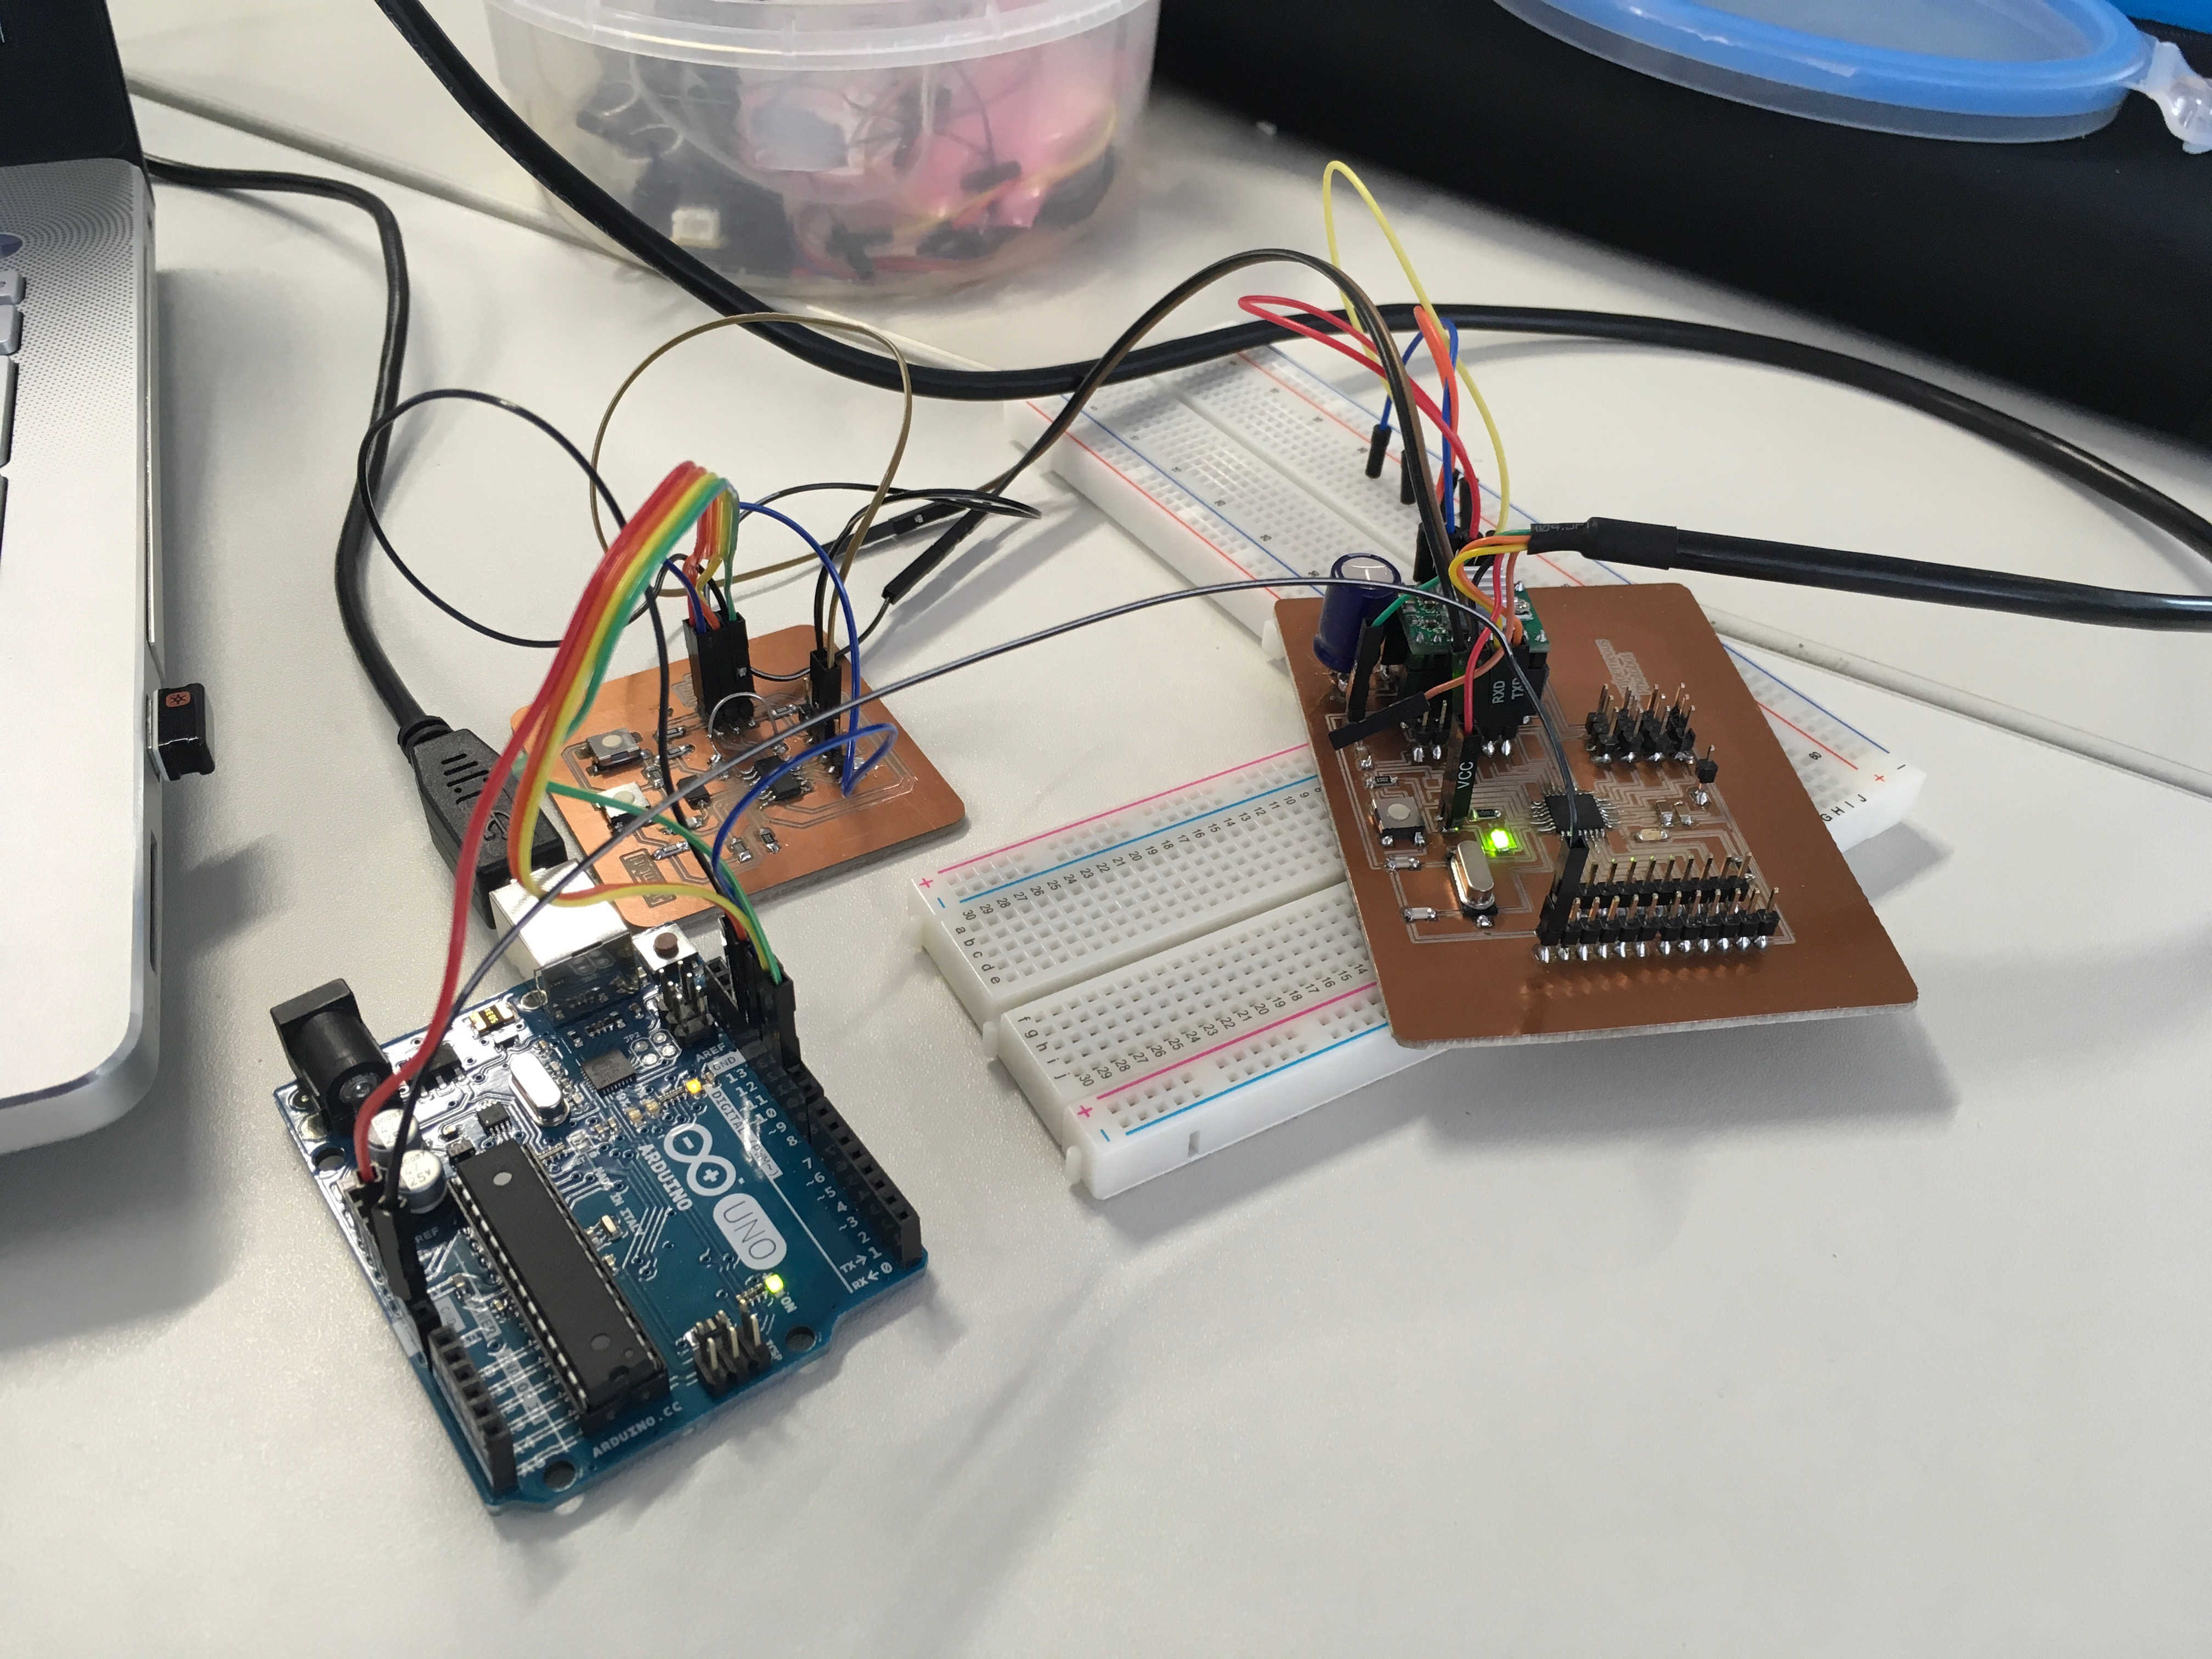
Once the soldering was completed. I started to programm the ComBoard. I used an Arduino Uno as an ISP programmer, burned the bootloader and followed up with programming via SPI. A simple blink sketch proved that the ComBoard was working.

On the ComBoard, we will use PA0 as RX and PA1 as TX which are 0 and 1 in the Arduino IDE.
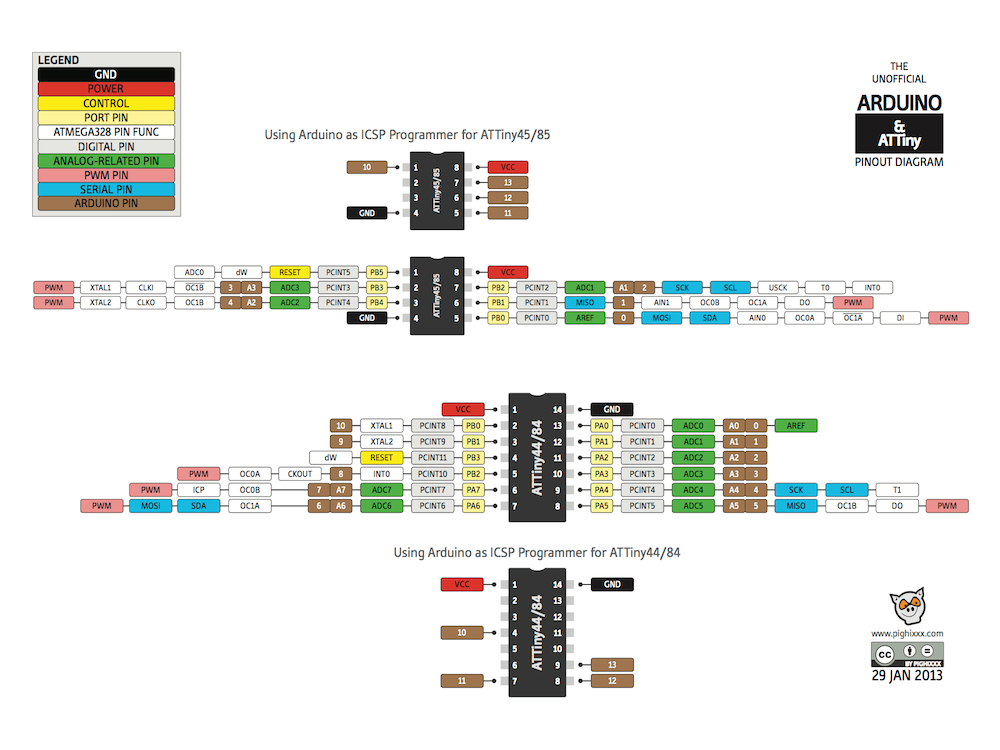
The ComBoard does not have hardware serial communication, so I will use the software serial.
// Joern Kiwitt - Serial Communication test //

#include < SoftwareSerial.h>

// MySerial object(Rx, Tx)
SoftwareSerial mySerial(0,1);

void setup() {
mySerial.begin(9600);
}

void loop() {
  delay(100);
  mySerial.print("hello Satshakit, this is ComBoard");
}
For the software serial on the Satshakit, I will use PD2 (Arduino pin 2) as RX_SoftwareSerial and PD3 (Arduino pin 3) as TX_SoftwareSerial. This can be varified, checking the documentation from week 10.
I will use Serial.write to write characters to the serial.
// Joern Kiwitt - Serial Communication test //

#include < SoftwareSerial.h>

const char* message;

// MySerial object(Rx, Tx)
SoftwareSerial mySerial(2,3);

void setup() {
Serial.begin(9600);
mySerial.begin(9600);
}

void loop() {
  Serial.println("hello ComBoard, this is Satshakit");
  delay(100);
  bool avabl=false;

  while (mySerial.available() > 0) {
     Serial.write(mySerial.read());
     avabl=true;
  }
  Serial.println();

if (!avabl){
  Serial.println("not available");
  }
}
To connect the serial ports, remember to also share the GND. After doing so, the ComBoard serial, send via software serial to the Satshakit can be read from the serial monitor of the Satshakit.
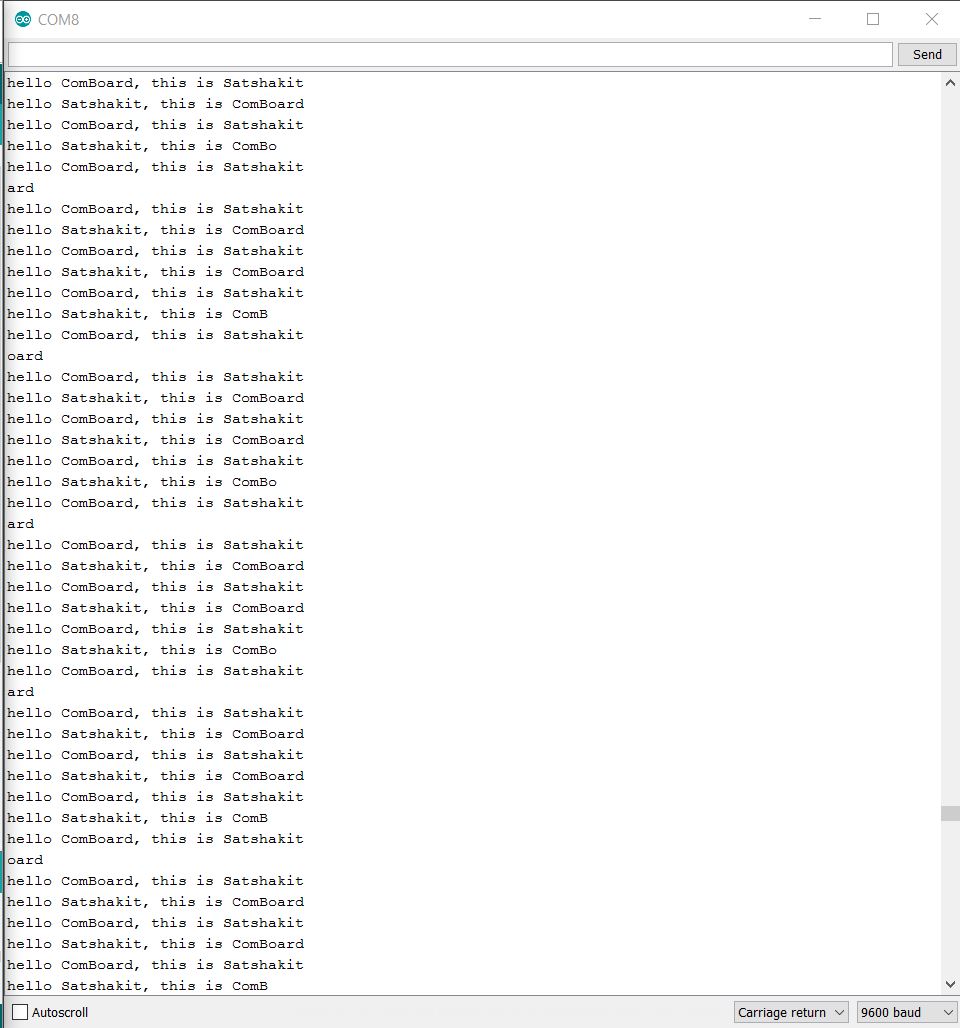
As the speed of the two microprocessors is slightly different, sometimes the message won't go through completely, but in general the message goes through.