WEEK 5 - 3D SCANNING AND PRINTING
ASSIGNMENT
- Test the design rules for your printer
- Design and 3D print a small object that could not be subtractively
- 3D scan an object and print it
3D PRINTER TEST
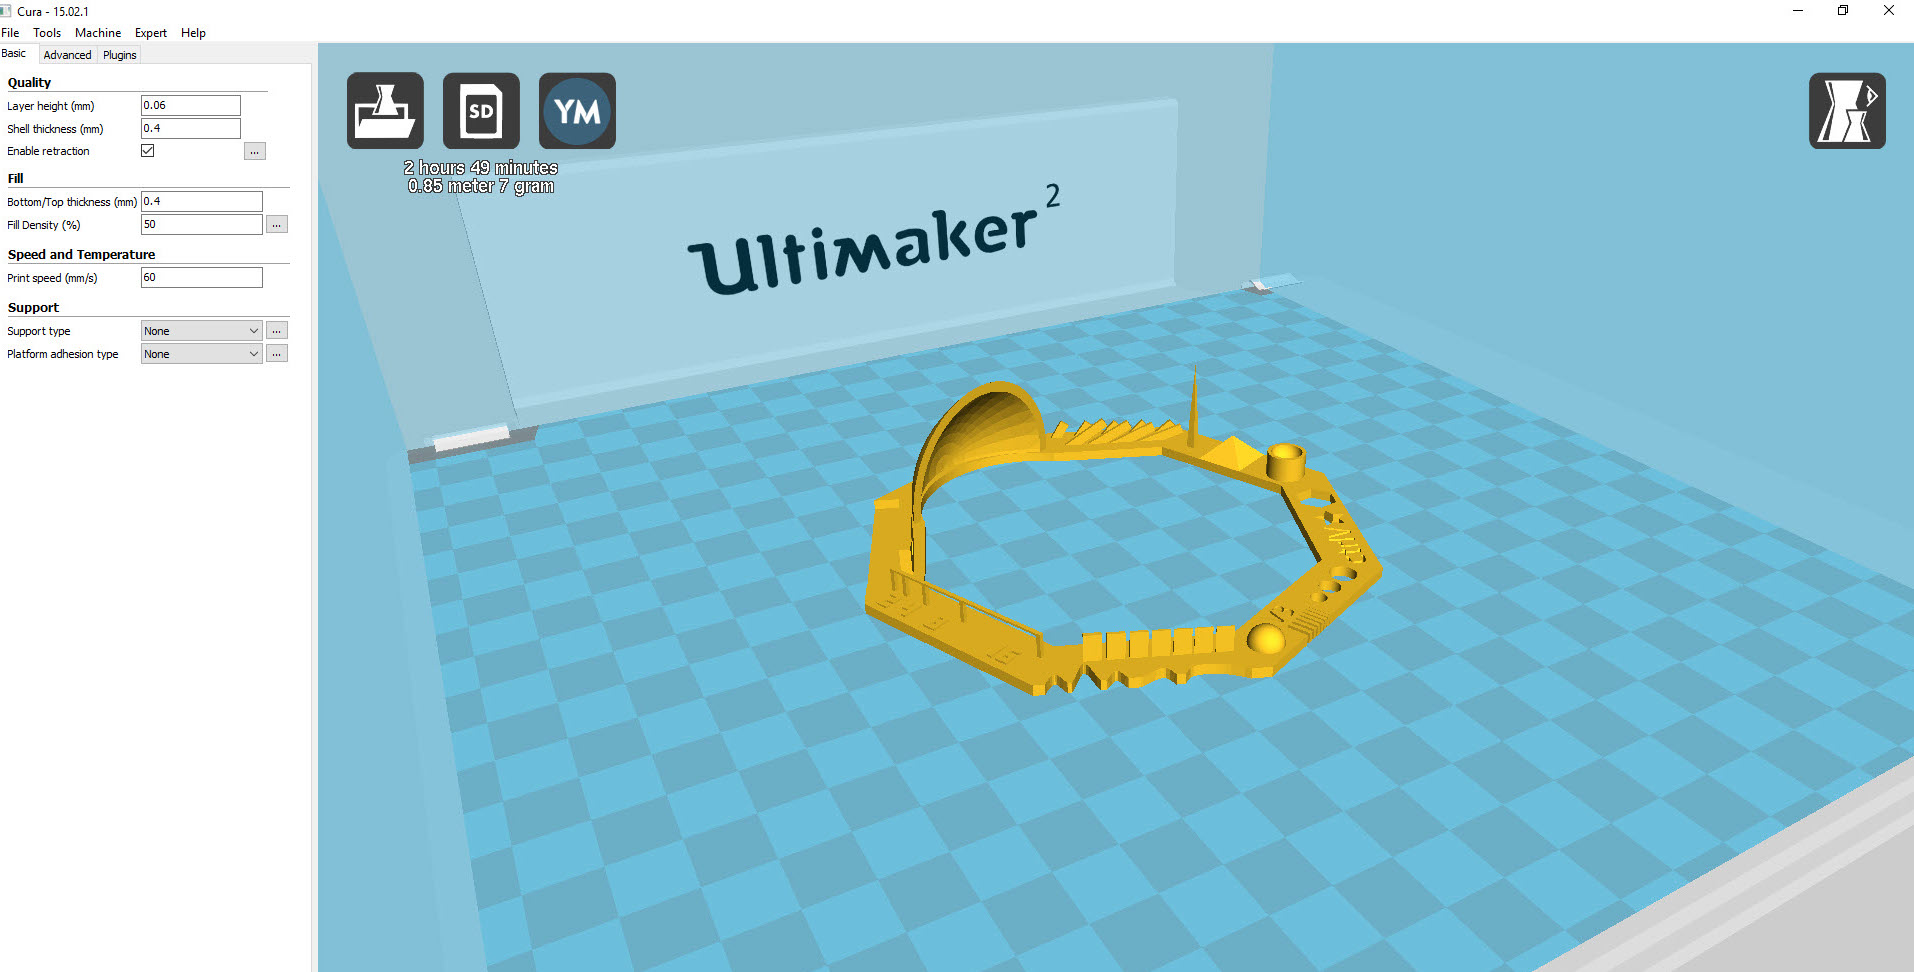
First thing I did was to look for a test subject for the 3D printer. I found one Thingiverse that I used. You can see all the sizes on the image below. The purpose of the test is to find out the limitation of our Ultimaker 3D printer

I downloaded the file and opened it in Cura. I set the fill density to 98% so the object would be full with plastic. It took 2 hours and 49 minutes to print in the Ultimaker 3D printer.
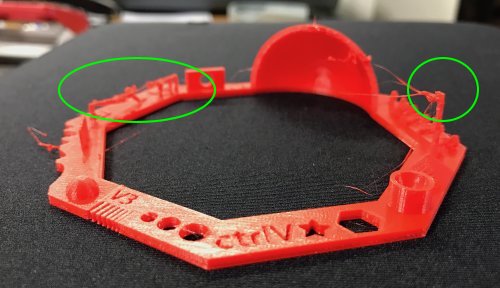
The 3D printer did not print everything 100% right, but most of it was satisfying enough. For example: the top of the spike is suppose to be sharp and it didn't print all the bridges and some of the overhang should be better. But overall everything was okay, not perfect but average.
3D SCAN
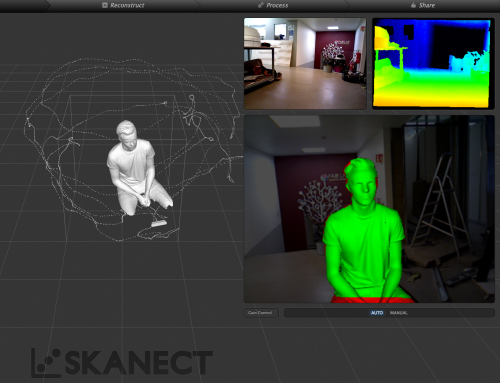
Using the Asus Xtion scanner we 3D scanned me. I sat on a chair and had to be perfectly still while I was being 3D scanned. Then with the help of the Skanect software we perfected the 3D scan. The Asus Xton scanner works well with big objects and people.
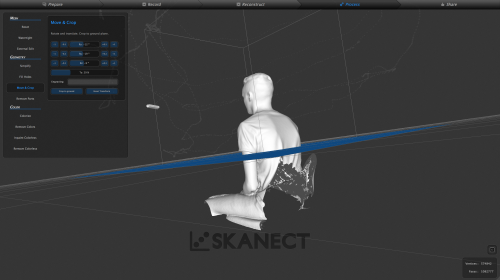
The holes on the back are there because of the back of the chair. So just I cut the body in half where there were no holes.
I opened the body in Cura but it opened in full size so I had to reduce it. I decided to have the scale 0.15 and the fill density 10%. It took 6 hours and 55 minutes to print.
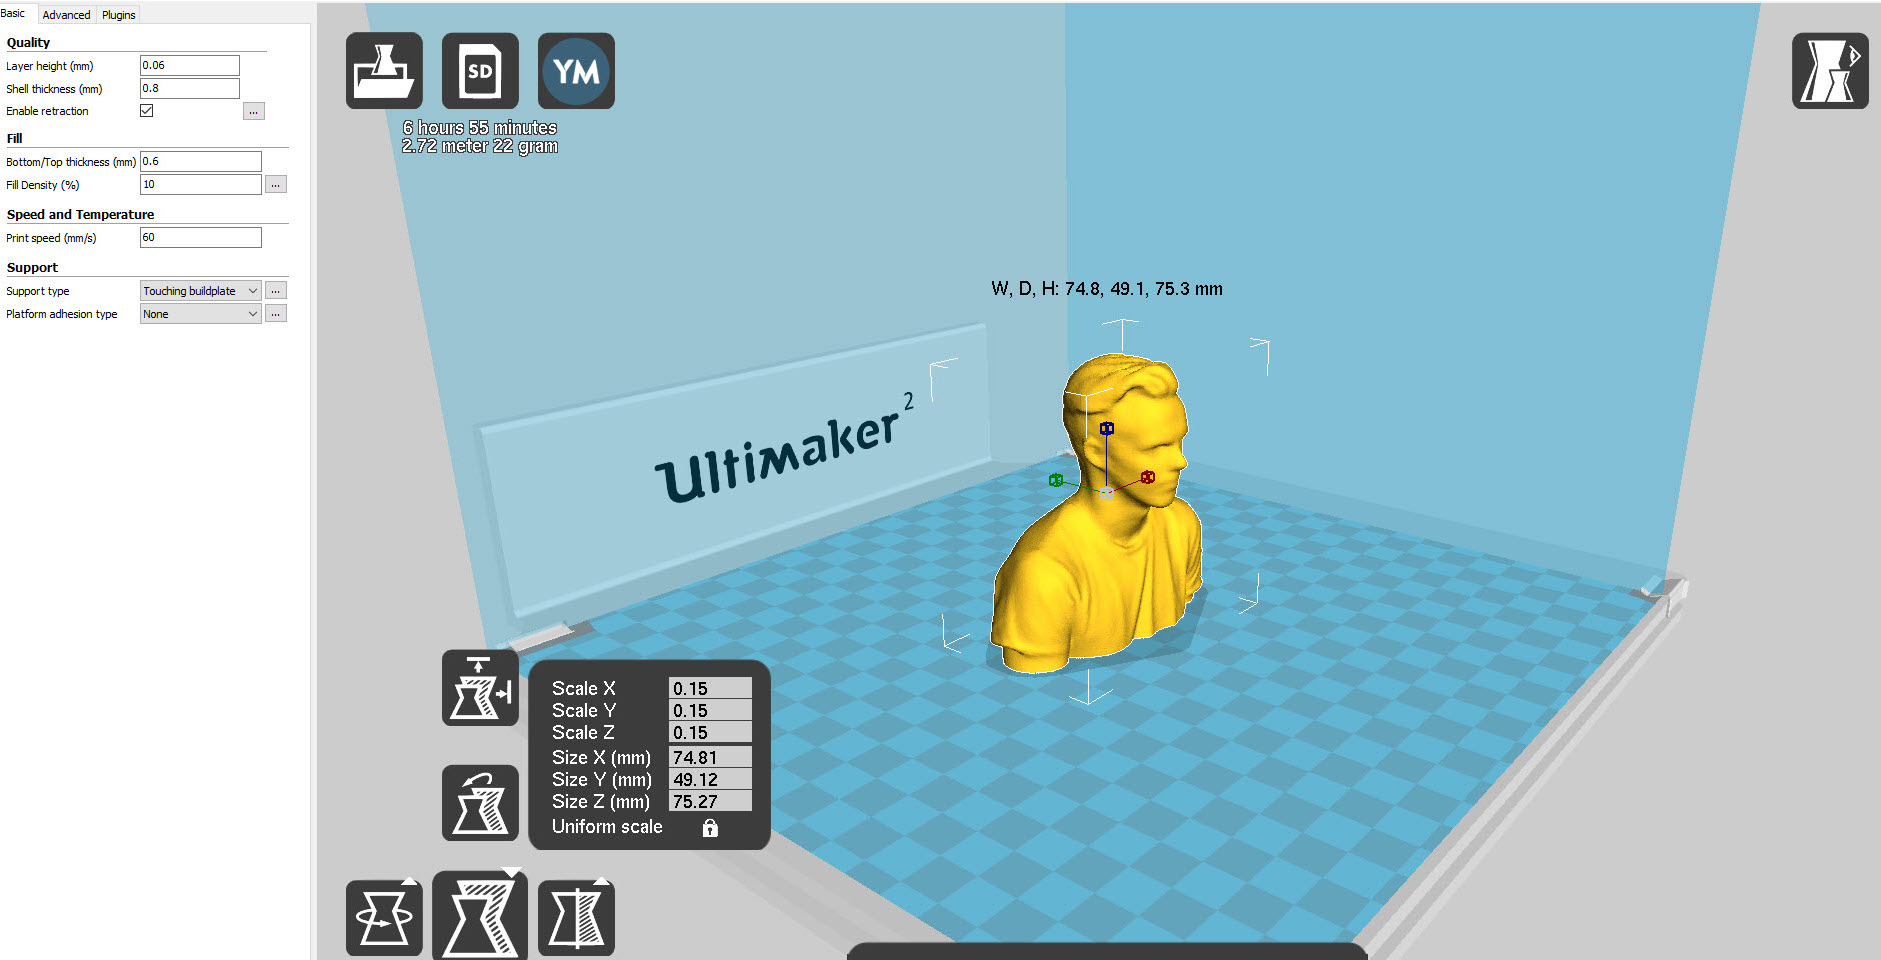
Here is the body while printing. The net inside is a support structure that is 10% fill density. If the fill density would be 98% than the object would be filled with plastic.
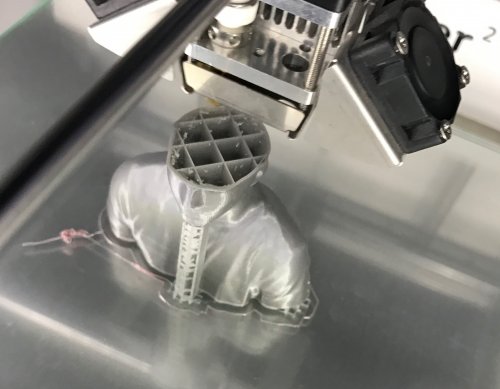
The thing under the chin is a support the bridge. It is very important because the printer cannot print horizontal into thin air and that makes the support crucial. The con of the support is that it leaves a mark on the 3D printed object.
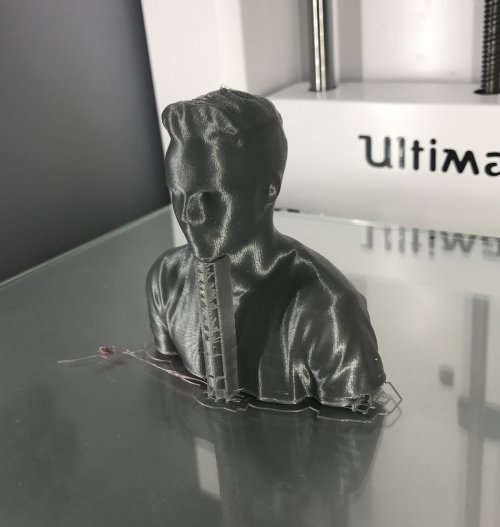
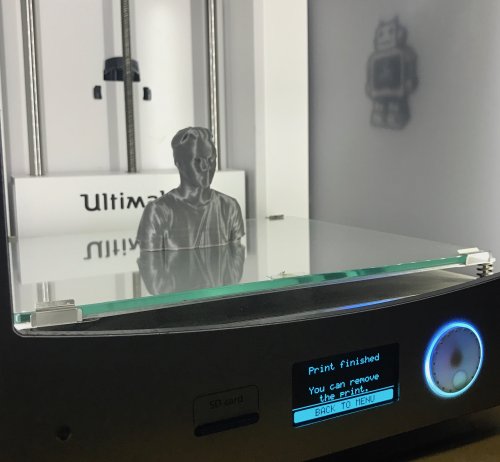
After removing the support bridge it was ready.
AUTODESK REMAKER
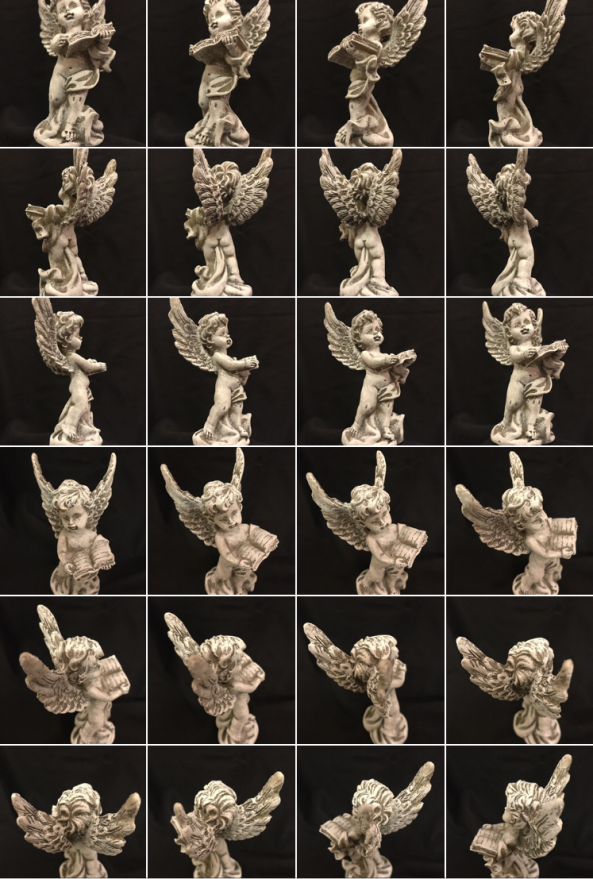
The propose of this project was to take photos of an object and work on it with some software and 3D print it. I decided to use Remake from Autodesk. I picked an angel statue from home made of clay and took pictures around all around it. I wasn´t very optimistic at first since it was a small object and I thought it wouldn´t turn out great but it did. I was very happy with the results. The background had to be black because the object is white and grey so it would be easier for Remaker to analyse it. I took photos all around the angel statue. I took 28 photos total of the angel. I used the camera on my phone – Iphone 7.
I uploaded the photos in Remaker and clicked on the “create model button” and set the quality to standard, auto-crop off and art texture off. Then it started to upload.

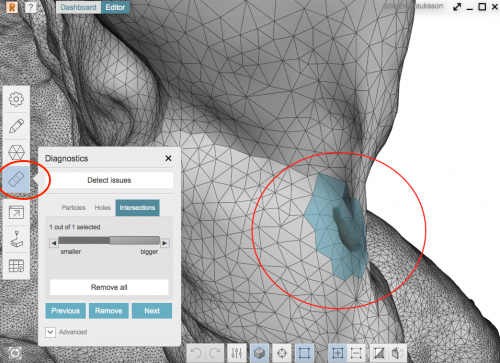
There were 3 detect issues that I saw by clicking on the “band-aid” on the left. First click on the microscope and then you can see the band-aid . After the issue was diagnosed I filled it, so it was fixed and ready to be printed. I saved it as obj file.
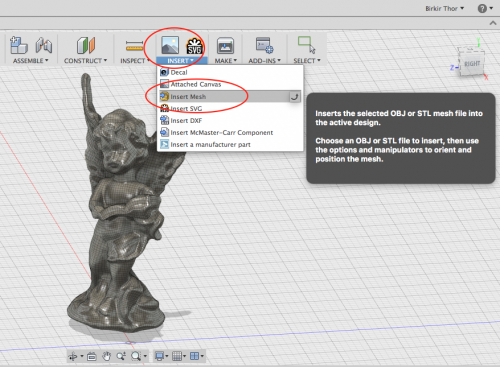
I wanted to keep the angel in Fusion 360 if I would want to do something with it later. I opened it Fusion 360 by clicking on “insert” and then “insert mesh” and got the obj file. One thing I should have done was to created a flat surface under the angel because it wasn't flat.
Then I opened the obj file in Cura. It was really small so I made it a little bigger. I set the fill density to 10% and support everywhere and a raft on the bottom. The printing took 3 hours and 52 minutes.
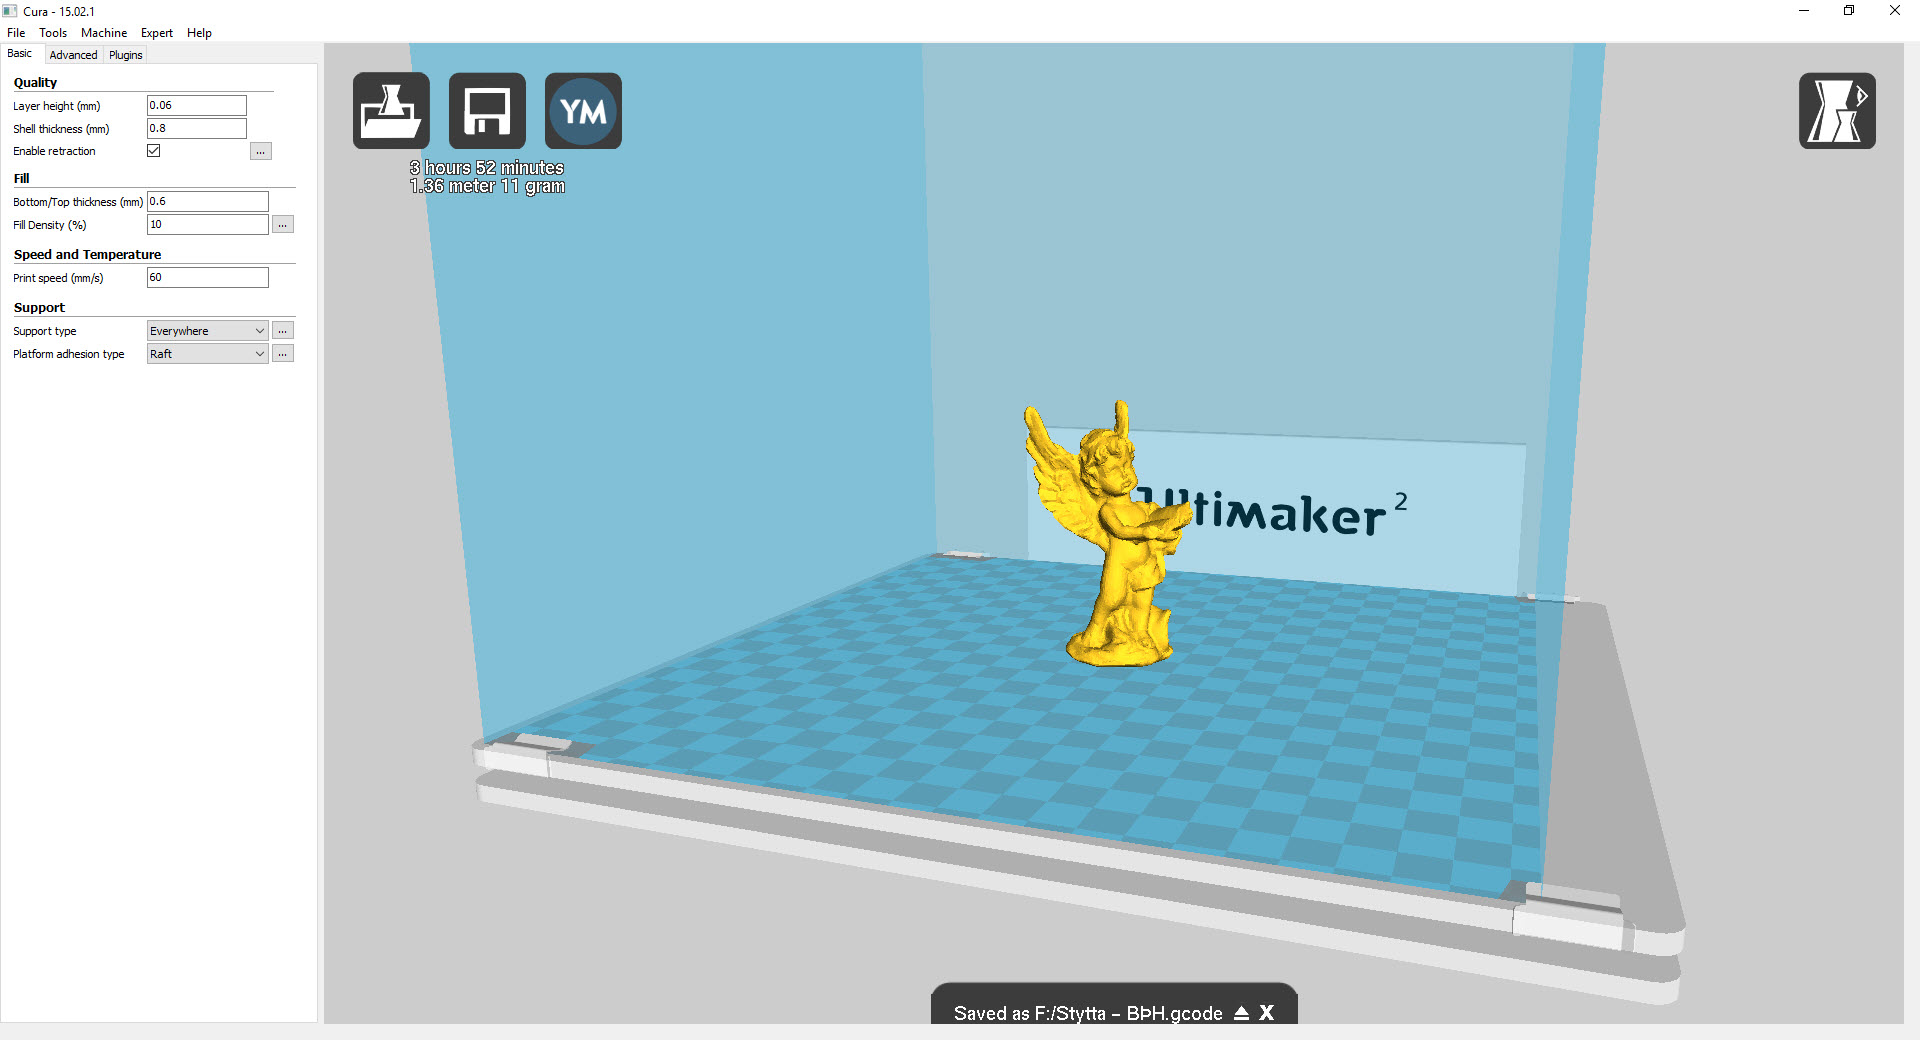
The plastic on the bottom is raft and is set to help the object stick better to the grass surface while printing.
Then after 3 hours and 52 minutes the angel was ready. It was successful, which I did not expect. As you can see there was a lot of support on it which made it easy to remove. I was surprised with the quality with this method. I will definitely use this technique again.

DESIGN AND 3D PRINT AN OBJECT
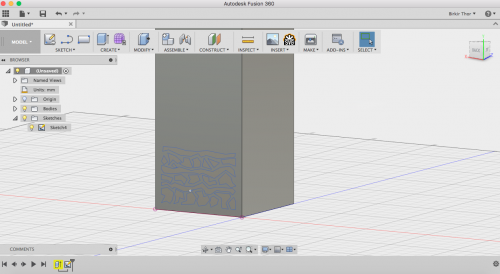
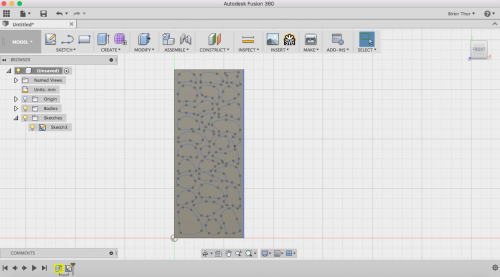
For the next project I decided to 3D print a vase. The main idea for the vase is to give a new life to old plastic or glass bottles. So the vase goes around the bottle so you don't have to throw it away. I decided to use Fusion 360. I started by making a 2D rectangle (70 mm x 70 mm) and then extruded (or press E) it up to 170 mm.

Then I clicked on “sketch and line” (or press L) to draw lines to create the patterns. Then I made a new rectangle (65x65mm) on the top of the box and extruded it though the box, so the thickness of the vase would be 5 mm.
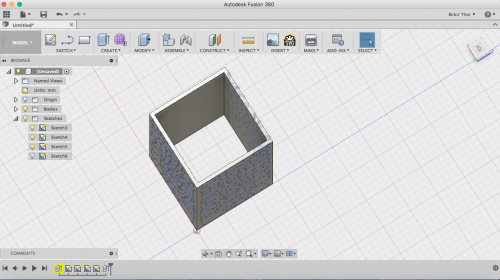
Then I copy/paste on the other sides. I had to be in the sketch to copy/paste on the same board/side and then create a new sketch to copy/paste on the other side.
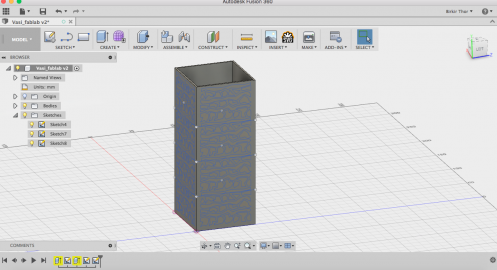
Then I selected all the forms and extruded them all the way through (70 mm). Then I did the same on the other side.
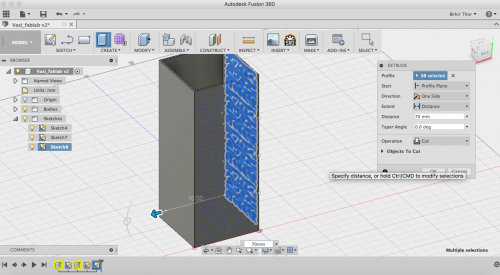
Then it was ready. I saved this project as STL file and opened it in Cura.
I had to rotate the vase 90° so it would be right and easier to print. Estimated was about 24 hours.
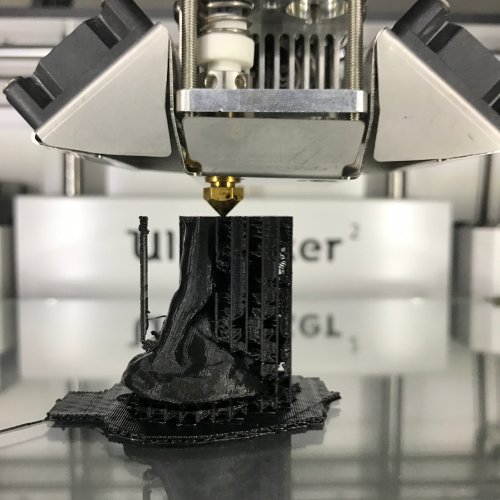
After few hours I decided to stop the printer because it was failing.

VASE 2
Because the other vase failed I wanted to make a new one, with less complex patterns. The process was the same except the patterns I drew were different.
After I drew a rectangle on the top of the box and extruded it all the way through. I copy/paste the patterns I drew to the other side.
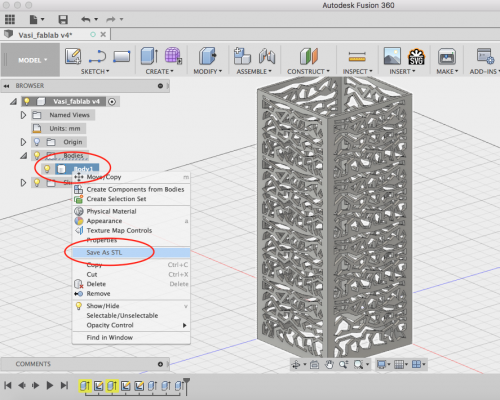
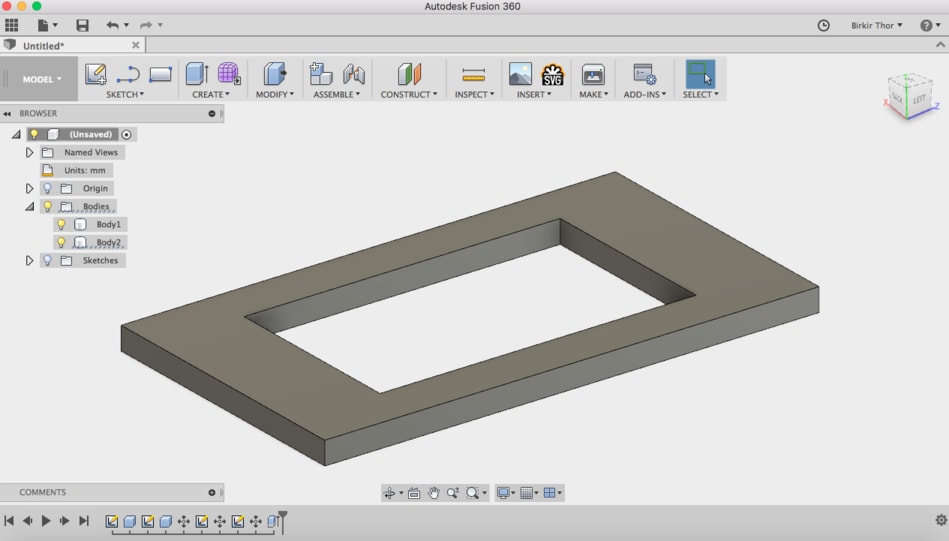
Then I extruded the patterns through the box. Then I saved it as a STL file by right clicking on the body and save as STL (see in the red circles).

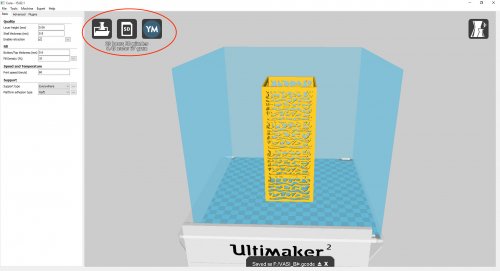
Then I opened the STL file in Cura and put the fill density to 10% and put support everywhere and a raft below.

The printing time was about 23 hours. You can see the support in the holes and the raft under the vase.
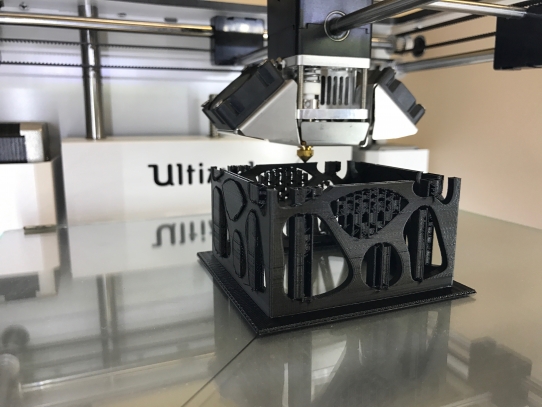
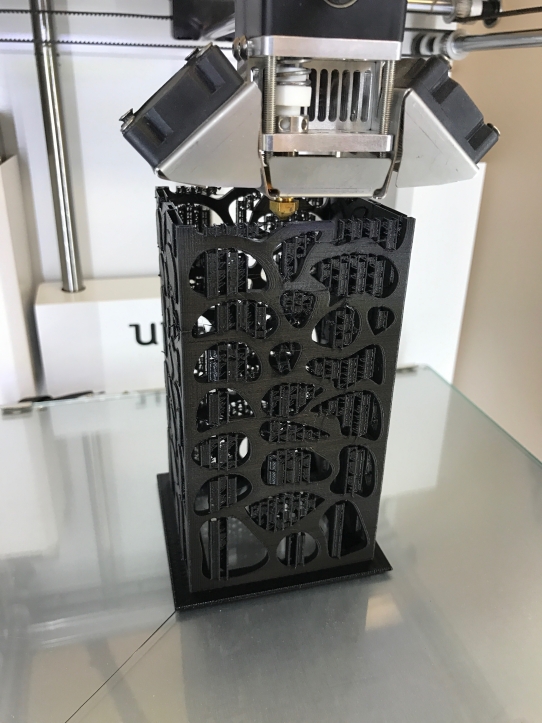
Then it was finally ready. I had to take all the support off. It would have been nicer and smoother to sand the rough sides it a little.

GUITAR PICKUP RISER
I wanted to make the pickup riser for my guitar, so I decided to 3D print it. I designed it in Fusion 360. It was simple and only took few minutes to design.
I saved the file as STL file and opened it in Cura. The fill density was 98% and the speed 60. There was no need for support or raft. It took 6 hours 55 minutes to print. Because of the heat on the bottom of the 3D printer the corners bent a little, so I think it should have been better to have a raft.

PANDA LAMP
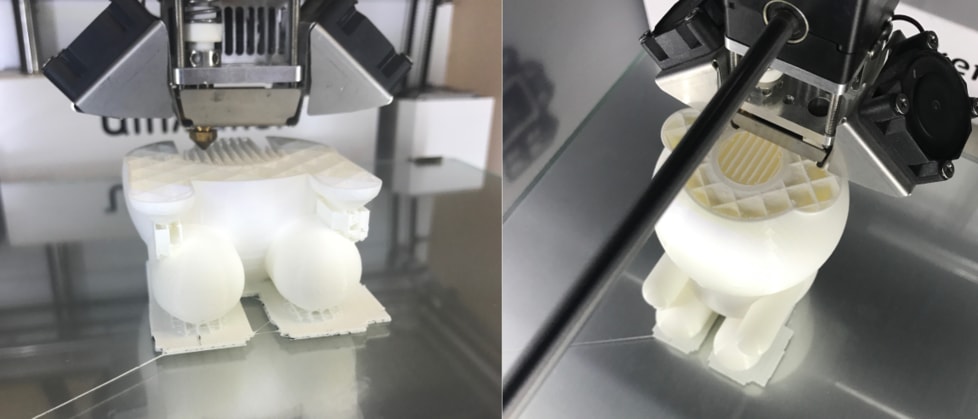
I decided to make this panda as a project for my friend. This panda is basically 11 spheres and four columns combined to form a panda. The panda will be hollow on the inside and to do that I made a smaller sphere inside the head and differenced it so it would be hollow.
This object could not been made in the ShopBot, because the form is to complex for that kind of machining. It can not be done subtractively because it is hollow inside. That is why this project is perfect for the 3D printer, because 3D printing allows you to make things that have complex forms in many ways and to make hollow things in one piece.
The idea is to light the panda up with LED light and put a small amplifier on the back. I took a part of the back of the panda for the amplifier. The stl file can be downloaded below so you can see the idea and 3D print it.

It was the same process like the other projects, set the size, fill density and etc. You can see the settings on the image.
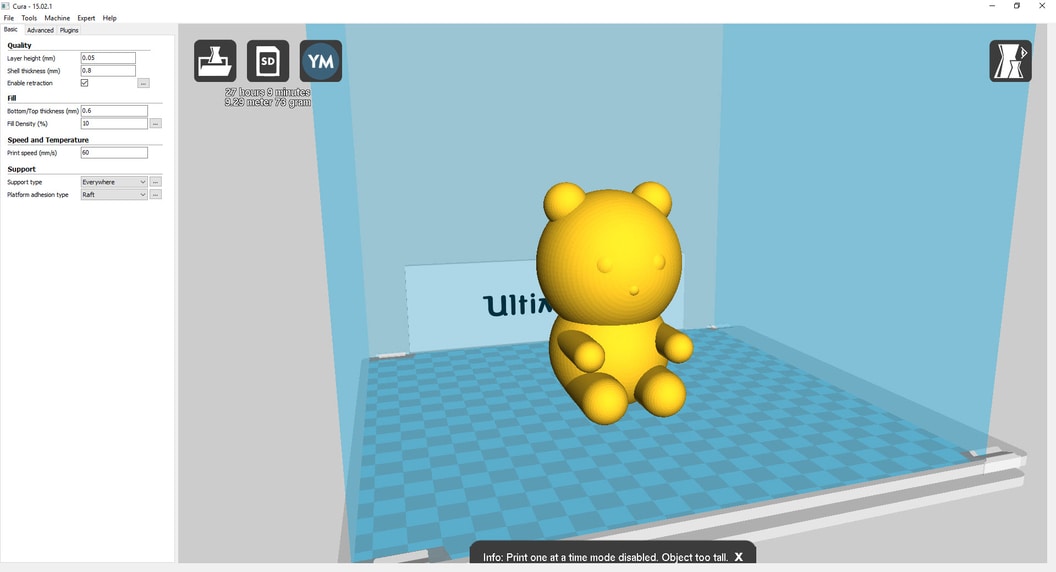
It took 27 hours to print. The fill density is 10% like you can see on the net.
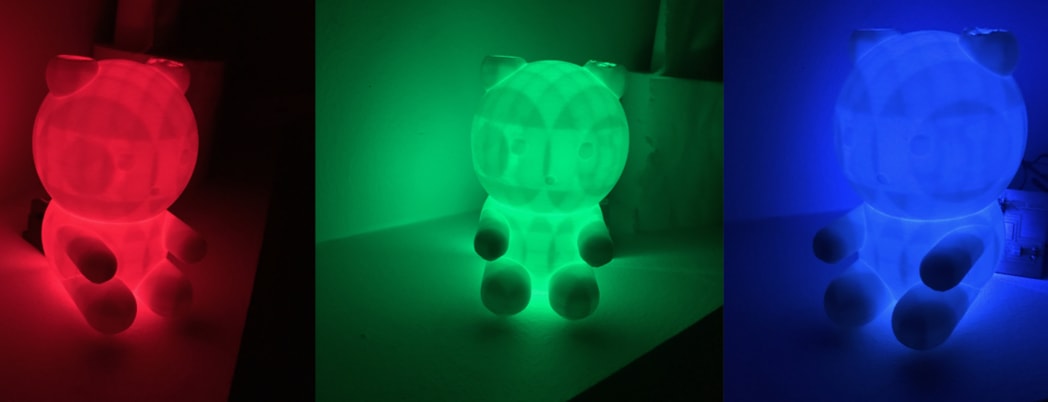
I put a RGB LED light in the panda, I didn't have any small amplifier to put in it.
WHAT DID I LEARN?
This week I learned how to 3D scan,design in Fusion 360 and take photos of an object and make them 3D printable. I was working with a few softwares which I got familiar with, ecpecially Fusion 360. Also I learned how to use the Ultimaker 3D printer.
RELATED LINKS
Thingiverse - 3D Test
Cura
Scanect
Remake
Autodesk
Autodesk Remake - Download
FILES
Me 3D stl - Right click to download
Angel obj - Right click to download
Vase 1 stl - Right click to download
Vase 2 stl - Right click to download
Pickup Box stl - Right click to download
Panda Lamp stl- Right click to download
HAVE QUESTIONS?
Contact me!
Höfn, Iceland
Email: birkirthorhauksson@gmail.com
Swing by for a cup of , or send me a message :)