- Week 2 +
computer-aided design
Tasks
2D software
To explore 2D drawing softwares, I decided to go with Inkscape. For designing I am redrawing a logo which I intend to use in future. Below is an image of it in very low resolution. By creating a vector drawing of it, would provide room for modification.
I referred following video to get hold of basics of Inkscape.
So to begin with, I imported the reference image in the workspace


Next step is to trace the outlines of the logo using line command.

Striaght lines were easy to draw by pressing ctrl command, but curves were tricky.

After managing to trace curves close to what is there in the image. I edit thier smoothness with the help of control points of the curve.


This is how final vector file looks like.

Finally, I am happy to be familiar with Inkscape's interface. its very easy and efficient.
3D software
Having limited experience in 3D modelling softwares other than google sketchup, I choose to explore Rhino 3D software. To begin with, I decided to draw a sketch of a 3D form that I would like to explore.

Then to get started, I spent some time learning the basics of rhino. Following video is the first amongst many tutorials I refered.
Overview of the Rhino 5 Interface from Rhino Tutorials on Vimeo.
To realise my sketch, I used Rectangle, Loft and Twist Command as major commands apart from other supporting commands. First step is to draw two squares using reactangle command at different heights with above a quarter in size of the lower one. And then after creating surface using loft command, I rotate the top square by a 15 degrees with reference to its center using twist command. Following screenshots with supporting text describes the process of creating the 3D object.
The first step is to use Rectangle Command, and give size of 300mm x 300mm. Then I made another rectangle using rectangle command of size 150mm x 150mm at the center of the bigger rectangle.

Then using Copy Command, I copied the bigger rectangle by 10mm in z-axis. Then I using Move Command, I shifted the smaller inside reactangle by 55mm in again z-axis. Then using Loft Command, I formed a surface connecting all three curves.

Then I used Twist Command to give final form to the object. Smaller rectangle at the top is twisted by 15 degrees in clockwise direction.

Then taking centroid of the lower rectangle as reference and using Scale Command, I scaled and copied the lower rectangle by 10mm on all sides. Making the final size of the base as 320mm X 320mm.

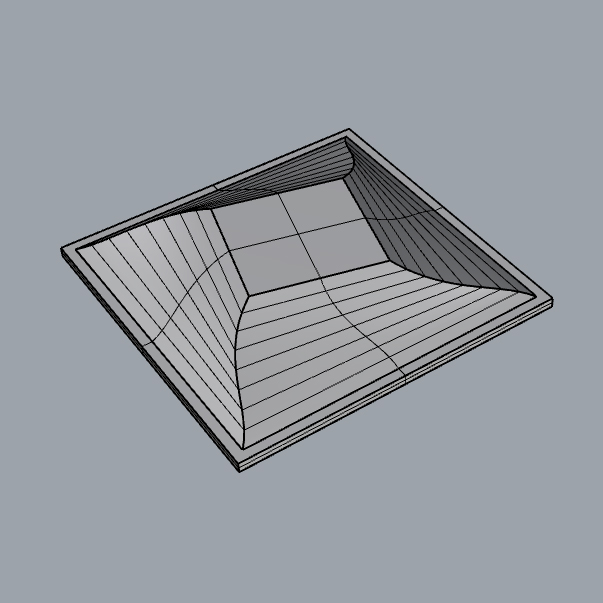
Next, with Join Command, I joined all the surfaces into one open polysurface. Later with Cap Command, polysurfaces were closed. Lastly, with the help of BooleanUnion Command the entire model was combined together to make it one solid geometry.

Final Object
Links
Week 2 FilesInkscape
Rhinoceros